
After long-awaited expectations, macOS 13 Ventura, replacing macOS 12 Monterey, is now available as a free software upgrade on Macs with Apple Silicon chips and Intel-based Macs.
Too often, Mac users can upgrade to macOS Ventura manually by clicking the Apple menu > About This Mac > Software Update > Upgrade now. Alternatively, you can keep the Automatically keep my Mac up to date option activated to allow an automatic update.
However, some too old-school Macs cannot receive this notification because Apple offers no official macOS Ventura upgrade for them. Don't be upset yet, you can learn how to install macOS Ventura on your unsupported Mac with the assistance of this tutorial.
Note: Download macOS Ventura 13 first before installing it: Download macOS on unsupported Macs.
Unsupported Macs that can run macOS Ventura
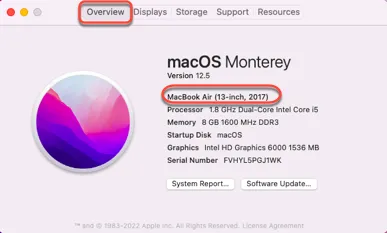
Before installing macOS 13 on your Mac, you can check your Mac model first with simple operations. Here is how to do:
- Click the Apple menu on your Mac desktop.
- Select the About This Mac option from the drop-down menu.
- Switch to the Overview tab, and your Mac model will be listed there. In this post, we take the MacBook Air (13-inch, 2017) as the testing machine to install macOS Ventura on it.
Official Macs can clean install macOS Ventura easily, while if your Mac model is unsupported device list, the only way you can experience macOS Ventura is to rely on the assistance of OpenCore Legacy Patcher, which provides a patch for macOS Ventura to run on your Mac.
Here are the unsupported devices that can run macOS Ventura with the assistance of OpenCore Legacy Patcher:
- iMac16,1 (21.5-inch, Late 2015) -- iMac17,1 (27-inch 5K, Late 2015)
- MacBook9,1 (12-inch, Early 2016)
- MacBookAir7,1 (11-inch, Early 2015) -- MacBookAir7,2 (13-inch, Early 2015)
- MacBookPro11,4 (15-inch, Mid 2015, iGPU) -- MacBookPro13,3 (15-inch, Late 2016)
- Mac mini7,1 (Late 2014)
- MacPro6,1 (Late 2013)

[macOS Ventura]Some Updates Could Not Be Installed Automatically
This post elaborates on 'Updates Not Installed: Some updates could not be installed automatically,' a notification that pops up in macOS Ventura. It analyzes the causes and also provides fixes. Read more >>
Go tell people how to install macOS Ventura on unsupported Macs!
How to install macOS Ventura on an unsupported Mac?
With this step-by-step tutorial, installing macOS on unsupported Macs can be a super-easy task. Just follow this post to complete this mission with ease!
Step 1: Install OpenCore Legacy Patcher on Mac
- Download the OpenCore Legacy Patcher Zip file on your Mac.
- Open the Downloads folder in Finder and locate the ZIP files that you've downloaded, then unzip the file on your Mac by double-clicking it.
- Drag the OpenCore-Patcher.app to the Applications folder to install it. You can also copy OpenCore-Patcher.app and paste it into your Downloads folder to install.
Step 2: Make a macOS Ventura bootable USB
Here are two options to make a macOS Ventura bootable USB:
- Use a bootable USB creation helper to download the macOS installer and create boot media
- Use terminal
Option 1: Use a bootable USB creation helper
With the assistance of iBoysoft DiskGeeker, you can download the macOS Ventura installer to a USB drive to make it bootable directly. It simplifies the bootable USB creation process to several steps:
1. Download and install iBoysoft DiskGeeker on your Mac.
2. Connect an empty USB drive of more than 16GB with Mac OS Extended Journaled format. If the drive is not Mac OS Extended formatted, go to format the drive on your Mac.
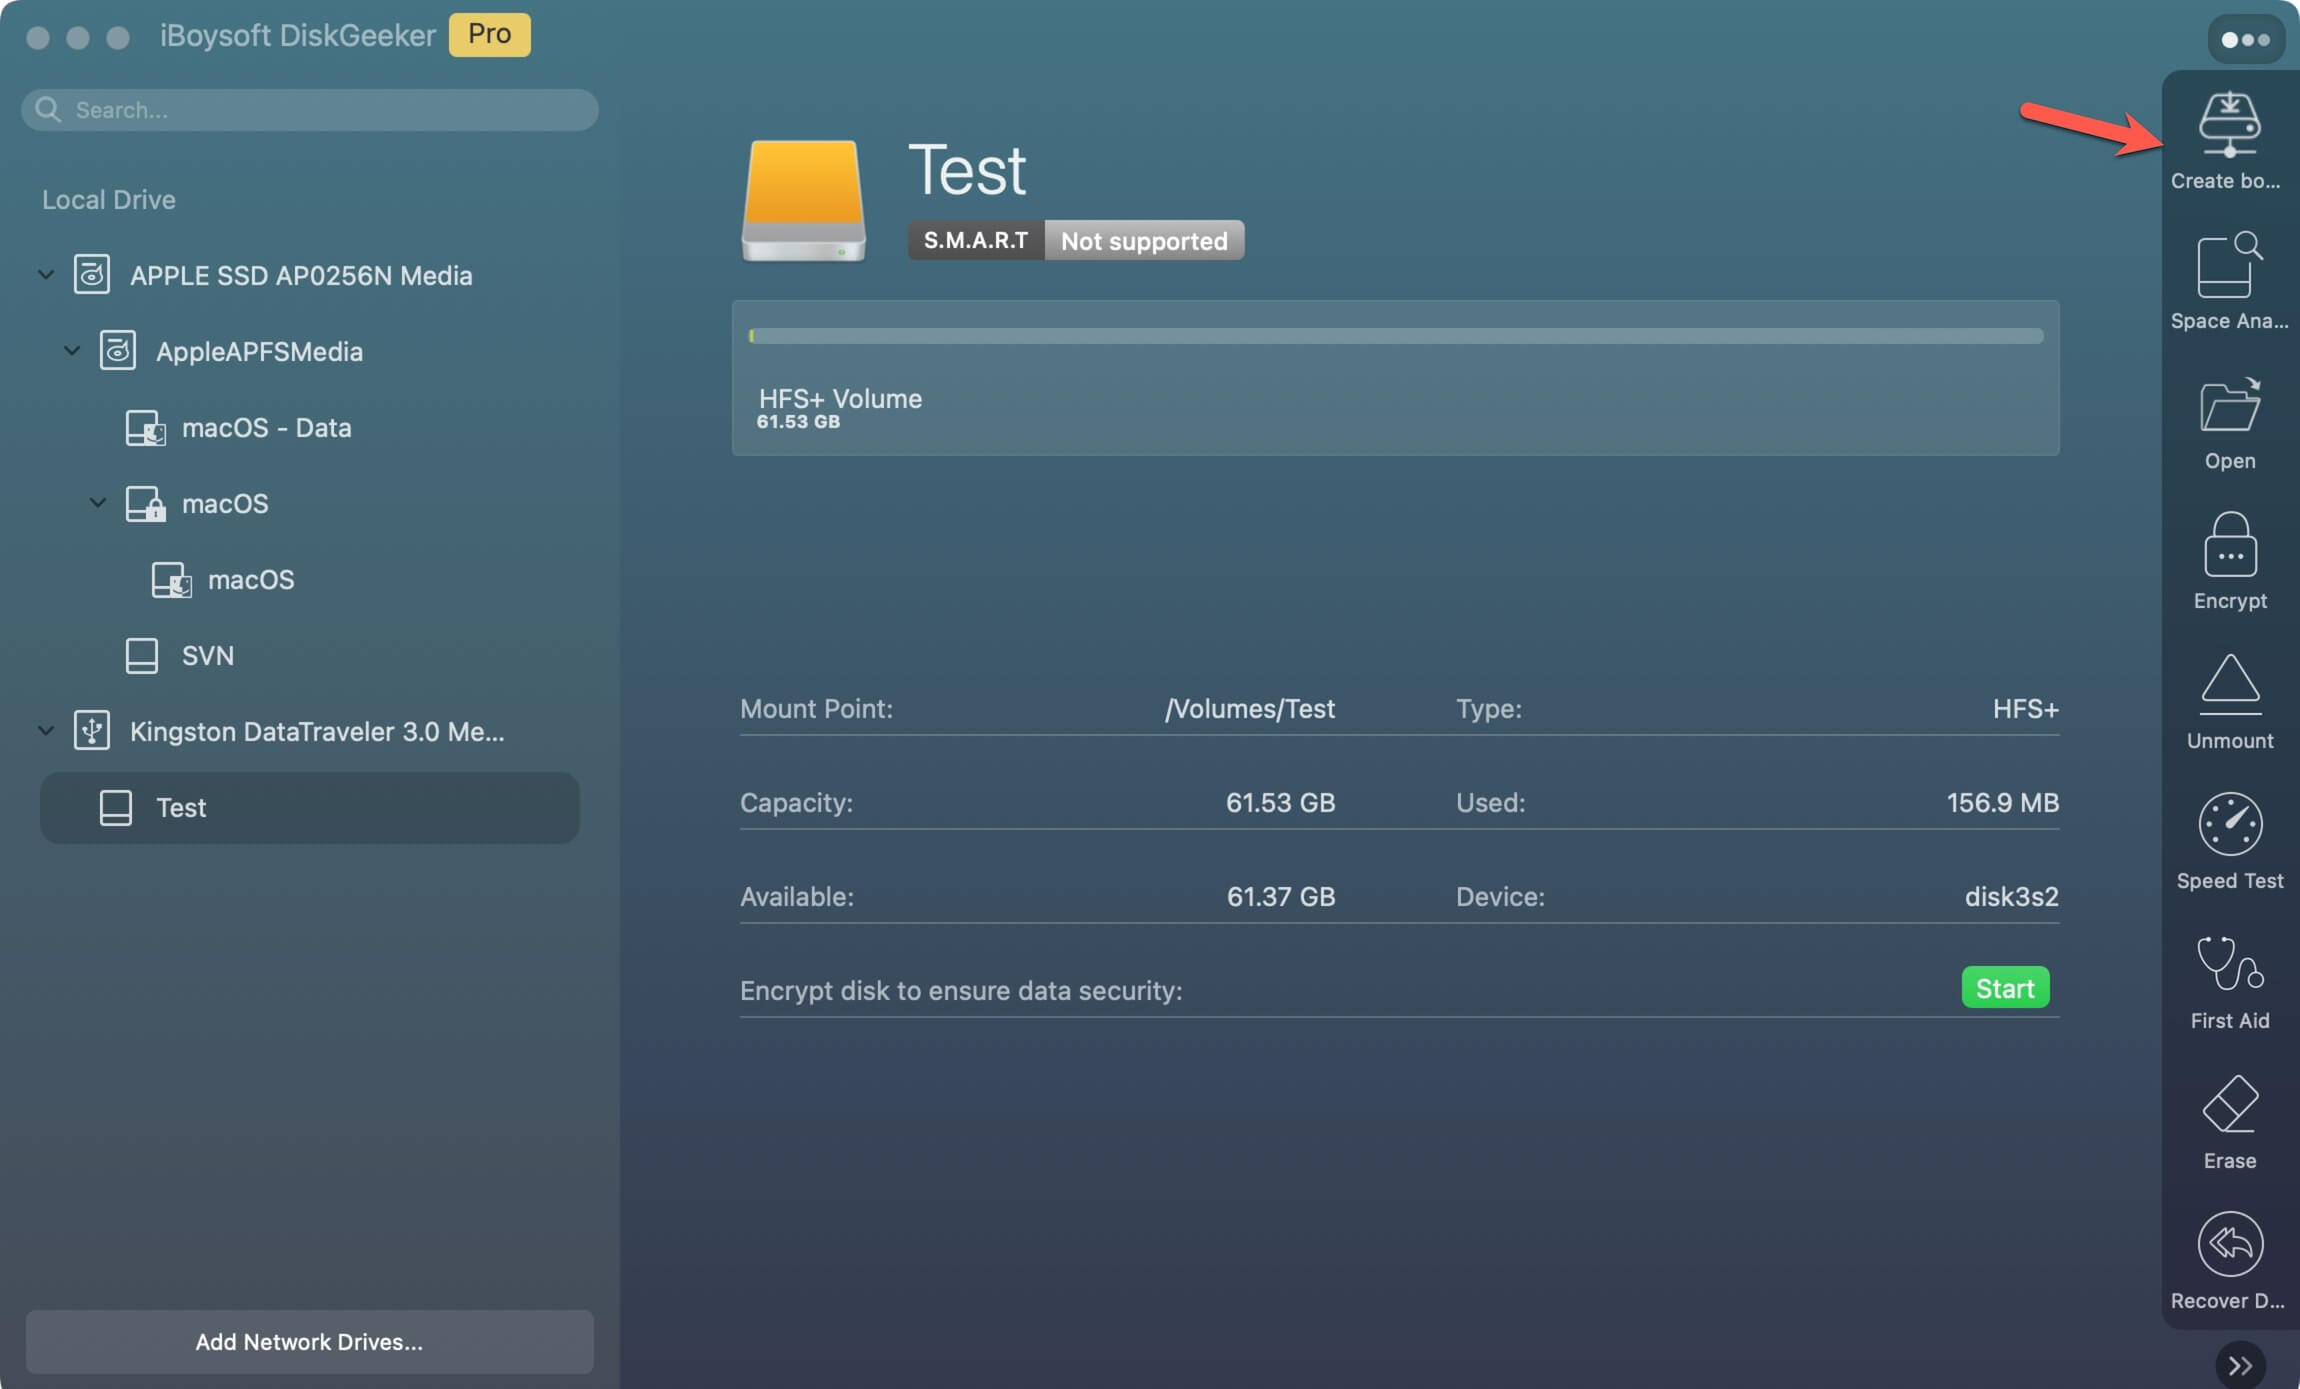
3. Open iBoysoft DiskGeeker and select a volume of the USB drive, and click "Create boot disk", then click "Continue".
4. Toggle on "macOS 13 Ventura" and click "Create boot disk", and wait for the process to finish.
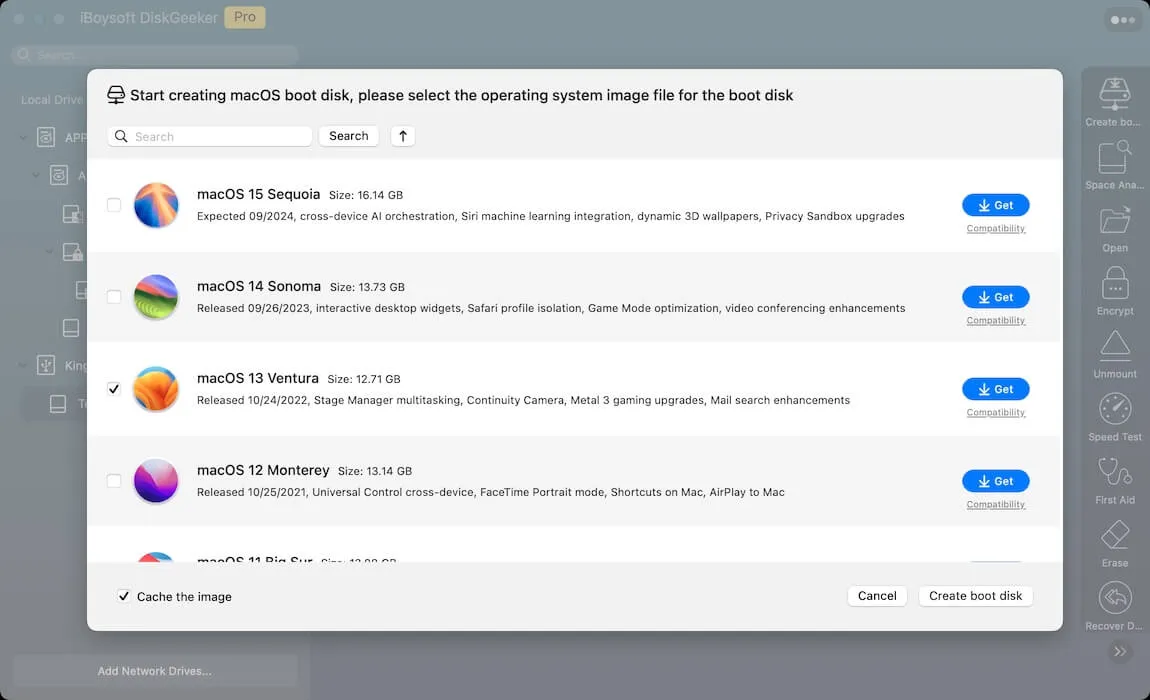
Once the process ends, you have a macOS Ventura bootable USB that can be used to install the unsupported Macs like MacBook Air 2017, MacBook Air 2016, MacBook Air 2015, MacBook Pro 2016, MacBook Pro 2015, etc.
Option 2: Use the terminal
Using a terminal to make a bootable USB drive is prone to failure since it requires advanced knowledge of command lines. Any little misoperation may put your machine at risk. Yet if you are enthusiastic about this approach, do as follows:
- Download the macOS Ventura.pkg file to your Mac. Once the download ends, drag the pkg file to Applications to install it. Make sure it is located in the Applications folder, or the command below will fail due to the wrong file directory or path.
- Launch Terminal via the Spotlight Search shortcut.
- Type the following command lines in the Terminal window. Replace "MyVolume" with the USB drive's name.sudo /Applications/Install\ macOS\ Ventura.app/Contents/Resources/createinstallmedia --volume /Volumes/MyVolume
- Hit Enter to execute the command line.
- Enter your admin account password when asked and hit the Y key to ensure your operations.
- Click OK if you see an alert that Terminal wants to access files on a removable volume.
- Once the process ends, the terminal will notify you, and your USB drive will be renamed to Install macOS Ventura.
Step 3: Change OpenCore Legacy Patcher settings
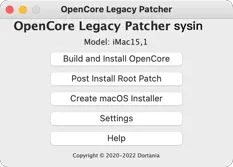
- Launch OpenCore Legacy Patcher on your Mac.
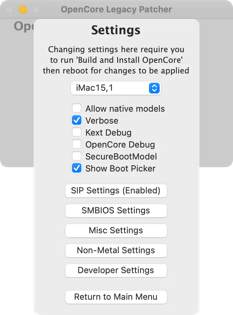
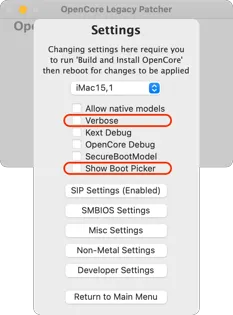
- Click Settings in the OpenCore Legacy Patcher main interface.
- Tick Verbose to present specific information to debug errors during the installation. If you don't need to debug any issues, you can disable this feature directly.
Step 4: Install macOS Ventura on unsupported Macs
- Click Build and Install OpenCore on the OpenCore Legacy Patcher main interface.
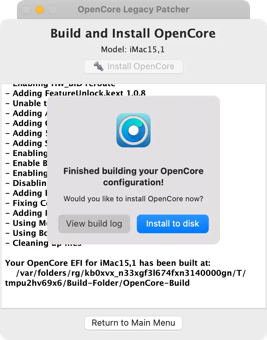
- Click the Build OpenCore button in the new pop-up.
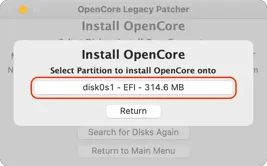
- Once the build succeeds, click Install OpenCore, and then tap Install to Disk. This step installs the OpenCore Legacy Patcher to the USB drive, providing an environment for macOS Ventura to run as expected.
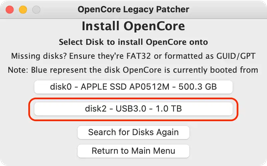
- Choose the disk that you want to place OpenCore on. Too often, disk 0 is the Macintosh HD, and disk 2 is the USB drive that you connect to your Mac with a default partition. If you have more disks inserted into your device, Mac also lists them one by one.
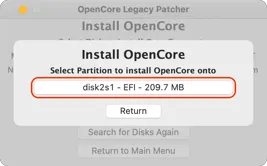
- Click the option with EFI to confirm your actions.
- Restart your Mac and hold the Option key until you see a boot screen with different boot options.
- Control your mouse with the keyboard to select the OpenCore icon with the EFI Boot characters option.
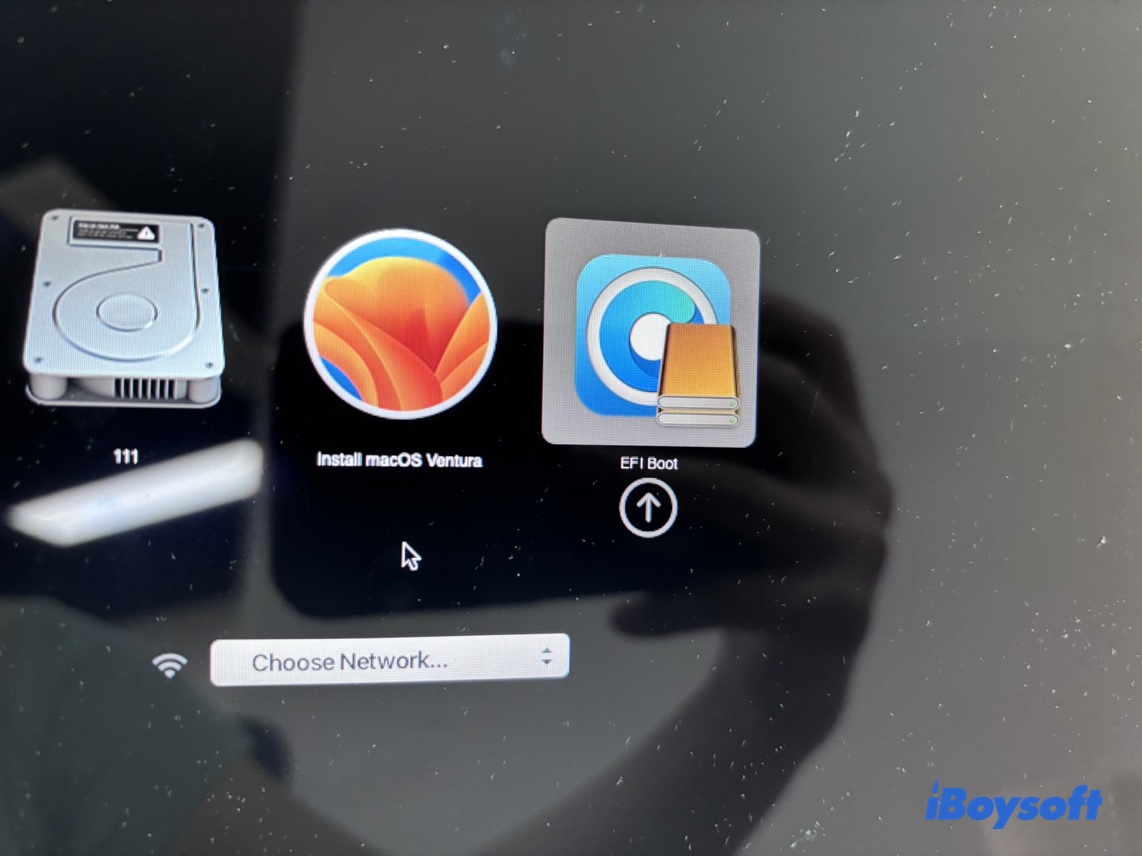
- You have uploaded OpenCore here successfully, and you can see the OpenCore Picker on your screen.
- Select Install macOS Ventura, then the wizard brings you to the regular boot screen.
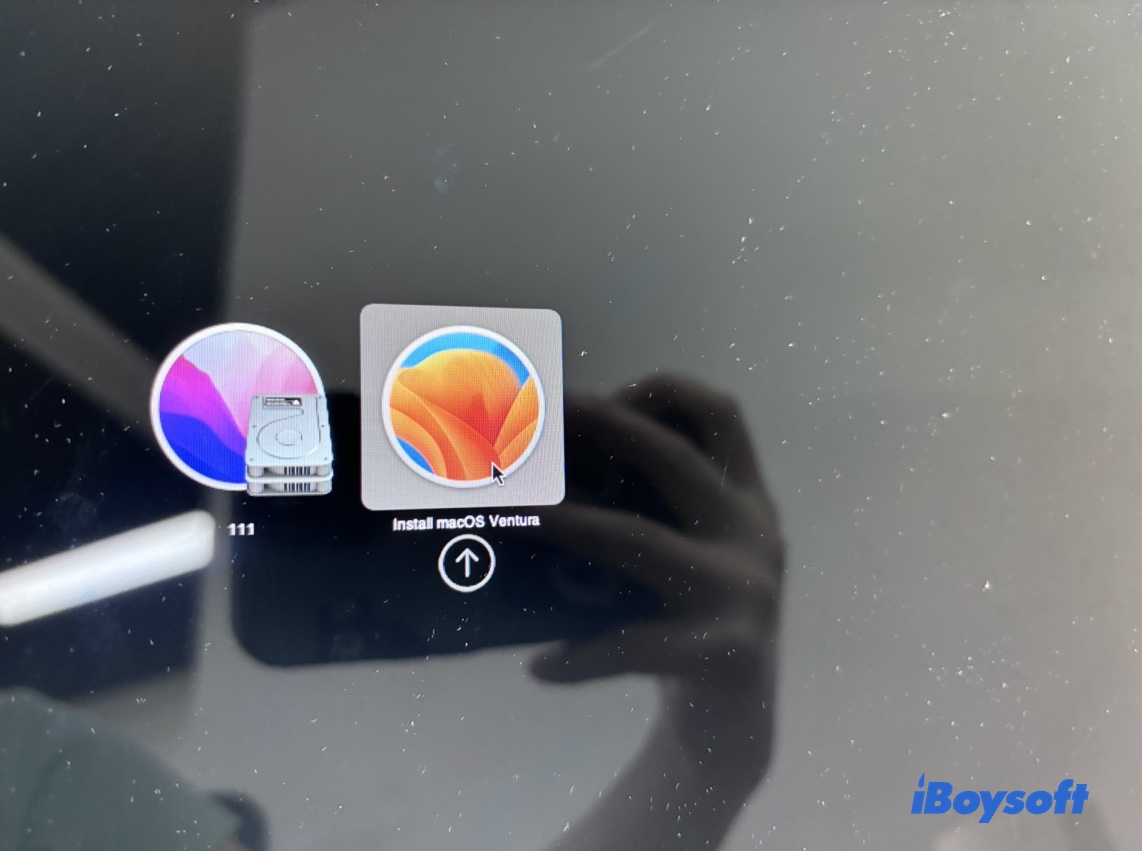
Now, you can use OpenCore Picker to boot into macOS Ventura.
If the bootup process goes wrong, re-hold the Option key until you see the EFI Boot option with the OpenCore icon, and then select the grey hard disk with Macintosh HD by default.
Step 5: Post-installation
1. Download and install OpenCore Legacy Patcher again
You have installed the OpenCore Legacy Patcher in your external storage device in its EFI partition. Once you disconnect the external drive from your Mac, you will no longer have a channel to boot into macOS Ventura. You, therefore, need to install OpenCore Legacy Patcher into your Macintosh HD this time.
- Run OpenCore Legacy Patcher on your Mac.
- Select Settings in the main interface to untick Verbose and Show Boot Picker.
- Choose Build and Install OpenCore, and then click Install OpenCore.
- Choose disk 0 (Macintosh HD) to install OpenCore.
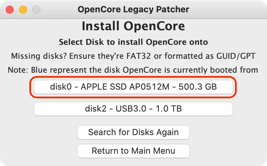
- Click the disk 0 with EFI characters.
- Restart your Mac, and hold the Option key until you see the EFI Boot option on the screen.
- Select the EFI Boot option with the OpenCore icon to return to the regular boot procedure.
- Follow the onscreen wizard to complete the whole bootup process.
If you want the OpenCore Boot Picker to appear, hold the EFI Boot and press the ESC key simultaneously until you see the cursor.
After you install OpenCore Legacy Patcher on your Macintosh HD, you can boot up macOS Ventura on your Mac seamlessly with no bootable USB any longer.
Install macOS Ventura successfully? Share your happiness and enjoyment with your family and friends!
Bonus tips on running macOS Ventura on your Mac
Generally speaking, the new operating system brings you new problems, let alone the new operating system on an unsupported Mac. When facing any trouble when you run the new macOS on your Mac, don't be anxious. The following related articles may help you out of your trouble:
- Top 10 macOS Ventura Problems and How to Fix Them
- Full Guide on How to Downgrade macOS Ventura to Monterey
- NTFS for Mac Ventura: Read/Write NTFS Drive on macOS Ventura
- 4 Ways to Recover Files after macOS Ventura Update
- Missing Photos After macOS Ventura Update, How to Recover?
- 'A required firmware update could not be installed' (Fixed)
Final thoughts
As a major macOS update, macOS Ventura really greets with lots of new improvements and enhanced features. For example, you can have a better user experience in Visual Look Up, Sticky Notes for Mac, Apple Notes, Stage Manager on Mac, Continuity Camera, and the Photos app that enables you to delete duplicate photos on Mac easily.
If your Mac is not officially supported by Apple, try this article to install macOS Ventura on your MacBook Air 2017, 2016, 2015, or earlier machines, and MacBook Pro 2016, 2015, or earlier devices.
Share this article to help more people experience the new macOS on their unsupported Mac!
FAQ about installing macOS Ventura on an unsupported Mac
- Q How do I run macOS Ventura on an unsupported Mac?
-
A
You can download and install OpenCore Legacy Patcher on your Mac, create a bootable installer of macOS Ventura on your Mac, and then boot up macOS Ventura on your Mac.
- Q What Macs will support Mac OS Ventura officially?
-
A
According to Apple, the following Macs will support macOS Ventura officially: MacBook Pro from 2017 to 2022, MacBook Air from 2018 to 2022, MacBook 2017, iMac Pro 2017, iMac 2017, iMac 2019, iMac 2021, Mac mini 2018, and Mac mini 2021, Mac Studio 2022, and Mac Pro 2019.