Generally speaking, a bootable installer for macOS is an external storage medium with a version of macOS installed. With it, you can:
- install macOS from a USB installer on multiple Macs
- upgrade macOS
- downgrade macOS
- download and install macOS on unsupported Macs
But sometimes, you may need a bootable installer for Mac. If so, this post on how to create a bootable installer for macOS is right for you. If you have already created one but find the USB Catalina installer not bootable (or other version), this post is also right for you.
To install the latest macOS release, create a bootable installer for macOS Tahoe.
If you have a spare SD card, you can also create a bootable macOS installer with it. Keep reading this guide to learn how to make a bootable SD card installer for macOS.
The easiest way to create a macOS bootable installer
Creating a bootable macOS installer usually involves using Terminal commands(we detail in the later methods), which are complex, time-consuming, and prone to errors. Especially for those without technical experience or wanna complete a simple process, is there a much better way?
The newly introduced Create boot disk feature in iBoysoft DiskGeeker for Mac streamlines this process, allowing users to create a macOS bootable USB with just a few clicks. And it supports the various macOS versions, just have a try~
Let's create a bootable installer for macOS with iBoysoft DiskGeeker:
(Prepare an external hard drive/USB drive with 15 GB at least.)
- Once installed, open iBoysoft DiskGeeker and connect the external hard drive to the Mac.
- Select a volume on your drive, then select the Create boot disk button on the right.
- Click Continue on the prompt window.
- Select the macOS version you want and click Create boot disk at the bottom.

- Click OK and wait for the DMG download process to complete > OK.
- Wait for the creation installer process.
So easy, right? Moreover, if you don't have enough space on your disk, this tool and help you. Please download and share this tool with others.
How to download the macOS installer of Tahoe & earlier
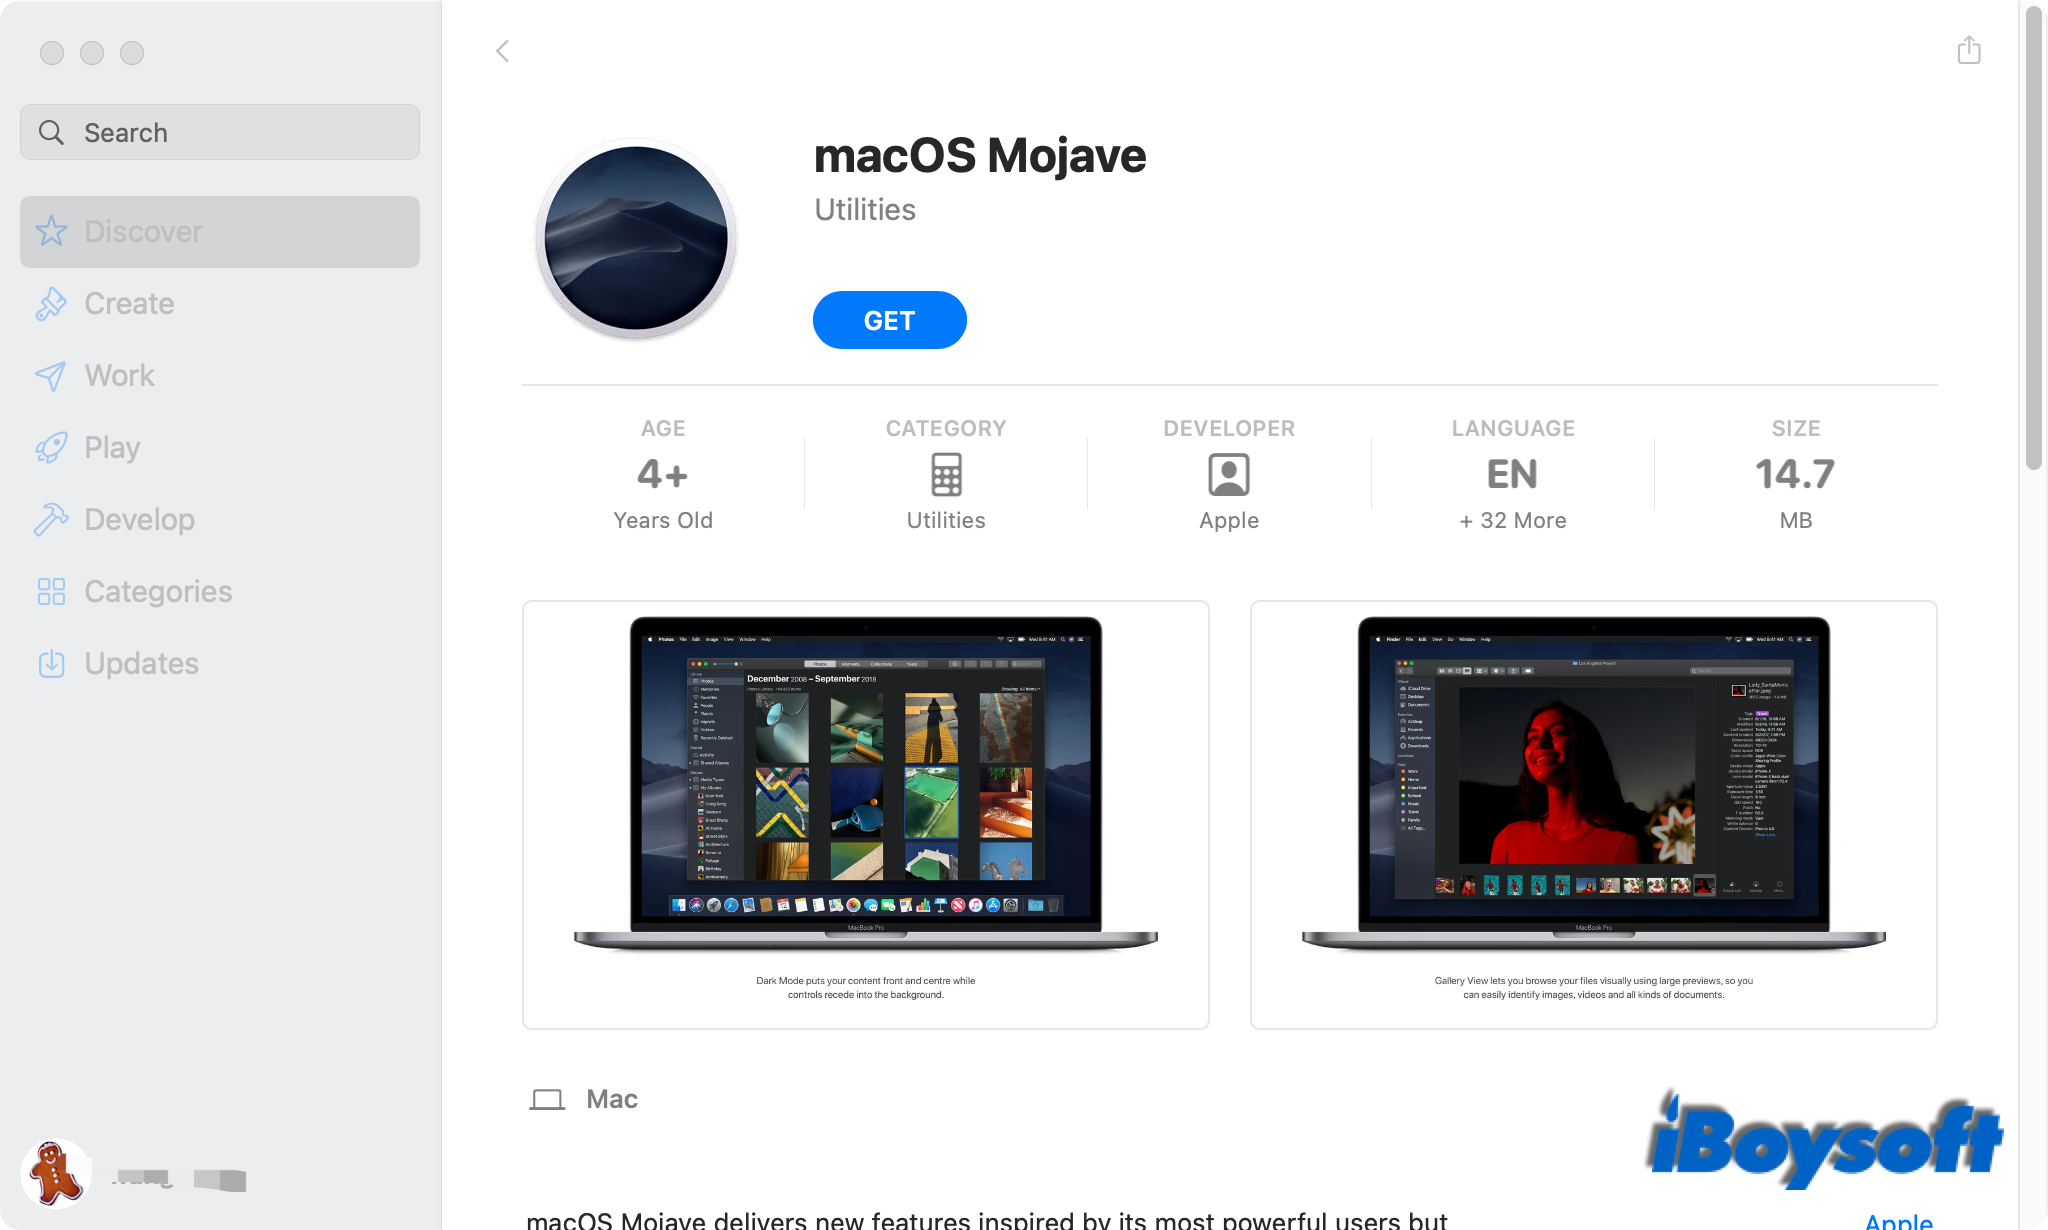
The first step to creating a bootable USB for Mac is to download the macOS installer of the version you prefer on a healthy Mac. You can get the latest macOS Sequoia in System Settings > General > Software Update and the Mac App Store, but you can't find macOS Mojave/Catalina/Big Sur/Monterey in App Store or earlier versions of macOS there.
The fact is that the installers of macOS High Sierra, Mojave, Catalina, Big Sur, and Monterey are available in the Mac Apple Store, but Apple hides them when you search for them in the App Store. You can use the links below to get the macOS installer App Store. We also collect the installers of recent macOS for you to download directly.
- macOS Golden Gate Beta
- macOS Tahoe (Download the macOS Tahoe IPSW full installer directly)
- macOS Sequoia
- macOS Sonoma
- macOS Ventura
- macOS Monterey
- macOS Big Sur
- macOS Catalina
- macOS Mojave
- macOS High Sierra
For older installers like macOS Sierra, OS X El Capitan, and OS X Yosemite, download them directly here (Old Mac OS Download. After downloading, the installer will open automatically. You should quit it to stop installing here.
How to create a bootable USB installer for macOS
Once the macOS installer has been downloaded on your Mac, you can make a bootable USB for your Mac now. Since OS X Mavericks in 2013, Apple has enabled Mac users to install macOS on external storage media via Terminal commands.
Be careful when you use the Terminal to create a bootable USB, and you can back up your Mac in advance to avoid data loss due to mistaken operations. Now, follow the steps below to get the macOS onto your USB:
- Connect your USB drive to the right port on your Mac.
- Press the Command-Space key to open Spotlight, and search for Terminal.
- Launch the Terminal utility on your Mac.
- Type the correct command from the following, and replace "MyVolume" with the name of your USB drive. sudo /Applications/Install\ macOS\ Tahoe.app/Contents/Resources/createinstallmedia --volume /Volumes/MyVolumesudo /Applications/Install\ macOS\ Sequoia.app/Contents/Resources/createinstallmedia --volume /Volumes/MyVolume sudo /Applications/Install\ macOS\ Sonoma.app/Contents/Resources/createinstallmedia --volume /Volumes/MyVolumesudo /Applications/Install\ macOS\ Ventura.app/Contents/Resources/createinstallmedia --volume /Volumes/MyVolumesudo /Applications/Install\ macOS\ Monterey.app/Contents/Resources/createinstallmedia --volume /Volumes/MyVolumesudo /Applications/Install\ macOS\ Big\ Sur.app/Contents/Resources/createinstallmedia --volume /Volumes/MyVolumesudo /Applications/Install\ macOS\ Catalina.app/Contents/Resources/createinstallmedia --volume /Volumes/MyVolumesudo /Applications/Install\ macOS\ Mojave.app/Contents/Resources/createinstallmedia --volume /Volumes/MyVolumesudo /Applications/Install\ macOS\ High\ Sierra.app/Contents/Resources/createinstallmedia --volume /Volumes/MyVolume
- Press the Return/Enter key to run the command.
- Enter your admin account password if asked and press Return/Enter.
- Type Y when it warns that the USB will be erased, then press Return/Enter.
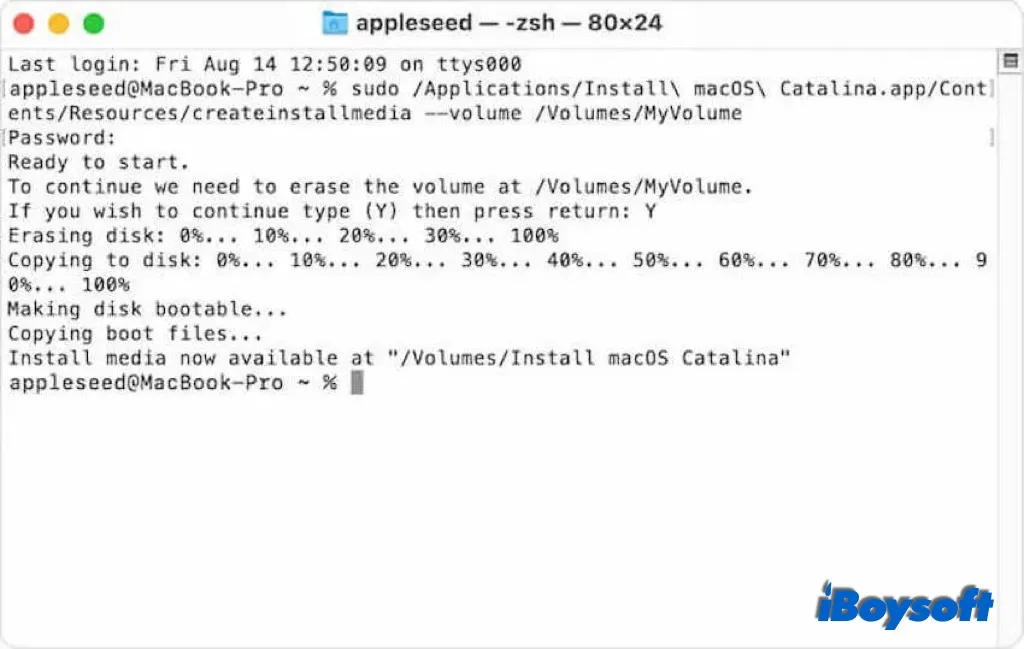
- It prompts "Copy complete and Done" when the process finishes.
- Eject the USB drive from your Mac.
Tips: If you fail, check out the errors and solutions roundup: Can't Create Bootable USB Installer on Mac?
If you see the error "The bless of the installer disk failed" during the process, follow: Fix "The bless of the installer disk failed." If you seem to be stuck on "Making disk bootable" in Terminal, wait it out.
Also, you are prone to encountering "The copy of the installer app failed." You should check your USB connection.
Except for Terminal, you can also find an easier way to get the downloaded macOS installer onto your USB by using a third-party application. However, they are all so difficult and may fail at last, so try the easiest tool iBoysoft DiskGeeker.
Now, you have successfully installed macOS onto the USB flash drive to create a bootable installer for macOS. With it, you can proceed to troubleshoot an underperformed Mac with a startup issue, downgrade macOS on your Mac, batch upgrade macOS on multiple Macs, or install a different macOS on a Mac's second volume.
How to boot a Mac from the macOS bootable USB installer
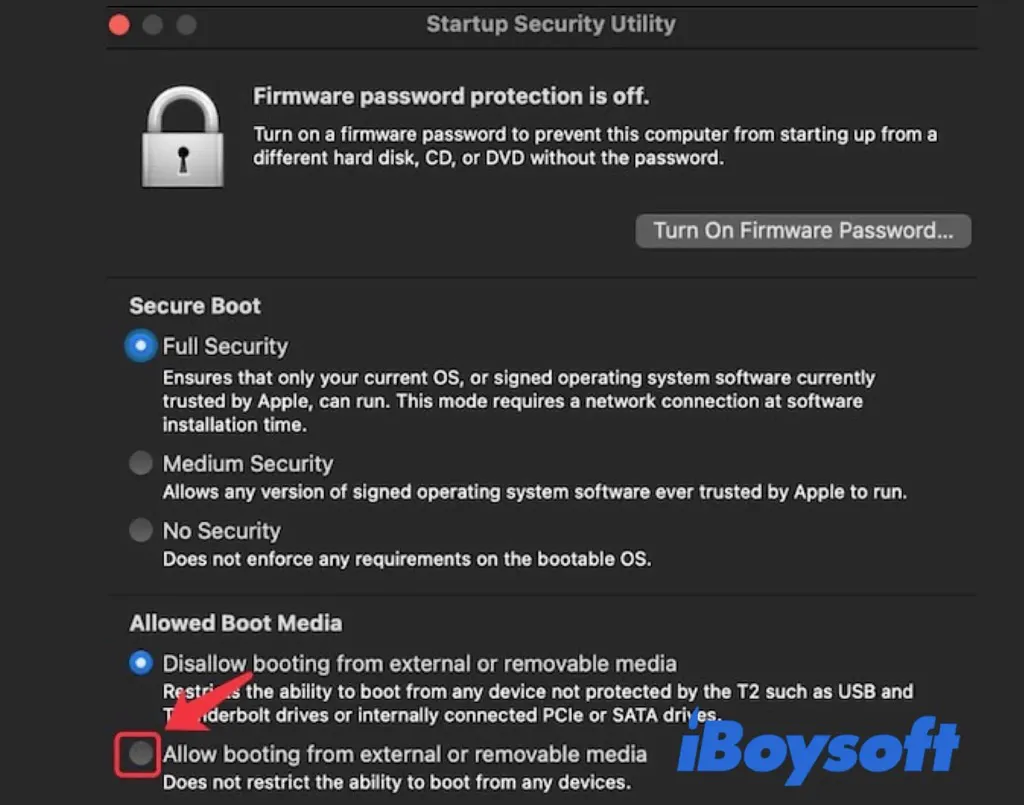
Before using the bootable USB on your Mac, you should change some settings of the Mac with a T2 security chip and Apple Silicon Mac so that you can boot the Mac from an external storage media. Thus, you need to access and change the settings of Startup Security Utility on your T2-secured or M1 Mac to allow your Mac to boot from USB.
By the way, you can also set the Mac to boot from the USB once or every time by changing the startup disk on Mac, just select the bootable USB as the startup disk of your Mac. Then, you can boot Mac from USB and install macOS on your Mac. The specific steps vary from Apple Silicon Mac to Intel-based Mac.
When do you need a bootable macOS USB installer
When the MacBook Pro won't boot from internal hard drive, you can use a bootable macOS installer to boot the Mac from USB to bring the Mac back on track. In addition to using the bootable macOS installer to troubleshoot a malfunctioning Mac, creating a bootable installer for Mac also helps when you need to:
- Install an earlier version of macOS on your Mac.
- Install the latest macOS on multiple Macs without downloading it on each Mac.
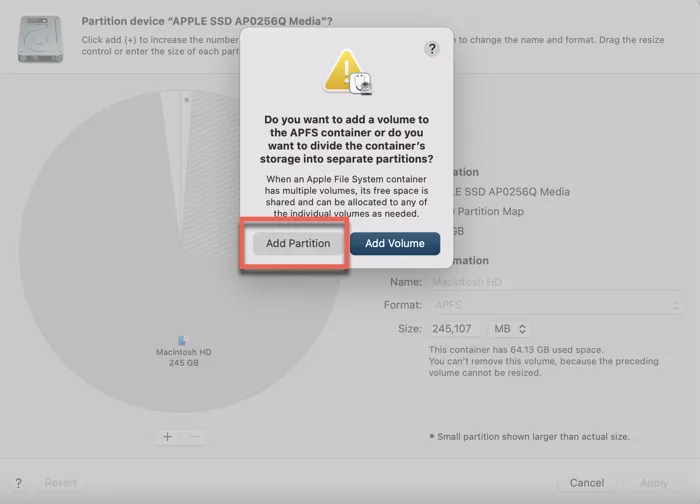
- Install macOS on a separate volume on your Mac's Macintosh HD drive for dual-boot macOS.
- Prepare an emergency disk for unexpected Mac failures.
- Install macOS on a new SSD.
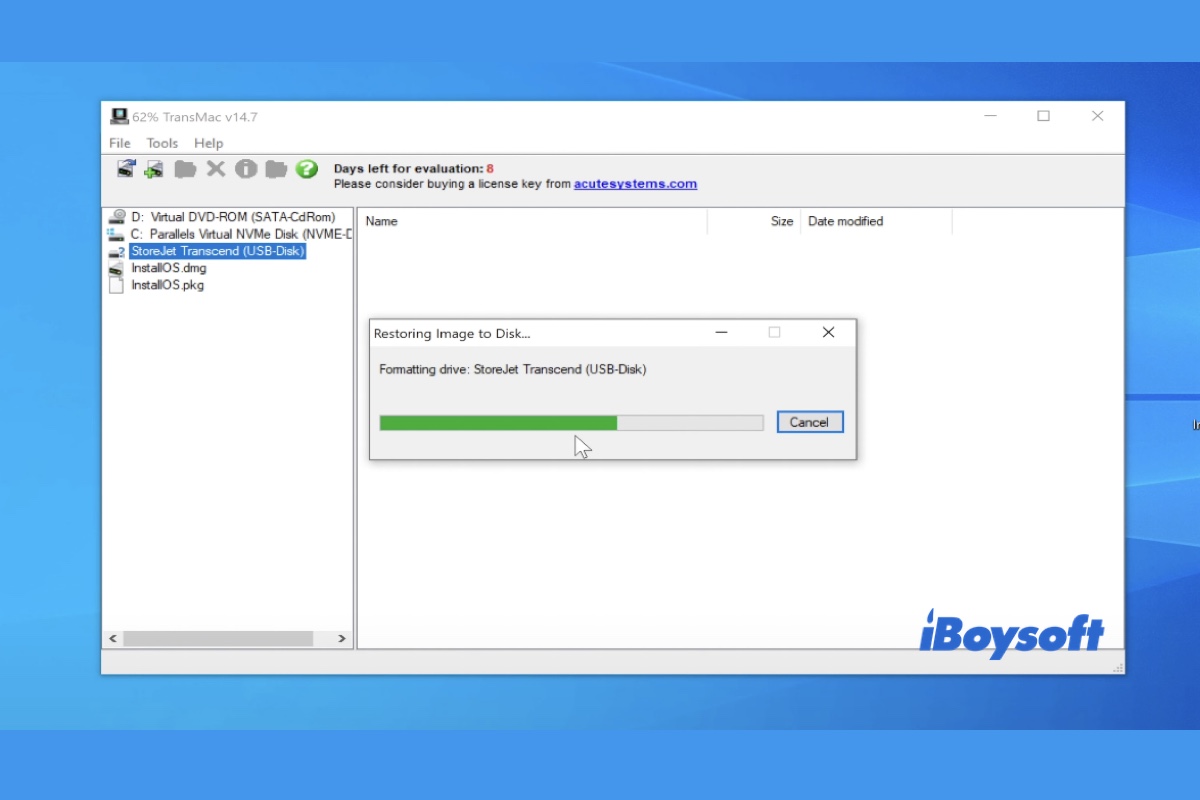
If you have a spare Windows PC, you can follow this guide to create a macOS bootable USB on Windows 11/10/8/7.
The final words
Although you don't have to be tech-savvy to create a bootable installer for macOS, the steps are somewhat complicated to use the Terminal. You should carefully and patiently follow the guide to make a bootable macOS installer. Why not use the convenient way - use iBoysoft DiskGeeker?
You'd better always be prepared with an emergency bootable USB for Mac, which can save the Mac once it undergoes serious issues.
When creating a bootable installer following the online instructions, you receive an error saying: "APFS disks may not be used as bootable install media." This article will address this error message.