If your Mac won't start, keeps looping at the Apple logo, or the internal disk isn't accessible, booting from a USB installer is often the only way to regain control - either to reinstall macOS or recover files before the system is gone for good.
This article is based on hands-on experience booting Macs from USB drives over the past year, covering Intel, T2-based, and Apple Silicon (M1- M5) models. Every method has been tested on at least one physical device, with clear notes on what works, what doesn't, and when it's not worth attempting.
Overview of the quick steps for booting a Mac from a USB:
- Download the macOS installer from the App Store.
- Install the macOS installer onto a clean, Mac OS Extended (for Intel Macs) or APFS (for Apple Silicon Macs) formatted USB drive.
- Boot your Mac from this bootable USB installer.
Identify whether you should boot your Mac from a USB
Before you follow any steps, identify where you stand.
❌ Circumstances where booting a Mac from a USB will not work
Scenario 1: Run macOS on incompatible Mac models
Example: You are going to run macOS Catalina or earlier on an Apple Silicon (M1–M5) Mac through a bootable USB.
Success rate: 0%
Scenario 2: Make a hardware-damaged Mac bootable
Example: Starting up a Mac whose internal disk is physically failing from a bootable USB.
Success rate: 0–5%
✅ Scenarios where booting a Mac from a USB boot actually helps
Scenario 1: macOS is broken, corrupted, but the internal disk is still readable
Symptoms: Mac won't turn on, freezes on the Apple logo, or gets stuck in a boot loop.
Goal: Bootable USB installer → reinstall macOS over existing system.
Success rate: 80%+ (from my experience)
Scenario 2: macOS won't boot, but data must be rescued
Symptoms: The system won't load, and the internal diskis unstable, mountable in macOS Recovery
Goal: Boot from USB → use data recovery tool → copy data out
Success rate: entirely dependent on disk health
Scenario 3: Installing macOS on multiple Macs or a certain Mac without affecting the main drive
Typical use: downgrade macOS, tests, labs, studios, IT maintenance
Requirement: hardware + macOS version compatibility
Success rate: dependent on your operation
Preparation phase (where most failures actually happen)
1. Ensure which Mac you should use to create the USB installer
Basic requirement: A Mac that boots normally.
From experience:
✅ Prepare an Apple Silicon Mac if you'll create a bootable USB installer for an Apple Silicon Mac. This is most reliable.
⚠️ If you create a bootable USB for an Apple Silicon Mac on an Intel-based Mac, noticeably higher failure rate.
If you don't have a working Mac, you can also create a macOS bootable USB installer on Windows. I don't recommend this way unless you're technically experienced. Of course, you can use a professional bootable USB creator like iBoysoft DiskGeeker for Windows to help you.
This tool helps you create a macOS bootable USB installer on Windows with a few clicks only.
- Install and open iBoysoft DiskGeeker for Windows.
- Connect a USB drive with at least 32 GB of free space.
- In the Download and create boot disk section, click "Create macOS USB Installer."

- Select your USB drive as the target disk.
- Select your target macOS version and click "Create boot disk."
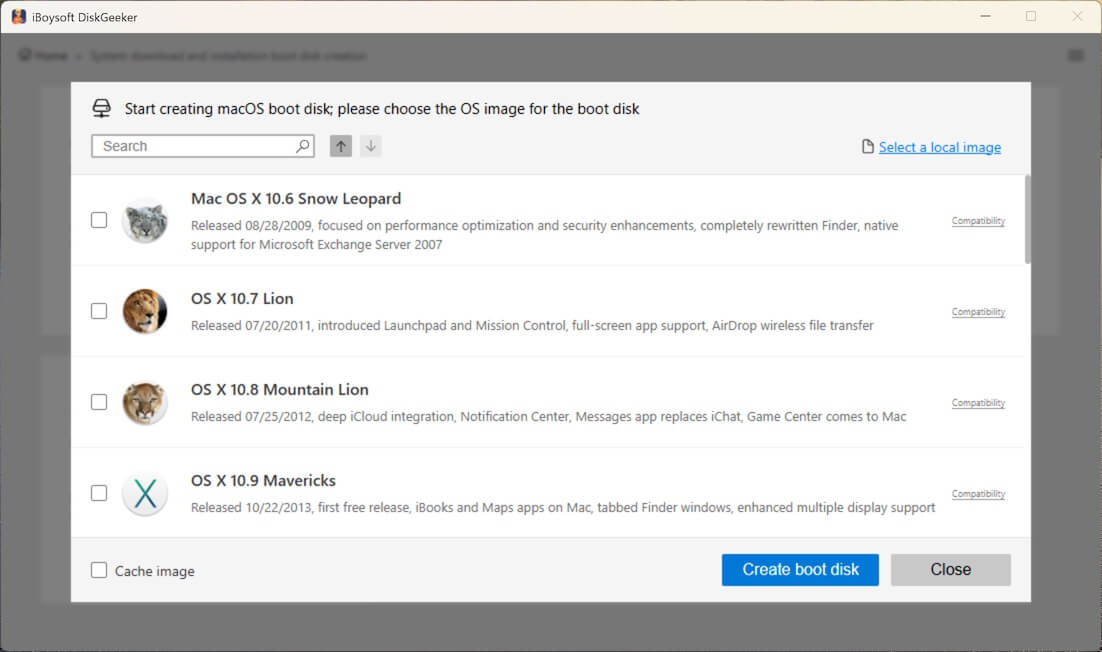
- A moment later, you'll get a bootable macOS USB installer.
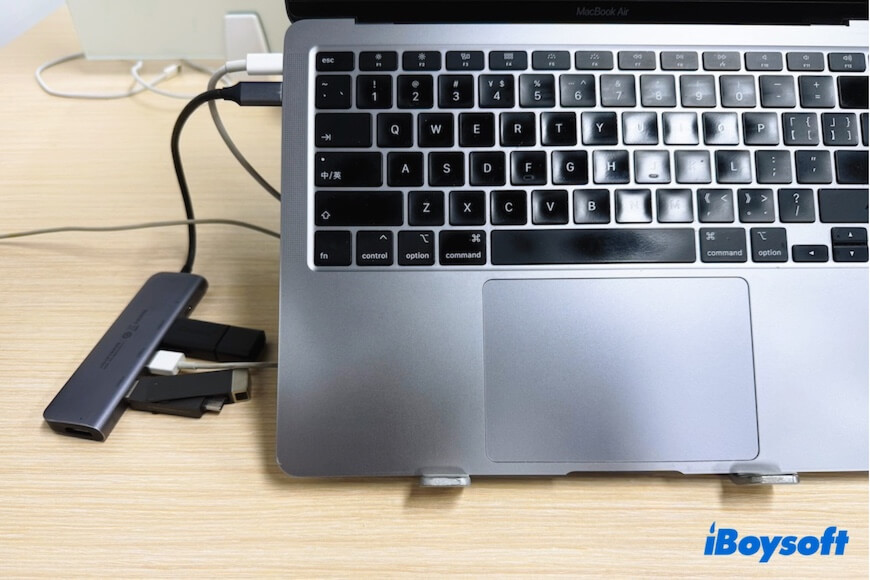
2. Choose the right USB or external drive
What I've tested in practice:
- Cheap USB flash drives: unreliable, especially on Apple Silicon Mac
- USB-C external SSDs: recommend, as it brings a high success rate
- Thunderbolt NVMe SSDs: most stable, but expensive
Capacity:
Creating a bootable USB installer for macOS Big Sur and later: 32GB minimum, 64GB recommended.
Correct format (often written incorrectly elsewhere):
| Target Mac | Required format |
| Intel-based | Mac OS Extended (Journaled) |
| Apple Silicon | APFS (mandatory) |
USB port:
USB 3 or USB Type-C. If you use an Apple Silicon Mac, you should use a Thunderbolt 3 NVMe M.2 SSD.
3. Ensure the target Mac supports the macOS version of the bootable USB you'll create
How to check: From support.apple.com
⚠️ If your target Mac doesn't support the macOS version, you should use OpenCore Legacy Patcher to create the installer and boot the Mac from it.
Get the macOS installer
For macOS Tahoe, you should get the installer from Software Update on your Mac.
For earlier versions, download the installer from the App Store.
Here are quick links to navigate to the macOS installer in the App Store:
- macOS Sequoia
- macOS Sonoma
- macOS Ventura
- macOS Monterey
- macOS Big Sur
- macOS Catalina
- macOS Mojave
- macOS High Sierra
Note: If you need a specific update for a certain macOS version, download it from the Mac OS updates download center.
If the installer auto-launches after download, quit it immediately.
I once clicked "Continue" out of habit and reinstalled macOS on my working machine.
Default installer location on a Mac: By default, the macOS installer is stored in your Applications folder.
Create a bootable macOS USB installer
Way 1: Create a bootable macOS USB installer with Terminal (the conventional but error-prone way)
Best for: tech-savvy users who are familiar with Terminal operations
Steps:
1. Connect your Mac OS Extended formatted USB drive to the Mac.
2. Open Terminal from Launchpad > Other.
3. Copy and paste one of the commands below and press Return/Enter.
Here, Applications stands for the destination where your macOS installer is stored on your Mac now. "MyVolume" means where the macOS installer file will be stored later.
You should replace Applications with the location your installer saves to (if you have changed its destination) and replace MyVolume with your USB drive name.
macOS Sequoia
sudo /Applications/Install\ macOS\ Sequoia.app/Contents/Resources/createinstallmedia --volume /Volumes/MyVolume
macOS Sonoma sudo /Applications/Install\ macOS\ Sonoma.app/Contents/Resources/createinstallmedia --volume /Volumes/MyVolume
macOS Ventura sudo /Applications/Install\ macOS\ Ventura.app/Contents/Resources/createinstallmedia --volume /Volumes/MyVolume
macOS Monterey sudo /Applications/Install\ macOS\ Monterey.app/Contents/Resources/createinstallmedia --volume /Volumes/MyVolume
macOS Big Sur sudo /Applications/Install\ macOS\ Big\ Sur.app/Contents/Resources/createinstallmedia --volume /Volumes/MyVolume
macOS Catalina sudo /Applications/Install\ macOS\ Catalina.app/Contents/Resources/createinstallmedia --volume /Volumes/MyVolume
macOS Mojave sudo /Applications/Install\ macOS\ Mojave.app/Contents/Resources/createinstallmedia --volume /Volumes/MyVolume
4. Enter your admin password if required and hit Return/Enter.
5. Type Y when warning that the USB drive will be erased. And then, press Return/Enter.
6. Wait a moment until the "Copy complete and Done" notification appears. During the process, you'll see the system installation progress.
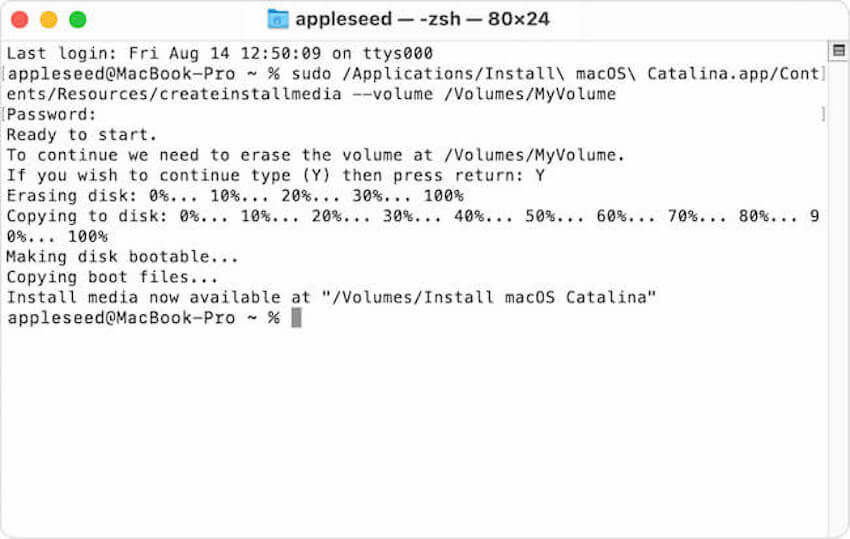
7. Eject your USB drive.
Way 2: Create a bootable macOS USB installer with a professional tool (the easy method I recommend)
If you are a tech newbie, you can use iBoysoft DiskGeeker for Mac to create a macOS bootable USB installer with only a few clicks, no Terminal required.
1. Install and open iBoysoft DiskGeeker for Mac and connect a clean USB drive or external drive to your Mac.
2. Click Create boot disk > Continue.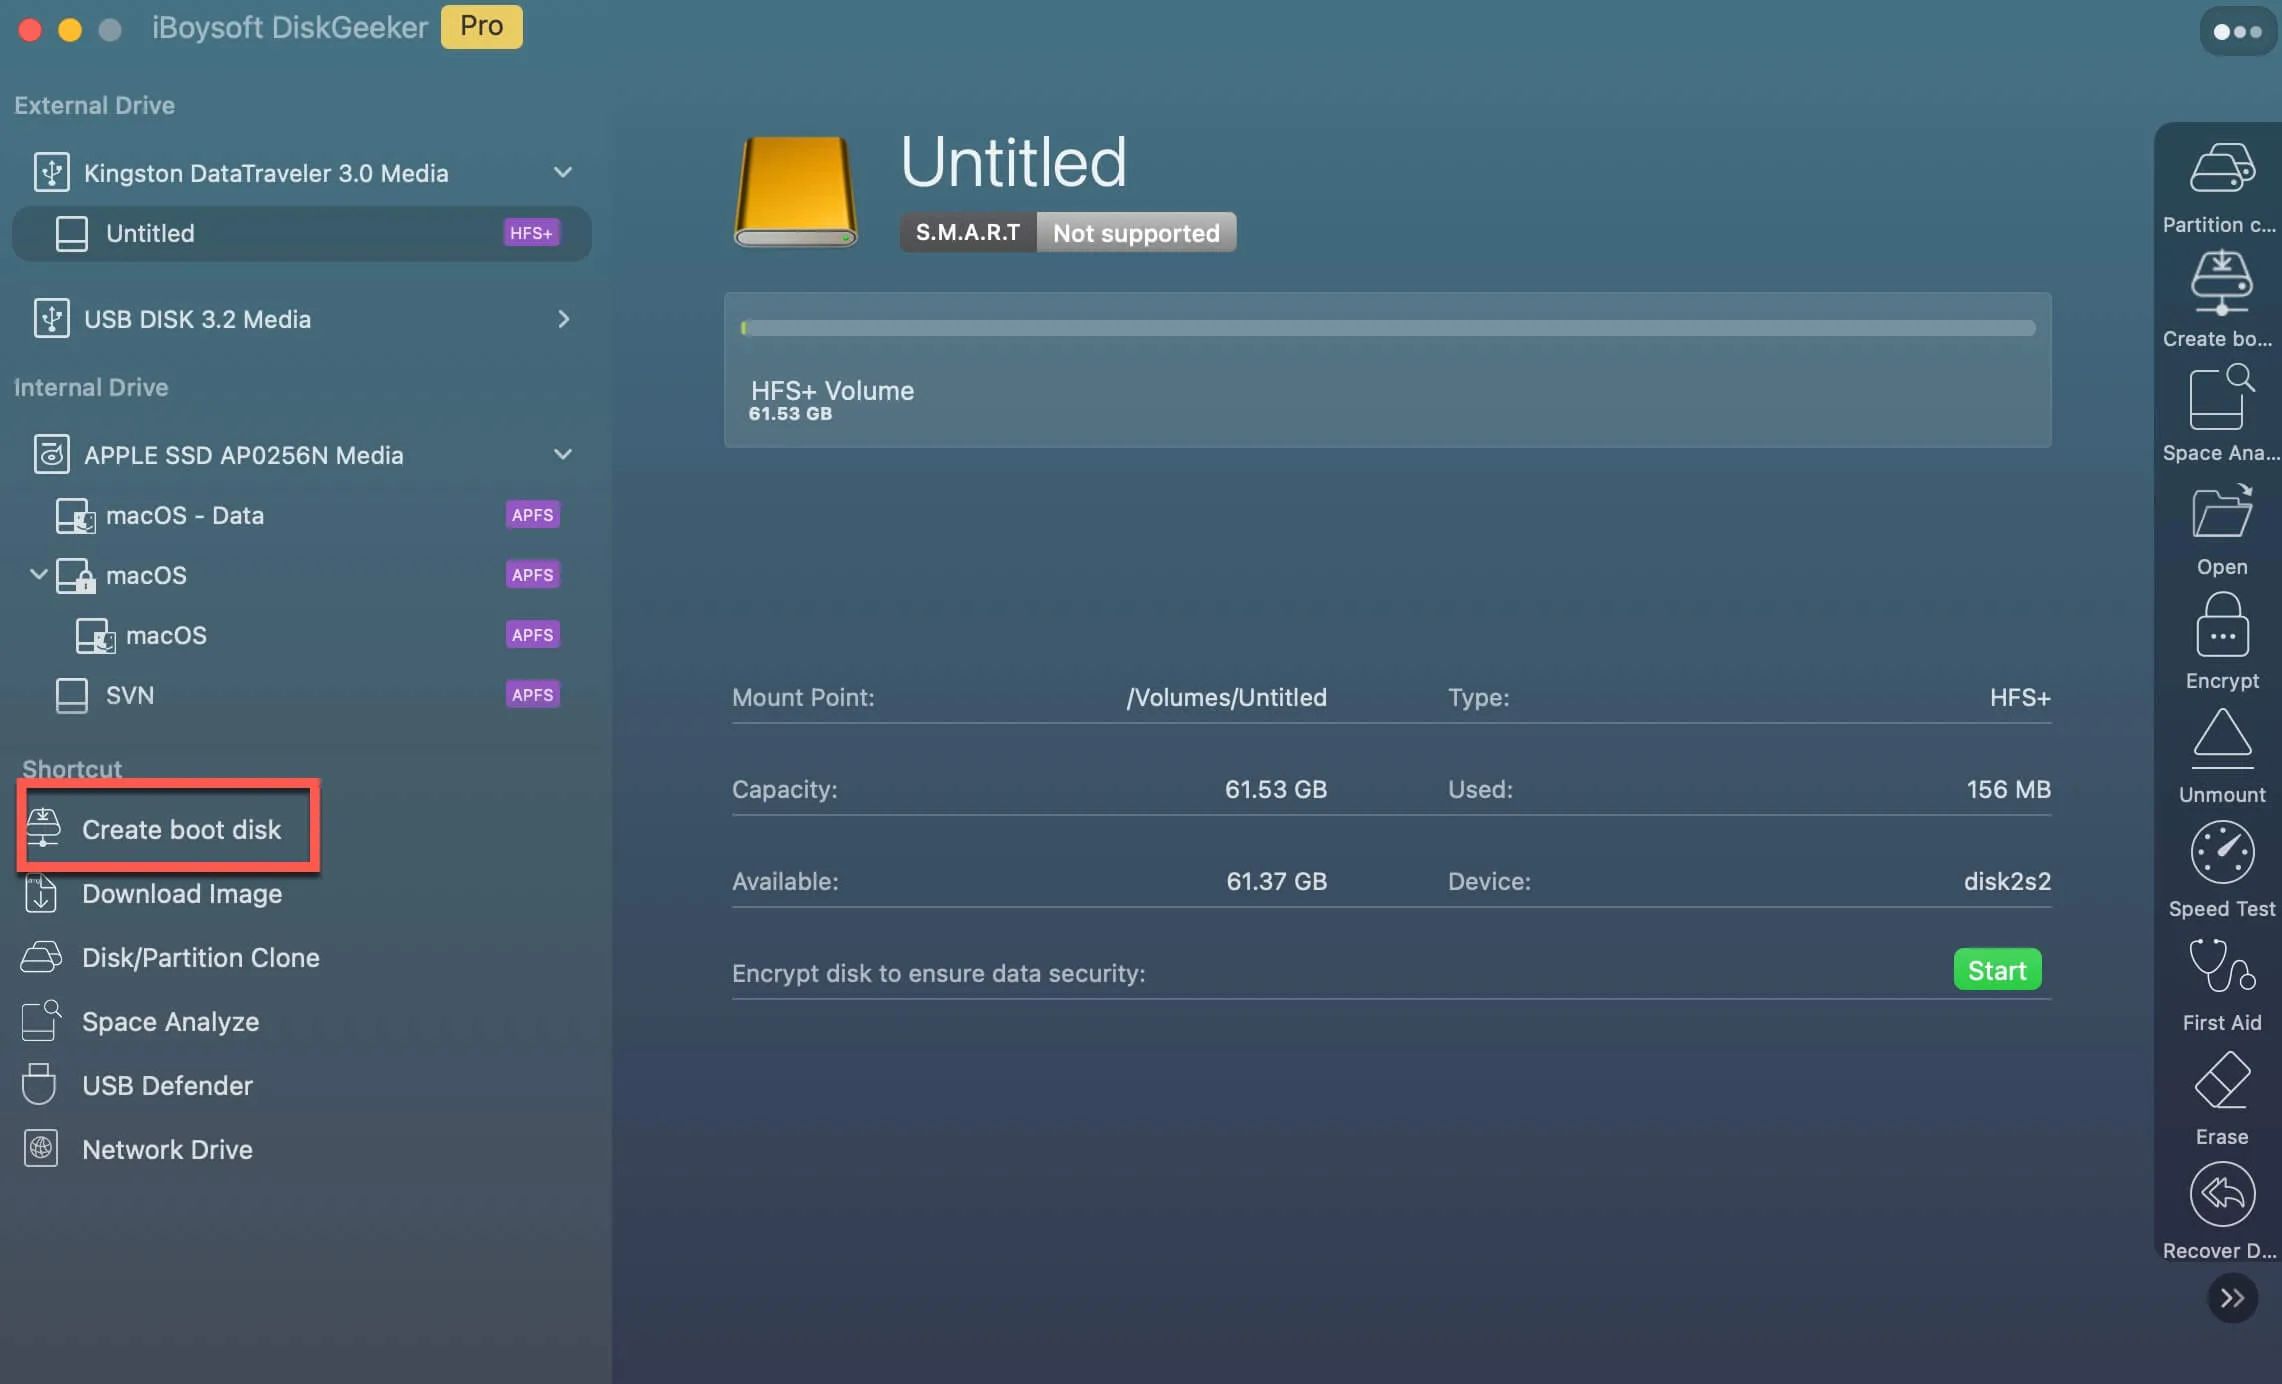
3. Select a volume on the USB drive.
4. Select your desired macOS version and click Create boot disk > OK.
This tool will download the macOS DMG installer first and then automatically start creating a bootable USB installer.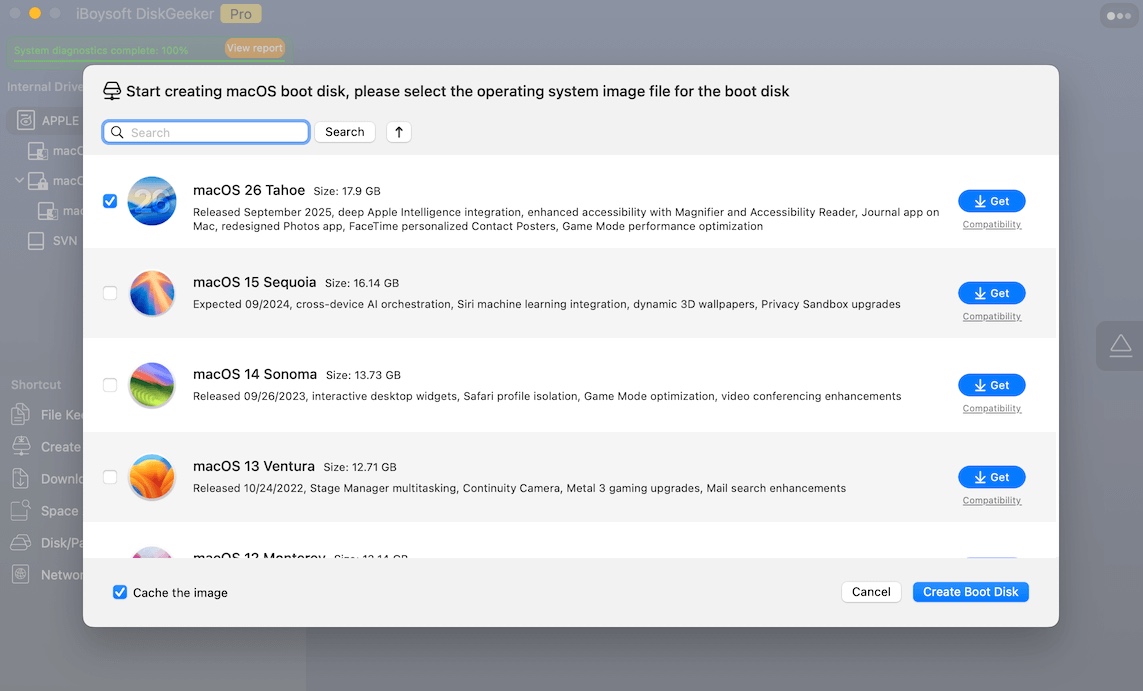
Boot a Mac from the USB
Before start:
1. Ensure you want to boot up a MacBook from a USB drive only once or for every startup. The way is different.
2. Check if the target Mac is T2-based or has an Apple Silicon chip.
For Apple Silicon Macs, you should change the startup security settings to enable them to boot from an external USB drive. Or else, you'll fail to boot the computer from the USB.
I once forgot to enable my Mac to boot from external bootable media. Consequently, I selected the bootable USB drive on the screen to start Mac, it failed.
Steps to enable a T2-chipped or Apple Silicon Mac boot from a USB:
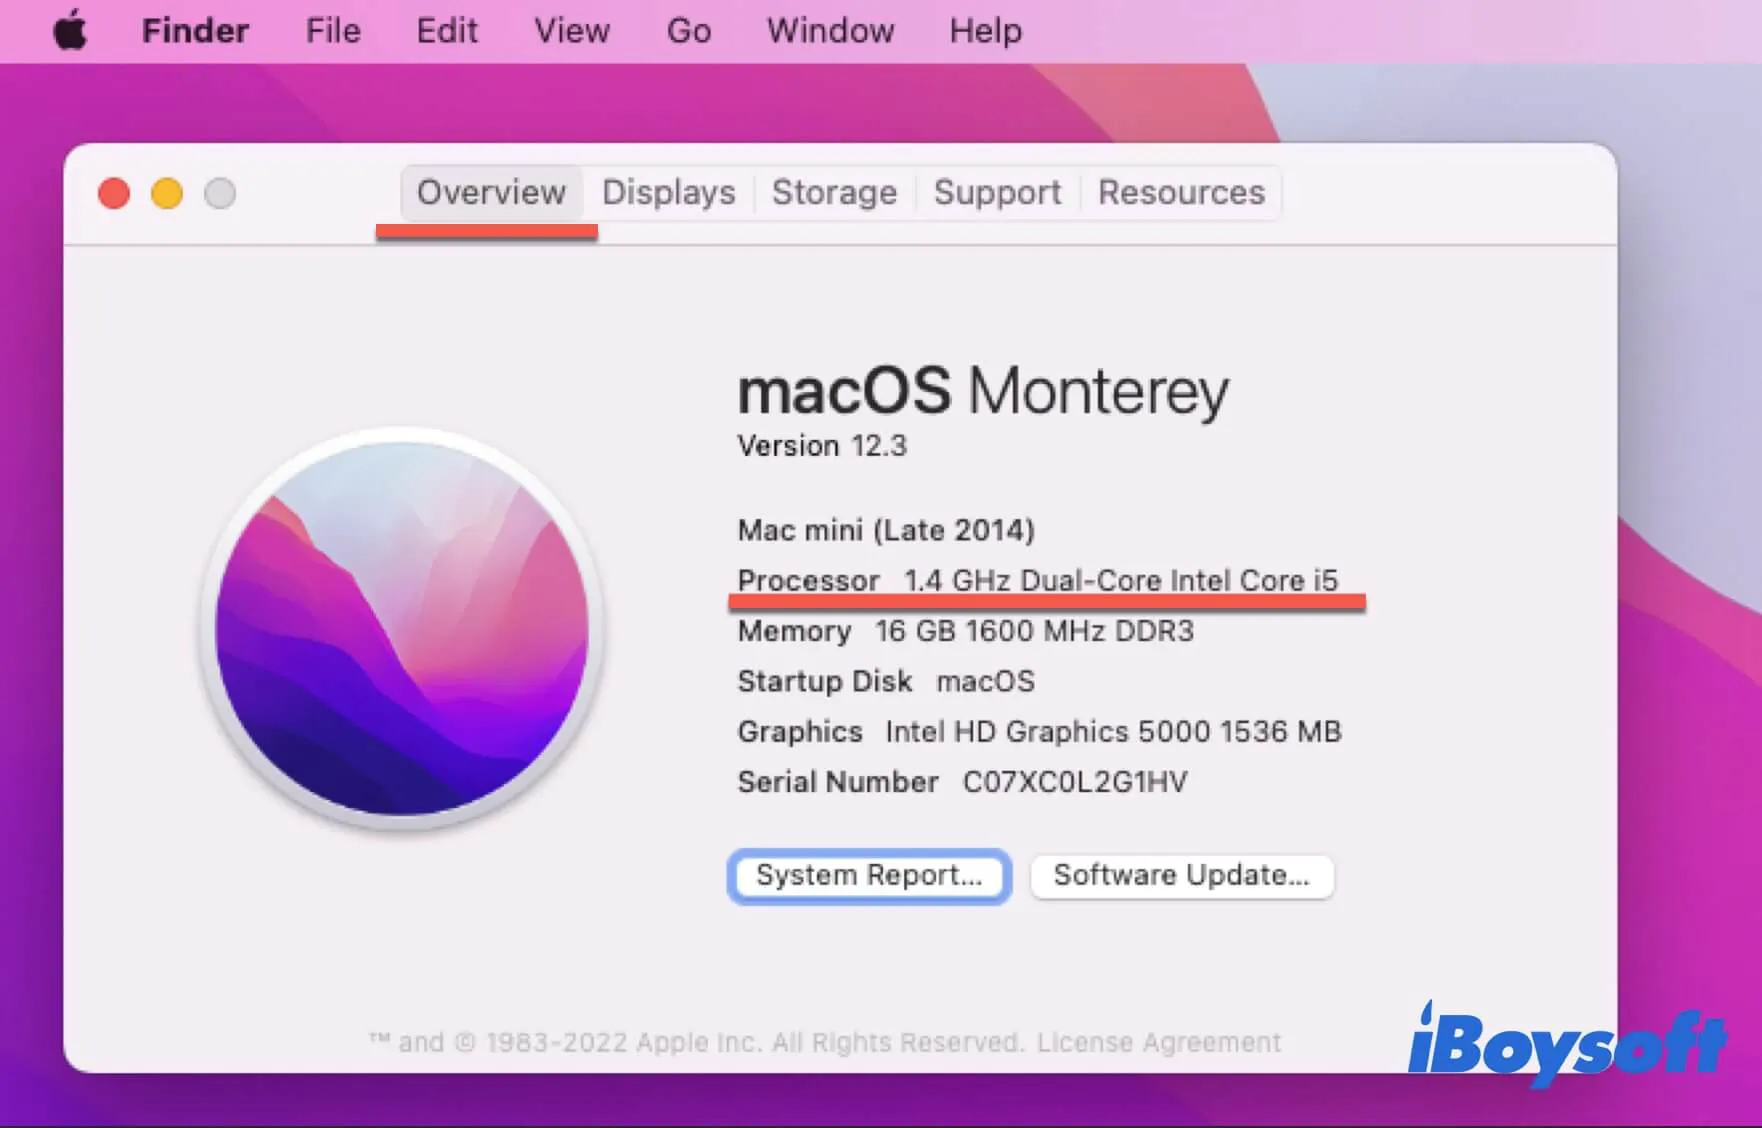
- Check the chip of the target Mac in the Apple menu > About This Mac.
- Boot your T2 Intel-based Mac or M1 Mac in Recovery Mode.
For a T2 Mac, start up your Mac and meanwhile, press down Command - Option/Alt - R together until the spinning globe appears on the screen.
For an M1 Mac, shut down your Mac first. Then, hit the power button (Touch ID) until the startup options show up. - Click Utilities > Startup Security Utility from the menu bar in macOS Recovery mode.
- Type your admin password if required to authenticate.
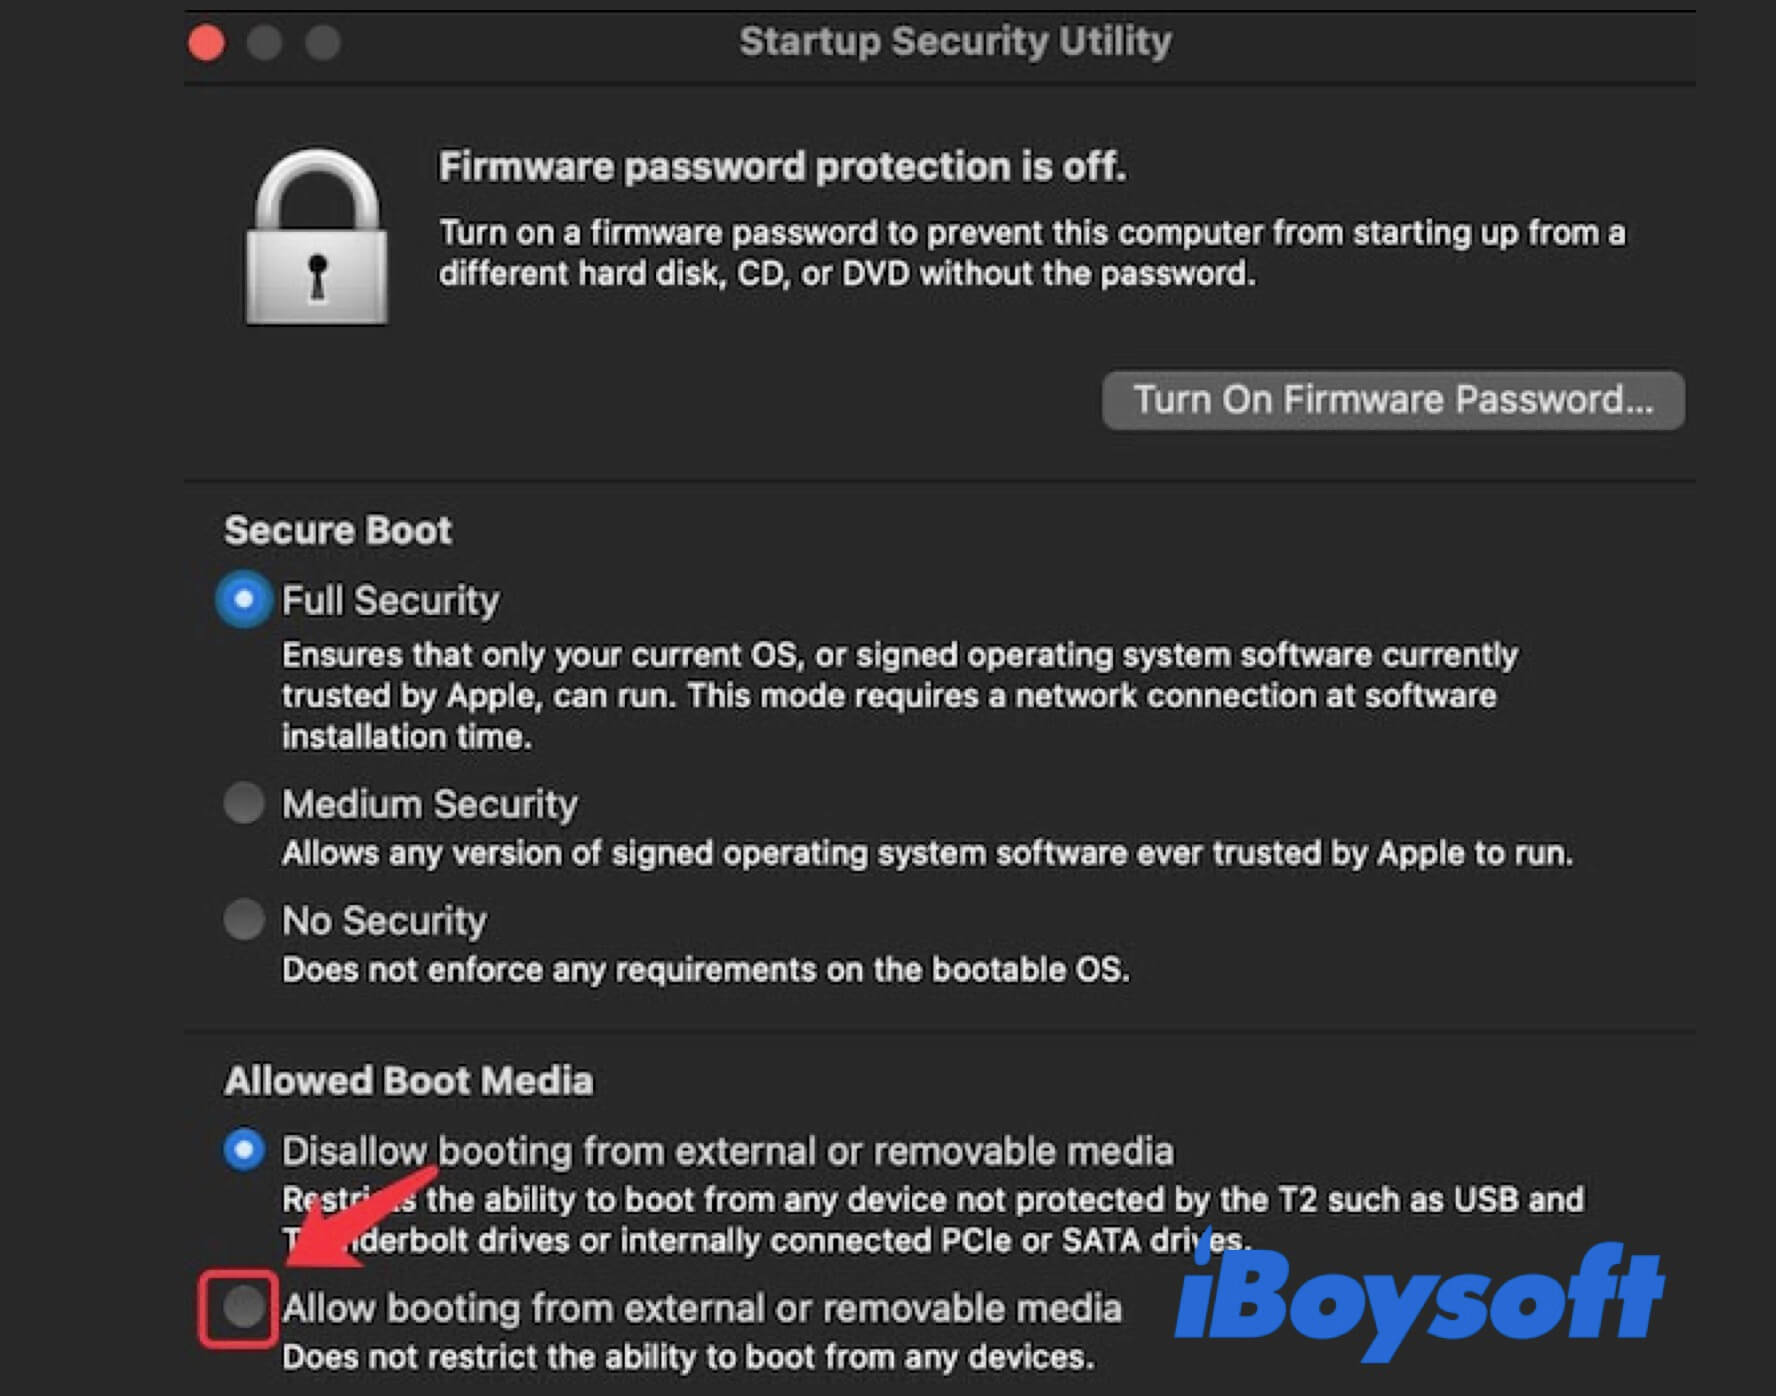
- Reset the Secure Boot to Medium Security.
- Check "Allow booting from external media" (on T2-based Mac) or "Allow booting from external or removable media" (on M1 Mac).
- Exit macOS Recovery mode.
Boot your Mac from the bootable USB drive only once (for Macs won't start up)
Use the startup disk manager to set your Mac to boot from the USB or external hard drive only once, as the following steps:
- Connect your USB drive to the target Mac that is connected to the Internet.
- Turn on or reboot the Mac and immediately hold down one of the following shortcut keys:
The Option/Alt key for an Intel-based Mac.
The power button for an Apple Silicon Mac. - Release the key when the startup disk options show up.
- Select the bootable USB drive and hit Return to boot your Mac in macOS Recovery Mode.
- Choose Install macOS from the Utilities window in Recovery Mode and click Continue.
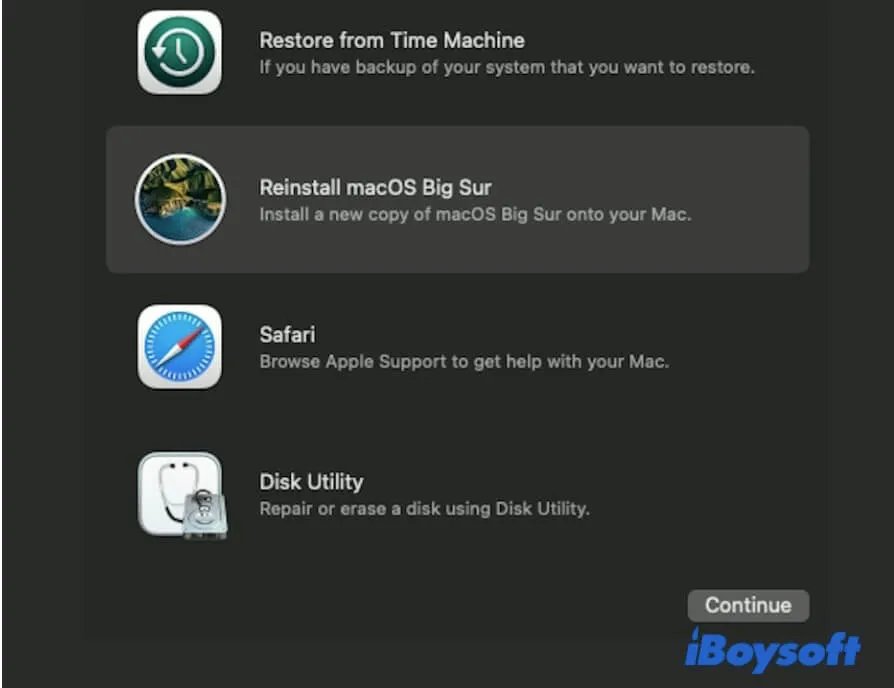
- Follow the onscreen instructions to install macOS and set up your Mac.
Boot your Mac from the bootable drive for every startup (If your Mac can boot up normally)
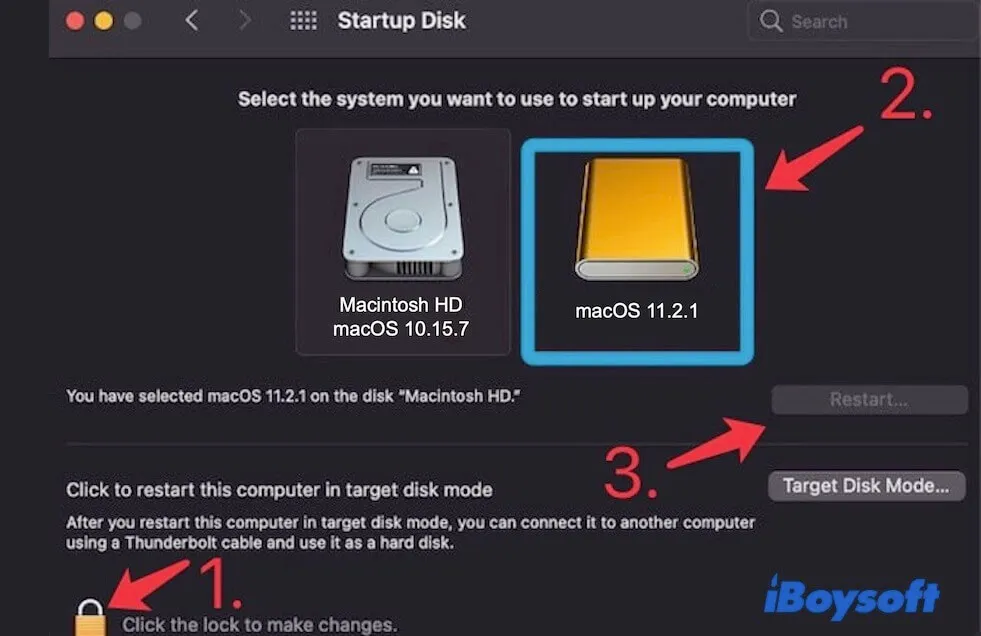
Use the startup disk manager to allow your Mac to boot from the external media at every startup.
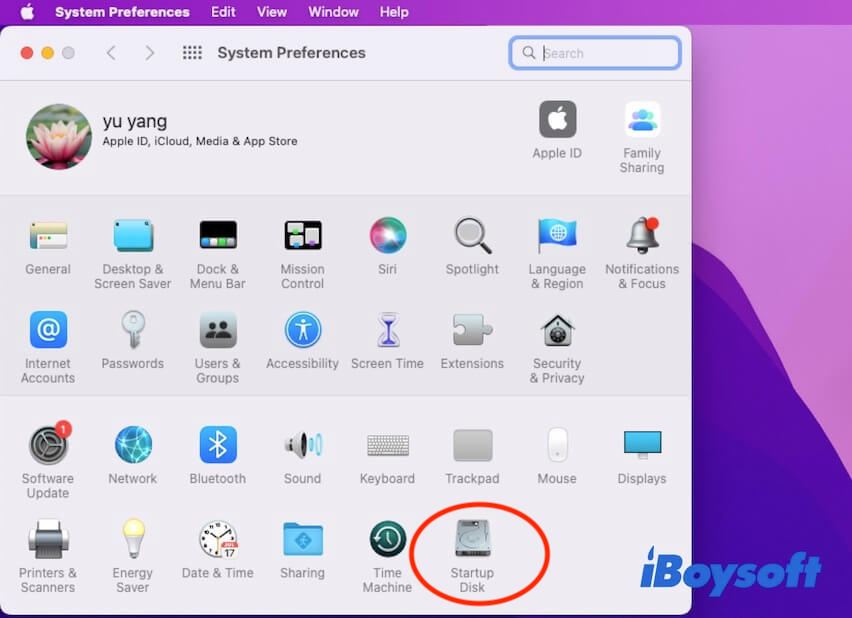
- Open the Apple menu > System Preferences > Startup Disk.
- Click the lock at the bottom left to unlock it.
- Select the bootable USB installer and click Restart to boot the Mac from the external USB drive.
Why won't a Mac boot from a USB drive
When your Mac won't boot from the USB drive, you may be in one of the following situations (All cases I've ever encountered):
- The bootable USB is not showing up in the startup options
- The Mac ignores the USB and boots from the internal disk
- The Mac gets stuck, reboots, or experiences kernel panics
- The Mac blocks the USB for security reasons
- The Mac boots but can't complete the installation
Common reasons:
- Startup Security settings were never changed (most common)
- The macOS version is incompatible with the Mac model
- The installer was never created correctly
- External drive protocol or power issue
Check the connections
Unplug the USB drive and reconnect it to your Mac, then try again. If the issue persists, connect the USB drive to another Mac to see whether it's detected.
If the drive shows up on the other Mac, the problem is likely with the USB port on the original Mac or USB cable. Try using a different USB port and USB cable.
Check the macOS compatibility of the Mac
If you use the bootable USB drive on multiple Macs, you should note that the macOS in the USB drive is compatible with all Mac models. It is worth mentioning that the Apple M1 Mac only supports macOS Big Sur or later.
You can head to Apple's support page to check the software compatibility of your Mac.
Check the Startup Security Utility
Boot your Mac in macOS Recovery to reset the Startup Security Utility.
Fix the USB drive
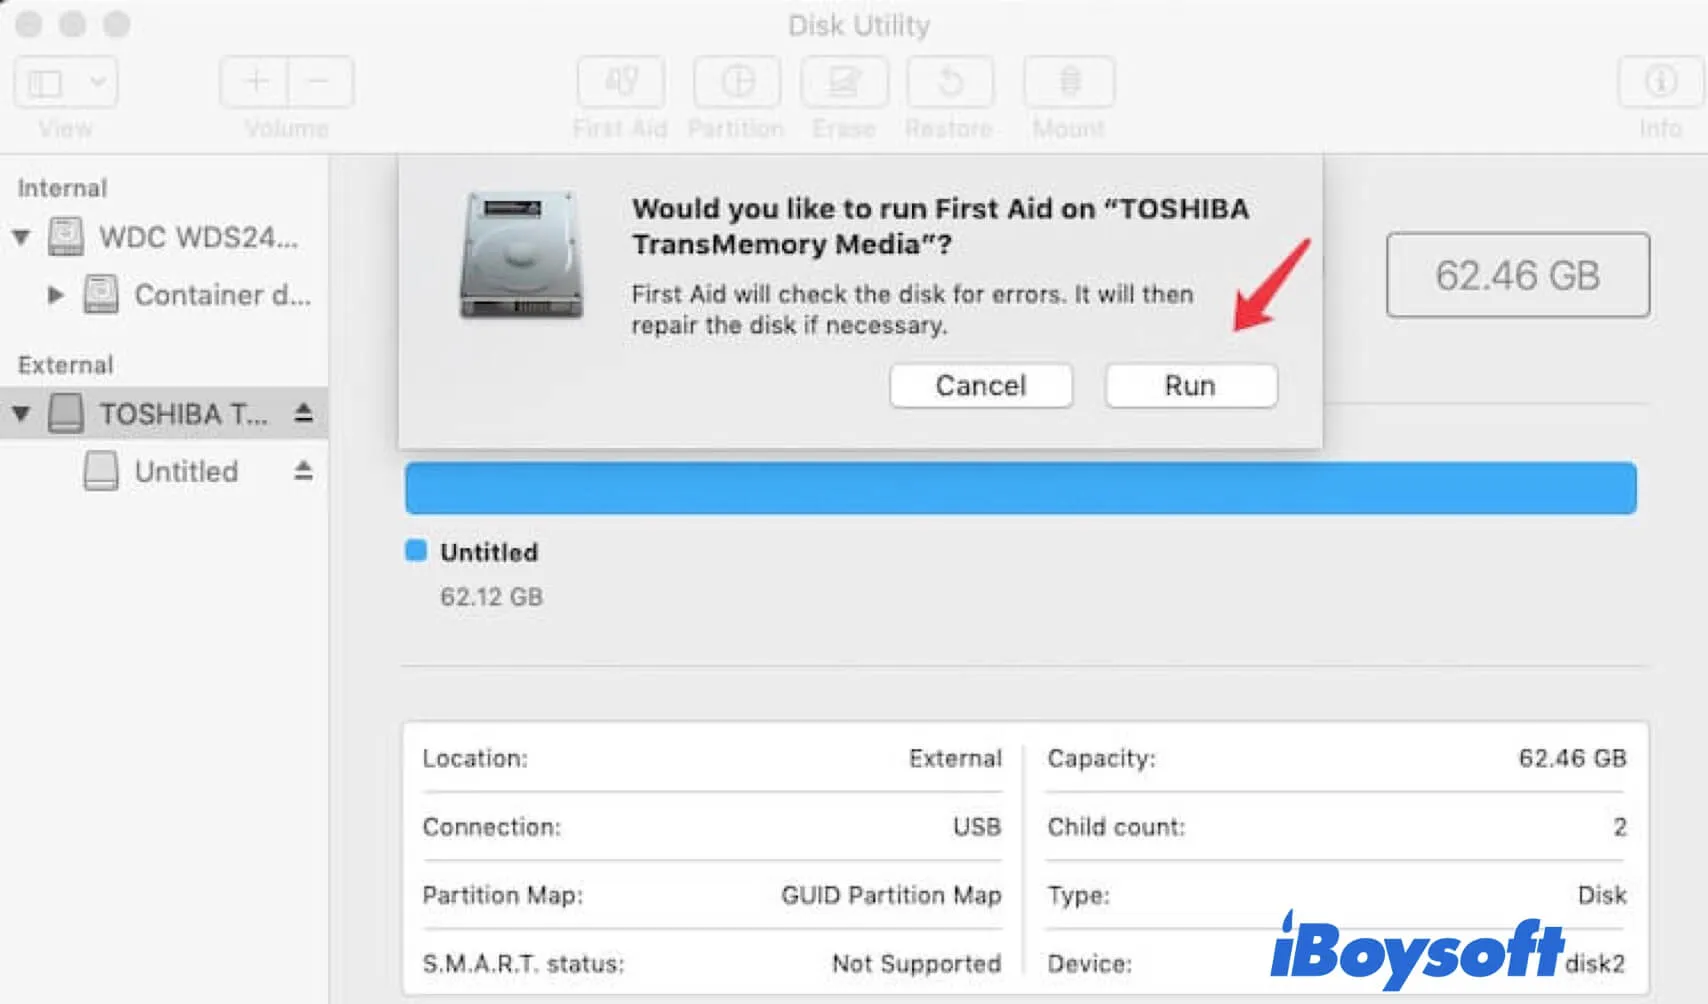
If the issue can't be fixed with the above solutions, your USB drive probably has some issues.
You can run First Aid in Disk Utility to repair it. If it is useless, you have to back up the files on the drive to another place and reformat it. Then, recreate a bootable installer.
My honest advice
If you're just upgrading macOS, don't bother with USB boot. Choose to upgrade from App Store or Software Update.
If you're trying to rescue data from an unbootable Mac, a USB boot is not your last resort. Try iBoysoft Mac Recovery Mode, which helps recover files from an unbootable Mac in macOS Recovery Mode.
If the Mac can't even reach startup options:
- Intel Macs → try Target Disk Mode
- Apple Silicon Macs → consider erase + restore or professional recovery
Final words
Booting a Mac from a USB has never been elegant. It's an engineering fallback — a way to regain control when the system fails.
If you've read this far, you're probably not learning out of curiosity. You're trying to save a Mac that's already in trouble.
I hope this record helps you avoid some of the mistakes I've already made.
FAQ about booting a Mac from USB
- Q1. Can you install macOS from USB?
-
A
Yes, you can download macOS installer from App Store. And then, run the specific command in Terminal to install the macOS onto the USB drive.
- Q2. How do you get to the boot menu on a Mac?
-
A
On an Intel-based Mac, press down the Option key when your Mac restarts or boots up until seeing the startup options. On an Apple M1 Mac, you need to turn on your Mac and hold down the power button when the startup options appear.
- Q3. How do I know if my Mac USB is bootable?
-
A
You can open Startup Disk in System Preferences. If it lists there, the USB drive is bootable. Or you can get to the boot menu, if the USB is in the list, it is bootable.
- Q4. How do I change my boot disk?
-
A
To change the startup disk for every startup, you should go to Startup Disk in System Preferences. Click the lock icon at the left bottom of the window and enter your admin password to unlock it. Then, reselect your boot disk.