It's always better to "have a Mac backup" than "need a Mac backup". How to back up your Mac? There are numerous ways to choose from. Read the following backup methods roundup table for reference if you have no idea:
| Backup need | Best method | Use when | Limit/Warning |
| Automatic regular backups | Time Machine | You have a dedicated external drive or network backup destination | Backup disk may need to be erased; keep the backup password if encrypted |
| Selected files across Apple devices | iCloud Drive | You mainly need Desktop, Documents, Photos, Notes, or app data synced | iCloud is not a full bootable or full-system Mac backup |
| Simple copy of important files | External drive manual copy | You only need documents, photos, videos copied now | Easy to miss app data, system settings, hidden folders |
| Disk migration or full drive copy | Disk clone | You are replacing a drive, migrating data, or need a full disk copy | Destination disk may be overwritten; verify source and target before cloning |
After selecting the most suitable approach, follow the detailed steps outlined below.
How to Automatically Back up Mac with Time Machine
When you turn on Time Machine on the Mac, it will automatically create one backup every hour for the past 24 hours, daily backups for the past month, and weekly backups for all previous months. If the destination backup external drive is almost full, it will auto-delete the oldest backups to clean up storage for the new ones.
If it's the first time you're backing up a Mac with Time Machine, you need to pay attention to the aspects below before you start:
- Use an external backup drive with enough space. For Time Machine, choose a drive ideally at least twice the storage capacity of your Mac.
- Do not store everyday files on the same volume used only for Time Machine backups.
- If macOS asks to erase the drive for Time Machine, make sure the drive does not contain files you still need.
- If you encrypt the backup, save the backup password securely. You may need it to restore files later.
How to Back up Your Mac with Time Machine on macOS Ventura or Newer
1. Connect your external storage device to your Mac.
2. Click the Apple logo > System Settings > General > click to open the Time Machine app.
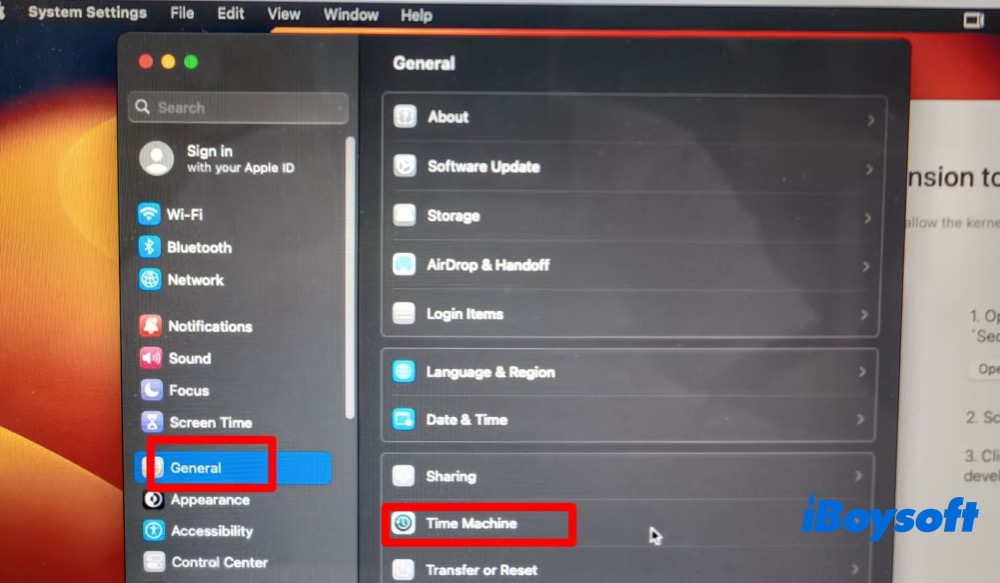
3. Click Add Backup Disk or the Add button (+).
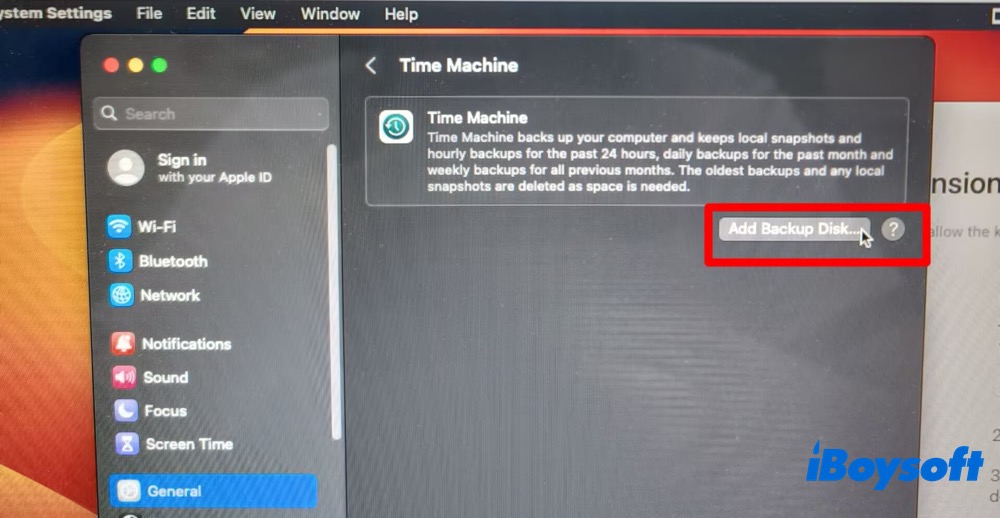
4. Choose your connected external drive and tap Set Up Disk. During setup:
- Your Mac may ask whether you want to erase the storage device so it can be used with Time Machine. You can either erase the device (backup files before erasure) or choose a different backup disk or volume.
- Your Mac may also ask whether this computer should claim existing backups that were created on another Mac. Select Claim Backups if you want those backups to be associated with this Mac and included in its backup history.
After setup is complete, your Mac will immediately begin using the connected storage device to create backups.
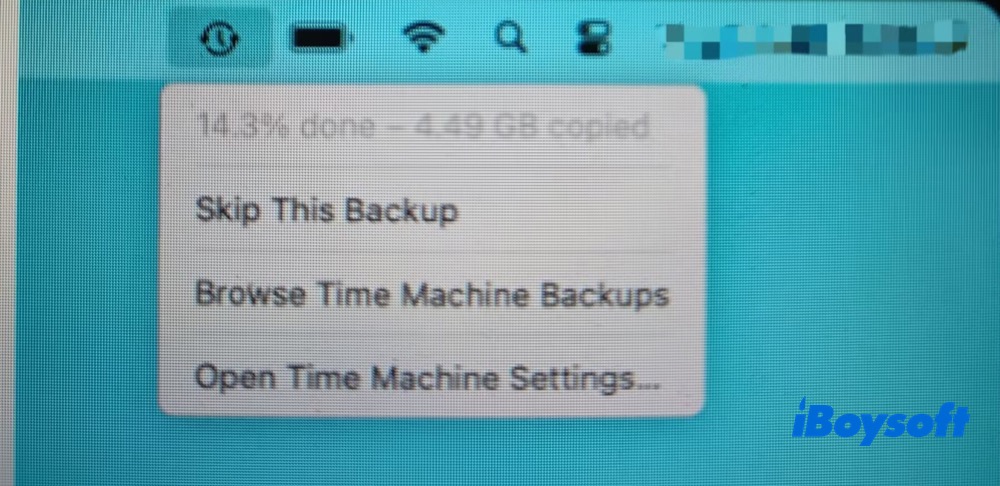
5. Select Back Up Now from the Time Machine menu in the menu bar. Alternatively, you can wait for the next automatic backup to run.
You can also use this menu to pause or skip a backup, or to check its progress. The top of the menu displays the current backup status, including the amount of data completed, or the date and time of the most recent backup.
How to Backup Your Mac with Time Machine on macOS Monterey or Earlier
- Connect an external hard drive to your Mac.
- Tap the Apple logo > System Preferences > select Time Machine to open.
- Click Select Backup Disk.../Select Disk... to choose a disk for Time Machine backups.
- Tick Encrypt backups if you want to protect private information, then click Use Disk. Time Machine backups could be written to Mac OS Extended drive on macOS Catalina and earlier and APFs drives on macOS Big Sur and later.
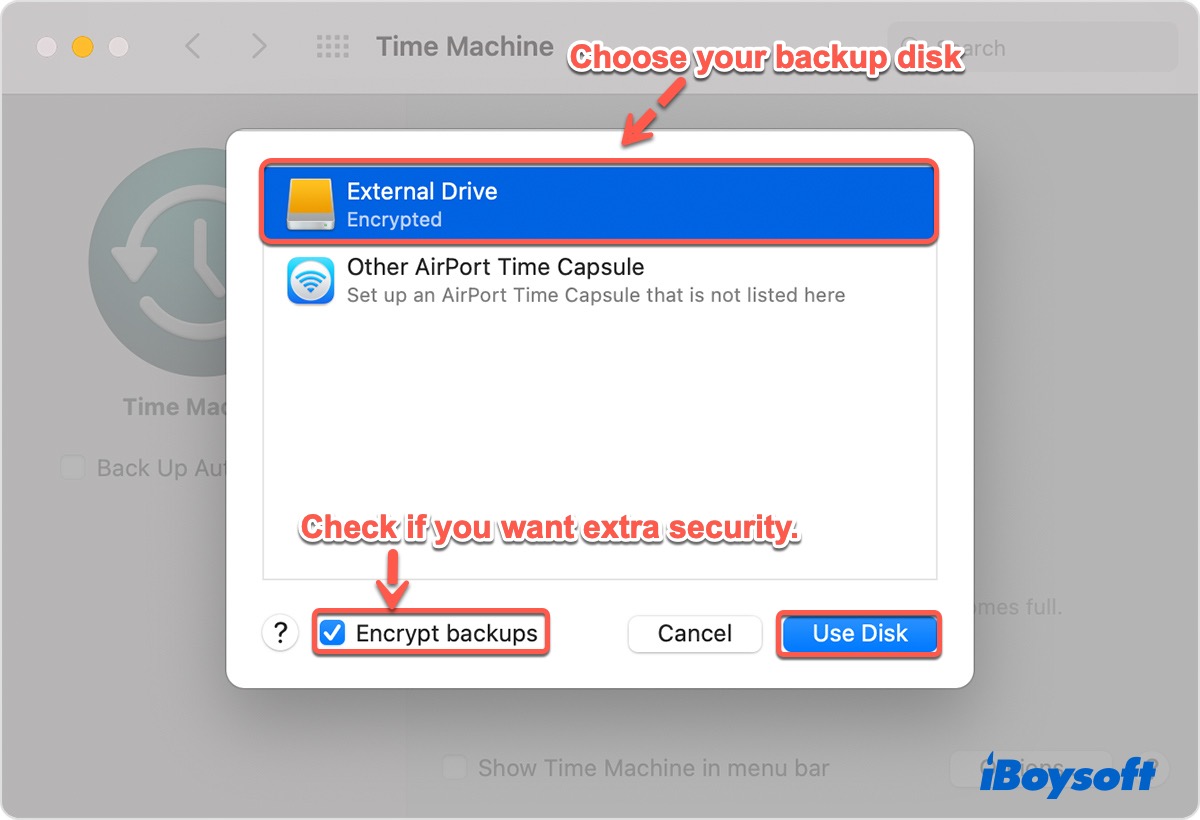
- Tick the box next to Back Up Automatically to enable automatic backups.
- Check Show Time Machine in the menu bar for convenience's sake.
- Click Option to exclude some items. Use the ( + ) and ( - ) buttons to add or remove.
- Wait for the automatic backup, or start a backup manually by clicking the Time Machine icon on the top-right menu bar and choosing Back Up Now.

Creating the initial backup with Time Machine takes the longest compared to subsequent incremental backups. Keep your Mac charged and don't put it to sleep during the backup process.
Sync and Store Selected Mac Files with iCloud Drive
iCloud is a cloud storage service from Apple, available on every Apple device like Mac, iPhone, and iPad. When it is enabled, it wirelessly syncs and stores your selected Mac files (not the full Mac backup), including photos, files, notes, app data, and more, to iCloud. You can access stored data on all Apple devices signed in with the same Apple ID.
Follow the steps below to sync and store selected Mac data using iCloud Drive:
- Go to the Apple menu, open System Preferences, then click Apple ID.
- Select iCloud on the left sidebar.
- Sign in with your Apple ID on the Mac.
- Choose iCloud Drive and click Options.
- Select the apps you want to create backups for, such as adding the Desktop and Documents Folders to iCloud. Then click Done,
- Check the boxes next to the apps that you want to sync to iCloud, like Photos, Contacts, Reminders, etc.
- Click Merge or OK if asked for confirmation.
- Wait for iCloud to back up selected files.

iCloud Drive is useful for syncing and storing selected files such as Desktop, Documents, Photos, Notes, and app data across Apple devices. However, it is not the same as a full Mac backup created by Time Machine or a disk clone. If you need to restore your whole Mac after a drive failure, keep a local backup or a disk clone as well.
Manual Copy Important Files to an External Hard Drive
Unlike a Time Machine full backup, you can select to only back up the important files to an external storage device instead of the whole boot disk. But it's suitable for a small number of important files. It does not back up the system, app data, or hidden data. Keep reading the steps if you're ok with its limits:
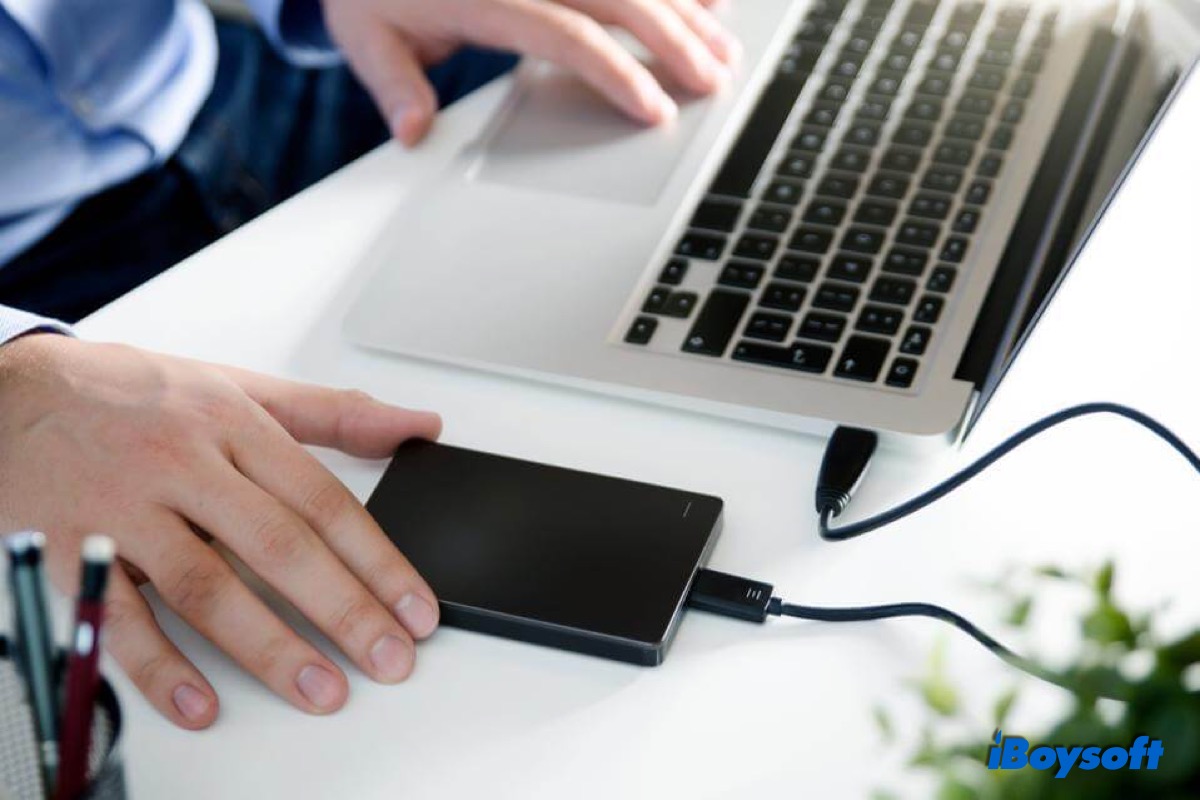
- Connect the external storage device used for backup to your Mac.
- Wait for the Mac to detect the drive and display the inserted drive on the desktop or in Finder.
- Open the backup drive and create a folder to store backup files.
- Find and drag the important files to the folder.
- Control-click the drive and select Eject.
When a Disk Clone Is Better Than Time Machine
Use a disk clone when you want a full copy of a Mac startup disk or external drive for migration, drive replacement, or a faster recovery path after disk failure. A clone is different from Time Machine, iCloud sync or manual file copy because it preserves the disk structure and selected source content on another drive.
Before cloning, check the source and target drives carefully. The target drive may be overwritten during the cloning process.
To clone your Mac disk, turn to iBoysoft DiskGeeker for Mac, which is well-crafted to help you create a exact clone of your Mac hard drive. It also lets you clone selected APFS partitions/volumes to satisfy your different needs.
To further speed up the startup disk cloning process, use its Space Analysis feature to identify and remove system junk, large unnecessary files, and duplicate files before cloning. Cleaning up your disk beforehand can significantly reduce the amount of data that needs to be transferred, making the cloning process much faster.
How to Use iBoysoft DiskGeeker to Clone Mac Disk
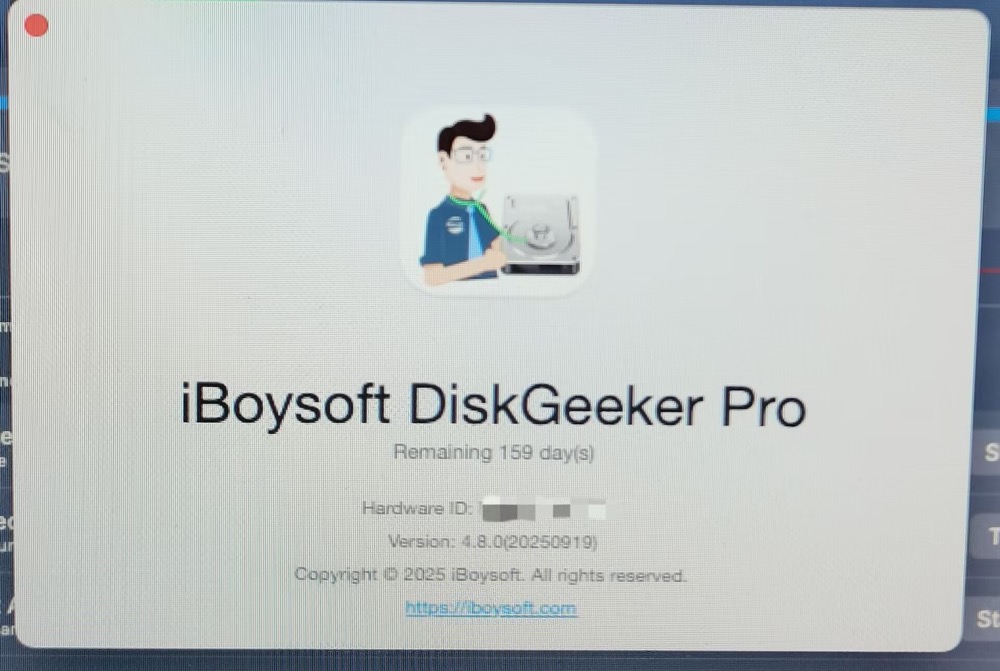
1. Download, install, and activate iBoysoft DiskGeeker for Mac (version 4.8.0).
2. Enroll iBoysoft DiskGeeker for Mac into the Full Disk Access list under System Settings.
3. Plug the external hard drive to your Mac and format it.
4. Select the source disk. (Choose the entire disk rather than a volume.)
5. Click "Clone" in the right panel > tap Start.
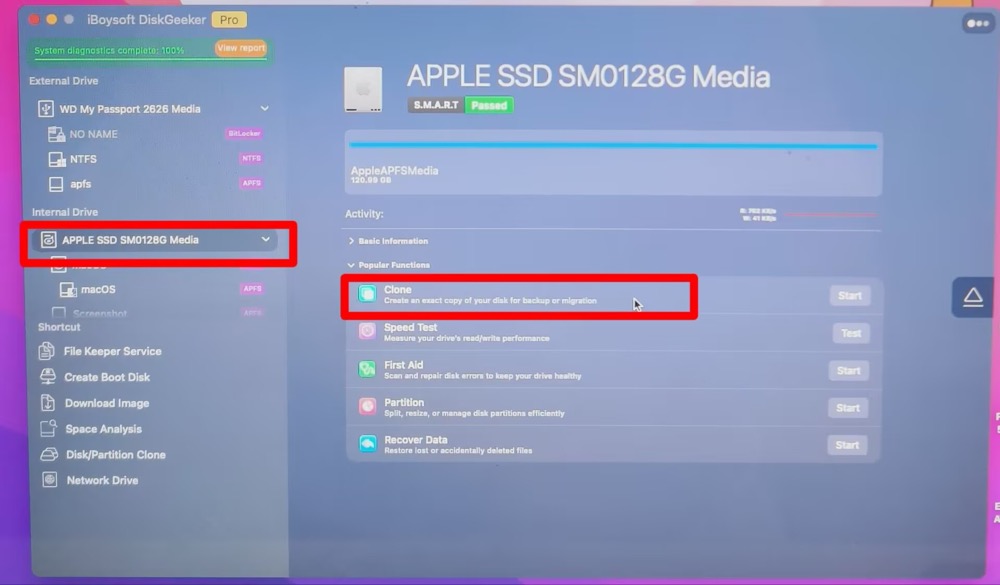
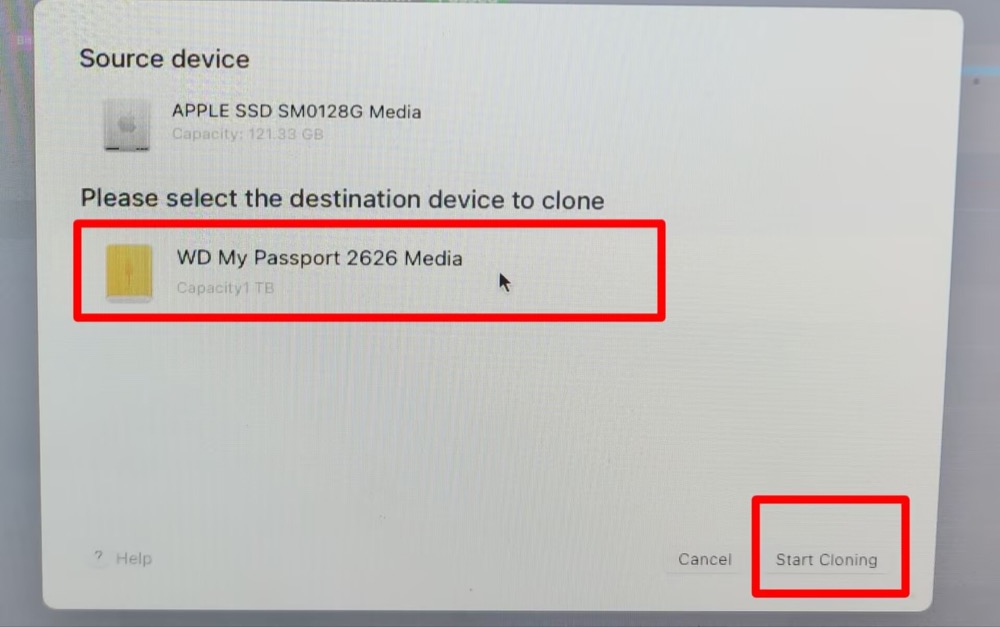
6. Choose the external hard drive as the destination device.
7. Tap "Start Cloning" to call it begin. Now wait for the completion.

This post tells you five ways to back up your Mac/MacBook without Time Machine, and the preparations before you back up are also included.
When iBoysoft DiskGeeker Helps
With iBoysoft DiskGeeker for Mac, you can do more than just clone your entire Mac disk. Its File Keeper feature lets you back up selected APFS volumes and recover important deleted or lost files when needed. You can also customize your backup schedule with hourly, daily, weekly, or monthly options for better data protection.
File Keeper is similar to Time Machine backup principles, including snapshots backup, automated scheduling, incremental updates, and a tiered retention policy. But they do have differences.
Time Machine will copy almost all your Mac's files, along with their original file paths (directory structure), during the first run, which will consume a large amount of GBs. However, File Keeper backup only preserves the original file paths for files restoration. So generally it only uses KBs on your Mac, no burden on your storage.
If You Already Lost Files Before Backing Up
If files are already missing and you do not have a backup, stop saving new data to the affected drive. Backups protect future data, but they cannot restore files that were never backed up. If the Mac drive or external drive is still detected, use Mac data recovery software to scan it before repairing, erasing, or reformatting the disk.
Troubleshooting Tips When Backup Fails
If you encounter backup failures, refer to the troubleshooting tips below for guidance on resolving common issues:
How to Fix 'Time Machine Can't Find Backup Disk'?
FAQs about Backing up Mac
- Q1. Is iCloud a full backup of my Mac?
-
A
No. Explain sync/store selected data vs full Time Machine/disk clone backup.
- Q2. How large should a Time Machine backup drive be?
-
A
Ideally at least twice the Mac storage capacity; cite Apple guidance.
- Q3. Will Time Machine erase my external drive?
-
A
macOS may ask to erase or set up the drive; use a different drive/volume if files matter.
- Q4. Should I use Time Machine or a disk clone?
-
A
Time Machine for versioned automatic backups; disk clone for full drive copy, migration, or replacement.
- Q5. What if I lost files before making a backup?
-
A
Stop using the drive; scan with recovery software before repair/erase/format.