
With all your important documents, images, and files stored on your Mac/MacBook, backing up your Mac/MacBook becomes crucial and indispensable. If your Mac/MacBook was corrupted or malfunctioned, such as Mac/MacBook being stuck, Mac/MacBook won't turn on or boot up, etc., you might lose all the data stored on it.
A well-known method for Mac/MacBook users is to use Time Machine to back up. With Time Machine backups, you can recover the corrupted and accidentally deleted files, and transfer files to a new Mac/MacBook. Even you can utilize it to boot your Mac/MacBook from the Time Machine disk if you have backed up the whole Mac/MacBook.
However, using Time Machine to back up is not infallible. You may find that Time Machine is not deleting old backups. Or, Time Machine may get corrupted or inaccessible for various reasons and you could receive kinds of error messages, for instance, Can't connect to a current Time Machine backup disk, Time Machine can't find the backup disk, etc.
Therefore, you can try to take other ways to back up your Mac. Read the following context and try backing up your Mac/MacBook without Time Machine.
If you want to back up your Mac/MacBook without Time Machine, keep reading this tutorial, and don't forget to share it after reading.
Prepare for Mac/MacBook Backup
Before you back up your Mac/MacBook, cleaning your Mac/MacBook is the first thing you must do. You'd better remove all the useless files on your Mac/MacBook to ensure all the crucial data can be backed up entirely and successfully.
After that, prepare an external hard drive and check the storage space of your external hard drive to ensure there is enough space for backups. By the way, check whether the external hard drive has been formatted correctly. If not, you can format it in Disk Utility.
- Insert your external hard drive into your Mac/MacBook.
- Open Finder > Applications > Utilities > Disk Utility. (Or you can click Launchpad > Other > Disk Utility in order.)
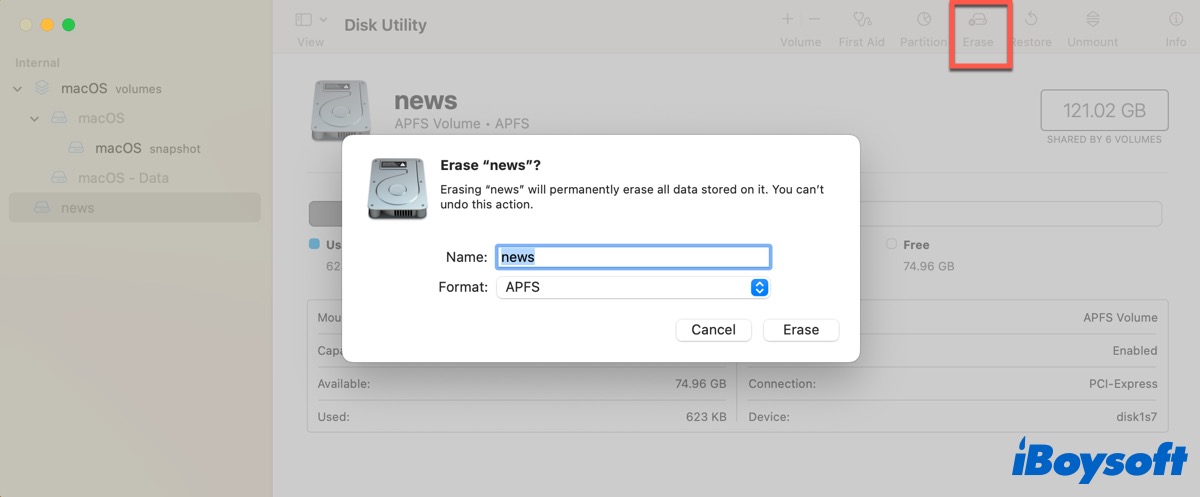
- Choose your external hard drive and then click Erase in the toolbar.
- Choose a format form in the pop-up window and then click Erase.
After that, you can back up your Mac/MacBook to an external hard drive without Time Machine.
Back up your Mac/MacBook with third-party software
Multiple methods can be used to back up your Mac/MacBook without Time Machine but the steps are a little complicated. Here, we introduce you to a powerful and advanced tool that you can erase your hard drive and back up your Mac at the same time.
iBoysoft DiskGeeker is an all-in-one disk management tool for Mac/MacBook. Using this software, you can clone all content from the source disk to the target disk fast, back up APFS volumes, check disk storage, clean junk files, and unwanted files on your Mac/MacBook, etc.
iBoysoft DiskGeeker
- Read/write BitLocker encrypted drive and NTFS drive on Mac
- Encrypt and unlock disks by using FileVault or BitLocker
- Prevent virus attacks via setting USB Defender
- Check and diagnose disk errors
- Map network drives with different protocols
- Manage USB drives, flash drives, external hard drives
- Test the sequential or random read and write speed of disks
- macOS Sonoma & macOS Ventura & Apple Silicons supported, including M2 Ultra
Read-only & risk-free
With advanced algorithms and a streamlined interface, it's easy for users to operate it. You can take the following actions in sequence to back up your Mac/MacBook.
Clean junk files to prepare for Mac/MacBook backup
- Download, install, and activate iBoysoft DiskGeeker.
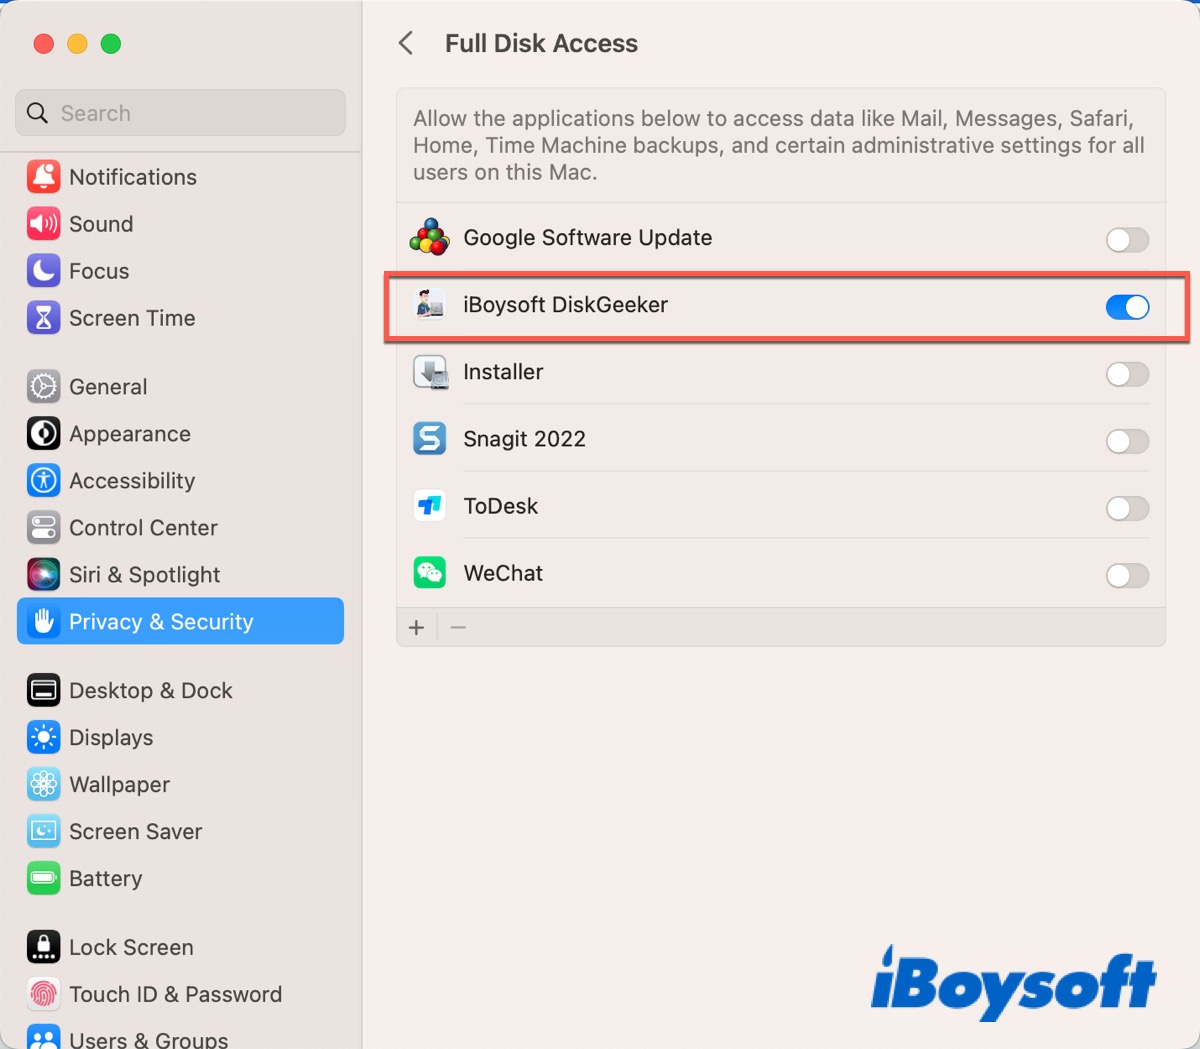
- Go to System Settings > Security & Privacy > Privacy > Full Disk Access to check if iBoysoft DiskGeeker is checked in the list.
- Restart your Mac/MacBook.
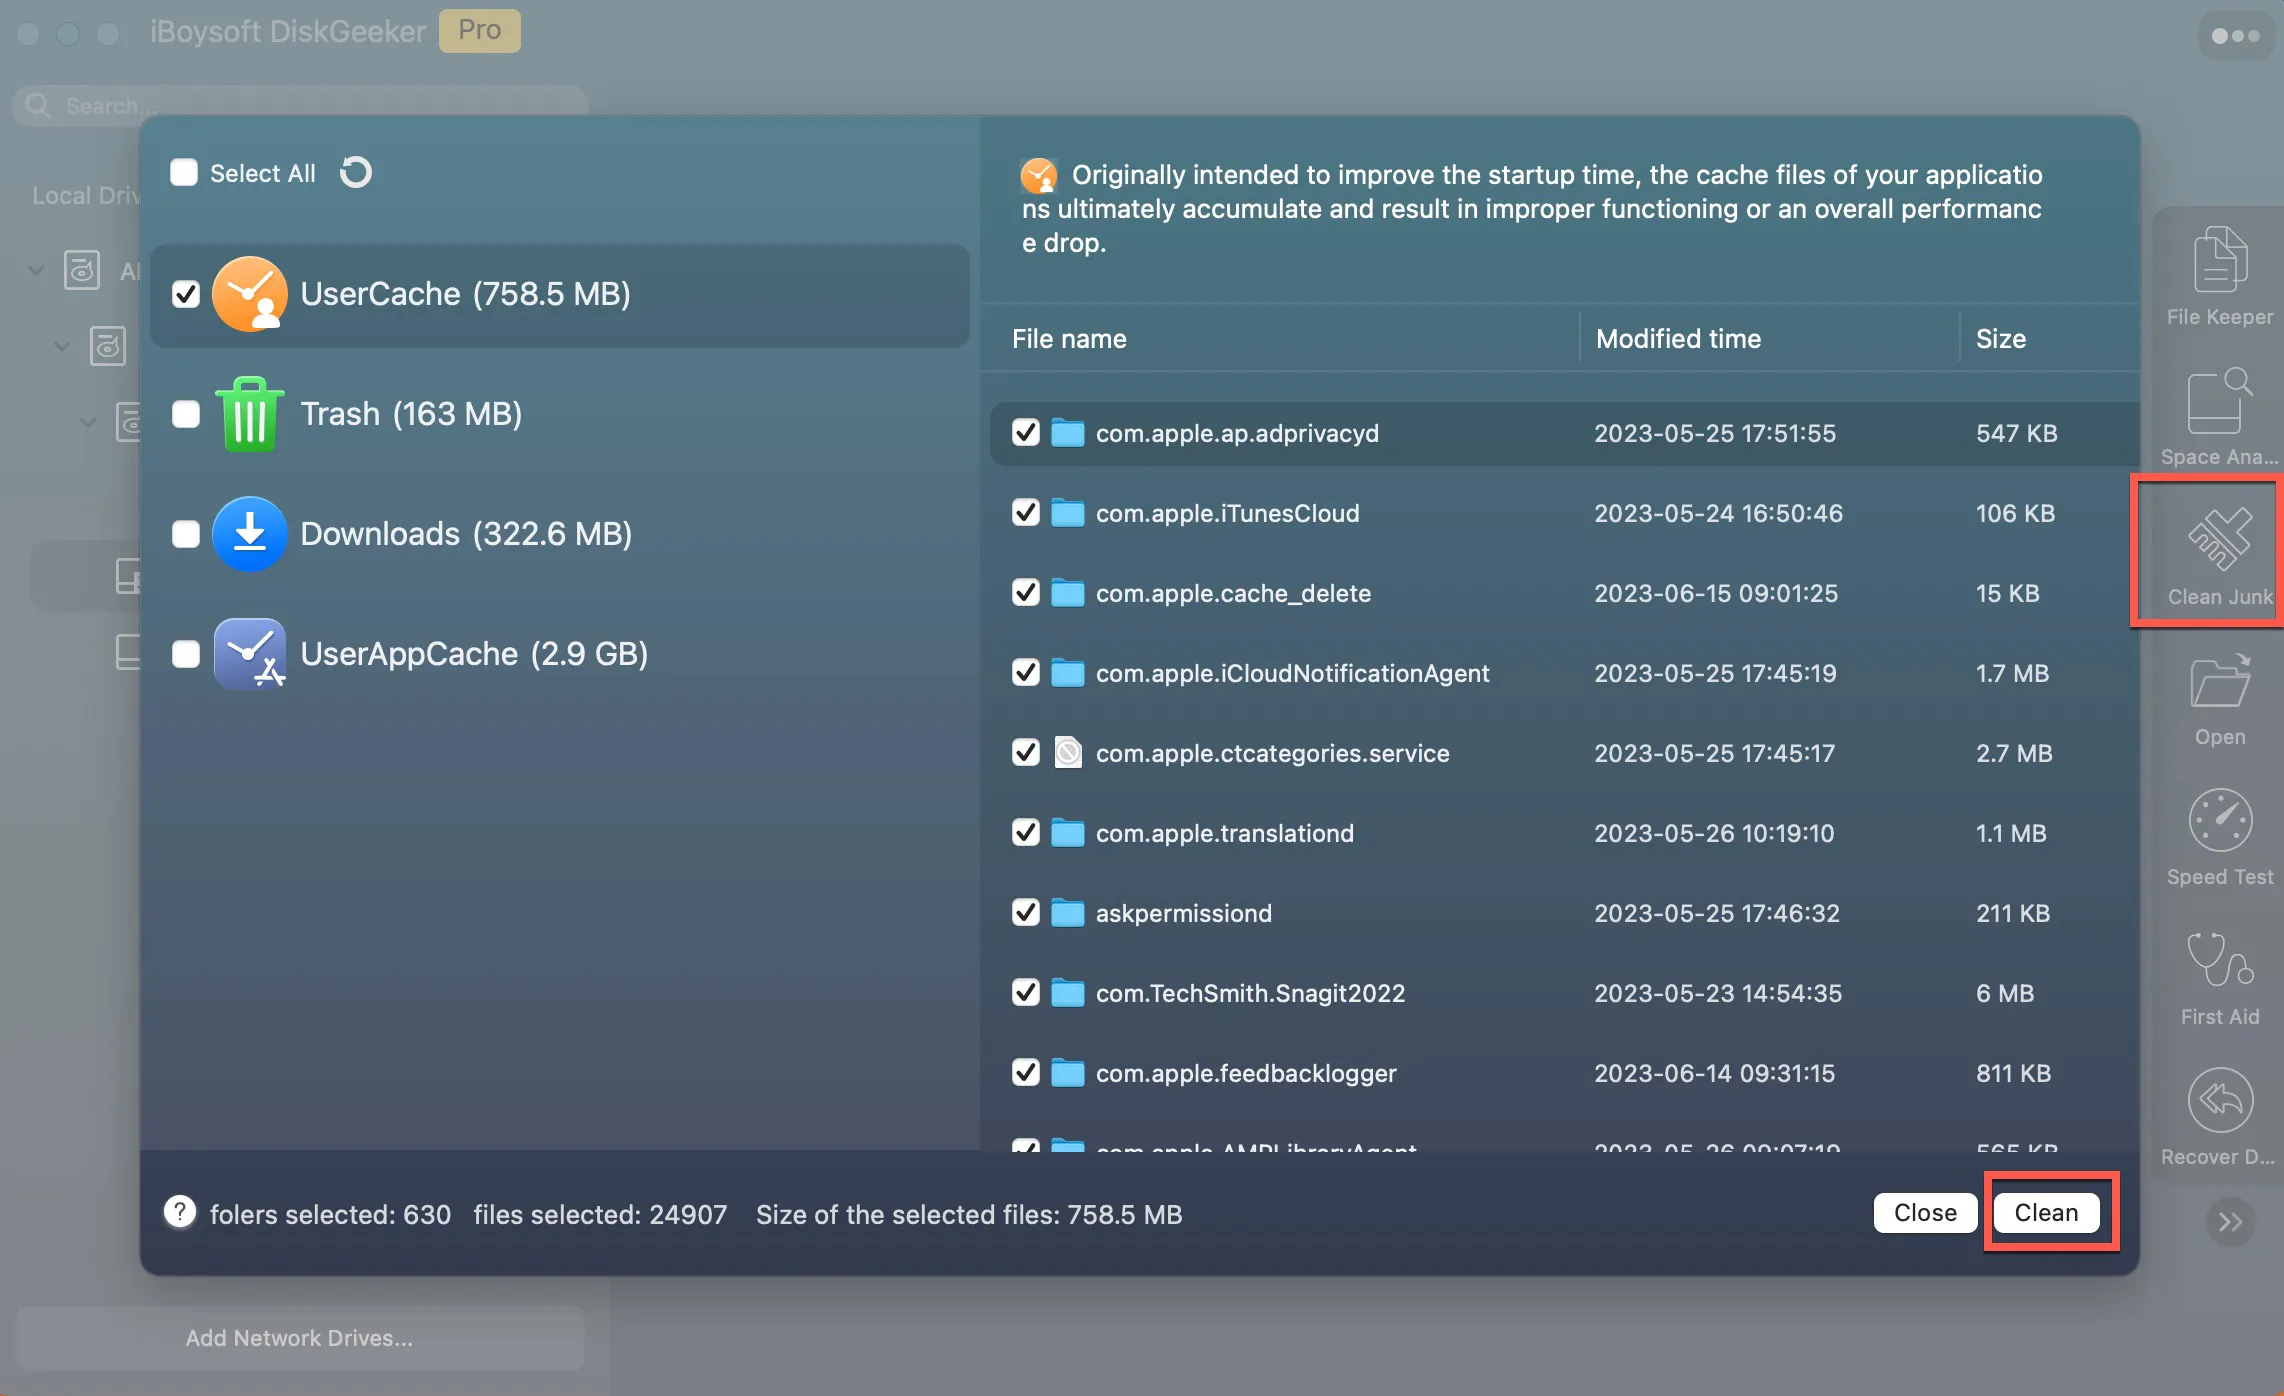
- Choose your macOS disk and then click Clean Junk in the right sidebar.
- Wait for the scan process to finish, then choose your unwanted files and click Clean at the right bottom of the window.
Check the disk storage and format the external hard drive
- Insert your external hard drive into your Mac/MacBook.
- Do the same above to launch iBoysoft DiskGeeker.
- Choose your external hard drive in the left sidebar.
- Click Space Analyze in the right toolbar to check its available storage.
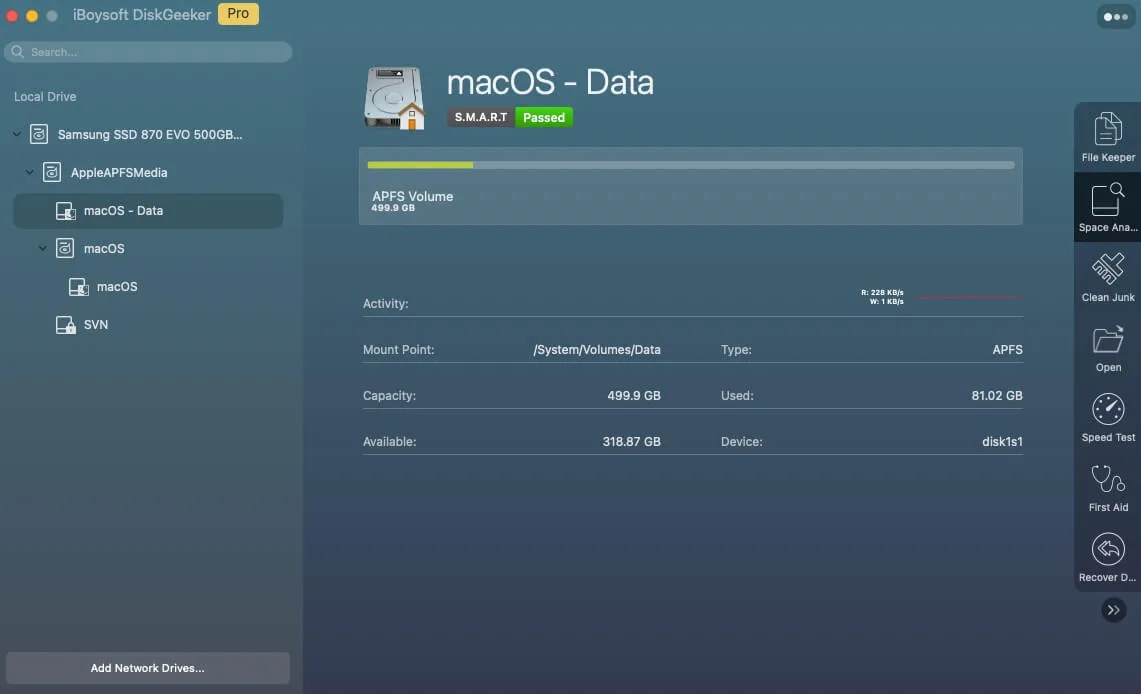
- After that, back to the original interface and then click Erase in the right toolbar.
Although you use the Erase function in iBoysoft DiskGeeker, it still takes you to Disk Utility to format your external hard drive unless it is NTFS formatted. So take the same operation above to format your drive in Disk Utility.
Back up your Mac/MacBook
If all the data you want to back up is stored in the APFS volume, you can use the File Keeper feature in iBoysoft DiskGeeker.
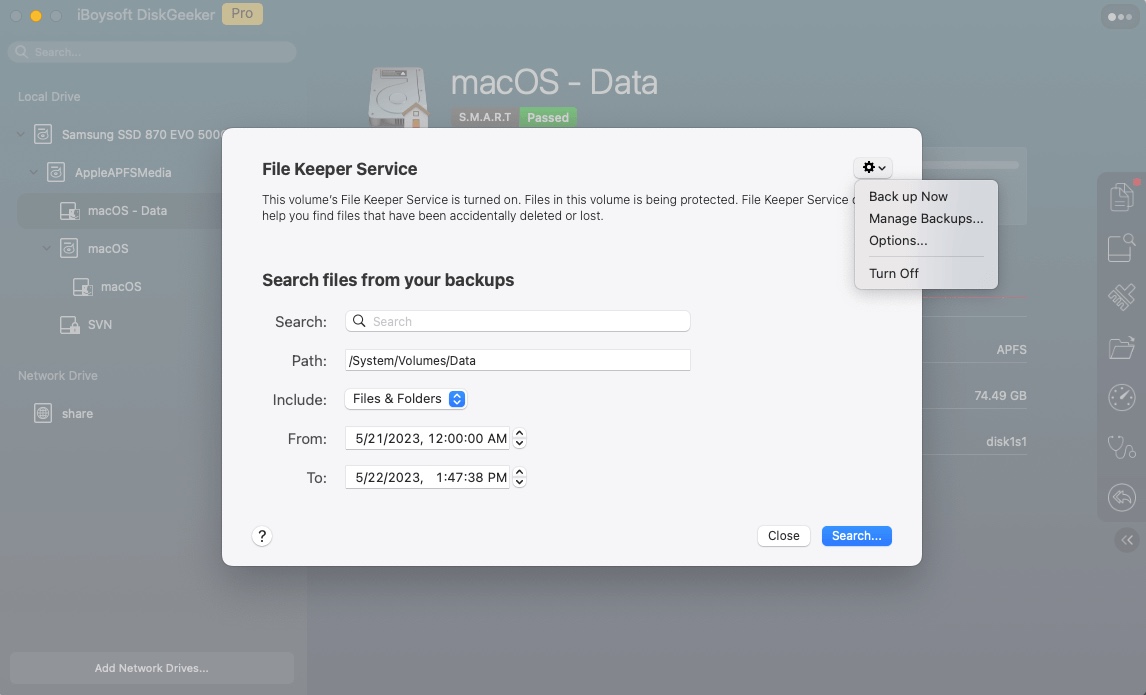
- Choose your APFS formatted volume and then click File Keeper in the right toolbar.
- Click the Settings icon in the top right corner of the pop-up window and then tap on Options.
- Set the interval time to back up your data and the keep time to save the backups.
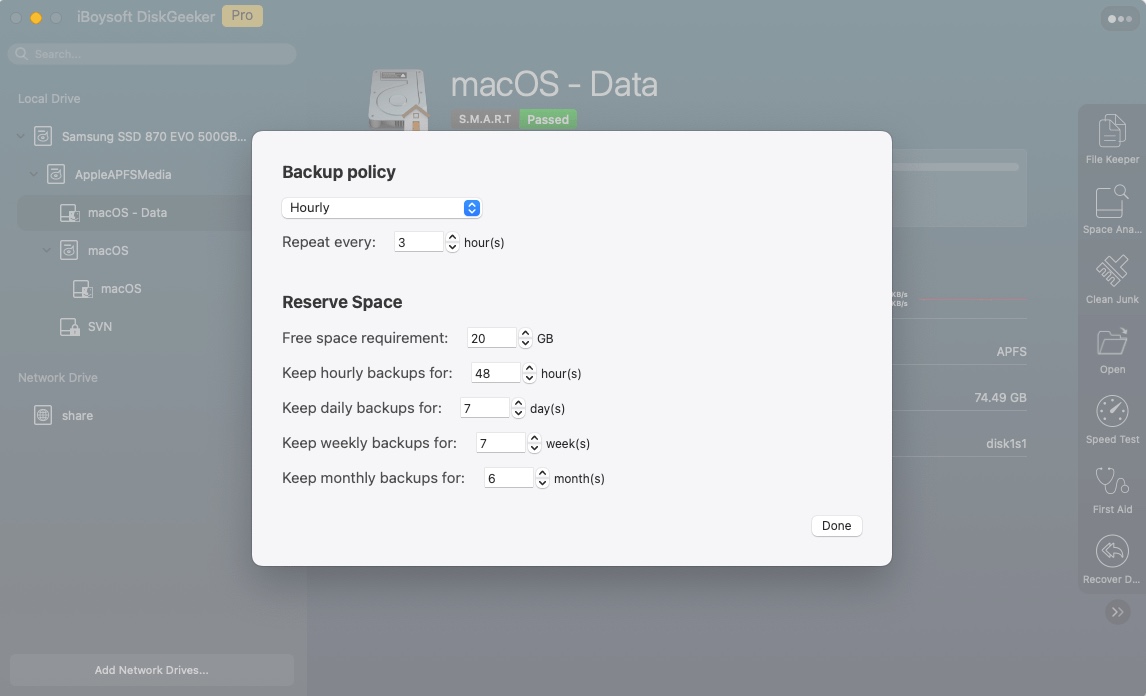
- Click Done to save the settings and then back to Settings.
- Click Back up Now to start.
After that, your Mac/MacBook will be backed up automatically. Once your Mac/MacBook has been corrupted, you can search for the backups and restore your data by using these backups.
Clone your Mac/MacBook
iBoysoft DiskGeeker can only back up the data stored in APFS volume, so if your internal drive is other file systems formatted, you can clone it to another disk. Before you clone the disk, you need to pay attention to the following points.
- The storage of the target disk must be larger than the source disk.
- The disk containing an operating system can't be selected as a target disk.
- Make sure you have backed up the data on your target disk as it will be overwritten to store data cloned from the source disk.
Now, you can start to clone your Mac/MacBook.
- Insert the two disks into your Mac/MacBook.
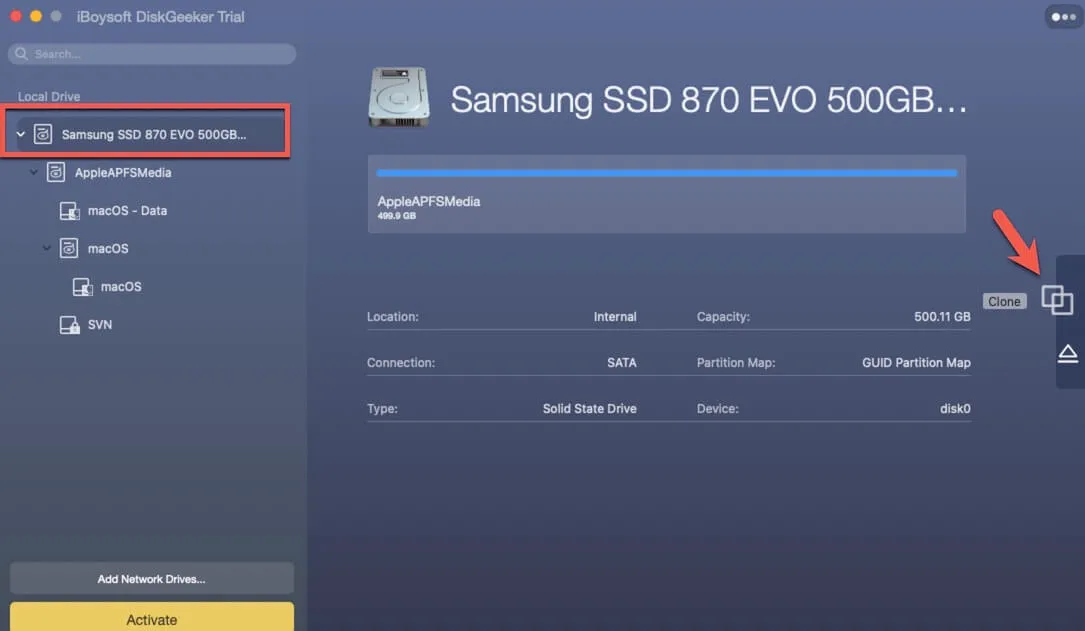
- Select the source disk. (Choose the entire disk rather than a volume.)
- Click Clone in the right toolbar.
- Select the target disk in the list and then click Start Clone.
The cloning process can't be ended by users. If the process is terminated by accident, the disk cloning will resume automatically after two disks are connected to Mac/MacBook again.
Back up/clone your Mac/MacBook successfully? Don't forget to share this powerful and advanced software on your social media.
Other ways to back up Mac/MacBook without Time Machine
Except for using third-party software to back up your Mac/MacBook without Time Machine, you can use other ways to back up your Mac manually.
Manually back up Mac/MacBook
Different from Time Machine, you can only select to back up your important files to an external storage device instead of the whole boot disk. Using this method, you even can save your disk storage.
- Insert your external hard drive into your Mac/MacBook.
- Open Finder and then click your external hard drive.
- Create a folder to reside backup files in your backup drive.
- Find and drag your important files into the folder.
- Correctly and securely eject your drive.
Use iCloud to back up Mac/MacBook
iCloud is a storage space available to allow you to store data on remote storage systems. If you enable iCloud, you can back up your data to it. You can access stored data on all Apple devices signed in with the same Apple ID.
- Open System Settings and click on your Apple ID.
- Click iCloud and then click iCloud Drive to turn it on.
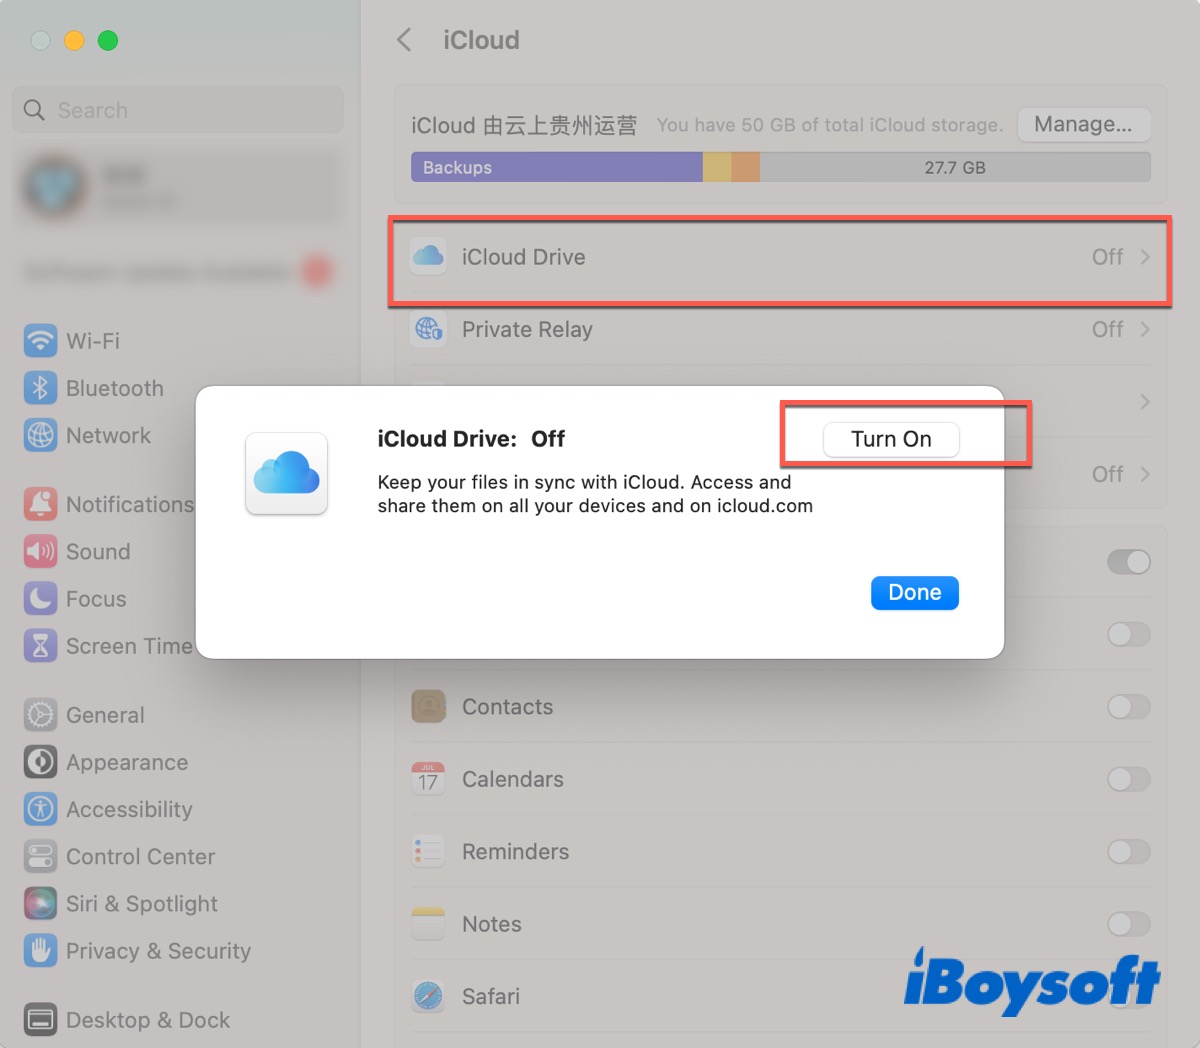
- After that click Options and then choose the apps you want to store.
- Click Done to start backing up.
Although it's an easy way to back up your Mac/MacBook without Time Machine, Apple only provides users with 5GB free storage. Thus, if you want more space, you need to pay for it.
Use Google Drive to back up Mac/MacBook
Better than iCloud Drive, Google Drive allows you to back up 15GB of data on it. You can sign into your Google account on the website to make a backup for your Mac/MacBook.
- Log in to your Google account on Google Chrome or another browser.
- Go to Google Drive's official website.
- Click New to select the File upload or Folder upload option from the drop-down list.
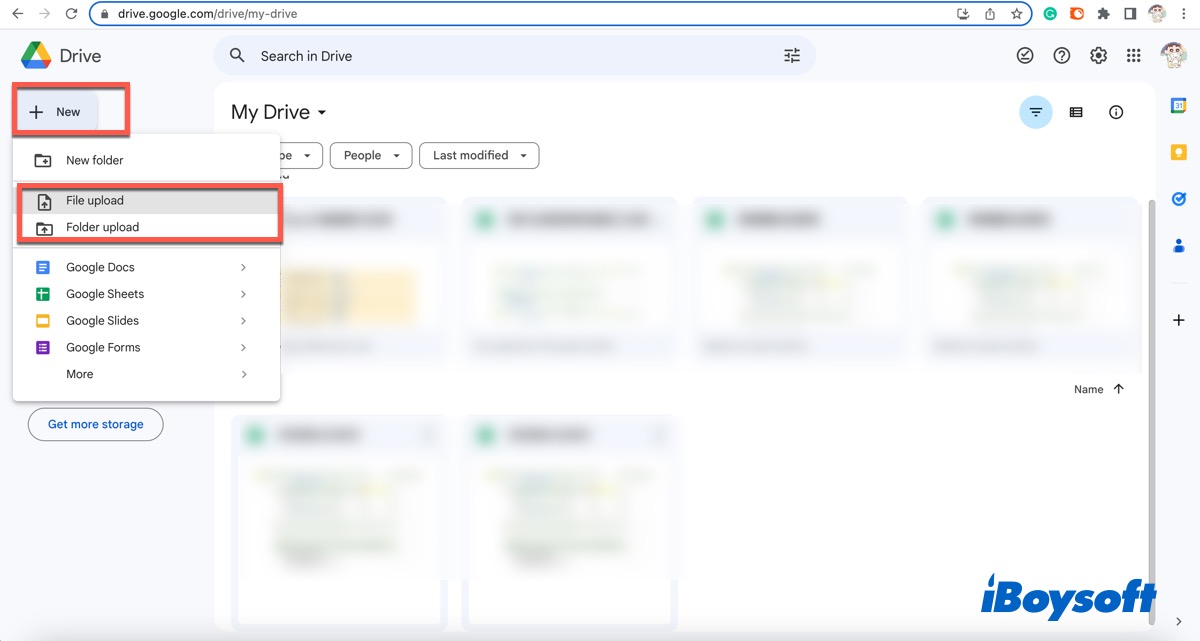
- Choose the file or folder you want to back up and then click Open to upload.
- The time for uploading the data is depending on the size of your files and folders. Apart from using iCloud or Google Drive to back up your Mac/MacBook, Dropbox, One Drive, etc. are also worth trying.
Bottom Line
To prevent data loss, it's indispensable for you to back up your Mac/MacBook no matter whether you use Time Machine or other tools. That's because you can always restore your data from these backups in case your Mac/MacBook gets some problems. All in all, you can back up your Mac/MacBook without Time Machine by using iBoysoft DiskGeeker or the other three ways. Hope you can use these ways to back up your Mac/MacBook or protect your data successfully.
Have you backed up your Mac/MacBook successfully without Time Machine? If you have, please click the below buttons to share these wonderful methods with people who need them.
FAQ about how to back up Mac/MacBook without Time Machine
- QHow do I manually backup my Mac to a hard drive?
-
A
Connect an external hard drive on your Mac and then create a new folder in it to reside backup files. Then just need to find and drag your important data in it.
- QHow do I backup my Mac without Time Machine or iCloud?
-
A
You can use iBoysoft DiskGeeker to back up the APFS volume on your Mac or clone your Mac to an external hard drive.
- QCan I backup my Mac to iCloud?
-
A
Sure. But you only have 5GB free storage space.