Disk Utility on Mac is a free built-in tool that you can employ to finish all types of tasks. Here are the primary functions of Disk Utility on Mac:
- Repair hard drives using Disk Utility First Aid
- Secure-erase or format a disk
- Restore Mac hard drives
- Add or delete partitions on a disk
- Add or delete volumes on a disk
- Mount or unmount a disk
What is Disk Utility?
Disk Utility, a built-in disk manager on Mac that can be accessed with or without your Mac booting up, can repair, restore, partition, and erase internal disks and external storage devices. There were two utilities in the classic Mac OS: Disk Utility and Disk Copy, and it was not until Mac OS X Panther that they merged to the nowadays' Disk Utility.
There are various types of disk management tools like disk cleaners or disk analyzers. It's easy to confuse Disk Management with Disk Utility, many PC users always like to put it that way instead of Disk Utility. Notably, Disk Management is the system utility in Windows, while the other one is used in Mac.
Where is Disk Utility on Mac?
If your Mac functions well, you can find it in the "Other" folder of your Launchpad or the Utilities folder in your Applications folder. It looks like a disk going through a stethoscope.
If your Mac fails to boot up, or the options on the toolbar are dimmed, you need to first boot into Mac Recovery Mode to access Disk Utility from the macOS Utilities window.

What does Mac Disk Utility do?
Before diving into its essential functions, let's go through the items listed on its interface. The position of icons may look slightly different on your Mac running a different operating system. The picture below shows a Disk Utility interface on macOS 11 Big Sur.
Click View > Show All Devices, and then all the detected internal or external drives and disk images will appear on the left sidebar, beginning with the startup disk. Beneath it is the APFS container if you are running macOS 10.13 or later and two volumes - Macintosh HD for system files and Macintosh HD - Data for user data.
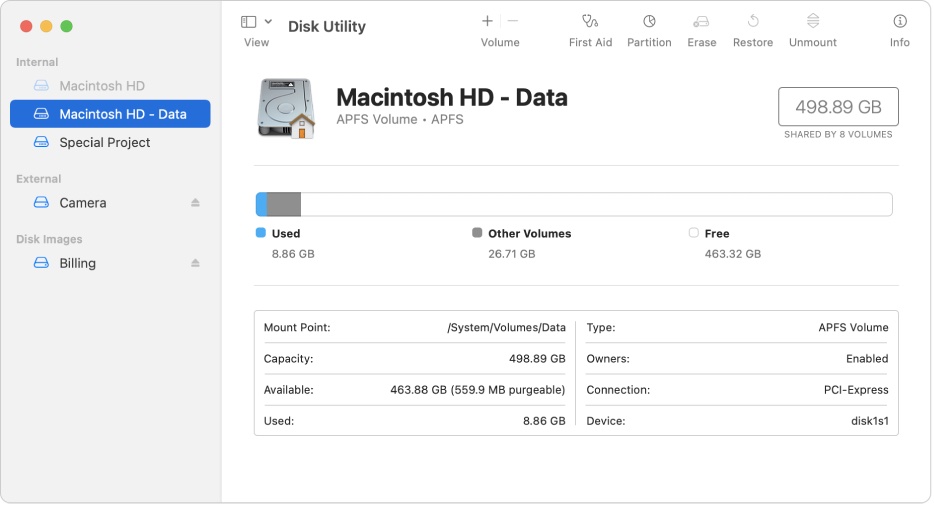
Take a look at the top-right of the menu. Six tools you can perform on the shown disks or volumes are listed horizontally. They allow you to add or delete volumes, check and repair hard drives, partition, erase, restore, and unmount a disk or a volume. We will explain how to use every tool in the following paragraphs.
Share this informative news with neighbors to garner more guidance on this website.
What does First Aid do in Disk Utility?
Check hard drives
If your hard drive is experiencing problems and you would like to make a diagnosis, Disk Utility First Aid is at your disposal. It's a free built-in tool in macOS, which can check and repair directory damages.
If you are running a macOS later than El Capitan, you can click the desired drive and click the "First Aid" button to check your drive. Then Disk Utility First Aid will examine the partition maps on the disk and each volume. Note that running diagnoses on the startup disks will cause your computer to stop responding.
Repair hard drives
When it detects problems, Disk Utility First Aid will try to fix them. If your disk is healthy, you will see a green tick on your drive.
For startup disks where the operating systems are stored, it may report that First Aid found corruption that needs to be repaired. In that case, you need to run First Aid from Recovery Mode.
For non-startup disks, we recommend you run First Aid more than once to ensure a consistent result. If you encounter the error "Disk Utility can't repair this disk", it would be best to back up your data first.

What does Erase do in Mac Disk Utility?
Common scenarios in which you need to erase or format a disk:
- Preparing Mac for sale
- Preparing an external drive for backups
- Reformatting a drive that is incompatible with your operating system
- Creating bootable USB drives with Mac Disk Utility
- Cleaning up all files to have a refreshed device
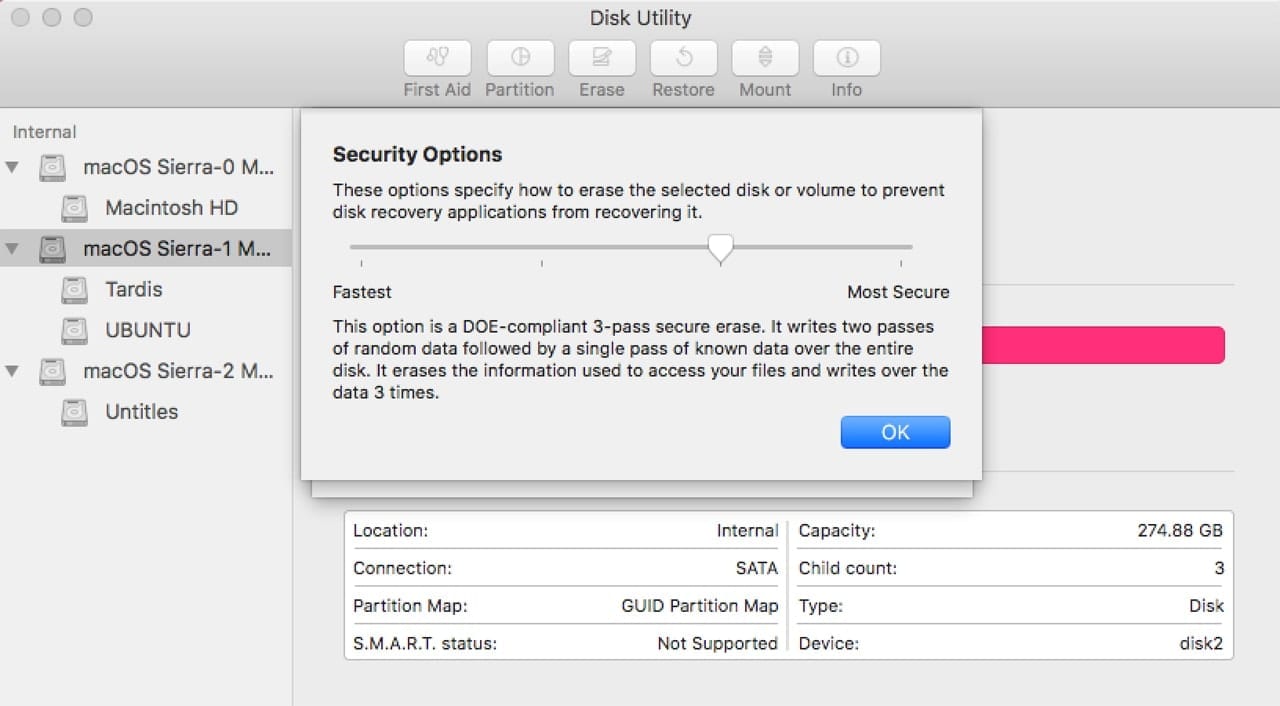
If you want to wipe your external hard disk drives securely, the Security Options, which can be seen after clicking the "Erase" button, allows you to select how thoroughly you want to erase the data.
The Fastest mode removes only the header information, which can be quickly recovered using Mac data recovery software. You can move the slider to the Most Secure mode to ensure a complete erasure so that nobody can access your data later including yourself.
Beware that you need to choose the format based on how you intend to use the formatted drive. For further information, please read this step-by-step guide on how to format an external hard drive on Mac.
If you fail to format the drive with Disk Utility on Mac, don't hesitate to grab this complete guide on What to Do When Disk Utility Won't Let You Erase Hard Drives?
What does Restore do in Disk Utility?
The Mac Disk Utility "Restore" option allows you to copy one volume to another. To clone a Mac hard drive to another, you need to create an image of the targeted Mac backing up the hard drive using Disk Utility first.
Disk images copy the data and structure of a disk, which could be beneficial for copying a system to different computers, going back to a previous configuration, and backing up the system.
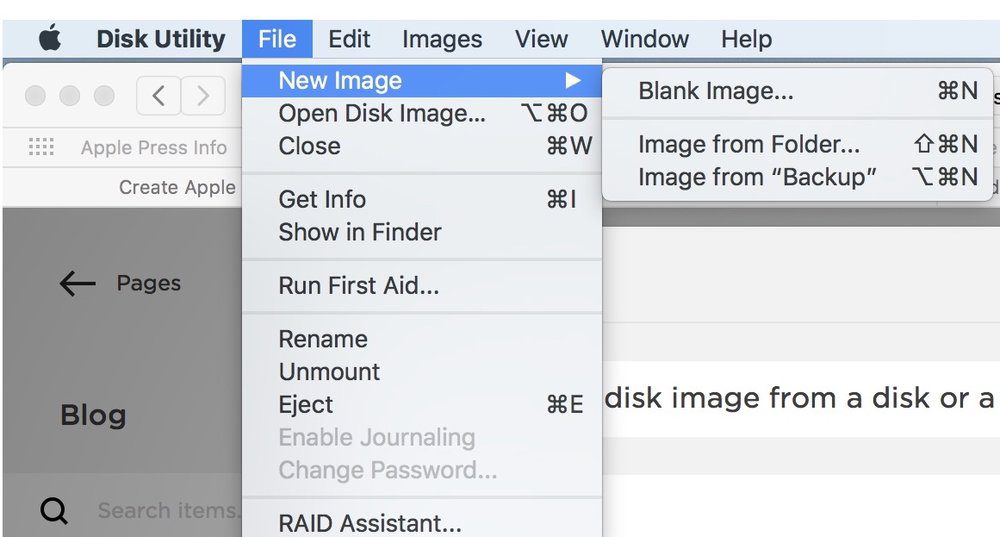
Create images of Mac hard drives by following: select the desired drive > click File on the top menu bar > Choose New Image > Image from (partition name) > save it to a location.
Then you can restore this image file to another partition by selecting the receiving drive > click Restore > choose Restore from... Beware that this operation will erase all the data on the receiving partition.
What does Partition do in Disk Utility?
By partitioning, your physical drive will be split into multiple logical drives, which allow independent usage. After clicking on the "Partition" button, you will be brought to a window with a pie chart. You can use the Add or Delete button beneath the pie chart to adjust the number of partitions and partition size.
You need to name the disk, choose a format that suits your requirements, and then confirm by clicking Apply.

Note: Back up data before deleting any partitions.
What does Volume mean in Mac Disk Utility?
Browsing from the top-left side, the first tool you can see is a Volume option with add (+) and delete (-) buttons. By selecting an APFS disk from the left sidebar and clicking the Add Volume or Delete Volume button, you can create or delete an APFS volume under its container with ease.
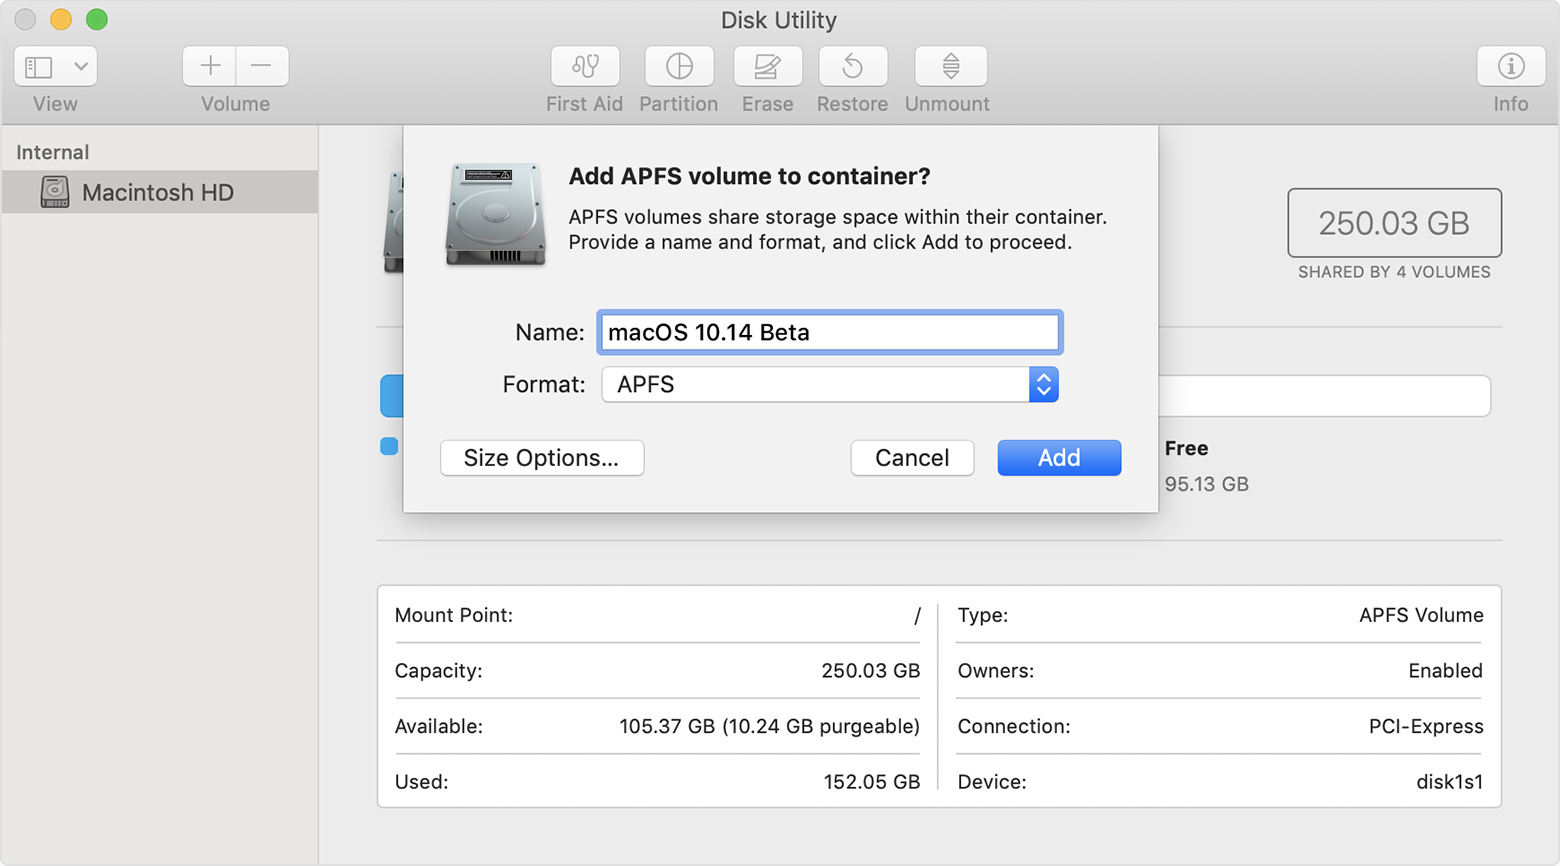
As stated in Apple's User Guide, for Mac OS High Sierra and later, adding volumes is a faster and simpler choice than partitioning to run different operating systems. Due to the flexible space management of APFS, a container can have multiple volumes that share free space.
You can also reserve size to ensure the amount of storage will always be available for the volume.
Note: You can't delete a startup volume that contains system files. Back up your disk to avoid data loss before deleting an APFS volume.
What does Unmount mean in Disk Utility?
Disks appearing in the sidebar are already mounted, but sometimes you want to unmount a disk to avoid false information transferring. The option is often highlighted and can be found on the top right of the menu.
A better disk management tool for Mac
After having a comprehensive acquaintance with the know-how of Disk Utility, it's a necessity to know Utility Disk can fix some of the disk abnormalities. For instance, several applications unintentionally exit, files are damaged, an external drive cannot work well or you cannot boot the computer.
When meeting a disk predicament, there is another alternative, you might as well utilize iBoysoft DiskGeeker, a trustworthy software. It's a secure, easy-handling, and multiple-task-based tool. For your disk issue, it has advanced features like space analysis, speed test, disk cloning, cleaning junk, and managing network drives of different protocols easily in contrast to Disk Utility.
iBoysoft DiskGeeker
- Read/write BitLocker encrypted drive and NTFS drive on Mac
- Encrypt and unlock disks by using FileVault or BitLocker
- Prevent virus attacks via setting USB Defender
- Check and diagnose disk errors
- Clean junk files and unwanted files from hard drives
- Clone all content from the source disk to the target drive fast
- Map network drives with different protocols
- Manage USB drives, flash drives, external hard drives
- Back up files on APFS volumes (Macintosh HD) to avoid data loss
- Test the sequential or random read and write speed of disks
Read-only & risk-free
Leave your fabulous remark and share this crystal-clear knowledge!
FAQ about Disk Utility
- QWhat is the purpose of Disk Utility?
-
A
In general, Disk Utility is to manage all disk-related missions where you can format, replicate, space planning or fix some of the disk errors. When you cannot fix the errors with Disk Utility, please backup and reteieve your data on erroneous disk with iBoysoft DiskGeeker.
- QHow long does it take to run Disk Utility?
-
A
It has already been built in macOS and it requires about five minutes, less time will be needed if no errors are found when running First Aid in Disk Utility.
- QWhat format does Disk Utility use?
-
A
Apple File System (APFS): The file system used by macOS 10.13 or later. Mac OS Extended: The file system used by macOS 10.12 or earlier. MS-DOS (FAT) and ExFAT: File systems that are compatible with Windows.
- QDoes Windows have Disk Utility?
-
A
Yes, Windows has its disk management tool called Disk Management.
- QDoes Disk Utility erase everything on Mac?
-
A
When you use Disk Utility to erase a disk on a Mac, it will indeed erase all data on that disk. Therefore, it's crucial to back up any important data before performing disk erasure.