If you need to repair or do any maintenance on a disk set or member disk, you can unmount it first on Mac. Perhaps, you may encounter the error couldn't unmount disk on Mac while you fail to erase, partition, or delete a volume on Mac, then you may try to unmount the disk on Mac manually.
What does unmount disk mean on a Mac
Indeed, a device should always be unmounted before being disconnected. To prevent any open files when it is unplugged, this is done to make sure that all data has been correctly written and preserved.
When a drive is unmounted, the OS releases the filesystem and stops using it, but the drive is still connected and available on your device and can access the drive at a lower level. When you need to read and write data to it, you can easily mount the disk on Mac.
Eject and unmount are interchangeable terms for non-removable media, but when it comes to an external drive, the meanings are different. An unmounted drive can be mounted again via Disk Utility to be available in Finder, when you eject an external hard drive on Mac, it first unmounts the drive and then removes it. The drive is virtually disconnected, you need to unplug and connect it to your Mac so that you can continue to use the drive again.
How to unmount a disk with Disk Utility
With the macOS built-in disk management tool - Disk Utility, you can add/delete APFS volume, partition the drive, First Aid the disk, etc., it also enables you to mount and unmount a disk set or a member disk, here's how:
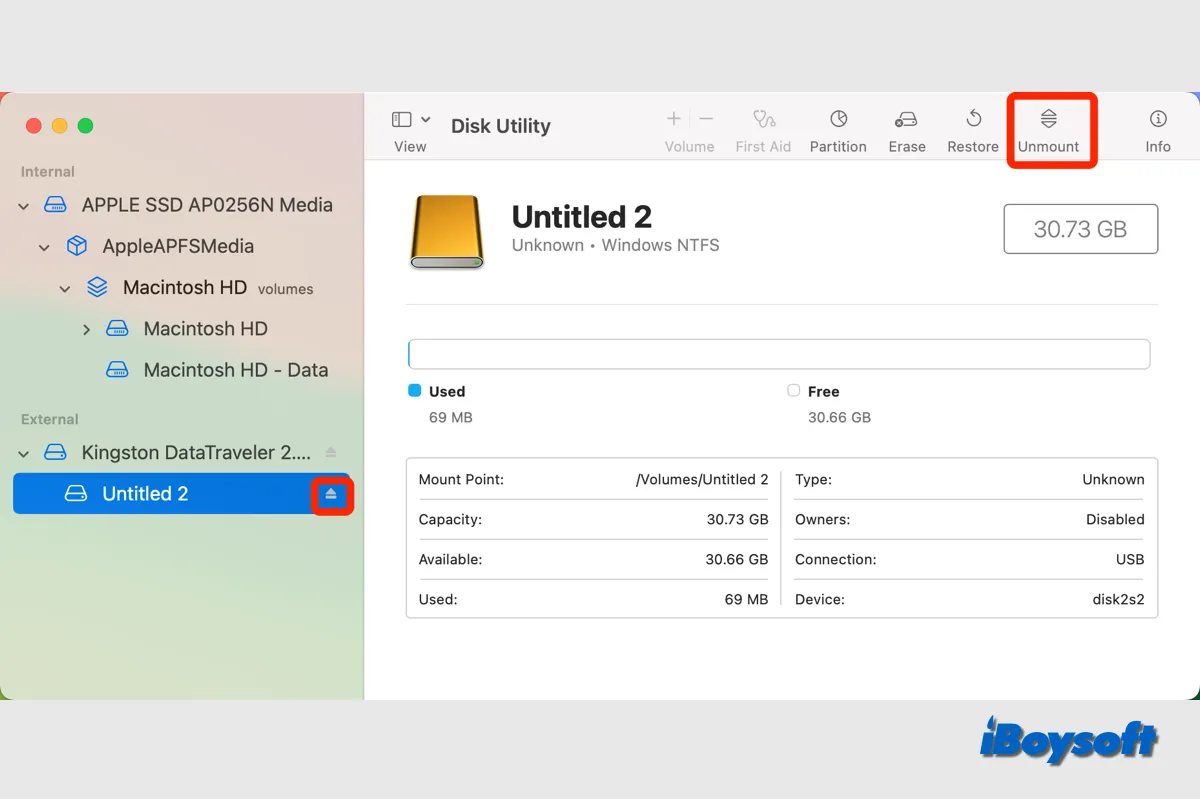
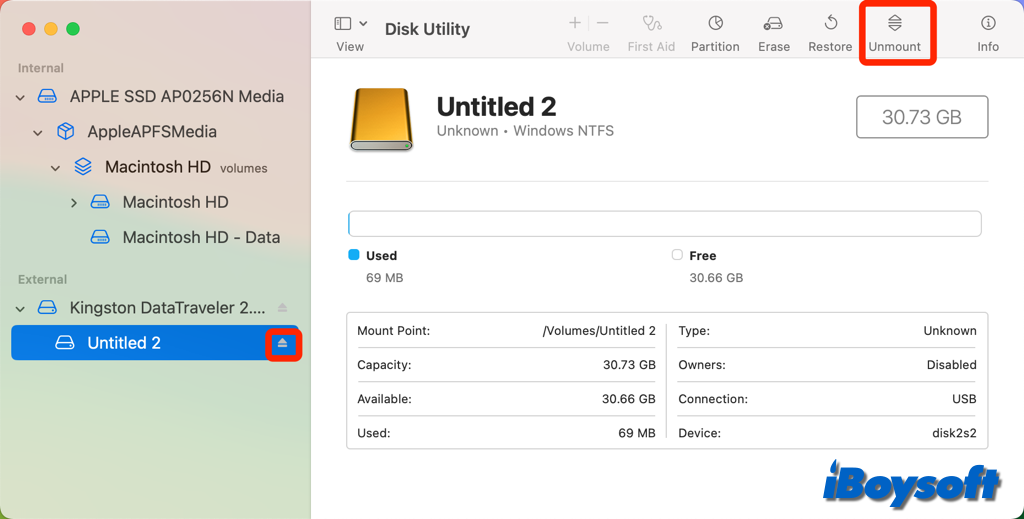
- Launch Disk Utility from Finder > Applications > the Utilities folder.
- Click the View button in the toolbar and choose Show All Devices.
- Select the volume of the drive you want to unmount.
- Then click the Unmount button in the toolbar or beside the volume name. If you click the button beside the whole drive, it ejects the drive.
How to unmount a disk via iBoysoft DiskGeeker
In addition to macOS' disk management tool, you can also choose a third-party all-around disk management assistant designed for Mac users such as iBoysoft DiskGeeker. You can easily unmount the external hard drive with iBoysoft DiskGeerker, which supports SSD, HDD, SD card, and USB flash drive formatted with APFS, HFS+, FAT32, exFAT, and NTFS.
Steps to unmount a disk with iBoysoft DiskGeeker:
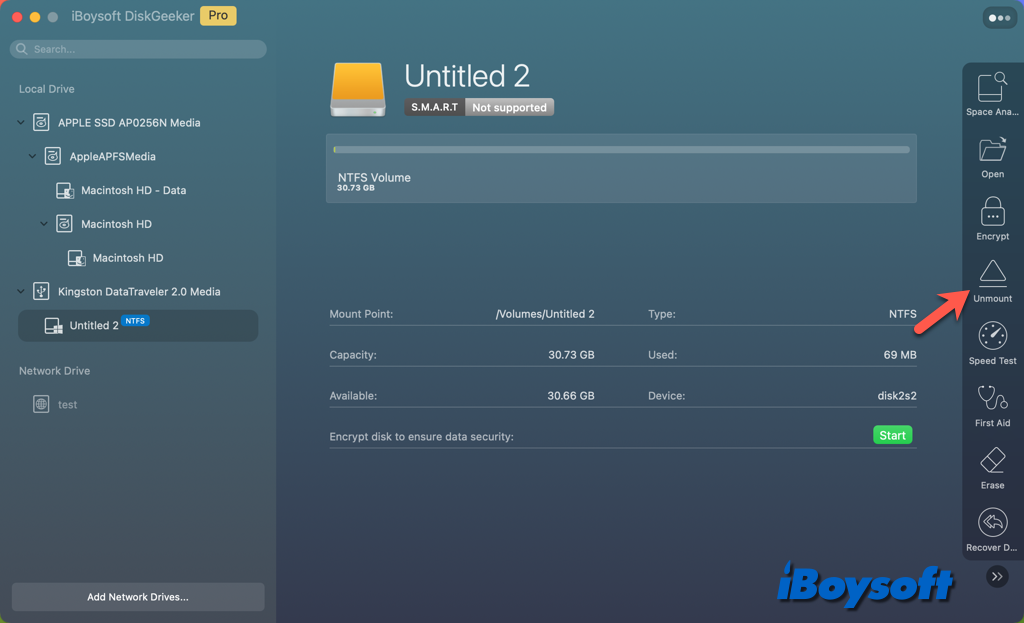
- Free download, install, and open iBoysoft DiskGeeker on Mac.
- Select the disk or volume that you want to unmount from the left panel.
- On the right sidebar, click Unmount All for the disk to unmount all its volumes, or click Unmount to unmount the selected volume.
With iBoysoft DiskGeeker, you can also mount and eject external hard drives on your Mac. In addition, you can also use this versatile disk management tool for Mac to:
- Read and write BitLocker and NTFS drive on Mac
- Encrypt/unlock drive using FileVault or BitLocker
- Prevent virus attacks via the USB Defender feature
- Run First Aid to check and repair disk errors
- Clean junk files and unwanted files
- Clone the source disk to the target drive fast
- Map network drives with different protocols
- Back up files on APFS volumes (Macintosh HD) to avoid data loss
- Test the sequential or random read and write speed of disks
Recommend this all-in-one disk management software to more people!
What if you fail to unmount a disk on Mac
Unexpectedly, when you try to unmount the drive in Disk Utility or perform other operations that need to unmount the volume first, it fails and returns some error messages such as "Couldn't unmount disk 69888" and "Unable to unmount volume for repair. : (-69673)".
When you can't unmount the drive on Mac, you can try the third-party tool iBoysoft DiskGeeker mentioned above, in case it doesn't work, you can try the following methods.
1. Quit the processes using the drive
If any process is reading or writing data to the drive you want to unmount, then it may prevent you from successfully unmounting the drive, you should make sure one of the disk's files and folders are opened in Finder, close the apps on Mac or force quit them via Activity Monitor. If it is a Time Machine drive, make sure the backup has stopped.
2. Exclude the drive from Spotlight indexing
Perhaps, the drive you want to unmount is indexing by Spotlight, then it fails and prompts the couldn't unmount drive error. You can wait for the Spotlight indexing to complete and try to unmount the drive again. In case it indexes forever, you can exclude the drive from Spotlight indexing to fix this issue.
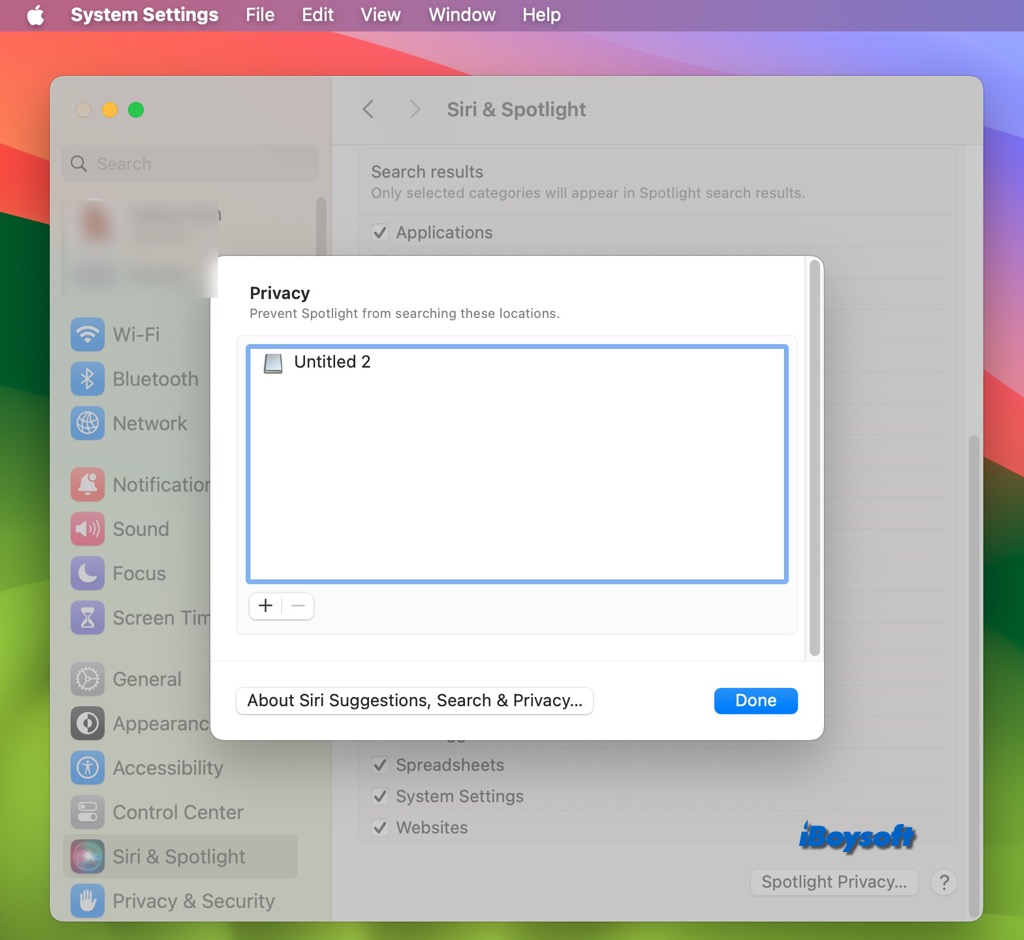
- Open the Apple menu and select System Settings.
- Choose Siri & Spotlight on the left sidebar.
- Click the Spotlight Privacy at the bottom-right corner.
- Click the + button under the box and select the drive you can't unmount to prevent Spotlight from searching the selected location.
- Click Choose and click Done.
3. Force unmount the drive via Terminal
If you still can't unmount the drive, you can run Terminal commands to force unmount the drive on the Mac, then you can proceed to format or partition the drive again.
- Launch Terminal from Applications folder/Launchpad/Spotlight.
- Type the command below to get the disk identifier.[enter terminal diskutil list]
- Enter the command below and hit Enter to force unmount the drive, you need to replace diskN with your disk identifier.diskutil unmountDisk force /dev/diskN
4. First Aid the drive in macOS Recovery Mode
If you receive the error saying that you couldn't unmount the drive for repair, you should then try macOS Recovery Mode. You need to boot your Intel-based or Apple Silicon Mac into macOS Recovery Mode, first, access the Disk Utility on the Utilities screen, and then select the malfunctioned disk and click the First Aid button.
5. Reformat the drive that can't be unmounted
In case all the above methods don't work to unmount the drive on Mac, you can try to reformat it as the last resort. This will erase all the contents, you can get files from the drive that can't be unmounted with third-party data recovery software such as iBoysoft Data Recovery for Mac if you haven't backed up the important files on the problematic drive.
Then, you can continue to format the external hard drive on Mac without losing data.
6. Delete the internal volume in Safe Mode
In a standard boot, you are only allowed to erase external disks and internal none-startup volume. When the couldn't unmount drive error occurs while erasing or removing additional internal files, you can try to boot into Safe Mode, shut down your Mac, and then boot your Mac up normally.
Share the methods that help you fix the drive can't be mounted issue!
FAQs about unmounting a disk on Mac
- QHow do you unmount an SD card on a Mac?
-
A
Open Disk Utility on Your Mac.
Find the SD card on the left list.
Click the Unmount button beside the SD card volume or select it and click Unmount.
- QHow do I force unmount a disk in Terminal Mac?
-
A
From the Applications, open the Terminal from the Utilities folder.
Type the command diskutil list to get the disk identifier.
Enter the command "diskutil unmount Disk force /dev/[your disk identifier]", and press "Enter".
- QIs it safe to remove an unmounted drive?
-
A
It's true that before unplugging a device, it should always be unmounted. This is to guarantee that all data has been written and saved correctly, preventing any files are open if the device is disconnected.