Only if the internal or external drive is mounted on Mac can you read and write data to it. By default, macOS should automatically mount the recognized disk, and you can directly access it in Finder or on the desktop. However, there comes to sometimes the drive is not mounted, then, you need to mount the disk on Mac manually.
Here, you will get several methods to mount the SSD/HDD/USB flash drive on Mac. Plus, you can also follow the steps below to restore data from the unmounted drive on Mac to avoid potential data loss.
Share this post to help others mount a disk on Mac!
What does it mean to mount a disk on Mac?
Mounting is the process by which the operating system makes the files and directories on a storage device (such as a hard disk, CD-ROM, or shared resource) accessible to users through the computer's file system. When you mount the drive on Mac, it should be available in Disk Utility, Finder's sidebar, and the desktop.
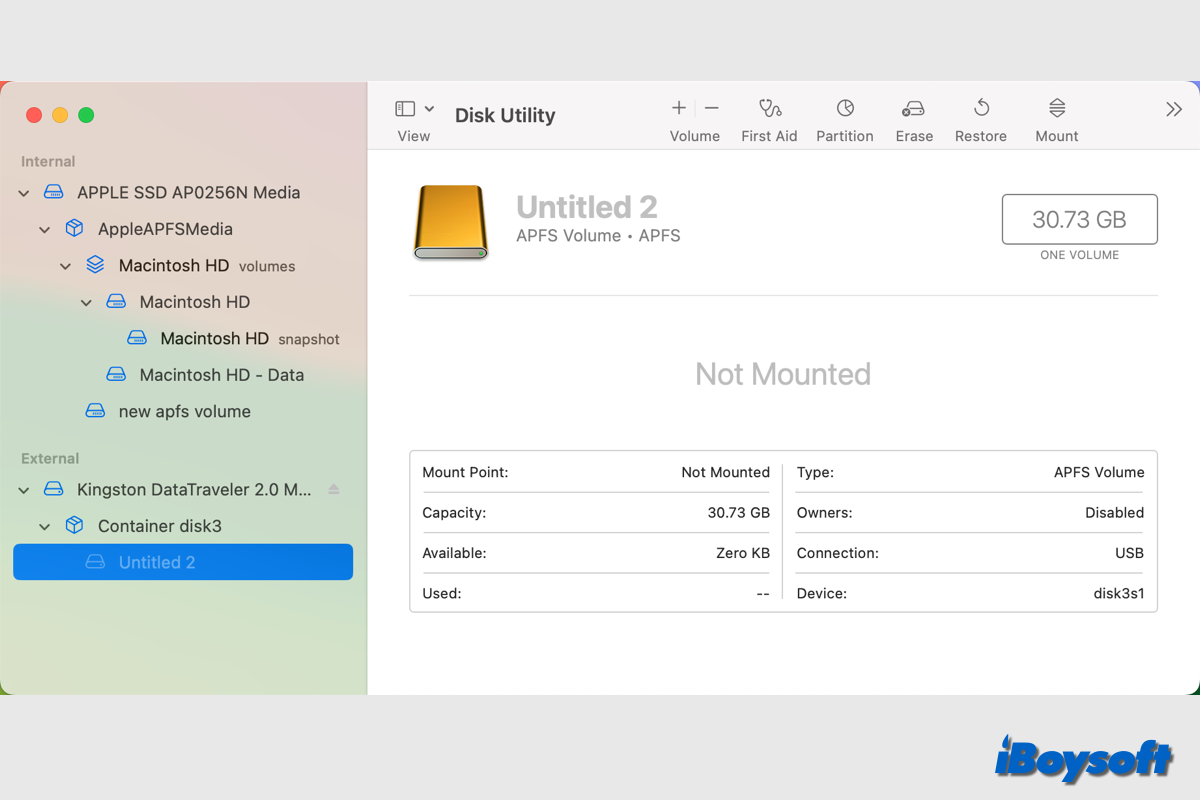
Suppose you find the volume of your internal or external HDD, SSD, and USB flash drive are greyed out in the Disk Utility. In that case, it means the drive is recognized but not mounted on Mac, hence, the external hard drive is not showing up on Mac's desktop and Finder, and you cannot access it to read files and write data to it.
How to mount a disk on Mac that won't mount?
Due to some reasons, macOS failed to mount the drive and it prevents you from using the drive as normal. If so, you can try the solutions in this part to force mount the drive on Mac.
Mount a drive using Disk Utility
With the macOS default disk management tool - Disk Utility, you can try to force mount the external drive via the Mount button. Here's how:
- Connect the external drive to your Mac's USB port.
- Open Disk Utility from Finder > Applications > Utilities.
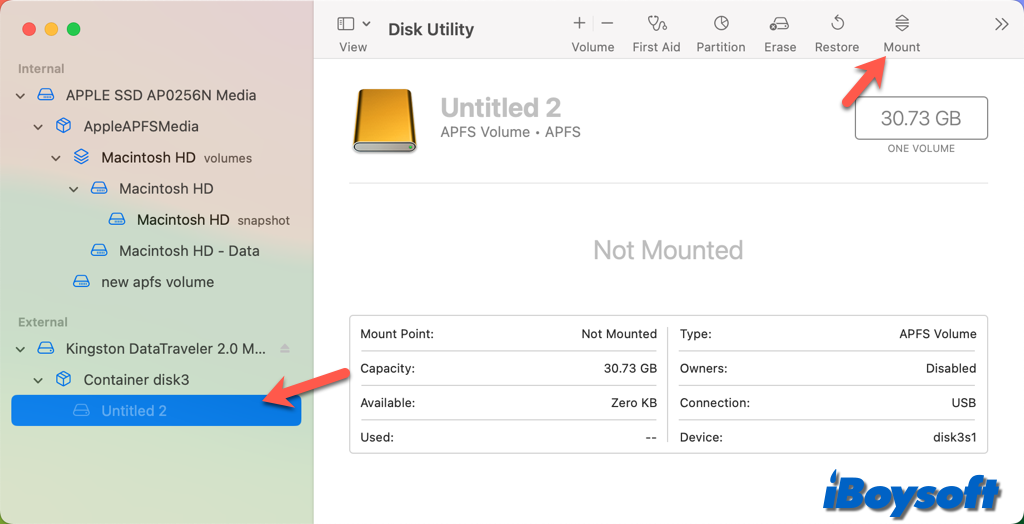
- Select the greyed-out volume of the unmounted drive on the left.
- Click the Mount button on the toolbar.
Force mount a disk via Terminal
Alternatively, you can run Terminal commands to perform some tasks on Mac including mounting an external hard drive. You can try this method if you can't mount the drive in Disk Utility or recover the mount failed with 77 and 72 errors. Let's see how to mount a disk on Mac via Terminal:
- Launch Terminal from the Launchpad or using Spotlight.
- Type the command below to list all your disks. diskutil list
- Locate the target disk you want to mount and its identifier.
- Then enter the following command to mount the drive, replace 0 with the identifier of your unmounted drive.diskutil mount /dev/disk0
Force mount internal drive with FSCK
Sometimes, internal hard drive not mounting occurs on Mac, then it is advised to use the FSCK command, known as File System Consistency Check. It can reveal and repair the macOS hard drive's underlying structure. Follow the steps below to force mount Macintosh HD with FSCK:
- Restart your Mac, hold down Command+S to boot the Mac into Single User Mode, and release the keys until the Apple logo appears.
- Type this command and press Enter. /sbin/fsck -fy
- When it says "File system was modified", retype the above command until you see "The volume [name] appears to be OK".
- Enter the following command to restart your Mac. reboot
- Verify if the macOS disk has been mounted successfully.
Mount external drive using third-party software
It could be the incompatible file system of the external hard drive that makes it not mount on Mac. You can check whether it is an NTFS drive in Disk Utility. Some Mac users reported that the NTFS drive won't mount on macOS 10.15.7 after the Apple security update on March 17, 2022, and received the "com.apple.DiskManagement.disenter error 49221" error message when trying to mount it with Disk Utility.
If you encounter the same issues while mounting an NTFS drive on Mac, the professional NTFS driver for Mac can fix the issue with ease. iBoysoft NTFS for Mac is what we recommend to mount the NTFS drive in read-write mode on Mac.
Steps to mount NTFS drive on Mac with iBoysoft NTFS for Mac:
- Free download, install, and launch iBoysoft NTFS for Mac.
- Connect the external NTFS drive to Mac and iBoysoft NTFS for Mac will automatically mount it. You can read and write the NTFS drive with the software now.
Note: If you fail to read and write the NTFS drive using iBoysoft NTFS for Mac, a prompt window will ask you to install a standalone iBoysoft NTFS driver and enable the System Extensions. After that, you can use the NTSF drive on Mac with full privileges.
Share the method that helps you to mount the drive on Mac!
Why the drive is not mounting on Mac?
There are various reasons for the internal and external hard drives not mounting on Mac. We conclude some common ones:
- File system damage. The master file table will be directly impacted by a corrupted file system, which will prevent the Mac from mounting the drive.
- Catalog file corruption. The record files of partitioned volumes are contained in catalog files. If any fault occurs in the catalog file, it causes the drive to be unmounted.
- Disk Utility failures. Perhaps it is the Disk Utility failure that hinders the system from mounting the drive.
- System malfunctions. System glitches could also be the culprit when you can't mount the drive on Mac.
- Virus attacks. In case the drive is infected with a virus or malware, then it could become unmountable.
- Connection problems. Loose connection or defective USB port and cable could also be the reason when you find the drive is not mounting on Mac.
- Hardware issue. Probably, the drive has many bad sectors or is physically damaged, then you can't successfully mount it on your Mac.
How to fix internal/external drive not mounting on Mac?
Unluckily, you have tried the abovementioned methods to mount the drive on your Mac but it fails, there are some other possible solutions to fix the drive that is not mounting.
Restart your Mac computer
After you restart the Mac, the device starts up from scratch, which could eliminate some OS-related errors, then you can launch the Disk Utility again to check if the internal/external hard drive is mounted.
Check the connection for the external hard drive
If it is an external hard drive not mounting on Mac, you should first check the connection, including the USB ports, the cable, and the USB hub if you are using one, and make sure the storage media is turned off if it has a switch.
Update macOS
An outdated OS and disk driver will fail to mount your drive on Mac, therefore, it is necessary always to keep your Mac updated to date so that it can function well. Go to the System Settings and check if any update is available.
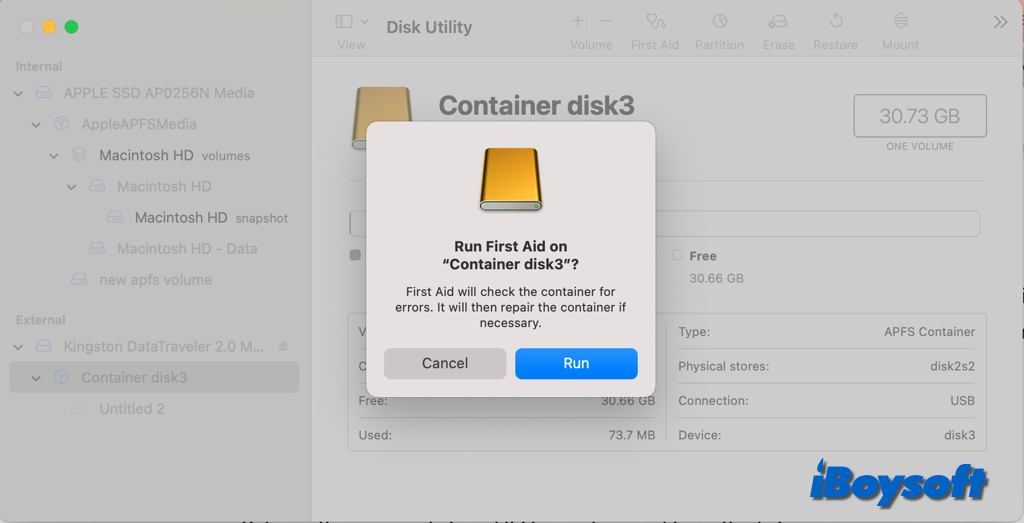
Repair the drive with Disk Utility's First Aid
When you find the internal or external hard drive performing abnormally, you can run First Aid to check and repair disk errors, it could fix minor errors in the disk formatting and directory structure, and the drive may be mountable again after that.
Repair the unmounted drive with Terminal
Alternatively, you can use another tool Terminal to run certain commands to repair the errors on an unmounted drive on Mac, here's how:
- Boot your Mac in Recovery Mode if you want to repair the Macintosh HD.
- Open Terminal from the Launchpad or choose Utilities > Terminal in recovery mode.
- Enter this command to list available volumes. diskutil list
- Check the Volume identifier of the unmounted volume from the appeared table.
- Enter the command below to repair the drive. [** needs to be replaced with your drive's volume identifier].diskutil repairvolume /disk **
Reset Mac firmware settings
Sometimes, Firmware affects how your Mac and other devices work. Incorrect firmware settings can also result in an external hard drive that won't mount. Remember to unplug your Mac's external drive before resetting Mac firmware settings including SMC and NVRAM.
Try Safe Mode to fix the unmounted internal drive
If your internal hard drive is not showing or mounting, you can try Safe Mode. Troubleshooting software issues, particularly those brought on by third-party drivers, is made easier by the checks and changes made during your Mac's safe boot. In addition, it examines and corrects directory problems on the startup volume.
Format the drive and reinstall macOS
In case the methods above don't work to fix the unmountable drive on Mac, the last resort you can try is to reformat the drive, this will erase all data and if you haven't created a backup for the drive before it becomes unmountable, you can move to the next part to recover data from it first. After that, you can reinstall macOS on the unmountable internal drive.
Can I recover data from unmounted drive on Mac?
Do you have any backups for the unmounted drive? If there is, then you can easily restore data from your backup after reformatting the drive to restore the data to a new disk. If there is not, you can consider third-party data recovery software for Mac.
If the drive can be recognized by Mac, that is to say, it displays in the Disk Utility's sidebar but is grey-out, you can try to recover data from the unmounted drive with data recovery software such as iBoysoft Data Recovery for Mac. Even if you can't find the disk in Disk Utility, try such software to see whether it can be detected.
If your Mac won't turn on, read Recover Your Data When macOS Won't Start.
If your Mac can boot up, follow the steps below to recover data from the unmounted volume.
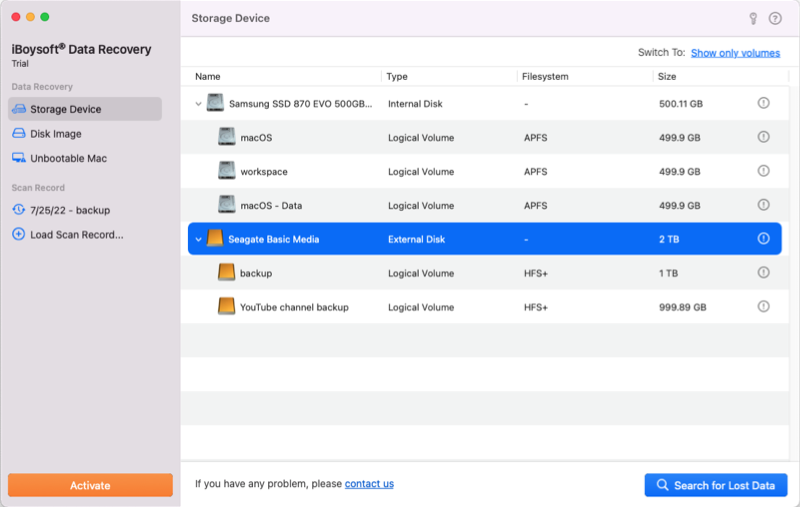
- Free download, install, and launch iBoysoft Data Recovery for Mac.
- Select your target volume from the Storage Device section.
- Click the Search for Lost Data button to start scanning.
- Filter and preview the scanned results.
- Choose the items you want to recover and click Recover.
- Choose a different destination to save the recovered data.
If you have successfully recovered data from an unmounted disk, share it to help others!
Read more: