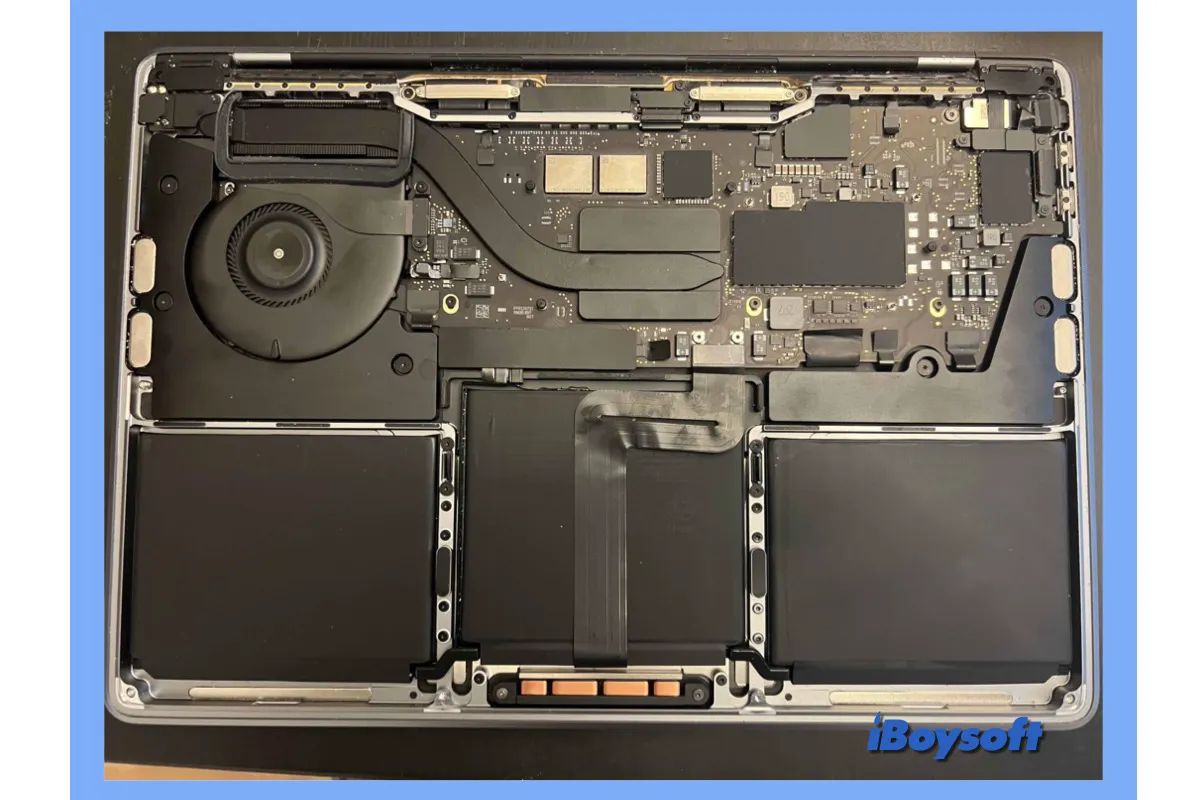
To avoid losing your data accidentally, it is essential to keep a backup of your Mac. Normally, you may do a backup using Apple Time Machine or send it to a cloud service. Today we're going to talk about another approach - clone a Mac hard drive for use as a backup.
When you want to upgrade your Mac computer with a new SSD, it's always the best choice to clone your Mac hard drive to the SSD. Cloning your Mac's main drive creates a perfect one-to-one copy, fully bootable and exactly like the original. In this article, you'll find what a Mac hard drive clone is as well as how to clone a hard drive on a Mac step by step.
What is Mac hard drive cloning?
When you clone your Mac's hard drive you create a perfect, bit-by-bit, duplicate of it. It includes the data allowing you to boot your system right from that copy. In other words, a cloned hard drive is an exact copy of the original, including the operating system and all the files it needs to boot up and run.
How to prepare an external drive for cloning
Before cloning a hard drive Mac for use as a backup, you need to prepare a place for the clone to store. A popular option is using an external drive, preferably an SSD drive with enough space to store a clone. To clone Mac hard drive to an SSD drive, you first have to format the external hard drive on Mac:
- Connect your external drive to the appropriate port on your Mac.
- Use Spotlight to search for the Disk Utility app.
- Double-click on Disk Utility to open it.
- Find the hard drive under External and select it. It will usually be named after the company that made it.
- Click the Erase tab at the top of the window.
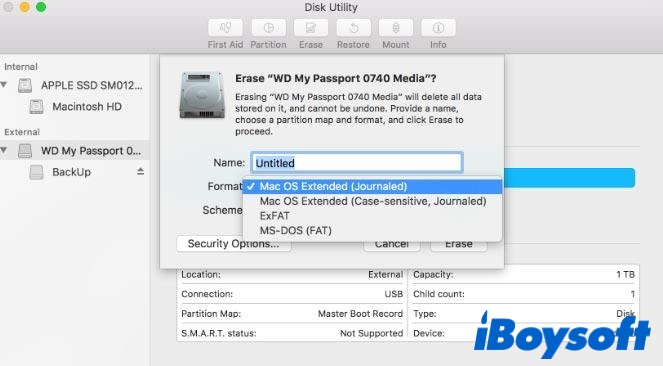
- Name the drive and select macOS Extended (Journaled) from the format list.
- Click Erase.
- Click Done once the process is complete.
- Close the Disk Utility window.
Your hard drive is now formatted for cloning your Mac. Just keep reading to learn how to clone Mac hard drive.
How to clone a Mac hard drive using Disk Utility
To clone a hard drive on a Mac, you can use a built-in macOS utility - Disk Utility. Now, let's walk through how to clone your Mac hard drive using this free cloning option:
- Launch Disk Utility. To do this, you can use Spotlight Search to find and launch the application. Simply press the Command + Space bar at the same time and then type in Disk Utility. It will then show up as one of the results.
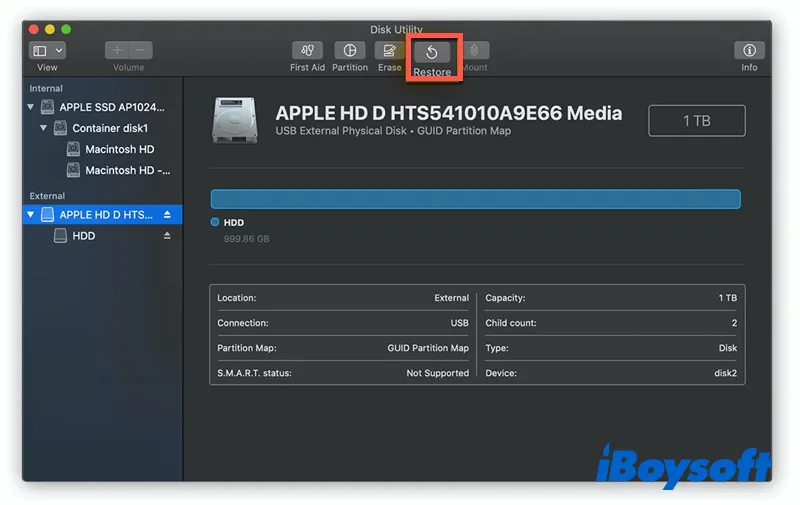
- Once you've launched Disk Utility, select the backup drive that you would like to clone your Mac hard drive to as the target drive. Lastly, click Restore.
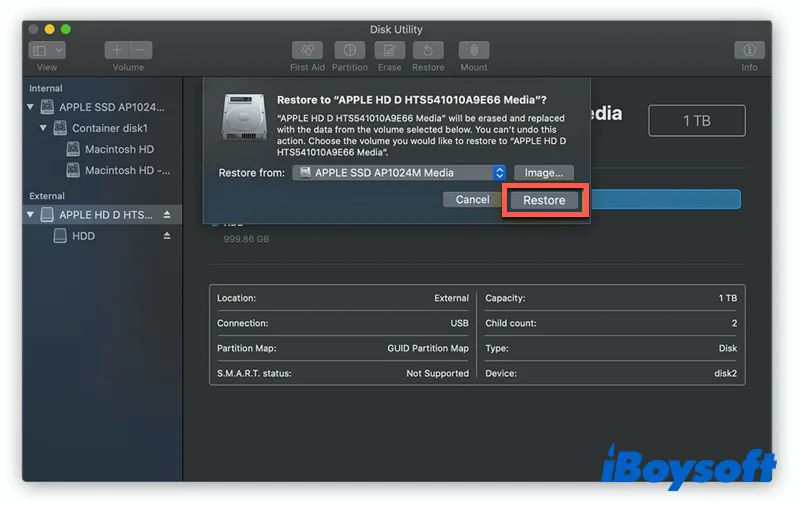
- Disk Utility will display a new window with a drop-down menu labeled Restore from. Select your Mac SSD (normally APPLE SSD XXX) from the drop-down menu as the source drive., then click Restore to begin the cloning process.
- Then, Disk Utility will show you a status bar that slowly fills up as it clones your drive. When it's finished, click Done to complete the operation.
How to use a hard drive clone tool for Mac
To clone your Mac hard drive to an SSD easily, another way is to use a professional hard drive clone tool for Mac. There are many options such as iBoysoft DiskGeeker, HDD Raw Copy Tool, SuperDuper!, Carbon Copy Cloner, or EaseUS Todo Backup. All of them have free or trial versions, so you can check out which one works best for you. Here, we use iBoysoft DiskGeeker.
iBoysoft DiskGeeker is an all-in-one disk management tool for Mac. It supports cloning your Mac hard drive and supports managing your external hard drives, USB drives, and flash drives. Besides, it also enables to read and write BitLocker encrypted and NTFS drives as well as encrypting and unlocking disks by using FileVault or BitLocker.
This intuitive hard drive clone tool for Mac works fine on macOS 12 Monterey, macOS 11 Big Sur, macOS 10.15 Catalina, macOS 10.14 Mojave, and macOS 10.13 High Sierra. Its Disk Clone feature not only supports backing up the entire startup disk. It also enables cloning an external hard drive to another one as a backup to avoid data loss, which can't be achieved by Time Machine.
Now, let's see how to clone a Mac hard drive with the help of iBoysoft DiskGeeker:
- Download and install iBoysoft DiskGeeker on your Mac, and restart your Mac computer when the installment finishes.
- Connect the disk you need to use to clone your Mac hard drive and launch iBoysoft DiskGeeker.
- Select the Mac hard disk at the left sidebar of the iBoysoft DiskGeeker window.
- Click Clone from the right toolbar to use the Mac internal hard drive as the source device.
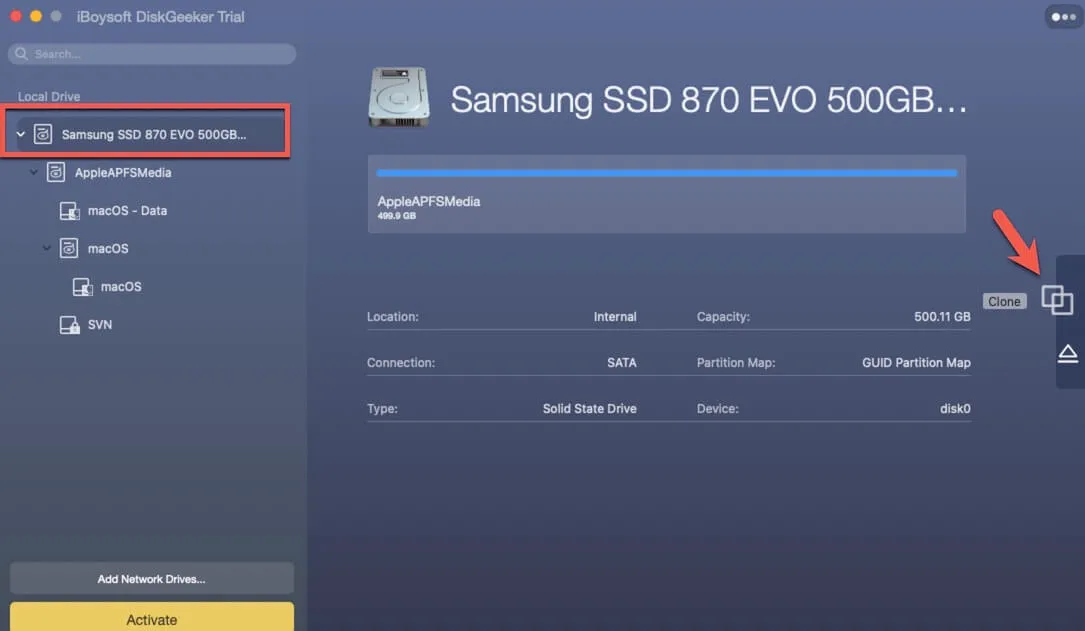
- Choose your external SSD as the target drive from the pop-up list and click start clone. A prompt will warn you to make a backup of the destination disk because the cloning disk will overwrite all data on it. If you click OK, the clone starts.
The cloning process can't be terminated once it begins. So remember to keep your Mac in charge or make sure it has enough power. If the process is terminated accidentally, the disk cloning will resume automatically when the destination disk is connected to your Mac again.
How to restore your Mac from a clone
Now you have a Mac hard drive clone on an external drive. If there is any reason you need to restore your Mac from a clone, here's what to do:
- Turn off your Mac.
- Connect your external drive to the appropriate port on your Mac.
- Turn on your Mac.
- Hold down the Command and R keys as soon as the system restarts to enter macOS Recovery Mode. Your Mac will boot to the macOS Utilities screen.
- Click on Disk Utility and then click Continue.
- Select your hard drive.
- Click on the Restore tab at the top of the Disk Utility window.
- Select your external drive next to Restore From.
- Select your Mac's hard drive next to Restore to and click Restore.
- Once the backup has finished restoring, restart your computer.
FAQs about how to clone Mac hard drive
- QAre there any risks when cloning my Mac hard drive to SSD?
-
A
The risks of cloning a drive are very low. The one potential risk is if you're using a destination drive with important data on it. Cloning will overwrite everything on the target drive, so be sure that you don't have anything valuable on there. It's always best to clone to a new or empty destination drive.
- QCan I clone one Mac to another?
-
A
Use Migration Assistant to copy all of your documents, apps, user accounts, and settings to a new Mac from another computer. Migration Assistant copies all of your files from your old Mac to your new Mac so that you don't have to copy them manually.
- QDoes cloning a drive copy the OS?
-
A
Yes, a cloned hard drive is an exact copy of the original, including the operating system and all the files it needs to boot up and run.

