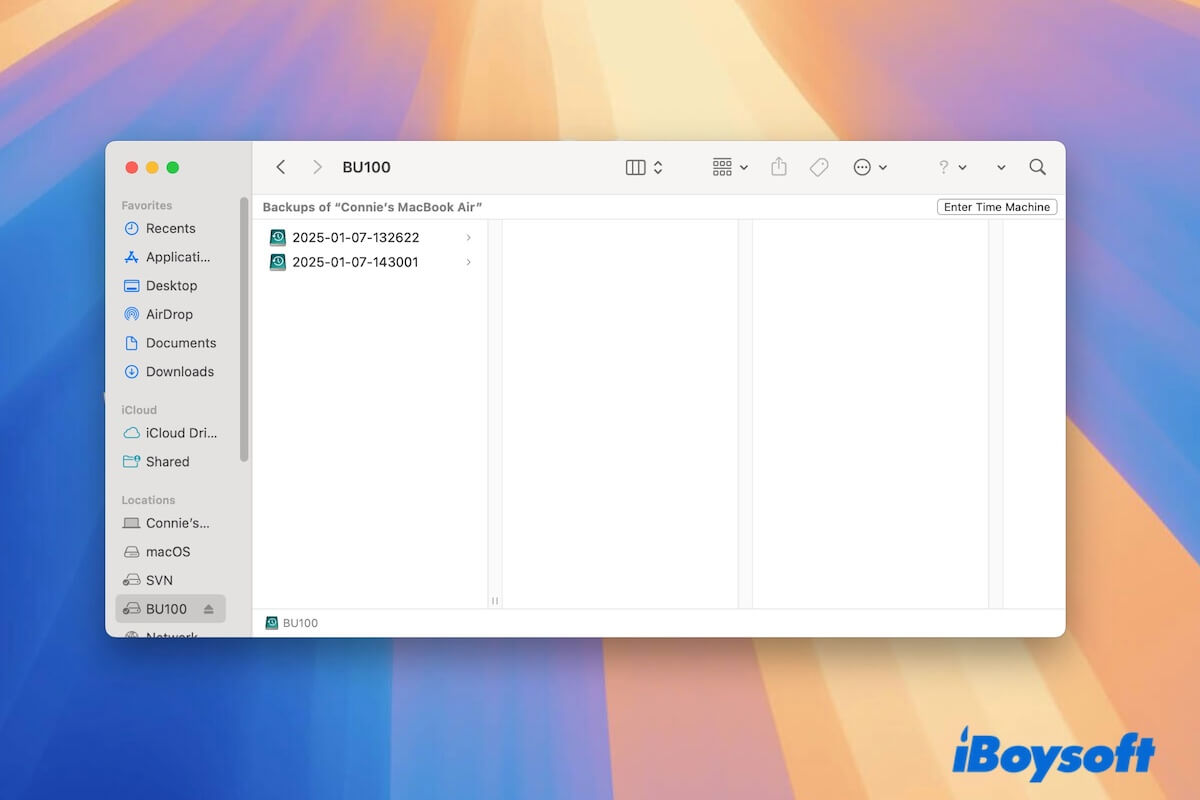
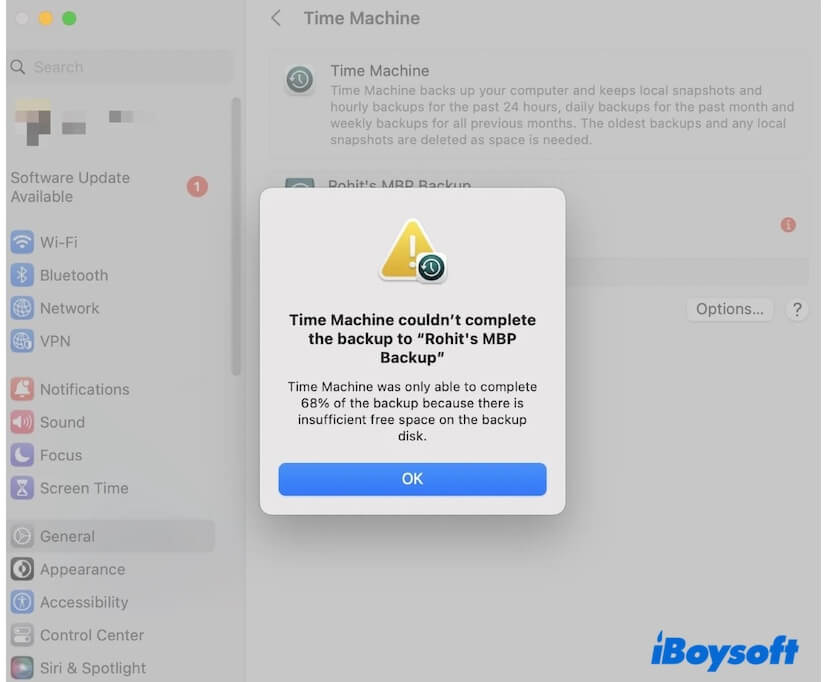
Apple claims that the Mac Time Machine can clear up old backups to make room for new ones, but it doesn't. Some users found that Time Machine is not deleting old backups automatically but says "There is insufficient free space on the backup disk." or "Your backup drive does not have enough storage to perform the backup."
If you're facing this issue, don't worry—it's not as complicated as it seems. We'll provide solutions to free up your full Time Machine backup disk and explain why Time Machine does not delete old backups as expected.
Time Machine is not deleting old backups, what to do?
Why isn't Time Machine deleting old backups? The problem occurs when the number of new backups added far exceeds the number of old backups deleted. In other words, the backup frequency is too high, and the files being backed up are too large, making it difficult to notice the removal of older backups.
To resolve the Time Machine backup disk full issue, you can reduce the amount of backup data, lower the backup frequency, manually delete old backups, or switch to a more user-friendly backup tool.
In the following sections, we'll explain each solution in detail.
Way 1. Manually delete the old Time Machine backups
Can you delete old backups from an external hard drive? Of course, you can manually delete the old Time Machine backups to free up much more disk space.
Here's how to delete Time Machine backups:
- Connect your Time Machine backup drive to your Mac.
- Open Finder and select your backup disk from the sidebar. If your backup drive appears on the desktop, you can directly open it here.
- Select the backup you want to delete and move it to the Trash. You can also remove certain files or folders of the backup only.
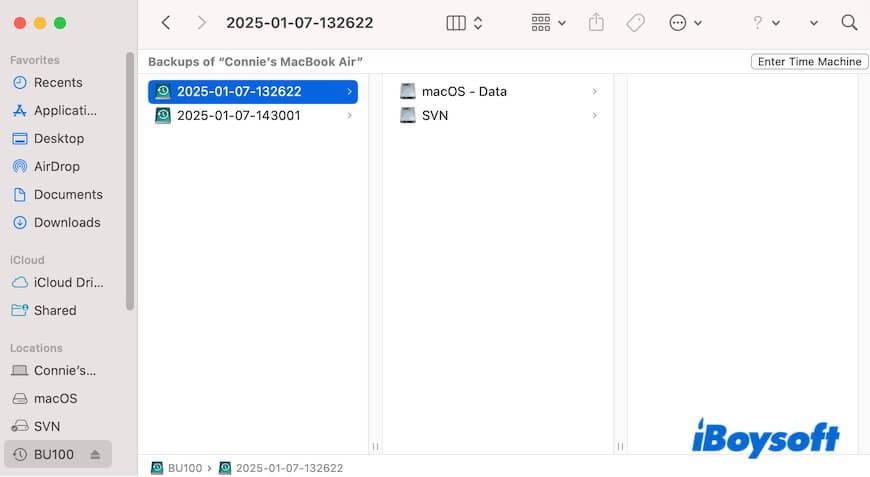
- Empty the Trash to release the space the deleted backup occupied.
Way 2. Turn off the automatic Time Machine backup
Time Machine lets you back up your Mac manually or automatically. However, if you set it to back up hourly, daily, or weekly, your disk can quickly run out of space, leading you to believe Time Machine isn't deleting old backups.
Thus, if Time Machine keeps running out of space, go to check if you've enabled automatic backup. If you have, disable it.
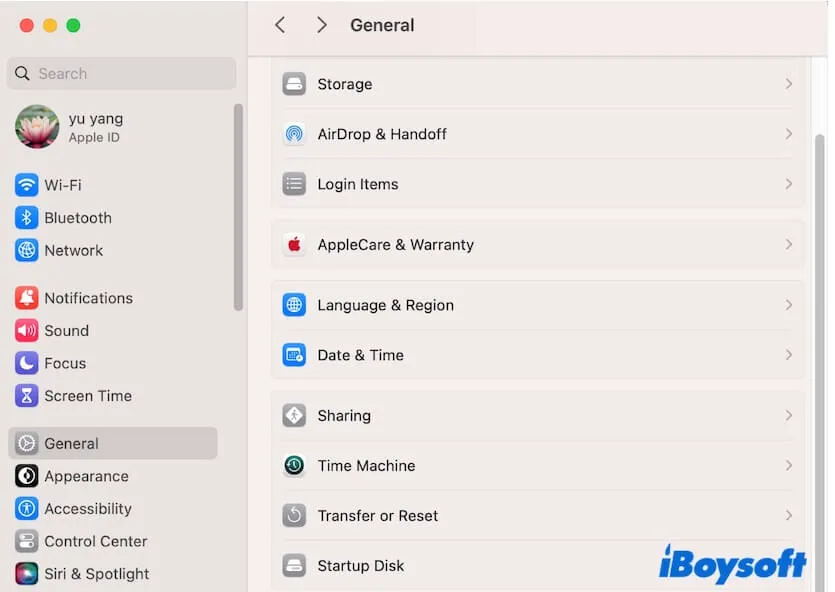
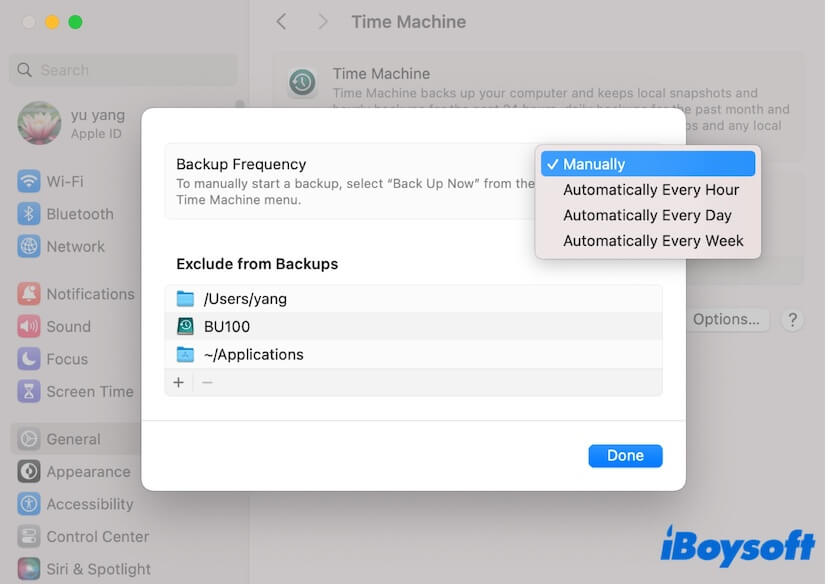
- Click the Time Machine icon on the menu bar and select Open Time Machine Settings. Or, click the Apple menu > System Settings > General > Time Machine.
- Click Options.
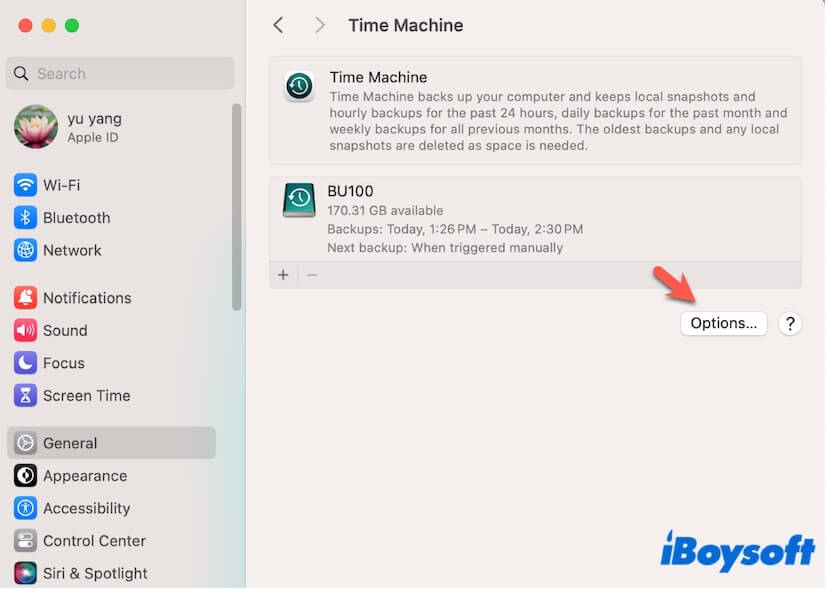
- In the Backup Frequency field, choose Manually.
Way 3. Exclude unnecessary files from backups
The more data you back up, the faster your Time Machine backup disk will fill up. To free up space, you can stop Time Machine from backing up unnecessary files.
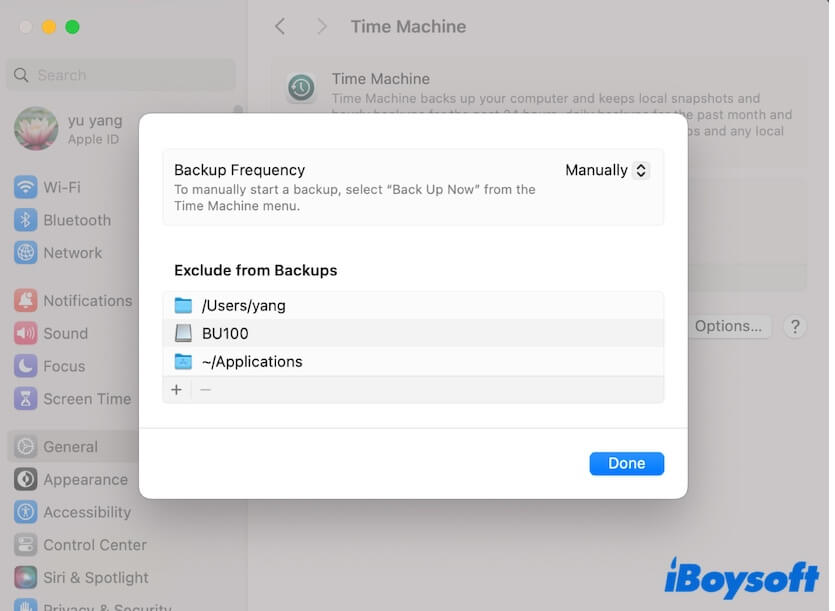
- Click the Time Machine icon on the menu bar and select Open Time Machine Settings.
- Click Options.
- In the Exclude from Backups field, click the add button (+) to add the files or folders you don't want to be backed up.
Way 4. Switch to use another backup tool
If Time Machine keeps running out of space, why not switch to a different backup tool?
iBoysoft DiskGeeker for Mac is a disk management utility that quickly clones your Mac's startup disk for backup. It also supports backing up and syncing file changes from the user data volume (Macintosh HD - Data) to recover accidentally deleted files.
Here's how to use iBoysoft DiskGeeker for Mac to back up your Mac data to an external drive:
- Download, install, and open iBoysoft DiskGeeker for Mac on your Mac.
- Connect the external hard drive to your Mac. Ensure that the external drive has a larger capacity than your Mac startup disk.
- Select the entire startup disk and click Clone.

- Select the external drive as the destination and click Start Cloning.
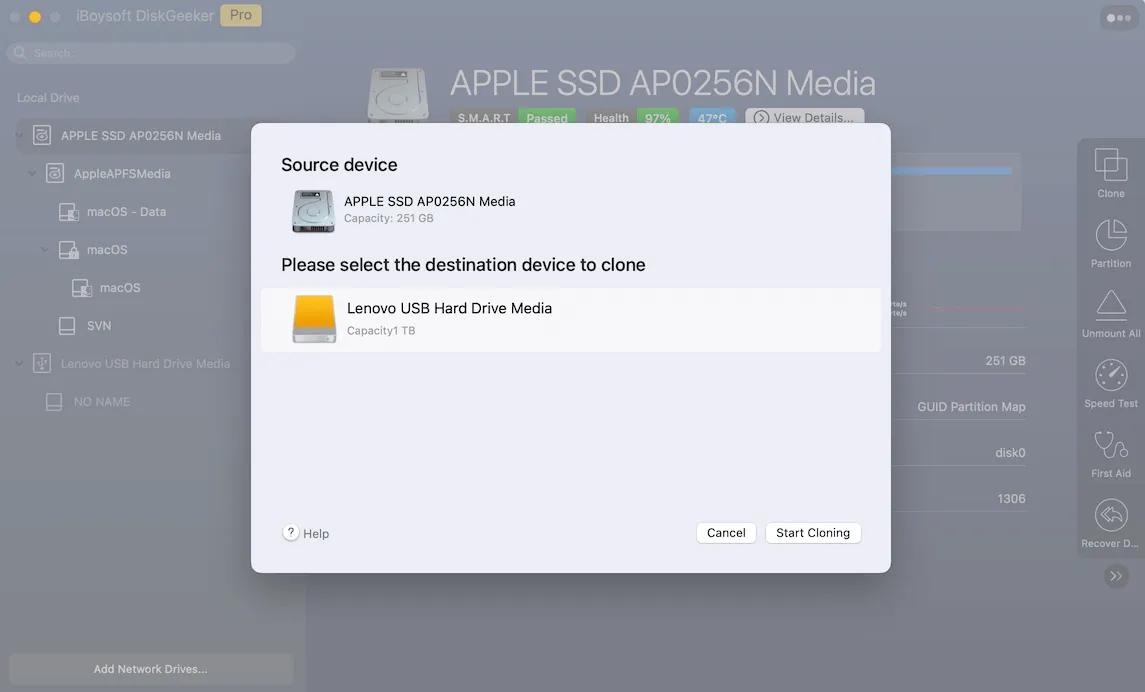 A prompt will warn you that the cloning will overwrite data on the external disk. Click OK to start cloning.
 - Wait for the cloning process to finish.
If you prefer to back up and sync your Mac's data locally for quick recovery in case of accidental deletion, you can use the File Keeper feature of this tool.
- Download, install, and open iBoysoft DiskGeeker for Mac on your Mac.
- Select the Macintosh HD - Data or macOS - Data (the user data volume) and click File Keeper.
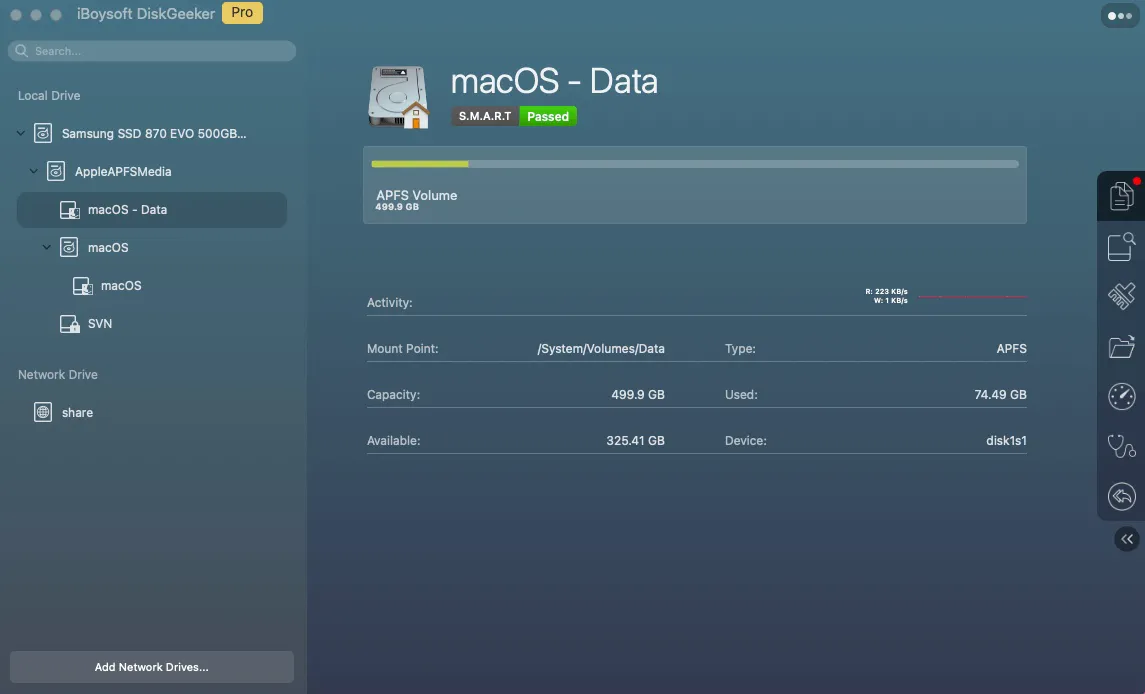
If you have partitioned other APFS volumes on your startup disk, you can also back up files on them. - Click Turn On on the pop-up to turn on this service. Then, it will immediately start backing up the target volume.
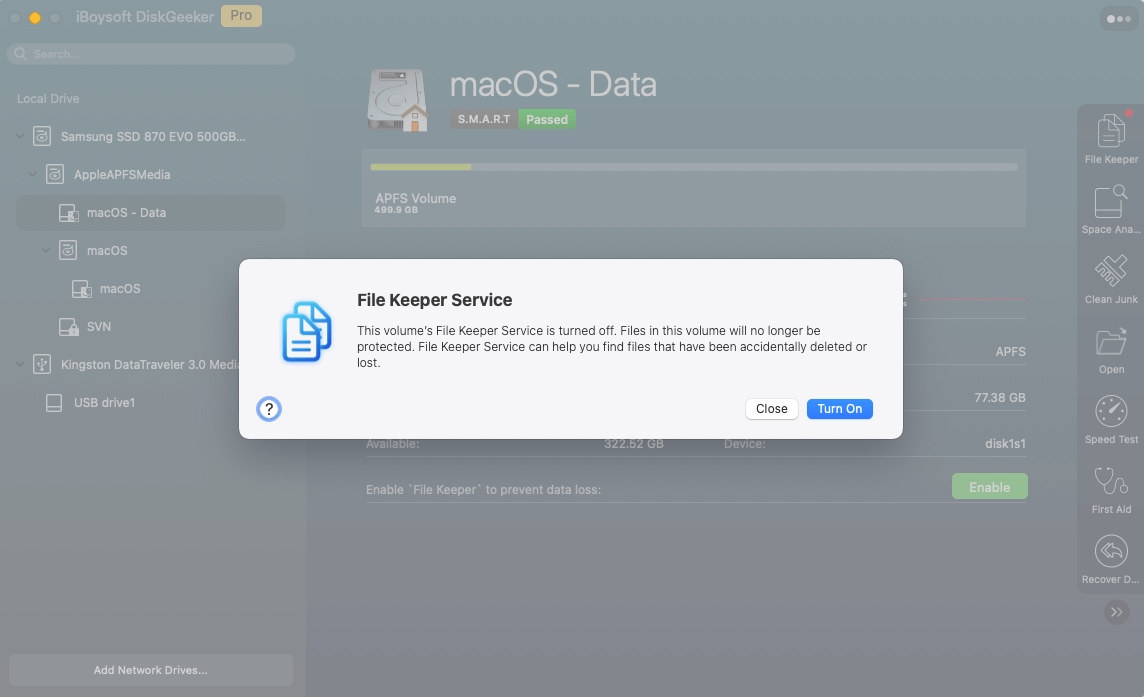
When you need to restore files from the backup later, open this app, click File Kepper, and follow the on-screen guide to find the backups.
Tell others this user-friendly and easy-to-manage backup tool for macOS.
Way 5. Reformat the Time Machine backup disk and restart the backup
If your Time Machine backup disk is full and you don't need the old backups, you can reformat the drive and start the backup process from scratch.
Before reformatting, go to Time Machine settings, select the disk, and click the remove button (-) > Forget Destination to stop it as the backup disk first. This is to prevent the disk reformatting process from failing.
- Open Disk Utility from Launchpad > Other.
- Select the external drive and click Erase.
- Set a name, choose APFS as the format, and use GUID Partition Map as the scheme.
- Click Erase.
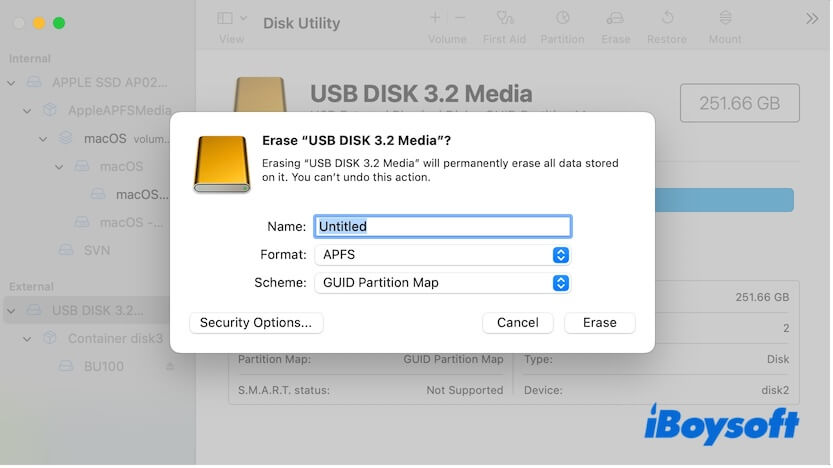
Now, go to Time Machine settings, set the disk as the Time Machine destination, and start backup.
Way 6. Change a larger drive for backup
If your Mac holds a large amount of important files that you frequently update, you may need to back up your entire Mac regularly.
In that case, you are suggested to use an external drive with a larger capacity as the Time Machine backup disk. The capacity of the disk should preferably be several times the total amount of data you want to back up.
Share the above ways to give assistance to those who also think Time Machine doesn't automatically clear up old backups.
Why is Time Machine not automatically deleting old backups?
Does Time Machine overwrite old backups? Yes, it does. But why does it seem like Time Machine doesn't automatically delete the oldest backups to free up space for newer ones? Time Machine is designed to retain past backups. If you back up hourly, it deletes the oldest backup from the last 24 hours to make room for new incremental backups, and the same happens with daily and monthly backups.
However, even with automatic file clearance to save space, the backup drive will gradually fill up over time. The issue isn't that Time Machine doesn't delete old backups, but that the amount of deleted data is much smaller than the new backups, especially with automatic backups enabled.
Additionally, if you're backing up multiple Macs to the same drive, Time Machine on one Mac won't clear space used by another Mac's backups.
Share the reasons why Time Machine is not deleting old backups with more people.
