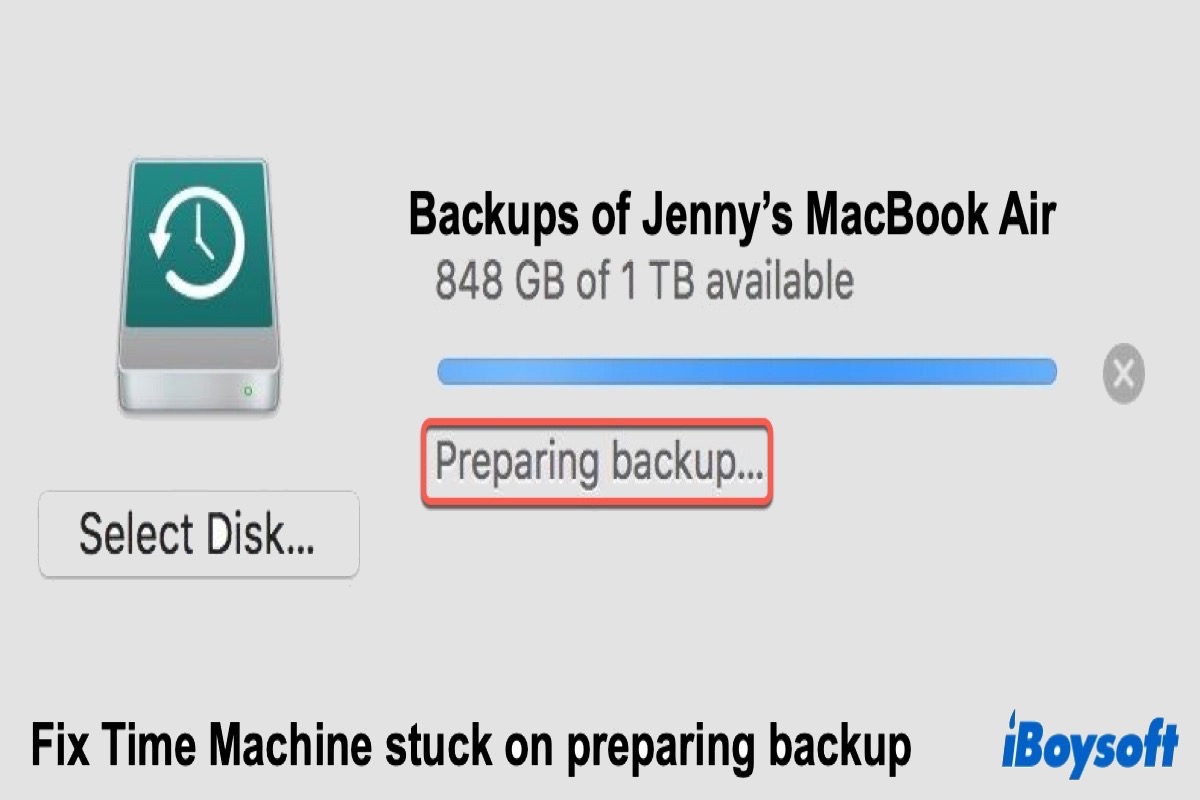
Mac Time Machine keeps saying "preparing backup," but you can't see any other changes happening? If this case remains for hours when you back up with Time Machine, you are likely encountering a Time Machine failure.
Like the errors 'Waiting to Complete First Backup' and 'Time Machine can't find backup disk', Mac Time Machine stuck on preparing backup could happen in macOS Big Sur, Catalina, Mojave, High Sierra, Sierra, and other macOS versions for many reasons. We will explain them in this post and tell you how to fix them in detail.
If the issue occurs on macOS Tahoe, check out the tips in this guide: Time Machine Not Backing Up after Upgrading to macOS Tahoe
How can you tell if Time Machine is stuck on preparing backup?
Steps to check if Time Machine hangs on preparing backup:
Step 1: Launch Time Machine by clicking on the Apple menu > System Preferences > Time Machine app.
Step 2: You will see a progress bar and description like "Preparing backup", "Scanning...items", or "Preparing...items" on the window.
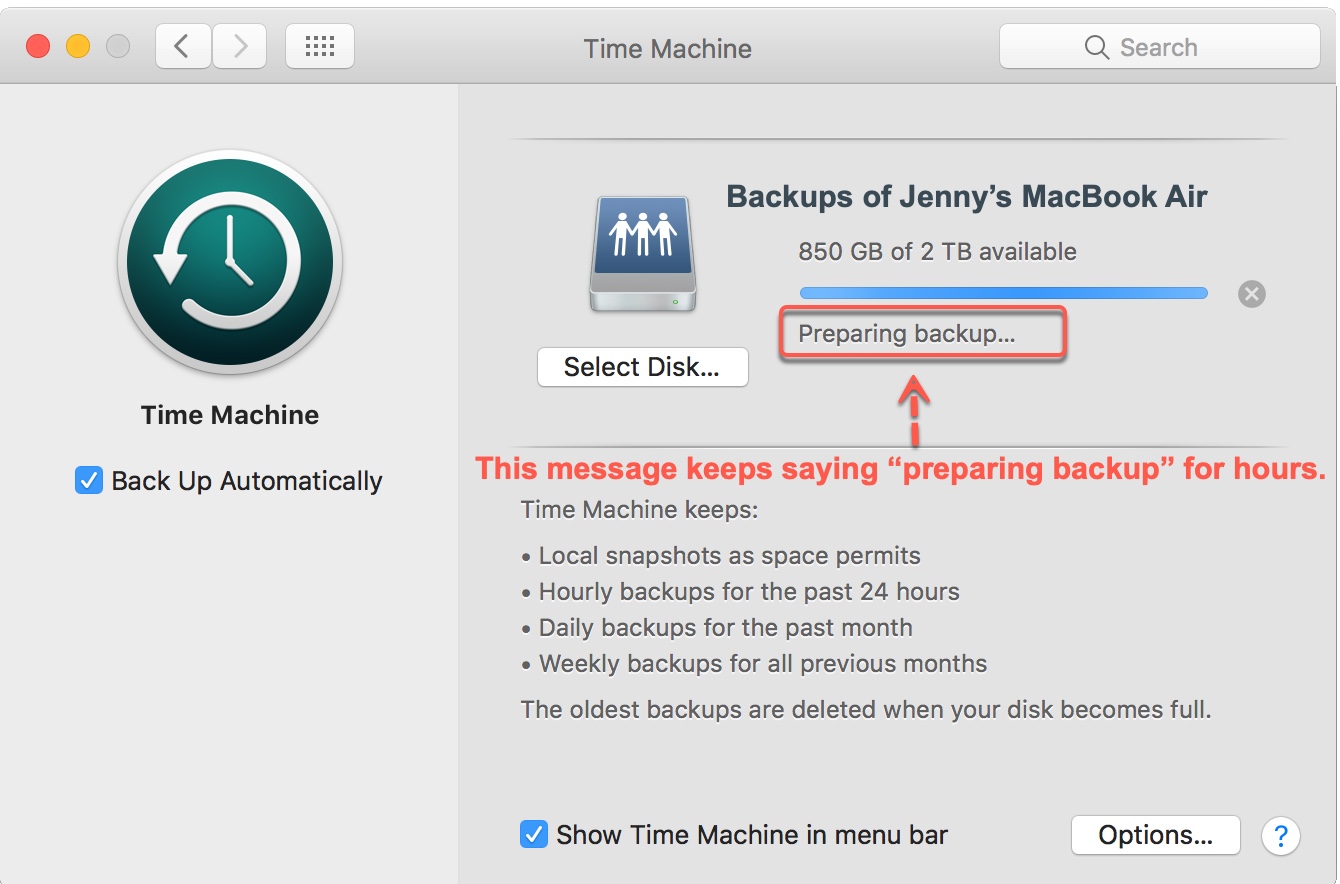
If the message changes, even slowly, then Time Machine is working fine.
If the message still freezes on “preparing backup” after 30 minutes, it's stuck. You can wait for another 30 minutes to be sure.
Why is Time Machine stuck on preparing backup?
The reasons that result in Time Machine being stuck on "preparing backup" are as follows:
- Excessively large files
- Outdated operating system
- The previous backup was interfered
- Damaged or virus-infected backup disk
- Interference of anti-virus software or Spotlight
- Many changes ( such as software updates) have been made since the last backup
- Poor Wi-Fi connection for the network drive
- Corrupted file system changelog due to sudden Mac shutdown or improperly ejection of the backup disk
The reason may vary from case to case, but it's not that difficult to handle. Let's have a look at the solutions.
What to do if Time Machine is stuck on preparing backup?
Here are the steps to fix the issue that Time Machine preparing backup takes forever.
If you are using a network drive with Time Machine, check the performance of your network first. This is often the main reason why Time Machine backup fails after upgrading to Sequoia.
Step 1: Turn off the current Time Machine backup.
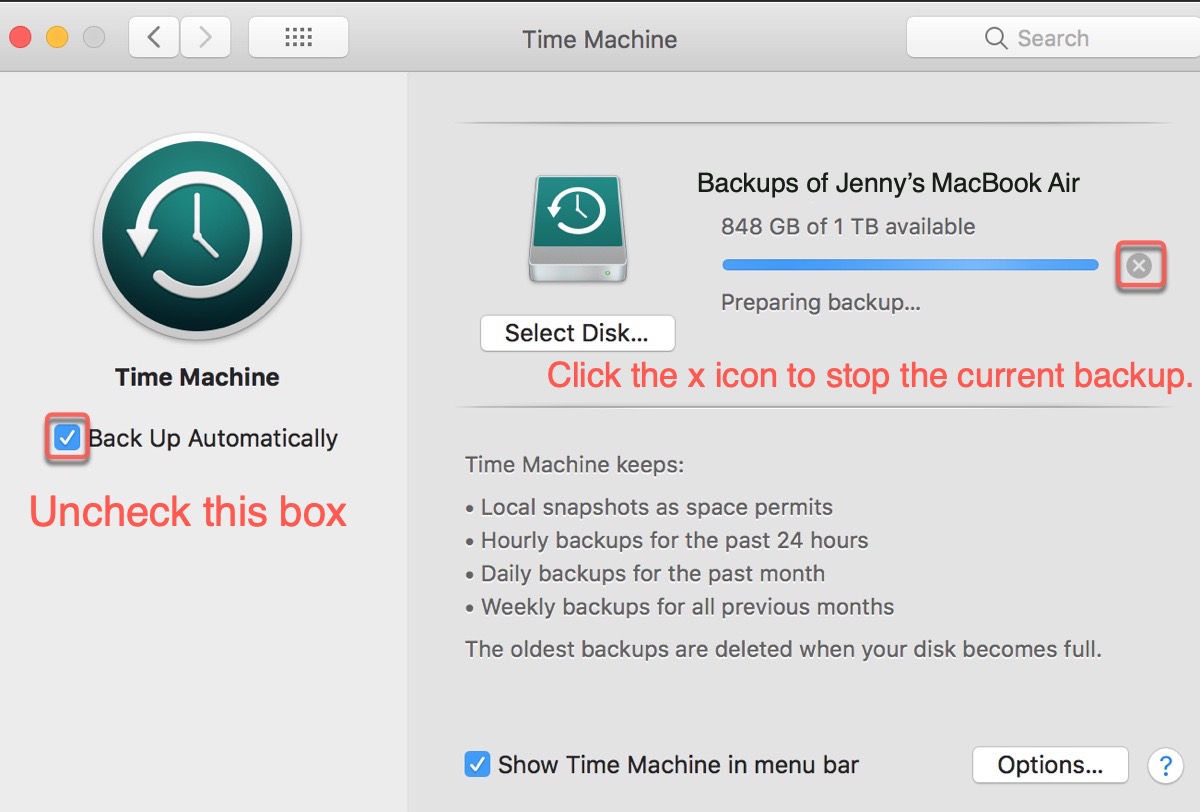
- Click on the Time machine icon at the top-right of the menu bar and choose Open Time Machine Preferences.
- Click the small cross icon ( x ) next to the progress bar from the Time Machine panel to stop the backup.
- Uncheck Back Up Automatically and wait until the process terminates, and follow the instructions below.
Step 2: Exclude Time Machine from scanning by anti-virus programs, if any.
If the anti-virus program allows you to exclude the Time Machine backup volume, that's good. But if that's not the case, you can try to exclude the "Backups.backupdb" file on the backup volume.
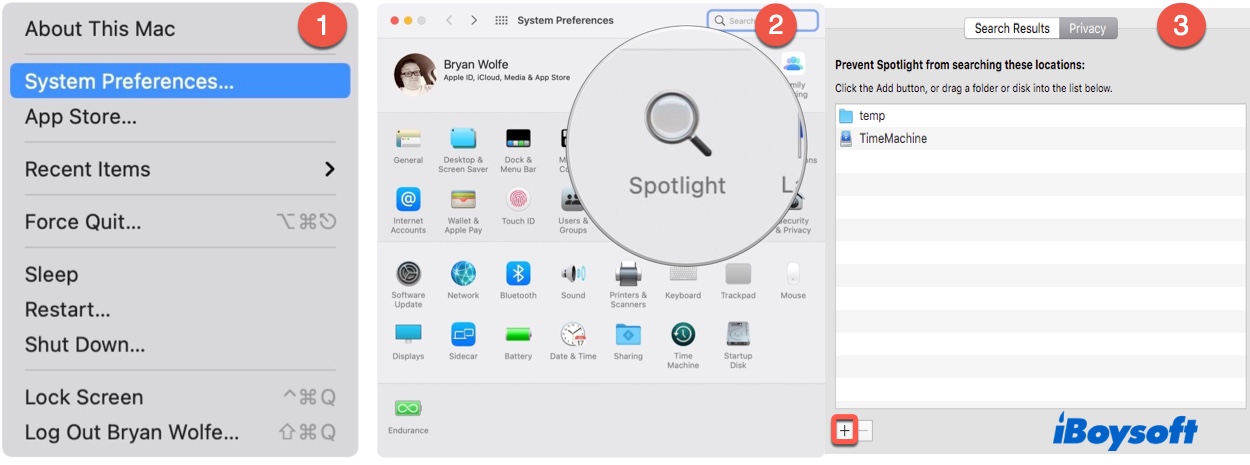
Step 3: Prevent Spotlight from indexing the Time Machine backup volume.
If Spotlight is indexing the Time Machine backup volume, it will interfere with the preparation process.
- Launch Spotlight by clicking on the Apple icon > System Preferences > Spotlight.
- On the pop-up window, click the Privacy tab.
- Tap on the Add button (+), and browse to find the Time Machine backup disk/volume.
Step 4: Delete the ".inProgress" file.
Removing the ".inProgress" file as it may carry outdated or corrupt information helps clean up your Mac and prepare it to start Time Machine over.
- Open Finder and select your Time Machine backup disk.
- Find and click the folder named Backups.backupdb, then tap on the folder with the name of your current Mac.
- Locate the file that contains .inProgress in the folder, right-click on it and choose Move to Trash.
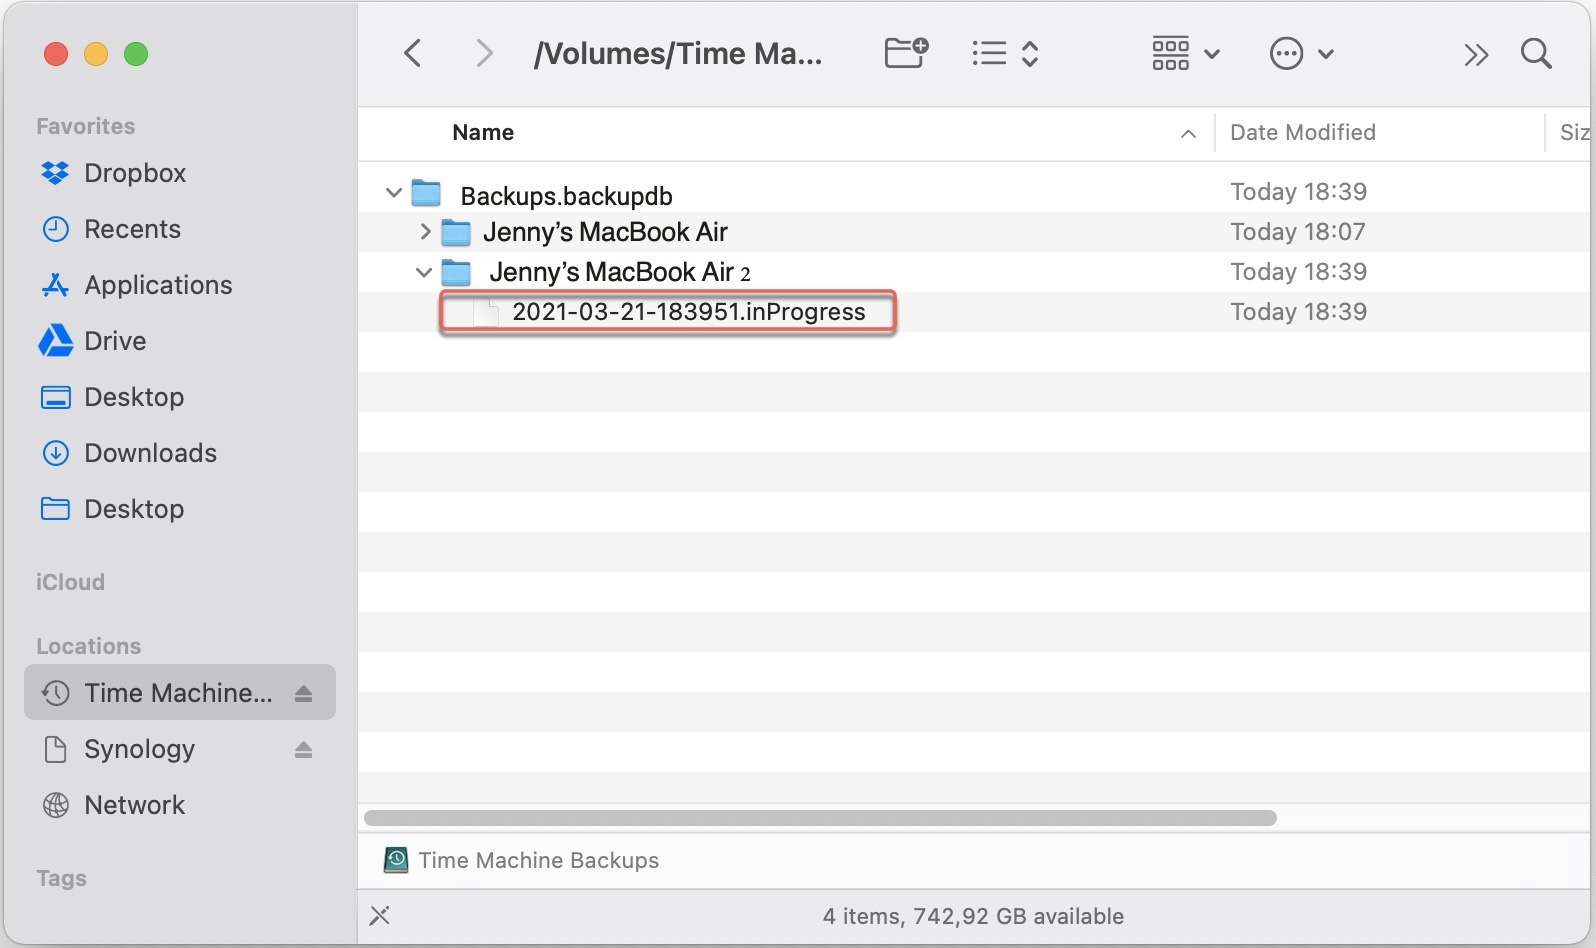
The .inProgress file was created when Time Machine gathered information of files needing a backup. It is named xxxx-xx-xx-xxxxxx.inProgress, consisting of 8 numbers that indicate the year-month-date of the backup, 6 random numbers, and the .inProgress extension. For example, 2021-09-21-123456.inProgress.
Step 5: Restart your Mac and try Time Machine backup again.
This step should help your Mac to re-index the files related to your Time Machine backup drive.
- Keep the backup disk connected to your Mac, click the Apple logo, and select Restart.
- Click the Time Machine icon and choose Back Up now to initiate a new backup.
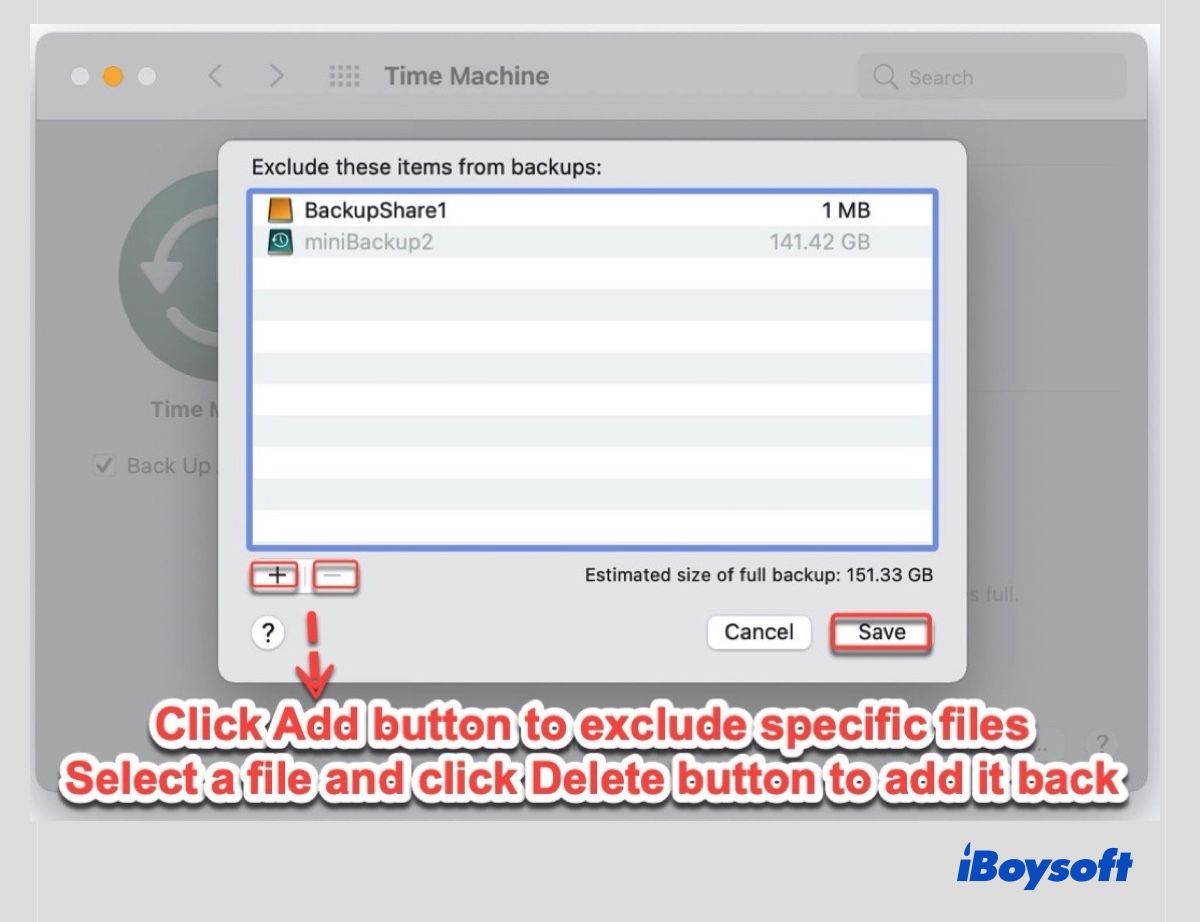
- To speed up the Time Machine backup, you can exclude specific files from being backed up by clicking Option and then the Add button ( + ) to select unwanted files.
Other solutions:
If the above solutions don't work, you can run Disk Utility First Aid to check your backup disk and repair errors. Time Machine performance is dramatically improved when used with macOS Big Sur with an APFS-formatted backup disk. You can upgrade your Mac to macOS Big Sur and rerun Time Machine.
[3 Ways] Speed Up Time Machine Backup on Mac
Time Machine backup takes too long? This article offers step-by-step instructions to help you speed up Time Machine backup on your Mac. Read more >>
FAQ about the 'Time Machine stuck on preparing backup' issue
- QHow long should preparing backup Time Machine take?
-
A
The time needed for a Time Machine backup depends on the amount of the data on your Mac, the size of the backup, the connection speed between your Mac and the Time Machine backup disk, and if it is an initial backup.
I made an initial Time Machine backup of 38 GB with my 64 GB Toshiba USB 3.0 flash drive in macOS Big Sur. Preparing backup only takes one or two minutes, and the whole backup finishes in two hours.
- QCan I interrupt Time Machine backup?
-
A
Yes, you can interrupt a Time Machine backup, but it is not suggested. If Time Machine is interrupted, it will resume after everything is set up. Still, it may take longer than an uninterrupted one and potentially cause Time Machine to be stuck on preparing backup.
- QHow do I delete from Time Machine and start over?
-
A
If you want to start over completely with Time Machine, you can erase the backup disk to delete all data stored.
If you just want to delete some old copies of files, you can open Finder and choose your Time Machine backup disk. Then from a folder named Backups.backupdb, choose the sub-folder with your Mac’s name, scroll up and down to find the folder for the data you want to delete. Right-click the folder, then select Move to Trash.
