The built-in function Time Machine in Mac computers helps a lot in data backup and reduces data loss risks. But many Mac users reported that Time Machine failure happens after upgrading to Sequoia or Time Machine causes problems as their Macs running macOS 11.6.1 Big Sur or upgrading to macOS 12 Monterey.
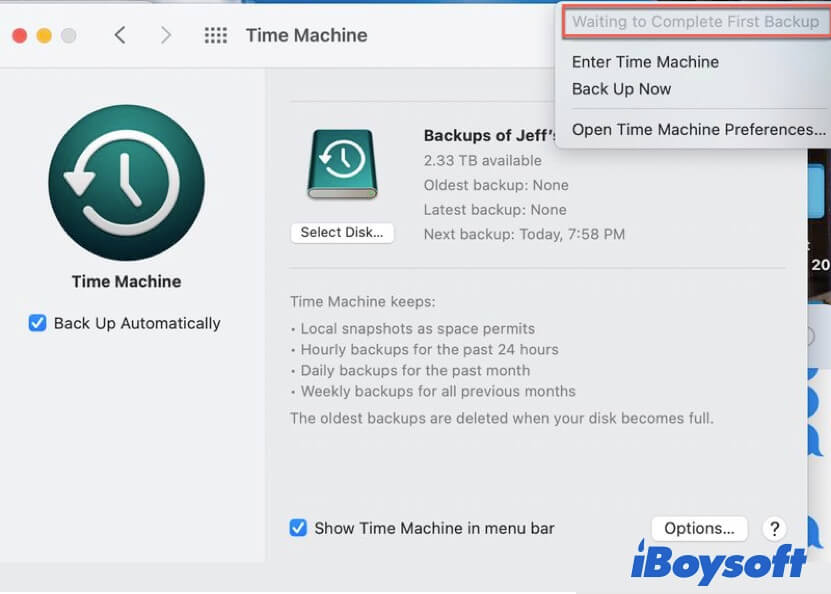
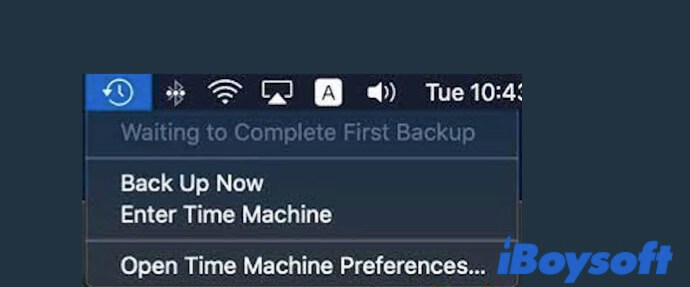
The highlighted complaint is that Time Machine says "Waiting to Complete First Backup" when the initial backup has already finished 100% backup. There are no notifications of Time Machine backup completion. And some users even can't see any files or folders on the Time Machine backup drive.
How to Fix 'Time Machine Can't Find Backup Disk'?
If Time Machine on your Mac can't detect your backup disk, you can try the testified solutions in this post to make it accessible. Read more >>
Here's a true case from the Apple community:
After successfully finishing 100% of backup of my M1 MacBook Air that runs macOS Monterey, the Time Machine Preferences pane showed - Oldest backup (none), Latest Backup (none). And it also indicated the next backup time. When I click the TimeMachine icon on the top bar, it says "Waiting to Complete First Backup".
Believe that you've been wrestling with this issue with kinds of possible solutions but in vain. Thankfully, we've analyzed and concluded efficient solutions for the Time Machine "Waiting to Complete First Backup" error. You can read this post carefully to learn about the reasons and detailed fixes.
Why is Time Machine stuck on "Waiting to Complete First Backup"?
Although the initial Time Machine Backup failure is mainly reported to occur in macOS Big Sur and Monterey, not all users using macOS Big Sur and Monterey come up against it. So, we can't attribute this Time Machine error only to the system bug or software hole.
According to the various scenarios from different people, Time Machine freezes on "Waiting to complete first backup" can be caused by the following reasons:
- Errors in the file system of the Time Machine backup disk.
- Software conflicts between Time Machine and installed third-party software.
- Some directories on your Mac can't be backed up due to "Failed to proactively acquire device lock assertion" or "Failed to acquire device lock assertion" errors.
- Glitches in Time Machine utility.
- System bugs.

If you encounter the error that the volume is the wrong format for a backup while copying Time Machine backup to a new drive, read this post to know why and how to fix it.
How to fix Time Machine "Waiting to Complete First Backup" error?
The Time Machine stuck on the waiting to complete first backup error prevents you from backing up your Mac, and makes the Time Machine backups not visible. Whether your M1 MacBook Air, M1 MacBook Pro, or other new Mac models running macOS Big Sur or Monterey, you can try the following solutions to get out of the Time Machine "Waiting to Complete First Backup" dilemma.
Since the situation varies from person to person, so do the solutions. Therefore, maybe only one or some of the methods offered below apply to you. Please troubleshoot carefully.
Wait until the next backup is complete
If the Time Machine halts on the 100% backup but shows the next backup time, you can wait until the next backup finishes.
Perhaps, you've tried this way. Or, you even perform several rounds of Time Machine backup but still get the same error message "Waiting to Complete First Backup". If so, please move on to the next method.
Run First Aid to check & repair your Time Machine backup disk
Sometimes, the file system of your Time Machine backup disk has small errors that lead to it performing abnormally. That may be the possible cause why some users note that when Time Machine stops at "Waiting to Complete First Backup", they also find no files or folders in the Time Machine backup disk.
If so, you can run First Aid in Disk Utility to check and repair the tiny errors on the Time Machine backup disk. This method may also work when the Time Machine Restore button greyed out.
- Press the Command + Space keys to launch Spotlight Search and type Disk Utility to open it.
- Select the Time Machine backup disk at the left sidebar.
- Click First Aid at the top of the window and then click Run.
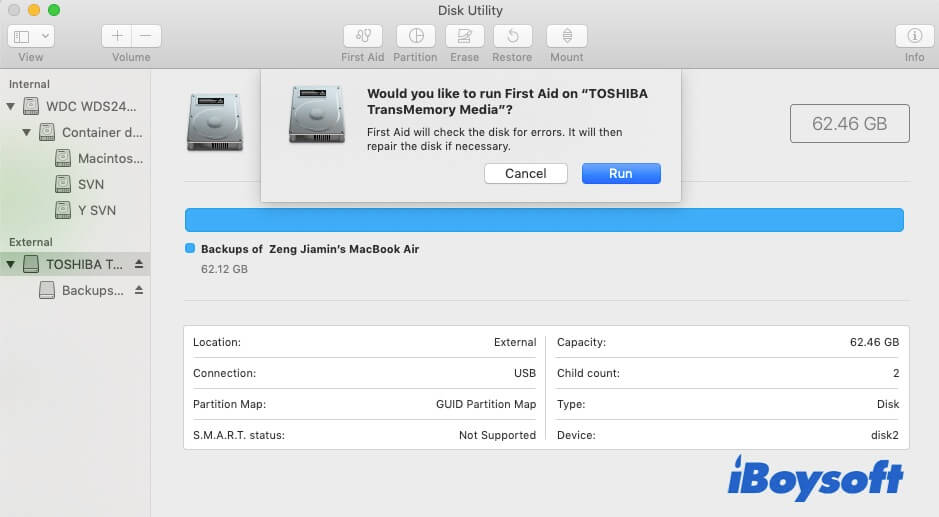
After repairing, wait for a moment to check if Time Machine offers any notice that the initial backup has successfully been performed.
Exclude affected directories & erase the Time Machine backup disk
Perhaps, your Time Machine pauses on the 100% backup point are prevented by some directories that run into "Failed to proactively acquire device lock assertion", or "Failed to acquire device lock assertion" errors. This explanation is given by a user from StackExchange and has been approved.
So, firstly, you need to find out the faulty directories.
Step One: Use Spotlight Search to launch Mac Terminal.
Step Two: Type the following command in Terminal and hit Return.
log show --info --style compact --predicate '(subsystem == "com.apple.TimeMachine") && (eventMessage like[cd] "Failed * acquire device lock assertion*")' --last 24h
Then, it will list the directories that have encountered the "Failed to acquire device lock assertion" error. For example:
~/Library/Containers/com.apple.findmy.FindMyWidgetItems
~/Library/Containers/com.apple.findmy.FindMyWidgetIntentsPeople
Next, add these directories to the Time Machine backup exclusion list.
Step One: Click the Time Machine icon at the top right corner of your screen and select Open Time Machine Preferences.
Step Two: Select Options at the lower-left corner of the pane.
Step Three: Click the + icon and follow the paths of the directories to locate each of them, and then click Exclude.
After excluding the problematic directories, you can reformat your Time Machine backup disk and then back up your Mac once again. Note that formatting a disk will erase all data stored on it.
Step One: Open Disk Utility > select the Time Machine backup disk at the left sidebar.
Step Two: Click Erase. Then, file a disk name, select APFS as the format, and choose GUID Partition Map and click Erase.
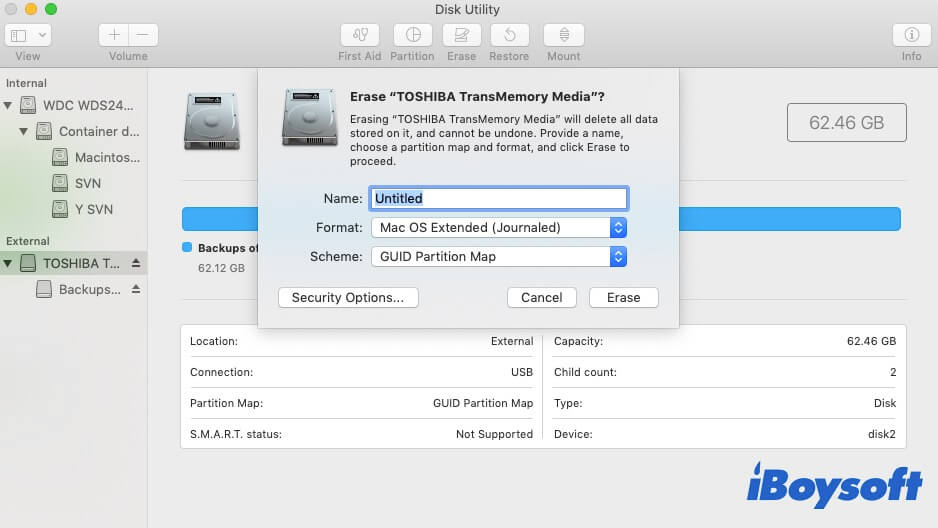
Now, you can proceed with a new run of Time Machine backup. When the Time Machine backup finishes, you won't see the error message "Waiting to complete first backup" anymore.
Back up your Mac in Safe Mode
We can see that Time Machine "Waiting to complete first backup" error mainly appears on M1, M1 Pro, M1 Max MacBooks, and Macs running macOS 11.6.1 Big Sur or macOS 12 Monterey.
So, one possible reason is that the latest systems or Macs with M1 chips are incompatible with some third-party software.
You can boot your Mac in Safe Mode and perform a Time Machine backup from there.
Boot an M1 Mac in Safe Mode:
- Shut down your M1 Mac and wait about 10 seconds to let it completely turn off.
- Press down the power button and release it when you see the startup options and the Options gear icon.

Boot an Intel-based Mac in Safe Mode:
- Completely shut down your Mac.
- Restart your Mac and meanwhile hit down the Shift key.
- Release the Shift key when seeing the login window.
In Safe Mode, you can run a Time Machine backup. This temporary solution is offered by Apple Support and works for most users.
If it also works for you, you can try to uninstall the recently installed third-party software and clear up their cache files from your Mac. Then, you can try your next Time Machine backup in normal mode and check if the error "Waiting to Complete First Backup" shows up again or not.
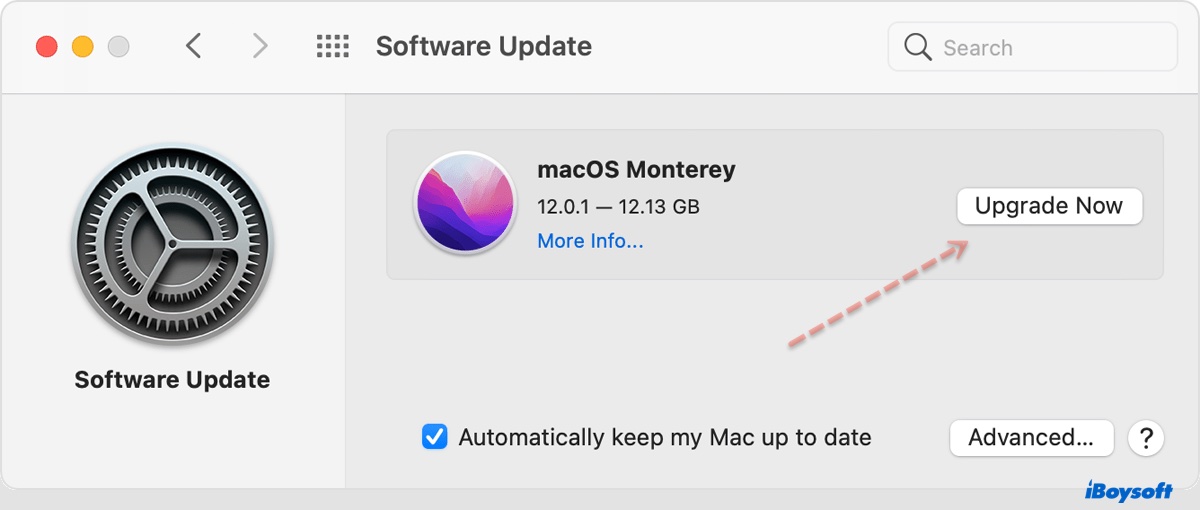
Update Mac or wait for the next macOS update available
Unfortunately, if you back up your Mac with Time Machine in Safe Mode without success, the macOS may have some bugs.
Maybe your Mac is already running the newest macOS. So, all you can do is wait for the next macOS update available. If it doesn't, you can update your Mac. System updates always conclude bug patches and software enhancement.
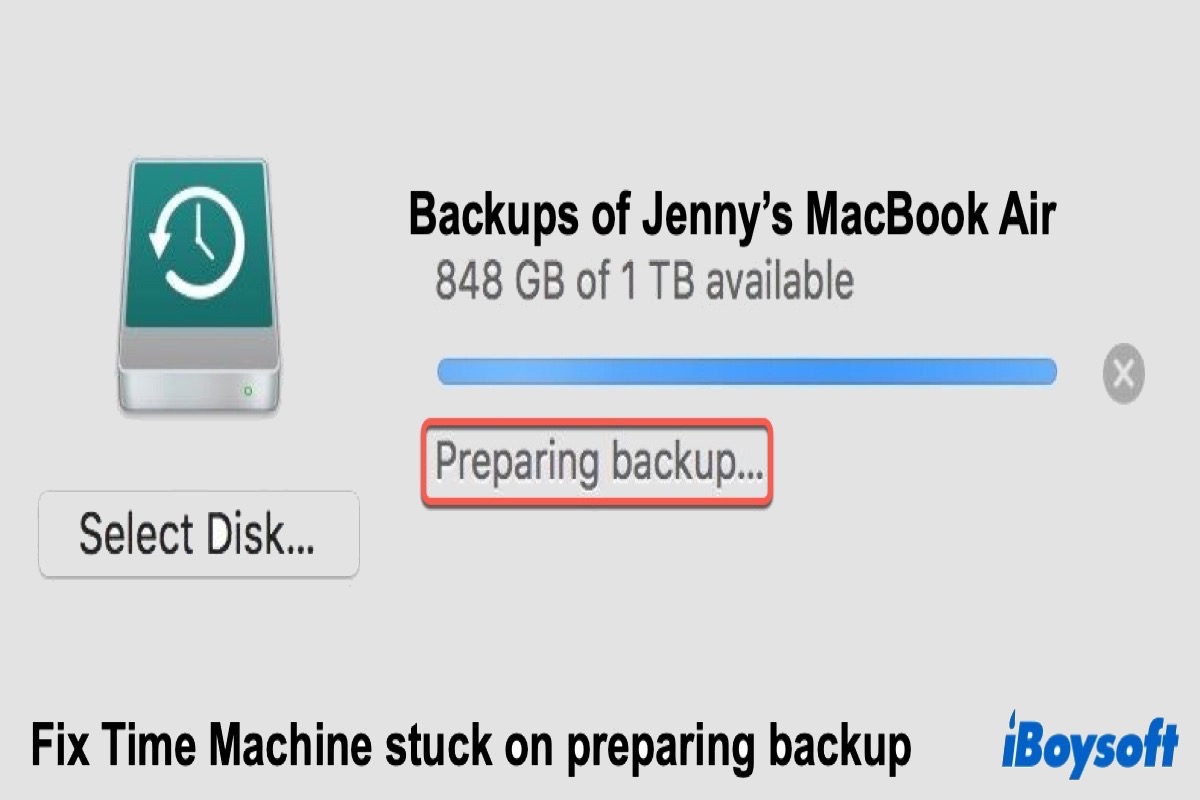
Fix Time Machine Stuck on Preparing Backup
This article shows how to fix your Mac that's stuck on preparing backup. It helps you back up your Mac with Time Machine successfully.Read more >>
FAQs about Time Machine "Waiting to Complete First Backup" error
- Q1. How long should my first Time Machine backup take?
-
A
It depends on how many files you need to back up. If you back up your entire Mac with a lot of files, it may take hours even a day. But the future Time Machine backup will be faster.
- Q2. Can you use your Mac while Time Machine is backing up?
-
A
Yes. Time Machine backup goes on underway. You can continue to use your Mac when a backup proceeds.
- Q3. Why is Mac backup taking so long?
-
A
Because there are lots of files that need to be backed up. Besides, the USB port type of your Time Machine backup disk will also influence data transfer speed. And if you use a NAS (Network-attached Storage) to back up your Mac, the network speed will also affect your backup time.