After everything is ready, you run the specific command in Terminal or use OpenCore to create a bootable USB installer for macOS. However, the error "The bless of the installer disk failed" occurs, rendering you unable to create bootable USB installers on Mac. Or, you may see "The copy of the installer app failed."
Here are some specific error messages you may encounter:
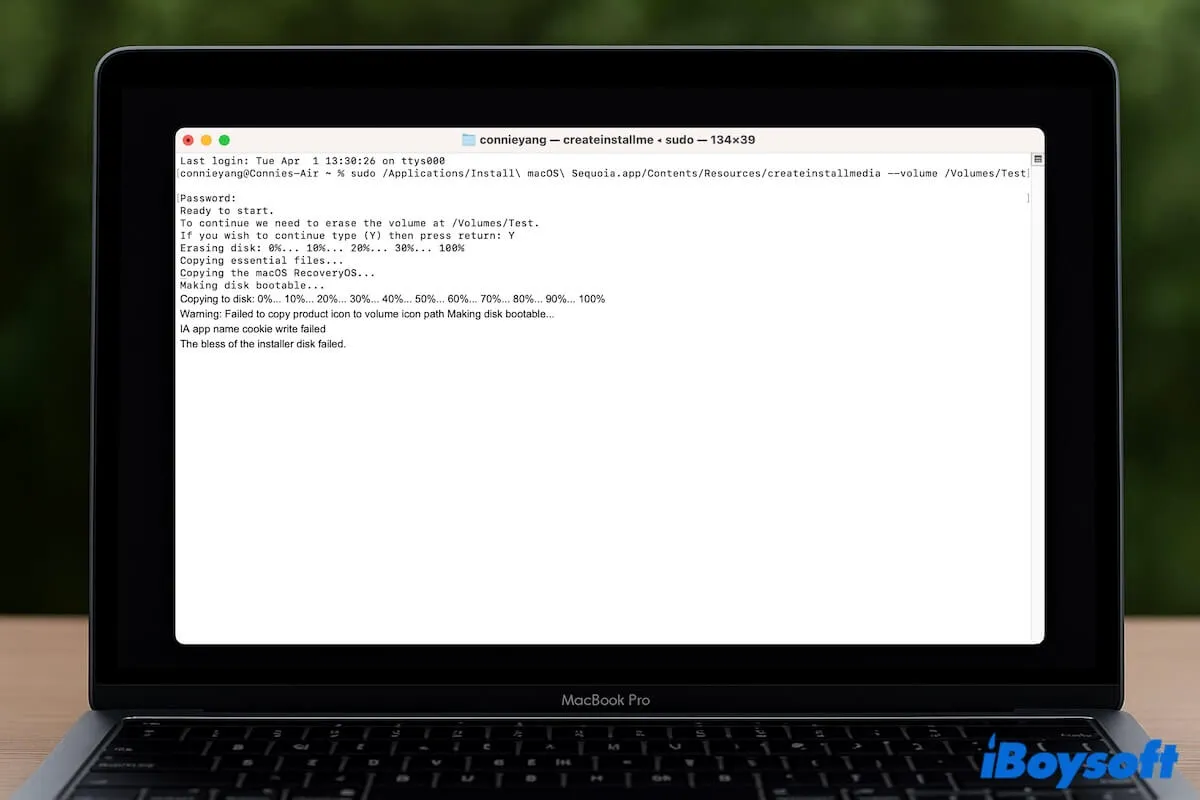
| Warning: Failed to copy product icon to volume icon path Making disk bootable... IA app name cookie write failed The bless of the installer disk failed. |
| Making disk bootable... Couldn't extract BaseSystem to path: /Volumes/Install macOS Big Sur/BaseSystem The bless of the installer disk failed. |
| Making disk bootable... Failed to extract AssetData/boot/Firmware/Manifests/InstallerBoot/* from update bundle The bless of the installer disk failed. |
If you have no clue about where to start, follow our steps. We'll help you fix the error and enable you to continue successfully making a bootable USB installer for macOS Sequoia, Sonoma, Ventura, Monterey, Big Sur, etc.
Quick ways to fix "The bless of the installer disk failed.":
- Switch to an easier way to create a bootable macOS USB installer
- Check if the USB drive is formatted properly
- Grant Full Disk Access to Terminal or OpenCore Legacy Patcher
- Remount the USB drive
- Modify the startup security settings in macOS Recovery
- Delete the macOS installer and re-download
- Resolve the OpenCore Bootloader conflicts
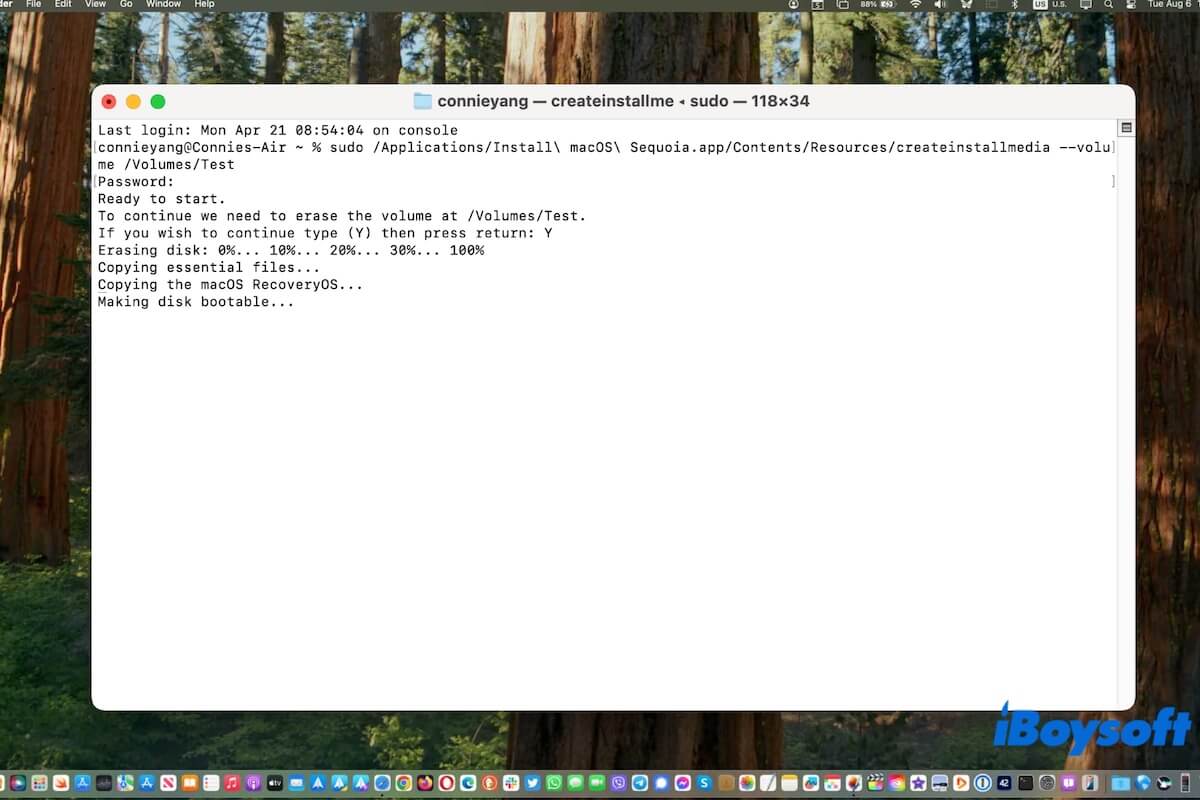
If Terminal is stuck on the 'Making disk bootable' message and won't go further, follow this post to resolve it and finish bootable macOS USB installer creation.
What does the error 'The bless of the installer disk failed' mean
The error "The bless of the installer disk failed." usually occurs when creating a bootable installer for macOS. It means that bless (a system command in macOS used to configure a boot disk) fails to set up the disk properly, making the disk can't be recognized as a bootable medium by the Mac device.
The common reasons for the error message include an improperly formatted USB drive, secure boot blocking, a disk mounting or recognition issue, incorrect OpenCore settings, a broken macOS installer file, or USB drive corruption.
Tell other sufferers what the error means.
How to fix 'The bless of the installer disk failed'
Multiple reasons can trigger the error 'The bless of the installer disk failed' when creating a bootable macOS Sequoia, Sonoma, Ventura, Monterey, etc. USB installer. Therefore, the solutions are not unique. Just follow our troubleshooting tricks below until the problem is fixed.
Switch to an easier way to create a bootable macOS USB installer
It is complicated and error-prone whether using Terminal or OpenCore to create a bootable macOS USB installer. To simplify the process and improve the creation success rate, we suggest that you use a professional tool to help you.
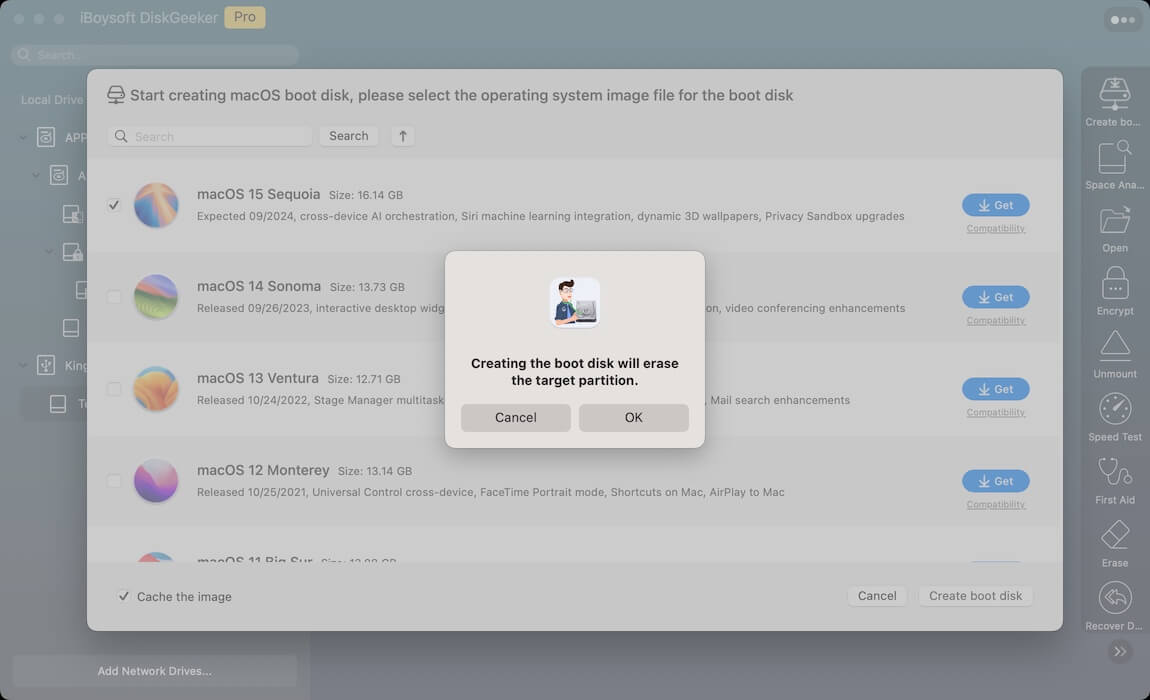
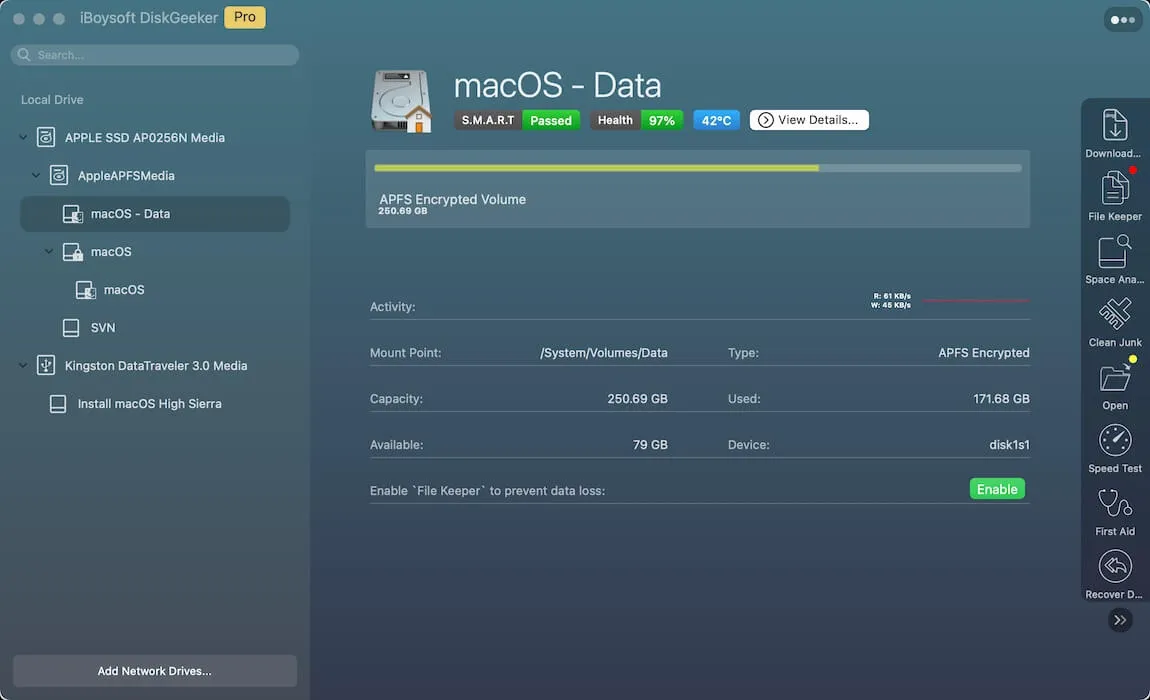
iBoysoft DiskGeeker is a multi-functional disk management tool that supports quickly downloading macOS DMG files and creating a bootable disk installer without using Terminal.
Here's how:
- Free download, install, and open iBoysoft DiskGeeker on your Mac.
- Connect the USB drive to your Mac.
Remember to back up data on the drive, as creating a bootable installer will erase data on it. - Select a volume on the drive and click Create boot disk > Continue.

- Choose a desired macOS version and click Create boot disk > OK.
- Wait for the macOS download.
During the process, ensure your internet is stable. - Click OK on the prompt to start bootable USB installer creation and wait for the process to finish.
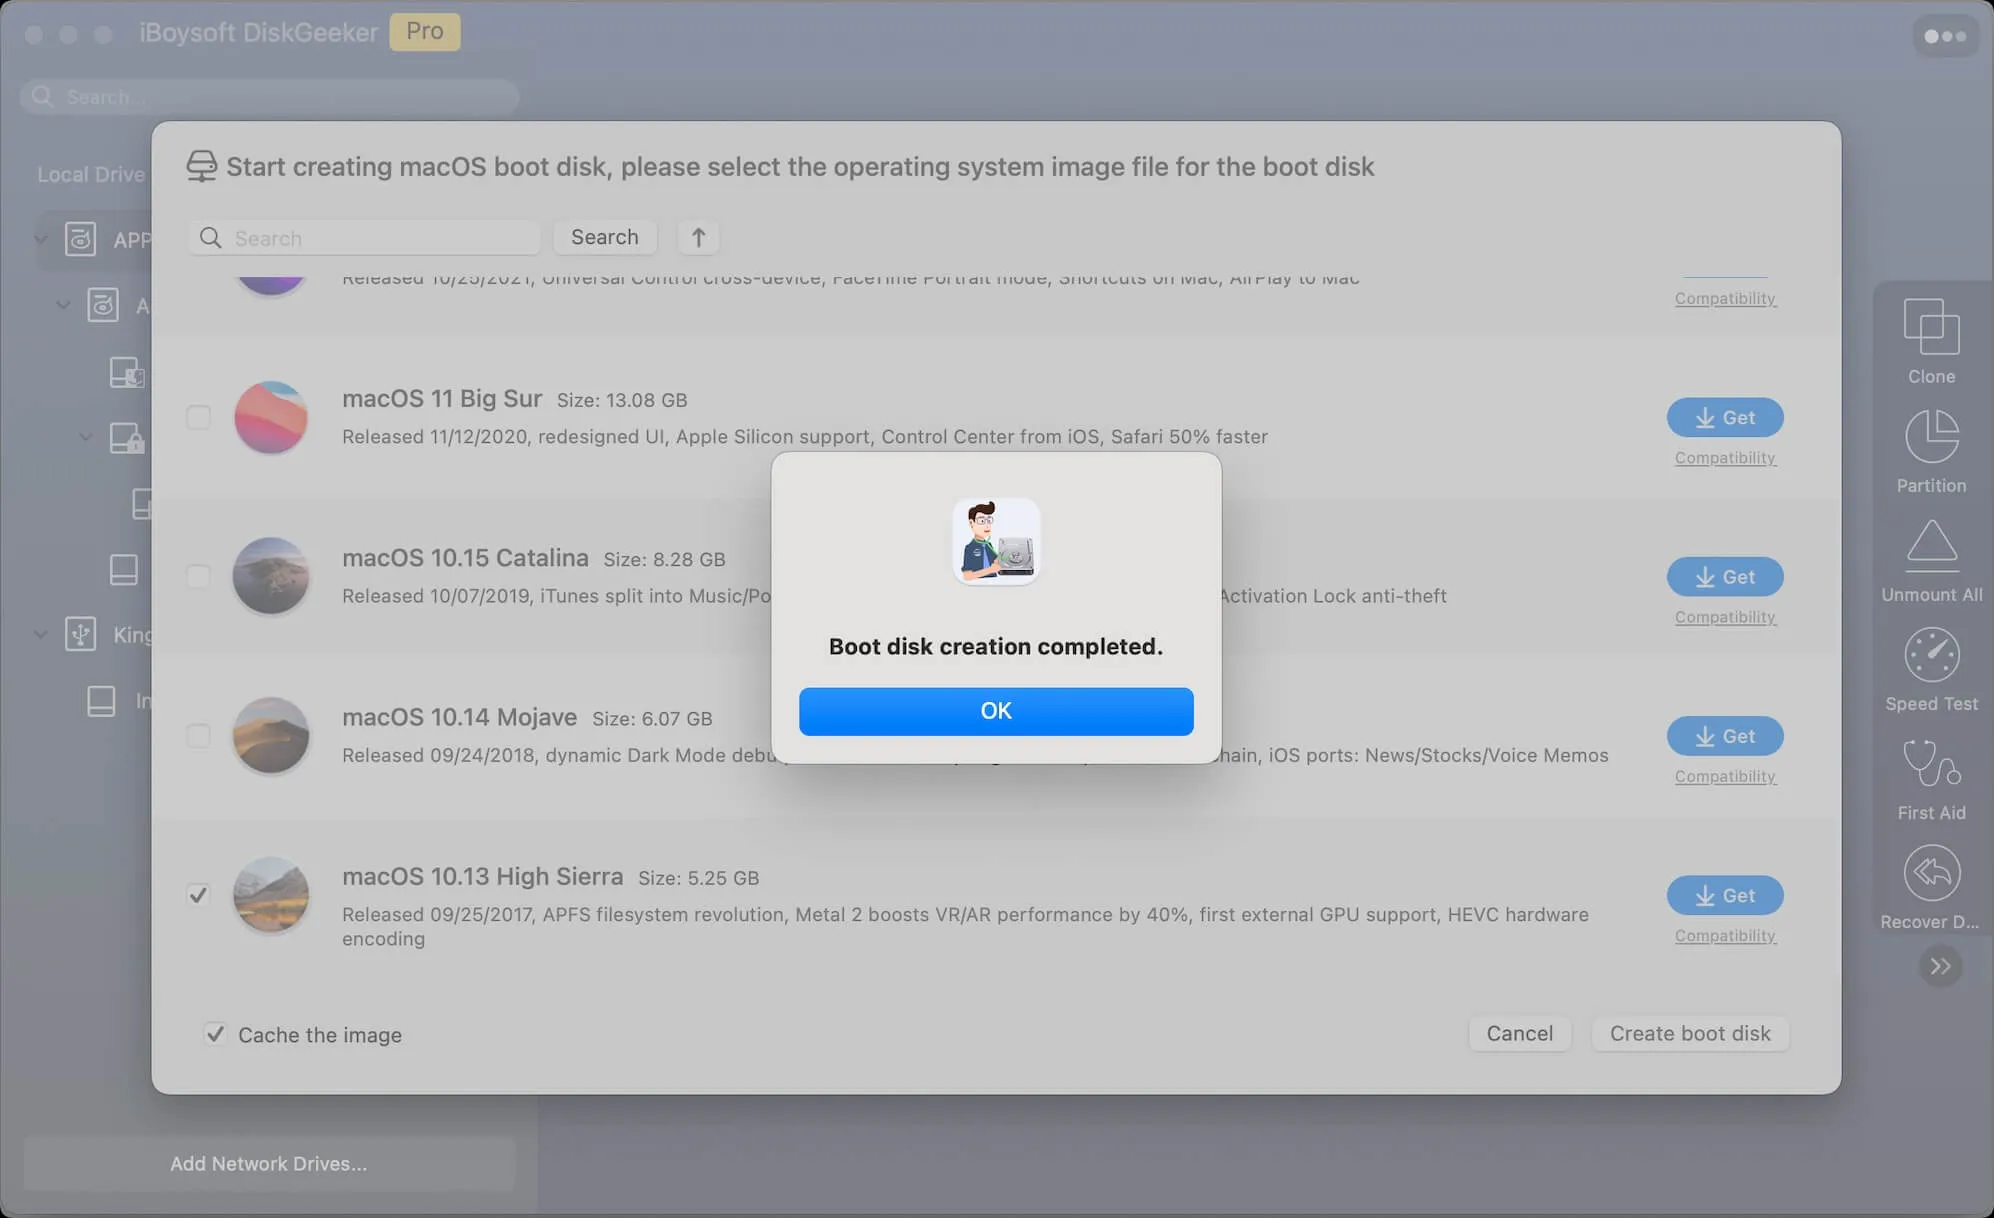
Now, you get a bootable macOS USB installer. You can use it to boot up your unbootable Mac, make tests on multiple compatible Macs, or boot an unsupported Mac with the assistance of OpenCore Legacy Patcher.
Also, you could try DiskMaker X. This tool only supports macOS Catalina or earlier.
Share this easy-to-operate tool to help more people create bootable macOS installers with only a few clicks.
Check if the USB drive is formatted properly
Terminal can commonly remind you and erase your USB drive if the drive is not formatted properly; but sometimes it may have trouble identifying the file system and partition scheme of the disk. Consequently, the 'The bless of the installer disk failed' error pops up.
Thus, go to Disk Utility to check if the drive is formatted correctly. In other words, if you will use the bootable USB on an Intel-based Mac, it should be formatted as Mac OS Extended (HFS+) in GUID Partition Map. If you create the bootable USB installer for an Apple silicon Mac, format it to APFS with GUID Partition Map.
If the USB drive isn't formatted properly, follow the steps to manually erase it.
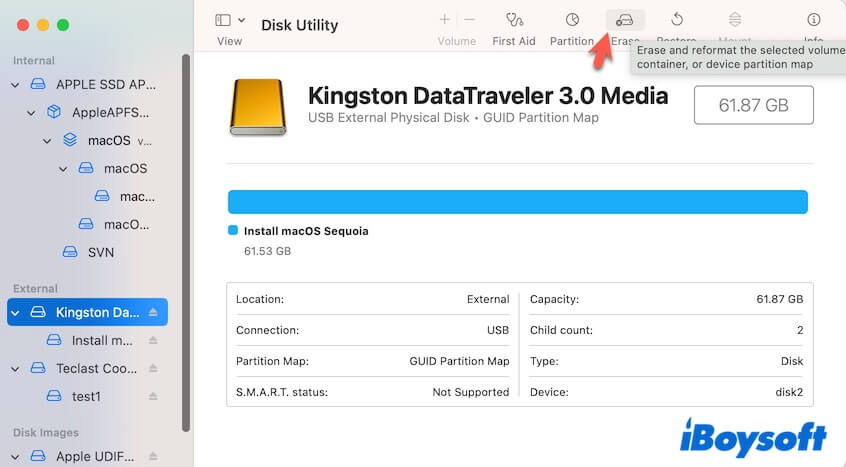
- Open Disk Utility and click the View button to show all devices.
- Select the USB drive (rather than the volume on it) and click Erase.
- Name the drive, choose Mac OS Extended (Journaled) or APFS to be the format, and set GUID Partition Map as the scheme.
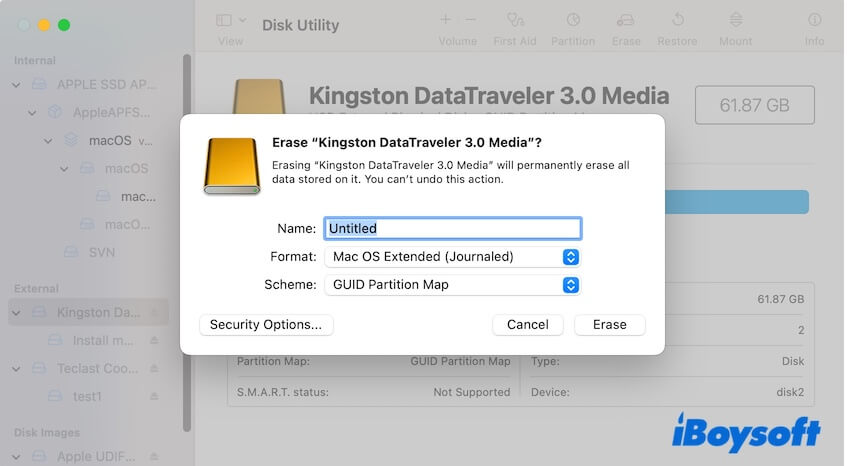
- Click Erase.
Then, re-open Terminal or OpenCore to re-create the bootable macOS installer.
Grant Full Disk Access to Terminal or OpenCore Legacy Patcher
If you receive the error "The bless of the installer disk failed" when using OpenCore or Terminal, go to check if you have enabled Full Disk Access to Terminal or OpenCore Legacy Patcher (depends on which one you use to create the bootable USB installer).
Enabling Full Disk Access for Terminal or OpenCore allows it to access all files on the system (including system files and user data) and ensure the success of bootable installer creation.
- Click the Apple menu > System Settings Privacy & Security > Full Disk Access.
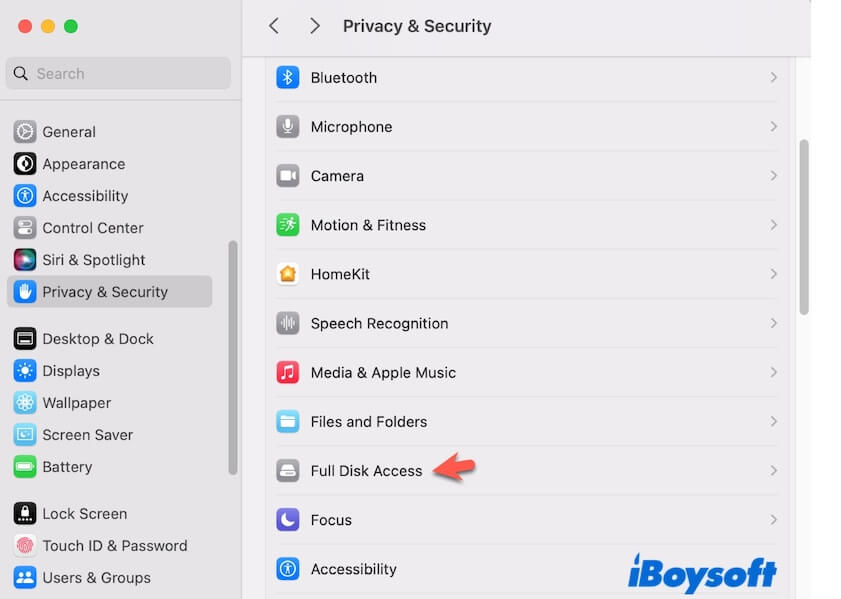
- Enable the button next to Terminal and OpenCore Legacy Patcher (if you use it).
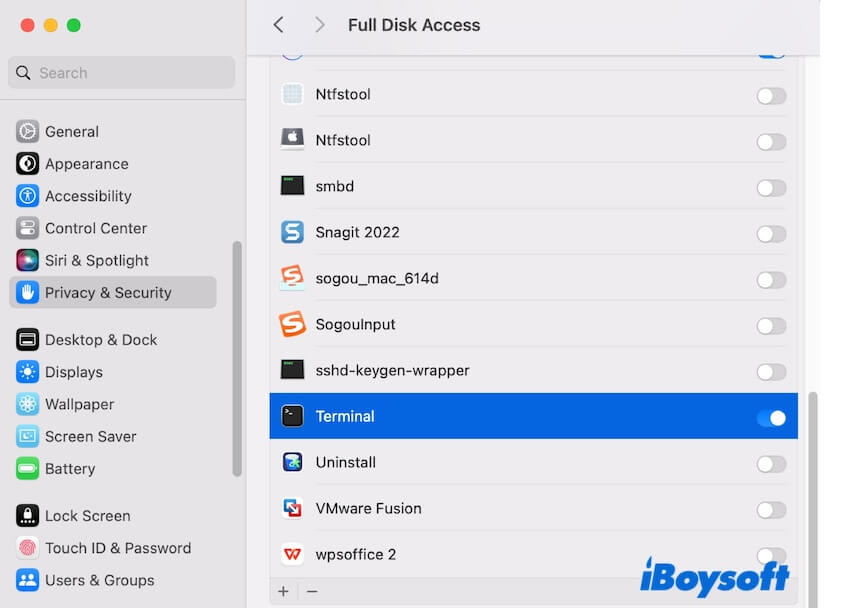
Then, retry creating the bootable installer with Terminal or OpenCore.
Remount the USB drive
When you use Terminal to create a bootable macOS installer on the USB drive, temporary errors in Terminal or the system may make the USB drive fail to be recognized properly. Therefore, macOS fails to mark the USB drive as a bootable medium and sends you the "The bless of the installer disk failed" error.
You can reconnect the USB drive to let the system automatically remount it, or go to Disk Utility and click the Unmount/Mount button to manually remount it.
After that, create the bootable USB installer from scratch and check if a similar error hint shows up on your Mac again.
Modify the startup security settings in macOS Recovery
Usually, we need to change the startup security settings only when trying to boot a Mac from a USB bootable device, but the startup security protection may also prevent USB drives from being blessed when creating a bootable installer.
You can try to reduce the startup security settings and then check if the error message goes away.
- Enter macOS Recovery Mode.
To go into macOS Recovery Mode, restart the Mac and simultaneously press the Command + R keys until you see the Apple logo. If you have an Apple silicon Mac, press and hold down the power button until the startup options show up, choose Options, and click Continue. - Click Utilities on the top menu bar and select Startup Security Utilities.
- Choose "Medium Security" in the Secure Boot section.
- Choose "Allow booting from external or removable media" in the Allowed Boot Media section.
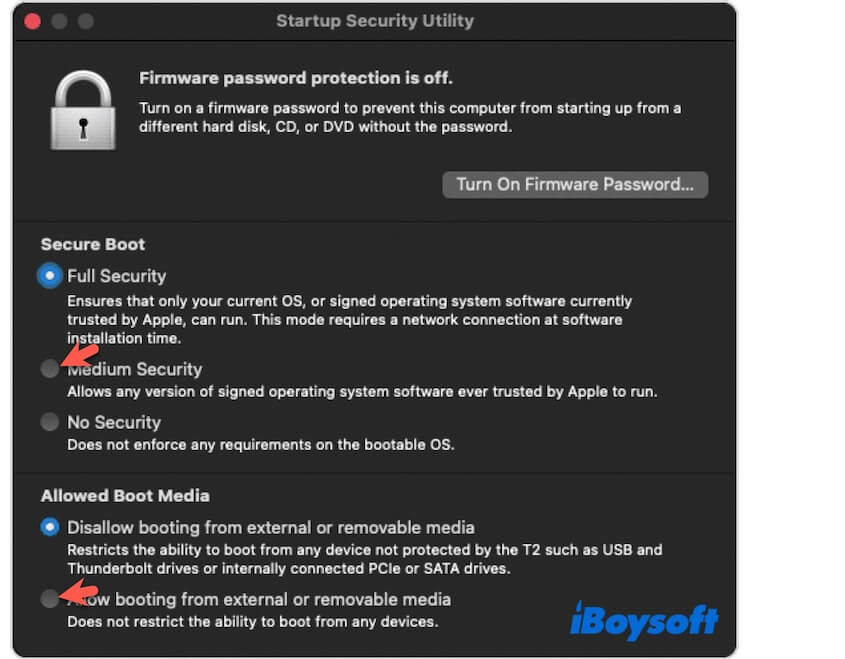
- Restart the Mac.
Now, go to Terminal to try creating the bootable USB installer again.
Delete the macOS installer and re-download
Perhaps, the macOS installer file is corrupted or not intact, causing the creation failure and the error "The bless of the installer disk failed" on your Mac.
You can try re-downloading the macOS installer, but be cautious about where you get it from. While there are many sources available, not all provide complete or usable versions. We recommend downloading the macOS installer from a trusted source to ensure reliability.
iBoysoft DiskGeeker is an Apple-trusted application that offers very fast macOS DMG file download for bootable installer creation, including macOS High Sierra, macOS Mojave, macOS Catalina, macOS Big Sur, macOS Monterey, macOS Ventura, macOS Sonoma, and macOS Sequoia.
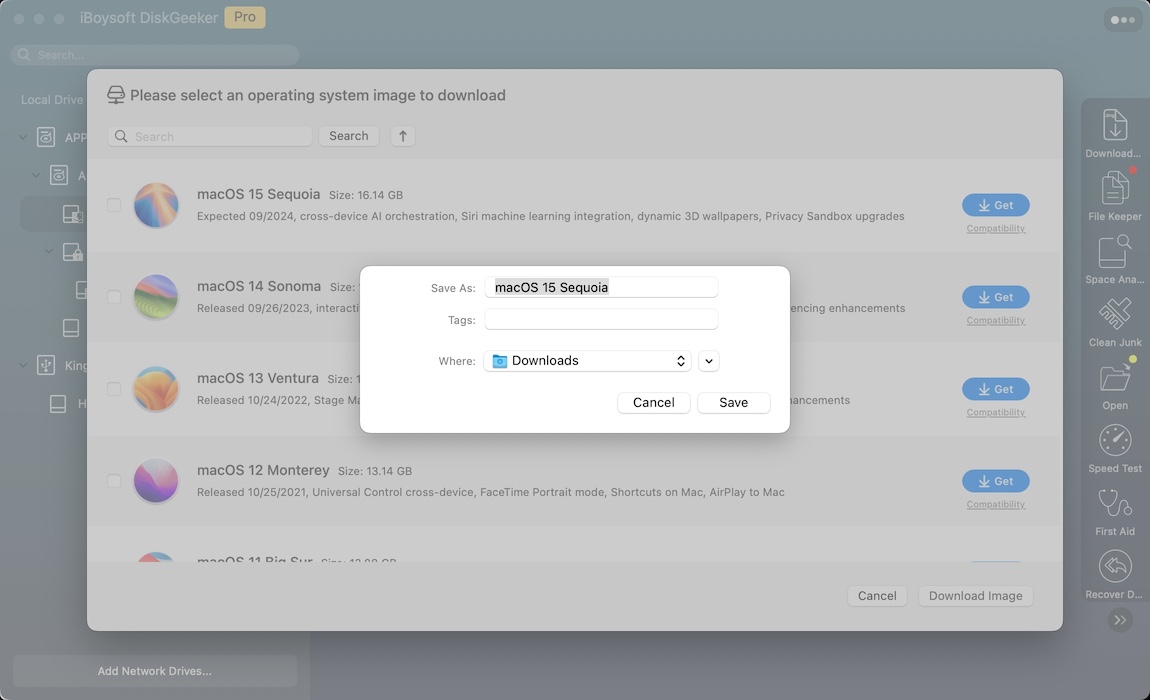
- Free download, install, and launch iBoysoft DiskGeeker on your Mac.
- Select the startup volume and click Download Image.
- Click Get next to your desired macOS.
Don't forget to click Compatibility to check the hardware compatibility of the OS. - Choose where to save the macOS DMG file and wait for the download to finish.
Resolve the OpenCore Bootloader conflicts
If you use OpenCore to create a bootable macOS installer, note that incorrect settings in config.plist can prevent the system from recognizing the USB as bootable, and give the blessing failure error message.
Go to Misc > Security and ensure that SecureBootModel is set to Disabled in config.plist.
If this post helps you resolve the "The bless of the installer disk failed" error that blocks you from creating a bootable macOS USB installer, share it with others.