A bootable macOS SD card can be useful in various scenarios. It can boot up your Mac when it crashes, help you install macOS from the SD card, and allow you to efficiently install the same macOS on multiple Macs without downloading the installer repeatedly.
This is not to be confused with running macOS from the SD card. If you're looking to boot from an SD card to directly work with a different macOS version, you should install macOS on the SD card instead. This post will touch on both aspects, helping you create a bootable SD card for macOS or install macOS on the SD card.
Here's a summary of the two types of bootable SD cards and their functions.
| Types of bootable SD card | Functions |
| A bootable macOS SD card installer | 1. Boot your Mac into macOS Recovery 2. Access utilities in Recovery Mode 3. Install macOS on one or more Macs |
| A bootable SD card with macOS installed | Run a different macOS from the SD card without impacting the system on your Mac |
Note: To create a bootable SD card on a Mac, use iBoysoft DiskGeeker. This install disk creator allows you to create a bootable SD card or USB drive with various macOS versions. It's easy to use and doesn't require any technical knowledge.
Follow these steps to make the SD card bootable:
* Remember to back up the important files on the SD card, as the process will delete all of its content.
Step 1: Free download, install, and launch iBoysoft DiskGeeker.
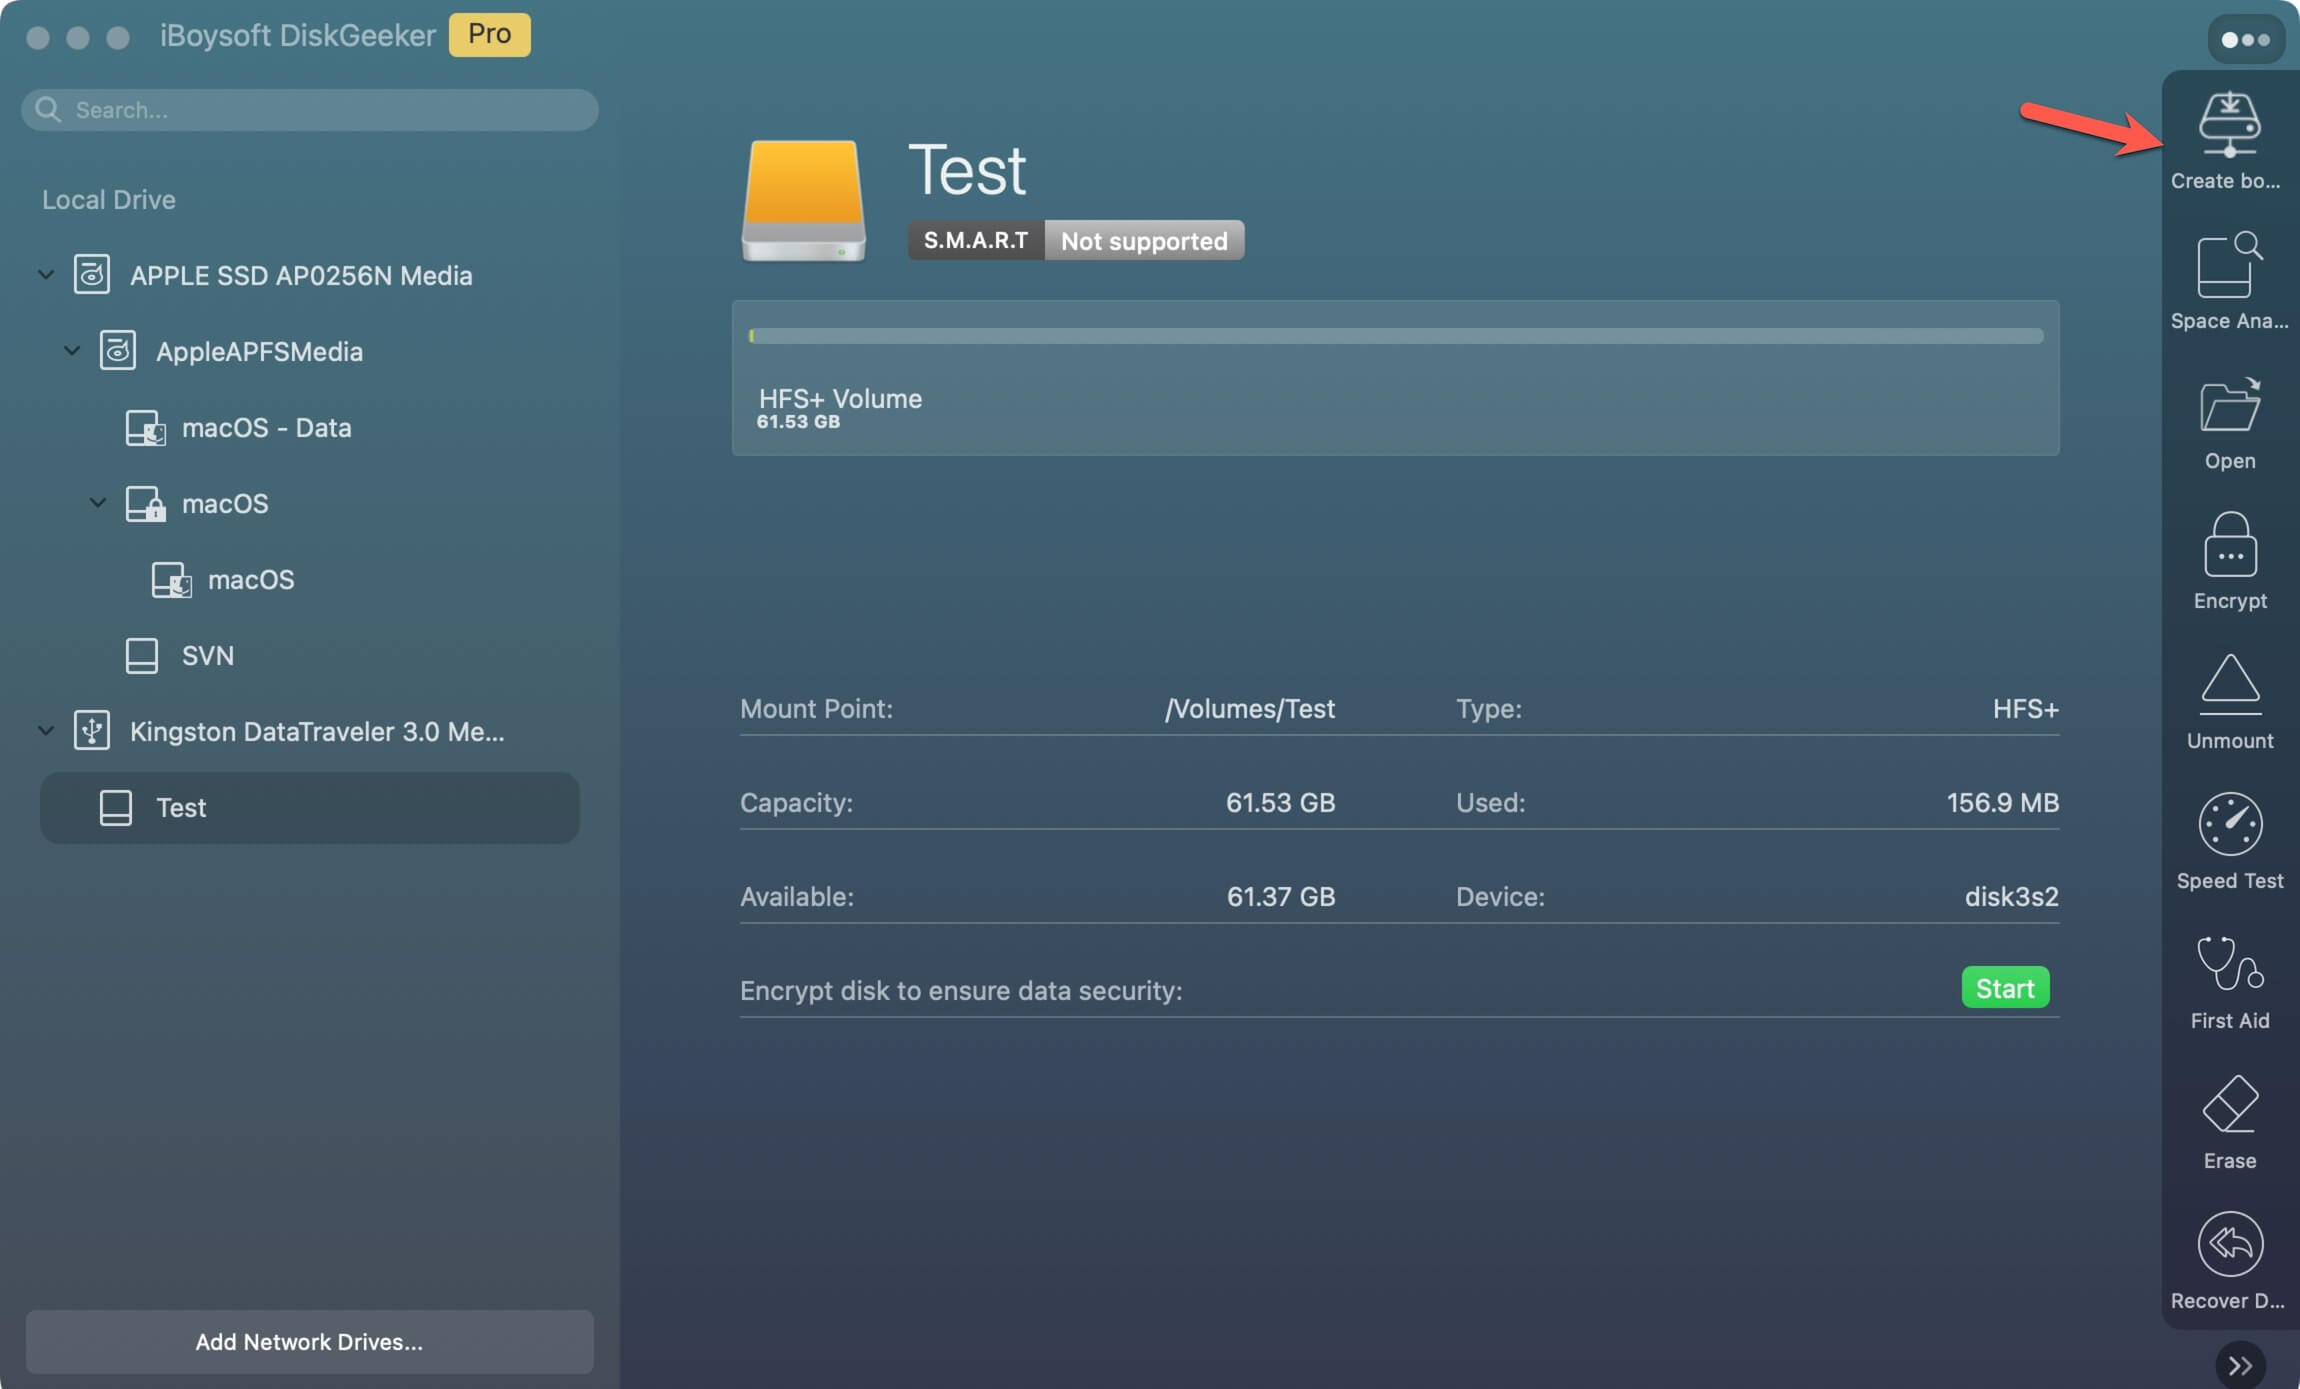
Step 2: Choose your SD card from the left side and click Create boot disk.
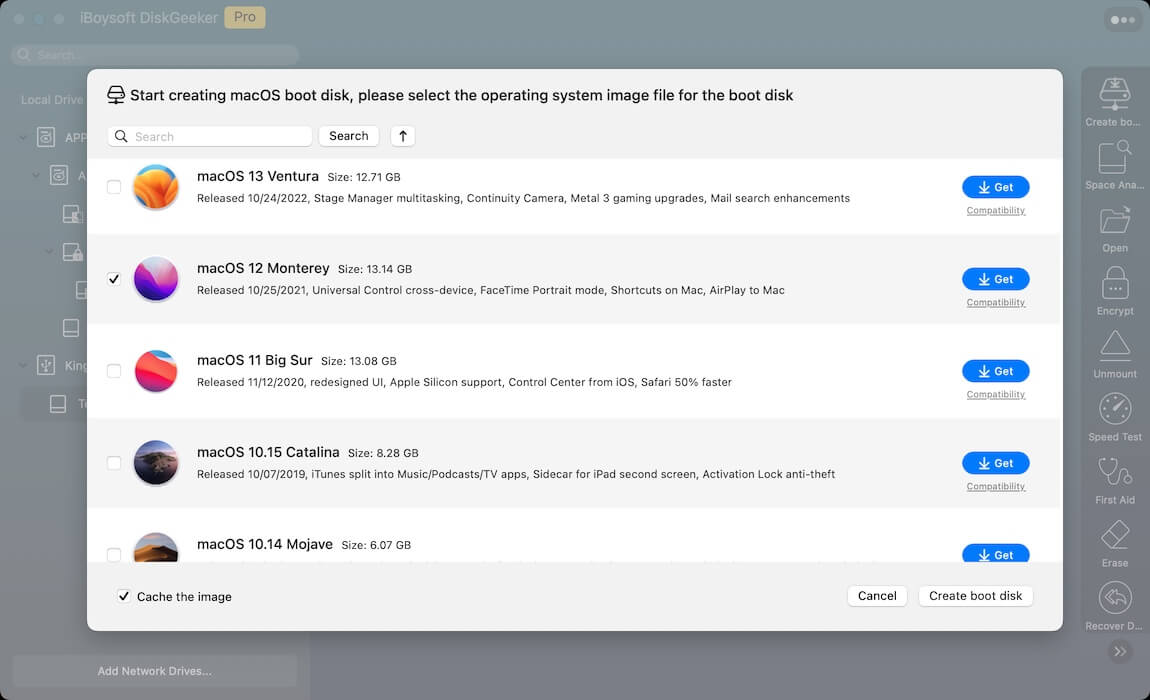
Step 3: Select the macOS version you want to use and click Create boot disk again.
Step 4: Wait while the app is creating the bootable SD card.
Besides, we'll also discuss how to make a Windows 10 bootable SD card on Mac in case your Windows PC is having issues booting up.
How to create a macOS bootable SD card on Mac?
Typically, two ways exist to make an SD card bootable for macOS. One is to utilize a boot media creator like iBoysoft DiskGeeker, which is fast and doesn't need any technical commands.
Another one is to manually create a bootable SD card from Terminal. Since it requires searching for the macOS installer and executing commands to make the SD card bootable, it takes time and may fail if done incorrectly.
If you want to make a bootable SD card manually, follow the steps below:
Step 1: Preparations before creating a macOS bootable SD card on Mac
Before creating a macOS bootable SD card, you should prepare the following items:
① An SD card with at least 16GB of available storage.
The size of a macOS installer varies, depending on the version. Earlier versions of macOS are smaller, about 5- 8 GB. But newer versions are larger, around 12GB or more. An SD card with 16GB or more space is recommended to accommodate any installers. However, if you need to install macOS on the SD card, it should have a much larger size.
② Back up data on the SD card.
The SD card will be reformatted to work on macOS, which will remove all data on it. If it contains important files, back it up before proceeding.
③ A full installer of the macOS version you wish to use.
To create a bootable installer for macOS, you must download the full macOS installer instead of a combo or delta update. Depending on the macOS version you're attempting to get, you can either download the installer from the Mac App Store or the Apple server.
To download macOS High Sierra or a later version, click the corresponding link below to access the Mac App Store.
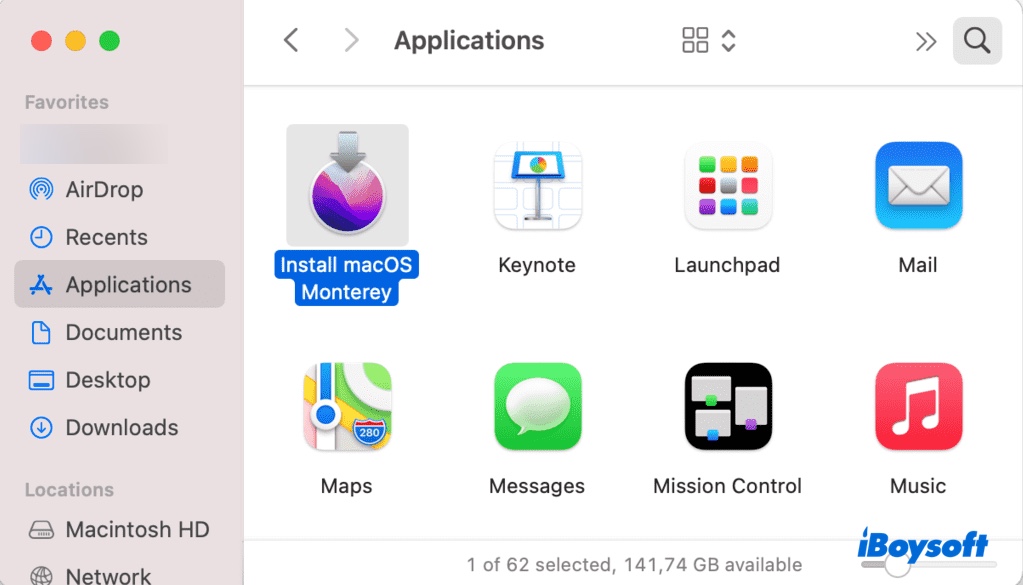
The App Store allows you to download the application file (.app) of a selected macOS installer. After the download is complete, you should find the installer in your Applications folder, named similar to "Install macOS Sonoma.app."
To get macOS Sierra or an earlier version, open the matching link below in Safari.
These older macOS versions are packaged into disk images (.dmg). To create a bootable macOS SD card from the DMG file, you must install the installer into your Applications folder. Here's how:
- Double-click the .dmg file to open it.
- Double-click the .pkg file inside and follow the onscreen instructions to extract the installer to the Applications folder.
Note: The methods above are only available on compatible Mac computers. If you're trying to make a bootable SD card installer on an incompatible Mac, look for the dmg file of the installer in a browser.
Step 2: Format SD card on Mac
The next step is to format your SD card with the GUID partition Map, which is essential for the bootable installer and the macOS installation if you plan to install macOS on the SD card.
- Ensure your SD card is properly connected to your Mac.
- Open Disk Utility from the Applications > Utilities folder.
- Click View > Show All Devices.
- Select the physical card at the top and click Erase. (The card's name likely resembles "SD Card Reader Media.")
- Name your SD card MyVolume.
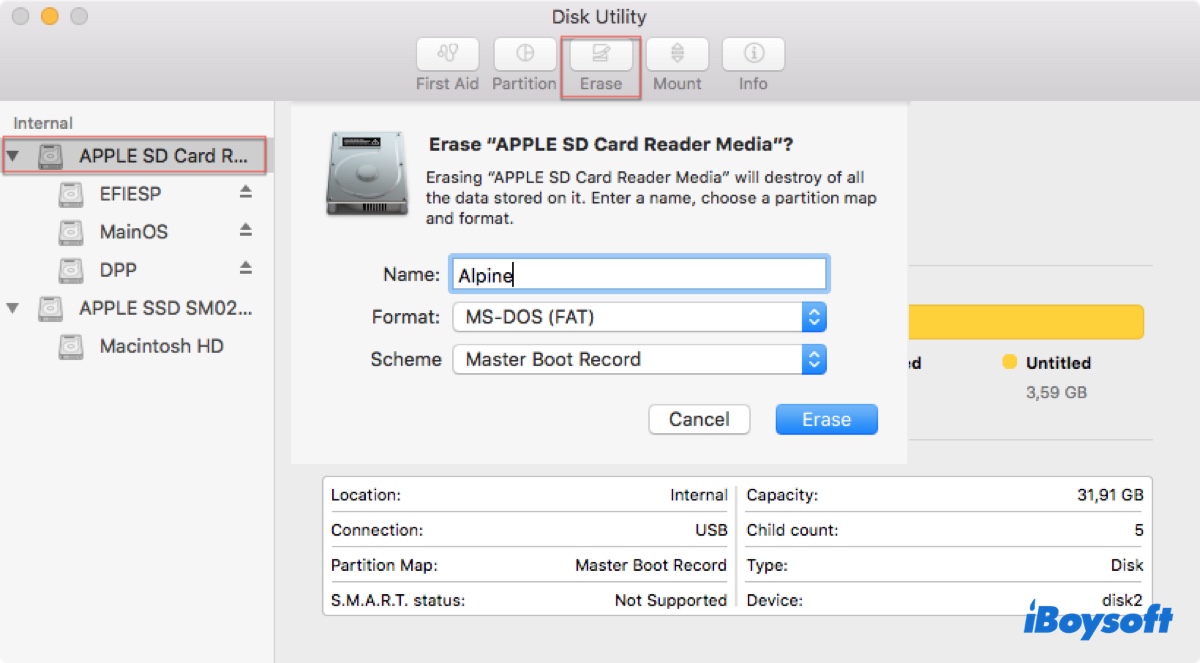
- Set the format to Mac OS Extended (Journaled).
- Choose GUID Partition Map as the scheme.
- Tap Erase.
After the erase process finishes, your SD card is ready to be bootable or to start the macOS installation.
If you intend to create a bootable installer that starts your Mac in Recovery Mode and allows you to access Disk Utility or Terminal, install macOS on your Mac, or restore from Time Machine, continue with Step 3.
If you want to make an alternative startup disk, from which you can run another macOS version, open the installer from your Applications folder and follow its instructions to install it on your SD card.
Step 3: Make SD card bootable on Mac
Here comes the most important step for making your SD card bootable on Mac: use the createinstallmedia tool in Terminal to create a bootable installation media.
- Open Terminal from the Applications > Utilities folder.
- Type one of the following commands into Terminal and hit Enter. (If your Mac is using macOS Sierra or earlier, add --applicationpath to the command, followed by the installer path, similar to the command for El Capitan.
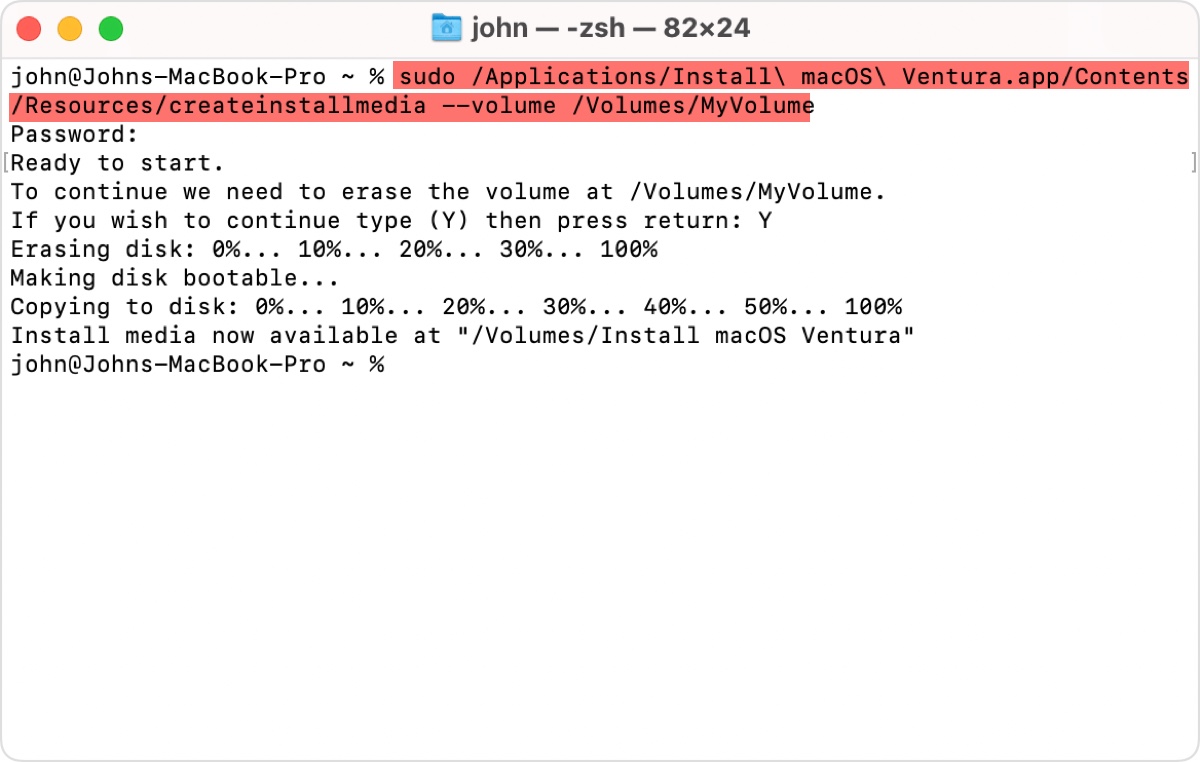
macOS Sonoma:sudo /Applications/Install\ macOS\ Sonoma.app/Contents/Resources/createinstallmedia --volume /Volumes/MyVolume macOS Ventura:sudo /Applications/Install\ macOS\ Ventura.app/Contents/Resources/createinstallmedia --volume /Volumes/MyVolume macOS Monterey: sudo /Applications/Install\ macOS\ Monterey.app/Contents/Resources/createinstallmedia --volume /Volumes/MyVolume macOS Big Sur:sudo /Applications/Install\ macOS\ Big\ Sur.app/Contents/Resources/createinstallmedia --volume /Volumes/MyVolume macOS Catalina:sudo /Applications/Install\ macOS\ Catalina.app/Contents/Resources/createinstallmedia --volume /Volumes/MyVolume macOS Mojave:sudo /Applications/Install\ macOS\ Mojave.app/Contents/Resources/createinstallmedia --volume /Volumes/MyVolume macOS High Sierra:sudo /Applications/Install\ macOS\ High\ Sierra.app/Contents/Resources/createinstallmedia --volume /Volumes/MyVolumeOS X El Capitan:sudo /Applications/Install\ OS\ X\ El\ Capitan.app/Contents/Resources/createinstallmedia --volume /Volumes/MyVolume --applicationpath /Applications/Install\ OS\ X\ El\ Capitan.app - Type your administrator password and hit Enter. (The password won't appear on the screen.)
- Type Y to confirm that you want to erase the volume and hit Enter.
- Click Ok when you see an alert that Terminal wants to access files on a removable media.
- Exit Terminal when the message, "Install media now available at "/Volumes/Install macOS (version)" shows up.
Step 4: Boot Mac from SD card (Optional)
Once you have a bootable installer or boot media where macOS is installed, you can boot your Mac with it. The steps vary based on whether the Mac is Intel-based or Apple-Silicon based.
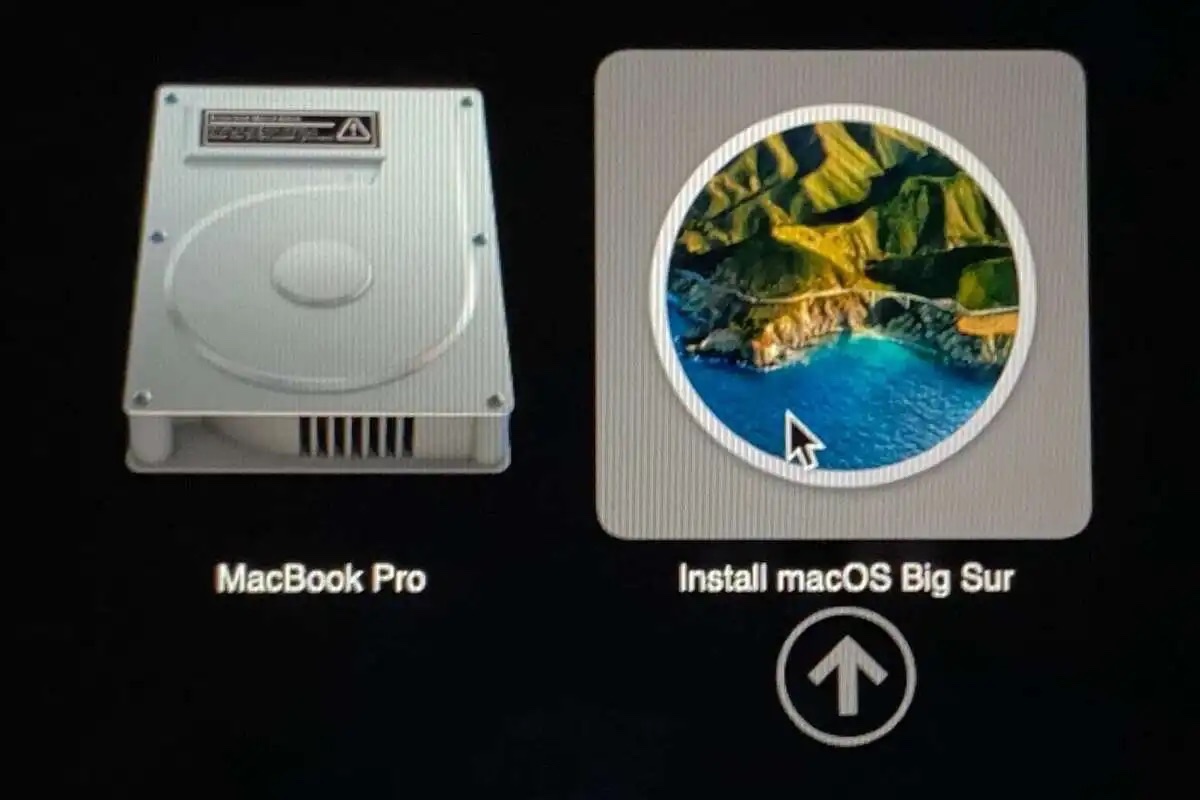
To boot an Intel-based Mac:
Note: If it's an Intel Mac with a T2 chip, you must allow booting from external media in Startup Security Utility first. Otherwise, you can't start up from the installer.
- Shut down your Mac.
- Press the power button, then immediately press and hold the Option (Alt) key.
- Release the key when you see the bootable volumes.
- Select your bootable SD card and press Enter or the onscreen arrow.
To boot an Apple Silicon Mac:
- Turn off your Mac.
- Press the power button until you see "Loading Startup Options."
- Select your bootable SD card and click Continue.
Here, you should be able to access the Recovery Mode and perform the intended tasks if you have a bootable SD card installer. If you have installed macOS on the SD card, you can run your Mac from the SD card now.
Step 5: Install macOS from SD card (Optional)
If you're making the bootable SD card to install macOS on a Mac, click "Install macOS (version)" from the macOS Utilities window, then click Continue and follow the instructions on the screen to finish the installation.
This is how to make an SD card bootable on Mac from a DMG or installer. Share it if you find it useful!
How to create a Windows 10/11 bootable SD card on Mac?
If your Windows PC can't boot up and only a Mac is available, you can create a Windows 10/11 bootable SD card on Mac. There are several ways to achieve that.
- Create a bootable Windows 10/11 SD card on Mac using Terminal: The process involves erasing your SD card > Mount the Windows ISO file in Terminal > Install Homebrew from Terminal > Install wimlib to split files larger than 4 GB > Copy all files to the SD card.
- Create a Windows 10/11 bootable SD card on Mac with Disk Utility: This method erases the SD card in Disk Utility and then copies the Windows ISO file to the SD card.
- Create a Windows 10/11 bootable SD card on Mac with Boot Camp Assistant: This process utilizes the option "Create a Windows 10 or later install disk" in Boot Camp to make a bootable Windows SD card.
To learn more about the above methods, keep reading: How to Create Windows 10 Bootable USB on Mac?
Share this guide to help others make an SD card bootable on Mac.