The public release of macOS Ventura in late October might be the biggest thing for macOS this year. As the successor of macOS Monterey, Ventura adds a lot of new features and improvements to your Mac, including a multitasking tool Stage Manager, a new dark mode, performance improvements, bug fixes, etc.
After updating Mac to macOS Ventura, some users report that there are a few Ventura problems that occur during or after the update process. Among them, missing photos after macOS Ventura update is a tricky one. If you are unlucky to encounter the same issue, don't panic because you come to the right place. In this post, you'll learn how to recover lost photos after macOS Ventura update in several ways. Keep reading!
Why have photos disappeared from Mac after macOS Ventura update?
For your information, the macOS update doesn't delete any files stored on your Mac computer if the update process goes smoothly and normally. It's hard to determine what is the exact reason that leads to photos missing from Mac after updating to Ventura, but here are the possible reasons for this error, you can take a look:
- Mac crashing when updating to macOS Ventura.
- Some applications on your Mac are not compatible with the latest operating system.
- Not enough space to install macOS Ventura and data is overwritten.
- Photos are accidentally deleted or mistakenly removed without knowing.
- The location of stored photos is changed after the macOS update.
If you're experiencing this problem, there are a few things you can do. First, you can check to see if your photos are moved to a different location after the update. If not, move to the next section and try the solutions provided there to recover lost photos after macOS Ventura update.
Think this content is informative? Share it with more people!
How to recover missing photos after macOS Ventura update?
In this part, you'll find five feasible solutions to get your photos back. You can recover lost photos with the help of data recovery software, restore them using Time Machine or iCloud, find missing images in the Photos app, and put back accidentally deleted photos from the Trash. OK, without further ado, let's get started!
Solution 1: Recover lost photos using data recovery software
If you recently update your Mac to Ventura and find there are photos missing from Mac after the update, don't panic. iBoysoft Data Recovery for Mac can do you a favor. It is the most powerful Mac data recovery software that can scan and recover files after macOS Ventura update. Despite photos, this data recovery tool supports recovering over 1,000 files of different formats, including documents, videos, audio, music, emails, etc.
iBoysoft Data Recovery for Mac is fully compatible with both Intel-based and Apple Silicon Macs. It supports macOS Ventura/Monterey/Big Sur/Catalina/Mojave/High Sierra/Sierra and Mac OS X 10.11 El Capitan. Here's how to recover deleted or lost photos after macOS Ventura update using iBoysoft Data Recovery for Mac:
- Click the above button to download iBoysoft Data Recovery for Mac on your computer, then follow the on-screen wizard to finish the installation.
- Lunch iBoysoft Data Recovery for Mac, select the disk where you lose photos from after the macOS Ventura update in the main interface, then click Search for Lost Data.
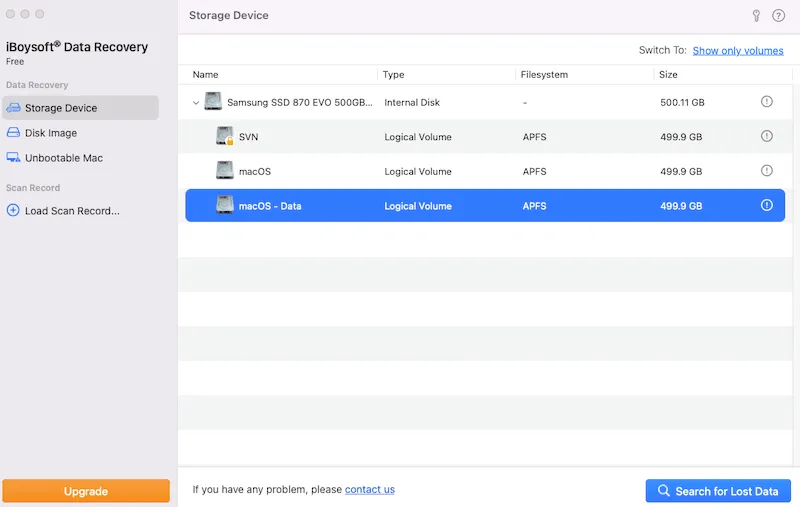
- This data recovery software will begin to scan the selected disk for you sector by sector. The scan process may take a while, which depends on the size of your disk. For the best recovery results, wait patiently until the whole scan process is completed.
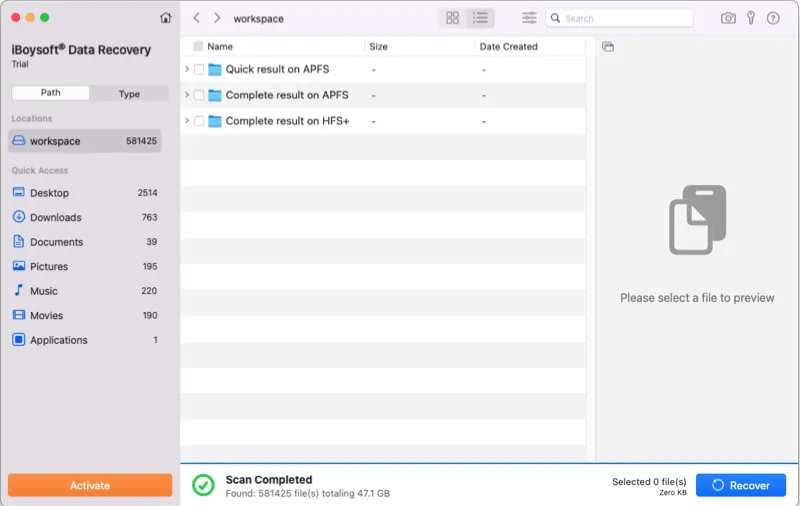
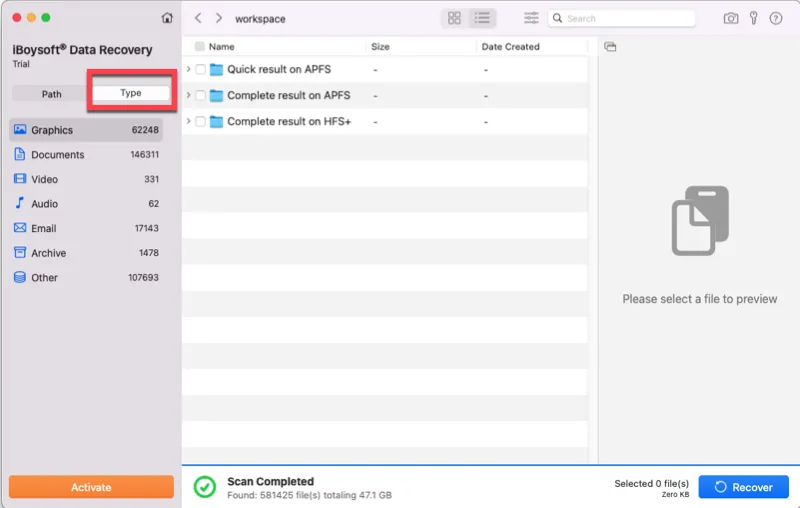
- Once the scanning is over, all found files will be listed. You can manually filter the found results with file type, size, and date. If all you want to recover are photos, you can click Type and choose Graphics, then only photos will be listed.
- Select photos that you want to recover, then click the Preview button to preview them, and check if they are corrupted or not. There's no need to recover a corrupted file.
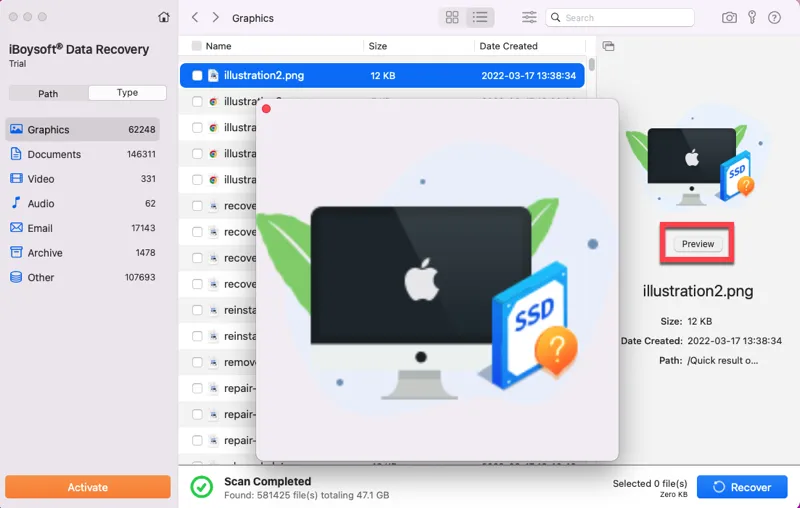
- Check the checkbox next to the photos you want to restore, then click the Recover button to get them back. Do not save the recovered photos back to your Mac computer, it may cause data overwritten. Save them to an external storage device, like an external hard drive.
If despite photos or images, there are other files or documents you want to recover, you can also let iBoysoft Data Recovery for Mac to help you.
You can also launch this software to recover disappeared mail folders after macOS Ventura update on your Mac computer with ease.
Solution 2: Repair the Photos library and recover photos from it
The photo library on the Photos app is the database where all photo files and thumbnails are stored. If you find photos missing from the Mac Photos library after an update, or you open the library folder but see no photos on it, then it might get corrupted.
Fortunately, you can manually repair it with the Photos Repair Library tool when photos or photo albums disappear for no reason:
- If Photos is open on your Mac, close the app.
- Click on the Photos app and immediately hold down the Command + Option keys together.
- In the window that opens, click on Repair to start repairing the corrupted Photos library, thus recovering lost photos after the macOS Ventura update. You might be asked to enter your user account password.
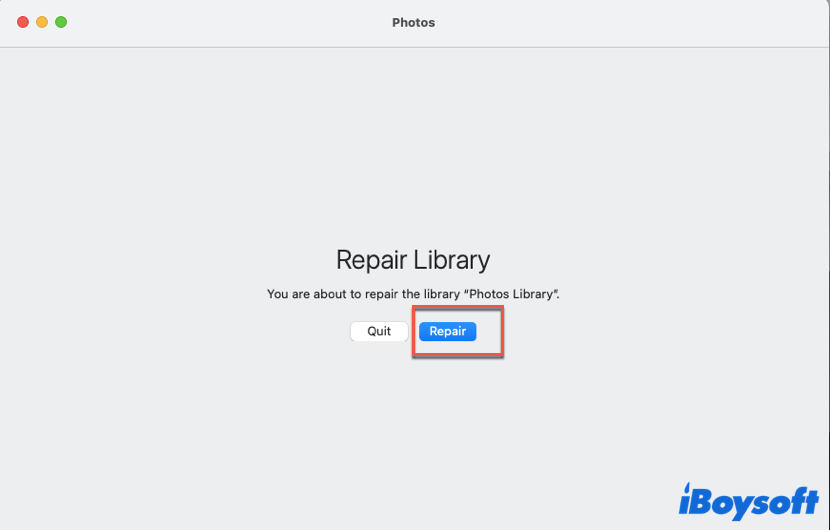
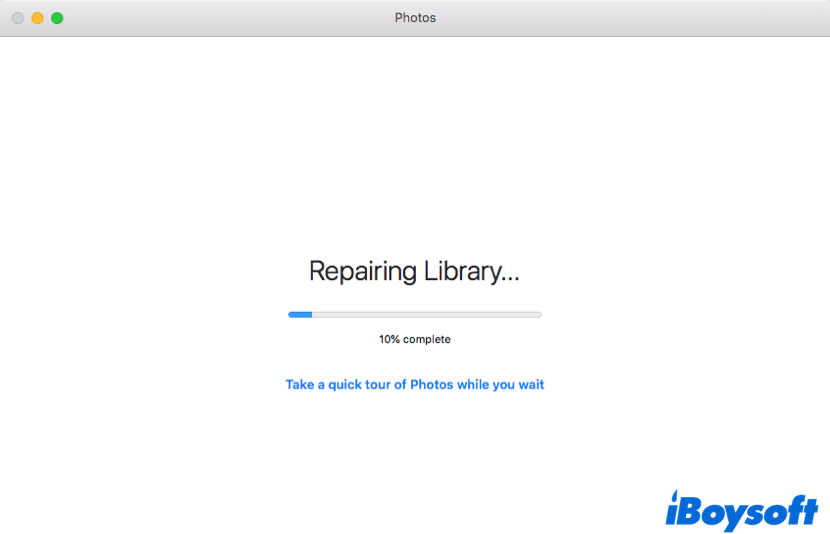
- Once the repair process is finished (it may take a while, depending on the size of your library), the Photos library will be opened automatically. Now you can check if your lost files are back.
Or, sometimes your photos are not mysteriously 'missing' from the Photos app, and you may accidentally delete them without knowing. To recover deleted photos from the Photos app, follow these steps:
- Open Photos on your Mac, then tap on the Recently Deleted album from the left panel.
- In the Recently Deleted album, check if there are your wanted photos or videos.
- Select the photos you want to recover, then click on the Recover button.
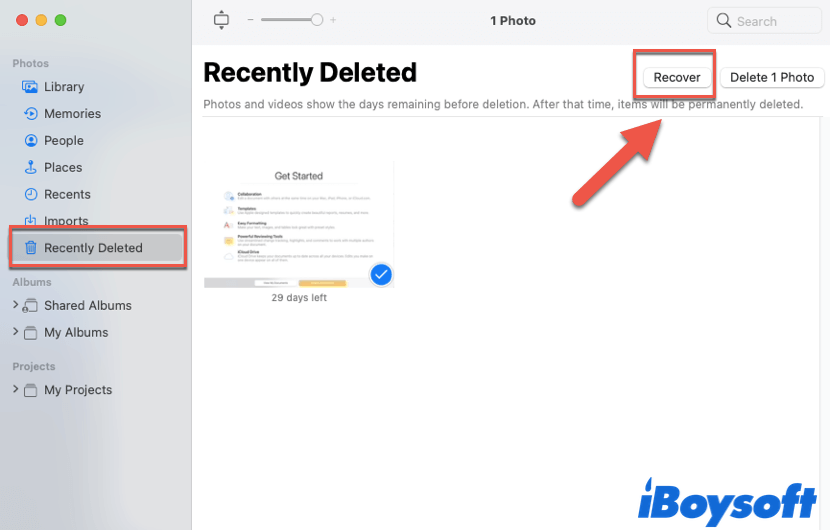
The (mistakenly) deleted photos or videos are stored in the Recently Deleted album for 30 days. After 30 days, they would be permanently removed from your Mac.
If you think this content really helps, please share it with more people who need it! Thanks in advance!
Solution 3: Restore lost photos after Ventura update with Time Machine
Time Machine is Apple's built-in back solution for Mac computers. If you find there are photos missing from your Mac after the update, and you've enabled and set up the Time Machine backup, you can use Time Machine on Mac to help you recover lost photos. Here's how:
- Navigate to Launchpad > Other, then click on the Time Machine icon to open it on macOS Ventura.
- Time Machine will show you all available backups. Browse the backups and find the lost photos that you want to recover, then press the space bar to preview them.
- Select wanted photos, then click on the Restore button. Time Machine will start recovering your lost photos back to their original locations.

- Once the recovery process is over, you should find your lost photos in their original locations.
But if you haven't set up Time Machine backup, don't worry! You can still use iBoysoft Data Recovery for Mac to recover lost photos after the macOS Ventura update.
Solution 4: Restore missing Photos with iCloud backup
iCloud is Apple's cloud-based service that allows users to store 5GB of data for free and access it on all other Apple devices. If you don't have a Time Machine backup but enabled iCloud backup, there's a chance that you can find your missing photos there.
Here's how to recover lost photos after macOS Ventura update with iCloud backups:
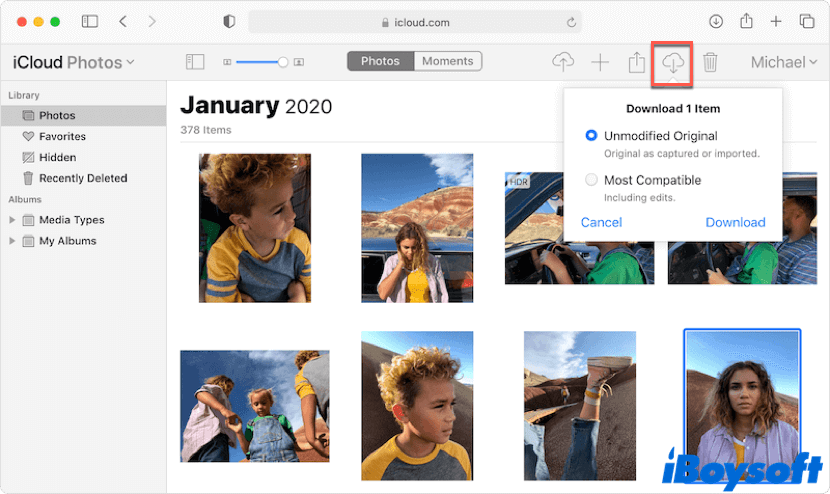
- Go to the iCloud website (iCloud.com) in your browser on Mac, then sign in to your account.
- Navigate to Library > Photos, then select the photos you want to restore to your Mac.
- Click on the Download button at the top to download your missing photos to the Mac. You can find these photos later in the Downloads folder.
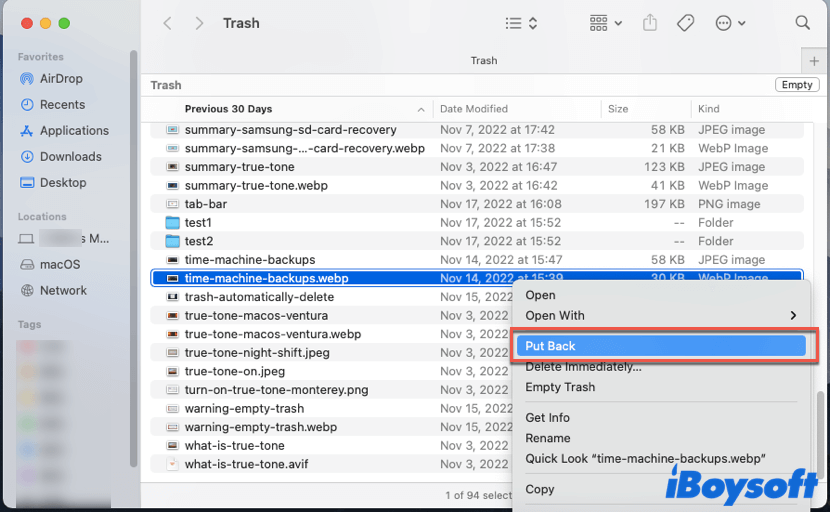
Solution 5: Recover missing photos after Ventura update using Mac Trash
The last shot for you to find your missing photos is to check the Mac Trash. When deleting a photo on Mac, whether intentionally or without knowing, it will be moved into the Trash and stay there for 30 days.
Here's how to recover lost photos after macOS Ventura update using Mac Trash:
- Click on the Trash icon on your Mac Dock to open Trash.
- Check if there are missing photos you want to recover.
- If it does, select wanted photos and right-click on them, then choose Put Back.
Successfully recover missing photos after the Ventura update by reading this post? Share you happiness on social media right now!
Conclusion
In this article, we provide 5 solutions to help you recover lost/deleted/missing photos from your Mac after you update it to macOS Ventura. You can recover them with the help of data recovery software, Time Machine backups, or iCloud backups, restore them from the Photos app, or get them back from Mac Trash.
Hope this article can help you fix your problem!
FAQ about missing photos after macOS Ventura update
- QHow can I get my pictures back after an update?
-
A
The most effective way to get your pictures back after an update is to use data recovery tools like iBoysoft Data Recovery for Mac. You can free download it and follow the above tutorial to restore missing pictures with a few clicks.
- QDoes the Mac update delete photos?
-
A
No, normal Mac updates won't delete any photos on your Mac computer unless any unexpected situations happen, like a sudden power outage during the update process, the latest macOS is not compatible with some of your apps on Mac, or data overwritten due to not enough space to install the new macOS.
