The Dock is an essential part of macOS, just like the Taskbar of Windows. As one of the main tools for interacting with the macOS, it is used to open applications and switch between running applications.
By default, it locates at the bottom of the screen, taking the color of your wallpaper as the background. After reading this post, you will have a deeper understanding of the Dock, and know how to use it effectively to boost your productivity.
What the Dock contains
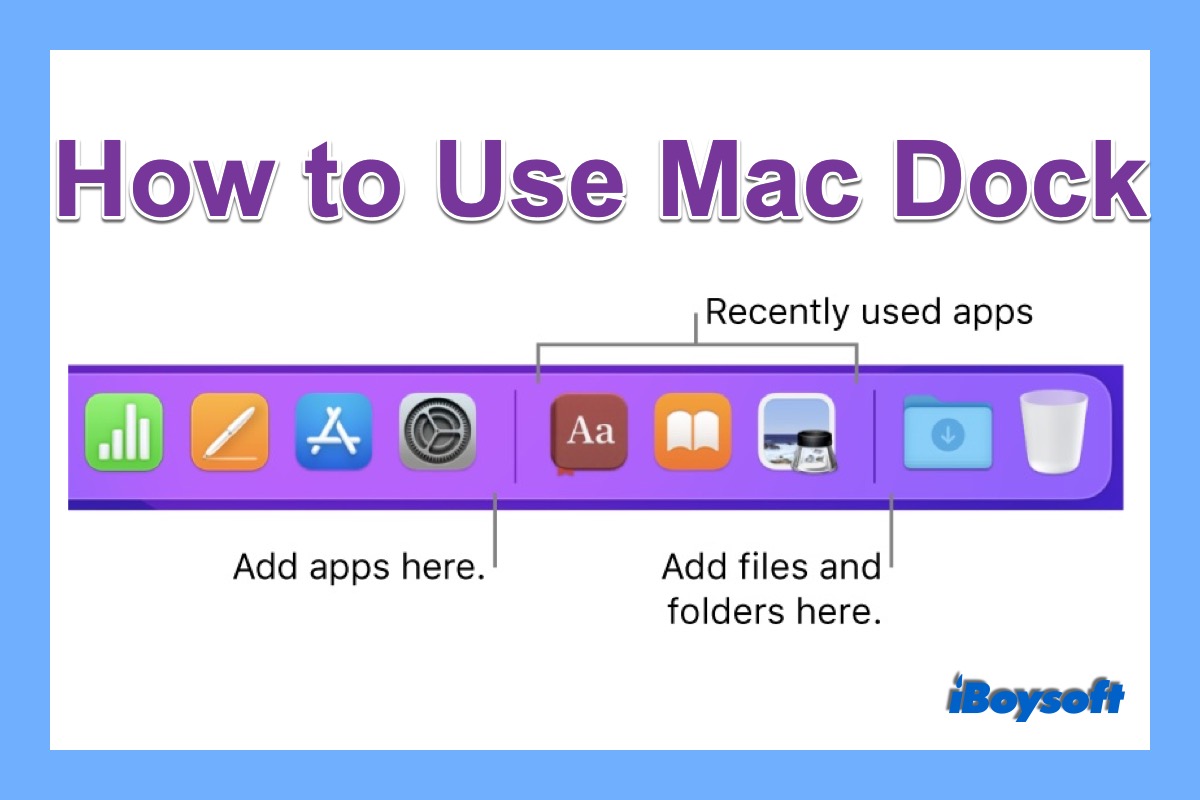
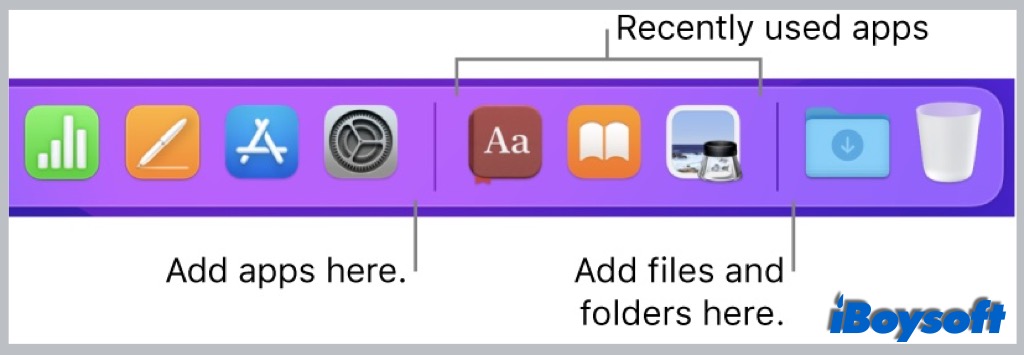
Depending on users' settings in System Preferences, the elements displayed on the Dock vary. Usually, the Dock contains three parts, including added applications, recently used applications, then added files, folders, and Trash, with a demarcation line between every two parts.
The Finder (the macOS' file manager) and the Trash are anchored in the leftmost and rightmost of the Dock, respectively, and their locations can not be changed. And you can choose to show the recently used apps in the Dock or not by making changes in System Preferences.
How to use and organize the Dock
You are free to choose what items appear in the Dock so that you can quickly click and open frequently-used apps and work files from the Dock. Here is how to add, remove, and relocate Dock items.
To utilize the shortcut menu of an item: Control-click or long-press the item to display the shortcut menu. The layout varies by item. From here, you can hide, force quit an app, and other options.
To add an item to the Dock: Open Finder, find the app, file, or folder you want to add, then drag an app to the left side of the line that separates the recently used apps, and a file or folder to the right side of the line separates the recently used apps. You can use the way to add your Downloads that disappeared from Dock.
Or, open an app from the Launchpad to make it show in the Dock automatically, then control-click the icon, and choose Option > Keep in Dock from the shortcut menu.
To remove an item from the Dock: Click the drag the icon far away to the Dock until you see “Remove,” then release the pointer. Or, control-click the item to display the shortcut menu, choose Option > Remove from Dock.
To rearrange the Dock items: Click and drag the item to the left or right (up or down) to put it in a new location
How to customize your Dock
Apple allows you to customize the Menu Bar as well as the Dock on the screen. If you want to see what custom options Apple provides, click on the Apple menu icon > System Preferences, then choose Dock&Menu Bar.
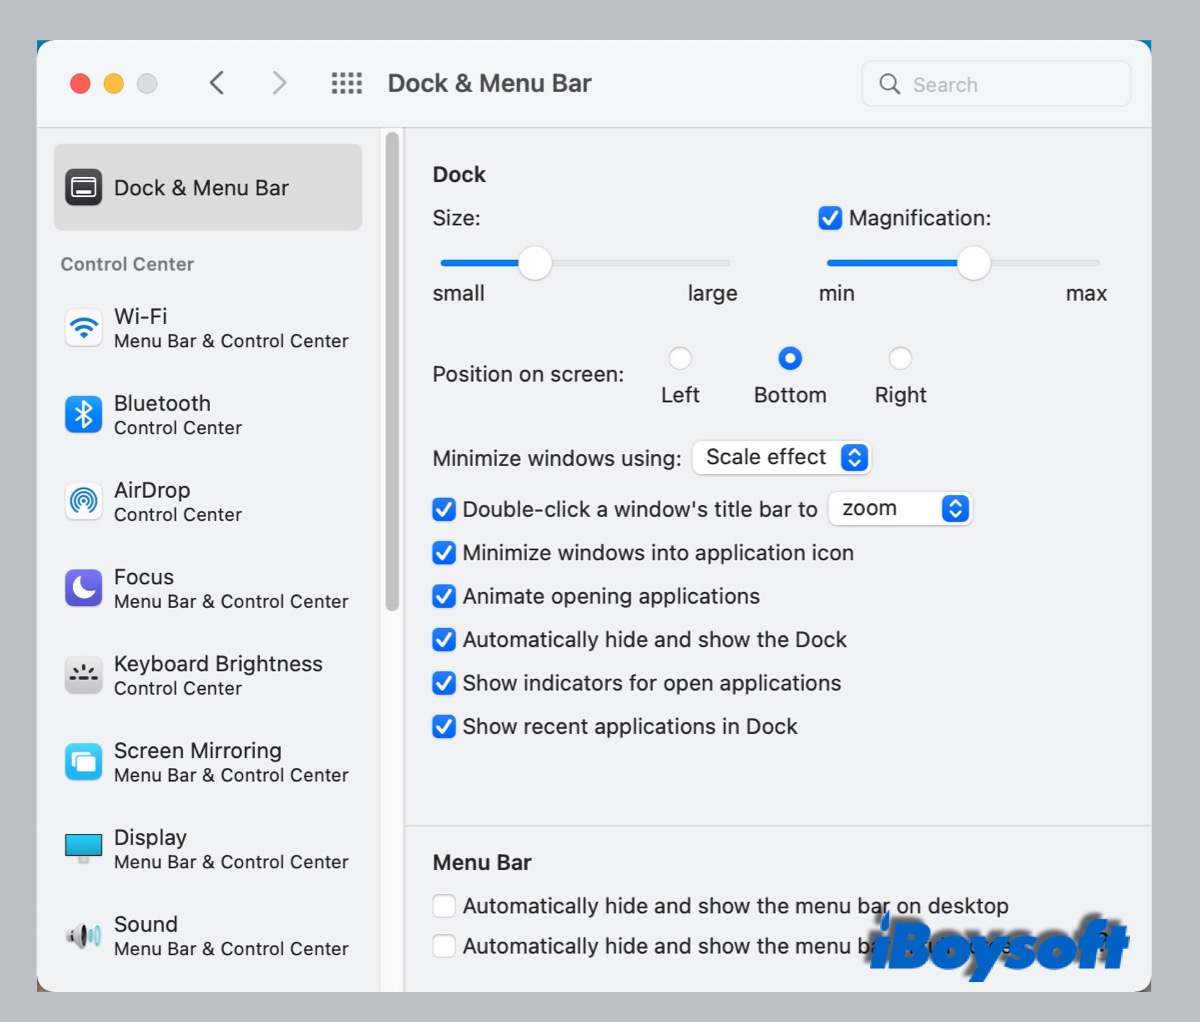
Size: Drag the slider to the left and right to change the Dock size. And the icons of the items will become small or large accompanied.
Magnification: Check the box next to Magnification. It will magnify the icon when you hover the cursor on it. Drag the slider to decide the magnification size.
Position on screen: Choose to locate the Dock on the left, right, or bottom of the screen by ticking the circle correspondingly.
Minimize windows using: Two effects are available. Try both to decide which effect you like when you minimize a window. You can also enable slow motion effects on Mac on macOS High Sierra and later.
Double-click a window's title bar to: Zoom in or out the window, or minimize the window to the Dock.
Minimize windows into application icon: If this is not selected, the minimized window will display next to the Trash can.
Animate opening applications: It makes the icon bounce when you click to open the app in the Dock.
Automatically hide and show the Dock: The Mac Dock will hide when the cursor moves away and show up when you hover the pointer to the edge of where the Dock locates. If you find the Dock disappears, you may have checked this box accidentally.
Show indicators for open applications: A small dot below an app marks an open app.

Mac Dock Getting Stuck or Frozen, How to Fix It?
This post tells what to do when your Mac Dock gets stuck, freezing, or not responding on Mac. Also, it explains why Dock freezing on your Mac. Read more >>
The Bottom Line
After reading this post, you can know the Dock on the Mac comprehensively. By following the steps in this post, you can arrange and customize the Dock as you like to improve your efficiency.
In addition, if you have several displays connected to your computer and you want to change to Dock size according to the display, you're suggested to try HiDock, which implements the task with ease.