In WWDC 2022, Apple released its new version of the operating system - macOS 13 Ventura, along with various new features, like image search in Spotlight and Apple Stage Manager. It is always exciting for us to experience new features and enhanced performances of an updated macOS.
If you decide to clean install macOS Ventura on Mac instead of upgrading to it from the earlier macOS versions, then you've come to the right place. In this post, with a detailed guide, we will tell you how to perform it with a bootable USB drive. Without further delay, let's begin!
Download the macOS installer here
Top 10 macOS Ventura Problems and How to Fix Them
This article from iBoysoft is a roundup introduction of the 10 most common macOS 13 Ventura problems and illustrates the most effective solutions to each problem. Read more >>
Clean install macOS Ventura: Things you should know beforehand
Why clean install macOS Ventura instead of upgrading
Instead of upgrading, clean install macOS seems more suitable for those who want to get a new start on their Macs, or prepare their devices for sale. Upgrading merely does the tricks on the operating system itself, all data and settings on Mac remain, while a clean install will literally give your Mac a new OS, without any redundant software, just like what it was when you bought it.
Besides, there are several benefits for cleaning install macOS Ventura on Mac:
- Better stability
- Better responsiveness
- Full usage of storage space
- Improved performance and efficiency
- Increased compatibility with applications
Compatibility
Not every Mac is compatible with macOS Ventura and can have a clean install of it. So, before you install a new macOS version on your Mac, it is important to know if your system will support it or not. Here are the macOS Ventura compatible devices:
- iMac (2017 and later)
- iMac Pro (2017 and later)
- MacBook (2017 and later)
- MacBook Pro (2017 and later)
- MacBook Air (2018 and later)
- Mac Mini (2018 and later)
- Mac Pro (2019 and later)
- Mac Studio (2022)
What you need to clean install macOS Ventura
Despite a compatible Mac, you need two external drives, one for creating the bootable installer and another for backup files. For the bootable drive, it is required at least 16GB of storage space.
Moreover, you need to free up space on Mac to clean install macOS Ventura. The installer of macOS Ventura is about 12GB, but you still need extra space to make it work and install some important software and applications on your Mac, so, leaving enough space is important as well. Make sure there are 16GB available on your Mac's internal disk to install this new version.
How to Prepare Mac to Upgrade to macOS Ventura?
This article tells you how to prepare your Mac to upgrade to macOS Ventura. Also, answers some frequently asked questions about macOS Ventura. Read more >>
Think this content is helpful? Share it now!
How to clean install macOS Ventura from bootable USB?
Since you already know the requirements before clean installing macOS Ventura on Mac, it's high time for us to dive in. Cleanly installing macOS Ventura from a bootable USB is also suitable for those who can't install macOS after erasing the Mac from Recovery Mode.
Step 1: Back up files and documents stored on Mac
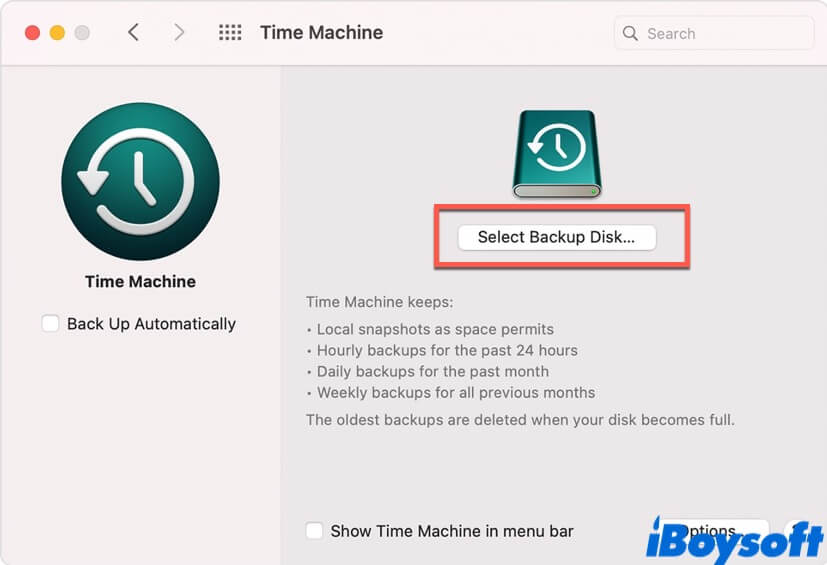
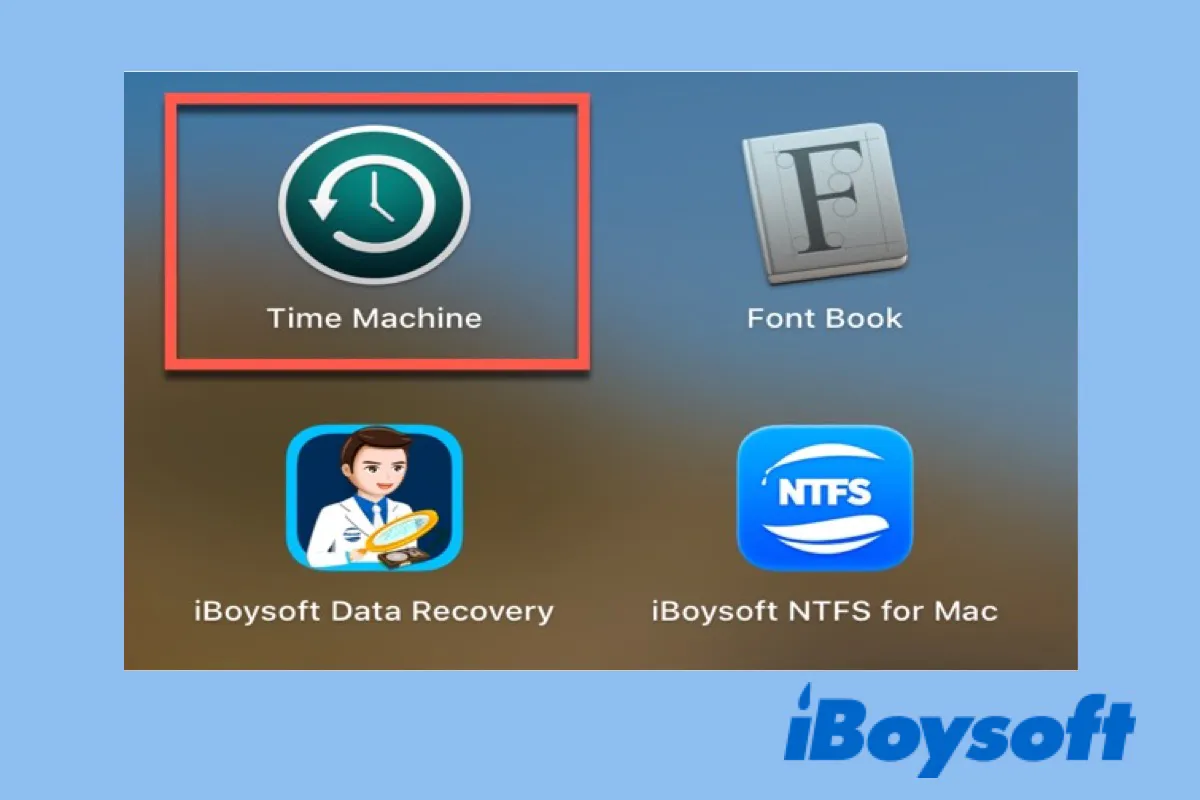
In case the clean installation causes any unwanted data loss, it's always beneficial to back up your Mac's data to an external hard drive or cloud-based account, like Apple iCloud. Here's how to back up your files to an external drive using Time Machine on Mac:
- Make sure your external drive is connected to your Mac.
- Go to Apple Menu > System Preferences > Time Machine.
- Click on the Select Backup Disk button, select the drive used for Time Machine backups, then click on Use Disk.
How to Use Time Machine on Mac: Backup and Restore Tutorials
This article tells you how to use Time Machine on Mac to backup the operating system, files and apps, and steps to restore your Mac. Read more >>
Step 2: Create a bootable installer for macOS Ventura on USB
Since the public version of macOS Ventura is not available up to now, to clean install macOS Ventura on Mac, you need to download the developer beta version of macOS Ventura. Click the hyperlink to download it. After you successfully download the beta version, follow these steps to create a macOS Ventura bootable USB:
- Connect your USB drive to your Mac.
- Go to Launchpad > Others, click on Disk Utility. After Disk Utility is launched on your Mac, locate External in the left column, choose your USB drive, find its name in Mount Point, and write it down.
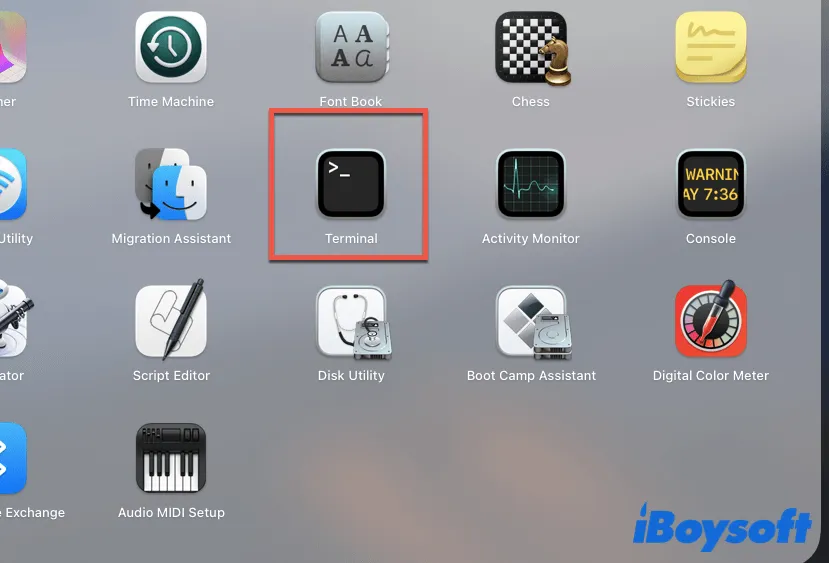
- Launch Mac Terminal on your Mac. You can find it by going to Mac Finder > Applications.
- Copy and paste the following command line into the Terminal window. Caution! You need to replace "MyVolume" in the command line with the name of your USB drive.sudo /Applications/Install\ macOS\ 13\ Beta.app/Contents/Resources/createinstallmedia --volume /Volumes/MyVolume
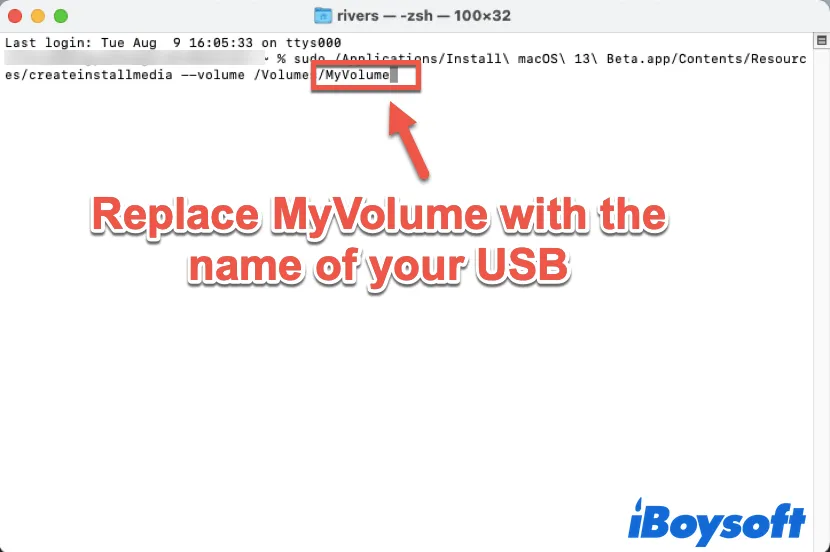
- After the command line is typed into the Terminal, hit Return.
- Wait until the installation is completed, and safe eject your USB drive.
Now, you have created a bootable USB for clean install macOS Ventura successfully. Keep up with the following steps to finish the clean installation.
Create a bootable USB successfully? Share this content with your friends!
Step 3: Adjust Startup Security options in Recovery Mode
- Reboot your Mac and start it in Mac Recovery Mode. For Intel-based Macs, hold down the Command + R keys together as soon as Mac starts. For M1 Macs, press and hold the Touch ID (power button) for a few seconds until you see “Loading startup options”.
- After you boot your Mac into Recovery mode, click on the Utilities tab on the top menu, and choose Startup Security Utility.
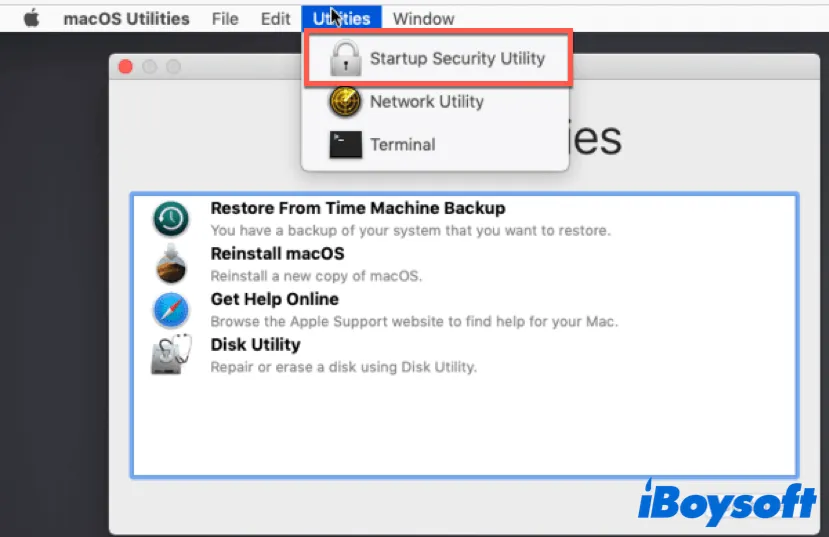
- Check “No Security” option first, and then check the box next to “Allow booting from external or removable media”. Click the Close button to save the settings.
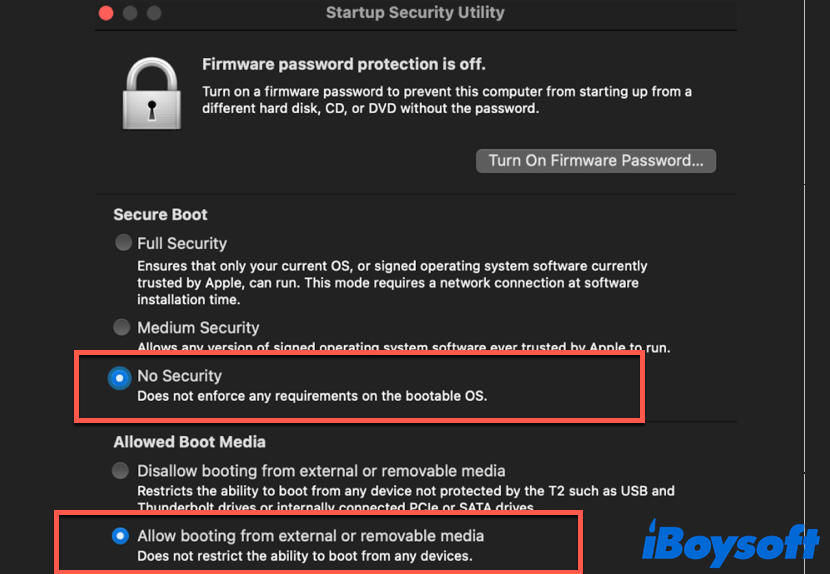
- Shut down your Mac.
Step 4: Clean install macOS Ventura on Mac
After you have done all the above preparation work, you can clean install macOS Ventura on your Mac now. Follow these steps to clean install macOS Ventura from the bootable USB you just created:
- Connect the USB drive to your Mac. Turn on your Mac again while holding the Option key until you see a set of boot options.
- Select the bootable drive you just created in the list and a window will appear.
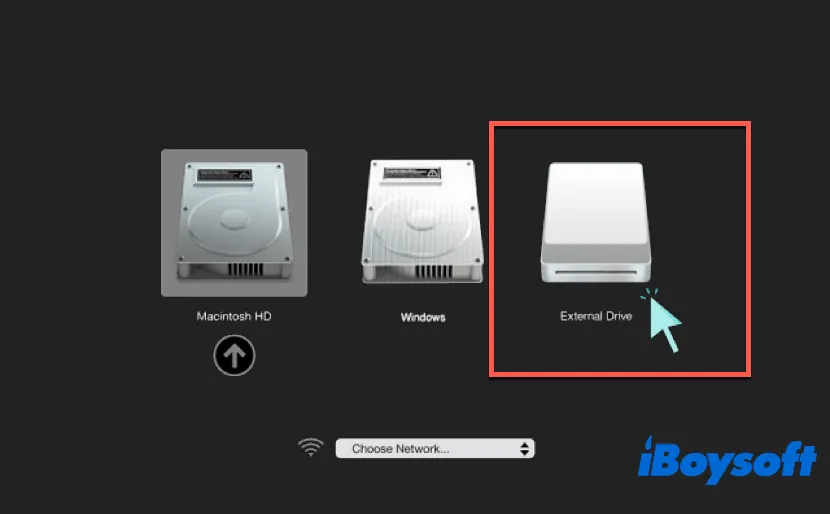
- Choose Disk Utility and click Continue.
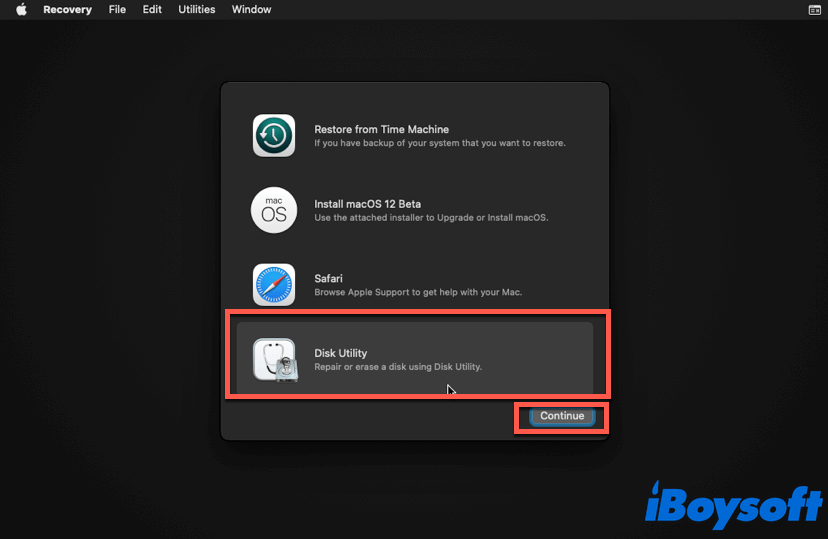
- Select your Mac's internal disk and click the Erase button to clean the entire disk for macOS Ventura clean installation.
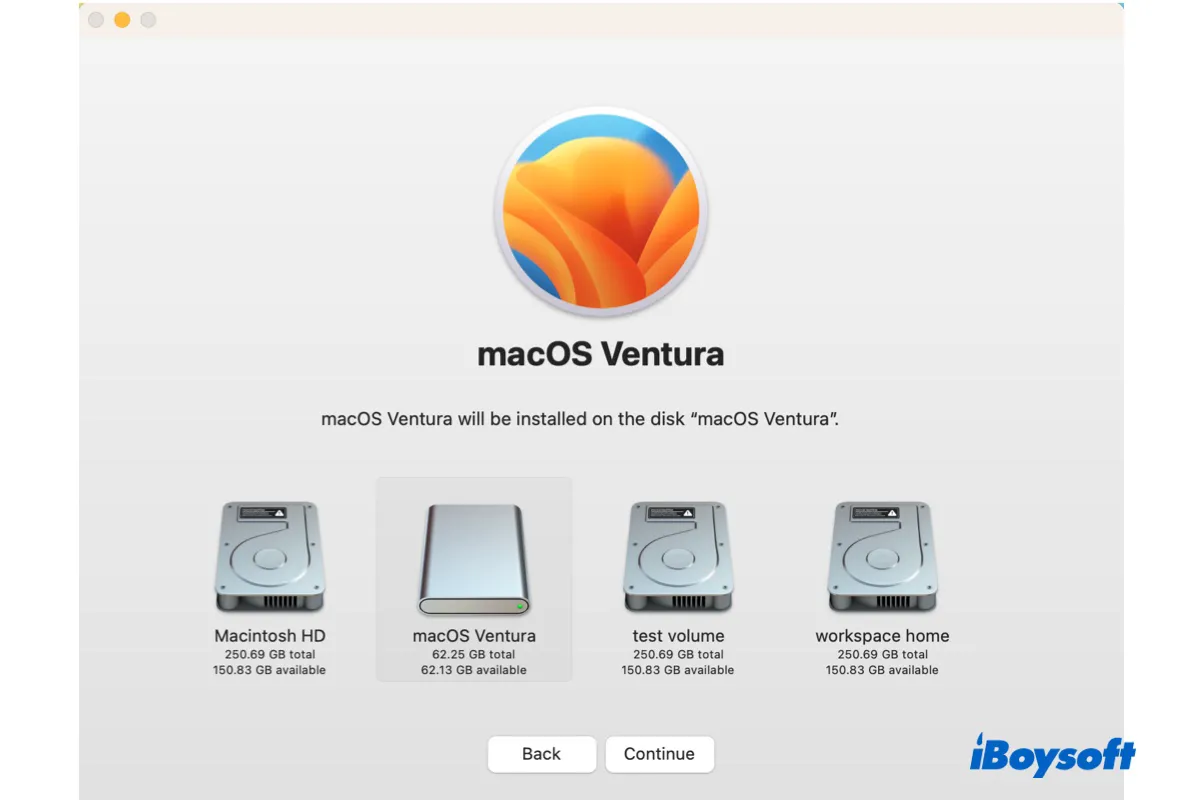
- When the cleaning process is done, close the Disk Utility window, and choose install macOS 13 beta to begin the clean installation of macOS Ventura.
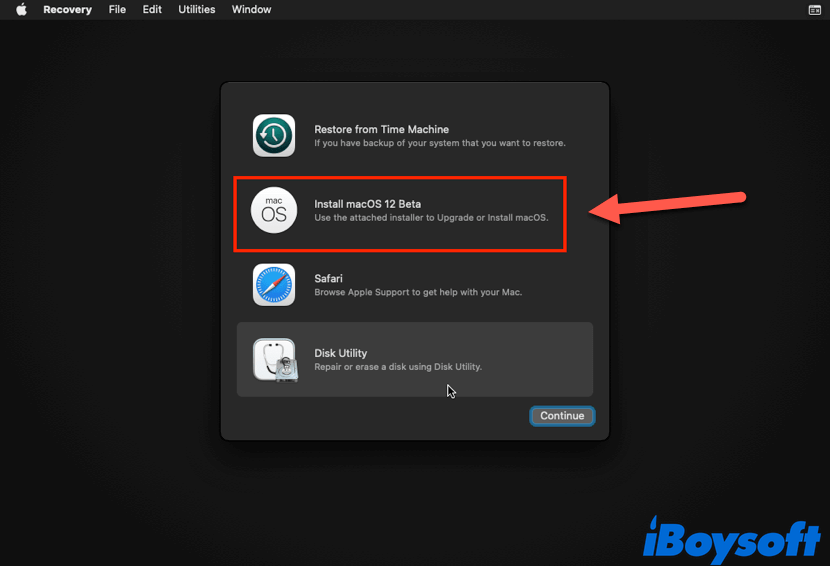
- Follow the on-screen instructions to finish the installation.
Clean install macOS Ventura on your Mac successfully? Share it with more people who need it! If the installation failed with a personalization error, resolve it with this guide: Fix 'Failed to personalize the software update' on M1 Mac
Conclusion
Clean install macOS Ventura is a good choice for those who want to experience the new features of Apple's latest operating system. This article covers a detailed tutorial on how to clean install macOS Ventura from a bootable USB. Hope you can enjoy the convenience that macOS 13 brings! Besides, you can uninstall the macOS Ventura beta on Mac if you find it too buggy.
[Full Guide] How to Install macOS Ventura on a Separate Partition?
If you are hesitant to install macOS Ventura on your main Mac, you can install it on a separate partition, as guided in this post. This way, you can test the new features of Ventura while keeping the old macOS intact. Read more >>

Not Enough Space to Install macOS Ventura, How to Fix?
This article tells you some quick fixes on the not enough space to install macOS Ventura problem. Also, answers the question about how much space macOS Ventura needs. Read more >>
FAQ about clean install macOS Ventura
- QHow do I upgrade to Ventura?
-
A
If you want to upgrade to macOS Ventura, the first thing you should do is to back up your Mac. Then you can download the macOS Ventura installation files from Apple's developer site, and install it on your Mac.
- QShould I upgrade to macOS Ventura?
-
A
Generally speaking, if you want to experience the new features and performances that macOS Ventura brings, you can upgrade to macOS Ventura. But honestly, since the public version of it is not available until later this fall, nobody can promise you that there are no bugs or flaws in the beta version of macOS 13.
