An ISO image is a digital copy of the contents of an optical disc which can be used to install software, to boot a computer, etc. This post explains the ISO file and offers a variety of macOS ISO files that you can download to run on virtual machines or other unsupported devices. Let's get started!
If you want to get them directly, check out the following resource hub:
Free Download macOS, OS X, Mac OS X ISO Files
Free Download Old Windows ISO Files
What is an ISO file?
An ISO image is a file that contains all the data, file systems, and structure of a disk, like a CD, DVD, or Blu-ray. Unlike compressed files (like ZIP or RAR), an ISO file is not compressed, so the destination disk must be the same size or larger than the original disk to transfer it successfully.
ISO files are often used for bootable discs, and the software from these discs is available for download in ISO format. This is why you are likely familiar with ISO files when using your computer.
Compared to the DMG file, ISO files work on more operating systems, including macOS, Windows, and Linux. A DMG file, on the other hand, is only for macOS, so if you want to use a DMG file on a non-Mac system, you'll need to convert the DMG to ISO.
Conversely, you need to convert ISO to DMG if you need to create a bootable USB installer for macOS only.
Directly download the macOS ISO files
macOS files make it possible to run the Mac operating systems on virtual machines like VirtualBox, VMWare, Parallels Desktops, and other unsupported machines. Compared to making a macOS ISO file by hand, it's quite straightforward to download the macOS ISO file directly.
- macOS Tahoe ISO file (To run it on Windows, install macOS Tahoe on VMware.)
- macOS Sequoia ISO file
- macOS Sonoma ISO file
- macOS Ventura ISO file
- macOS Monterey ISO file
- macOS Big Sur ISO file
- macOS Catalina ISO file
- macOS Mojave ISO file
- macOS High Sierra ISO file
- macOS Sierra ISO file
If, however, you prefer the challenge of creating a macOS ISO file by yourself, you can install iBoysoft DiskGeeker to complete this mission with less time and effort, which provides a macOS download source for macOS Sequoia, Sonoma, Ventura, Monterey, Big Sur, Catalina, Mojave, and High Sierra.
How to create an ISO file manually?
Users can create the ISO file from the optical discs via disk imaging software, from a file ground by optical disc authoring software, or different disk image files via conversion.
Here we will show you how to create an ISO file by manual operations:
How to create an ISO file on a Mac?
For Mac users, you can create an ISO file by creating a DMG file and then converting the DMG file to .iso file:
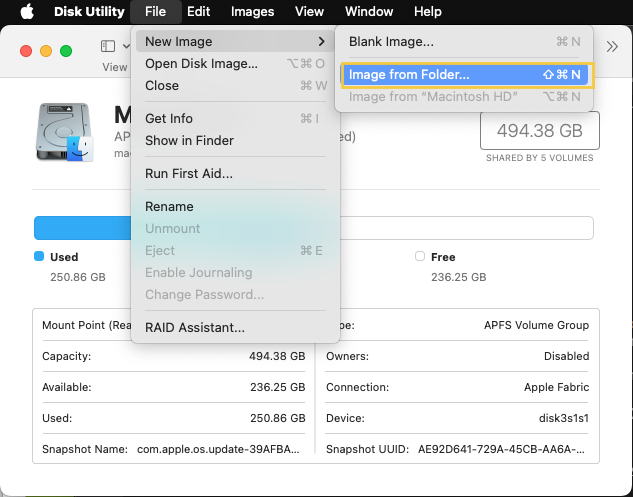
- Launch Disk Utility > File > Image from Folder > browse to and select the folder containing your files > set the 'Image Format' to DVD/CD master > then save the file well. These steps create a CDR disk image.
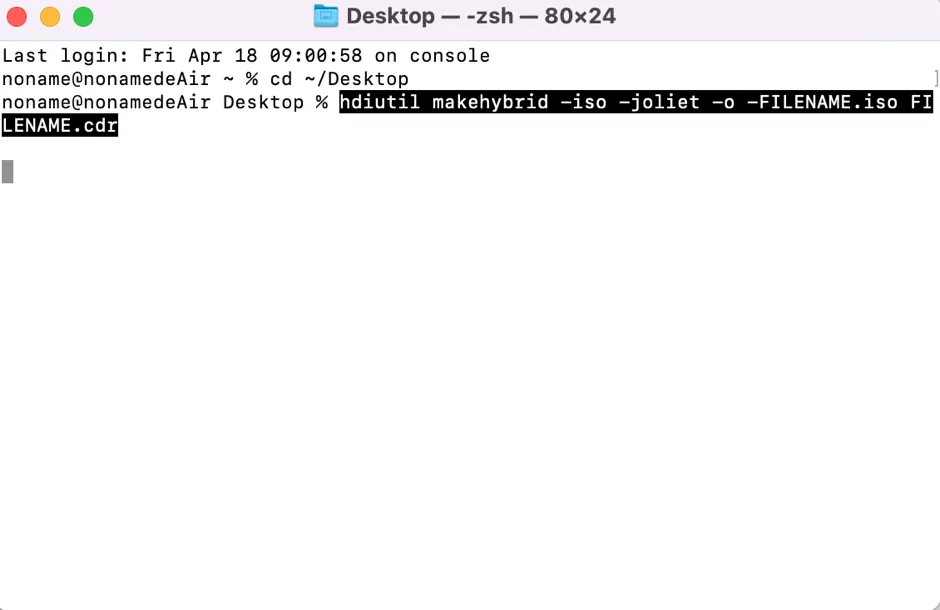
- Step 2: Then we need to execute certain command lines to convert the CDR disk image to the ISO image. Open Terminal, copy and paste this command, and hit Enter to run this command line.cd ~/Desktop
- Then, input the following command and replace the FILENAME with the real name of the CDR disk image you created before. Hit Enter to execute the command:hdiutil makehybrid -iso -joliet -o -FILENAME.iso FILENAME.cdr
- makehybrid: generate cross-platform hybrid images
- -iso: Generate an ISO9660 filesystem
- -joliet : Generate Joliet extensions to ISO9660
- -o: Output filename
- FILENAME: Source filename
How to create an ISO file on Windows?
For Windows machines, there is no direct way to create an ISO file. WinCDEmu helps a lot in ISO file creation if you'd like to give it a shot.
- Install WinCDEmu on your PC.
- If you have a CD or DVD to copy by creating an ISO, insert it into your PC now.
- Open File Explorer by pressing the Windows + E keys together.
- Put the files you want to copy to the ISO file in a single folder.
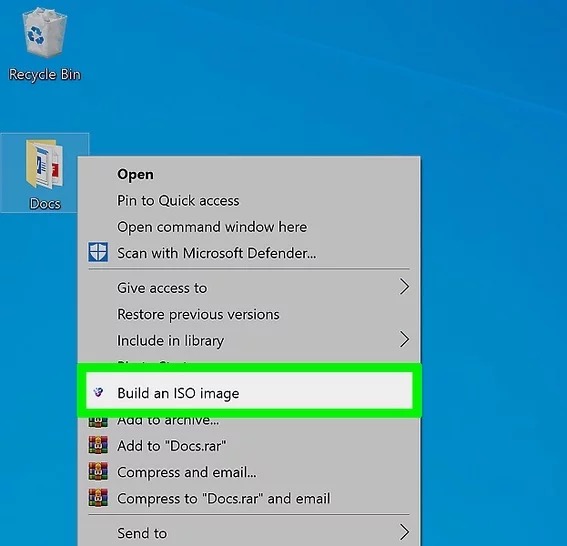
- Right-click the single folder or the drive you inserted before.
- Select Create ISO Image or Build ISO Image from the dropdown menu.
- Fill necessary info and click Save, then the ISO file will be created by WinCDEmu automatically.
How to create a bootable USB from iSO file for Windows 10,11?
You can create a bootable USB from the ISO files for Windows 10 and Windows 11. Let's go deep:
Step 1: Download the ISO files you want. You can click the following links to download the desired ISO files based on your requirements:
- Windows 11 update download: 25H2, 24H2, 23H2, 22H2, 21H2
- Windows 10 update download: 22H2, 21H2, 21H1, 20H2 & earlier
- Download Windows 10 officially from Microsoft without Media Creation Tool
- Windows 7 Download 64-bit & 32-bit
- Windows 7 Ultimate ISO | Windows 7 Home Premium ISO
- Windows 98 ISO
- Windows 2000 ISO
Step 2: Then, you need to burn the ISO file to the USB drive.
Since the native software allowing users to burn an ISO file to a USB drive has been removed from Windows 10 and Windows 11 already, you have to rely on the assistance of third-party software; here, Rufus is recommended.
Step 3: Download and install Rufus from its official site on your PC.
Step 4: Plug a USB drive into your PC. Back up the drive beforehand, or data will be erased.
Step 5: Open Rufus and go to the Device drop-down option, select the USB flash drive you connected.
Step 6: Click SELECT to choose the downloaded ISO file.
Step 7: Leave the other options as default. Followingly, click START to begin the Windows bootable USB creation from ISO.
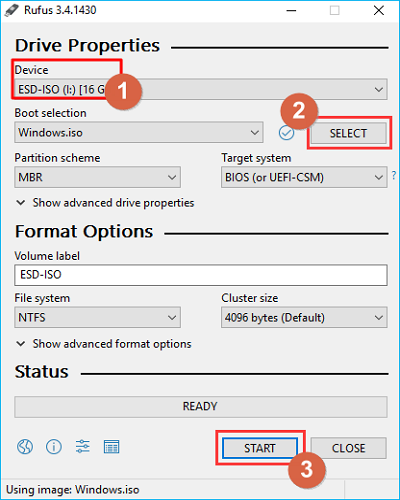
Step 8: When the Status reads READY in green, click CLOSE to exit the tool.

Once this process finishes, you can then boot your PC with this USB drive without a hitch!