
The latest macOS Tahoe 26 was released to the public on September 15, 2025. Compared with its predecessor, macOS Sequoia, this major update revamped the interface with a "Liquid Glass" look, replaced Launchpad with a new Apps control, and considerably improved Spotlight Search.
The new Spotlight borrows from the popular productivity app, Alfred, and goes beyond it in terms of integration. It now features four sections: Apps for finding and launching applications (including those on a connected iPhone), Files for quickly locating documents and folders, Actions for executing quick tasks and shortcuts, and Clipboard for viewing and managing your recent clipboard history.
If you want to download macOS Tahoe and install it on a virtual machine, like VMware, VirtualBox, or Parallels Desktop, create a macOS Tahoe bootable USB installer from Windows, or make a macOS Tahoe Hackintosh, so that you can run macOS Tahoe on Windows or Mac, it's essential to get the macOS Tahoe ISO file. Keep reading to learn how to create a macOS 26 Tahoe ISO file or download one directly.
How to download macOS Tahoe ISO on Windows?
Need to download macOS Tahoe ISO for VMware or VirtualBox on Windows? iBoysoft DiskGeeker for Windows can help you achieve the task easily.
It archives all the necessary macOS ISO and DMG files to facilitate macOS downloads on Windows, covering the latest macOS Tahoe ISO images and older macOS versions like Mac OS X 10.6 Snow Leopard. With it, you no longer need to worry about the ISO file's integrity and safety. Besides, this tool can also make macOS bootable USB installers on a Windows PC.
Here's how to download macOS Tahoe ISO on a Windows PC:
Step 1: Download, install, and launch iBoysoft DiskGeeker for Windows.
Step 2: Open Download and create boot disk > Download macOS system image.

Step 3: Select macOS Tahoe and click Get.
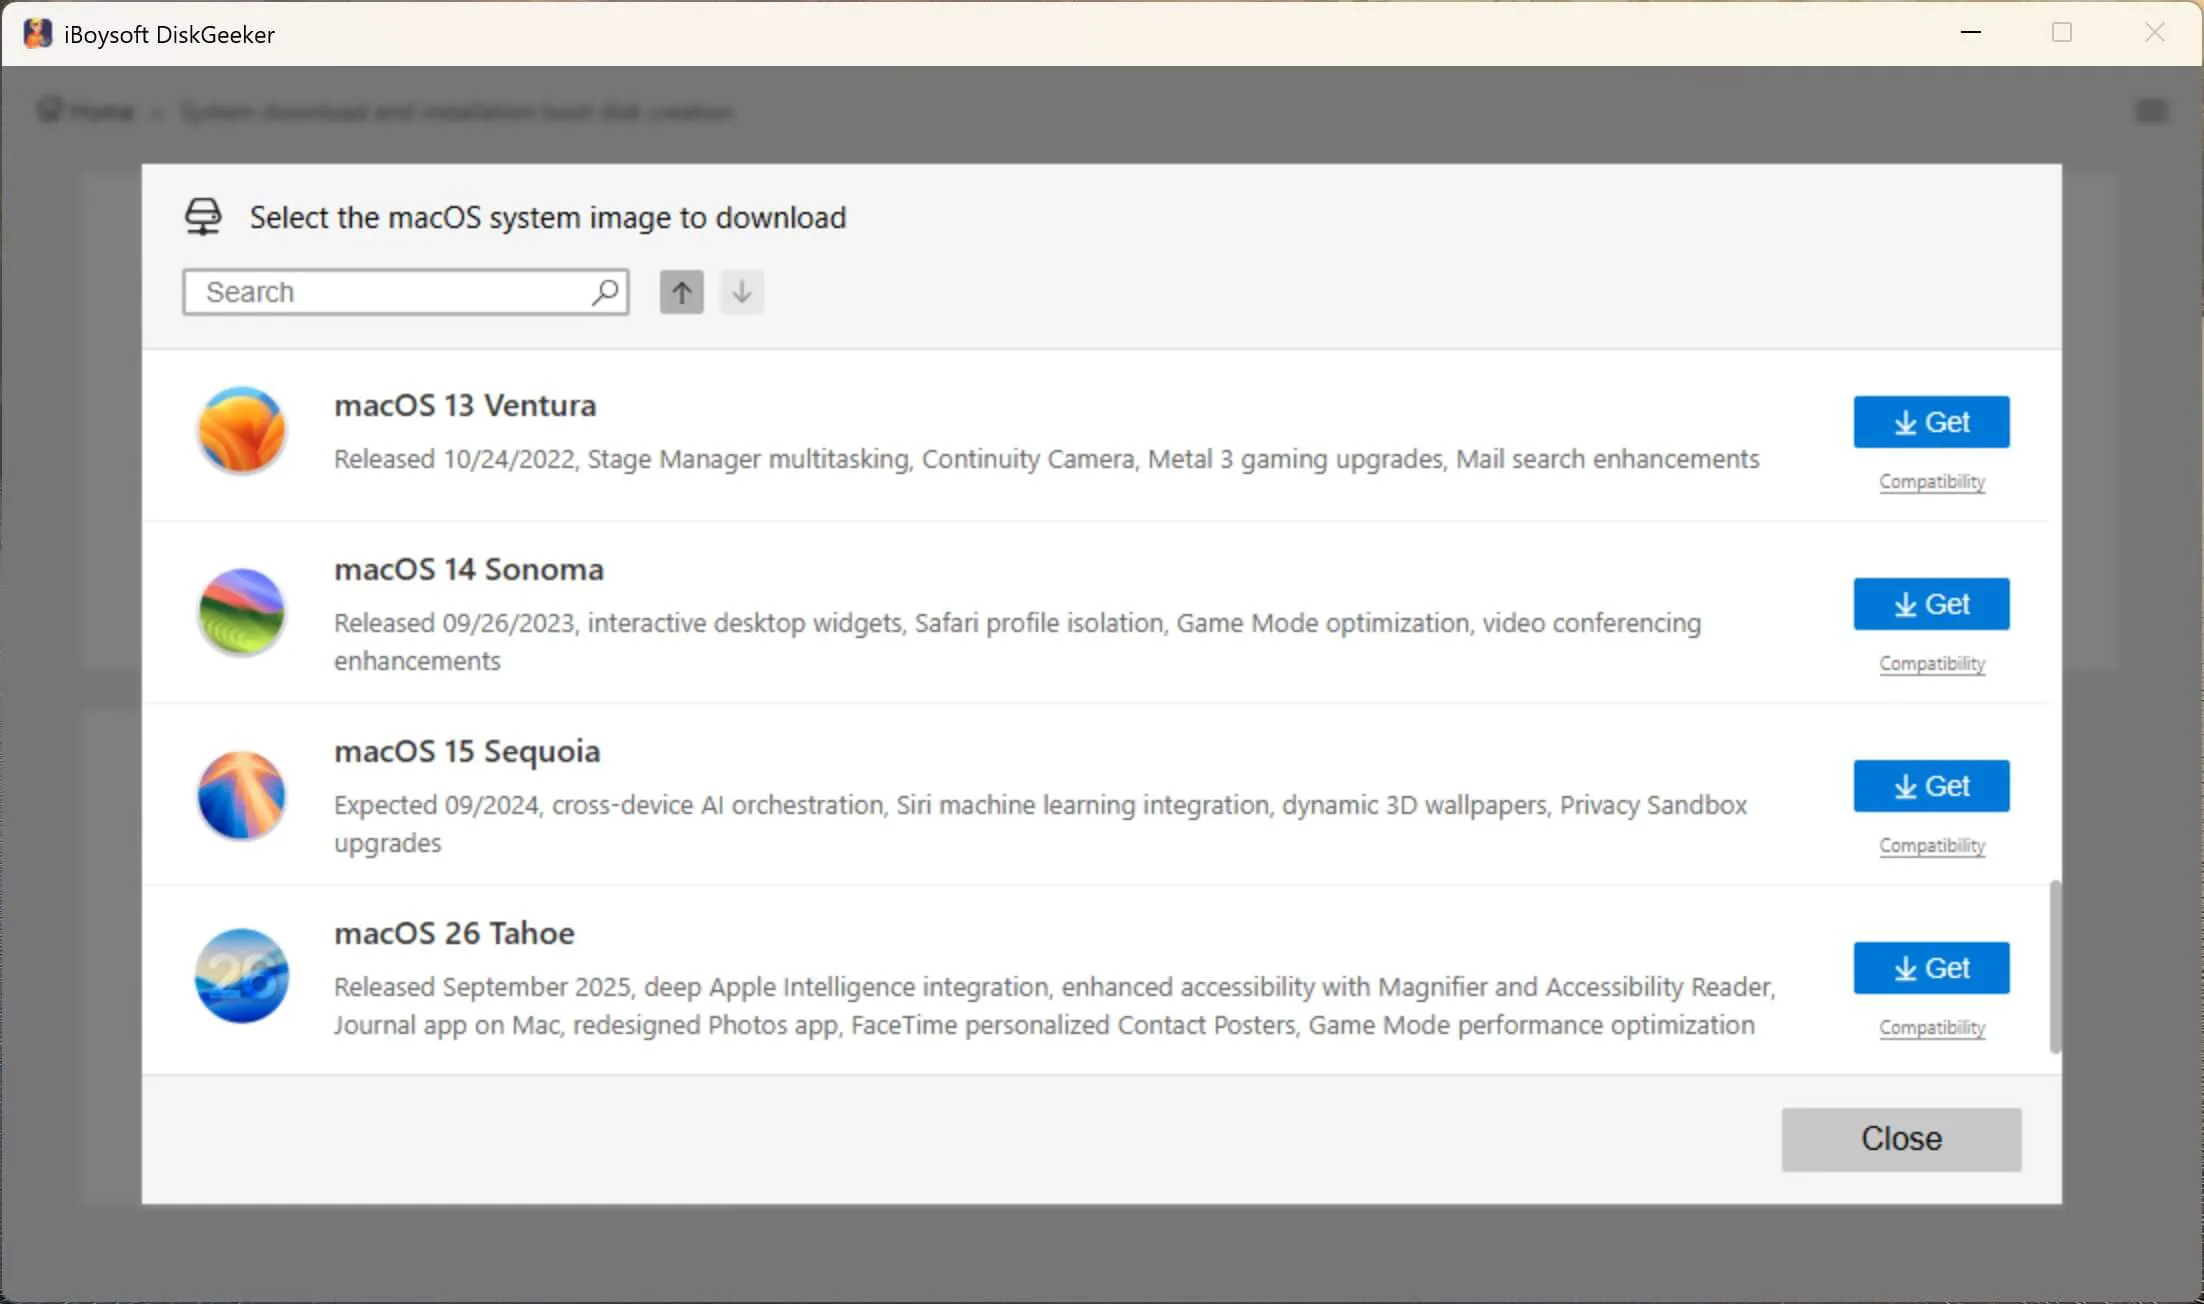
Step 4: Choose the .iso format.
Step 5: Select a location to save the macOS Tahoe ISO file.

Step 6: Wait for the macOS Tahoe ISO download to complete.
If you also need a macOS Tahoe bootable USB installer, click Create macOS USB Installer in Step 2.
How to create macOS Tahoe ISO file for VMware or VirtualBox?
The simple way to manually create the macOS Tahoe 26 ISO file for VMware or VirtualBox is by using iBoysoft DiskGeeker for Mac. It can save you a lot of time and make a bootable macOS Tahoe 26 ISO file on any Mac, no matter whether it's compatible with macOS Tahoe or not.
Here's how to create a macOS Tahoe 26 ISO file on a Mac:
Step 1: Free download and open iBoysoft DiskGeeker for Mac.
Step 2: Select macOS 26 Tahoe and click Download Image.

Step 3: After downloading the macOS Tahoe image file, launch Terminal from the Applications > Utilities folder.
Step 4: Run the command below to convert the macOS Tahoe DMG file to a CDR file.hdiutil convert dmg_file_path -format UDTO -o ~/Desktop/Tahoe.cdr
Details: type in "hdiutil convert" in Terminal, leave a space, then drag and drop the downloaded DMG file to Terminal, leave a space again, and paste the rest of the command "-format UDTO -o ~/Desktop/Tahoe.cdr," then hit Enter. A sample command: hdiutil convert /Users/jenny/Desktop/macOS\ 26\ Tahoe.dmg -format UDTO -o ~/Desktop/Tahoe.cdr
Step 5: Rename the macOS Tahoe CDR file to a macOS Tahoe ISO file.mv ~/Desktop/Tahoe.cdr ~/Desktop/Tahoe.isoYou should now find the macOS Tahoe.iso file on your desktop.
Share this tool to benefit others who need the macOS Tahoe 26 ISO file!
If you have a Mac compatible with macOS Tahoe, you could also create the macOS Tahoe ISO file for VMware or VirtualBox from scratch.
macOS Tahoe 26 is supported by any Mac with Apple Silicon (M1, M2, M3 & M4 chips) or one of the Intel-based Mac models below:
- MacBook Pro: 16-inch (2019)
- MacBook Pro: 13-inch (2020) with four Thunderbolt 3 ports
- iMac: 27-inch (Retina 5K, 2020)
- Mac Pro: 2019 model.
Supported Mac users can take the following steps to build a macOS Tahoe ISO image:
- Download the macOS Tahoe full installer.
- Create an empty ISO disk image for the macOS Tahoe installer.
- Mount the tahoe.dmg file.
- Make a bootable macOS Tahoe installer.
- Unmount the macOS Tahoe disk image.
- Convert the macOS Tahoe.dmg file to an ISO file in the .cdr format.
- Rename the macOS Tahoe.cdr file to an ISO file.
Step 1: Download the macOS Tahoe full installer
You first need to download the macOS Tahoe full installer. Since it's not currently available in the Mac App Store, you can get it from the link below or download it from Terminal.
macOS Tahoe full installer download
Once you've downloaded it, you can open the InstallAssistant.pkg file and follow the onscreen instructions to add the macOS Tahoe.app to your Applications folder.
Step 2: Create an empty ISO disk image for the macOS Tahoe installer
Next, you need to create an empty disk image for the macOS Tahoe installer and mount it with the hdiutil command line tool.
Open Finder and navigate to the Applications > Utilities folder, then launch Terminal. In the Terminal window, copy and paste the command below and hit Enter to run it.
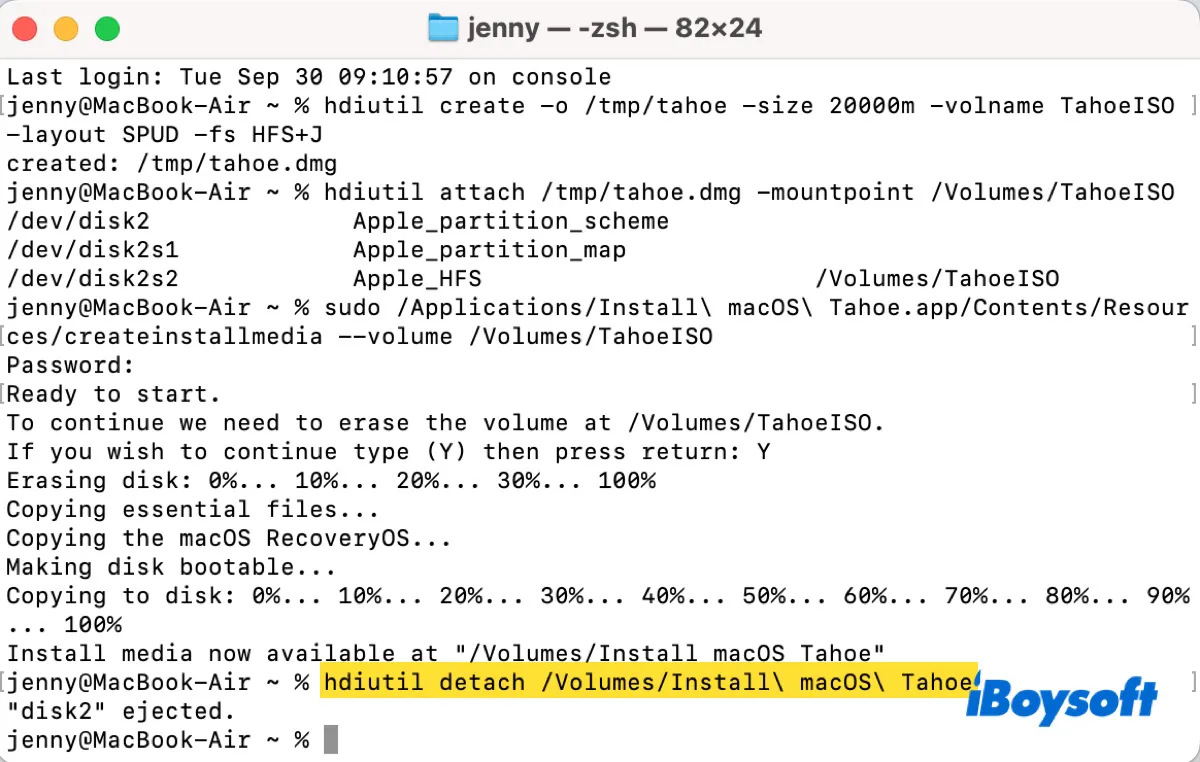
hdiutil create -o /tmp/tahoe -size 20000m -volname TahoeISO -layout SPUD -fs HFS+J
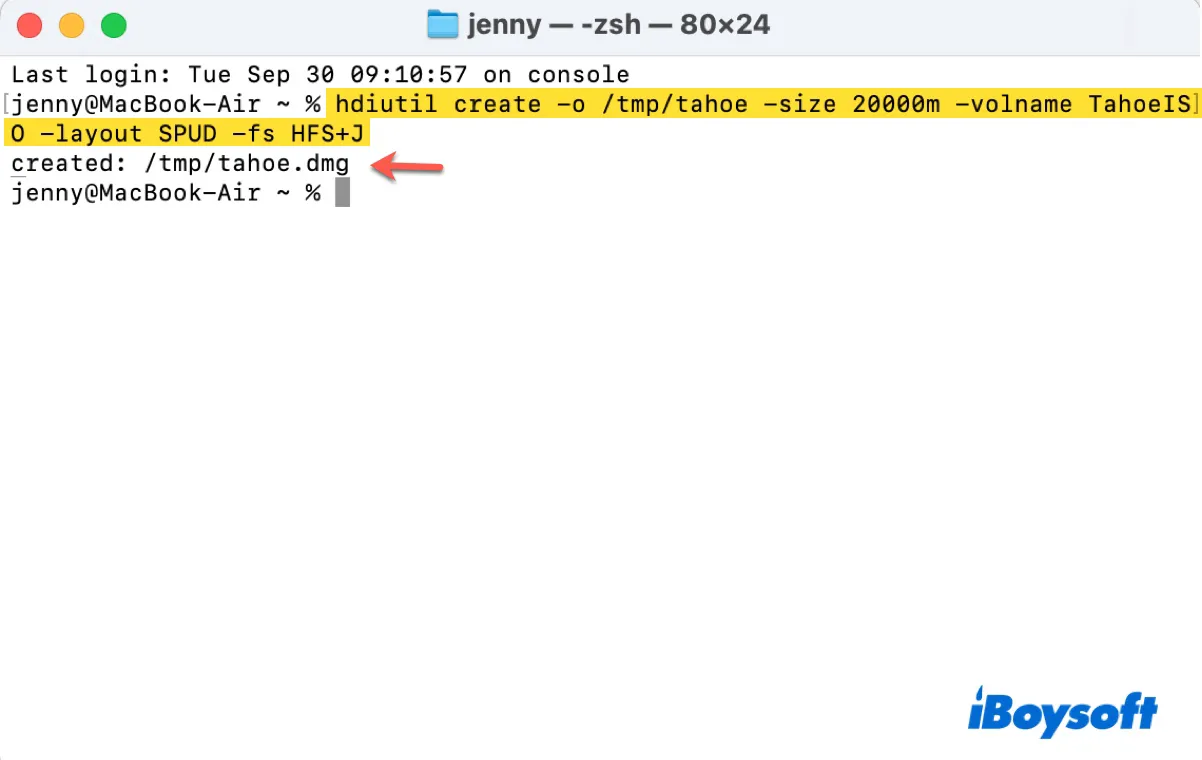
This command creates a 20 GB disk image named tahoe.dmg in the /tmp directory. The disk image will have a single partition using the HFS+J (Mac OS Extended Journaled) file system, and the volume name of the disk image will be set to TahoeISO. The process may take a minute or two. After it's complete, it'll say "created: /tmp/tahoe.dmg."
Here's the command breakdown:
hdiutil create:
The hdiutil utility is a macOS command-line tool used to manipulate disk images.
The create subcommand specifies that you want to create a new disk image.
-o /tmp/tahoe:
The -o flag specifies the output file path for the disk image being created.
In this case, the disk image will be saved as /tmp/tahoe.dmg. (By default, .dmg is added to the file name unless explicitly specified otherwise.)
-size 20000m:
The -size flag specifies the size of the disk image. 20000m means the disk image will be 20GB in size.
-volname TahoeISO:
The -volname flag specifies the name of the volume that will appear when the disk image is mounted.
In this case, the volume name will be TahoeISO.
-layout SPUD:
The -layout flag specifies the partition layout for the disk image. SPUD stands for "Single Partition, Apple Partition Map." It creates a single partition in the disk image.
-fs HFS+J:
The -fs flag specifies the file system format to use for the disk image.
HFS+J, also called Mac OS Extended (Journaled), stands for "Hierarchical File System Plus with Journaling," which is a macOS-specific file system format that supports journaling (a feature that helps prevent file system corruption in case of crashes or power failures).
Step 3: Mount the tahoe.dmg file
After the macOS Tahoe DMG file is created, you need to mount it, making it appear as a physical disk on your Mac. In Terminal, run the command below and press Enter:
hdiutil attach /tmp/tahoe.dmg -mountpoint /Volumes/TahoeISO
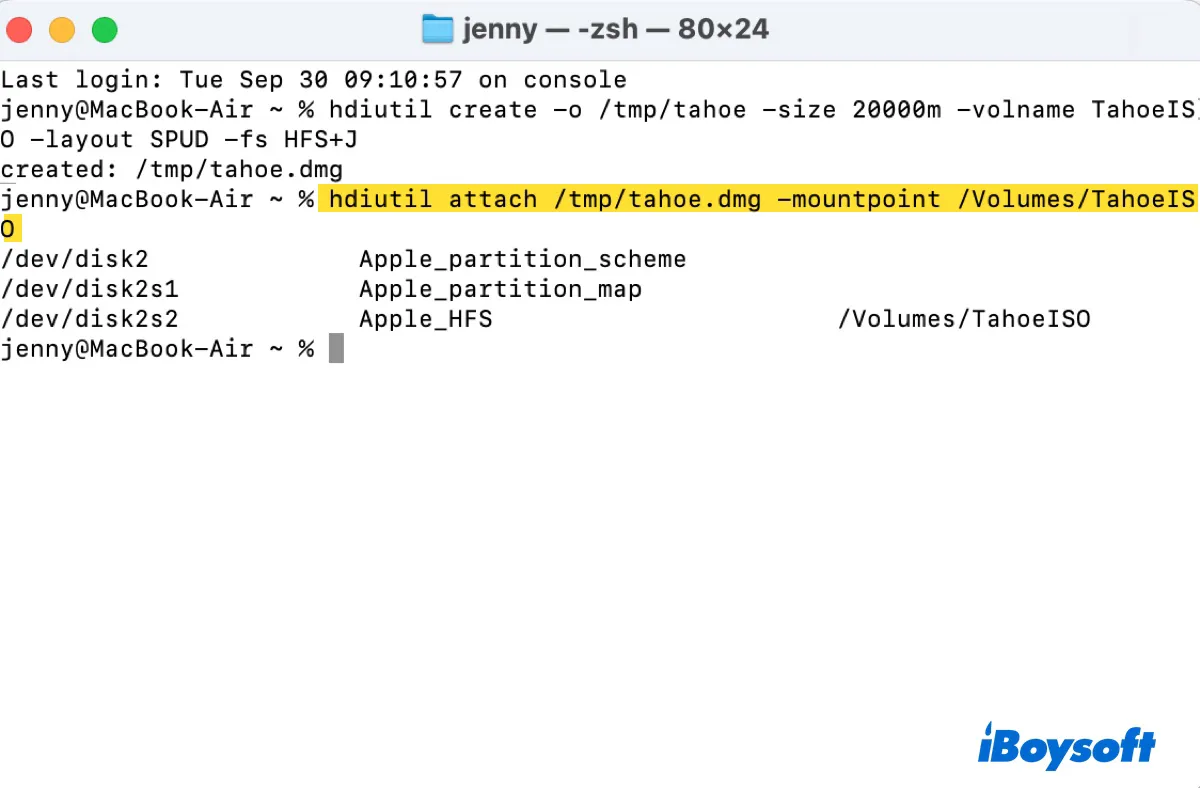
You should now find a volume called TahoeISO on your desktop or Finder's sidebar.

Here's the command breakdown:
hdiutil attach:
hdiutil is a macOS command-line utility for working with disk images (such as .dmg files).
The attach subcommand is used to mount a disk image, making its contents accessible as if it were a physical disk.
/tmp/tahoe.dmg:
This specifies the path to the disk image file (tahoe.dmg) that you want to attach/mount. In this example, the .dmg file is located in the /tmp directory.
-mountpoint /Volumes/TahoeISO:
The -mountpoint flag specifies the directory where the mounted disk image should appear in the filesystem.
/Volumes/TahoeISO is the desired location for mounting. On macOS, mounted volumes are typically placed under the /Volumes directory.
Step 4: Make a bootable macOS Tahoe installer
With your macOS Tahoe disk image mounted, you can now turn it into a bootable macOS Tahoe installer. This step will copy the macOS Tahoe installer to the empty disk image.
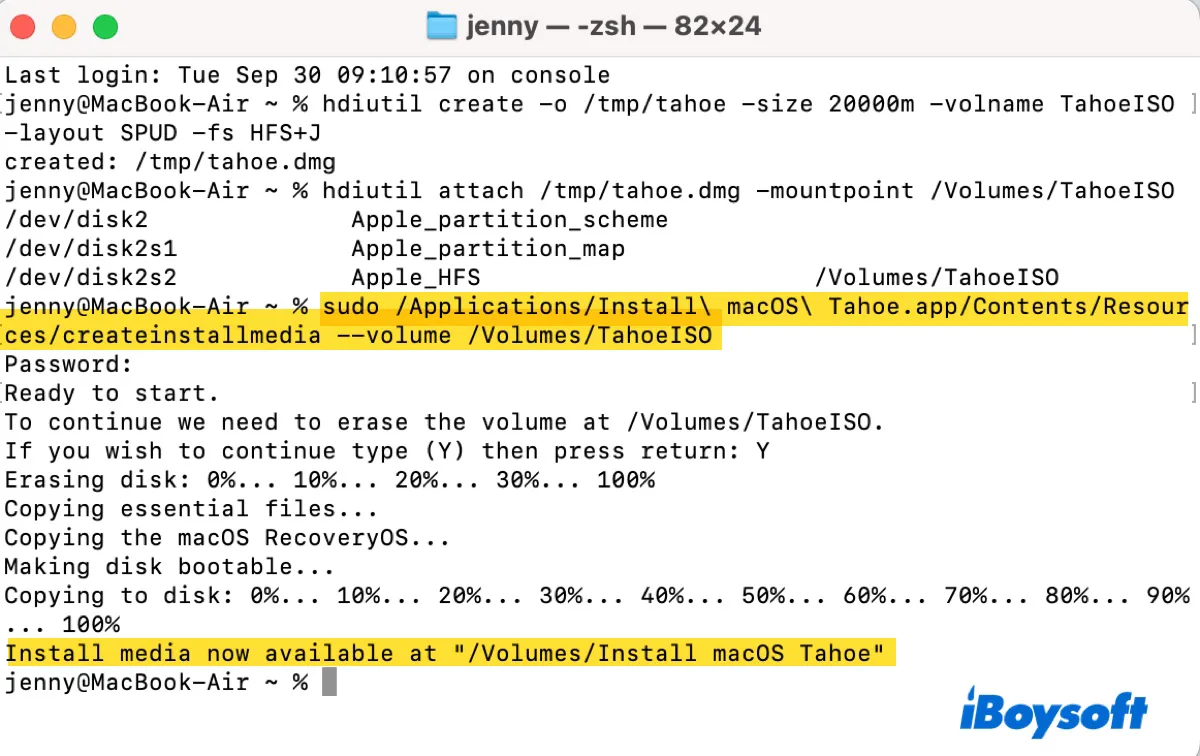
- In Terminal, execute the command below:sudo /Applications/Install\ macOS\ Tahoe.app/Contents/Resources/createinstallmedia --volume /Volumes/TahoeISO
- When it prompts for the password, enter your login password and hit Enter. Be reminded that the password won't show up on the screen for protection.
- Type Y and press Enter.
- Wait while Terminal is creating the bootable Tahoe installer.
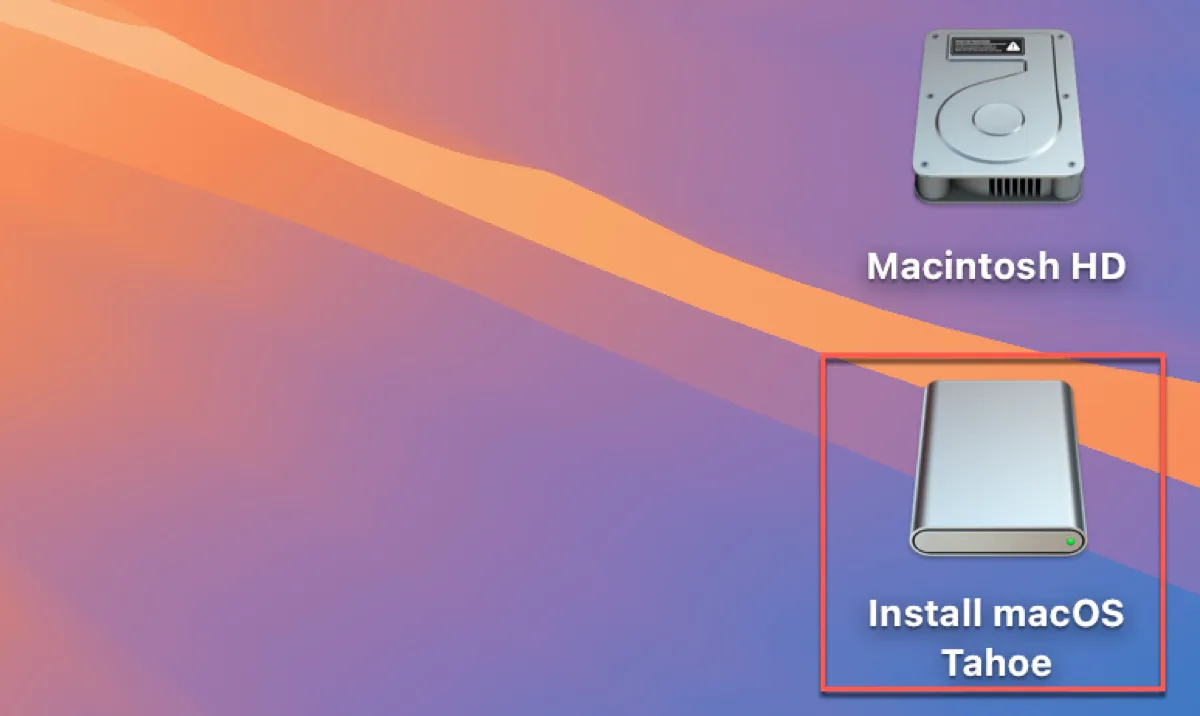
- When it returns "Install media now available at "/Volumes/Install macOS Tahoe," the bootable installer is created.
- The TahoeISO volume on your desktop will be renamed as "Install macOS Tahoe."
This command is used to create a bootable macOS Tahoe installer on a specified volume (in this case, /Volumes/TahoeISO) using the createinstallmedia tool provided in the macOS Tahoe installer application.
Here's a breakdown of the command:
sudo:
Runs the command with superuser (administrator) privileges. This is necessary because creating a bootable installer modifies system-level files on the target volume.
/Applications/Install\ macOS\ Tahoe.app/Contents/Resources/createinstallmedia:
Specifies the path to the createinstallmedia tool, which is included in the macOS Tahoe installer application. Install\ macOS\ Tahoe.app is the name of the macOS installer application. The backslashes (\) are used to escape spaces in the file path. The full path points to the createinstallmedia executable located in the Resources folder of the macOS installer.
--volume /Volumes/TahoeISO:
The --volume flag specifies the target volume where the bootable installer will be created. /Volumes/TahoeISO is the name of the volume (e.g., a USB drive or external disk) that will be used as the destination for the bootable macOS installer.
Step 5: Unmount the macOS Tahoe disk image
After that, you must unmount the macOS Tahoe bootable image so that it can be converted into an ISO file. In the Terminal window, run the following command:
hdiutil detach /Volumes/Install\ macOS\ Tahoe
This command will unmount the volume named Install macOS Tahoe located in /Volumes/.
Step 6: Convert the macOS Tahoe.dmg file to an ISO file in the .cdr format
Then, you'll need to convert the macOS Tahoe bootable disk image into a bootable ISO file with the following commnd:
hdiutil convert /tmp/tahoe.dmg -format UDTO -o ~/Desktop/Tahoe
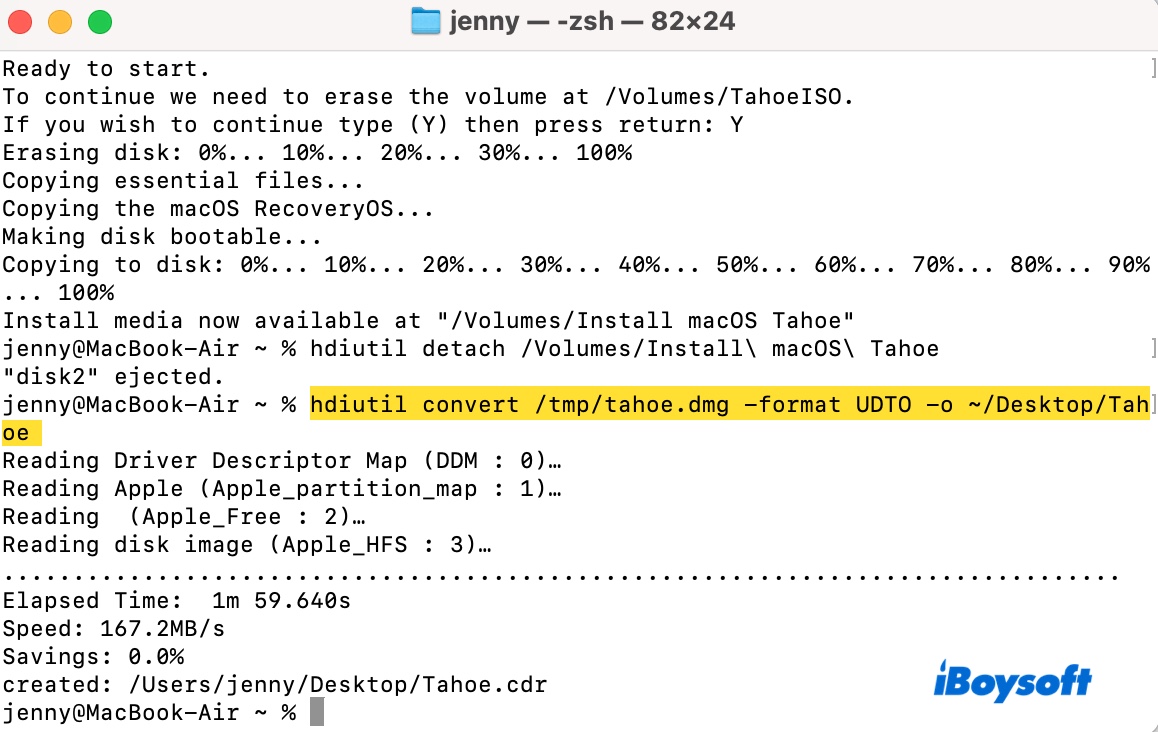
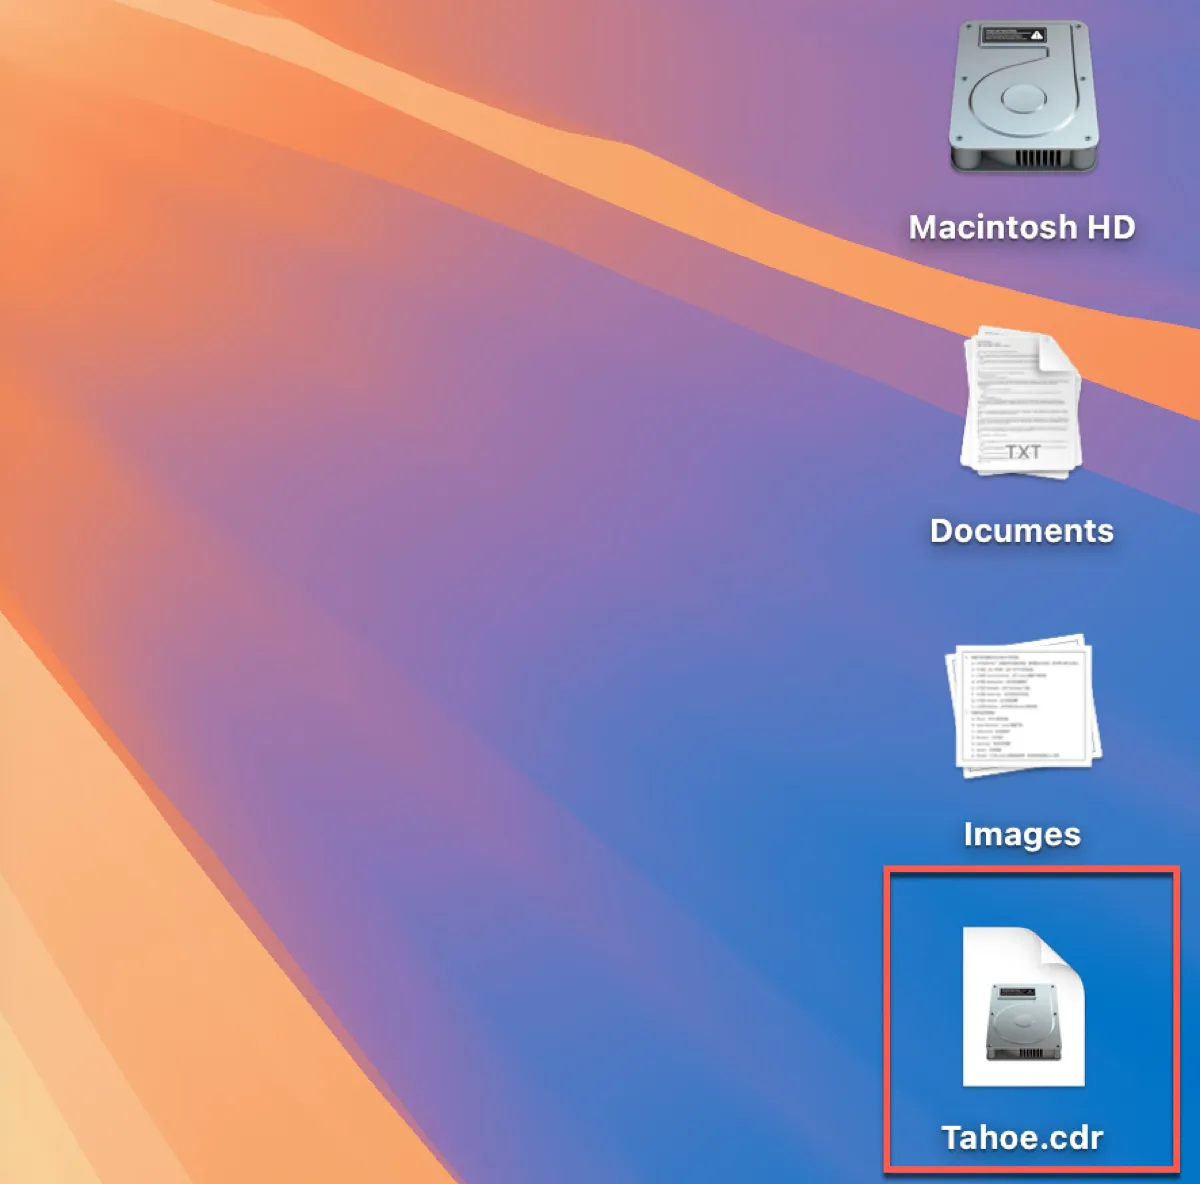
The command takes the .dmg file located at /tmp/tahoe.dmg, converts it to an ISO-compatible format (UDTO), and saves the resulting file as Tahoe.cdr on the desktop. Note that the .cdr extension is used by macOS for ISO files created via hdiutil.
Here's the command breakdown:
hdiutil convert:
The convert subcommand is used to convert a disk image from one format to another.
/tmp/tahoe.dmg:
This is the source disk image file (in .dmg format) located in the /tmp directory. The command is converting this file.
-format UDTO:
Specifies the target format for the conversion. UDTO stands for "Universal Disk Image Format (ISO 9660)", which is commonly used for creating ISO files. By specifying UDTO, the command converts the .dmg file into an ISO-compatible format.
-o ~/Desktop/Tahoe:
Specifies the output file path and name. The converted disk image will be saved to the user's desktop (~/Desktop) with the name Tahoe. The ~ represents the user's home directory.
Step 7: Rename the macOS Tahoe.cdr file to an ISO file
Finally, you can rename the .cdr extension to .iso so that it can be accessed by most virtual machines, including VMWare, VirtualBox, or UTM. In Terminal, run the following command:
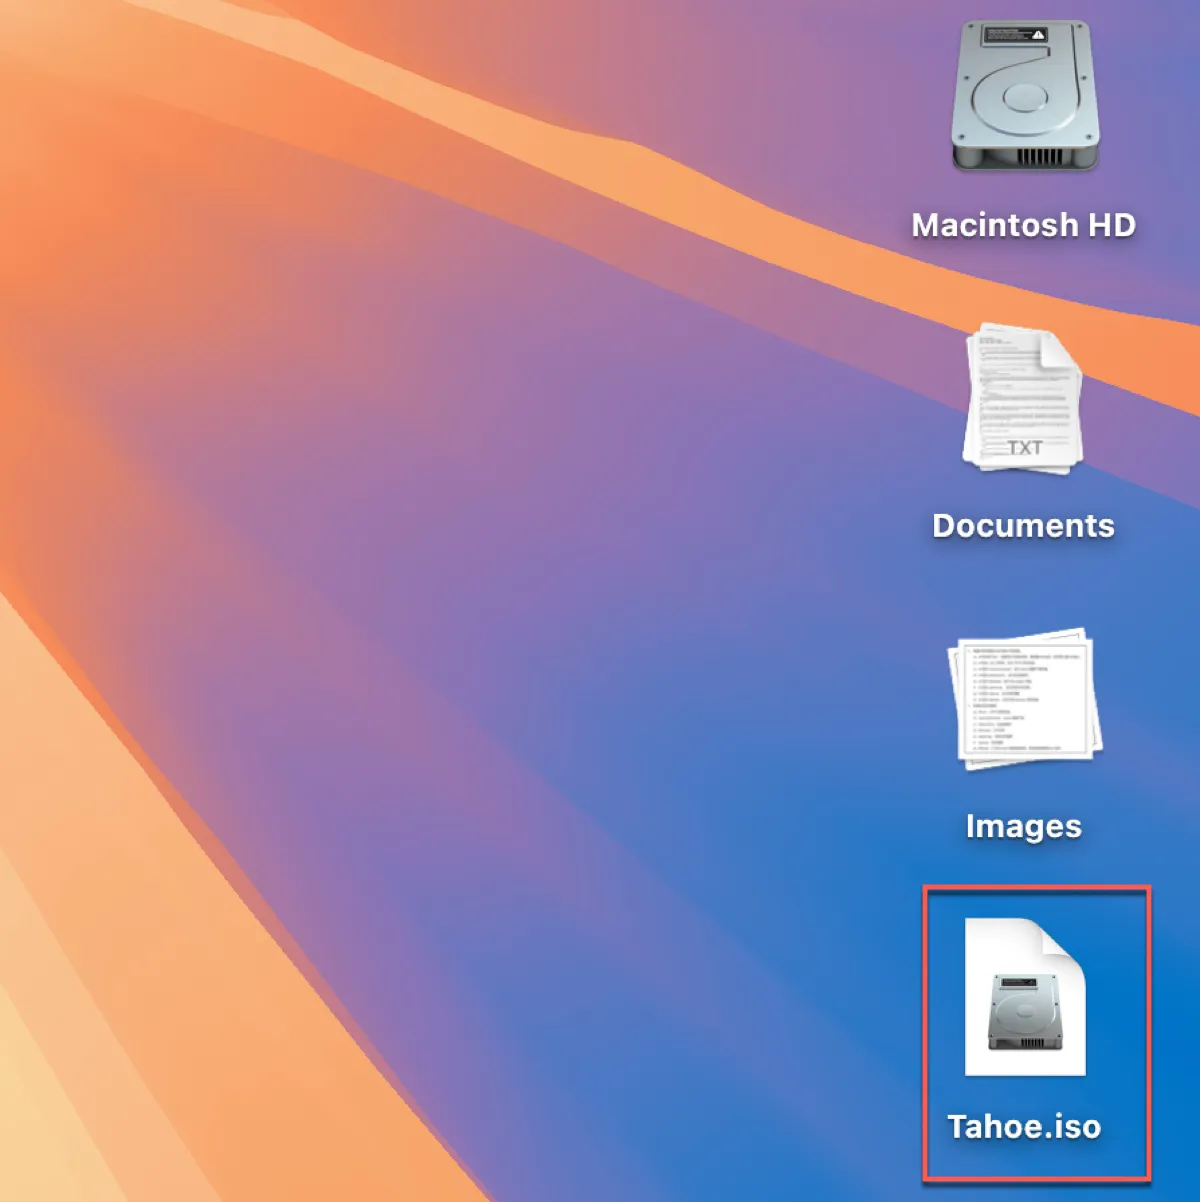
mv ~/Desktop/Tahoe.cdr ~/Desktop/Tahoe.iso
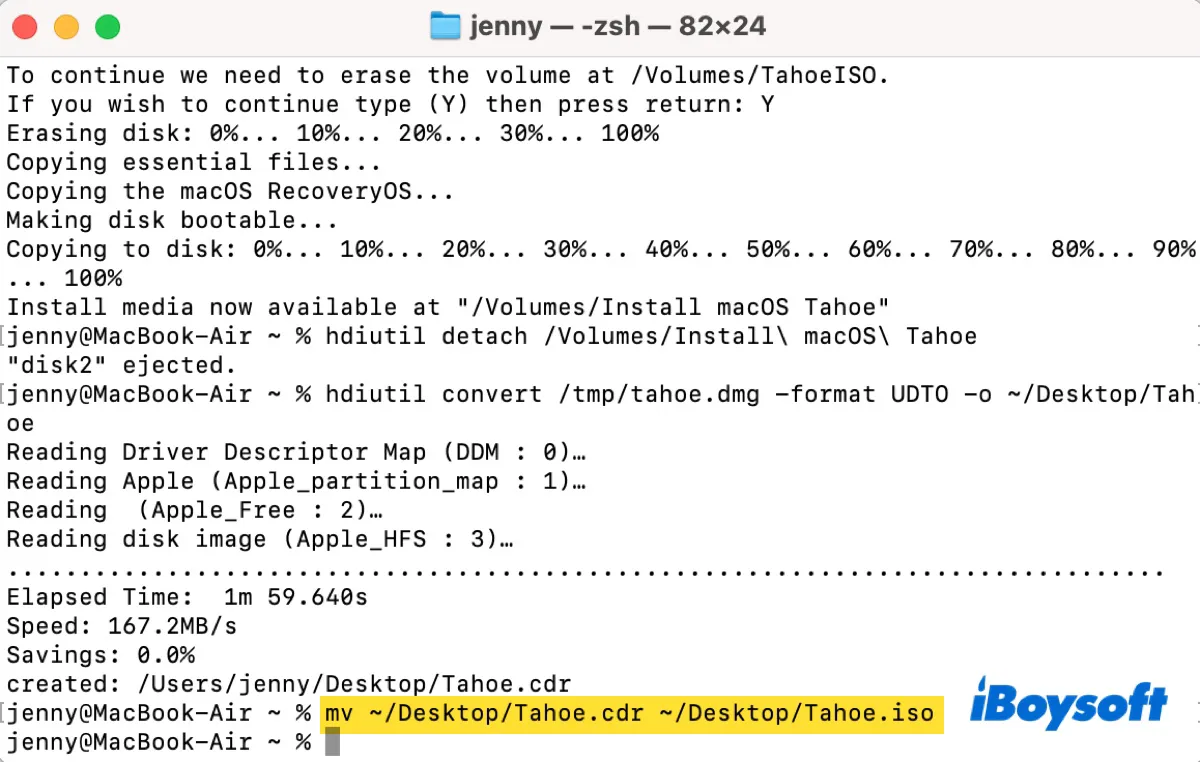
Now, check your desktop and you'll find the macOS 26 Tahoe ISO image.
Tips: Want to install macOS Tahoe on a Windows PC? Check out the following guides:
Share the steps on how to create macOS Tahoe ISO file for VMware or VirtualBox with others!
How to download macOS Tahoe ISO file for VMware or VirtualBox?
If you wish to download macOS Tahoe ISO file for VirtualBox or VMware directly, you can obtain it from a reliable third-party source. The following download links for the macOS Tahoe ISO file are hosted on Google Drive or MediaFire. Choose the one most suitable for you.
Free macOS Tahoe ISO Download for VMware/VirtualBox (19.53GB, MediaFire)
Free macOS Tahoe ISO Download for VMware/VirtualBox (20GB, Google Drive)
If you want to ensure the ISO file you downloaded is safe, download it from iBoysoft DiskGeeker.
Share the links to download macOS Tahoe ISO image directly!
In case you also need Windows ISO files, here are the original installers:
Download Windows 11, Download Windows 10, Download Windows 7 Home Premium, Download Windows 7 Ultimate
FAQs about macOS Tahoe ISO
- QWhat's a macOS Tahoe ISO file?
-
A
A macOS Tahoe ISO file is a disk image file containing the whole installation file needed to install macOS Tahoe 26. It's commonly used to run macOS Tahoe in virtual machines like VirtualBox, VMware, or Parallels on a Windows PC or another Mac.
- QWhy do you download and create macOS Tahoe ISO file?
-
A
Most users want to download or create a macOS Tahoe ISO file for running macOS Tahoe on a Windows PC or a Mac, or create an isolated environment to test macOS Tahoe.