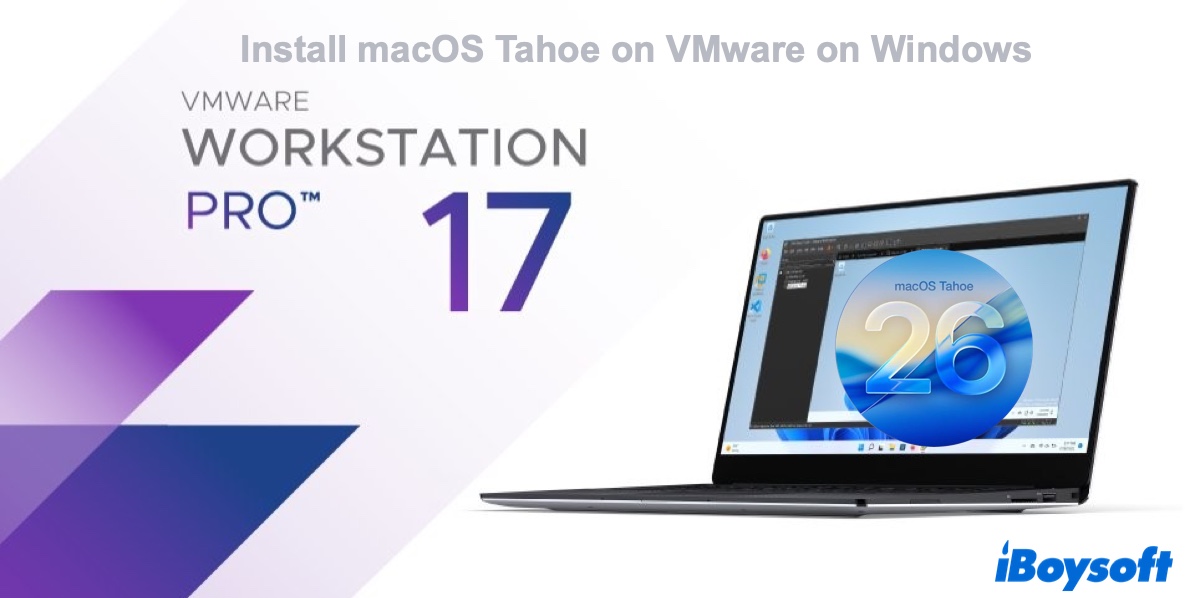
macOS Tahoe 26, the newest macOS version, was released on September 15, 2025. This major release brings you a completely different "Liquid Glass" look, major updates to Spotlight Search, and features include new customization options for icons and folders, a redesigned Control Center, etc.
Want to run macOS Tahoe on your Windows PC? This comprehensive tutorial is for you. Apart from creating a macOS Tahoe Hackintosh, installing macOS Tahoe via a free and maintained virtual machine like VMware Workstation Pro also enables you to utilize the new macOS features.
In this guide, we'll walk you through the process of downloading the macOS Tahoe installer and installing macOS Tahoe on VMware Workstation on a Windows PC step by step.
| Tips: Besides virtual machines, you can also create a macOS Tahoe bootable USB installer from Windows and install macOS Tahoe on a Hackintosh. This way, you can experience macOS Tahoe with near-native performance. |
Step 1: Preparations before installing macOS Tahoe on VMware
To install macOS Tahoe on VMware, you must ensure your Windows PC meets the following requirements and prepare the necessary tools listed below.
Requirements for installing macOS Tahoe on VMware on Windows:
- CPU: Intel Core i5/i7/i9 (6th Gen or newer) or AMD Ryzen (Zen 2+).
- Virtualization (VT-x/AMD-V) must be enabled in BIOS/UEFI.
- RAM: at least 8GB of RAM.
- Storage: 80 GB+ of free space.
Software needed:
① macOS Tahoe ISO file
The macOS Tahoe ISO file contains all the installation files for macOS Tahoe. To prevent installation errors, you should ensure it's complete and virus-free.
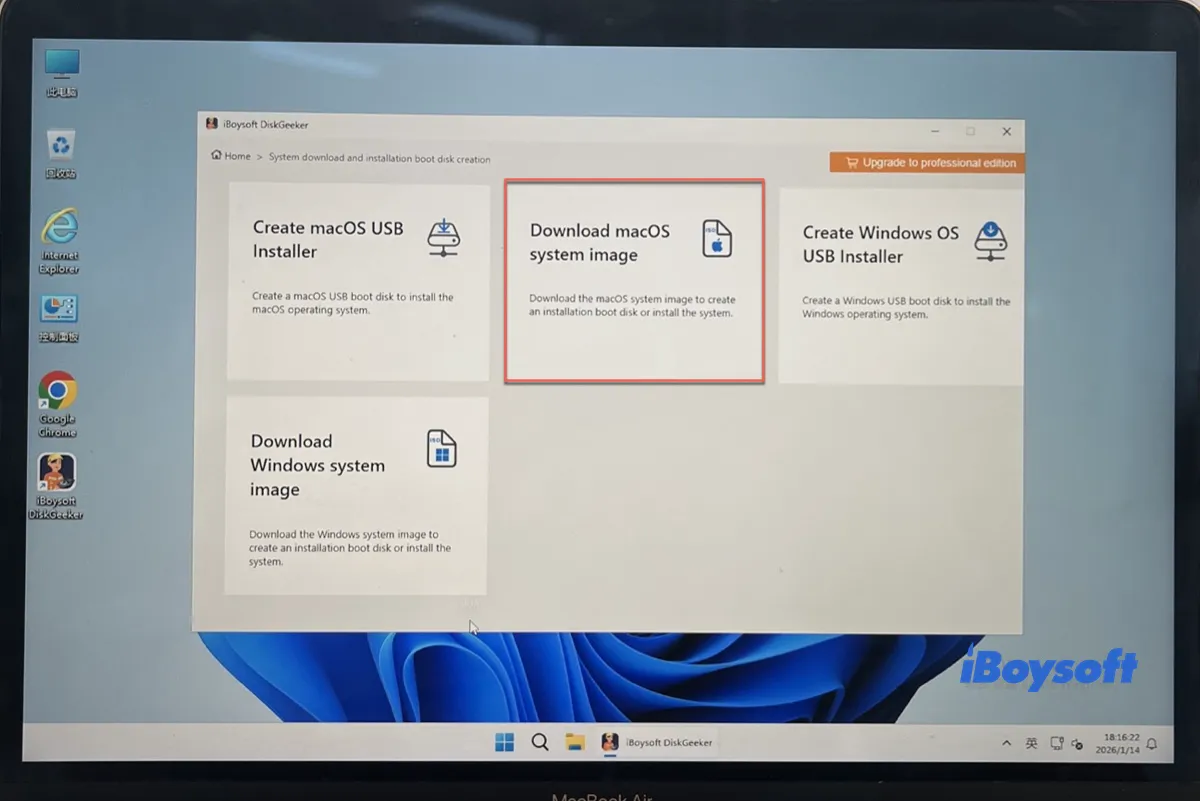
Fortunately, iBoysoft DiskGeeker for Windows hosts a full library of macOS ISO files, ranging from macOS Tahoe to older macOS releases like Mac OS X Snow Leopard.
Take the steps below to download the macOS Tahoe ISO image for VMware:
Step 1: Free download and open iBoysoft DiskGeeker for Windows.
Step 2: Navigate to Download and create boot disk > Download macOS system image.
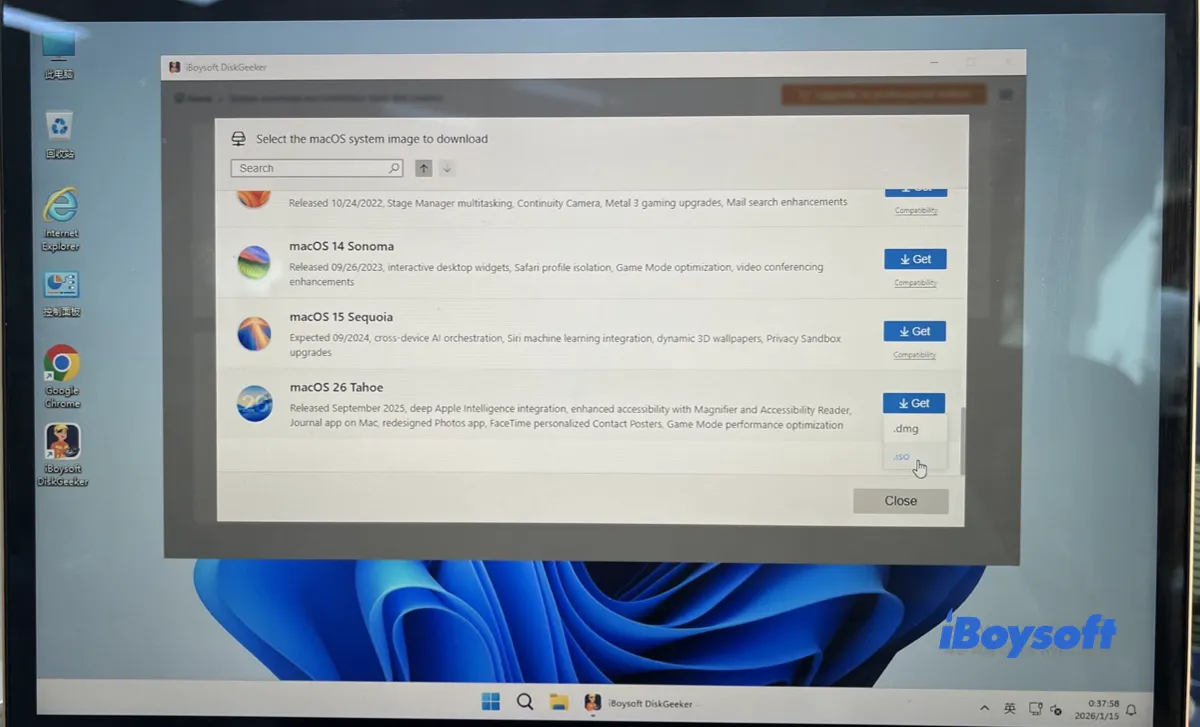
Step 3: Find the macOS 26 Tahoe and click Get.
Step 4: Choose the .iso format and select a location to save it.
② VMware Workstation Pro 17
VMware Workstation Pro 17 is a powerful virtualization tool that allows you to run the Mac operating system on a Windows computer. It's free for non-commercial use. You can download the latest version of VMware Workstation Pro 17 from the following link.
VMware Workstation Pro 17 download
③ VMware Unlocker
Installing macOS on a non-Apple device is not supported by default. To overcome the limitation, you'll need the VMware Unlocker, a tool designed to enable the use of macOS on non-Apple hardware through VMware.
In the download page, find the latest version and click release-python-embedded.zip to download it.
With all tools prepared, you're ready to install macOS 26 Tahoe on VMware.
Share these tools with others to install macOS Tahoe 26 on VMware!
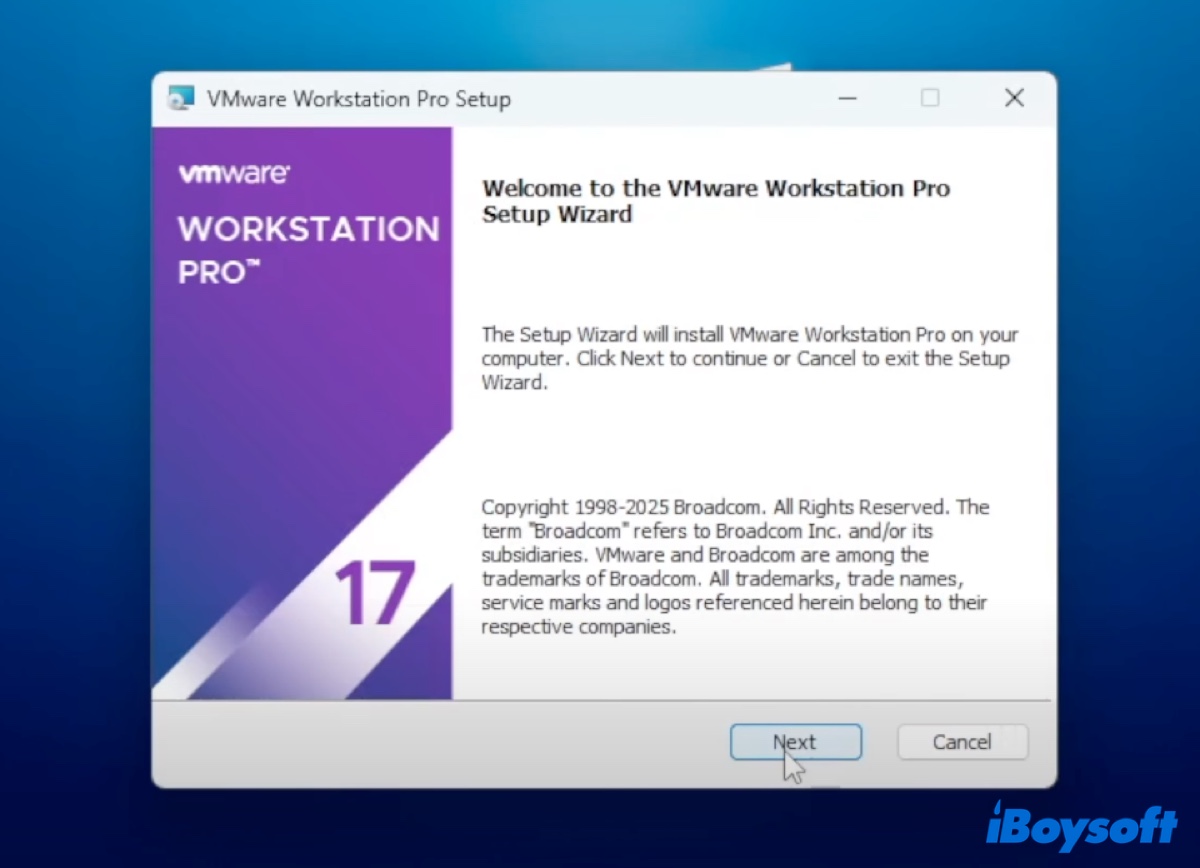
Step 2: Install VMware Workstation
Browse to the folder where you downloaded VMware Workstation, then double-click the exe program to install it.
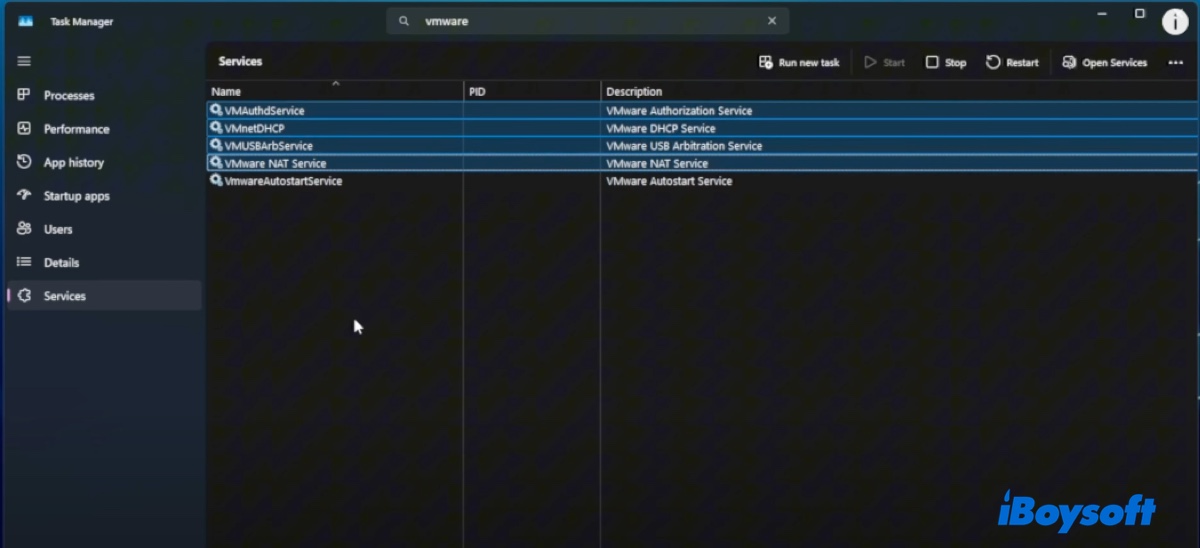
After the installation is complete, restart your PC. Once restarted, disable the VMware service first. To do this, right-click on the empty space on the Taskbar, select Task Manager from the menu, and then go to the Services tab and search for "vmware." Select all the firmware services and click Stop to close them.
Step 3: Unlock macOS on VMware
Next, you need to enable macOS on VMware. Navigate to the downloaded VMware Unlocker, extract its ZIP file, right-click on win-install.cmd, and choose Run as administrator.
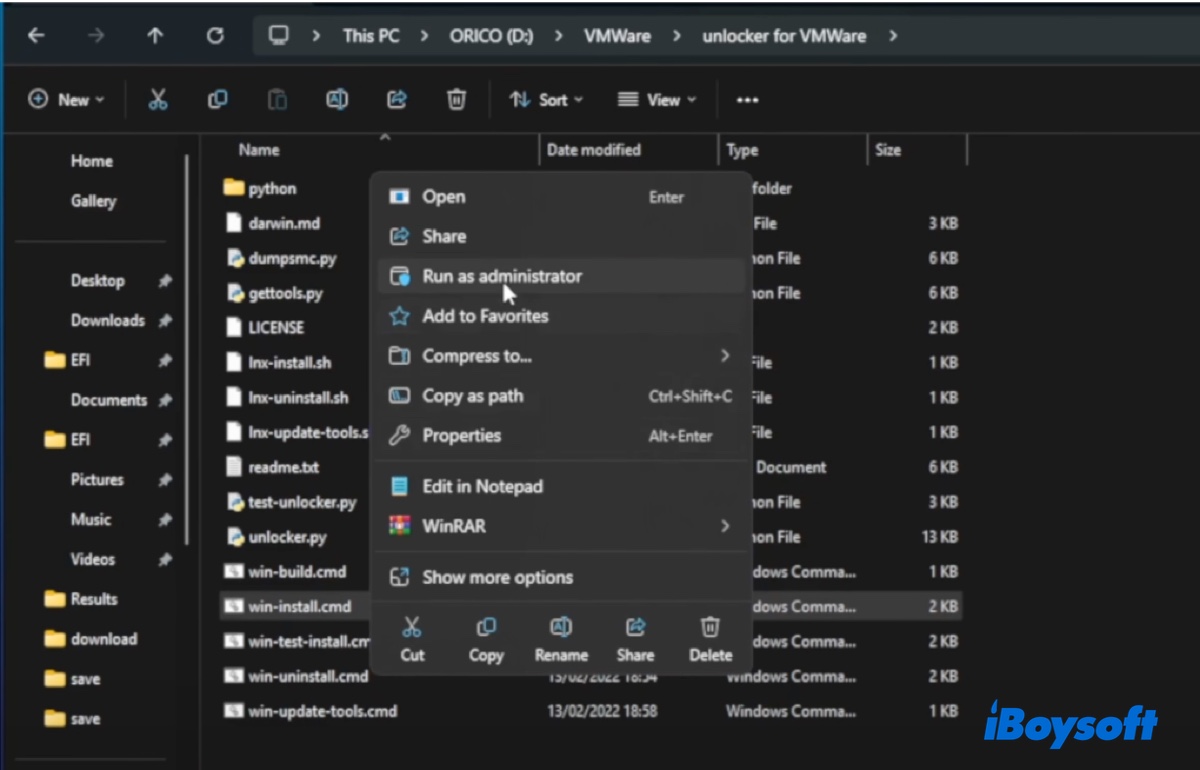
If you run into the error "Python not found," install Python on your Windows PC first and then run win-install.cmd as an administrator. After the unlocker is executed, close the window.
Step 4: Create a macOS Tahoe virtual machine using VMware Workstation
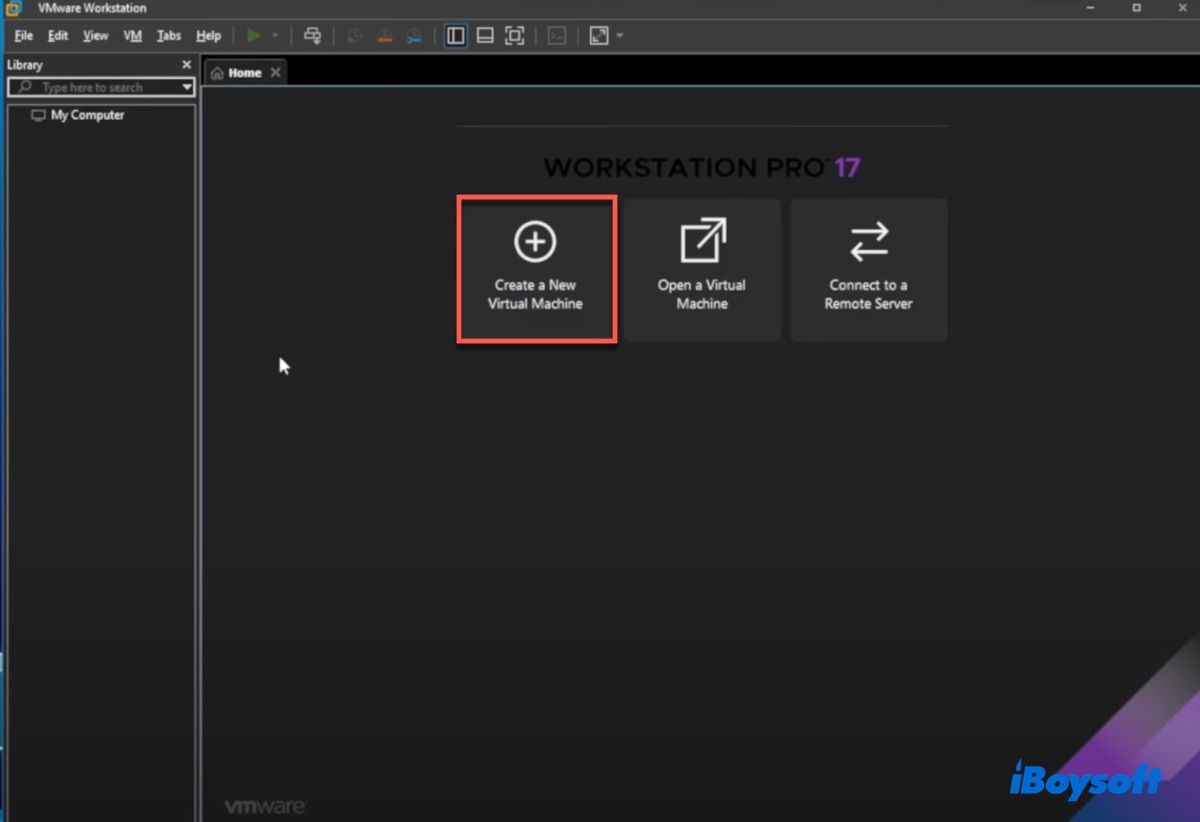
You can now create the macOS Tahoe virtual machine with the steps below:
- Open VMware Workstation.
- Click "Create a New Virtual Machine."
- Choose the Custom (advanced) setup.
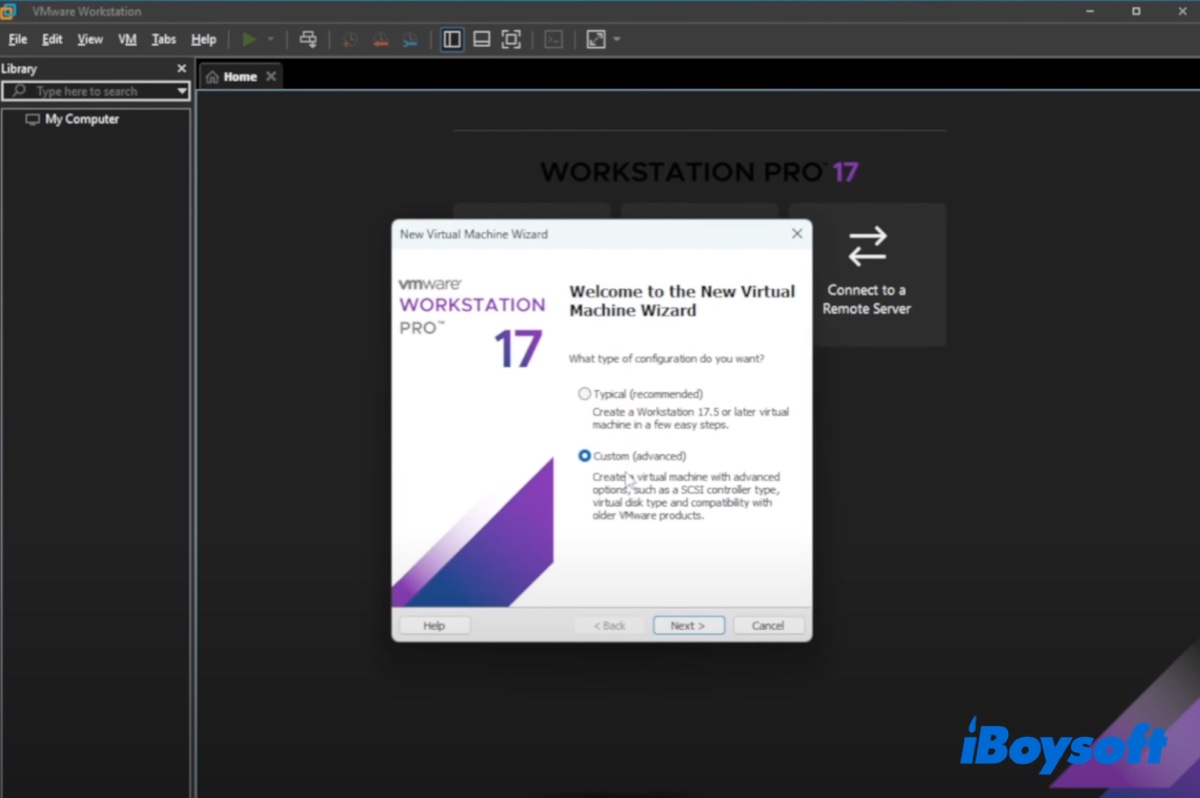
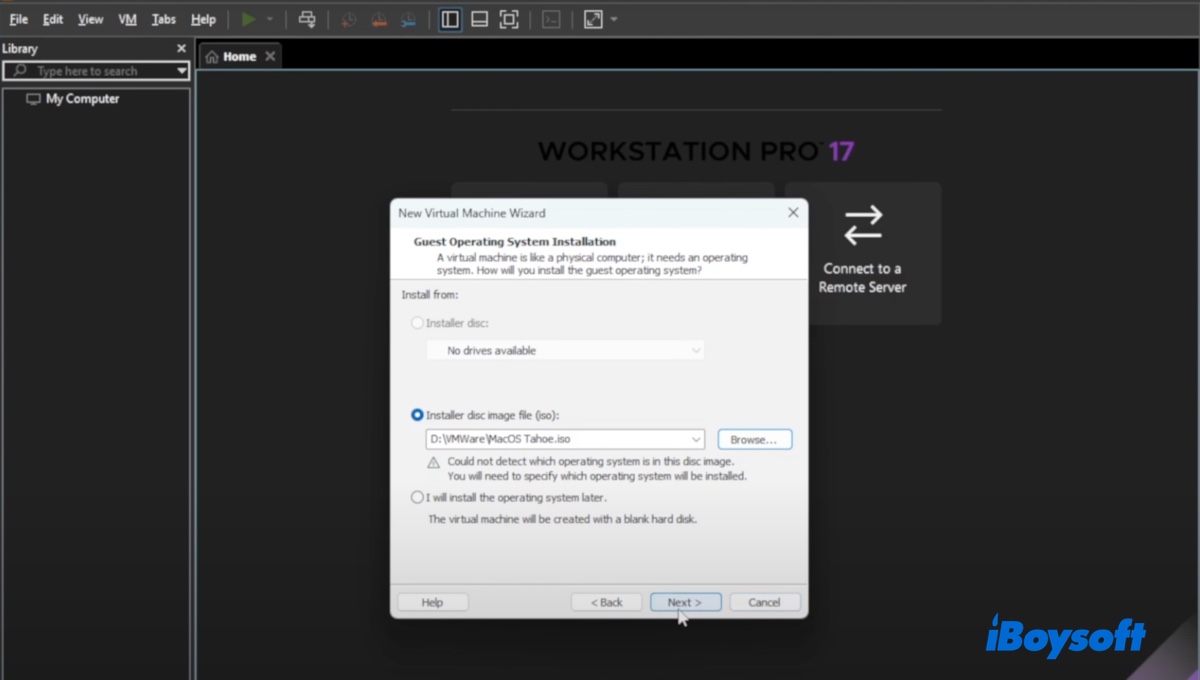
- Click Next until you reach the "Guest Operating System Installation" phase.
- Select "Installer disc image file (iso):" and click Browse to add the macOS Tahoe ISO file, then click Next.
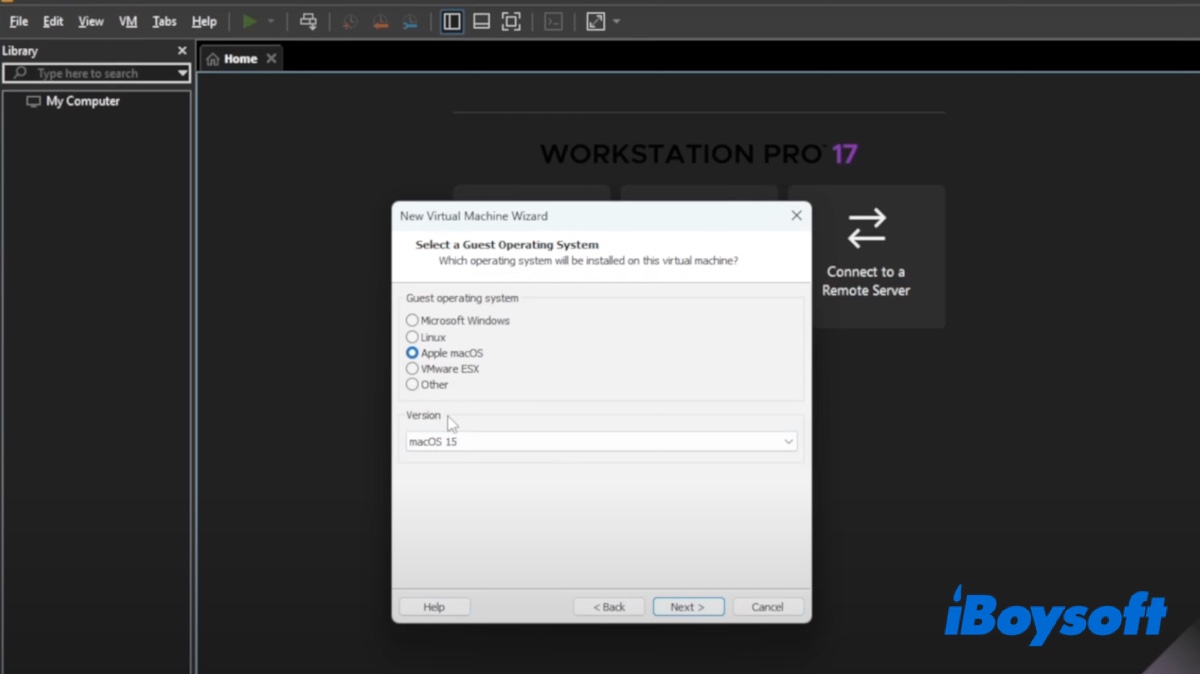
- Then choose "Apple macOS" as the guest operating system, select macOS 15 (if macOS 26 is not listed) in the drop-down menu of Version, and click Next.
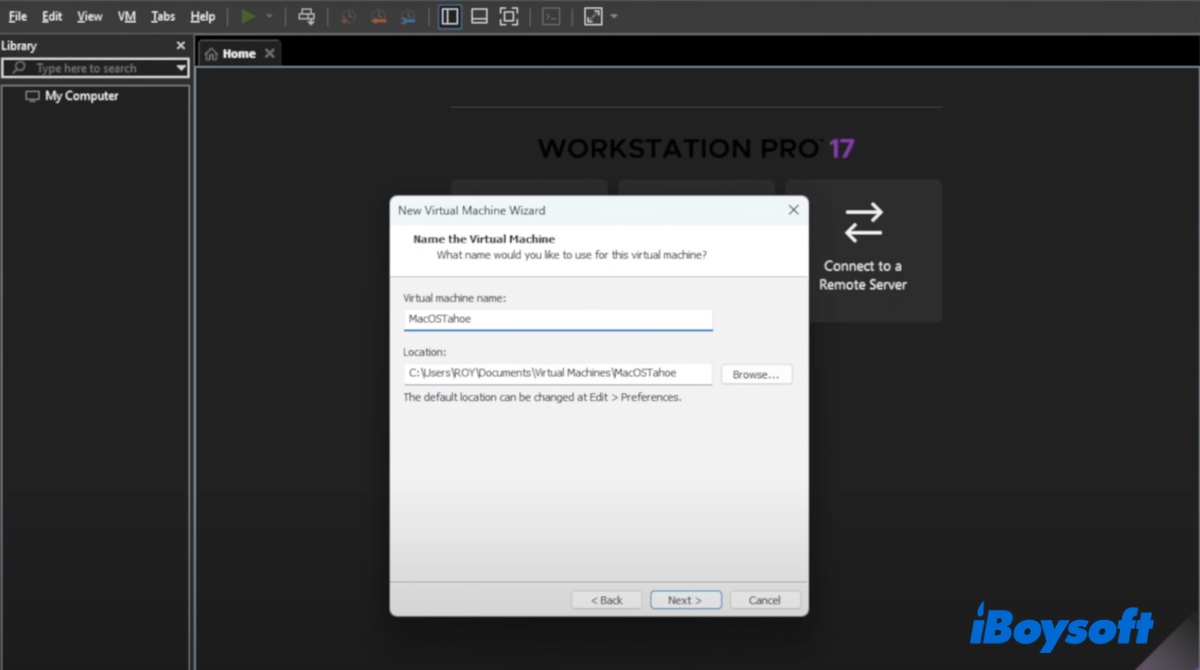
- Name the virtual machine macOS Tahoe and click Next.
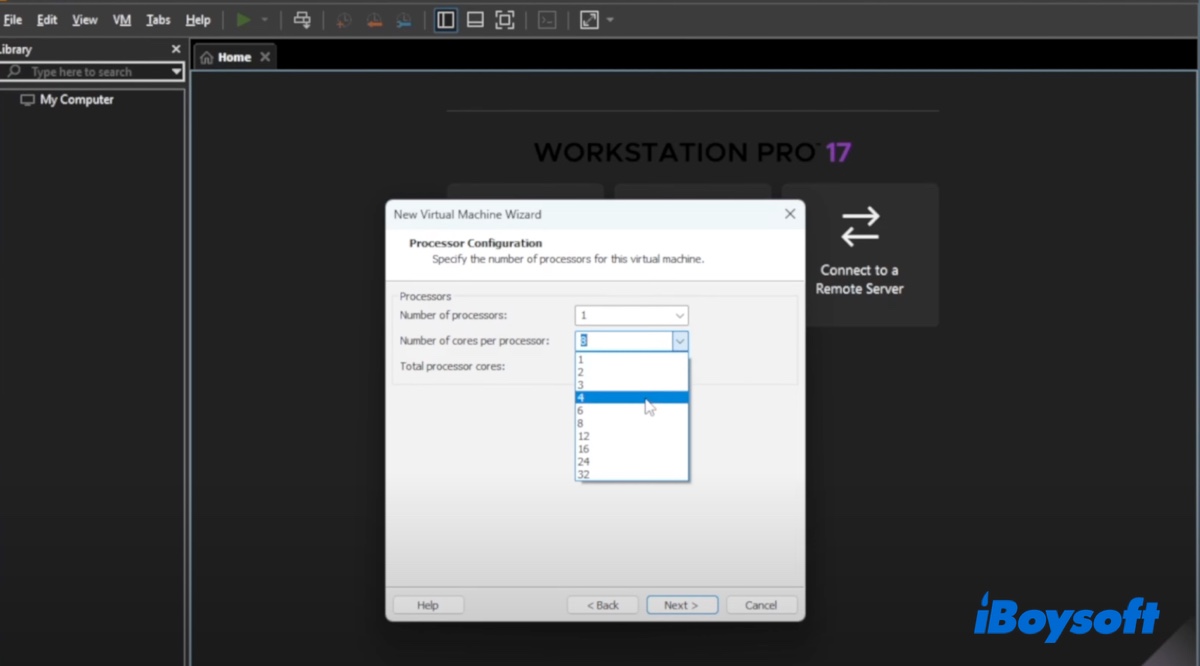
- In Processor Configuration, set the number of processors to 1 and the number of cores per processor to 4, then click Next.
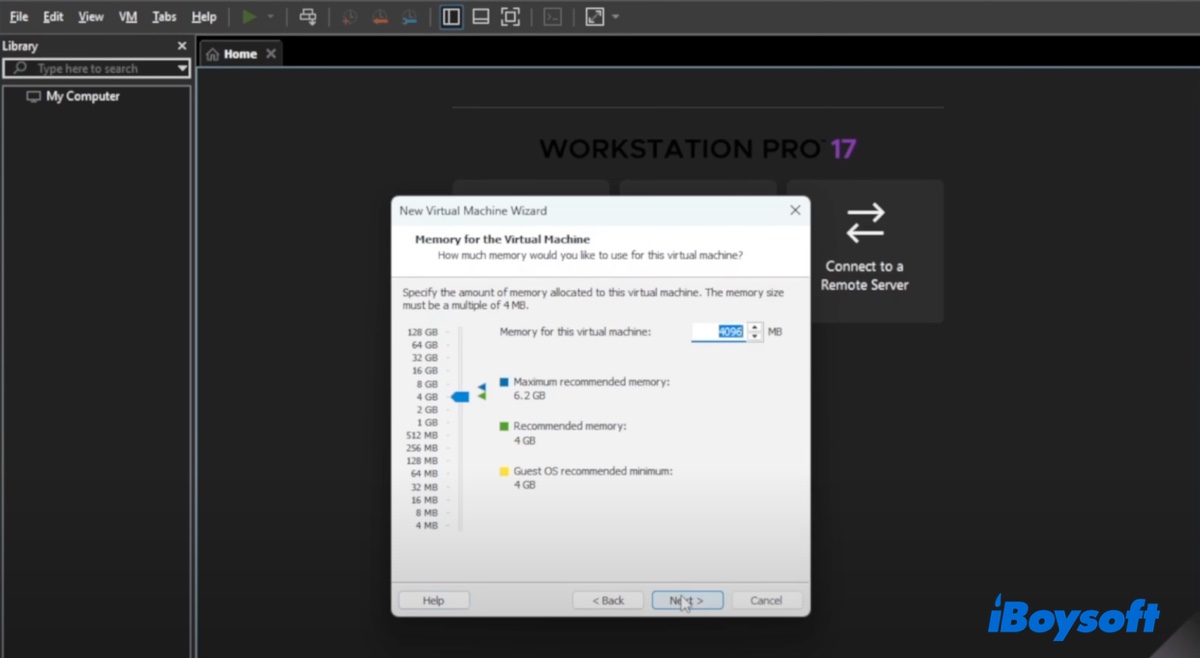
- Allocate 4GB of RAM to the virtual machine and click Next. (If you have more RAM, you can choose higher memory.)
- Choose "Use Network Address Translation" as the type of network you want to add and click Next.
- Select "LSI Logic (Recommended)" as the I/O controller type and click Next.
- Choose "SATA (Recommended)" as the disk type and click Next.
- When asked to select a disk, click "Create a new virtual disk" and click Next. If you have the macOS Tahoe VMDK file, you can also choose to "Use an existing virtual disk."
- Specify at least 80GB of space for the macOS Tahoe virtual machine and choose "Split virtual disk into multiple files."
- Choose where to store the disk file. You can keep the default if you don't have a specific location in mind.
- Click Finish to complete the setup.
Step 5: Edit the VMX configuration
For macOS Tahoe to run properly on VMware, you'll also need to edit the VMX file. Take the following steps:
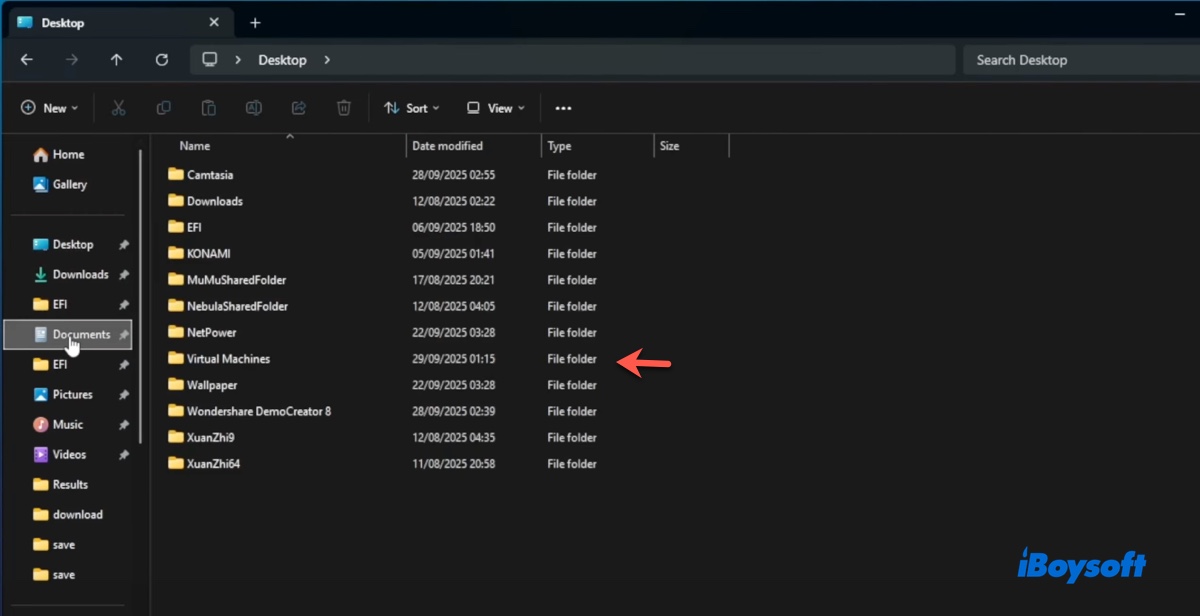
- Navigate to the Documents folder on File Explorer and open the folder labeled Virtual Machines.
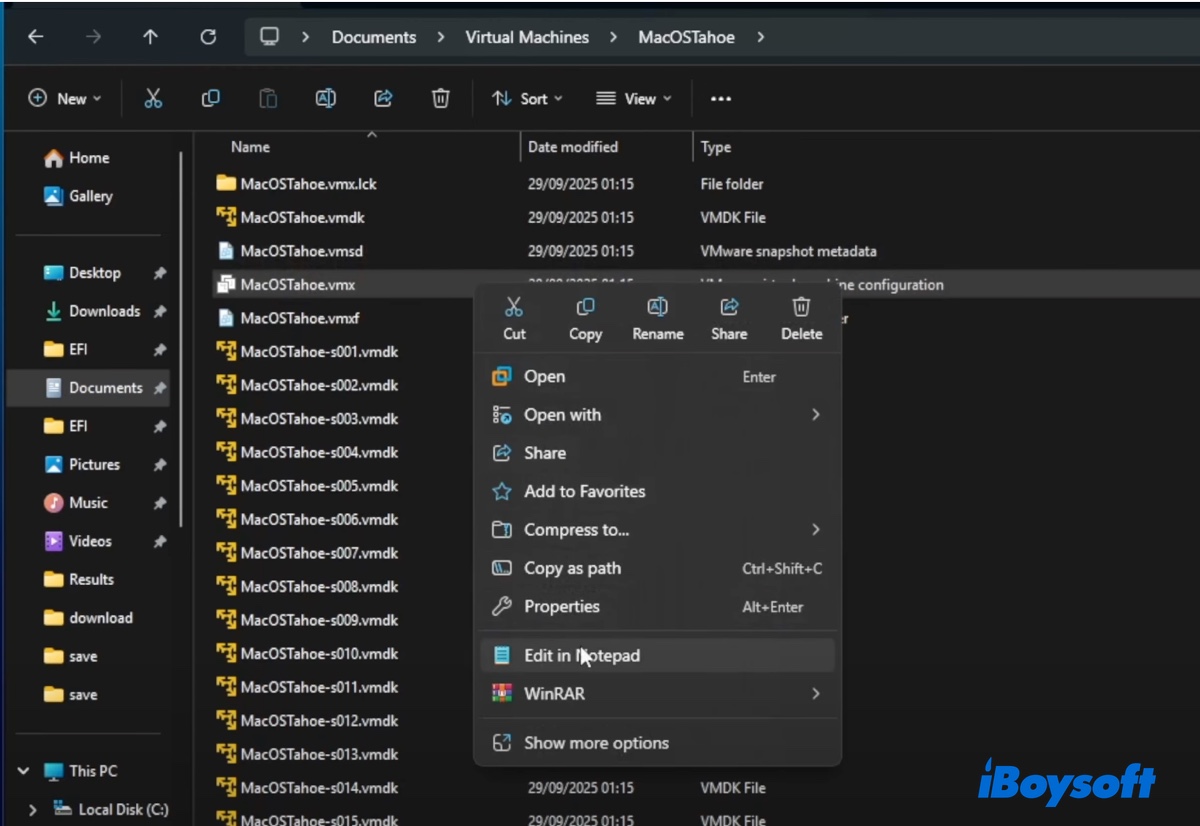
- Open the macOS Tahoe virtual machine folder.
- Find the MacOSTahoe.vmx file, right-click on it, and choose "Edit in Notepad."
- Add the following lines to the bottom of the file.
For Intel computers:
smc.version = "0"
For AMD computers:
smc.version = "0"
cpuid.0.eax = "0000:0000:0000:0000:0000:0000:0000:1011"
cpuid.0.ebx = "0111:0101:0110:1110:0110:0101:0100:0111"
cpuid.0.ecx = "0110:1100:0110:0101:0111:0100:0110:1110"
cpuid.0.edx = "0100:1001:0110:0101:0110:1110:0110:1001"
cpuid.1.eax = "0000:0000:0000:0001:0000:0110:0111:0001"
cpuid.1.ebx = "0000:0010:0000:0001:0000:1000:0000:0000"
cpuid.1.ecx = "1000:0010:1001:1000:0010:0010:0000:0011"
cpuid.1.edx = "0000:0111:1000:1011:1111:1011:1111:1111"
monitor.virtual_exec = "hardware"
monitor.virtual_mmu = "software"
Once added, click File > Save to save the configuration.
Step 6: Install macOS Tahoe on VMware Workstation on Windows
Finally, you can format the virtual hard disk and install macOS Tahoe on the virtual machine to test the new functionalities.
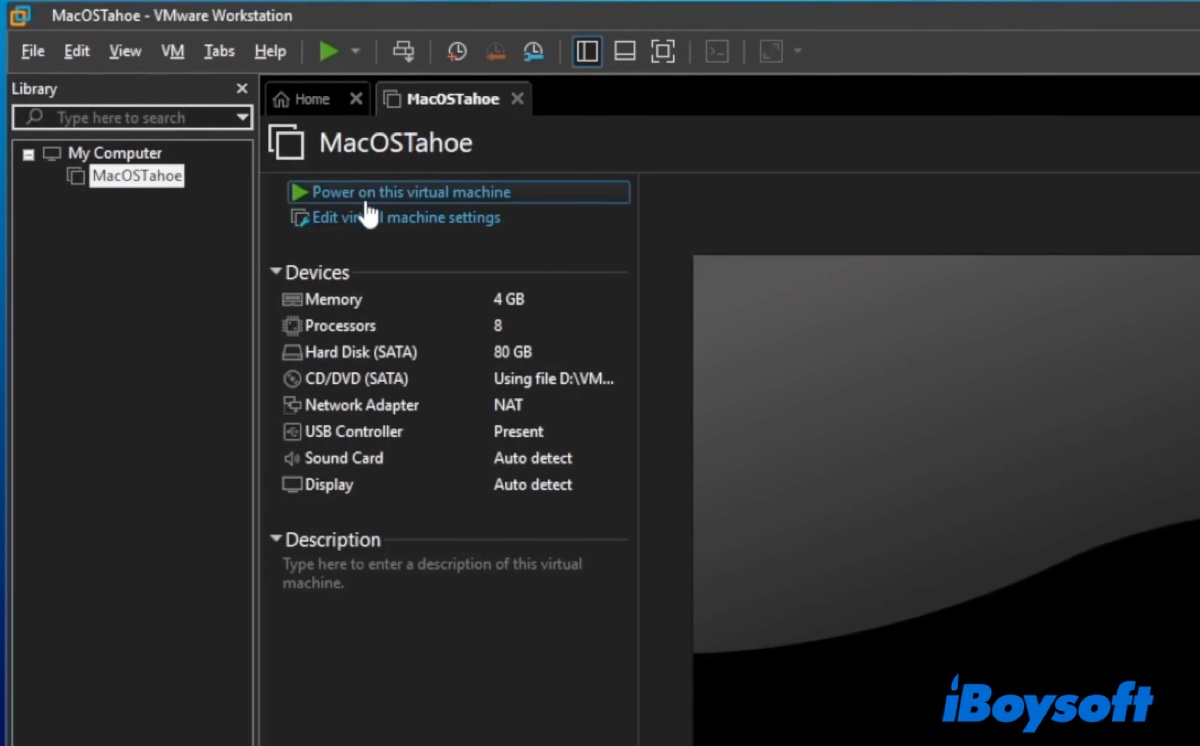
- Open VMware Workstation.
- Select the macOS Tahoe virtual machine and click "Power on this virtual machine."
- Once the installer loads, choose your preferred language and click the right arrow to continue.
- From the macOS Utilities window, choose Disk Utility and click Continue.
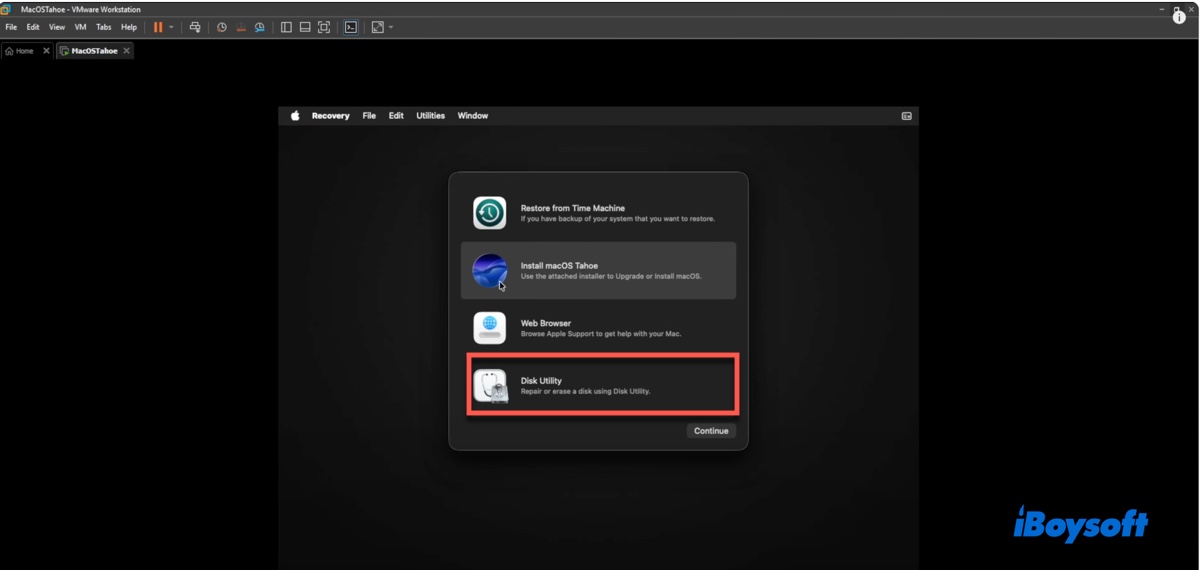
- Click View > Show All Devices.
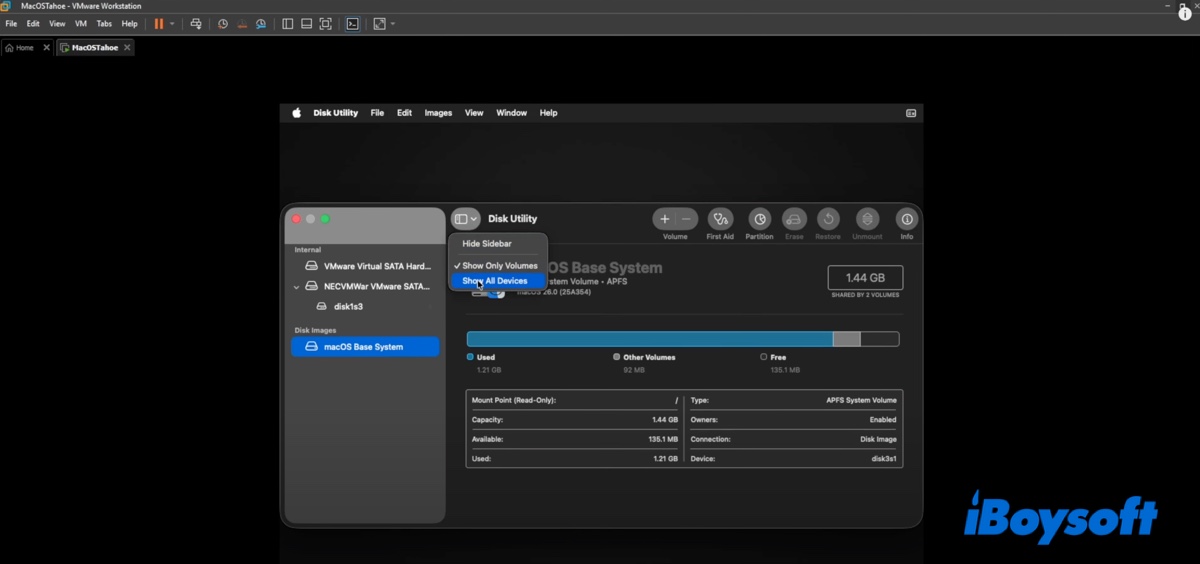
- Select the VMware SATA Hard Drive Media and click Erase.
- Name the virtual drive macOS Tahoe.
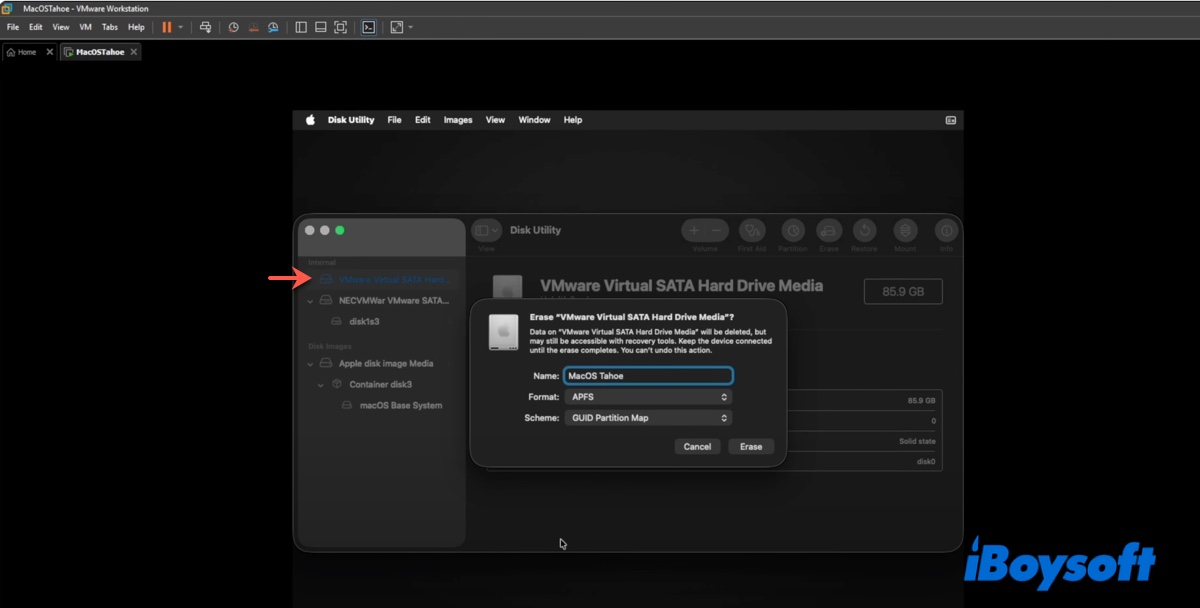
- Keep the format as APFS and the scheme as GUID Partition Map.
- Click Erase.
- Close Disk Utility once the formatting process is done.
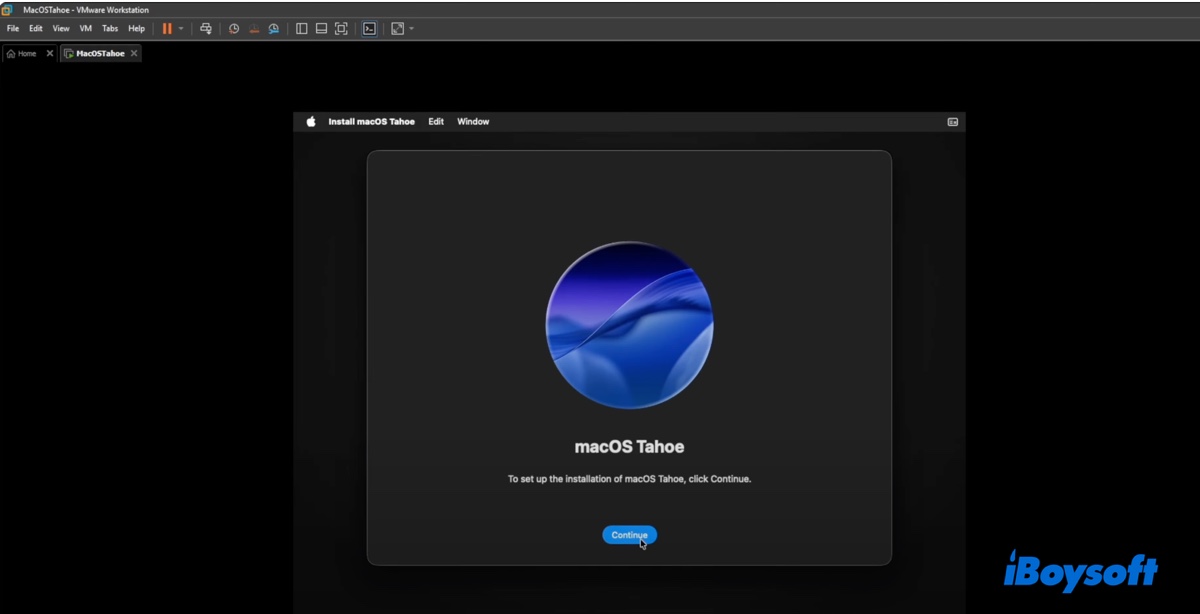
- Choose "Install macOS Tahoe" and click Continue.
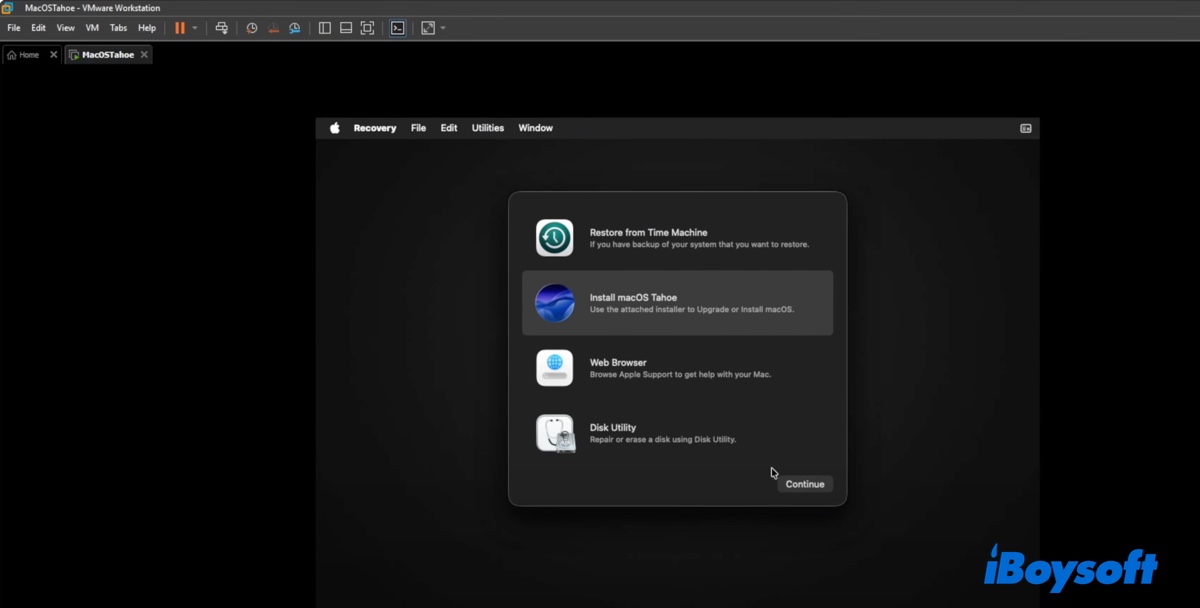
- Click Continue to set up the installation of macOS Tahoe.
- Agree to the terms and conditions.
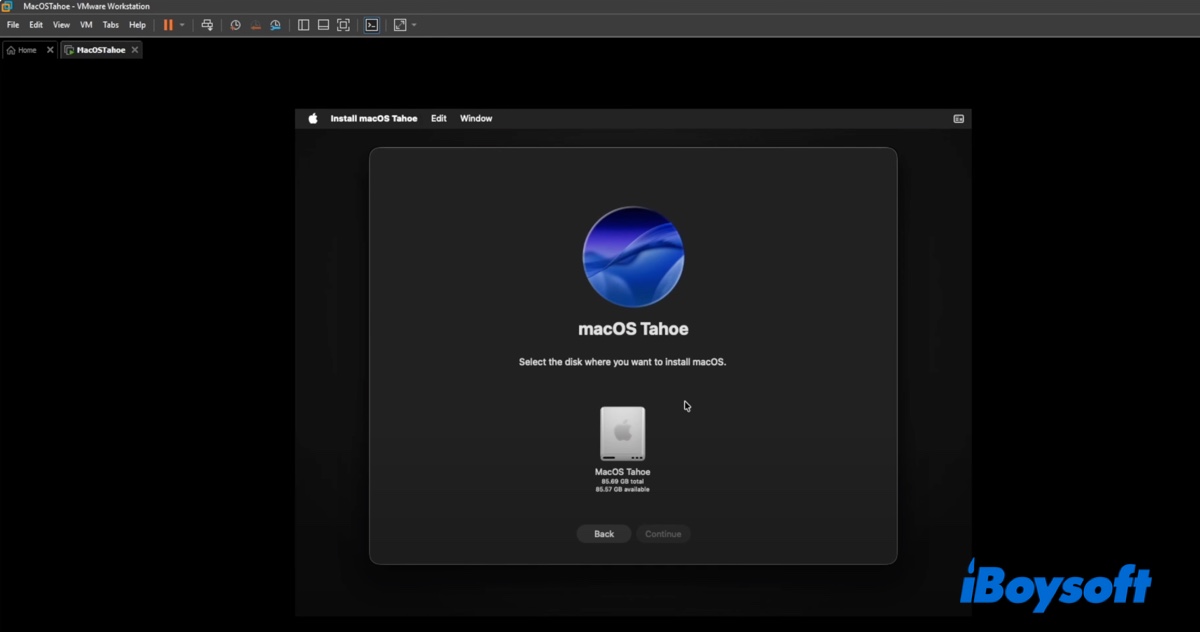
- When it asks you to select the disk where you want to install macOS, choose the macOS Tahoe virtual partition you just created and click Continue.
- Follow the instructions on the screen to finish the installation.
The installation process may take 20-40 minutes, depending on your computer's performance. During the installation, the virtual machine will restart several times. Let it reboot until it gets to the setup screen. Then you can configure macOS Tahoe on VMware.
Step 7: Install VMware Tools
Last but not least, you're recommended to install VMware Tools, which is a set of utilities and drivers specifically developed to enhance the performance and usability of virtual machines running on VMware Workstation.
They can optimize graphics performance, enable full-screen support, and facilitate the interactions between the host Windows operating system and the virtual macOS Tahoe.
- Power on the macOS Tahoe virtual machine in VMware.
- Click VM in the menu bar and click "Install VMware Tools" > Install.
- Enter your password and choose "Install Software."
- Suppose it fails with "System Extensions Blocked," then you can follow the instructions to enable it.
- Click Restart to reboot your macOS Tahoe VMware virtual machine.
macOS Tahoe slow performance on VMware
We highly recommend that you free up space on your computer if you want to run macOS Tahoe on VMware on your Windows PC smoothly. This can ensure the macOS Tahoe virtual machine has enough storage space, preventing errors and performance slips.
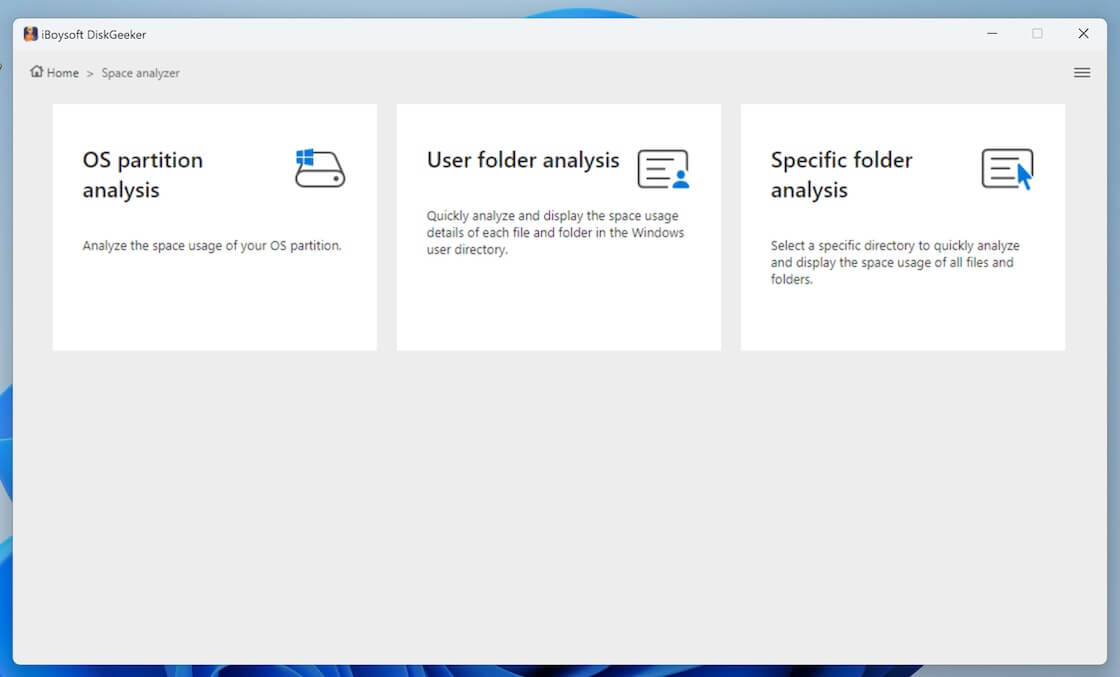
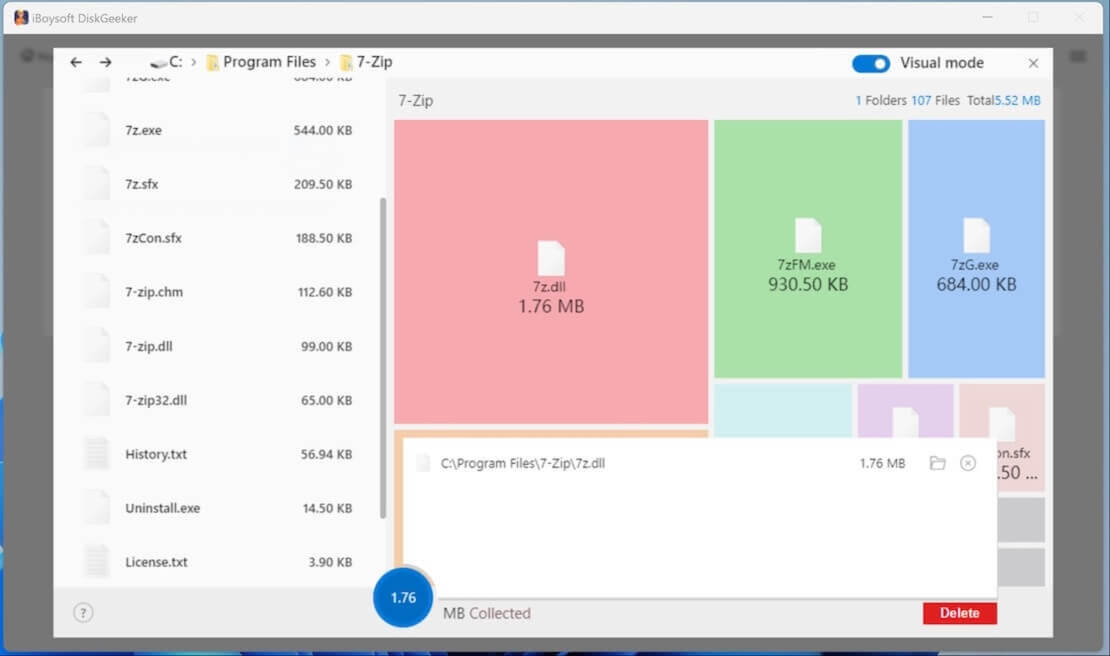
To delete the unnecessary junk on your PC, use iBoysoft DiskGeeker for Windows. It can analyze your internal hard drive and display which files are consuming space, helping you easily remove large and unwanted files.
Step 1: Free download and install iBoysoft DiskGeeker for Windows.
Step 2: Click Space analyzer. 
Step 3: Select a preferred module to start scanning.
Step 4: Select the unwanted files and click the Delete button to remove them.
Note: If you prefer VirtualBox, you can also install macOS on VirtualBox.
Share these steps to help others install macOS Tahoe on VMware!
FAQs about macOS Tahoe VMware
- QHow to run macOS Tahoe in a VM on a Windows PC?
-
A
Step 1: Preparations before installing macOS Tahoe on VMware
Step 2: Install VMware Workstation
Step 3: Unlock macOS on VMware
Step 4: Create a macOS Tahoe virtual machine using VMware Workstation
Step 5: Edit the VMX configuration
Step 6: Install macOS Tahoe on VMware Workstation on Windows
Step 7: Install VMware Tools
- QCan I run macOS Tahoe on Windows PC?
-
A
Yes, you can run macOS Tahoe on a Windows PC using a virtual machine like VMware or VirtualBox.