If you want to dual-boot macOS and Windows on your Windows PC, a virtual machine like VirtualBox is the best choice. It allows you to switch between Windows and macOS easily without rebooting. Whether you're trying to install an older macOS version like macOS High Sierra or the latest version like macOS Tahoe on Windows, VirtualBox can be helpful.
In the following paragraphs, we'll offer the steps to install any macOS, OS X, and Mac OS X on VirtualBox on a Windows PC.
Step 1: Preparation before installing macOS on VirtualBox
Before installing Mac OS on VirtualBox, you need to make sure the following items are checked:
① 80GB of free space for the macOS installation
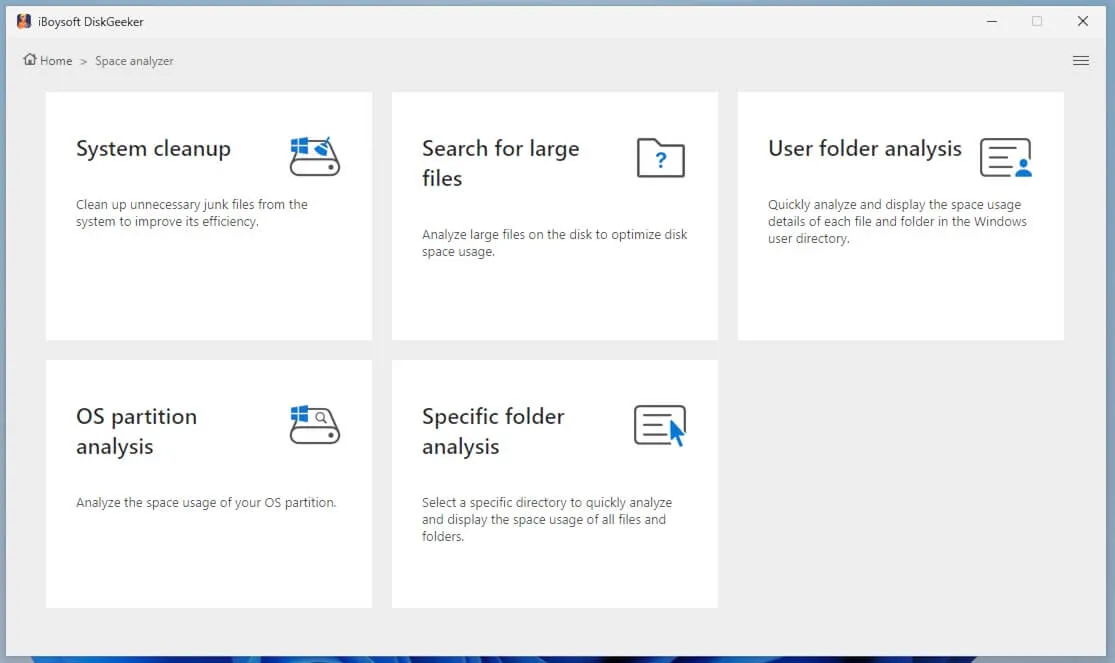
Having enough free space is essential for the macOS installation and its performance. If your Windows PC doesn't have sufficient space, delete unwanted files to make room. To save time and reclaim free space efficiently, use a disk cleaner like iBoysoft DiskGeeker for Windows.
It can scan the selected drive, partition, or folder and show you all files by size, allowing you to quickly spot and delete large and unnecessary files.
② Disable Windows Memory Integrity
Another important step is to disable Windows Memory Integrity. It's a feature of virtualization-based security, which uses your PC's hardware virtualization capabilities to create a secure, isolated environment.
To run macOS as a guest operating system efficiently on Windows, VirtualBox needs direct access to the same hardware virtualization feature. In other words, the host OS (Windows) and VirtualBox will compete for the same hardware resources, resulting in conflicts.
Here's how to disable Windows Memory Integrity:
- Click the search box on the taskbar.
- Type in "core isolation."
- Open the "Core isolation" setting.
- Toggle the switch for "Memory integrity" off.
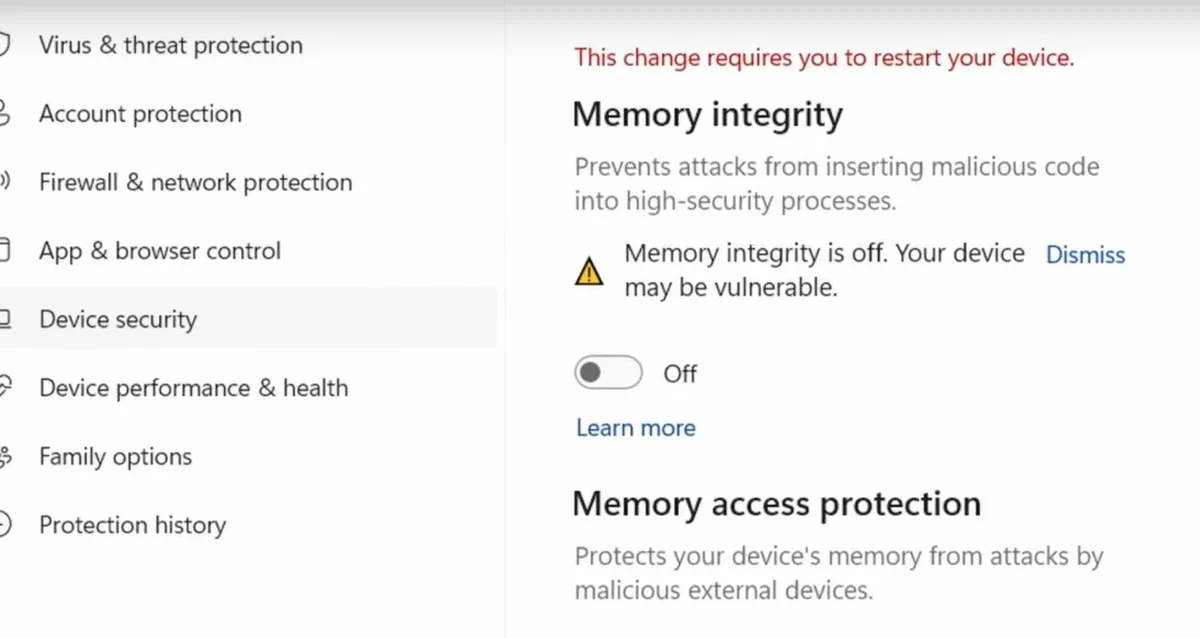
- If it asks you to restart, dismiss it and restart after changing all the necessary settings.
③ Turn off Windows Hyper-V
Similarly, you also need to turn off Windows Hyper-V, a Type-1 hypervisor that takes exclusive control of your PC's hardware virtualization capabilities. VirtualBox can't run properly with Hyper-V enabled, as they need the same hardware resources.
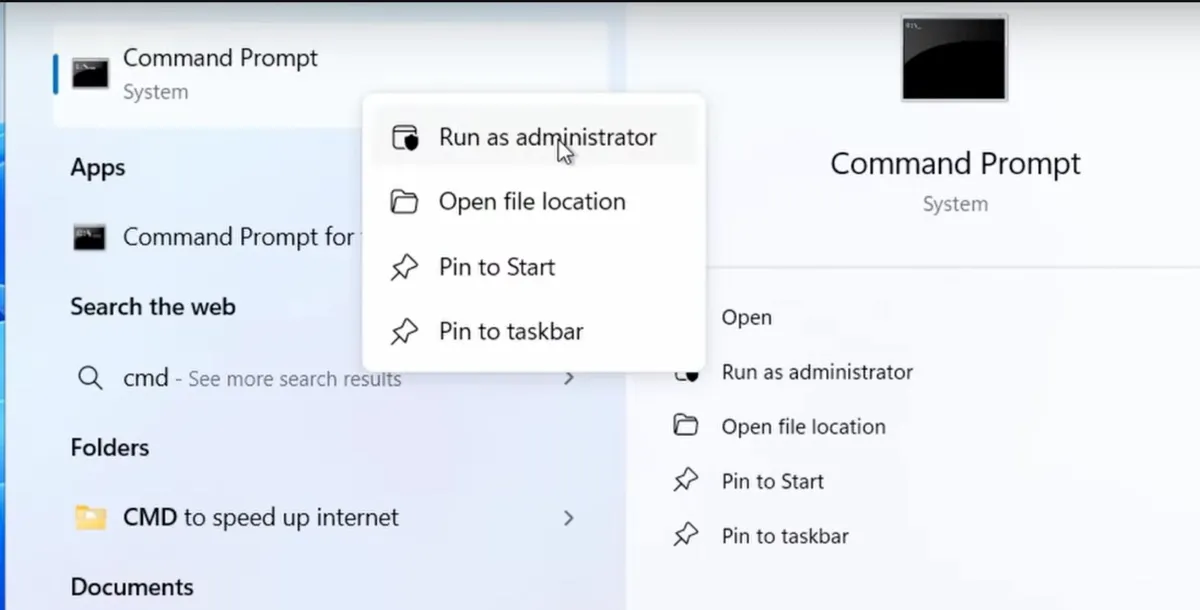
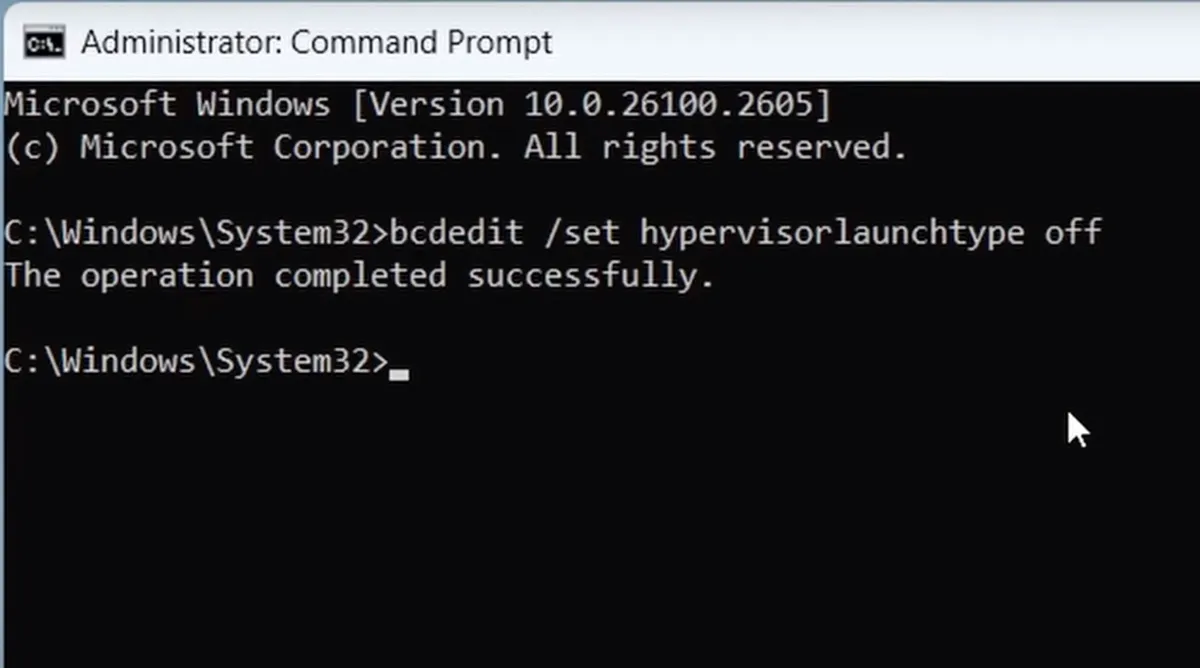
Here's how to turn off Windows Hyper-V:
- In the search box of the taskbar, enter "command prompt."
- Right-click on Command Prompt and choose Run as administrator.
- Copy and paste the following command and then hit Enter.bcdedit /set hypervisorlaunchtype off
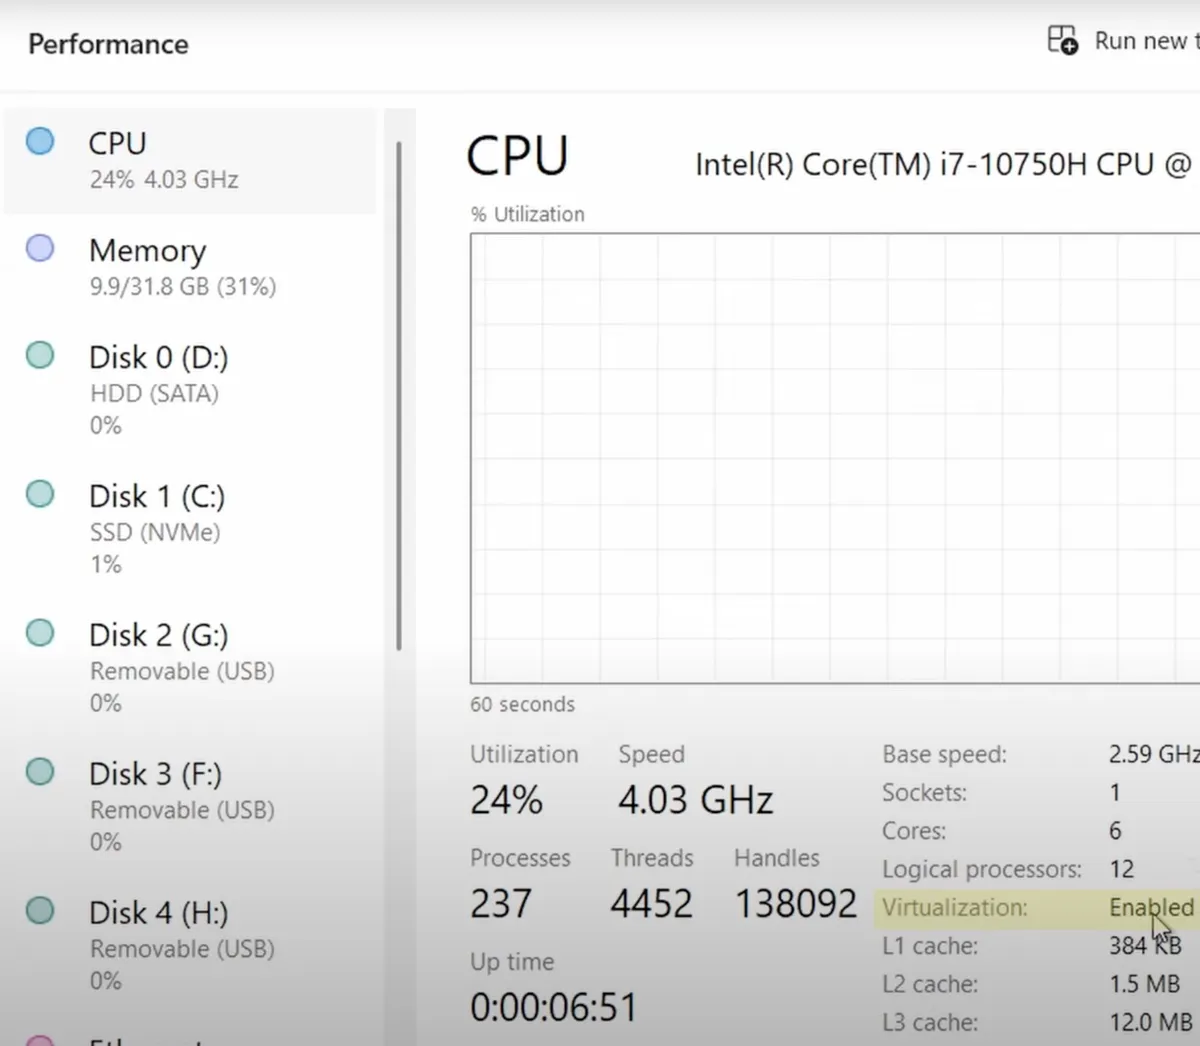
④ Ensure Virtualization is enabled
You must have hardware virtualization enabled for the virtual machine to work correctly and efficiently.
Here's how to check virtualization:
- Right-click on the taskbar.
- Choose Task Manager.
- Go to the Performance tab > CPU.
- Check if virtualization is enabled.
- After all settings are modified, restart your PC.
⑤ Download the Mac OS ISO file for VirtualBox
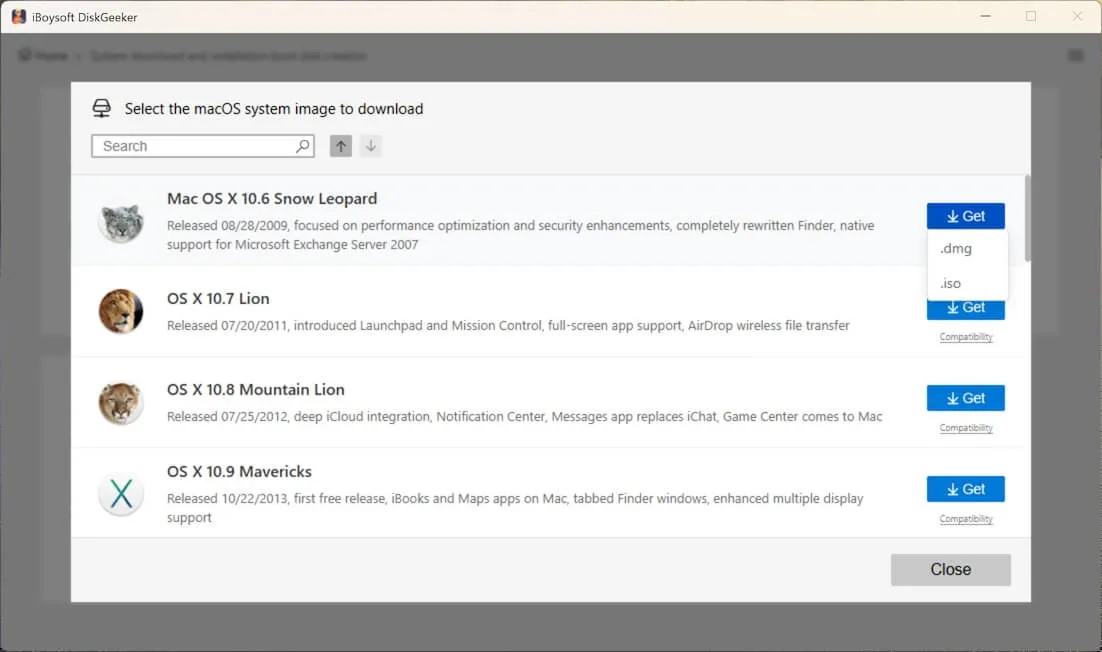
The next step of preparation is to download the Mac OS ISO for Windows. To ensure the ISO file is safe and complete, we recommend you download the desired macOS ISO from iBoysoft DiskGeeker for Windows. This reliable tool houses nearly all the Mac OS ISO images, from the latest macOS Tahoe to older macOS versions like Mac OS X Snow Leopard.
Follow these steps to download the macOS ISO file for VirtualBox:
Step 1: Free download and launch iBoysoft DiskGeeker for Windows.
Step 2: Go to Download and create boot disk > Download macOS system image.
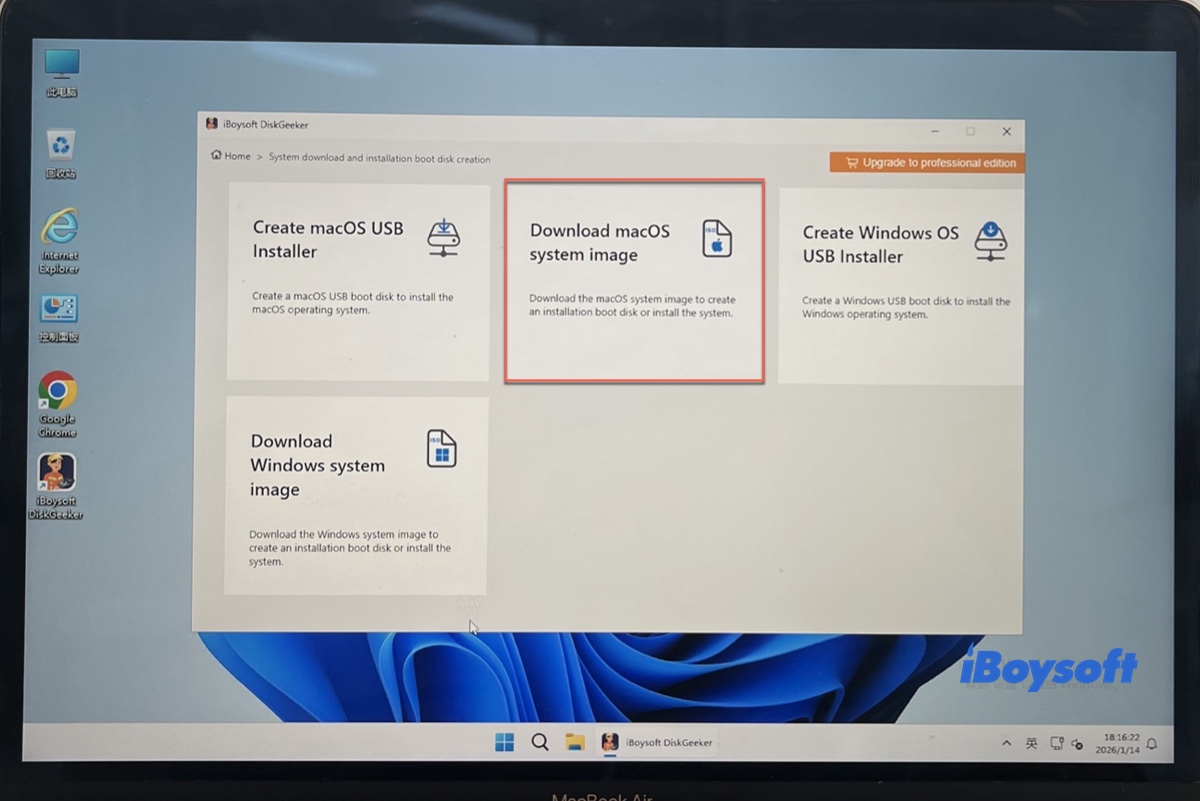
Step 3: Find the macOS version you need and click Get.
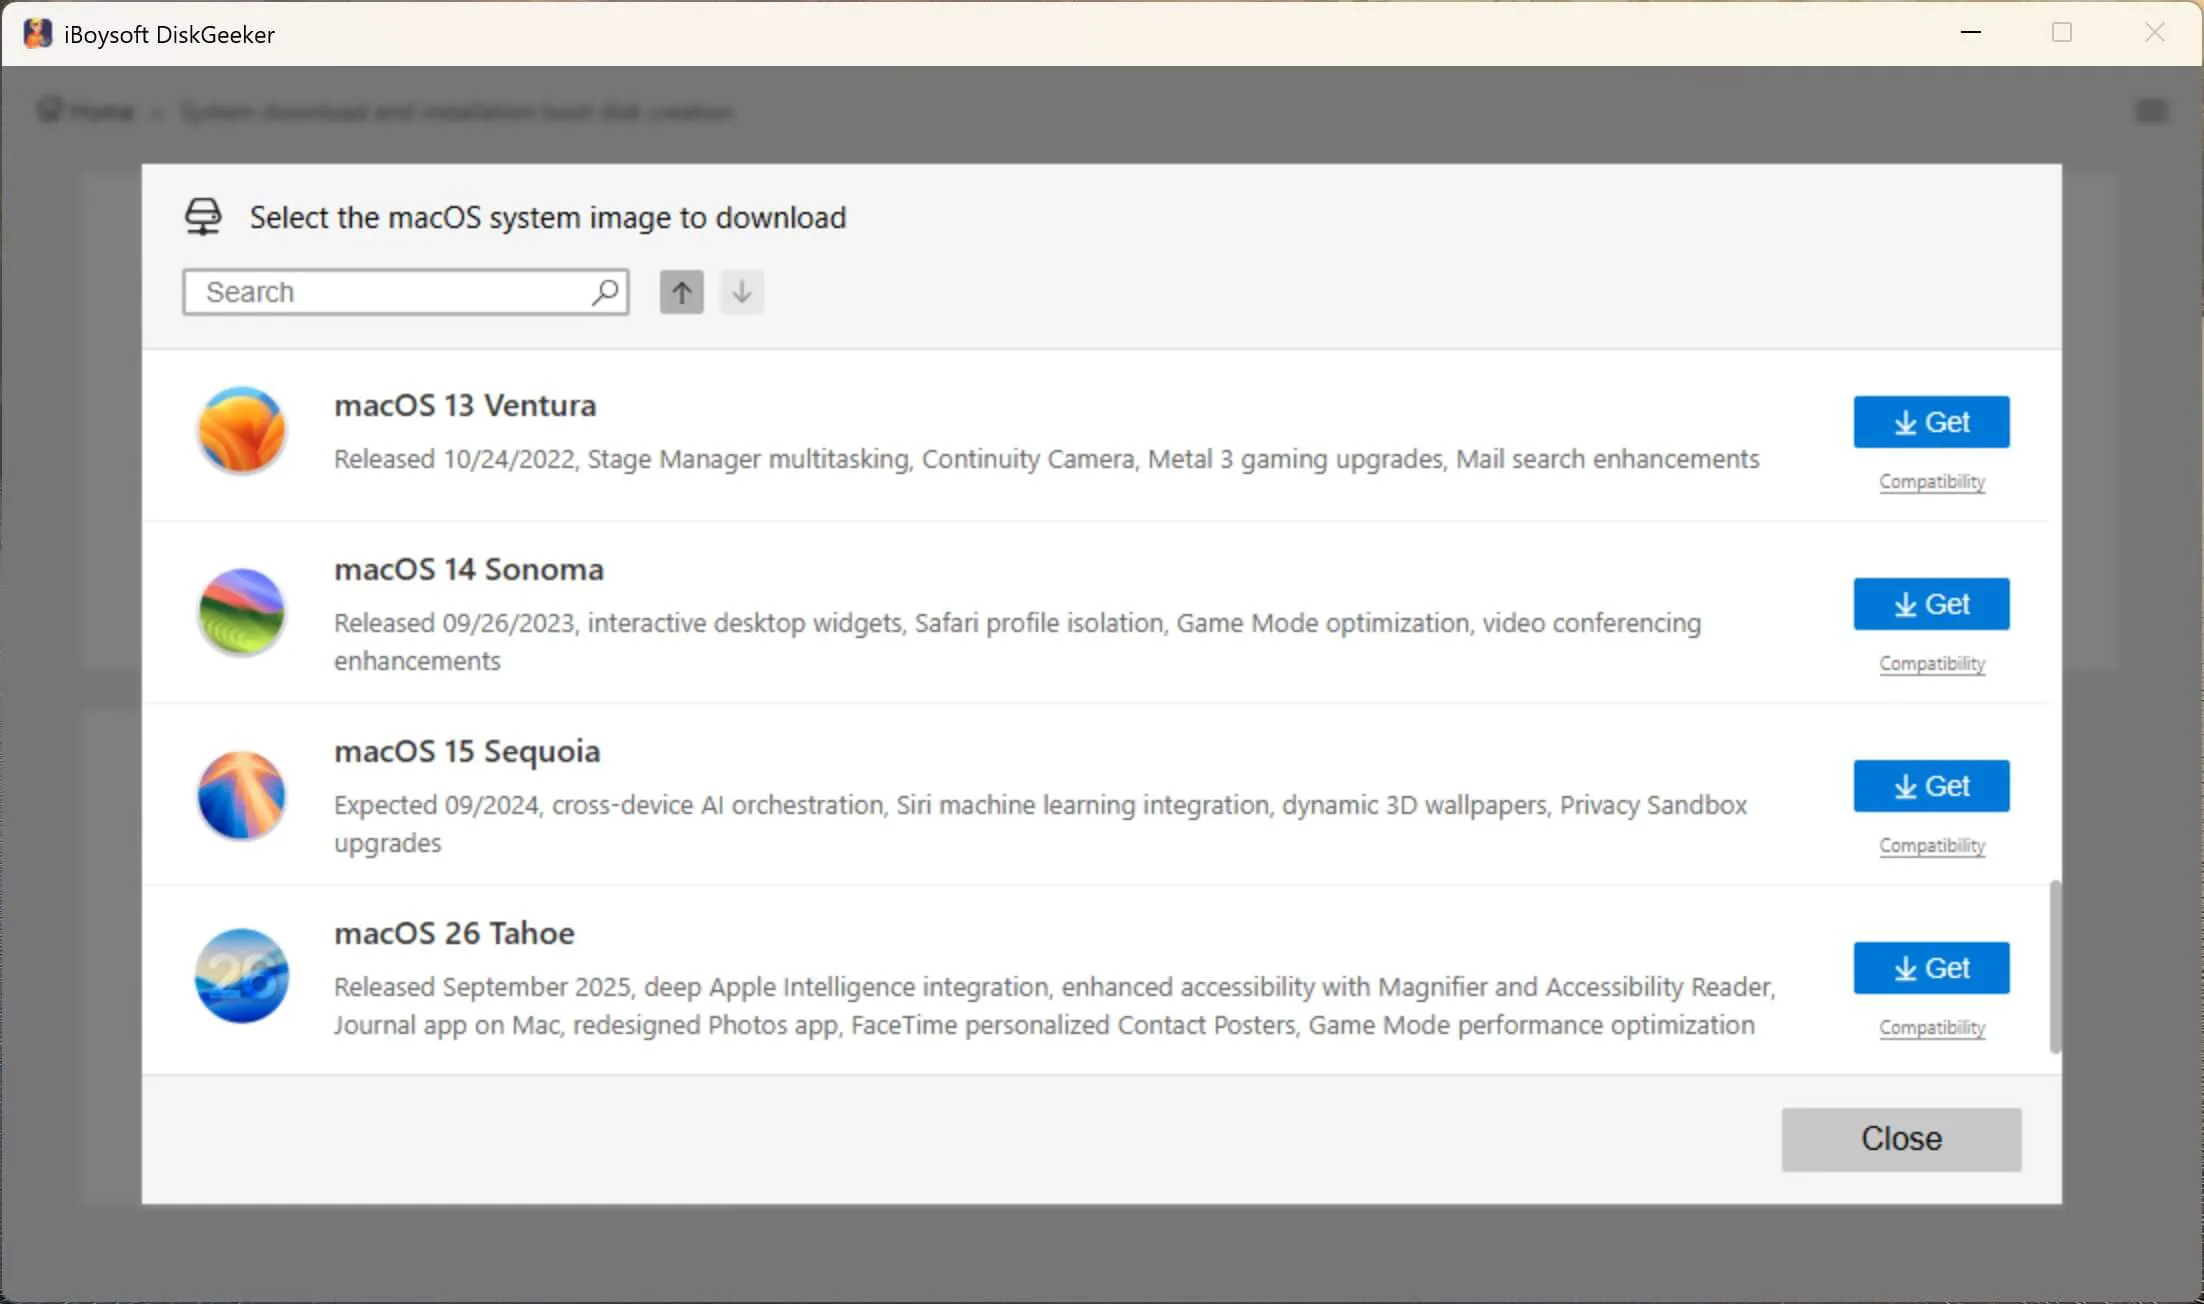
Step 4: Choose .iso and select a location to save the ISO image.
If you prefer direct ISO links from free archives, click the links below to get the macOS ISO installer.
macOS Tahoe ISO download for Windows
Other Mac operating system download for Windows
⑥ Download Oracle VM VirtualBox
You'll also need to download VirtualBox from its official website. After it's downloaded, open the package and install VirtualBox on your computer.
Step 2: Set up a new virtual machine on VirtualBox
Once prepared, you can create a new virtual machine for the Mac operating system on VirtualBox with the steps below: (You could also use the macOS VMDK file for VirtualBox to save time.)
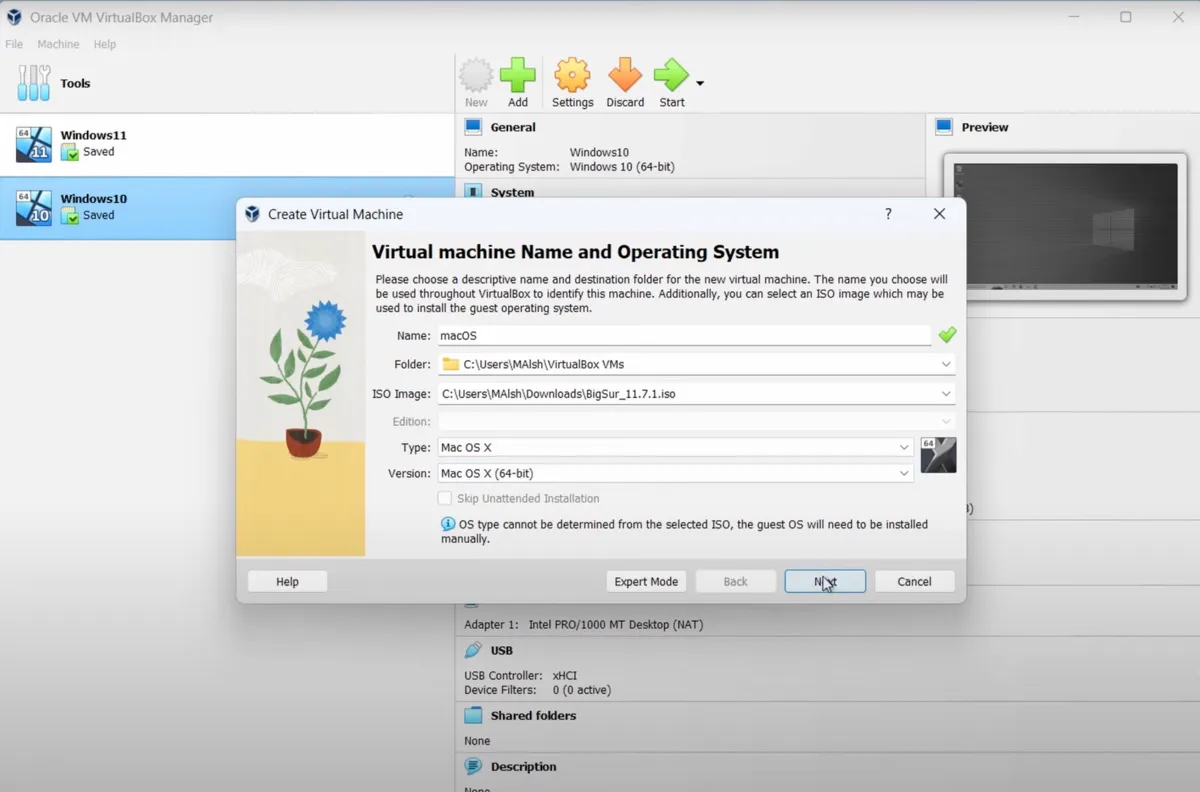
- Click New on the VirtualBox interface.
- Name the virtual machine as macOS, or whatever you prefer.
- Choose the downloaded macOS ISO image.
- Keep the Type Mac OS X.
- Keep the Version Mac OS X (64-bit).
- Click Next.
- In the Hardware section, assign at least 4GB of RAM/base memory (if your PC has 16GB of RAM, assign 8GB) and 1 CPU/processor.
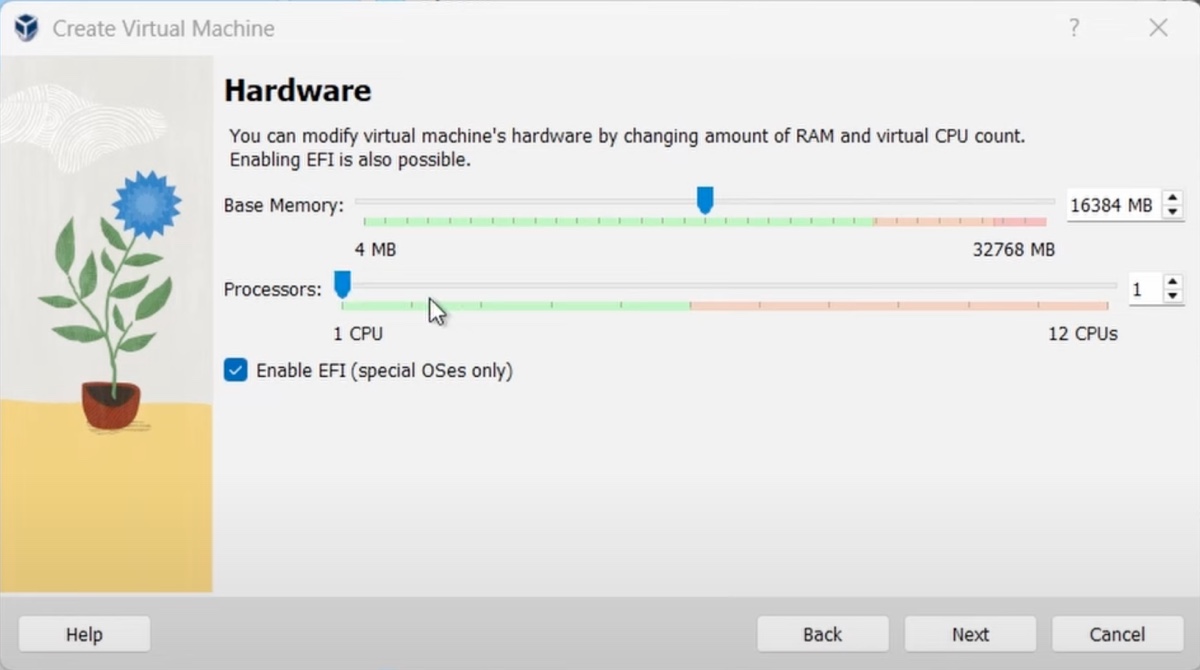
- Click Next.
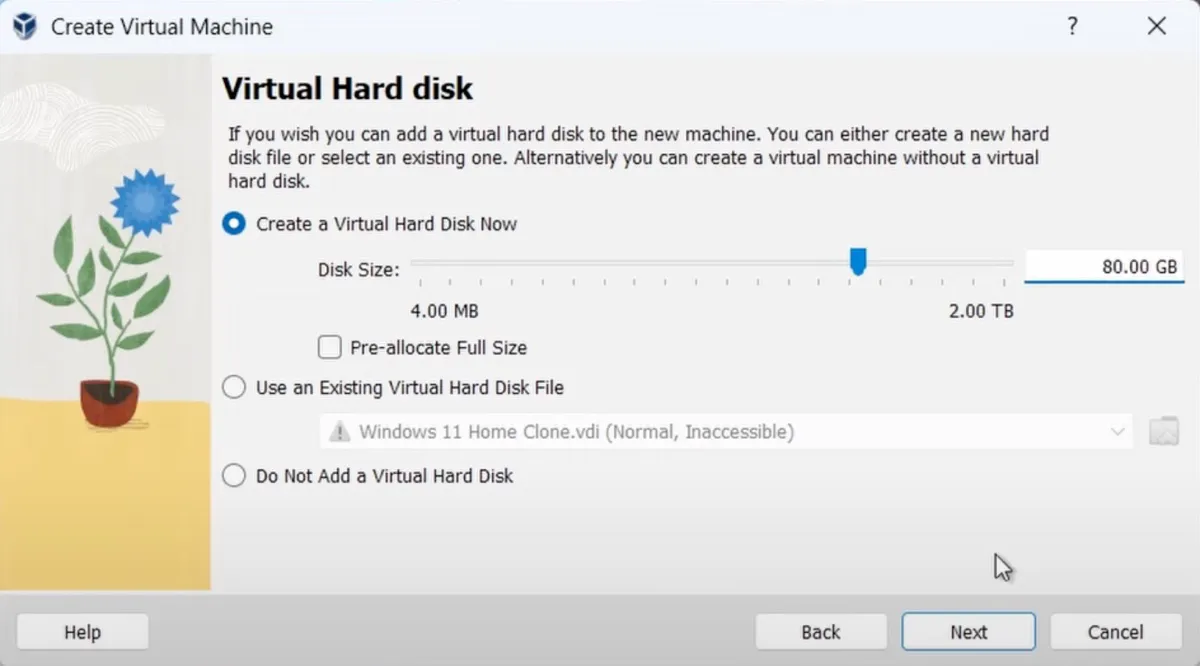
- Select "Create a Virtual Hard Disk Now" and allocate at least 80 GB of storage to the disk, then click Next and then Finish.
- Return to the interface.
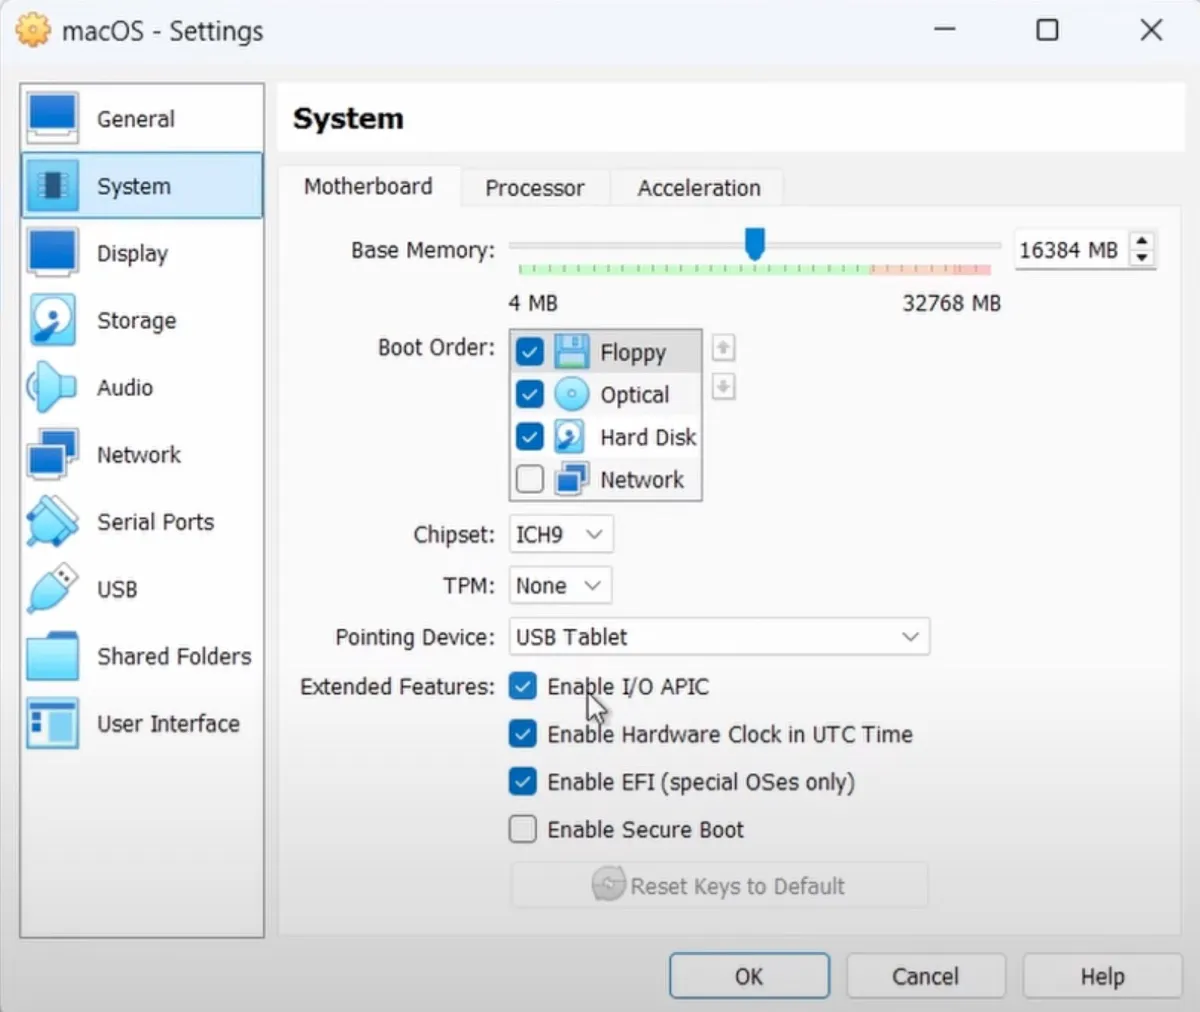
- Select the new virtual machine from the left, right-click on it, and choose Settings > System.
- Ensure "Enable I/O APIC, Enable Hardware Clock in UTC Time, and Enable EFI" are checked.
- Click Display and set Video Memory to the maximum value.
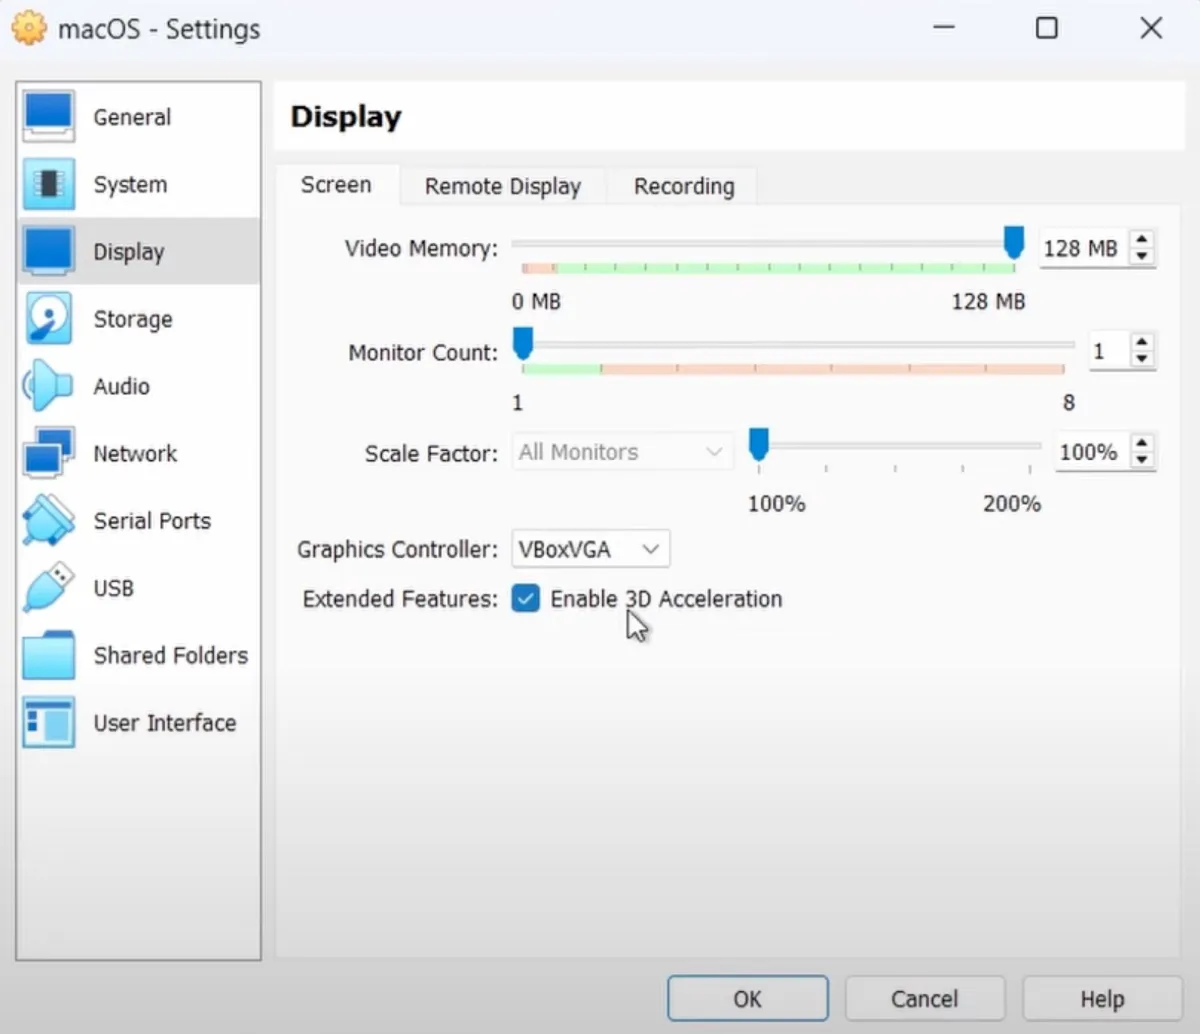
- Turn on "Enable 3D Acceleration."
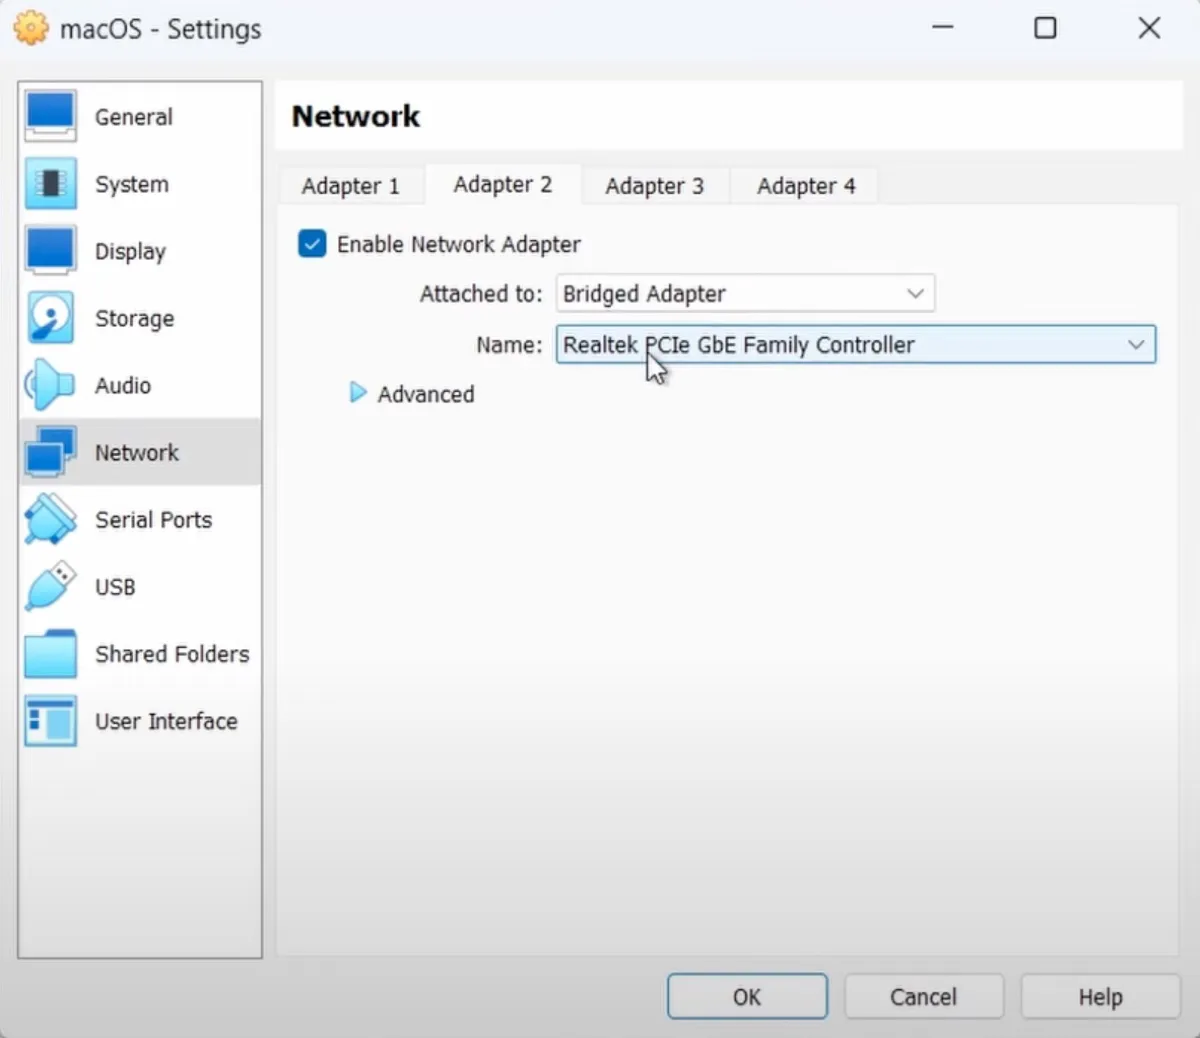
- Click Network and ensure Adapter 1 is set to NAT.
- Click Adapter 2, tick the box next to Enable Network Adapter, choose Bridged Adapter for the dropdown menu of "Attached to," then select your wireless adapter for the Name field.
- Click OK to close the settings.
- Exit VirtualBox.
Step 3: Patch the virtual machine
- In the search box of the taskbar, enter "command prompt."
- Right-click on Command Prompt and choose "Run as administrator."
- Then copy and paste the following commands and hit Enter based on your processor type.
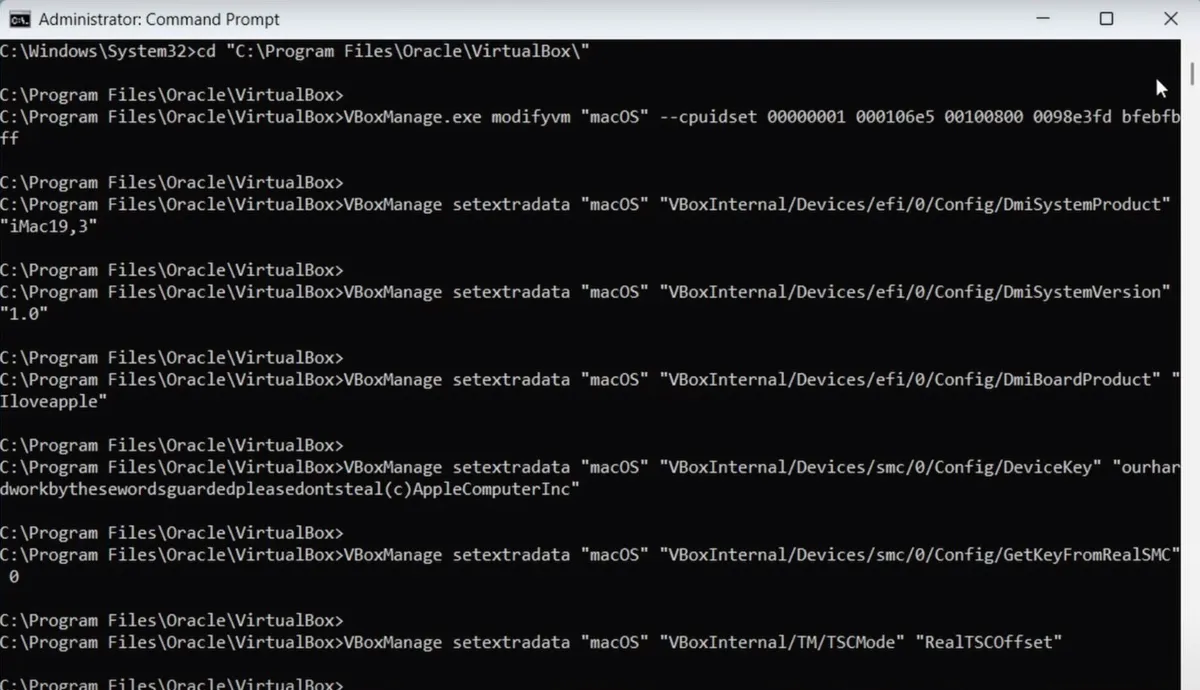
(The commands below use the name macOS as an example. Remember to change it to the name you gave to the new virtual machine.)
For Intel processors:
cd "C:\Program Files\Oracle\VirtualBox\"
VBoxManage.exe modifyvm "macOS" --cpuidset 00000001 000106e5 00100800 0098e3fd bfebfbff
VBoxManage setextradata "macOS" "VBoxInternal/Devices/efi/0/Config/DmiSystemProduct" "iMac19,3"
VBoxManage setextradata "macOS" "VBoxInternal/Devices/efi/0/Config/DmiSystemVersion" "1.0"
VBoxManage setextradata "macOS" "VBoxInternal/Devices/efi/0/Config/DmiBoardProduct" "Iloveapple"
VBoxManage setextradata "macOS" "VBoxInternal/Devices/smc/0/Config/DeviceKey" "ourhardworkbythesewordsguardedpleasedontsteal(c)AppleComputerInc"
VBoxManage setextradata "macOS" "VBoxInternal/Devices/smc/0/Config/GetKeyFromRealSMC" 0
VBoxManage setextradata "macOS" "VBoxInternal/TM/TSCMode" "RealTSCOffset"
For AMD processors:
cd "C:\Program Files\Oracle\VirtualBox\"
VBoxManage.exe modifyvm "macOS" --cpuidset 00000001 000106e5 00100800 0098e3fd bfebfbff
VBoxManage setextradata "macOS" "VBoxInternal/Devices/efi/0/Config/DmiSystemProduct" "iMac19,3"
VBoxManage setextradata "macOS" "VBoxInternal/Devices/efi/0/Config/DmiSystemVersion" "1.0"
VBoxManage setextradata "macOS" "VBoxInternal/Devices/efi/0/Config/DmiBoardProduct" "Iloveapple"
VBoxManage setextradata "macOS" "VBoxInternal/Devices/smc/0/Config/DeviceKey" "ourhardworkbythesewordsguardedpleasedontsteal(c)AppleComputerInc"
VBoxManage setextradata "macOS" "VBoxInternal/Devices/smc/0/Config/GetKeyFromRealSMC" 0
VBoxManage modifyvm "macOS" --cpu-profile "Intel Core i7-6700K"
VBoxManage setextradata "macOS" "VBoxInternal/TM/TSCMode" "RealTSCOffset"
After the commands are executed, close Command Prompt.
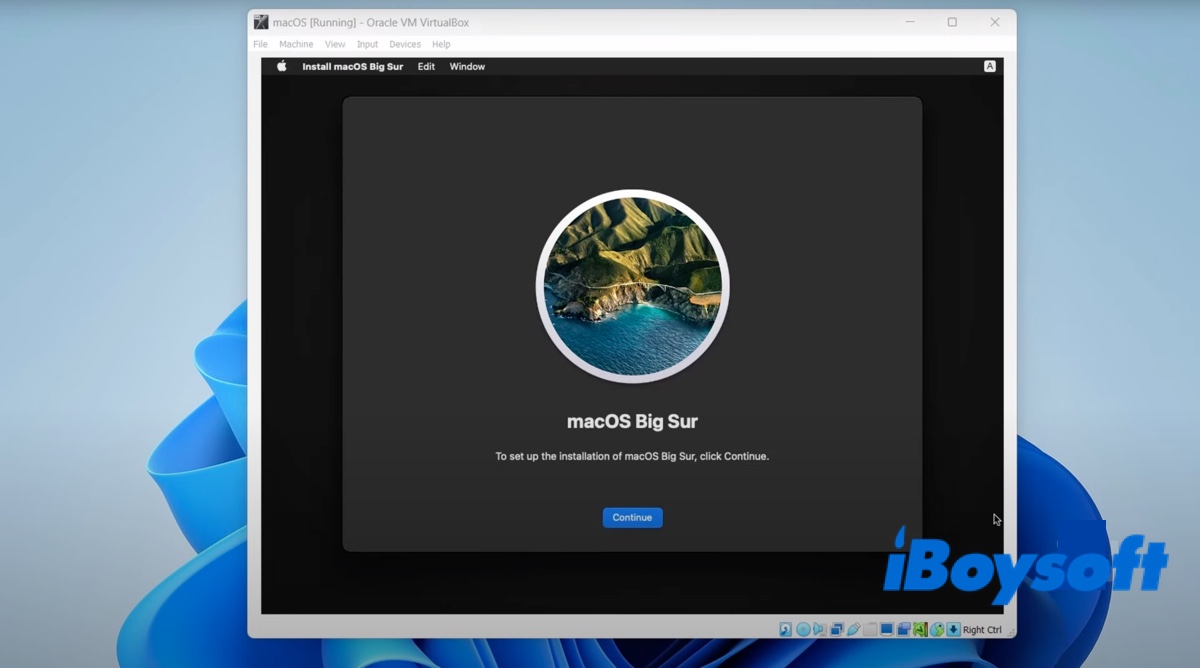
Step 4: Install macOS on Windows
- Open Oracle VM VirtualBox.
- Select the new virtual machine and click the Start icon.
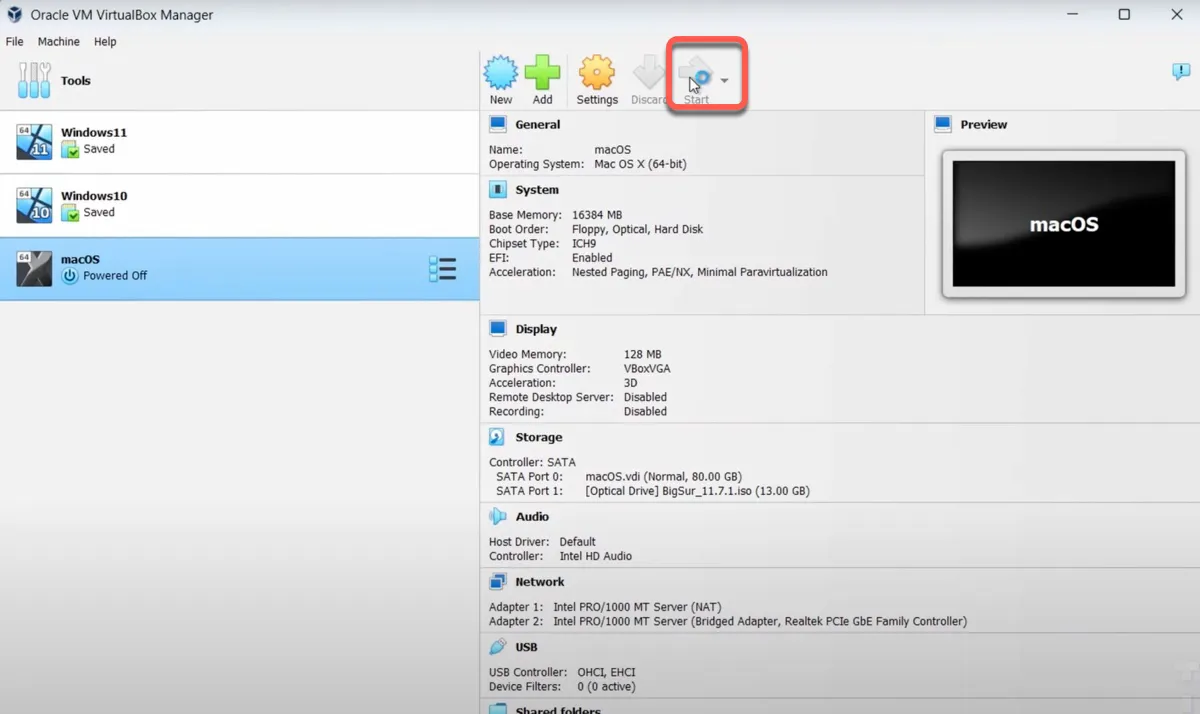
- Wait patiently.
- Choose your language and click Next.
- Click Disk Utility > Continue.
- Select the VBOX HARDDISK Media and click Erase.
- Give the disk a name.
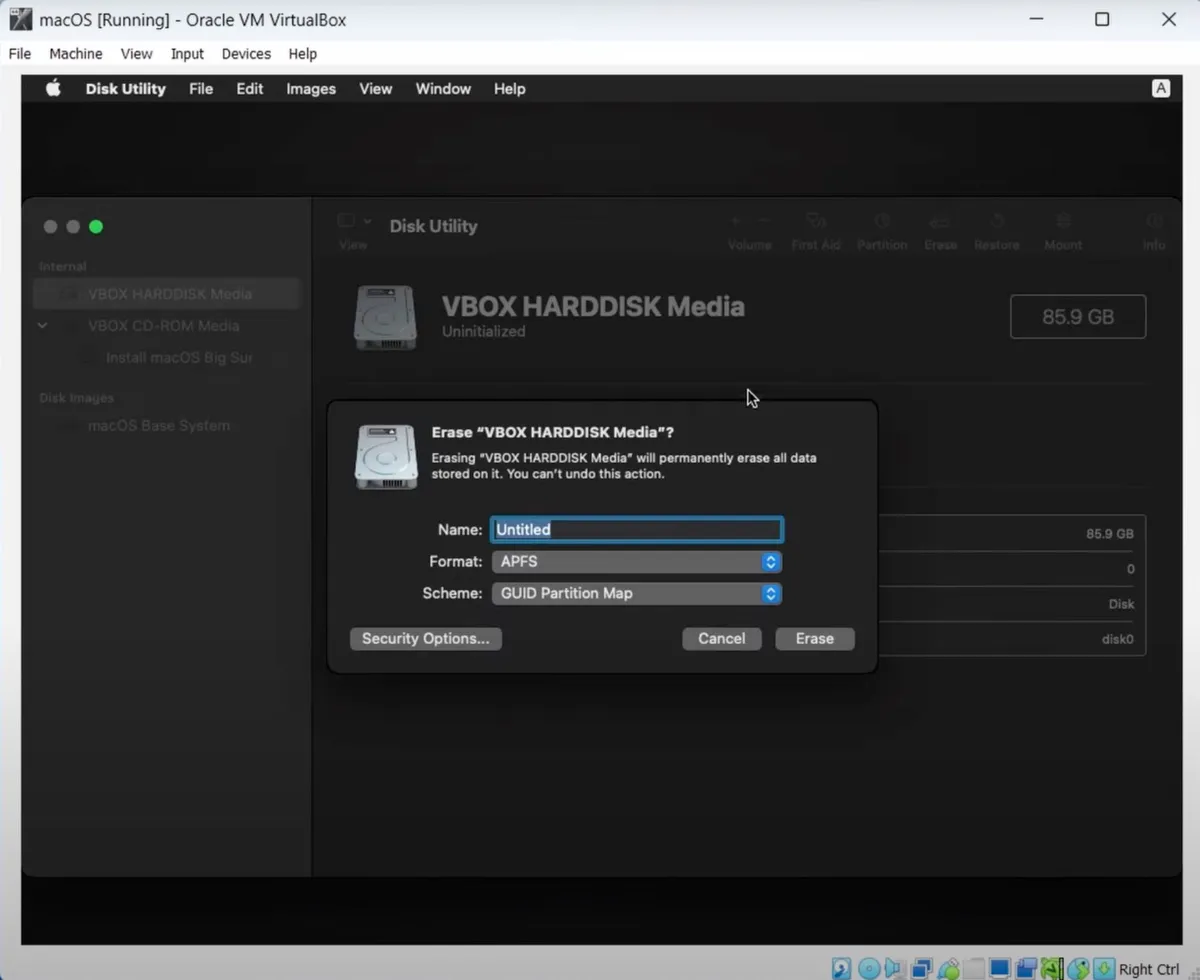
- Choose APFS as the format if running macOS High Sierra and later; otherwise, choose Mac OS Extended (Journaled).
- Keep GUID Partition Map as the scheme.
- Click Erase.
- Exit Disk Utility.
- Choose "Install macOS" and click Continue.
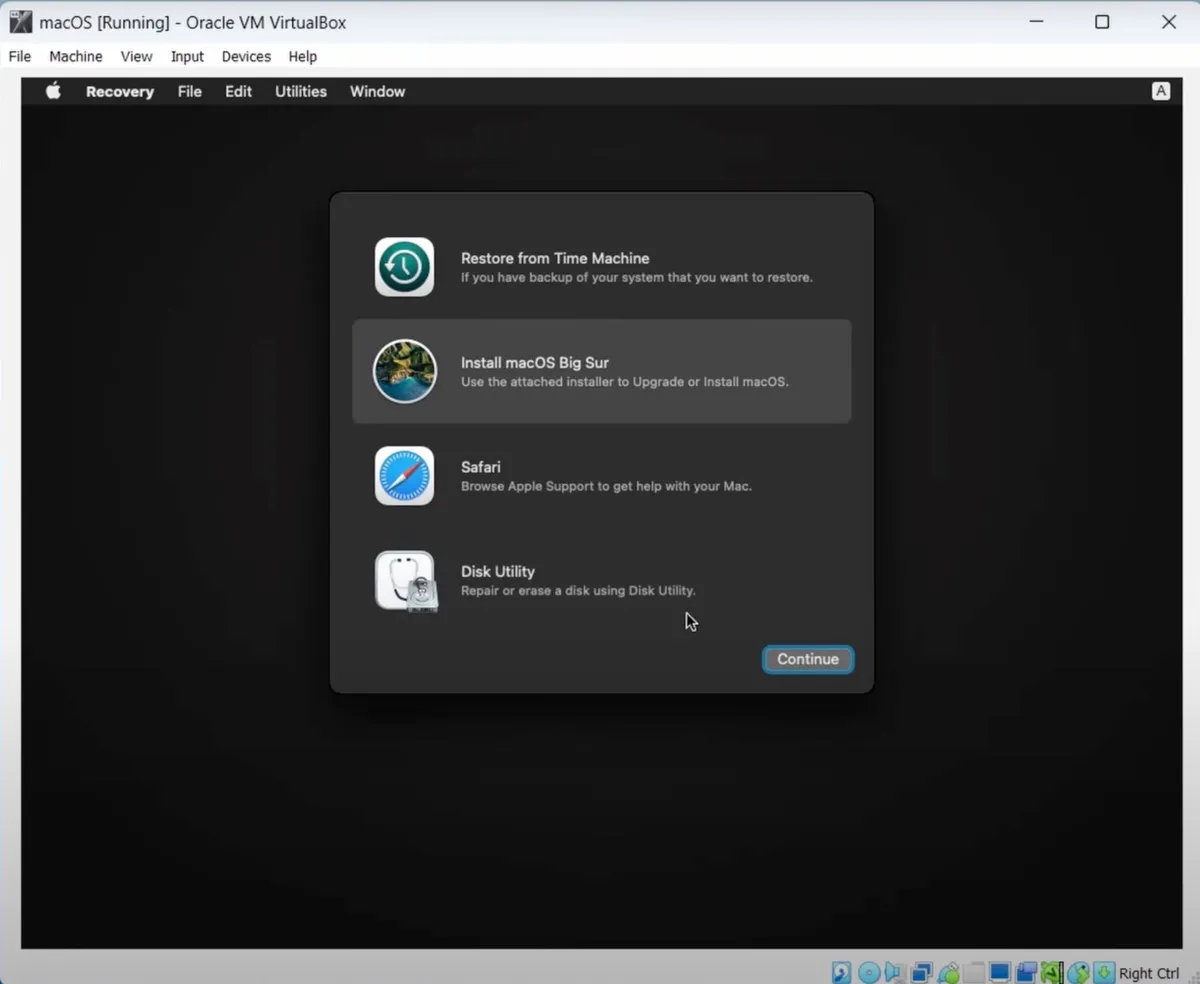
- Follow the instructions to install macOS on the virtual disk you created.
- Once it's installed, you can run macOS on your PC freely.

If you want to increase the window size of the virtual machine:
- Open Command Prompt as an administrator.
- Run the command below to change to the VirtualBox location. cd "C:\Program Files\Oracle\VirtualBox\"
- Replace macOS in the command below with your virtual machine's name and 1920*1080 with an ideal resolution (for instance, your PC's resolution), then execute the command to change the display resolution.VBoxManage setextradata “macOS” VBoxInternal2/EfiGraphicsResolution 1920x1080
| Like VirtualBox, VMware Workstation Pro, which is now free, also allows you to run macOS on a Windows PC. If you want to test the latest macOS Tahoe, you can install macOS Tahoe on VMware on a Windows PC. Besides, if you want to use macOS Tahoe on a daily basis on a PC, consider making a macOS Tahoe bootable USB from Windows and creating a macOS Tahoe Hackintosh instead. It offers better performance than virtual machines. |
Share this guide about how to install Mac OS on Oracle VM VirtualBox on Windows!
FAQs about how to install Mac OS on VirtualBox
- QIs it possible to install macOS on VirtualBox?
-
A
Yes, you can install mac OS on VirtualBox to run the operating sysetm on your Windows PC.
- QHow to use VirtualBox in full-sreen mode?
-
A
To change into full-screen mode, click View > Full-screen Mode on the menu bar.