macOS Tahoe 26 is the last major version of macOS to support Intel processors. Future releases will be practically impossible to run on a Hackintosh.
If you want to get this final macOS release on your PC, building a macOS Tahoe Hackintosh is the perfect choice. While this process is more intricate than installing macOS Tahoe on a virtual machine, a Hackintosh setup offers significantly better performance and a more authentic macOS experience.
Nevertheless, building a macOS Tahoe Hackintosh has many caveats and will consume a lot of space. If you want to make sure the installation process and performance after installation go well, I highly recommend you clean up your computer first.
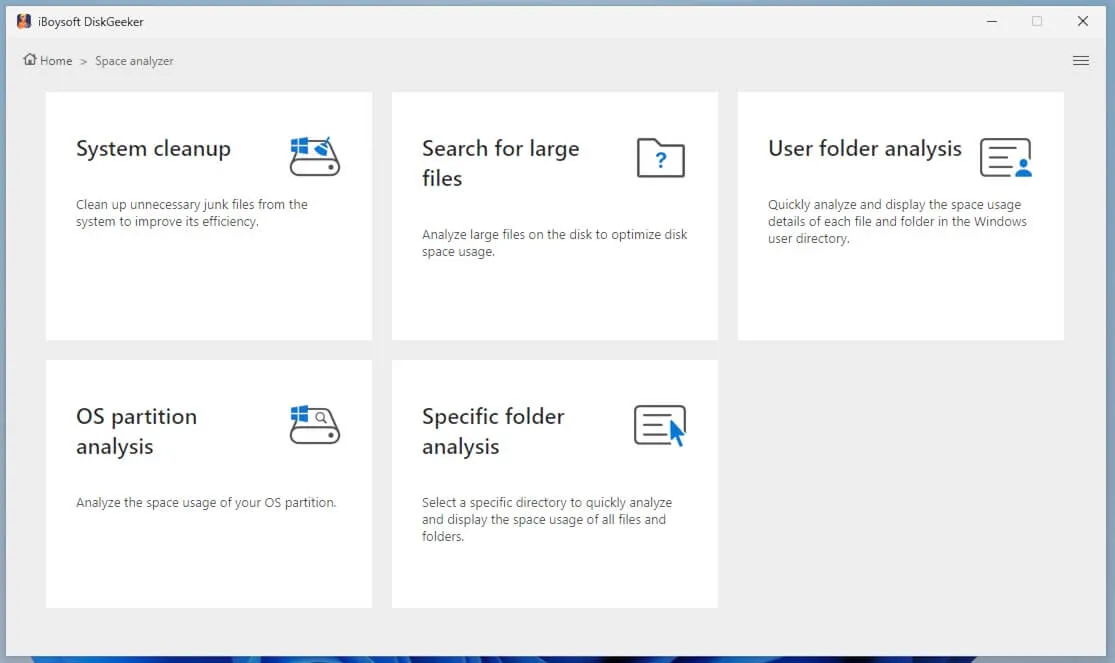
You can use iBoysoft DiskGeeker for Windows to analyze your disk space and remove unwanted files and junk files like caches or logs. This tool can save you a lot of time that would otherwise be spent on looking for unwanted files.
Download it from the button above and choose a module from the "Space analyzer" section.
Without further ado, let's start updating an existing Hackintosh to macOS Tahoe or creating a new macOS Tahoe Hackintosh.
Ensure your hardware is compatible with macOS Tahoe before installing it. You can take a look at the hardware compatibility discussion and check whether your CPU, GPU, storage, and Ethernet are supported.
Tips: If you prefer to run macOS Tahoe on a virtual machine, install macOS Tahoe on VMware, which is more stable than the open-source VirtualBox.
How to update to macOS Tahoe on a Hackintosh? (Intel/AMD)
Here, I'll show you how to upgrade an existing Hackintosh directly to macOS Tahoe on an Intel or AMD computer using OpenCore and Clover.
* Your PC should have at least 50 GB of free storage space on the boot drive and a working internet connection.
Step 1: Back up your current system
Before upgrading to macOS Tahoe, you should perform a full backup of your current system and data with Time Machine or a faster disk cloner like iBoysoft DiskGeeker for Mac. This software can clone a selected partition or the whole disk in less time. In addition, it allows you to analyze disk space and quickly remove unwanted files to release space.
Step 2: Update OpenCore EFI for macOS Tahoe
Apple typically changes the underlying architecture and implementation with every macOS release. Due to these changes, the bootloader used in your current system may not work with macOS Tahoe. Therefore, it's crucial to update the OpenCore EFI configuration to ensure that the system can successfully boot the new version of macOS.
Step 3: Restart your system and reset the NVRAM
After updating the boot loader, kexts, SMBIOS, or kernel patcher (AMD-only), fixing the USB-C ports, and configuring EFI, you should reboot your PC and reset the NVRAM twice for the change to take effect.
Step 4: Update your current macOS
Before upgrading to macOS Tahoe, you should install any minor releases to your current system. Go to System Settings > General > Software Update, then click More info... and install the latest update.
Step 5: Download and install macOS Tahoe
With everything prepared, you can now download the macOS Tahoe full installer and run it from your Applications folder, and then finish the setup.
Share these steps to help others upgrade their Hackintosh to macOS Tahoe!
How to create a new macOS Tahoe Hackintosh without a Mac? (Intel/AMD)
If you don't have macOS installed on your PC, you can build the macOS Tahoe Hackintosh from scratch with the following steps.
Step 1: Back up your PC
Before the installation, I strongly recommend that you back up the important files on your PC in case the installation fails or you encounter any issues. You can save the data to an external drive or clone your hard drive or the boot drive with iBoysoft DiskGeeker for Windows.
Step 2: Create a macOS Tahoe bootable USB on Windows
Next, you need to download the macOS Tahoe installation file and create a macOS Tahoe bootable USB installer.
If you have a Mac available, you can create the macOS Tahoe bootable USB installer from Terminal.
However, if you don't have a Mac, you can create the macOS Tahoe bootable USB installer from Windows with the following steps:
- Download balenaEtcher and the macOS Tahoe ISO file.
- Prepare a USB flash drive or any external disk with at least 20 GB of storage space.
- Launch balenaEtcher.
- Tap on "Flash from file" and choose the macOS Tahoe ISO image.
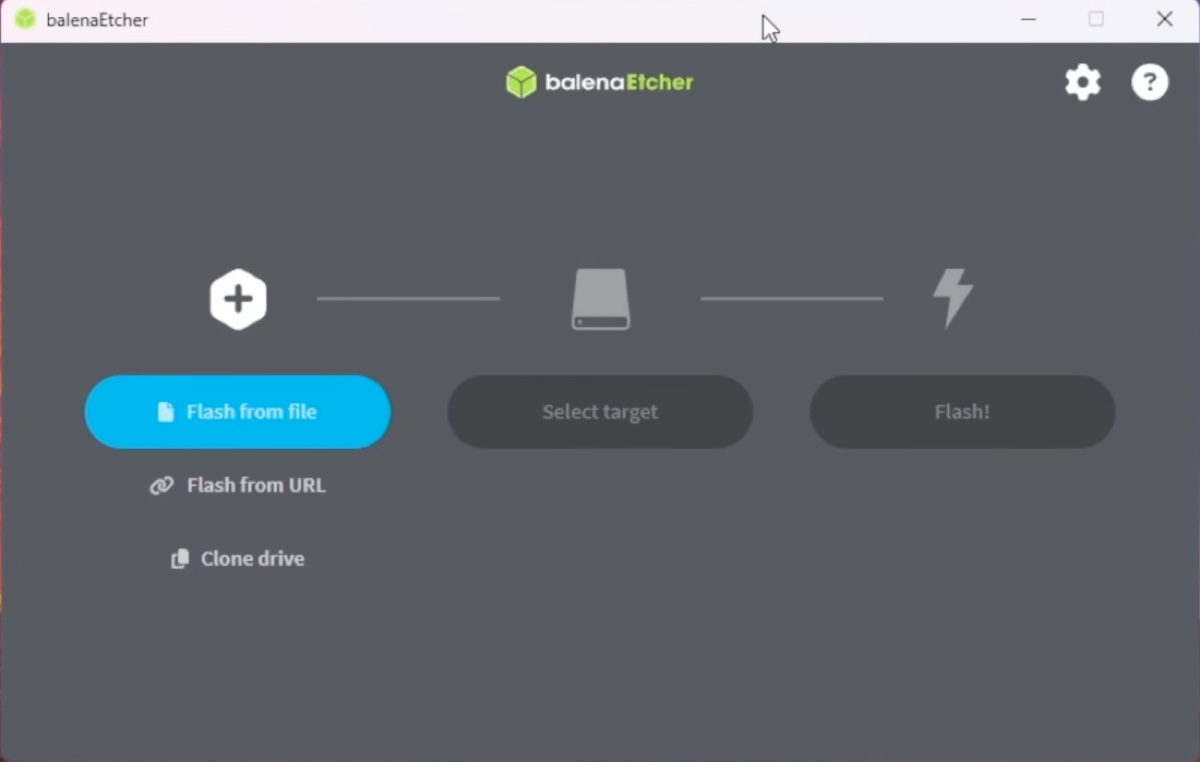
- Click on "Select target" and select the external USB drive.
- Click Flash to begin creating the bootable USB installer for macOS Tahoe on Windows.
Step 3: Prepare OpenCore EFI and SMBIOS
By default, macOS cannot boot on Windows hardware. This is where OpenCore EFI plays a crucial role. It is specifically designed to facilitate the installation of macOS on non-Mac systems. Given the unique configurations of different hardware, you must customize OpenCore EFI to match your specific setup.
Fortunately, there's a tool called OpenCore Simplify that does the hard work for you. It can check the macOS versions your hardware is compatible with and customize the necessary drivers, tools, kexts, APCIs, and SMBIOS information based on your computer specifications. With it, you can save hours of work, which would otherwise be spent if you prepared the EFI folder and SMBIOS by yourself.
- Download OpenCore Simplify.
- Open the folder and run the OpCore-Simplify bat file.
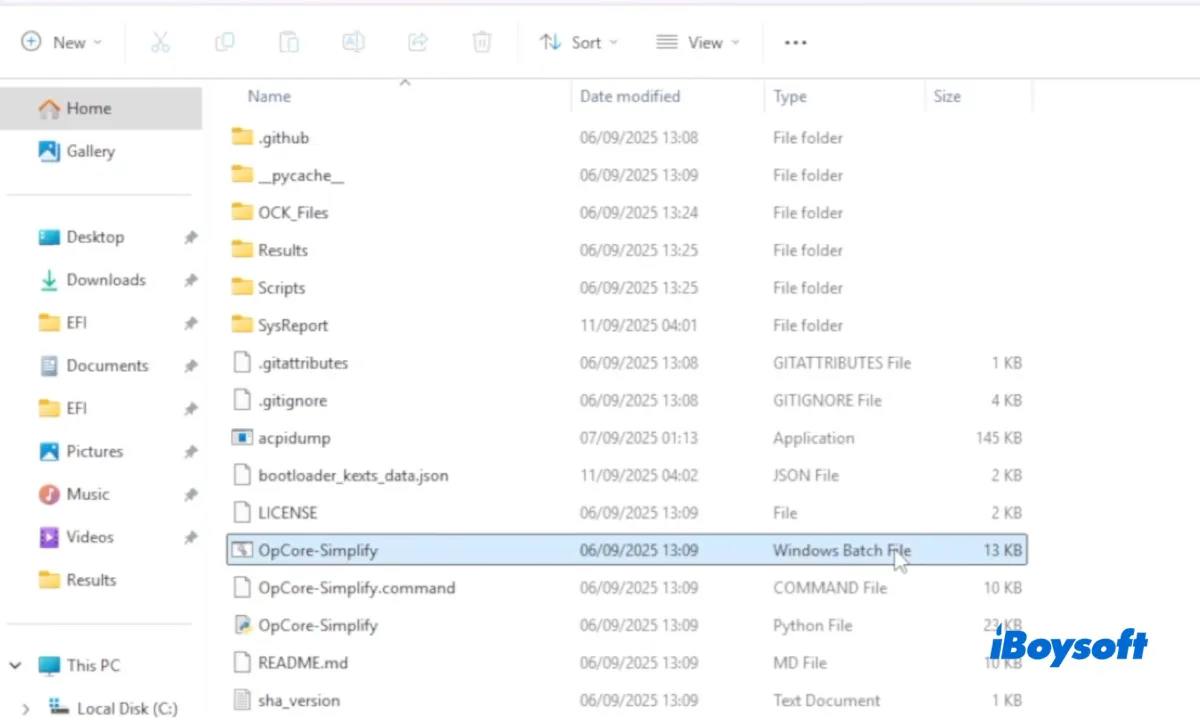
- Ensure your PC is connected to the internet.
- After the Terminal window opens, type 1 and hit Enter to allow the tool to export your hardware information to OpenCore. This way, it can build the EFI folder to match your hardware.
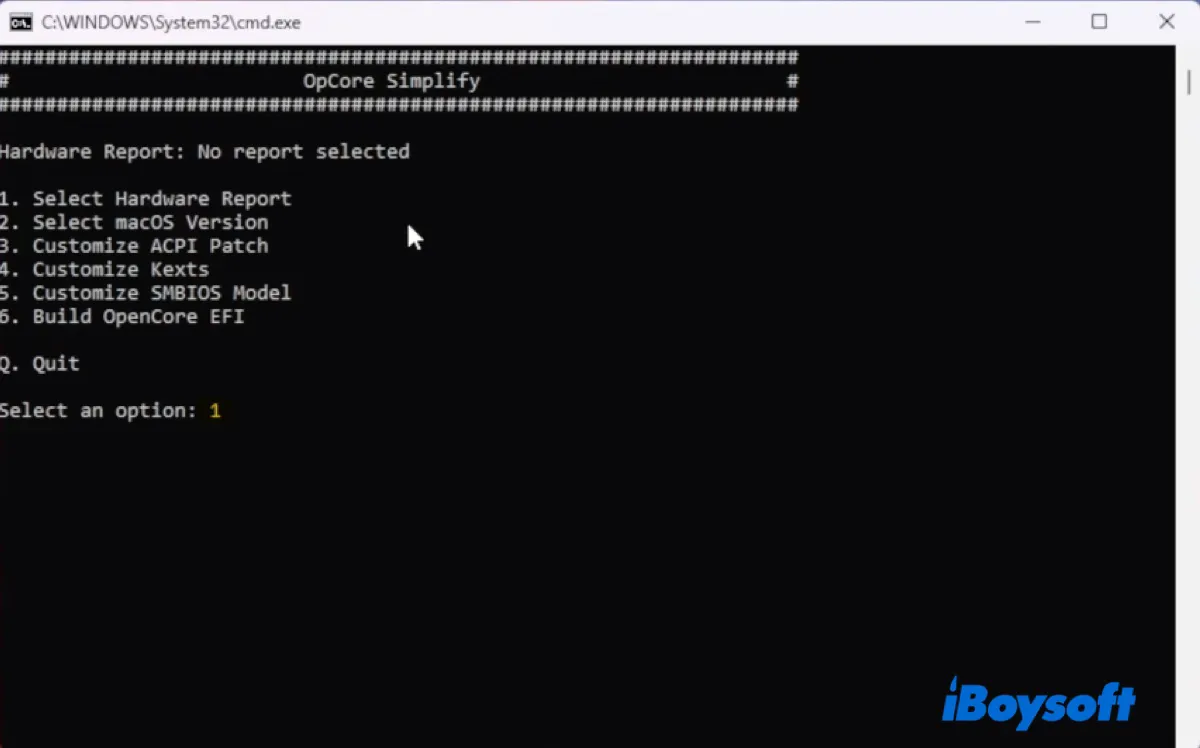
- Type E to export the hardware report.
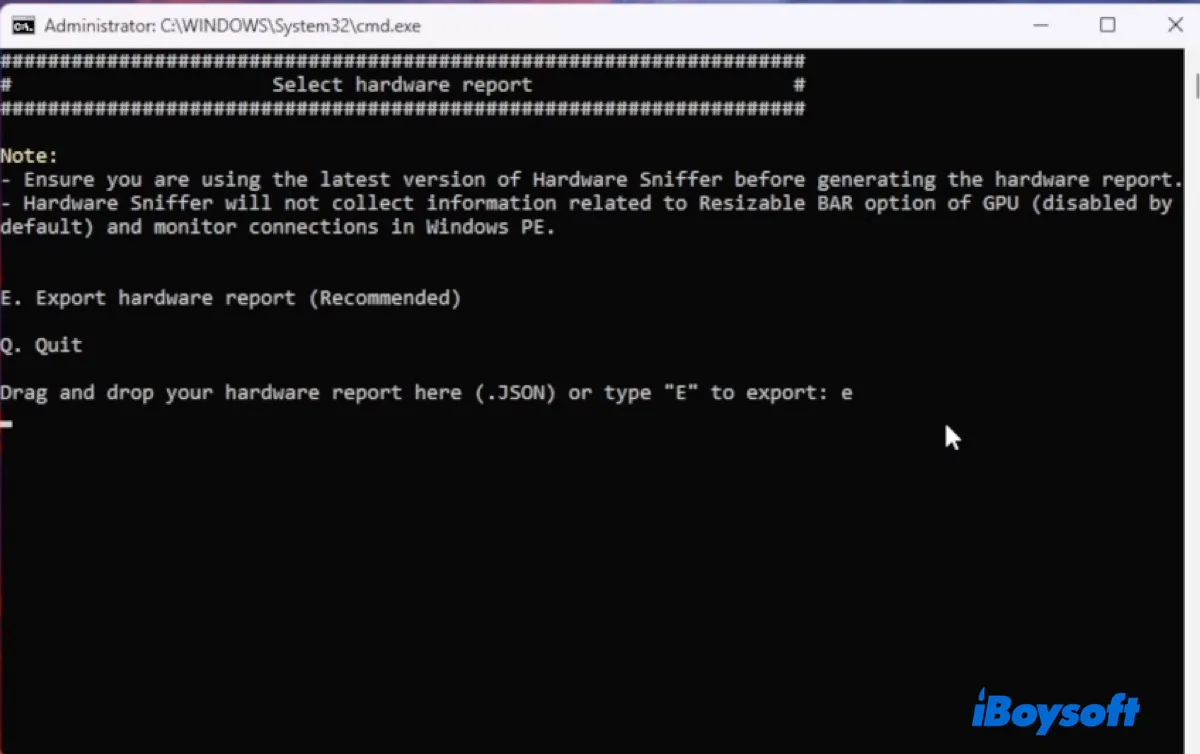
- OpenCore will automatically download a hardware sniffer tool and scan your PC to collect all the hardware specs for macOS Tahoe Hackintosh.
- After the scan is complete, you can find out whether your hardware supports macOS Tahoe and the suggested macOS version.
- Press Enter to continue.
- Enter the number of the macOS version you want to use. If macOS Tahoe is listed under the number 25, type in 25 and press Enter.

- Then you need to generate an appropriate SMBIOS so that the operating system can identify the hardware as a specific Apple model, thereby allowing you to run macOS Tahoe.
- Type 5 and press Enter to generate the SMBIOS.
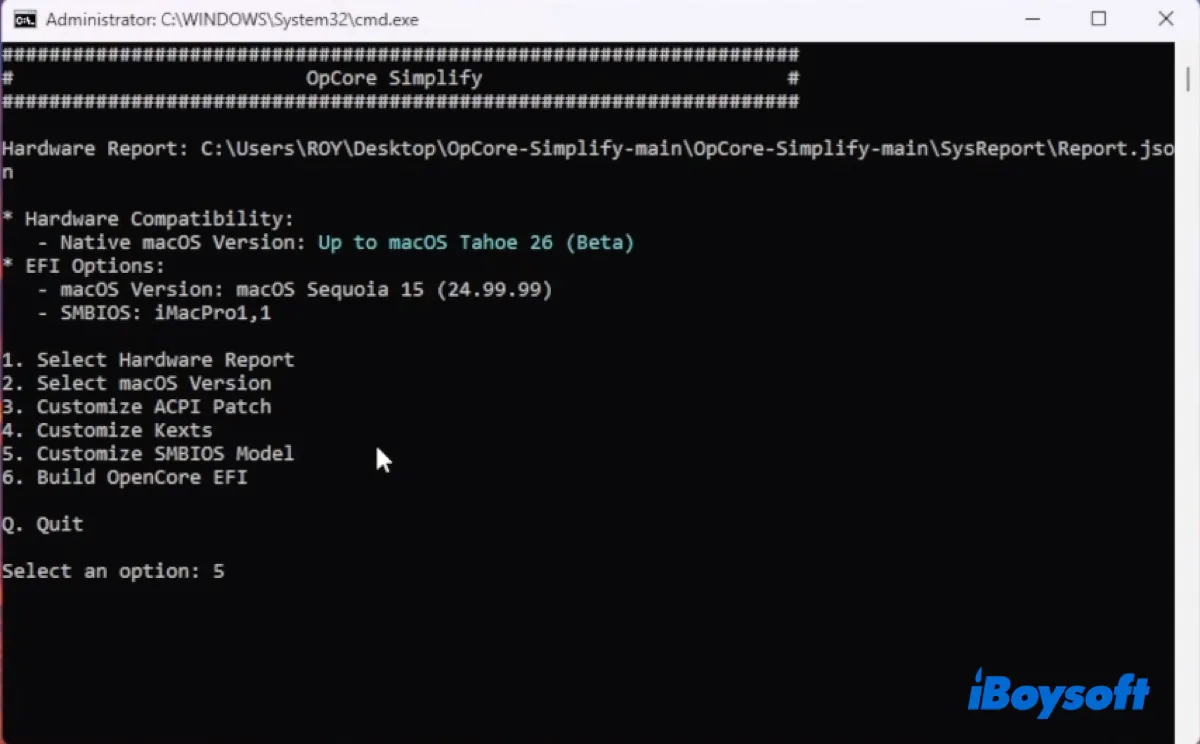
- The tool will automatically select the most suitable SMBIOS for your PC.
- Type b to go back to the previous menu.
- Type 6 to create your EFI folder.
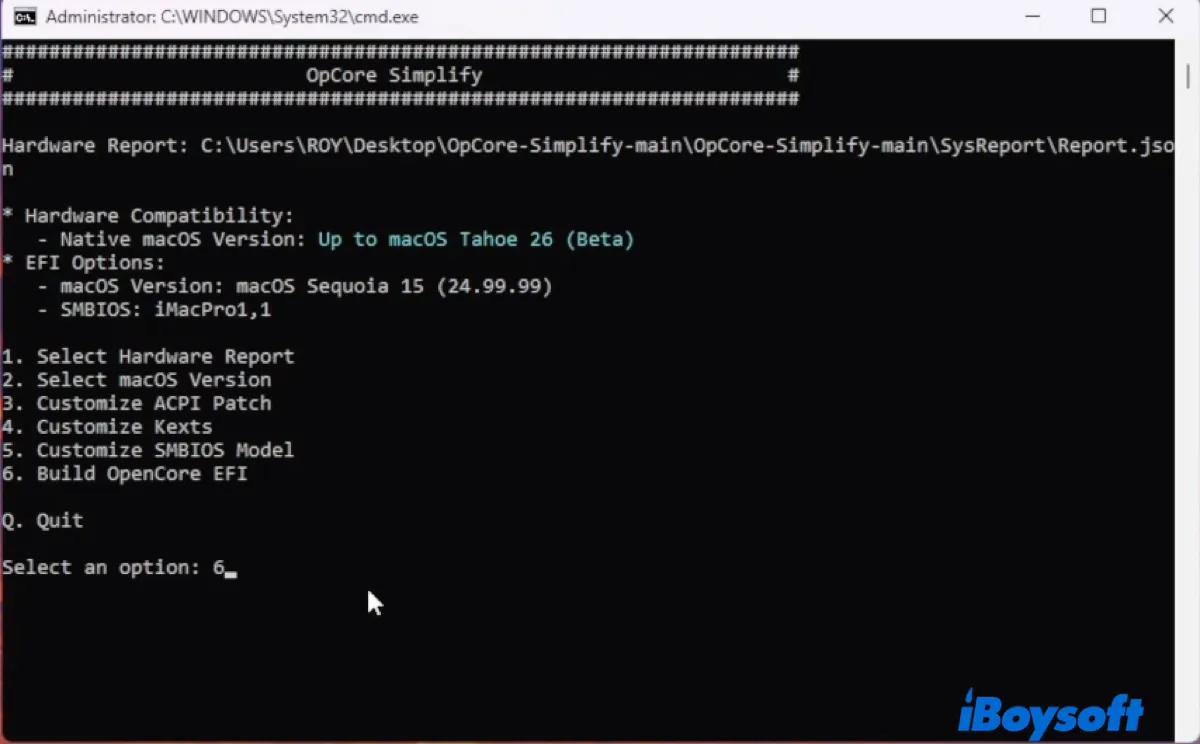
- OpenCore Simplify will now generate the EFI folder with all the needed files.
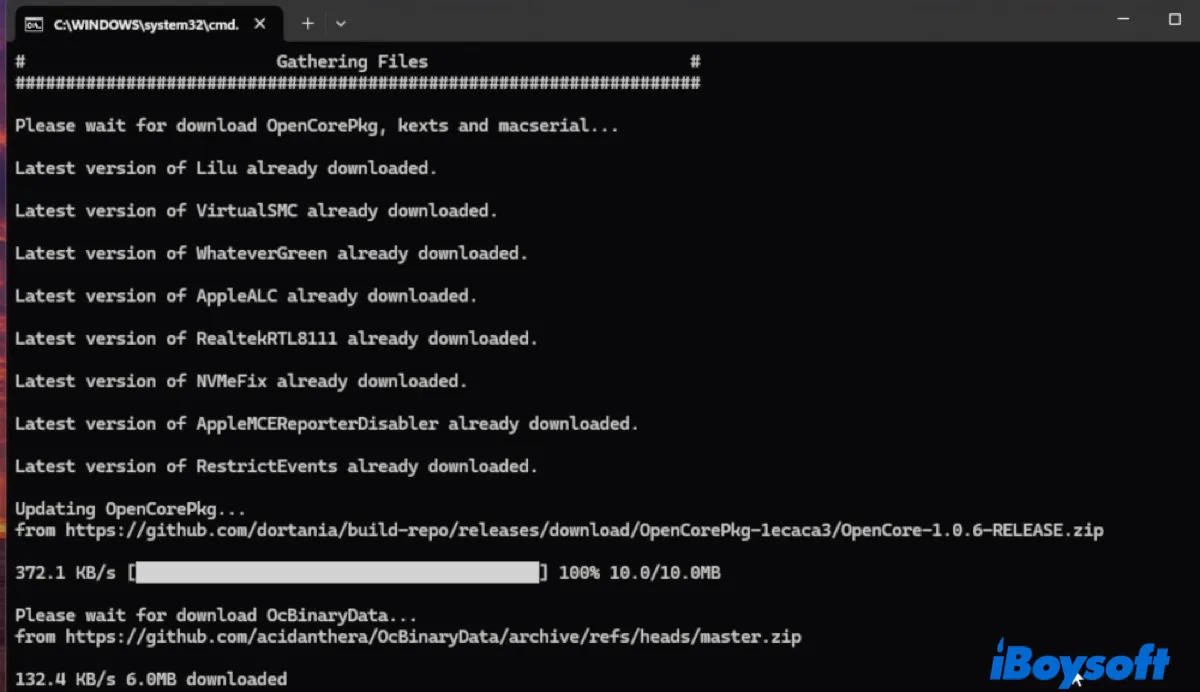
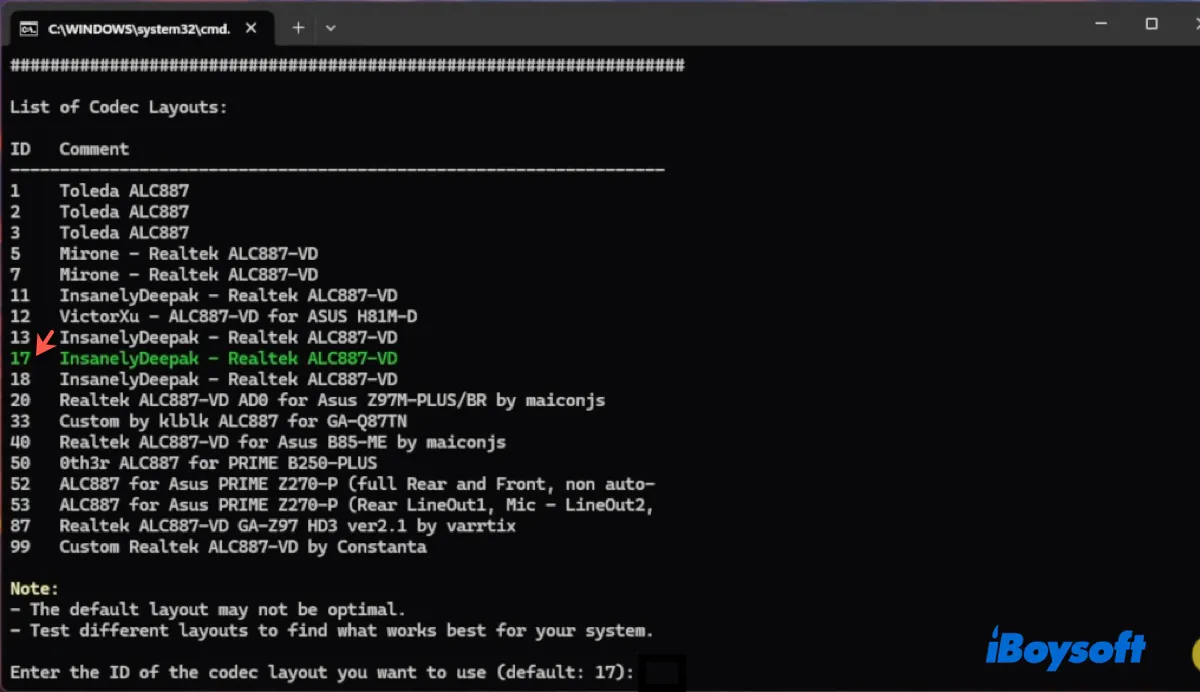
- When it asks you to choose a layout, go with the default option. For instance, if 17 is marked in green, type in 17 and hit Enter.
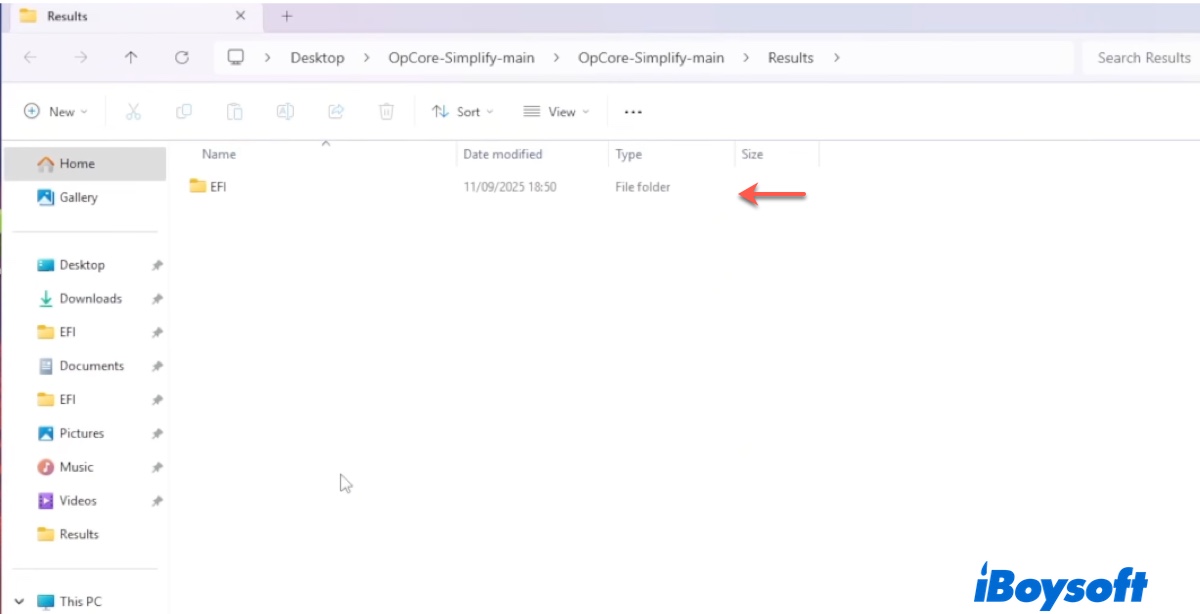
- Once the EFI folder is downloaded, you can find it in the Results folder.
Step 4: Install OpenCore to the bootable USB
After preparing the EFI folder and generating SMBIOS, all you need to do is install OpenCore to your bootable USB. To do this, you need to replace the EFI partition on the bootable USB drive with the OpenCore EFI folder you built earlier.
- Download the free version of MiniTool Partition Wizard.
- Make sure your macOS Tahoe bootable USB installer is connected.
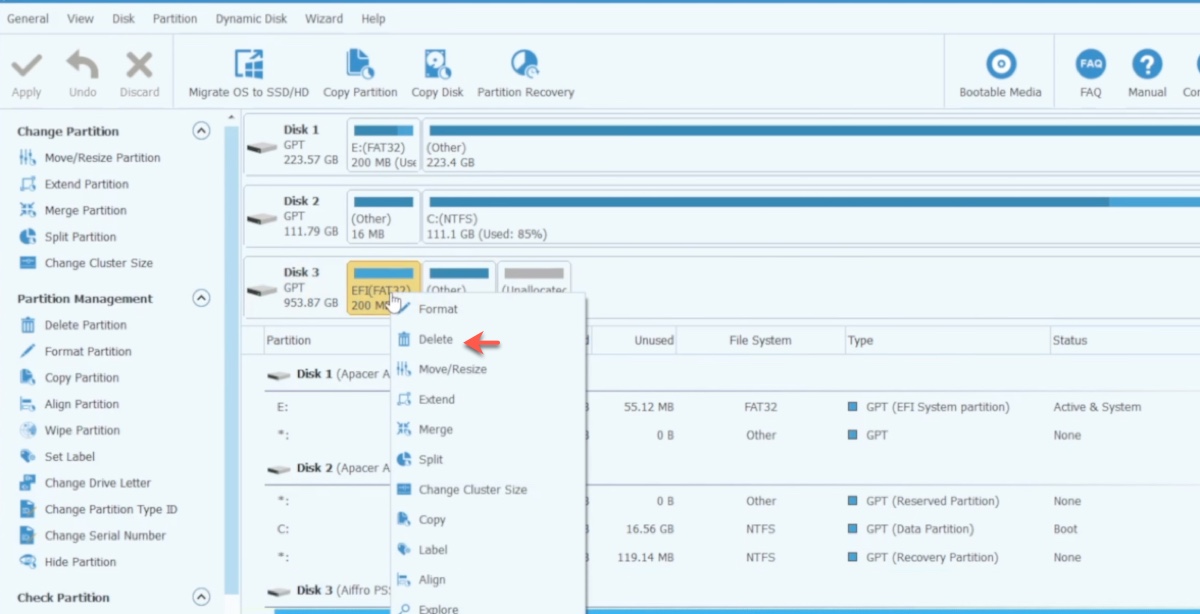
- Right-click on the EFI partition of the bootable USB.
- Choose Delete.
- Right-click on it again and choose Create.
- Name it EFI.
- Set the file system to FAT32.
- Click Apply.
- Locate the EFI partition you created in the previous step.
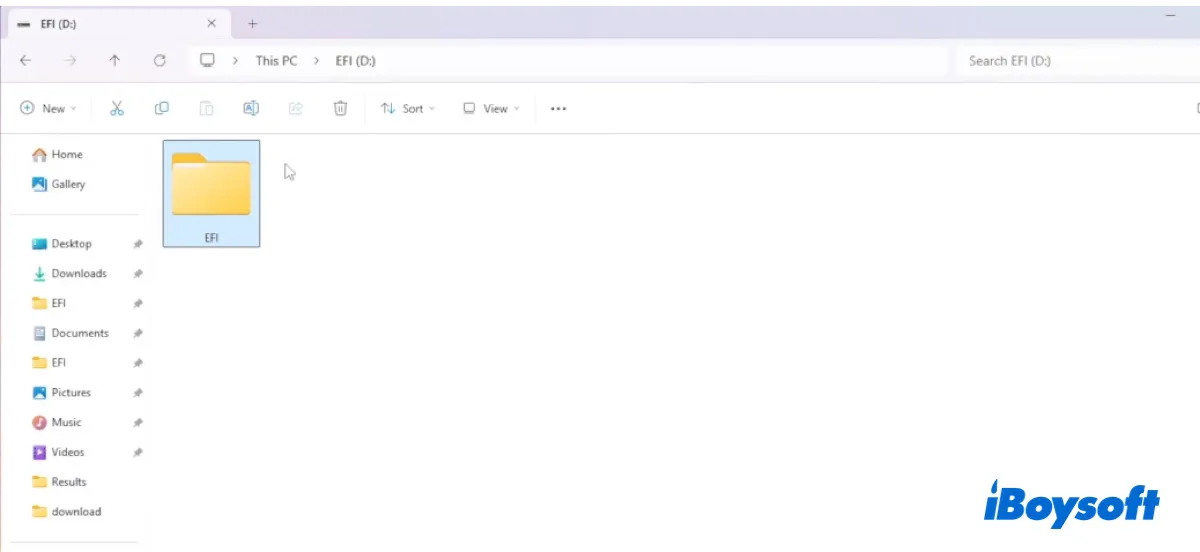
- Open the EFI partition on your bootable drive.
- Paste the EFI folder into it.
- Still in the partition wizard, right-click on the EFI partition and choose "Change Partition Type ID."
- Choose the EFI System Partition and click Apply.
- Now your USB is fully ready to boot with macOS Tahoe.
Step 5: Create a partition on your PC for macOS Tahoe (optional)
If you want to dual-boot Windows and macOS Tahoe, you can create a partition specifically for the macOS Tahoe installation. This is only recommended for users with plenty of free space to spare; otherwise, you may run into space issues on both systems. If you plan to use the whole computer for macOS Tahoe only, skip this step.
- In the search bar, type "partition" and select "Create and format hard disk partitions."
- Right-click on the C drive and choose "Shrink Volume."
- Specify the desired size in MB and click on Shrink.
- Right-click the unallocated space and choose "New Simple Volume."
- Follow the on-screen prompts to continue.
- Opt for NTFS as the formatting option.
- Assign the partition a name, such as "macOS Tahoe" or any name you prefer.
- Proceed to format the new partition to finalize the setup.
Step 6: Install macOS Tahoe on Hackintosh
At last, you can install macOS Tahoe on your Windows PC with the steps below:
- Boot into the BIOS/UEFI mode. Usually, it's done by pressing F2, F11, or F12 when starting up your PC.
- Make sure your macOS Tahoe bootable USB installer is connected.
- Select the USB flash drive with the UEFI prefix and hit Enter to boot up.
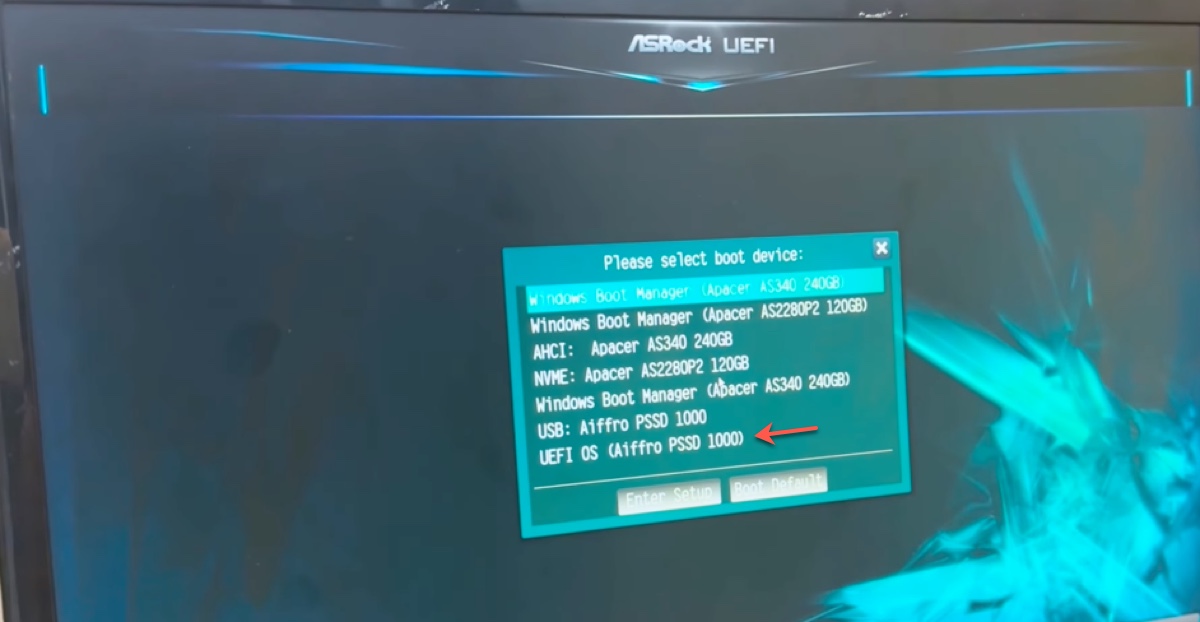
- Select "Install macOS Tahoe" and click the up arrow.
- Choose a language.
- In the macOS Utilities window, choose Disk Utility.
- Select the drive where you want to install macOS Tahoe. If it's a partition, choose the partition; if it's the whole drive, click View > Show All Devices and choose the top-level physical disk.
- Click Erase. (⚠️This will erase all data on the selected drive!)
- Name the drive Macintosh HD.
- Choose APFS as the format.
- Choose GUID Partition Map as the scheme.
- Click Erase.
- When the erase process is complete, exit Disk Utility.
- Click on "Install macOS Tahoe" and tap Continue.
- Agree to the terms and conditions.
- Choose the formatted disk as the destination disk.
- Follow the onscreen instructions to install macOS Tahoe on your Windows PC.
- During the process, your computer will reboot several times.
- Each time, go back to the boot menu and choose the macOS installer.
- Wait for the setup to be complete.
Now, you can have a fresh macOS Tahoe Hackintosh. Share the helpful steps with others!
FAQs about macOS Tahoe Hackintosh
- QWhat macOS versions work on Hackintosh?
-
A
The macOS version that works on a Hackintosh is decided by hardware specifications. If your computer has a higher-end specification, it's bound to support newer macOS versions like the latest macOS Tahoe. You can check the macOS versions your computer support with the steps in this guide.
- QDoes macOS Tahoe slow down Hackintoshes?
-
A
Not necessarily. The public version of macOS Tahoe should work fine on a Hackintosh that supports it. However, if your hardware specifications don't match well with macOS Tahoe, it's going to work slowly.
