Creating a macOS Tahoe bootable USB is essential if you want to clean install macOS Tahoe, upgrade multiple Macs to macOS Tahoe without downloading the app installer repeatedly, or need a recovery drive.
If you've made bootable USB installers before, you likely have tried to download the macOS Tahoe full installer but couldn't find it in the Mac App Store. Don't worry, creating a macOS Tahoe bootable USB is truly simple through iBoysoft DiskGeeker for Mac.
It's an install disk creator that provides the macOS Tahoe full installer and enables you to quickly make a Tahoe USB installer without complicated Terminal commands. Here's how to easily make a bootable USB installer for macOS Tahoe:
Tips: To create the macOS Tahoe install disk, you need to prepare an external drive, like a USB flash drive, with 32 GB or more storage space. If it has important files, you must back them up because the process will erase the drive.
Step 1: Free download and install iBoysoft DiskGeeker for Mac.
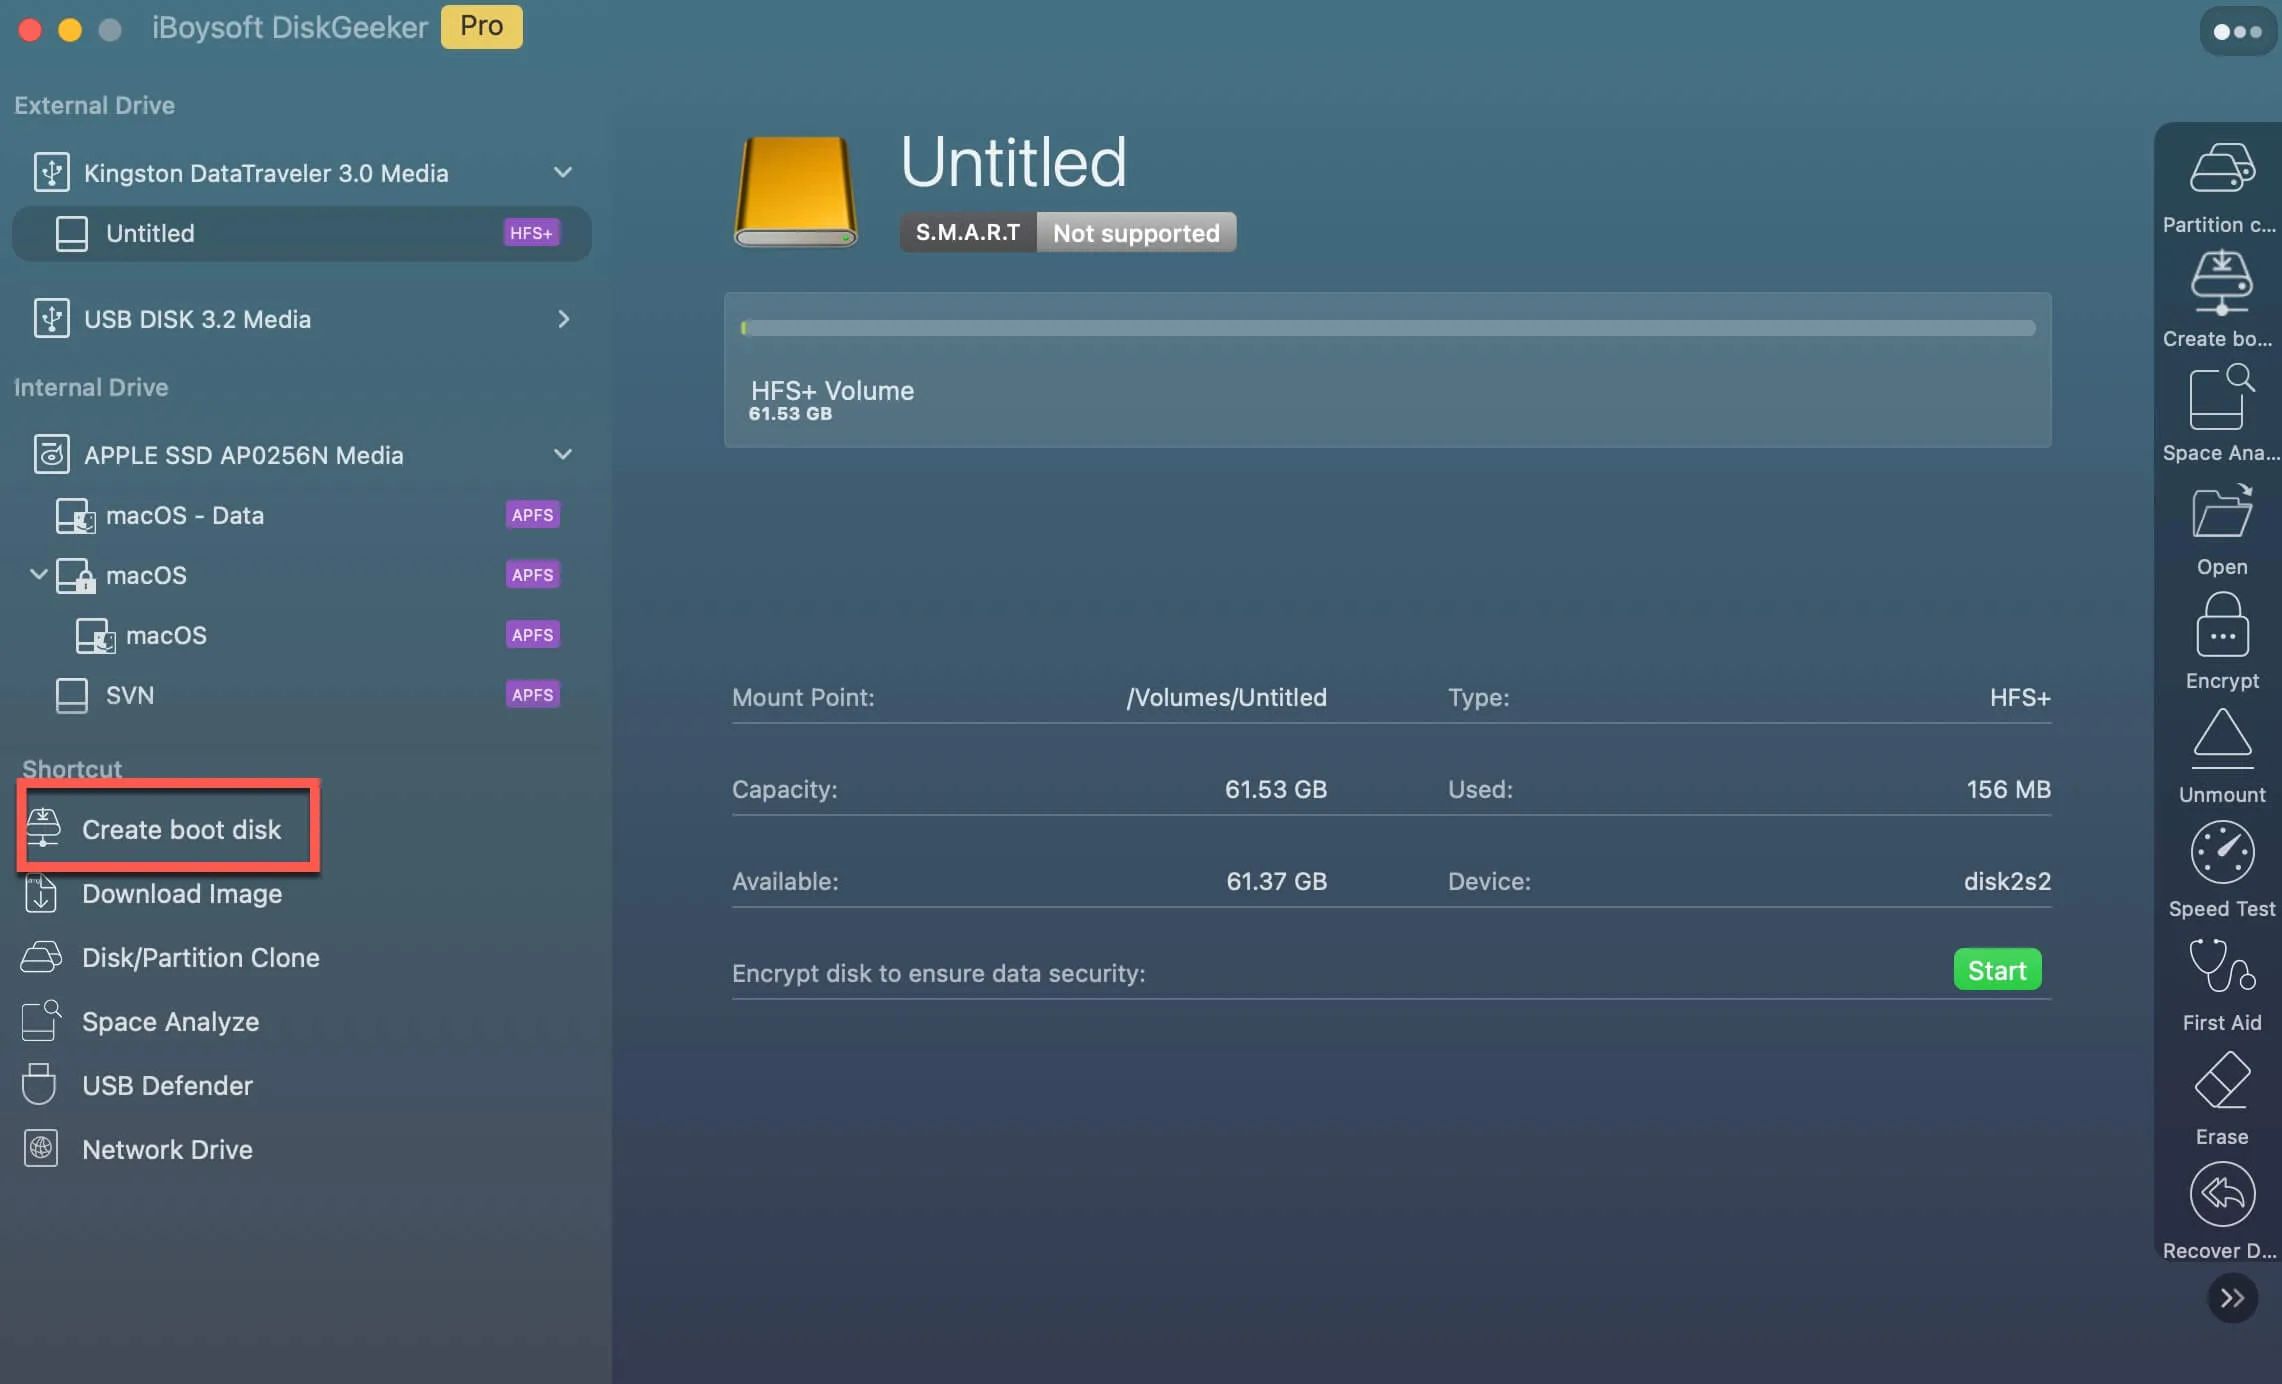
Step 2: Launch the install disk creator and click Create boot disk from the bottom-left toolbar.
Step 3: Select your external drive and click Select.

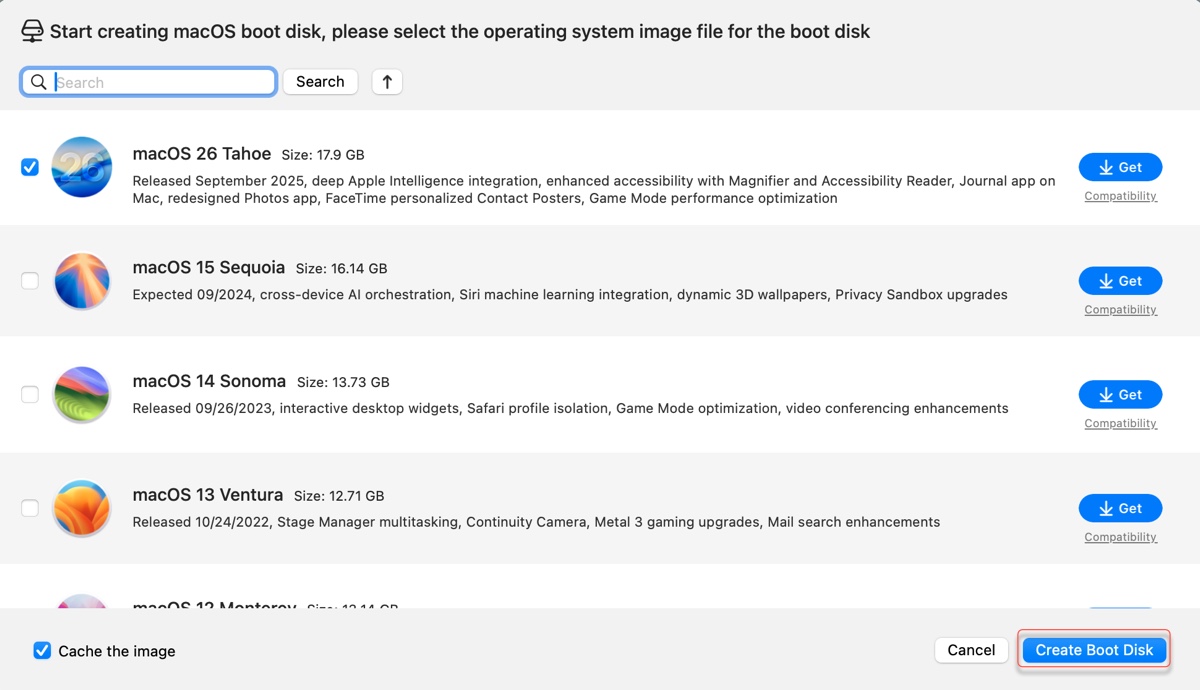
Step 4: Choose macOS Tahoe and click Create boot disk.

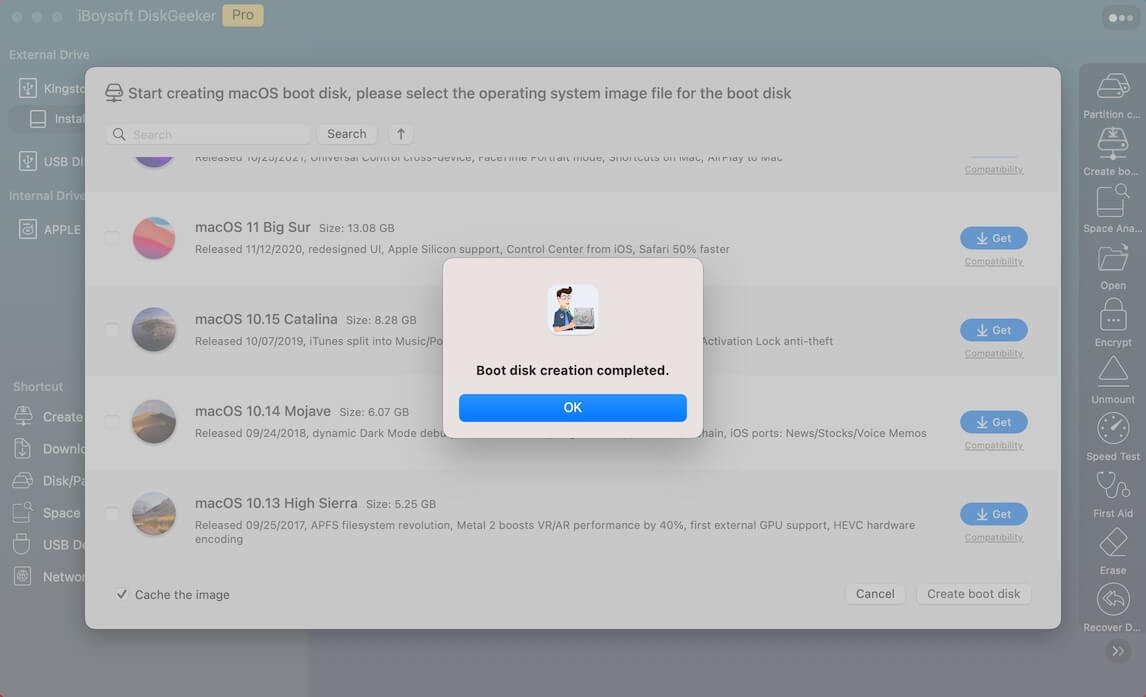
Step 5: Wait for macOS Tahoe to be downloaded.
Step 6: After the macOS Tahoe full installer is downloaded, the system will automatically create the boot drive.
Then, you can install macOS Tahoe from the USB installer.
Nevertheless, if you don't mind spending more time and running Terminal commands, you can follow the steps below to make the macOS Tahoe bootable USB manually.
Tips: If you want to build a macOS Tahoe Hackintosh, you can also create the macOS Tahoe bootable USB installer from Windows.
How to create a macOS Tahoe bootable USB installer?
Here's how to create a macOS Tahoe boot disk manually:
- Download the macOS Tahoe full installer directly from Apple's server.
- Double-click to open the InstallAssistant.pkg file.

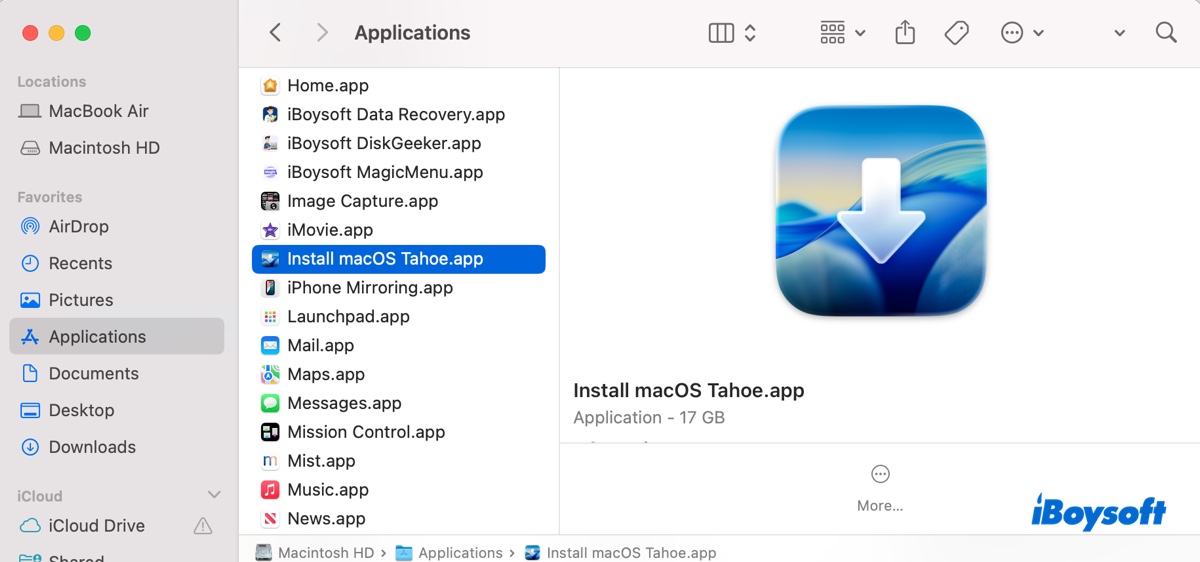
- Follow the onscreen instructions to install the macOS Tahoe app to your Applications folder.
- Plug in your external drive if you haven't already.
- Launch Disk Utility from the Applications > Utilities folder.
- Click View > Show All Devices.
- Select the physical drive, such as Colorful SL300 128GB Media, and click Erase.
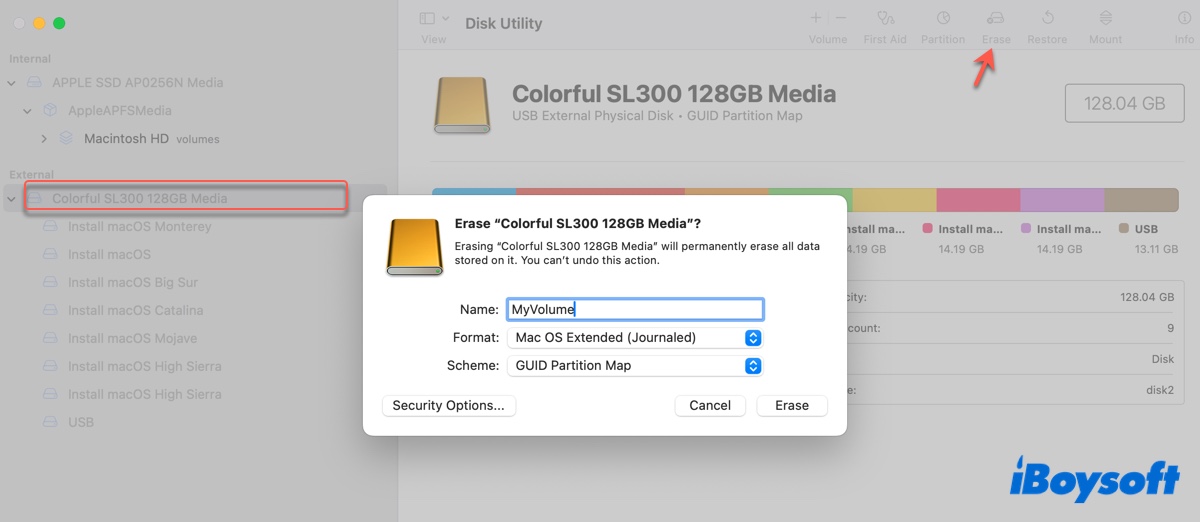
- Name the drive MyVolume.
- Choose the format as Mac OS Extended (Journaled)
- Keep the scheme as GUID Partition Map.
- Click Erase.
- Launch Terminal from the Applications > Utilities folder.
- Type sudo, space, drag and drop the macOS Tahoe installer app to the Terminal window, leave a space, then copy and paste --volume /Volumes/MyVolume into Terminal and hit Enter.sudo /Applications/Install\ macOS\ Tahoe.app/Contents/Resources/createinstallmedia --volume /Volumes/MyVolume
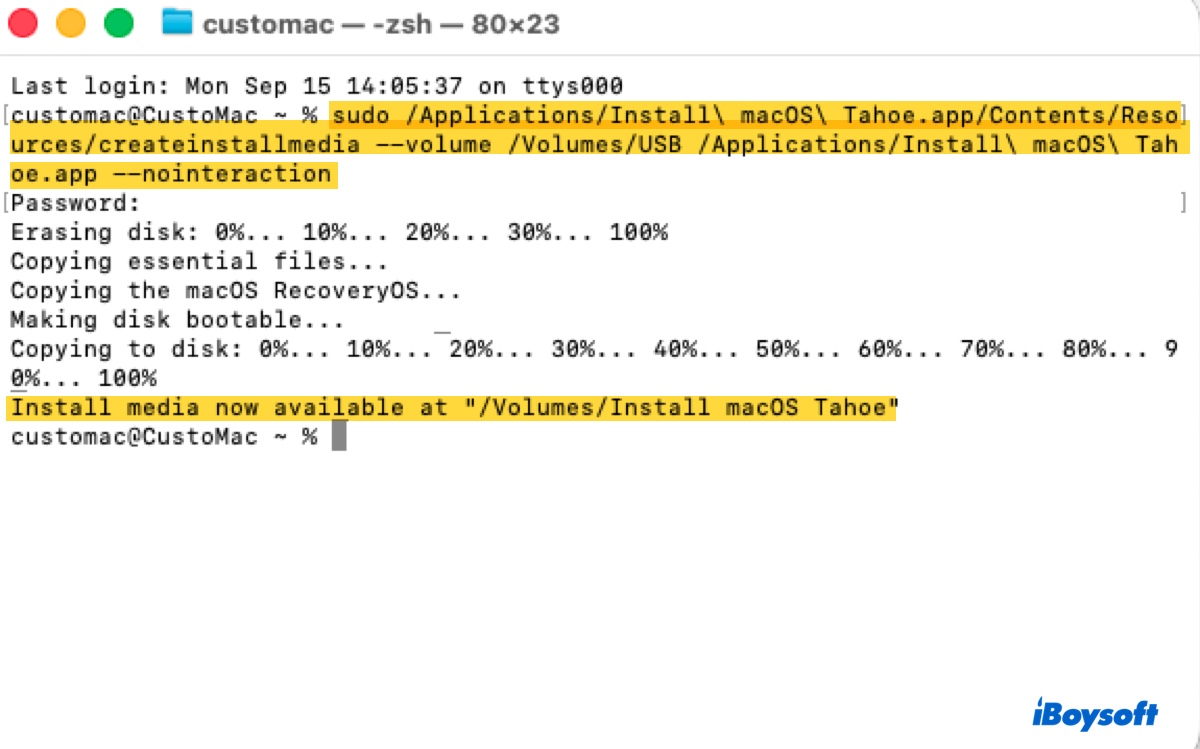
- Type in your account password and hit Enter.
- Type Y and press return when it says, "If you wish to continue, type (Y) then press return."
- The installation files will be copied to your USB drive.
- Once the install disk is created, you'll receive the message "Install media now available at "Volumes/Install macOS Tahoe."
Share the steps to help others create a macOS bootable USB installer for macOS Tahoe!
How to boot a Mac from the macOS Tahoe bootable USB?
Now, you can use the bootable media on any compatible Mac. Depending on the Mac's processor, the steps to boot from the USB installer are different.
If your Mac doesn't support macOS Tahoe, follow: How to Install macOS on Unsupported Macs.
On an Apple Silicon Mac:
- Ensure the macOS Tahoe bootable USB is connected.
- Turn off your Mac.
- Press and hold the power button until you see the startup options.
- Choose the Install macOS Tahoe partition and click Continue.
On an Intel-based Mac:
- Shut down your Mac.
- Press the power button, then immediately hold down the Option key.
- Release the key when the bootable volumes appear.
- Choose the volume containing the macOS Tahoe installer and hit Enter.
In the macOS Utilities window, choose Install macOS Tahoe to install macOS Tahoe without erasing your Mac, or select Disk Utility to format your hard drive and then clean install macOS Tahoe.
To clean install macOS Tahoe, read the macOS Tahoe Clean Install guide for more details.
If you're interested, you can also create a macOS bootable USB installer from Windows.
Find this guide helpful? Share it to benefit others!
FAQs about macOS Tahoe bootable USB installer
- QWhere can I download the macOS Tahoe full installer?
-
A
Apple doesn't provide the macOS Tahoe full installer in the App Store. If you want to get the full installer, download it from Apple's server using the link in this article.
- QHow long does it take to create a macOS Tahoe bootable USB installer?
-
A
If you use a tool like iBoysoft DiskGeeker for Mac, it may take less than 10 minutes to make a macOS Tahoe boot drive.
If you create the macOS Tahoe boot media manually, it'll take more time, depending on the speed of your external drive and Mac.