If you want to upgrade to the latest macOS Tahoe 26 while making sure it runs fast and smoothly, a clean install is usually the best option. It allows you to make a fresh start and ensures all junk and unwanted files built over time are removed. (🙋: Should I update to macOS Tahoe?)
If you've installed the beta version of macOS Tahoe, a clean install helps you update to the public version.
A clean install of macOS Tahoe is also the best way to reinstall macOS Tahoe if you've experienced macOS Tahoe issues after upgrading to it or got stuck on updating to macOS Tahoe before. (If you're interested in other ways to update to macOS Tahoe, check out: Mac Operating System Download and Install Guide.)
There are two ways to fresh install macOS Tahoe: Install Tahoe from USB & Install Tahoe from Recovery. Here's a summary of each method:
Tips: This article assumes your Mac (Intel or Apple Silicon) is compatible with macOS Tahoe. If you're not certain, check the macOS Tahoe compatibility list.
If your Mac isn't compatible with macOS Tahoe, follow: How to install macOS on unsupported Macs.
| How to Clean Install macOS Tahoe | Descriptions | Suitable Cases (For Compatible Macs) | Pros and Cons |
| ❶ Clean install macOS Tahoe from USB | Create a bootable USB installer to install macOS Tahoe from Recovery | 1. Upgrade to macOS Tahoe on all Macs; 2. Install macOS Tahoe on all Macs. | ✅ Faster installation process. ✅ Ideal for clean installs and multiple installations. ✅ Acts as a recovery tool. ❌ Requires preparation and creation of the bootable USB drive. ❌ Physical USB drive needed. |
| ❷ Clean install macOS Tahoe from Recovery | Directly boot into macOS Recovery to install macOS Tahoe without USB | 1. Upgrade to macOS Tahoe on Intel-based Macs (Option-Command-R); 2. Reinstall macOS Tahoe on Intel-based Macs (Command-R) if it's the most recent macOS installed on your Mac; 3. Reinstall macOS Tahoe on Apple Silicon Macs if it's the most recent macOS installed on your Mac. | ✅ Built-in tool that requires no additional preparation. ✅ Simple and straightforward for most users. ✅ Provides options for restoring from Time Machine and troubleshooting. ❌ Slower installation, especially with Internet Recovery. |
* To install macOS Tahoe on a Windows PC, build a macOS Tahoe Hackintosh to ensure the best performance.
Back up your Mac before clean installing macOS Tahoe
Generally, a macOS clean install involves erasing your Mac, which deletes all data on it, and installing the OS. That's why you must back up your Mac before proceeding.
If you only need to keep a few files and folders, you can transfer these files from your Mac to an external drive.
If you want to retain all documents, photos, music, videos, system files, apps, settings, calendar, and contacts, use Time Machine to back up your Mac.
With your data safeguarded, choose one of the two ways below to fresh install macOS Tahoe.
Clean install macOS Tahoe from USB
For a clean install to upgrade to macOS Tahoe, using a bootable USB installer is the ideal option, as it works seamlessly with both Apple Silicon and Intel-based Macs. Here are the steps to clean install macOS Tahoe from USB:
- Step 0: Prepare the USB drive
- Step 1: Create a macOS Tahoe bootable USB installer
- Step 2: Erase your internal hard drive
- Step 3: Install macOS Tahoe from USB
Tips: A clean install is also helpful if you can't install macOS Tahoe on Macintosh HD.
Step 0: Prepare the USB drive
Prepare a USB flash drive or other external disk with at least 16 GB of storage space. If it contains important files, ensure they are backed up. You can also reformat it with APFS to avoid issues when creating the bootable installer. To reformat your USB drive on Mac, take the steps below:
- Connect the external drive to your Mac.
- Launch Disk Utility from the Applications > Utilities folder.
- Tap View > Show All Devices.
- Select the physical disk of your USB drive and click Erase. (If you only want to use a partition for the bootable installer, choose the partition instead.)
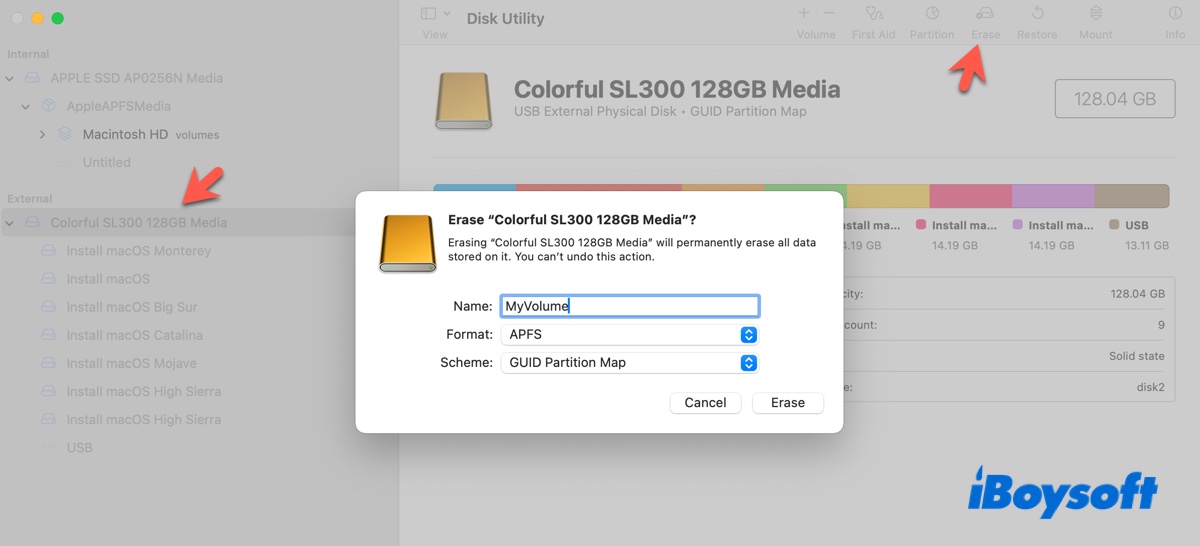
- Change the name to MyVolume.
- Choose APFS as the format.
- Use GUID Partition Map as the scheme.
- Click Erase.
After that, we can begin creating the bootable USB installer.
Step 1: Create a macOS Tahoe bootable USB installer
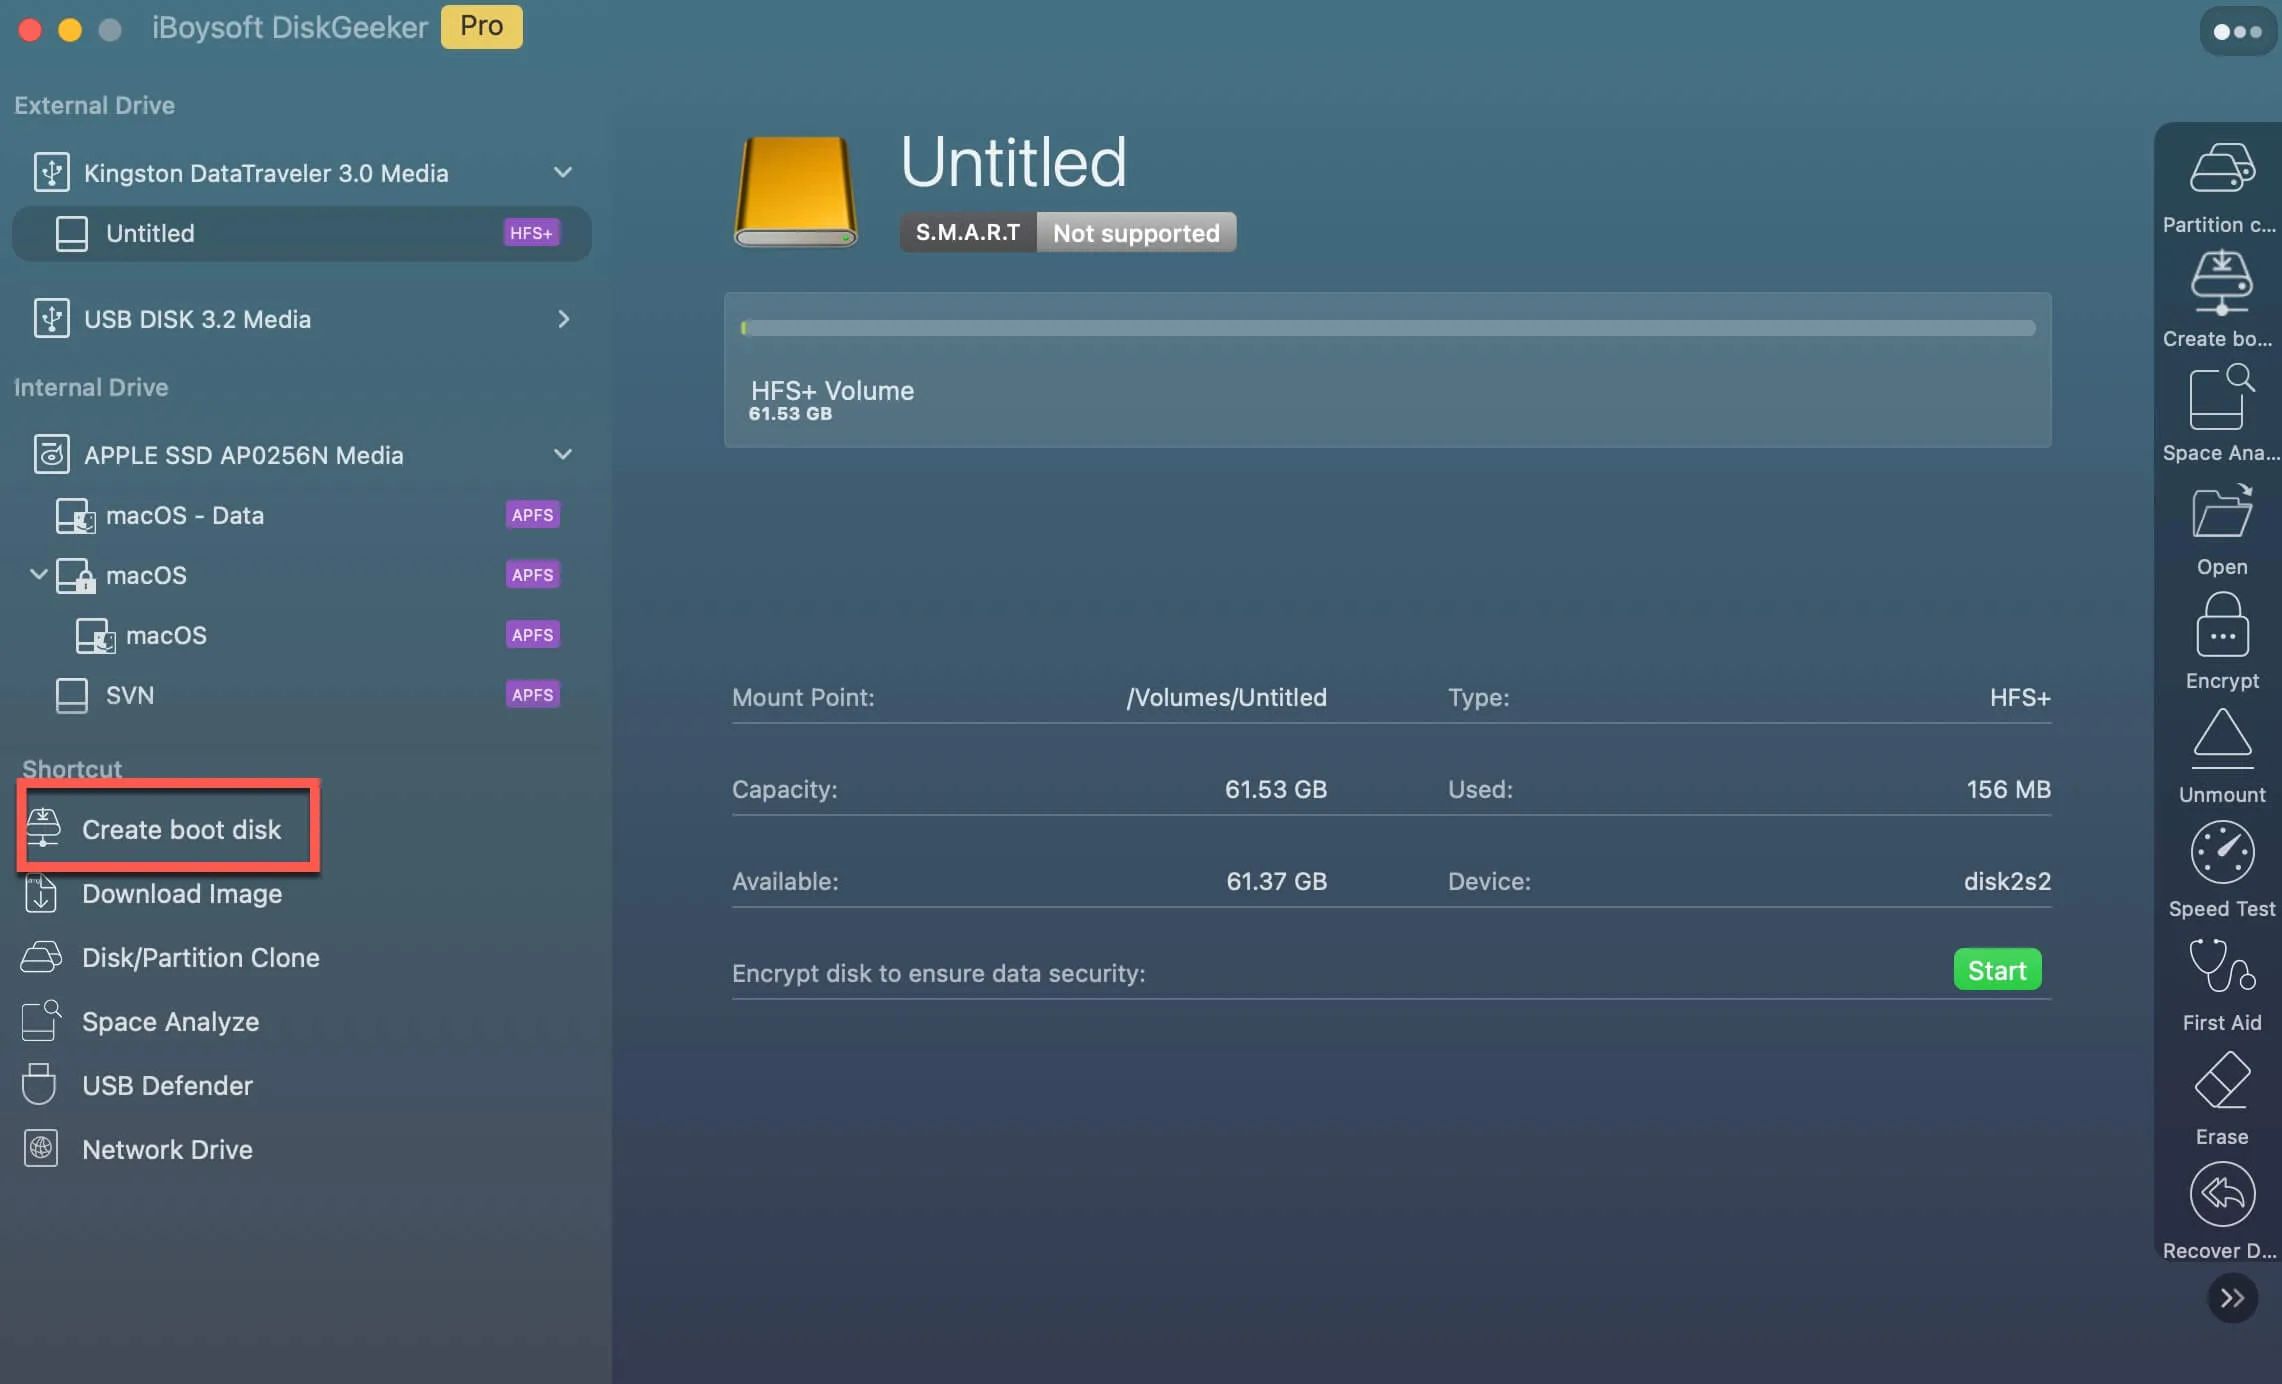
Tips: If you're not familiar with Terminal, you can use iBoysoft DiskGeeker for Mac to create the macOS Tahoe bootable installer.
This tool comes with the full macOS Tahoe installer included, saving you the time and hassle of searching for and downloading it from other sources. With just a few clicks, you can effortlessly create your macOS Tahoe bootable installer without needing to run Terminal commands. Apart from macOS Tahoe, it also supports all macOS versions starting from High Sierra.
To manually create the macOS Tahoe bootable USB installer from Terminal:
- Download the macOS Tahoe full installer or macOS Tahoe IPSW.
- Double-click the macOS Tahoe.pkg file to add it to your Applications folder.
- Check if the "Install macOS Tahoe" app is in your Applications folder.
- Open Terminal from your Applications > Utilities folder.
- Make sure you're logged in as an administrator.
- Type the command below in Terminal and hit Enter.sudo /Applications/Install\ macOS\ Tahoe.app/Contents/Resources/createinstallmedia --volume /Volumes/MyVolume
- When asked, enter your login password and press Enter. (For protection, the password is not visible.)
- Type Y and hit Enter to confirm that you want to erase the volume.
- When an alert says, "Terminal wants to access files on a removable volume," click OK.
- Wait for the message "Installation media now available at "Volumes/Install macOS Tahoe."
- Exit Terminal.
Step 2: Erase your internal hard drive
Next, we need to erase your startup disk. To do this, we must first boot your Mac from the USB installer.
To boot from USB on an M1/M2/M3/M4 Mac:
- Ensure your USB installer is plugged in and your Mac is connected to the internet.
- Shut down your Mac.
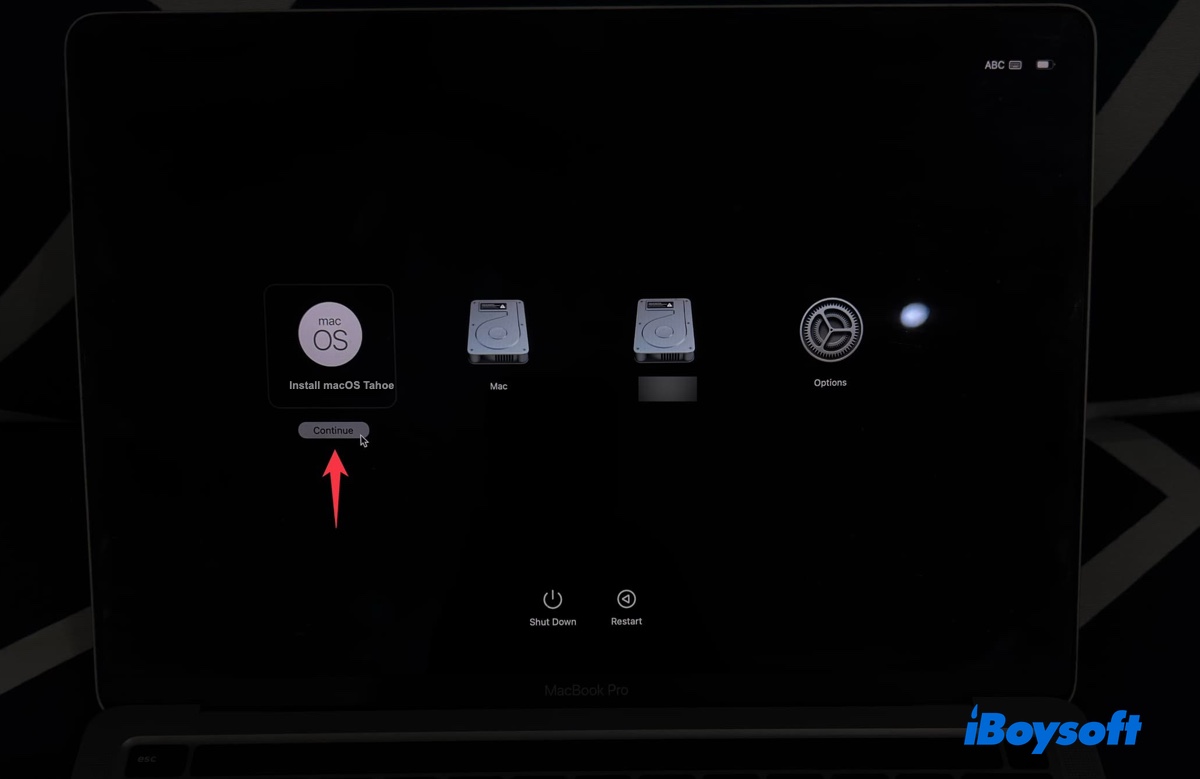
- Press and hold the power button until the bootable volumes show up.
- Select the macOS Tahoe bootable volume and click Continue.
To boot from USB on an Intel-based Mac:
- Ensure your USB installer is plugged in and your Mac is connected to the internet.
- Turn off your Mac.
- Power on your Mac, then immediately press and hold the Option key.
- Release the key when a dark screen appears with bootable volumes.
- Choose the volume with the macOS Tahoe bootable installer and click the onscreen arrow.
If your Mac won't boot from the USB installer, change Startup Security Utility as described in this guide: How to Boot Mac from External Drive?
🔺 On the macOS Utilities window, go through the following steps to erase your Mac: 🔻
- Choose Disk Utility and click Continue.
- Tap View > Show All Devices to reveal the physical startup disk.
- Select the top-layer physical disk (e.g., APPLESSD AC0728E Media) and click Erase.

- Name it Macintosh HD.
- Select APFS as the format.
- Choose GUID Partition Map as the scheme.
- Click Erase.
- Close Disk Utility and return to the macOS Utilities window.
Step 3: Install macOS Tahoe from USB
Now that you've wiped your Mac, you can finally install macOS Tahoe from scratch:
- Choose Install macOS Tahoe and click Continue.
- Click Continue to set up the installation of macOS Tahoe.
- Agree to the terms and conditions of Apple.
- Select your Macintosh HD drive and click Continue.
- Wait patiently while macOS Tahoe is being installed on your disk "Macintosh HD."
- After the installation is complete, follow the onscreen instructions to set up your Mac.
Share the steps to clean install macOS Tahoe from USB with your friends!
Clean install macOS Tahoe without USB
Another option is to install macOS Tahoe from Recovery without utilizing a USB drive. This method is commonly used to reinstall macOS Tahoe if you're currently running it. Even if you haven't installed macOS Tahoe, it allows you to upgrade to macOS Tahoe from Internet Recovery, provided that your Mac is Intel-based.
Here are the steps to fresh reinstall macOS Tahoe from Recovery Mode:
- Step 1: Boot into macOS Recovery Mode
- Step 2: Format your startup disk
- Step 3: Install (reinstall) macOS Tahoe from recovery
Step 1: Boot into macOS Recovery Mode
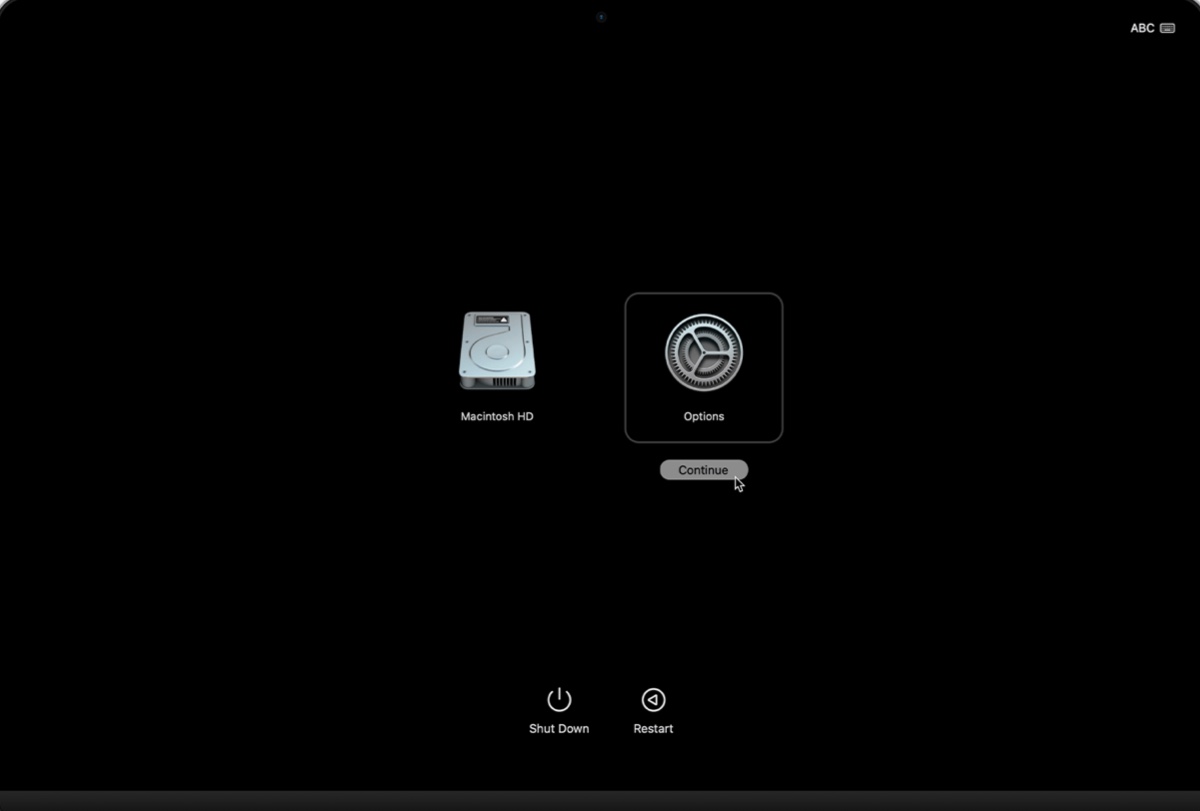
To boot into macOS Recovery on an M1/M2/M3/M4 Mac:
- Turn off your Mac.
- Press and hold the power button until you see "Loading startup options."
- Click Options > Continue.
- If prompted to choose a volume, select your startup disk (e.g., Macintosh HD) and click Next.
- Choose a user you know the password for, click Next, then type in the password if asked.
- When your Mac starts up from Recovery, it'll show a window with four utilities.
To boot into macOS Recovery on an Intel-based Mac:
- Shut down your Mac.
- Press the power button, then immediately press and hold the proper keyboard combinations.
To install macOS Tahoe: Hold down Option-Command-R to enter Internet Recovery. Release the keys when you see the spinning globe.
To reinstall the most recent macOS installed on your Mac: Hold down Command-R to enter Local Recovery. Release the keys when you see the Apple logo. - If asked, choose a network.
- If asked, select a user your know the password for and click Next, then enter the login password.
- When it starts up from Recovery, you'll find a window with four utilities.
Step 2: Format your startup disk
Formatting the startup disk of your Mac is a necessary step to perform a clean install of an operating system. It removes all existing data, including the macOS, applications, and personal files, helping prevent any potential conflicts with the previous installation and improving system performance.
We've discussed how to erase the startup disk in the first section. Click here to continue reading.
Step 3: Install (reinstall) macOS Tahoe from recovery
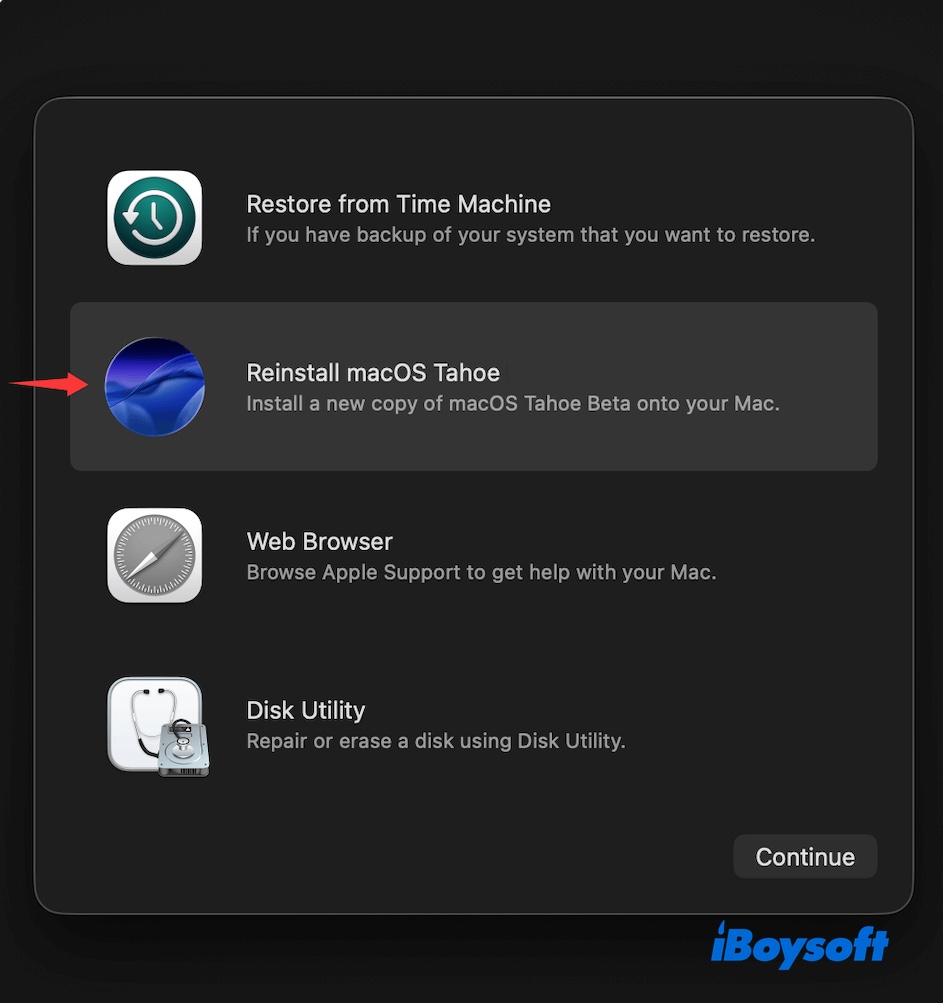
After your startup disk is formatted, you can revert to the macOS Utilities window to install or reinstall macOS Tahoe.
If you used Option-Command-R to boot an Intel Mac, click Reinstall macOS and follow the onscreen instructions to download and install the latest macOS compatible with your Mac, which is macOS Tahoe 26.
If you're reinstalling macOS Tahoe on an Intel-based or Apple Silicon Mac, click Reinstall macOS Tahoe and follow the instructions to clean reinstall it.
If you find the information useful, share it to help others clean install macOS Tahoe from USB or without USB!
Why do you need to clean install macOS Tahoe?
Clean installing macOS Tahoe is a bit complex, but it's still necessary if you want:
To remove issues from macOS Tahoe beta: If you installed a beta version of macOS Tahoe and experienced bugs or stability issues, a clean install is the recommended method for upgrading to the final, stable release.
To clear old and leftover files: Over time, files and settings from old applications can clutter your Mac's system. A clean install wipes everything and gives you a fresh start, which can resolve problems and clear out unused data.
To address unexplained performance problems: When a Mac is running slowly or behaving erratically, a clean installation can eliminate years of accumulated data and resolve underlying software issues that are difficult to diagnose.
To transition an older Intel Mac: macOS Tahoe will be the last major update to support Intel-based Macs. A clean install is the most thorough way to prepare these devices before the end of their software update cycle.
To securely wipe your Mac before selling it: If you plan to sell or transfer your Mac, a clean install is the best way to return it to factory settings and ensure all your personal data is removed.
FAQs about how to clean install macOS Tahoe
- QHow to download macOS Tahoe DMG for clean install?
-
A
Apple doesn't offer a direct macOS Tahoe DMG download for public release. However, you can download it from third-party resources or a reliable tooll like iBoysoft DiskGeeker.
- QHow to erase and reinstall macOS Tahoe?
-
A
To erase and reinstall macOS Tahoe, you can either use a macOS Tahoe bootable USB installer or the macOS Recovery Mode. This guide covers both methods.
- QHow to install macOS Tahoe from Terminal?
-
A
To install macOS Tahoe from Terminal when it's the latest macOS version compatible with your Mac, open Terminal and run the command: softwareupdate --fetch-full-installer --launch-installer
- QClean install macOS Tahoe vs. upgrade to macOS Tahoe in Software Update?
-
A
A clean install of macOS Tahoe erases all data, apps, settings, and files from your startup disk before installing the new operating system. This results in a completely fresh, like-new system.
But an upgrade from macOS Software Update simply replaces your current operating system with Tahoe, leaving your personal files, user accounts, and applications untouched. The upgrade process preserves all your data and settings, moving them to the new version of macOS.