Satisfying users' wait and expectations, macOS Sequoia finally came to the public on 16th September 2024. Compared to its predecessor OS - macOS Sonoma, this new macOS Sequoia welcomes loads of notable features and highlights, and each feature extends to you the incomparable user experience and productivity.
Among the stunning highlights are the new window tiling to arrange windows effectively, the new Passwords app to manage passwords, passkeys, and other credentials conveniently, the highly anticipated Apple Intelligence to let your Mac be smarter and more intelligent, etc.
If you want to fully experience macOS Sequoia on virtual machines such as VMware, VirtualBox, or Parallels Desktop, a macOS 15 Sequoia ISO file is essential.
macOS Tahoe, the successor of macOS Sequoia, has been released. If you want, download the macOS Tahoe ISO file.
Download macOS Sequoia ISO on Windows PC
If you want to install macOS Sequoia on your Windows computer, iBoysoft DiskGeeker for Windows is an ideal solution. It allows you to download the macOS Sequoia bootable ISO directly on Windows and streamlines the process of creating a macOS Sequoia bootable USB installer on Windows. Follow the steps below:
Step 1: Download and launch iBoysoft DiskGeeker for Windows.
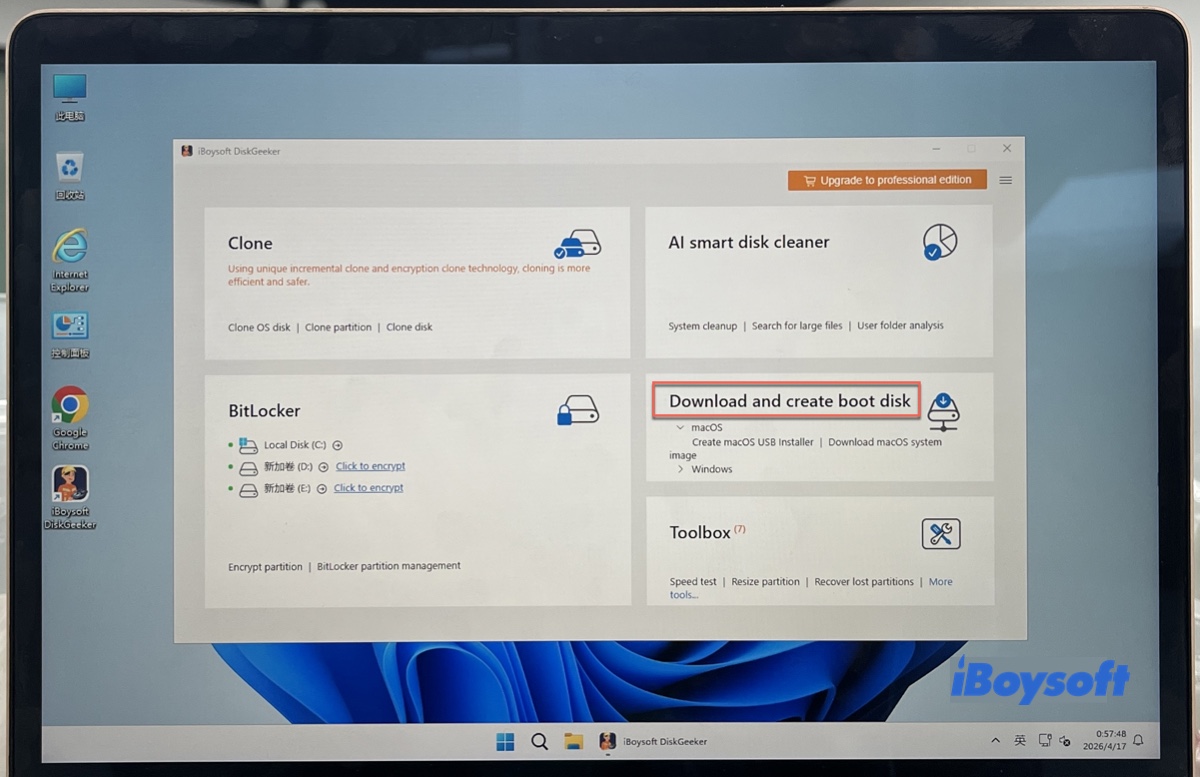
Step 2: Open Download and create boot disk > Download macOS system image.
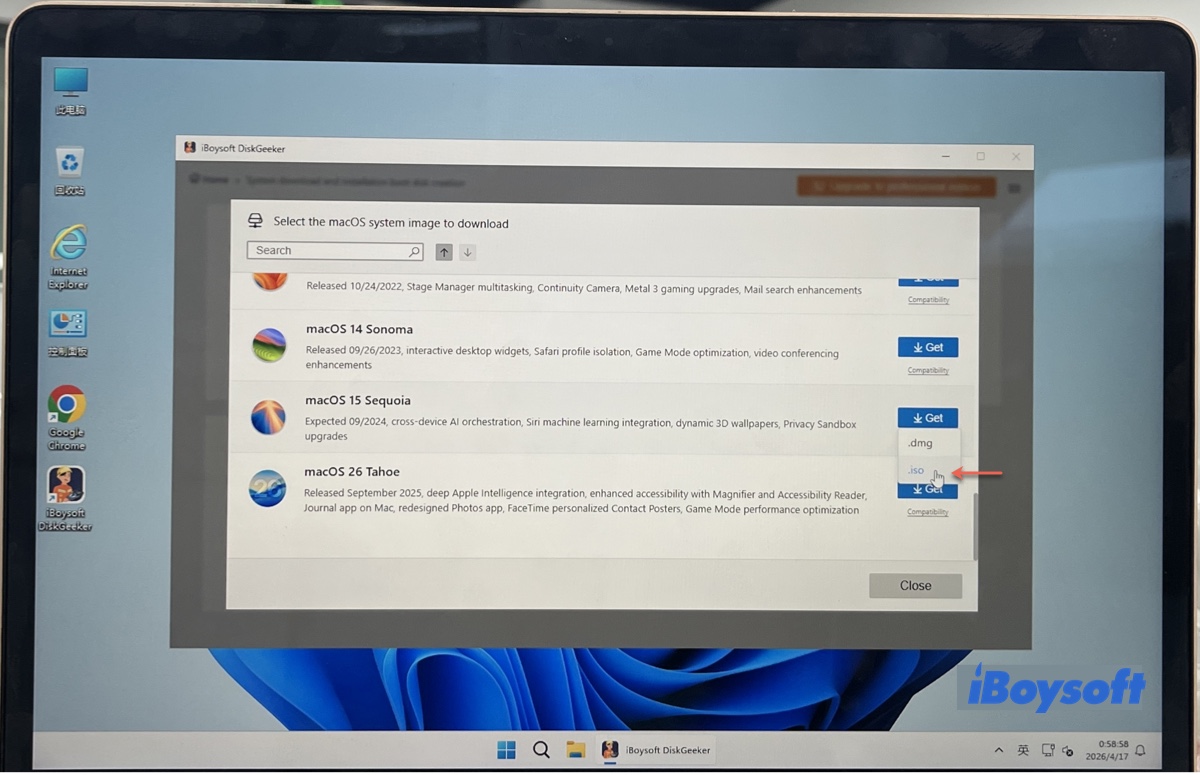
Step 3: Choose macOS Sequoia, click Get, and select the .iso format.
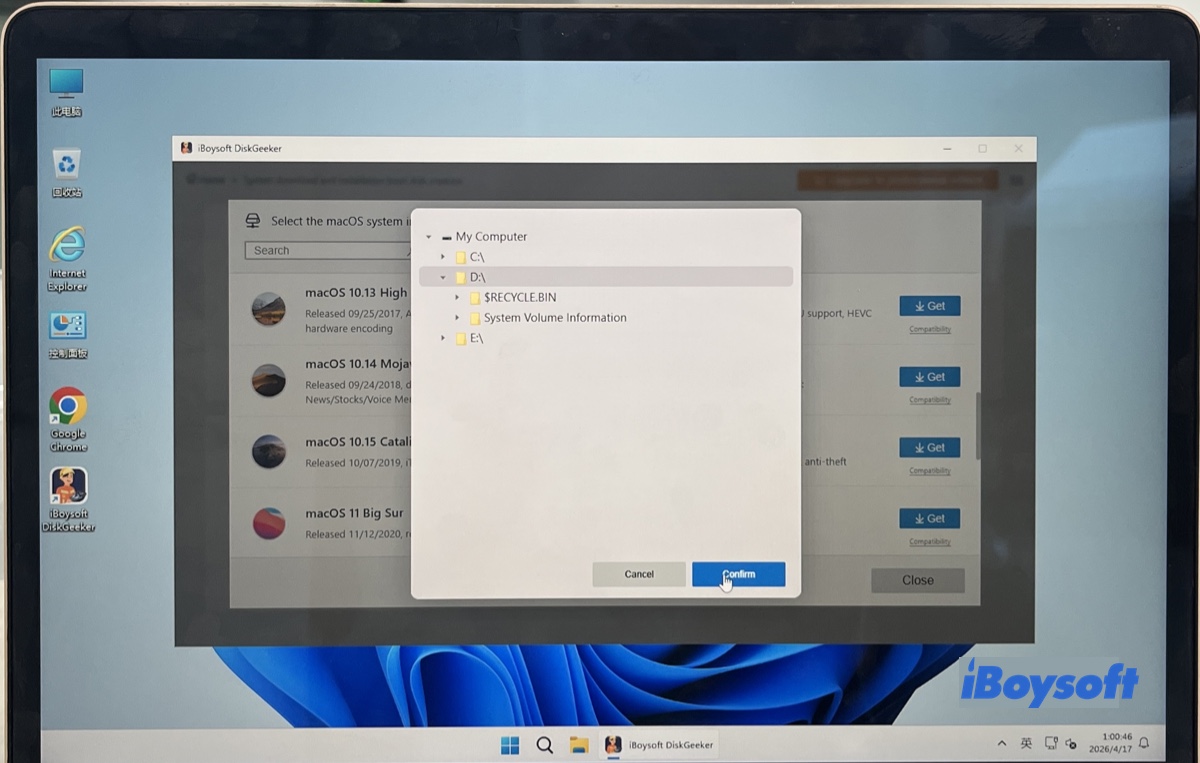
Step 4: Save the file to a preferred location.
Step 5: Wait for the ISO file to be downloaded.
If you need to make boot media, choose Download and create boot disk > Create macOS USB Installer in Step 2 instead.
Also read: macOS Installer Download for Windows
Create a macOS Sequoia ISO file on Mac for VMware or VirtualBox
If you get a Mac that is officially supported to run macOS Sequoia by Apple, you can create the macOS Sequoia ISO file for VMware or VirtualBox usage yourself. Don't worry, we'll walk you through the whole ISO file creation process!
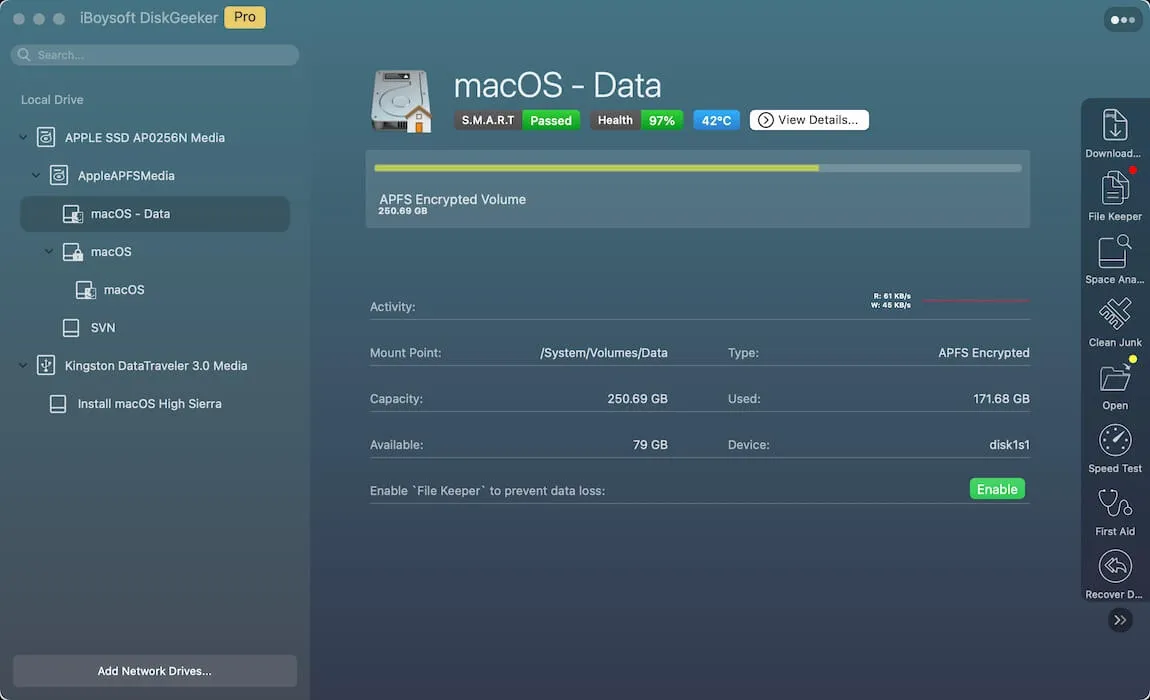
Note: The ISO creation process contains 4 steps. If you want to save time, skip three steps with iBoysoft DiskGeeker for Mac. It allows you to download the macOS Sequoia DMG file, simplifying the process.
This tool doesn't require a compatible Mac. With it, you can create a macOS Sequoia ISO image, no matter whether your Mac is supported or not.
Here is how to perform that:
Step 1: Click the Download Image button.
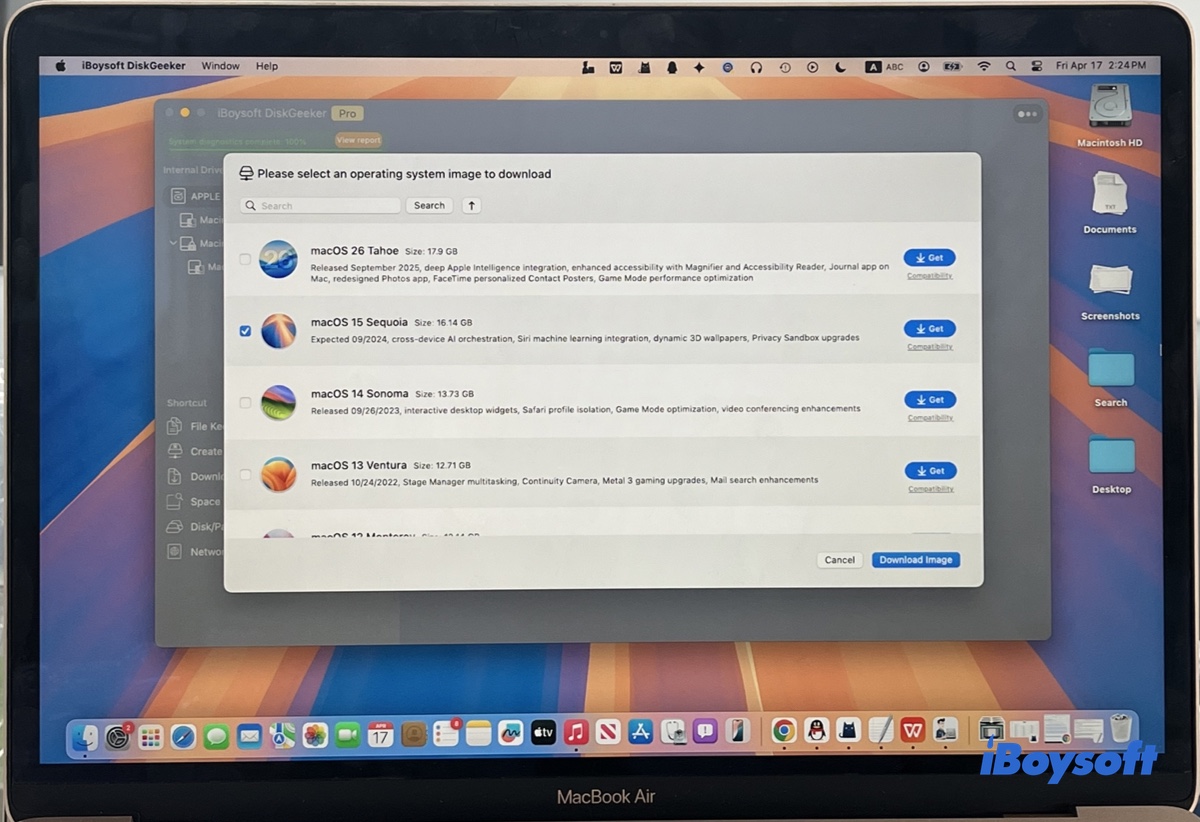
Step 2: Locate macOS Sequoia and click the Download Image button.
Step 3: Select where to save the DMG file.
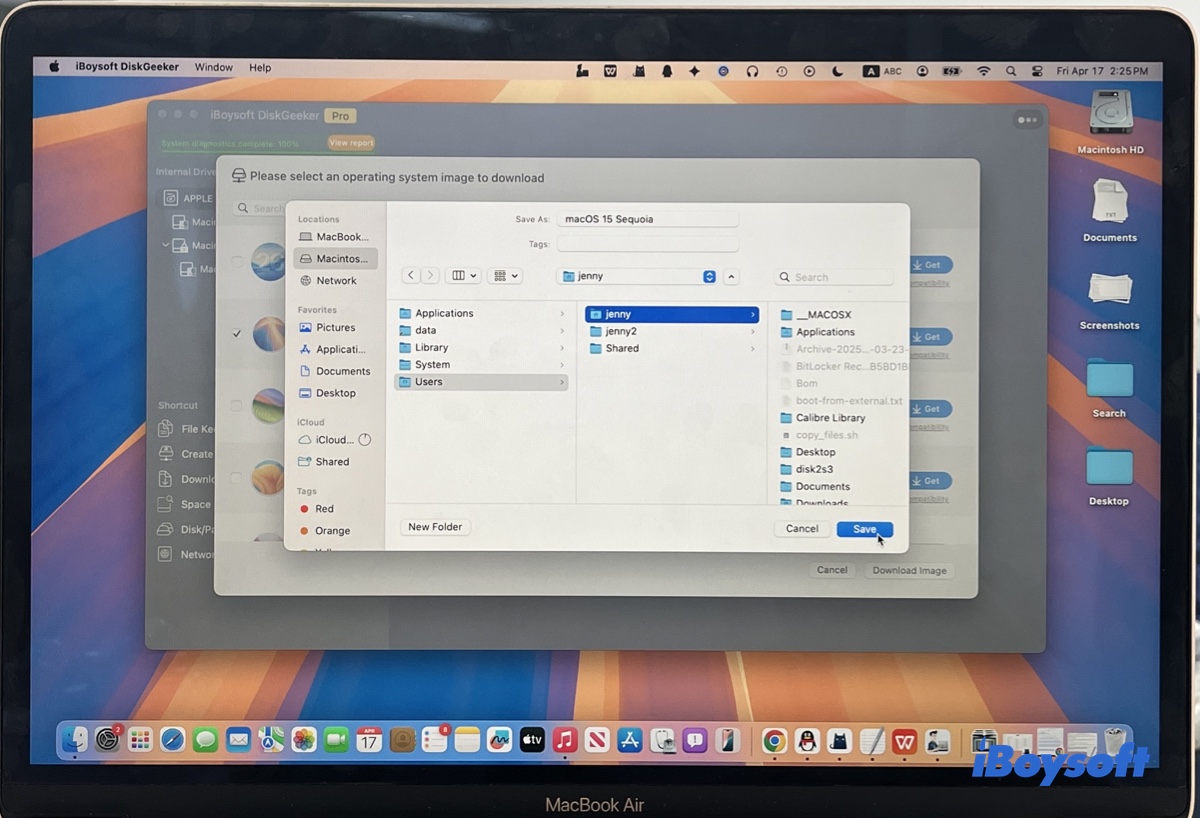
Step 4: Wait for the process to finish.
Once the macOS Sequoia DMG file is downloaded, continue with Step 4 in the following sections.
If you have a compatible Mac and prefer to roll up your sleeves and do it yourself, take the following steps:
- Step 1: Download the macOS Sequoia full installer
- Step 2: Create an empty ISO disk image in Terminal
- Step 3: Make the macOS Sequoia installer
- Step 4: Convert the macOS Sequoia disk image into the .iso format
Step 1: Download the macOS Sequoia full installer
Downloading the macOS installer is as easy as ABC if you have a Mac compatible with macOS Sequoia.
For the users who have a compatible Mac:
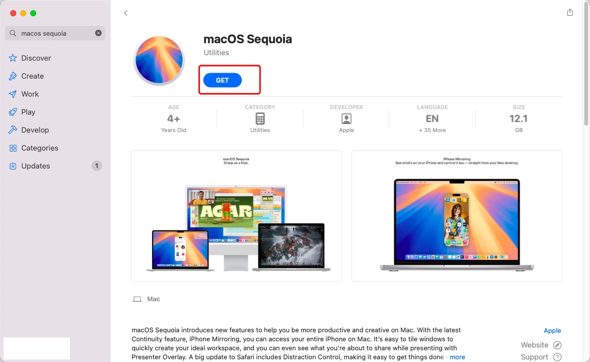
1. Go to the App Store, search for "macOS Sequoia", then hit the Enter key for the following actions.
2. When macOS Sequoia comes up, click the Get button to begin the download.
3. If it launches automatically when it has downloaded, press the Command-Q keys to quit it.
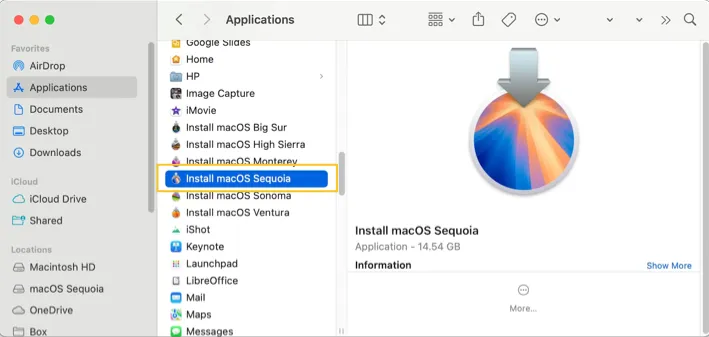
4. Check your Applications folder — you should see the macOS Sequoia installer there.
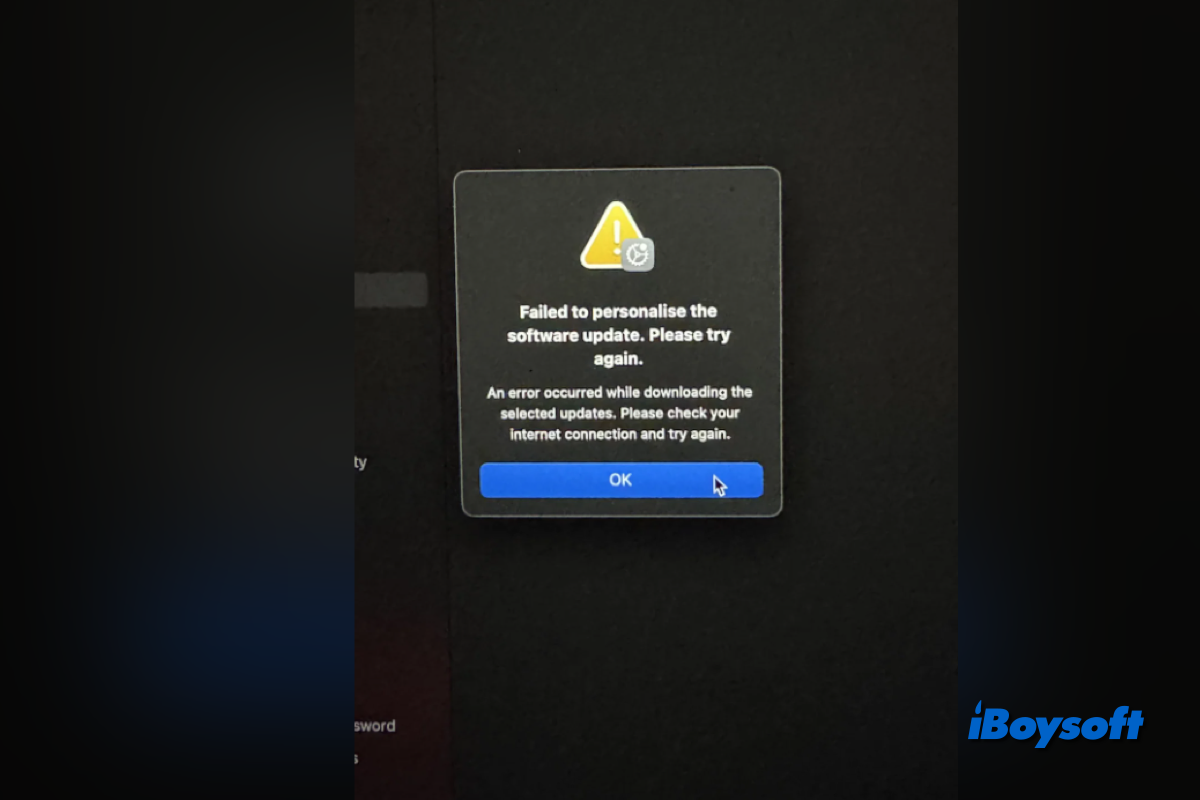
There are effective fixes for the issue can't downloading macOS Sequoia in Software Update. Follow this post to solve the macOS Sequoia downloading problem and the error messages, like an error occurred while downloading the selected updates.
For the users who have a virtual machine:
You can download the macOS Sequoia full installer from the server. Once the download ends, you can open the InstallAssistant.pkg file and follow the onscreen instructions to extract it. When it's extracted, you can see the "Install macOS Sequoia" app in your Applications folder.
Step 2: Create an empty ISO disk image in Terminal
You need to prepare the empty disk image for the macOS Sequoia installer in this section, where we need to execute some commands. Let's get started then!
1. Launch Mac Terminal on your machine by Spotlight Search or Applications > Utilities > Terminal.
2. In the Terminal window, paste the following command to create a 16.41GB disk image formatted as HFS+ on your Desktop. Please replace 'yourusername' in the command with your username on your Mac. (What is hdiutil?)
sudo hdiutil create -o /Users/yourusername/Desktop/Sequoia -size 16410m -volname Sequoia -layout SPUD -fs HFS+J
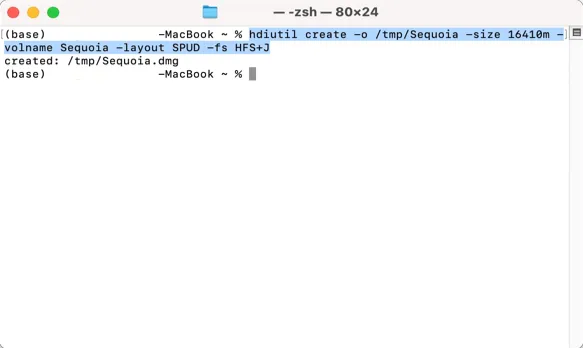
3. Hit the Enter key to begin creating an empty ISO disk image, which may take a minute or so.
After the command is executed, a new disk image called "Sequoiaiso" with a single partition and 16000MB is created, which is formatted to the HFS+ file system for creating CD/DVD/ ISOs.
4. You can see the DMG file appear on the Mac desktop or in the /temp directory.
5. Right-click this disk image and choose Open With to select Disk Image Mounter for mounting it on your machine.
Step 3: Make the macOS Sequoia installer
With the empty disk image being created, now we can dive right into making the macOS Sequoia installer.
1. In Terminal, type: sudo
sudo
2. Go to the Applications folder, locate the Sequoia installer you've downloaded, and right-click to select Show Package Contents.
3. Click the Contents folder and choose Resources.
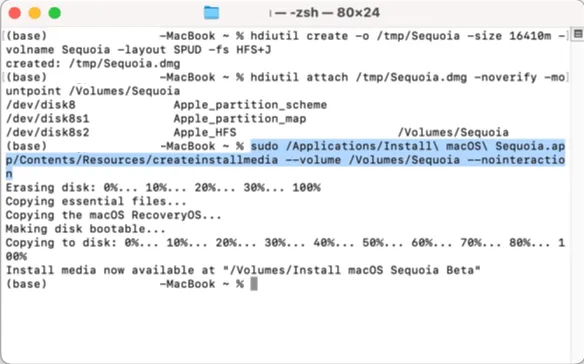
4. Drag the 'Create install media' you find in Contents > Resources to the Terminal window. Then you can see its path appearing next to the "sudo" command line.
5. Type -volume after the macOS Sequoia installer path.
6. Drag the mounted disk image from the Mac desktop to the Mac Terminal window.
The whole command line should be like this:
sudo /Applications/Install\ macOS\ Sequoia.app/Contents/Resources/createinstallmedia --volume /Volumes/Sequoiaiso --nointeraction
7. Press Return.
8. Open a new Finder window, look for the mounted disk image in the sidebar, and click the Eject button next to it.
Cheer up! We have done 90 percent of this mission. Let's complete the rest of it!
Step 4: Convert the macOS Sequoia disk image file into the .iso format
Now that the macOS Sequoia disk image file is created, we can convert it to an ISO file for VMware or VirtualBox.
1. Launch Terminal and type this command line into its window:
hdutil convert
2. Drag the Sequoia disk image file onto the Terminal window, whose path will show up in the window.
3. Paste the following command:
-format UDTO -o ~/Desktop/Sequoia
4. Hit the Return key to execute this command.
5. Finally, convert the CDR to ISO with this command:
mv -v ~/Desktop/Sequoia.cdr ~/Desktop/Sequoia.iso
6. Press the Return key.
Now that you have the macOS Sequoia ISO file created by yourself, you can utilize it to install macOS Sequoia on VMware or VirtualBox, or install macOS Sequoia on unsupported Macs.
Directly download macOS Sequoia ISO file
You can also directly download the macOS Sequoia ISO file from online resources to run it on VMware, VirtualBox, and other unsupported devices. But this is the least recommended solution, as these ISO images are from unknown sources and may be modified.
However, if you still want to try it out, check the following download links:
Not enough space to download or create a macOS Sequoia ISO file
Enough drive space is crucial to complete the macOS Sequoia ISO file download or creation, or you will presumably run into the failure of macOS Sequoia ISO file creation or download.
14.7 GB of space is an absolute minimum, while 30 GB is better for a smoother usage experience. For the successful ISO file creation or download, it's recommended to use iBoysoft DiskGeeker to clean your computer.
How to clean a Mac: (If you have a Windows PC, download the Windows version to free up your PC.)
Step 1: Free download and launch iBoysoft DiskGeeker.
Step 2: Click "Space Analysis" from the toolbar.
Step 3: Choose the partition you want to clean. (E.g., Macintosh HD - Data)
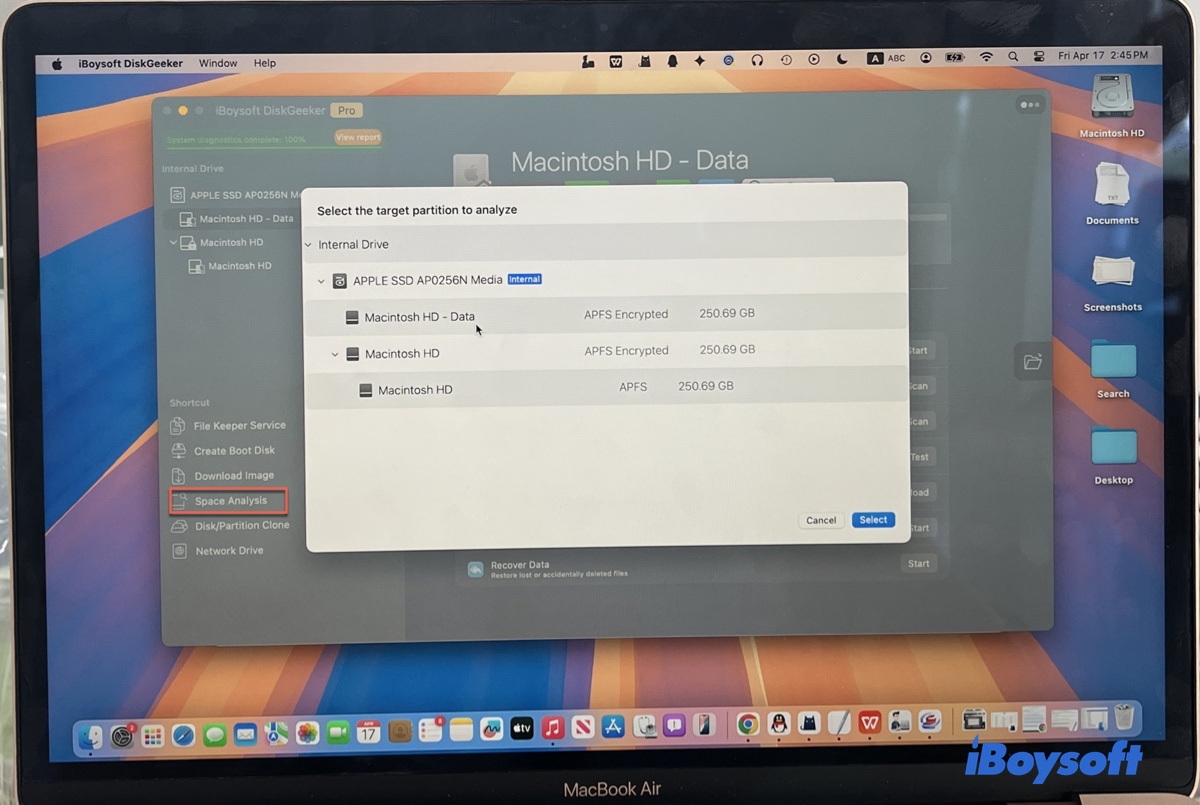
Step 4: Wait for the scan to finish. After it's complete, you'll see all files on your Mac in descending order by size.
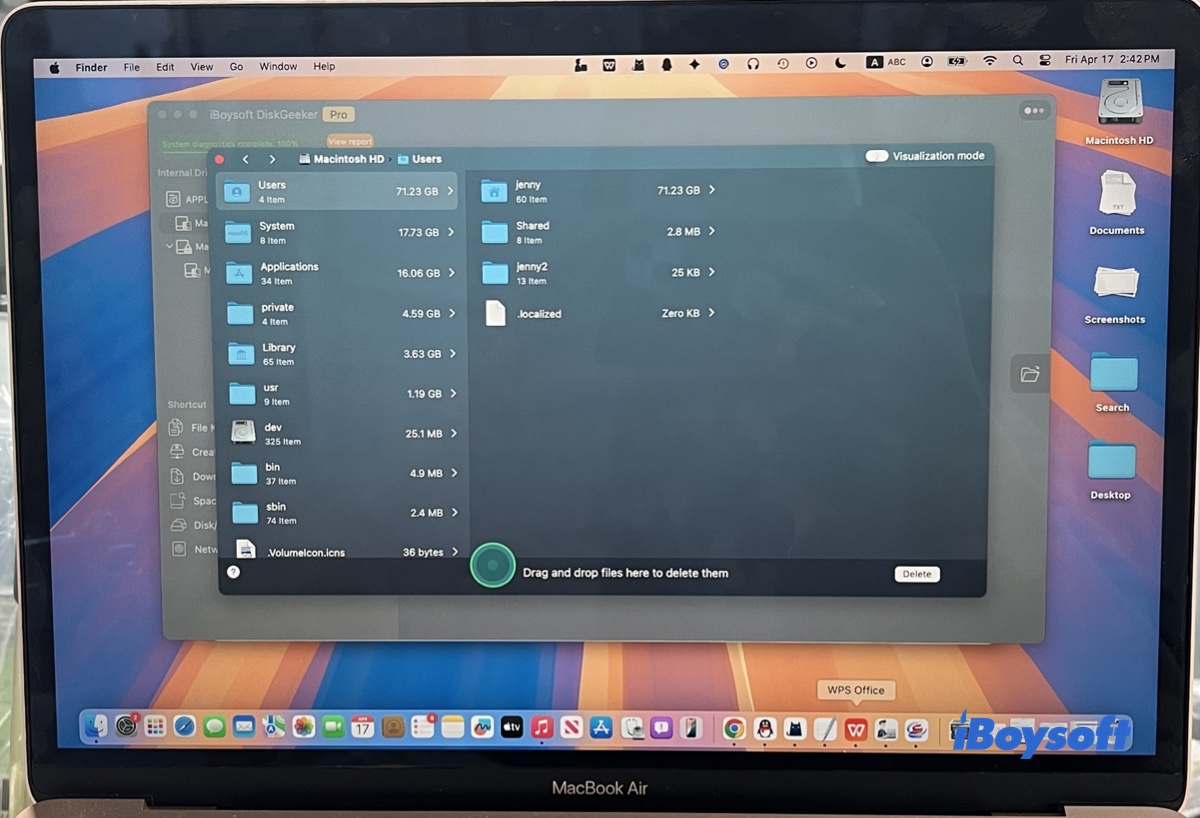
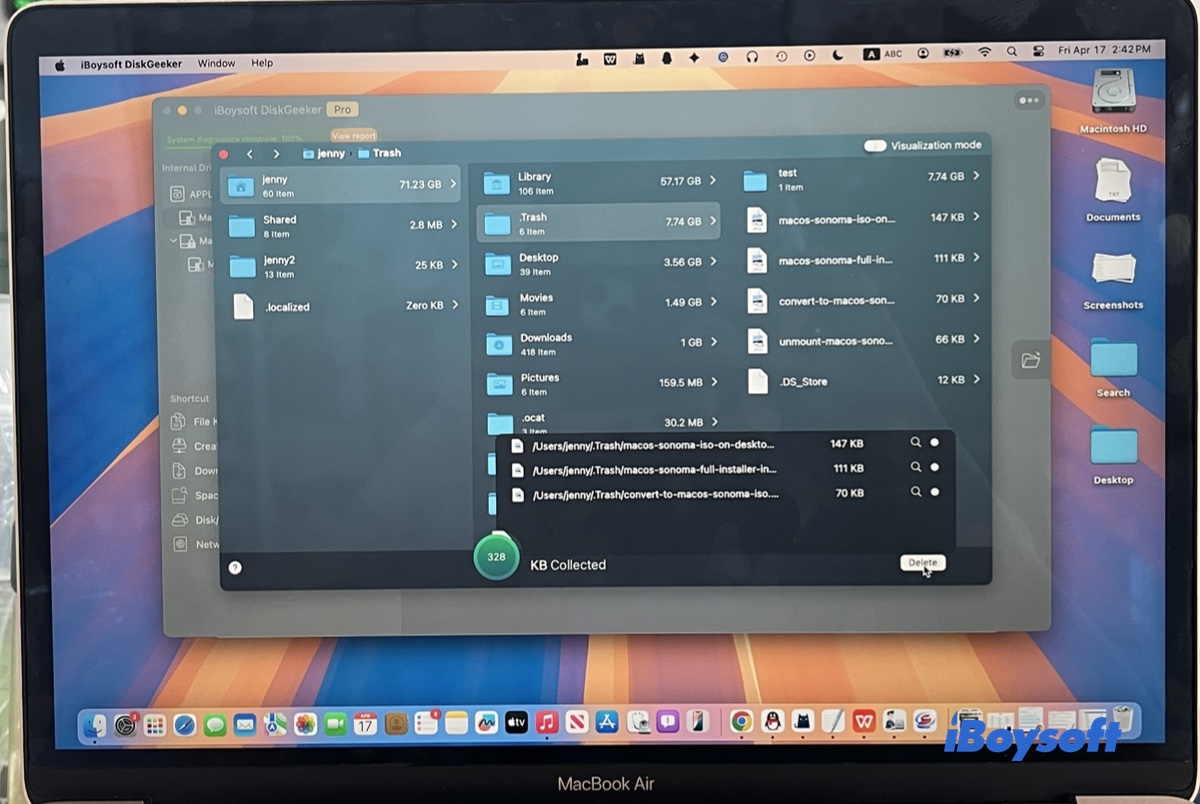
Step 5: Browse through the folders and find large files you no longer need.
Step 6: Drag the unwanted files to the trash circle, and click Delete > OK to delete them permanently.
Also read: How to Create or Download ISO Files for macOS or Mac OS X?
If you also need Windows installers, download Windows 11 ISO, Windows 10 ISO, Windows 7 Home Premium ISO, or Windows 7 Ultimate ISO.
Join us in sharing this article to inform more people about the macOS Sequoia ISO file!
FAQs
- QDoes Apple provide the macOS Sequoia ISO file?
-
A
No, Apple doesn't release ISO files for any macOS versions. Apple distributes macOS updates and installers through the Mac App Store as an .app file (e.g., Install macOS Sequoia.app) or as a .pkg file.
- QWhy do I need an ISO instead of the standard installer?
-
A
The standard macOS installer is designed to run on existing Mac hardware. An ISO is specifically required for Virtualization and Cross-Platform use cases, such as virtual machines, non-Mac systems, or legacy Intel Macs.