Apple welcomes new operating systems and lineups along with dropping support to old-fashioned machines. This shuts down sorts of computers shipped long years ago. This custom lasts with the release of macOS Sequoia.
Suppose you got a Mac shipped many years ago and are still curious about macOS Sequoia, you can read this article, which explores how to install macOS Sequoia on an unsupported Mac with an elaborate and step-by-step guideline.
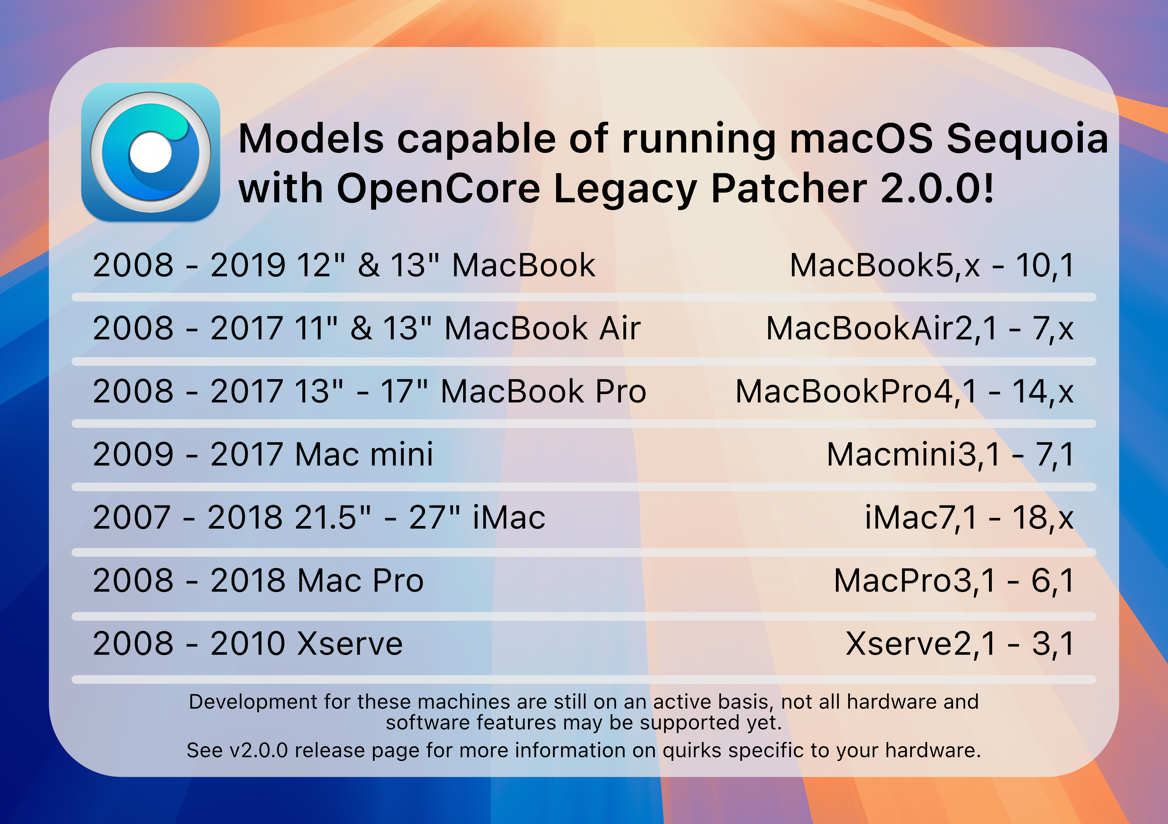
Here are the unsupported Mac models that can run macOS Sequoia with the assistance of OCLP:
How to install macOS Sequoia on unsupported Macs:
Preparations before the unsupported installation
Before the macOS installation, there are some requirements that you need to complete:
- A working internet connection
- A 30GB or larger USB flash drive formatted to Mac OS Extended (Journaled)
- An unsupported Mac
Except for these basic hardware preparations, two more preconditions deserve your great concern here:
Preparation 1: Completely back up your Mac
Unlike a clean install of macOS Sequoia on supported machines, installing macOS Sequoia on an old Mac will wipe the Mac. Therefore, for a rescue in case any accident happens, it's highly suggested to back up your Mac thoroughly.
Time Machine is a nice option that backs up your hard drive completely, allowing you to restore files and restore the OS on your Mac workstation later.
Preparation 2: Make sure enough hard drive space
Many users get stuck in the macOS Sequoia installation with a message saying "Your disk does not have enough free space. Updating requires 14.7 GB of disk space," which implies that there is not enough space to install macOS Sequoia on your Mac.
To avoid such trouble, you'd better check the available storage on your hard drive. 14.7 GB of space is an absolute minimum, while 30GB is better for smooth performance and user experience.
Thanks for sharing!
How to install macOS Sequoia on unsupported Macs?
Unsupported installation is not as challenging as you imagine, especially when you have a beginner-friendly tutorial. This post walks you through the whole installation, and you just follow up to proceed with ease.
Step 1: Make a macOS Sequoia bootable USB
You have two options to create a macOS bootable USB:
- A bootable USB creation helper
- The terminal
Option 1: Make the macOS Sequoia bootable USB via a helper
iBoysoft DiskGeeker simplifies the whole process into a few clicks, saving time used on downloading the PKG file, moving it to the USB drive, and making the drive bootable. Let iBoysoft DiskGeeker complete the bootable USB creation:
1. Download and install iBoysoft DiskGeeker on your Mac, then connect the USB drive you've prepared.
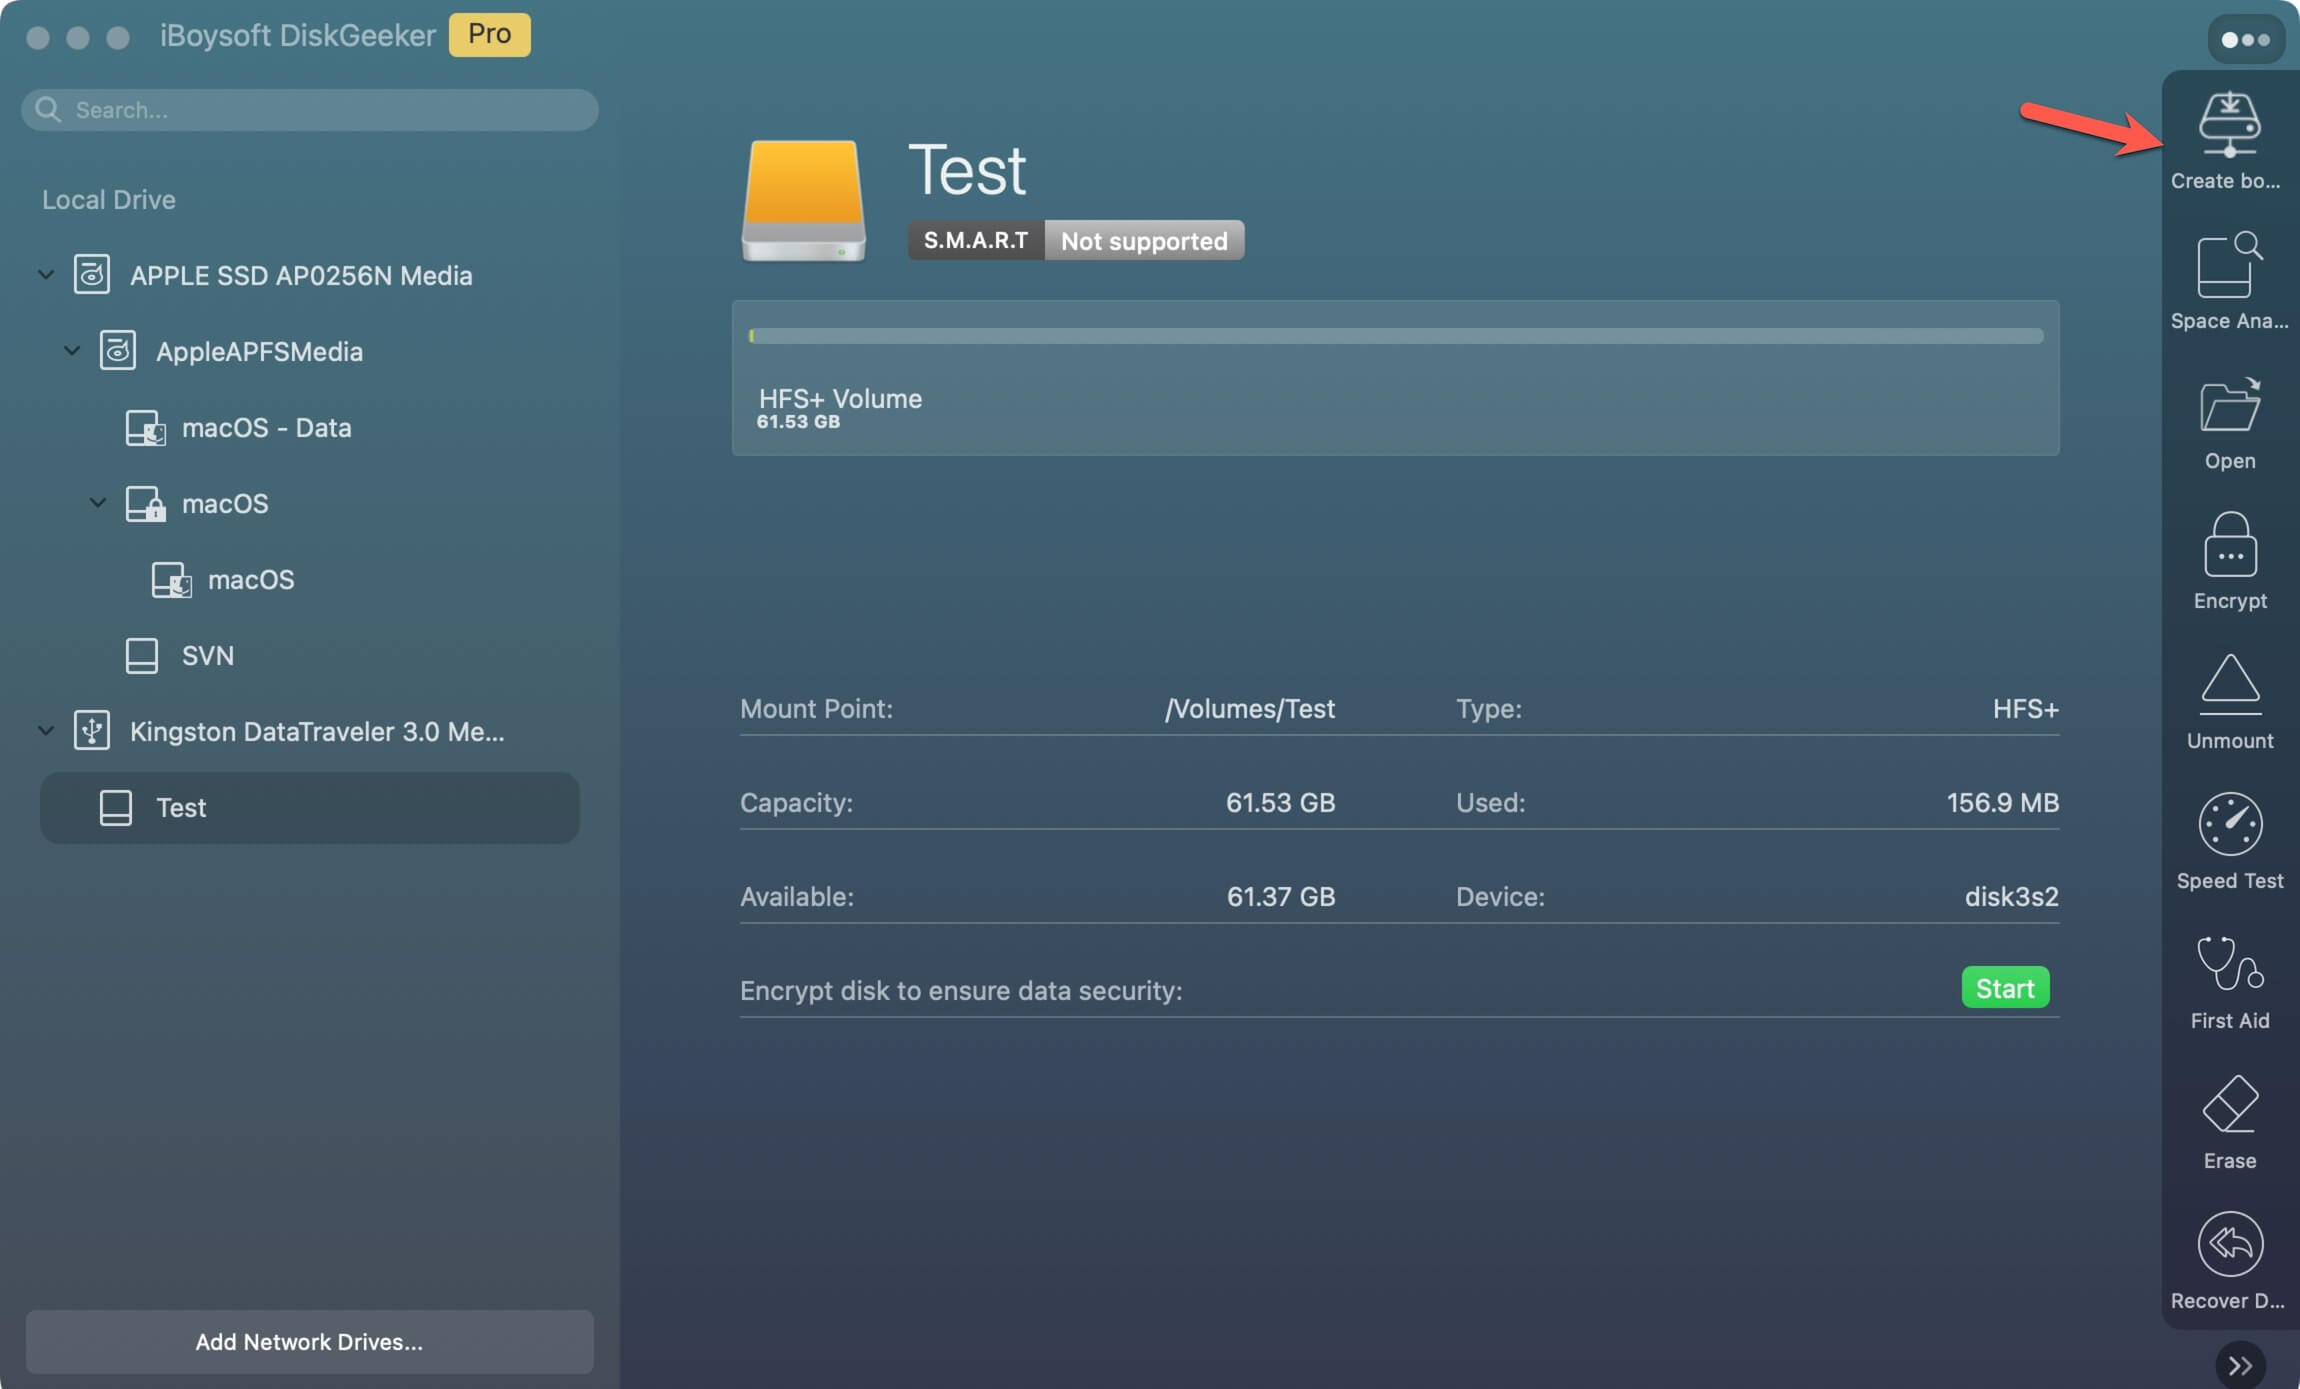
2. Select a volume of the USB and click "Create Boot Disk" on the right menubar.
3. Once asked to format the drive, permit further operations.
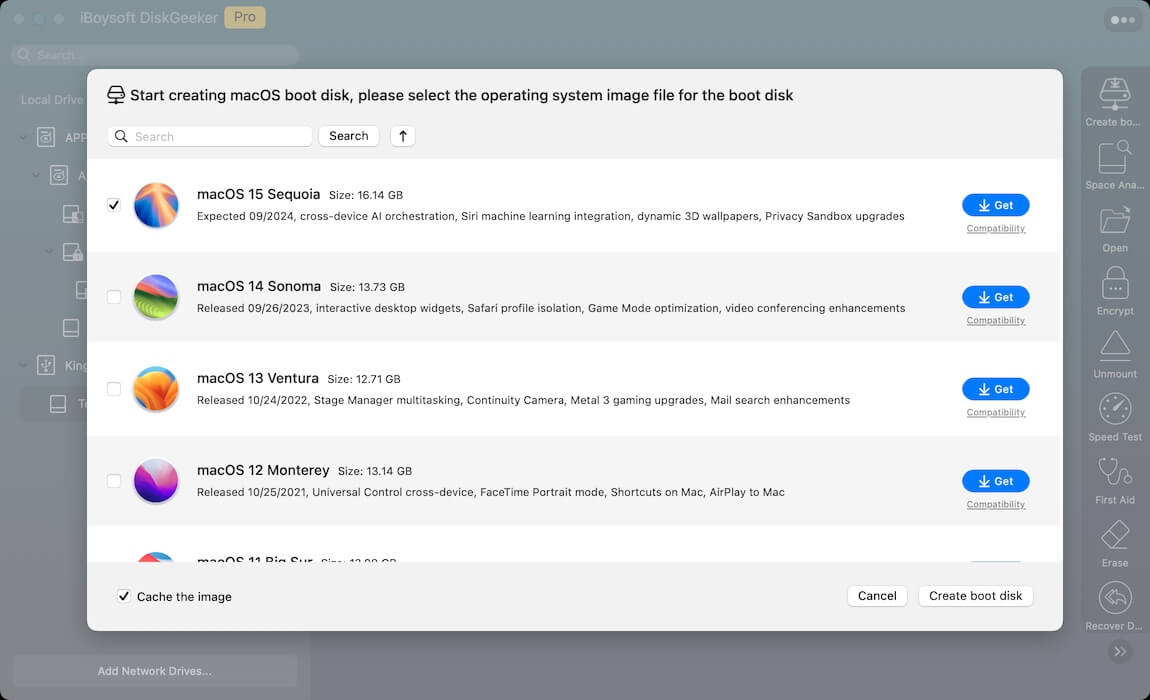
4. Select macOS 15 Sequoia from the operating system list and click "Create boot disk".
5. Wait for the process to end. Once it finishes, you have a bootable USB to install macOS Sequoia on unsupported Macs.
Go tell more people that there is a much easier way to create a macOS Sequoia bootable USB!
Option 2: Make a bootable USB via the terminal
Executing command lines in the terminal to make a macOS Sequoia bootable USB also works out, yet please think twice before you try this way. It is not only prone to failure with complicated commands, but also puts your machine at risk if any wrong operation.
- Download the macOS Sequoia PKG file. Preferentially choose the latest version of the InstallAssistant.pkg for more stable performance.

- When the download ends, double-click the PKG file and install it on your Mac, which is called Install macOS 15.app on your Mac.
- Drag and drop this application to the Applications folder, or the command may fail due to the wrong file directory or path.
- Launch the terminal on your machine and input this command line. Remember to replace "MyVolume" with the USB's name.sudo /Applications/Install\ macOS\ Sequoia.app/Contents/Resources/createinstallmedia --volume /Volumes/MyVolume
- Type in your user account password, then type Y to confirm your actions to proceed.

- Click OK if you see an alert that Terminal wants to access files on a removable volume.
- Once the process ends, the USB drive will be renamed to Install macOS Sequoia. This means it's bootable.
Step 2: Install OpenCore Legacy Patcher
In this section, we are gonna install the OpenCore Legacy Patcher for booting macOS Sequoia on your unsupported Mac computer.
- Download OpenCore Legacy Patcher directly.
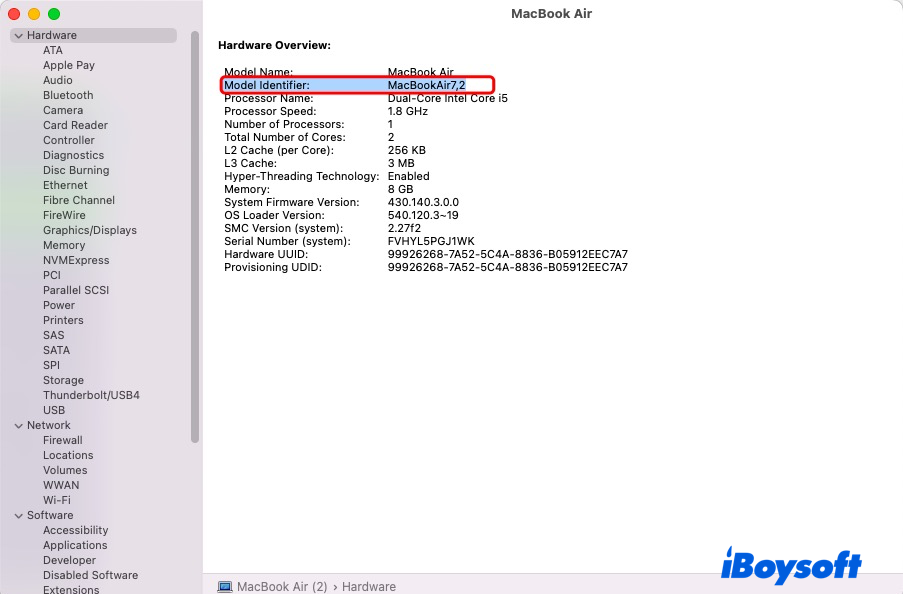
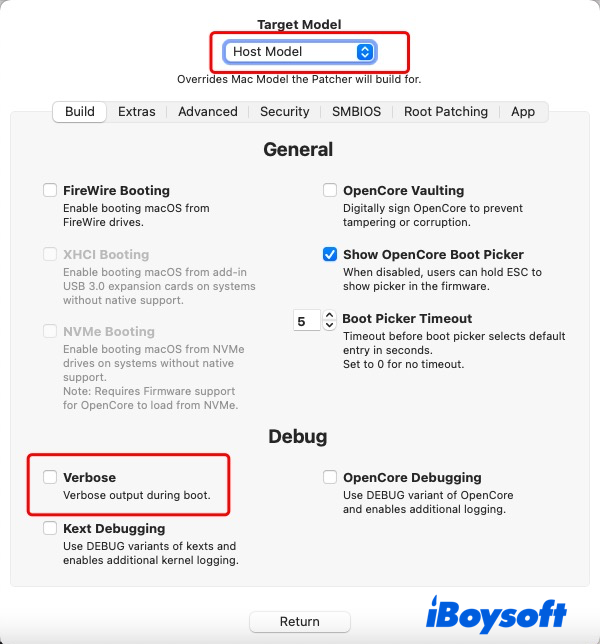
- When the installation ends, open OCLP to allow it to detect your Mac model. You can also manually choose it for an accurate model: Settings > Target Model. Don't know your Mac model? Go to Apple Menu > About This Mac > System Report > Model Identifier.
- Click Settings to disable Verbose so that the whole process won't enter debug status.
- Click Return to enter the main window, then click Build and Install OpenCore. This installs OCLP on the USB drive for a working environment to run macOS Sequoia.
- When OCLP is built, it will prompt you to view the build log and install OpenCore to the target disk for booting. Just ignore it and click Install to disk.
- Click OK to allow the disk access.
- Select the bootable USB you've made before. If the USB isn't listed in the list, click Search for disks again.
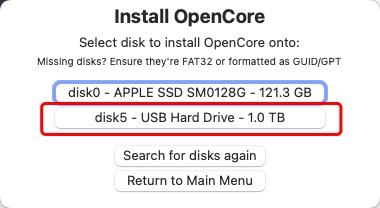
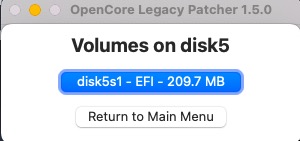
- Select the volume OCLP lists to place the OpenCore Legacy Patcher. In our case, it's disk5s1 - EFI.
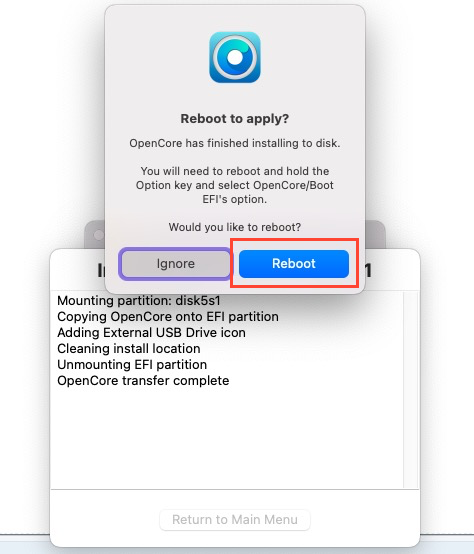
- A new window prompts you to reboot seconds later, click Reboot.
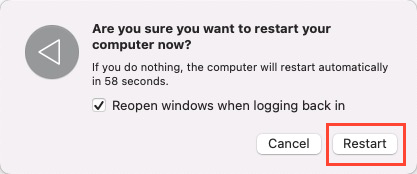
- You'll be asked to restart your Mac. Click Restart to go on.
Here, we have completed the OCLP installation. Next, we will go to the final yet significant state - installing macOS Sequoia on an unsupported Mac. Let's start!
Step 3: Install and boot macOS Sequoia on an unsupported Mac
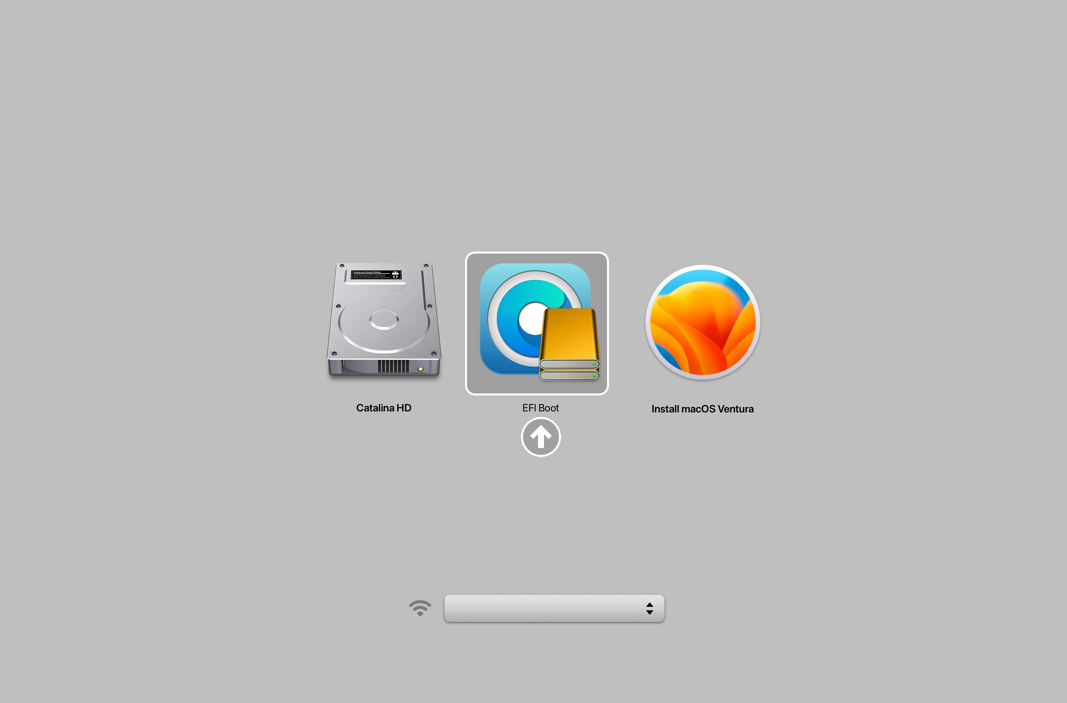
- When your Mac wakes after the restart, hold down the Option/Alt key to recall all the boot options.
- Select the EFI Boot entry with the OpenCore icon in the Mac boot options.
- Since you have loaded OpenCore Legacy Patcher, select Install macOS Sequoia on the boot screen.
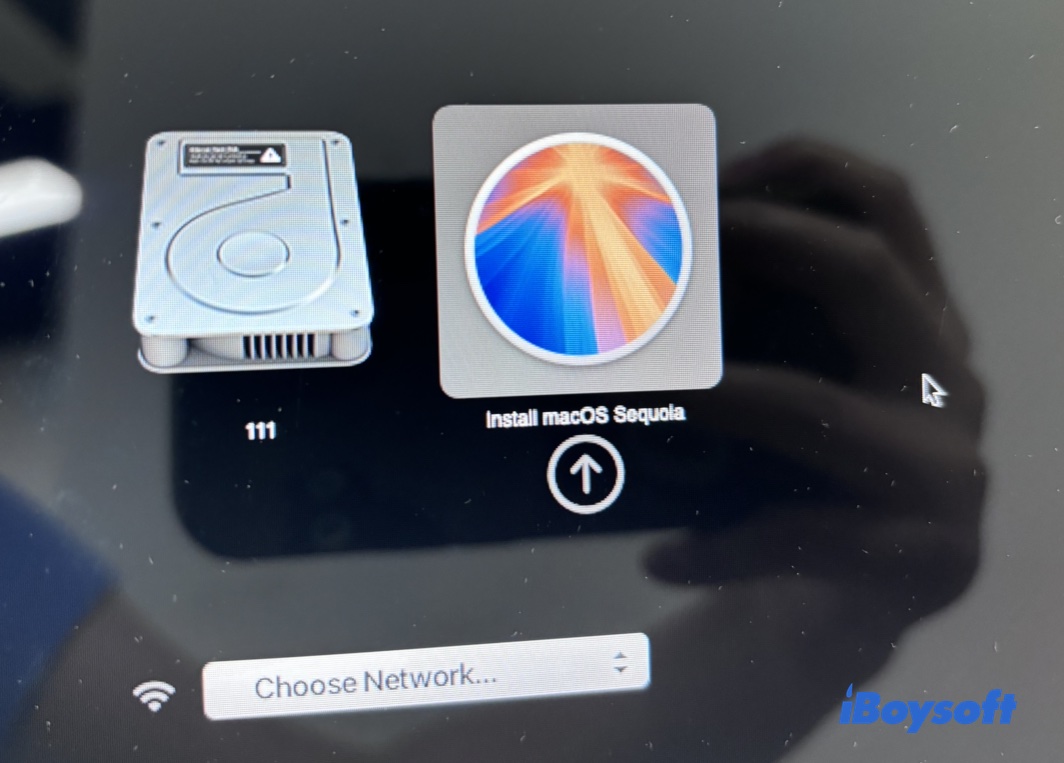
- If your Mac is looping back into the beginning of the setup after the first reboot, turn it off, start it again, and hold Option. This time, select the option with a grey hard disk icon, which can say "macOS Installer" or the name you gave the disk during the installer process. Keep repeating this step after every reboot if necessary.
- Follow the onscreen wizard to complete some user settings like language, network, user account, and so on.
- When the setup process finishes, your machine is running macOS Sequoia!
Successfully install macOS Sequoia on your unsupported machine? Then share your happiness with more people!
Post-installation: make macOS Sequoia run smoother
This section provides extra info and details, aiming smooth and seamless performance of macOS Sequoia on unsupported Macs.
How to boot your unsupported Mac to macOS Sequoia without the USB hard drive?
If you want to boot your Mac into macOS Sequoia without the bootable USB we've made before, you can change the setting with the following steps:
- Download OpenCore Legacy Patcher on your Mac computer.
- Change the Patcher settings as you like and select your Mac model identifier in Target Model.
- Back to the main window, click Build and Install OpenCore, then click Install to disk when prompted by a new window.
- Click OK to allow the disk access.
- Select the internal hard drive as the target disk, which always shows up with Apple SSD or so in the disk name.
- Select the volume to place the OCLP. And this volume belongs to the target drive you chose before.
- Click Reboot when asked. Then hold the Option key to enter the boot option screen, select the internal EFI to complete the rest of the installation.
After these steps are done, you can boot your unsupported Mac to macOS Sequoia without the USB drive.
How to boot macOS Sequoia on your unsupported Mac without Boot Picker?
- Launch the OpenCore Patcher on your Mac.
- Go to Patcher Settings, then uncheck "Show OpenCore Boot Picker" on the Build tab.
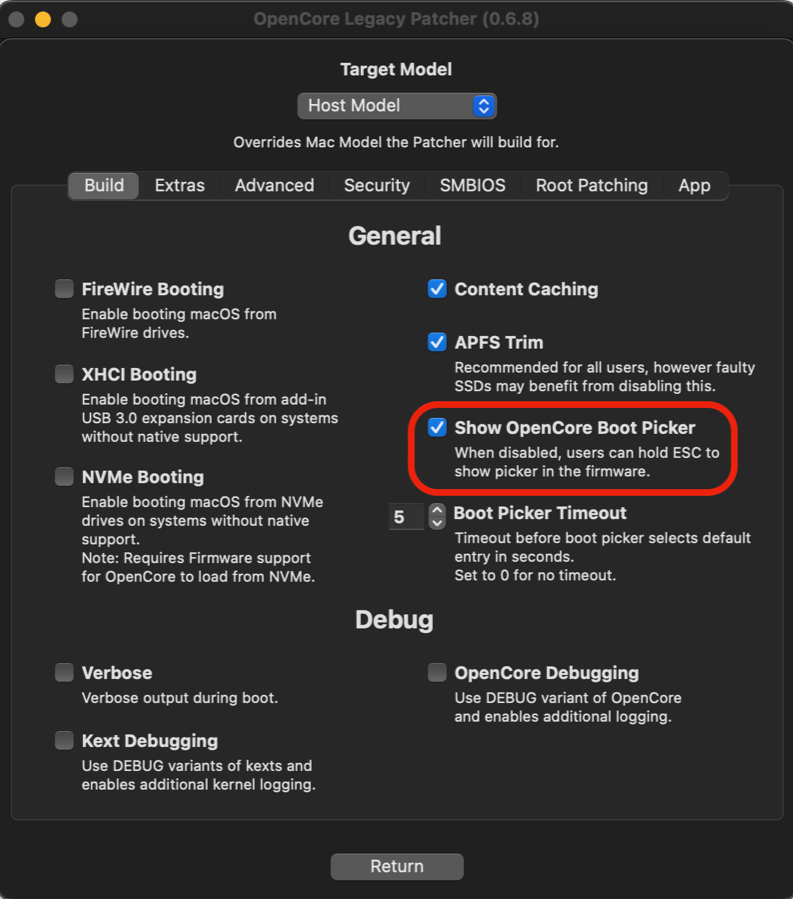
Once you've toggled it off, build your OpenCore EFI again and install it to your desired drive.
Now, to show the OpenCore selector, you can simply hold down the "ESC" key while clicking on EFI boot, and then you can release the "ESC" key when you see the cursor arrow at the top left.
About the SIP settings
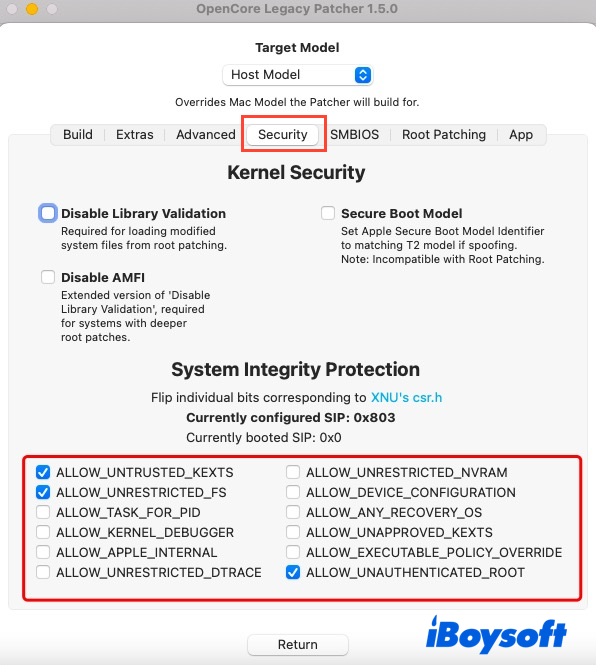
To install macOS Ventura and more advanced macOS versions on unsupported Macs, it's a prerequisite to lower the SIP settings.
- Launch OCLP on your Mac.
- Go to Settings > Security, then check the options in the pic below:
A video guiding to install macOS Sequoia on unsupported Macs
If you're not an audience to text description, you can also watch this video below to install macOS Sequoia on your outdated Mac:
Wrap all up
Although Apple drops support for certain Mac models along with the release of macOS yearly, it's still possible to experience the desired macOS on old machines.
However, successful installation is not equivalent to full compatibility, so certainly, you cannot experience every essence and highlight of macOS Sequoia due to the hardware gap. If you don't mind this, try this post to install macOS Sequoia on unsupported MacBook Pro, MacBook Air, Mac Pro, Mac mini, iMac, etc.!
Sharing is appreciated!
