Though the default hard disk file systems (also known as formats) of Windows and Mac are different, there should be some ways to format an external hard drive to make it compatible with your Mac or PC.
To format your external hard drive, which file system should you choose? Check the format recommendation table below based on the different users' needs:
| Usage Scenario | Best Format/Solution |
| Use on both modern Mac and Windows | exFAT |
| Use mainly on Windows, occasionally on Mac without erasing | NTFS + iBoysoft NTFS for Mac |
| Store a single file over 4GB or a drive partition over 32GB | exFAT or NTFS |
| Use as a Time Machine drive | APFS or Mac OS Extended |
| Use with older devices | FAT32 (if file size limits are acceptable) |
How to Make an External NTFS Drive Read & Write on Mac without Formatting
NTFS is not ideal for users who need to share an external drive between Mac and Windows. Because you can read NTFS drives on Mac, but not write to them.
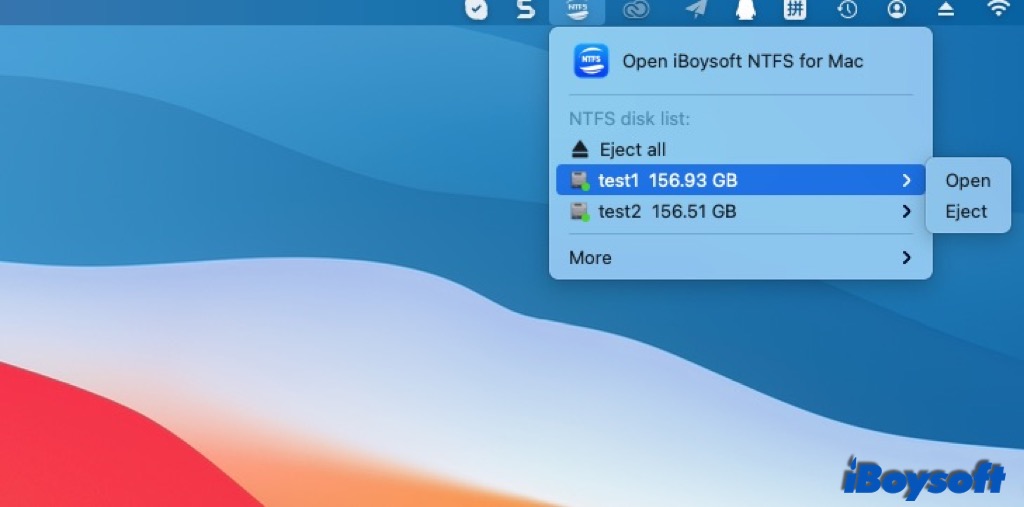
If you use your NTFS drive mainly on a Windows PC and occasionally use it on a Mac, there is no need to risk losing your file data by formatting the NTFS drive. Instead, a better solution exists - turn to a professional NTFS driver for Mac like iBoysoft NTFS for Mac to directly mount, read, and write to NTFS drives in Mac's Finder without formatting or extra steps.
And this Microsoft NTFS for Mac supports NTFS full reading & writing on Macs with the M1/M2/M3/M4/M5 chips running macOS Golden Gate 27 to High Sierra. Here is an easy tutorial to follow:
1. Free download, install, and launch iBoysoft NTFS for Mac on your Mac.
2. Connect your NTFS external drive to your Mac, and iBoysoft NTFS for Mac will automatically mount it.
3. Write to the NTFS external disk after the disk has been mounted in read-write mode successfully.
After knowing how to fix an external hard drive read-only on Mac without formatting, now share it on your social platforms.
Note: Formatting, initialization, partition deletion, and MBR/GPT conversion can all result in data loss. Please back up or recover important files before formatting. iBoysoft Mac Data Recovery can help you restore your deleted or lost files from exFAT, FAT32, APFS, or HFS+ drives, irrespective of whether they are intact, formatted, or corrupted.
How to Format an External Hard Drive for Mac
To format a Mac external hard drive, you'll need to launch the Disk Utility app. If you encounter the external hard drive greyed out in Disk Utility on Mac or the external hard drive not showing up in Disk Utility, fix the problems in the first place. Then, choose the best file format for your external disk when erasing it in the Disk Utility app.
Format the external drive with Disk Utility on Mac:
1. Connect the external hard drive to your Mac, and the computer will mount your drive.
2. Launchpad → Other → Disk Utility, and click the Disk Utility. For macOS Tahoe users, find Disk Utility in Apps.
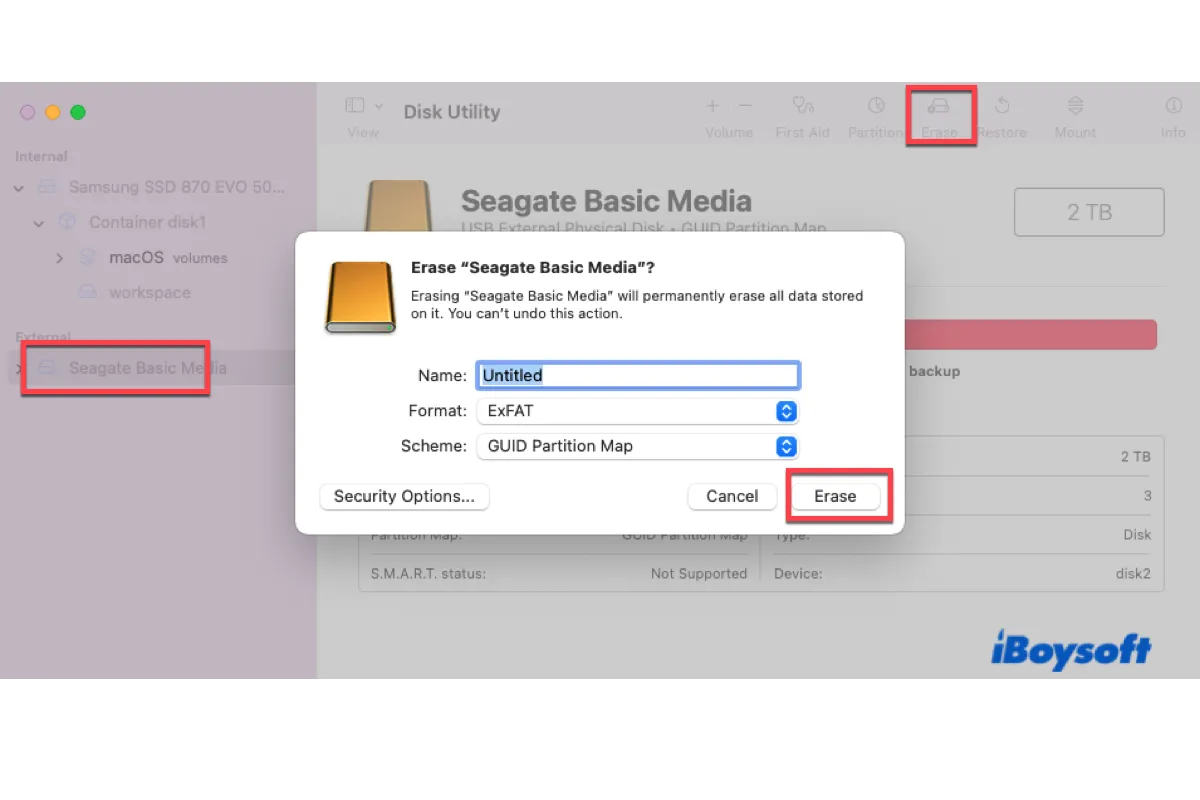
3. Choose your target external hard drive or volume, and click the Erase button at the top of Disk Utility.
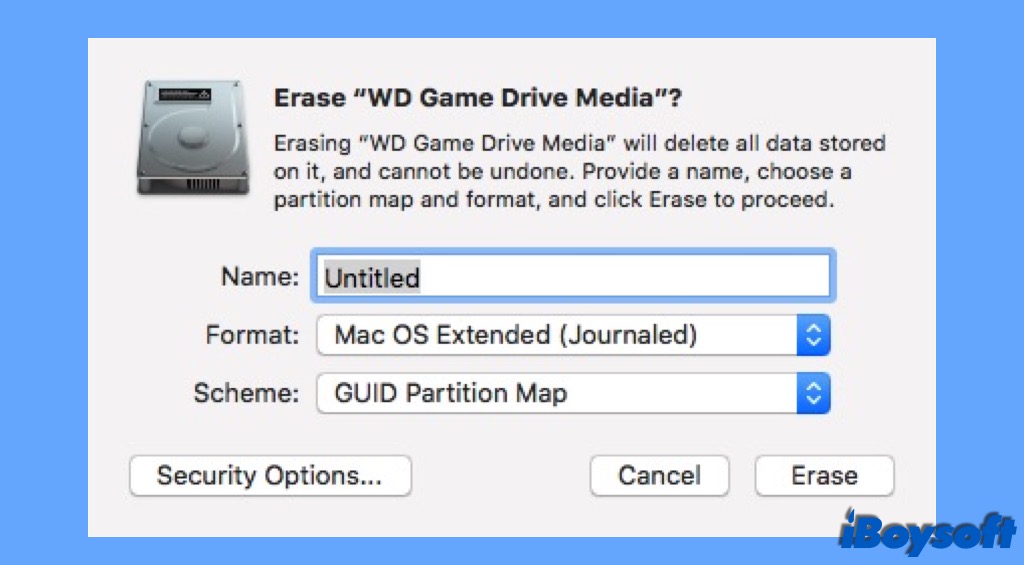
4. Edit the disk name, and select a file format and a scheme.
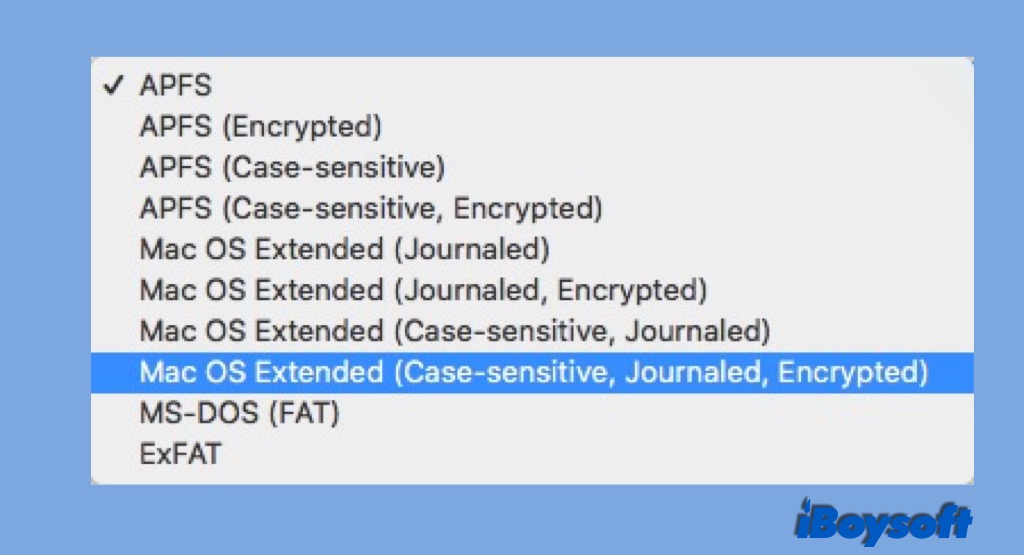
To reformat external hard drives on Mac, APFS is the highly recommended file system format, because it has the most recent features to work with the best performance and data management. However, it is only compatible with macOS.
If your goal is to format a drive for Mac and PC, choose FAT or exFAT. And finally, all the other file formats are only used for Mac.
During the process, you are going to find 3 kinds of schemes you can choose from: GUID Partition Map, Master Boot Record, and Apple Partition Map. Apple Partition Map, designed for old PowerPC Macs, is seldom used today. Thus, we mainly talk about the difference between GUID and MBR to help you make a decision in scheme selection.
| Feature | GUID Partition Map (GPT) | Master Boot Record (MBR) |
| Best use case | All modern Macs (Intel & Apple Silicon), internal drives, and external drives larger than 2TB | Small USB flash drives (32GB or smaller) meant for use with older Windows PCs, car stereos, or smart TVs |
| Boot compatibility | Works with modern UEFI-based systems, required for booting any modern Mac | Used for older BIOS-based systems and some older 32-bit versions of Windows |
| Deployed File System by OS | macOS: APFS, HFS+, FAT32, exFAT Windows: NTFS, FAT32, exFAT | macOS: HFS+, FAT32, exFAT Windows: NTFS, FAT32, exFAT |
| Max partitions | Supports up to 128 partitions | Limited to 4 primary partitions |
GUID Partition Map eclipses Master Boot Record in every aspect, especially in terms of modern compatibility and the APFS file system on macOS. Therefore, go ahead and select the GPT scheme in most cases. Certainly, feel free to choose MBR if your USB flash drive is 32GB or smaller, used for older devices.
5. After choosing the partition parameters, click Erase at the bottom of the window to confirm the formatting of the drive.
6. Click Done, and you have finished all the steps. Then you can quit the Disk Utility.
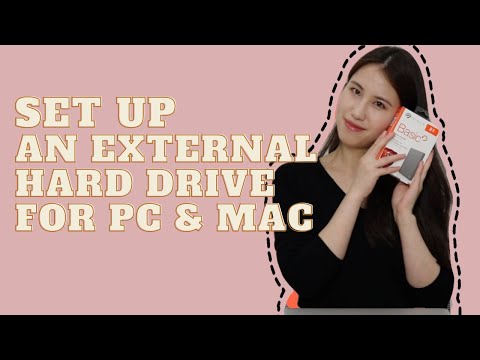
Watch this video to know how to set up a new external hard drive for both Mac and PC:
How to Format an External Hard Drive for Windows PC
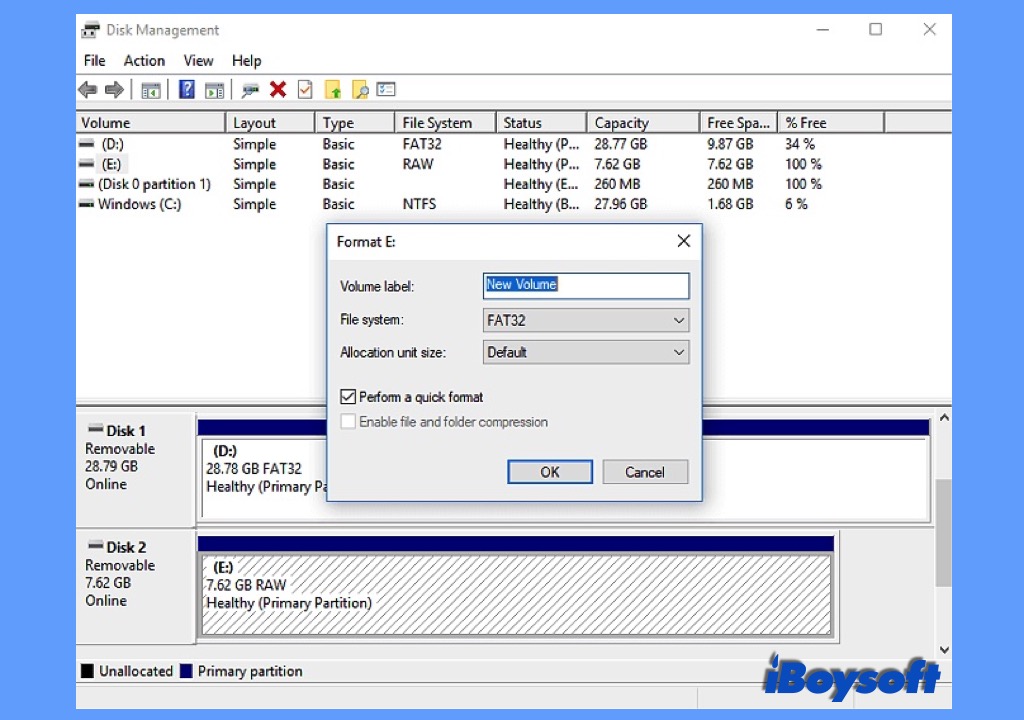
Similarly, you can also format your drive on Windows computers with a utility called Disk Management. Here is how to do it:
Format the external drive with Disk Management on Windows:
1. Find the target external hard drive in Disk Management and check if it's already initialized, if it's not, click on it using the right button of the mouse and choose the style (scheme) you are going to use, MBR or GPT, then right-click on it, and choose Format from the contextual menu.
2. Then set the disk information in the Format Partition screen, including allocation unit size, volume label, and format. If you want an interchangeable drive that works on both macOS and Windows, choose MS-DOS (FAT) or exFAT.
3. Click OK to format the drive.
In case some important data is missing from the external hard drive you format, you can restore files from Time Machine or rescue files with iBoysoft Data Recovery.
If you want to completely erase the Windows C drive and make the data unrecoverable, this post is right for you. It tells how to wipe the C drive on Windows 11/10/8/7 with Windows built-in tools or third-party disk managers such as iBoysoft DiskGeeker for Windows, a much easier way.
Which is the Best Format for an External Hard Drive for Mac/PC
The file system is what manages how your files are stored and retrieved on your devices. So, every hard disk needs a proper file system, including desktop drives and portable storage devices like external drives, USB flash drives, and SD cards.
However, different formats have different advantages and disadvantages. So before you know how to format a hard drive for Mac and PC, you should know the pros and cons of each file system.
1. Apple file system (APFS)
APFS is the new proprietary file system of Apple. It has been known to increase read/write speeds on solid-state drives (SSDs), as well as increase storage space due to the way in which it calculates the available data on disk.
- Pros:
- Allows full-disk encryption with single or multi-key encryption for added security.
- Efficient in management of free storage space.
- Crash protection to avoid corruption caused by system crashes.
- Cons:
- Not good for Time Machine backup due to no support for hard links to directories.
- Can only be used on macOS High Sierra and above.
2. Mac OS Extended (HFS+)
HFS (Hierarchical File System) Plus or HFS+ is a journaling format developed by Apple Inc. It's the startup disk's default file system in OS before macOS High Sierra. It is also frequently used as Time Machine backup external drive.
- Pros:
- Supported by all versions of Mac OS X and macOS 10.12.
- Has journaling, compression, and encryption features.
- Cons:
- Has no access permission control.
- Performs slow or crashes in dealing with a large number of files. This situation is even worse when it's an enormous quantity of very small files.
- Harder for data recovery when an HFS+ drive is corrupted.
3. exFAT
exFAT(Extensible File Allocation Table) is a modern derivative of the FAT file system (FAT32) and for this reason also a good option for external hard drives (e.g. Seagate Backup Plus Slim), especially for large-capacity removable storage devices. It also is frequently used in flash memory drives such as USB flash drives and SD cards. exFAT is easily often implemented in the firmware that has low memory and low power requirements, such as cameras, mobile phones, media players, etc.
- Pros:
- Supports the largest partition and stores files larger than 4GB.
- A format compatible with Mac and Windows.
- Cons:
- Not compatible with many common older operating systems.
- Not a good option for drives less than 32GB because it can't maximize space utilization for its cluster size arrangement.
4. FAT32
FAT (File Allocation Table) was one file system originally developed for use on floppy disks, later it was adapted for use on many other devices including Hard drives and it includes three major file system variants. The majorly used one is FAT32 which is commonly used in floppy disks, SD memory cards, USB, digital cameras, as well as many portable and embedded devices.
- Pros:
- Works universally with all versions of Mac, Windows, Linux machines, game devices, and other devices supporting a USB port
- Cons:
- Doesn't support a file size larger than 4GB and a drive partition size larger than 32GB on Windows.
- Doesn't support the drive partition larger than 2TB on macOS.
- Doesn't provide security and is prone to disk errors.
5. NTFS
NTFS is a proprietary journaling format developed by Microsoft. It is used as the default file system of Windows system hard drive (e.g. Windows 10). NTFS does well in data security based on its encryption, access permission control, and log file.
- Pros:
- Improved performance, reliability, and disk space use.
- Performs better in protecting data security, data management.
- Compatible with all versions of Windows and the latest hardware.
- Cons:
- Read-only in macOS and the disabled-by-default write support for NTFS in macOS is unstable.
- For resizing (shrink or expand a partition) you should rely on third-party tools because the Windows built-in one has shown to be faulty on many occasions.
📖 Format Drive to NTFS on Mac (USB/External hard drive/SD card)
After knowing their unique specifications, it becomes easier to choose the best one from mentioned file formats for your external drive on Mac and Windows computers.
If you want to use the same disk on both Mac and Windows, opt for FAT32 or exFAT. Providing you prefer to use the external drive on only one of the operating systems, select APFS (Apple file system) for Mac and NTFS for Windows without compatibility issues.
Suggesting you own an NTFS external drive with significant file data and need to occasionally use it on a Mac, you can avail yourself of iBoysoft NTFS for Mac to directly mount, read and write to your NTFS drive on a Mac without formatting, or data loss risk.
Share the helpful information on your social media!
How to Partition an External Hard Drive to Make it Compatible with Mac and PC
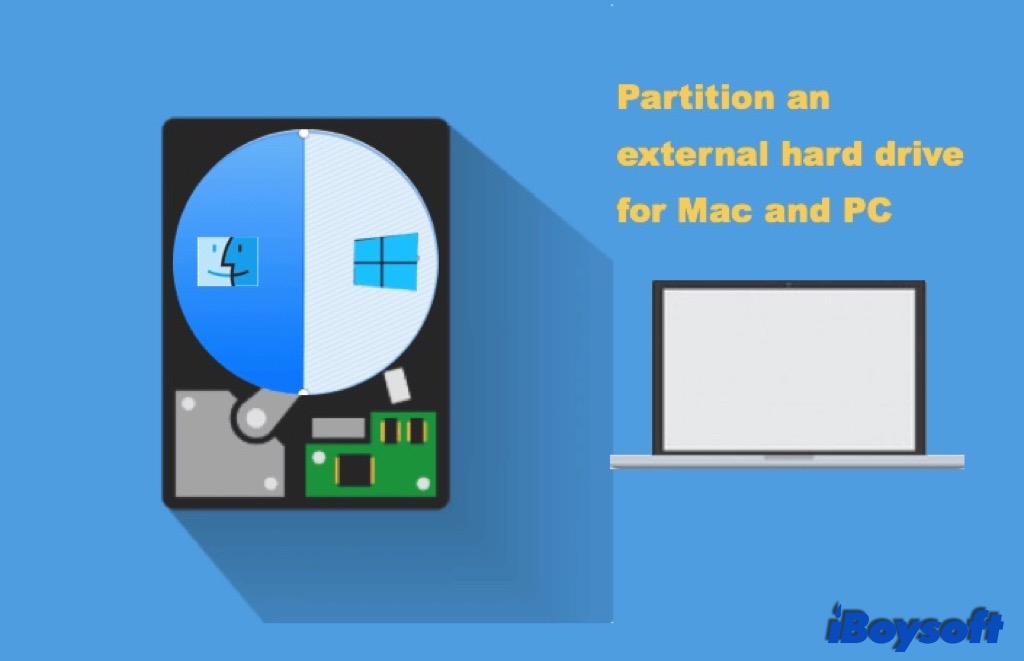
Instead of having the whole external drive formatted, you can also partition a Mac hard drive into two partitions to make the disk work on Mac and PC. One is formatted with a macOS-supported file system, the other with a Windows-supported file system, conversely. By this means, you can use all the advantages each format has on the respective system with the same drive.
Note: This advanced method carries high risk and is recommended for those who have already backed up their data.
Step 1: Connect the external drive to your PC and then launch Disk Management.
Step 2: Check if the external drive is initialized or not.
If the drive is not initialized, you need to initialize the external hard drive with Master Boot Record (MBR). Then you can create two new partitions. You need to format one of them as NTFS for Windows and format the other as your wish.
If the external drive is initialized, you need to right-click the disk to check if it's an MBR external drive.
If you see Convert to GPT Disk in the context menu, be it greyed out or lighted, it's an MBR hard drive. Then you can create two or more partitions. And you need to prepare one partition for the NTFS format, and reformat the other with any file system.
If you see Convert to MBR Disk in the menu, it's a GPT hard drive. In this case, you need first backup files, delete the existing partitions, then click the Convert to MBR Disk button. Then, you can create two new partitions. You need to format one partition as NTFS for Windows, and then format the other randomly.
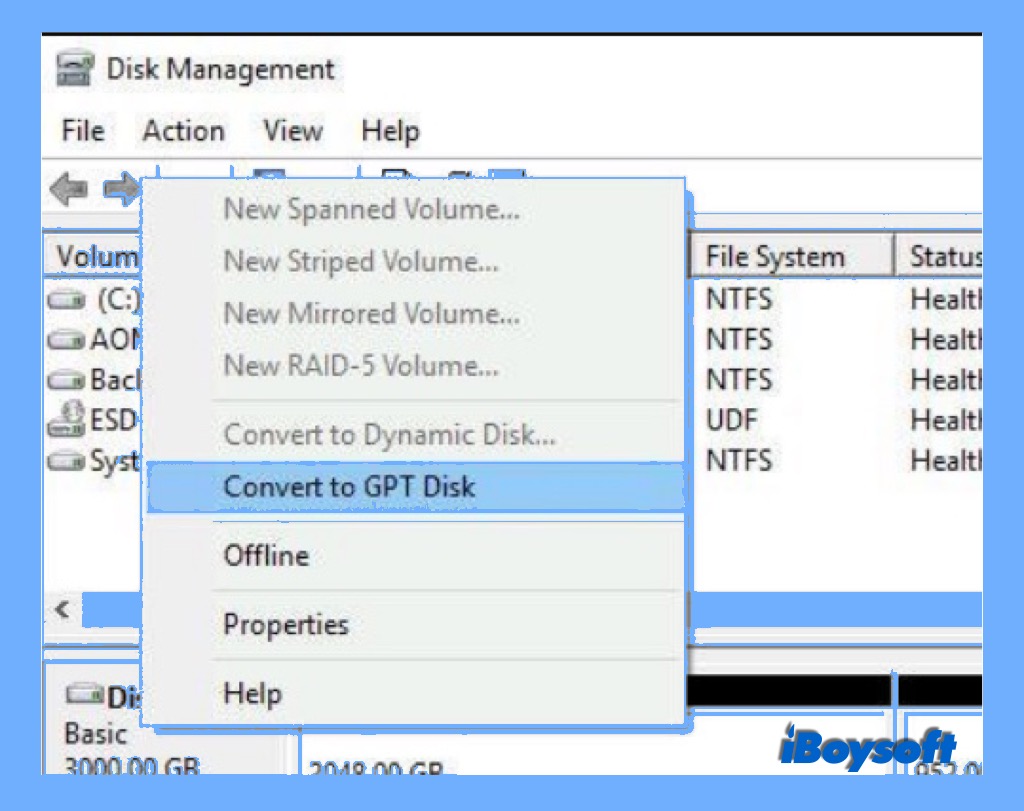
Step 3: Up to now, there should be at least two partitions on the external drive. And one of them (the NTFS one) is ready for Windows using. Then, you need to safely remove the external drive and plug it into a Mac.
Step 4: On the Mac computer Open Disk Utility and select the partition you preset for mac (not the NTFS one) under the name of your external drive.
Step 5: Click Erase on the window top, choose Mac OS Extended format when it asks, and click Erase at the bottom to finish.
Up to now, the external drive will have two partitions. One is HFS+ formatted for Mac, and the other is NTFS formatted for Windows.
By creating two separate partitions, you can use this external drive on Mac and Windows. You won't be able to write to the Mac partition from your Windows PC, and vice versa. Thus, it's a good solution for people who need to swap the same drive between two operating systems but with separate work.
If this post helps you out of trouble, share it right now!
Final Words
In conclusion, it is easy to format the external hard drive for Mac and Windows. Either choose to format the whole disk as exFAT/FAT, or you can create two separate partitions of Mac OS Extended and NTFS if you prefer.
Anyway if you have more than one external hard drive containing important files and want them to be interchangeable between PC and Mac computers, it's much easier to have a solution that allows your computer to work in any of them. For example, iBoysoft NTFS for Mac is a better and more feasible solution.
FAQ about Formatting External Drives for Mac & Windows
- QIs exFAT compatible with Mac and Windows?
-
A
Yes, exFAT is a good option if you need to use the external hard drive often with Windows and Mac. Linux also supports exFAT.
- QIs exFAT better than NTFS for Mac and PC?
-
A
In general, exFAT is better than NTFS if you need to work between Mac and PC at high frequency. Well, NTFS is better if you mostly use NTFS drives on Windows and occasionally read & write NTFS drives on Mac.
- QWill formatting erase my drive?
-
A
Yes. You'd better make a backup of your drive or restore your data before formatting.
- QCan I make NTFS writable on Mac without formatting?
-
A
Yes, you can. Install an NTFS for Mac driver like iBoysoft NTFS for Mac to auto-mount NTFS drives in read-write mode on Mac without formatting.
- QWhat hard drive format works on Mac and PC?
-
A
FAT, FAT32, and exFAT formats work on both macOS and Windows operating systems. With a capable NTFS driver for Mac, the NTFS file system can work equivalently as these compatible file systems.
- QCan any external hard drive be formatted for Mac?
-
A
Yes, any external hard drives can be formatted for Mac in Disk Utility. The steps below describe the process.
1. Plug the external hard drive into your Mac.
2. Open the Disk Utility application.
3. Select the hard disk and click on Erase tool.
4. Fill in disk info and choose a format.
5. Click Erase on the pop-up to format the hard drive for Mac.