If you newly bought an external hard drive or SSD, you must initialize the disk before Logical Disk Manager can access it. Or you may want to initialize or reformat hard a disk for reuse or when you encounter errors like:
This post will guide you to initialize, create a new partition, and format external hard drives on Windows computers.
Note: Also work for hard drives, USB flash drives, sd cards, and other mainstream storage devices.
Tips: Make sure you have backed up files (if any) on the external drive as the following operations will wipe your data off the drive. If you can't access your data for disk corruption, use iBoysoft Data Recovery for Windows to get files off first.
There are two ways to initialize, format, or reformat external hard drives.
Method 1: Initialize and Format External Hard Drive with Disk Management
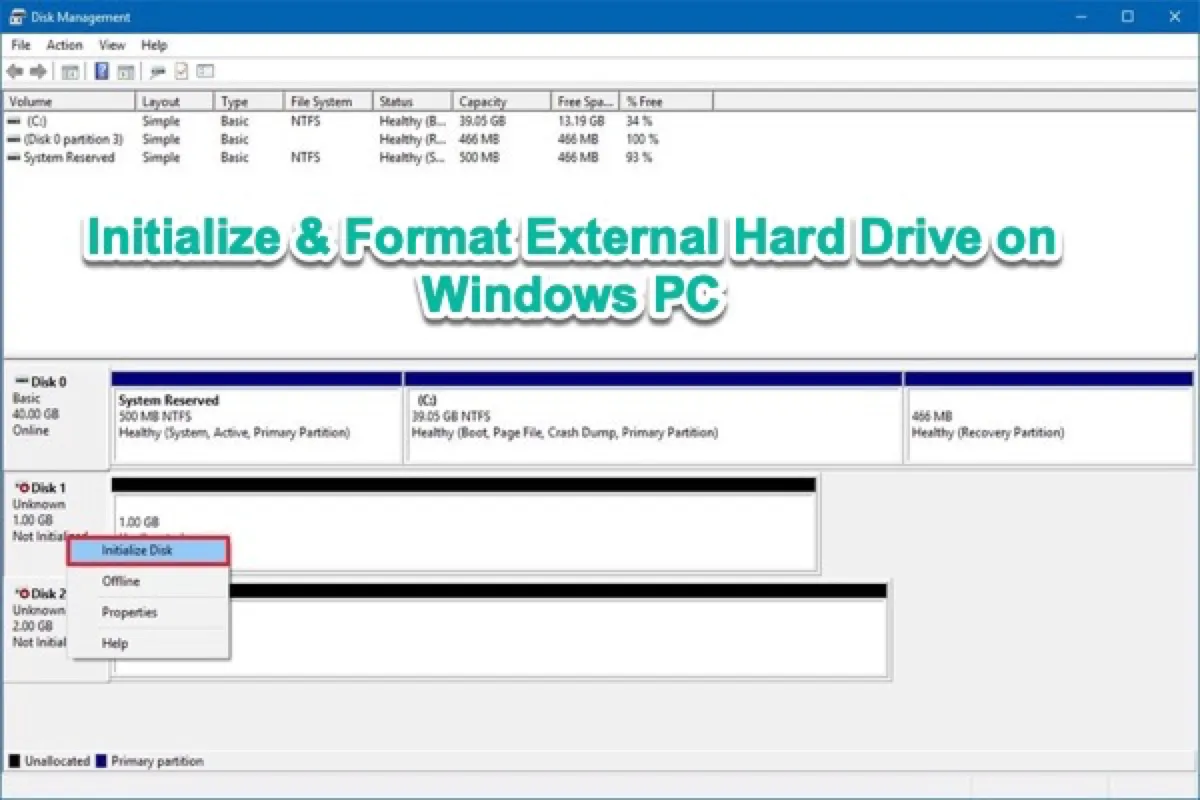
How to initialize an external hard drive on Windows?
1. Right-click This PC/My Computer and choose Manage in the context menu to enter Computer Management.
2. Select Disk Management on the left sidebar and open this utility.
3. Connect your external hard drive to your PC. New SSD or hard drive will prompt to initialize.
4. Right-click on the external hard drive marked as "Unknown" and "Not Initialized", then choose Initialize Disk. If the external hard drive is listed as Offline, you need to first right-click it and set it back to Online. 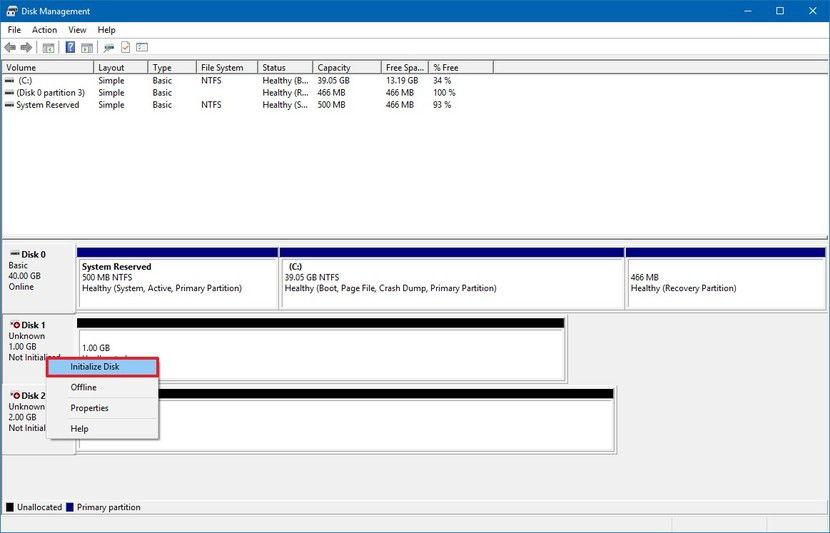
Tips: Some USB drives may not have the option "Initialize Disk", then you just need to jump to get the disk formatted for work.
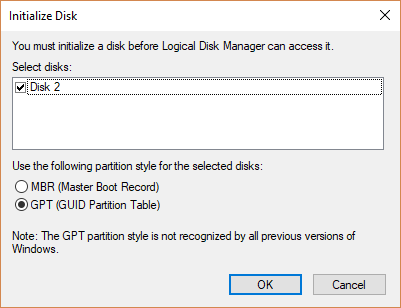
5. Click OK to accept the default partition style or change the partition style as you like.
For partition styles, you have two options on Windows computers.
- Most PCs use the GUID Partition Table (GPT) disk type for hard drives and SSDs. It's more robust and allows for volumes bigger than 2 TB.
- Master Boot Record (MBR) is used by 32-bit PCs, older PCs, and removable drives such as memory cards that have a size smaller than 2TB.
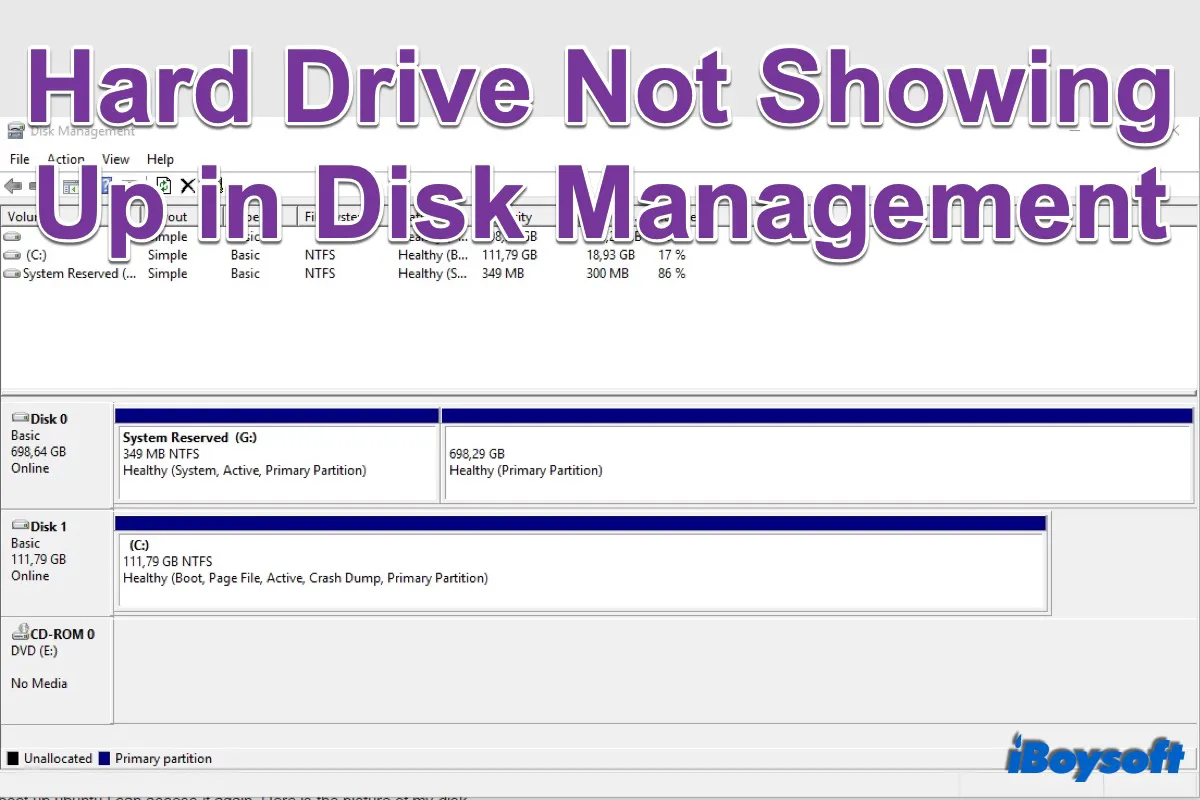
[Solved] Hard drive Not Showing Up in Disk Management Windows 10/11
You plug an external hard drive into the Windows PC, but it doesn't show up even in Disk Management. Here are 6 fixes to fix the hard drive not showing up in Disk Management in Windows 10/11. Read more >>
How to create a new simple volume for external hard drives in Disk Management?
After choosing the partition style for the drive you want to format, you can now partition this external hard drive.
1. Right-click on the external hard drive (often marked unallocated space) and select the New Simple Volume option.
2. Click Next and follow the wizard to specify the volume size, assign the drive letter, and choose the File System you want.
For the disk file system, three types are available in Windows.
- Choose FAT32 if your external hard drive is less than 1 TB. And if each file of yours is less than 4 GB ( like photos, songs, documents), FAT32 is fine to use.
- You can choose exFAT if your external hard drive is relatively large and you want to use the external hard drive for Mac and Windows PC.
- Choose NTFS if your external drive is an SSD or a large-capacity hard drive. Also, for Windows installation and file backups, NTFS is a more ideal option.
3. Click Finish to complete this process.
How to format external hard drives on Windows?
If the external hard drive is initialized and you need to reformat it for reasons like disk corruption, you need to:
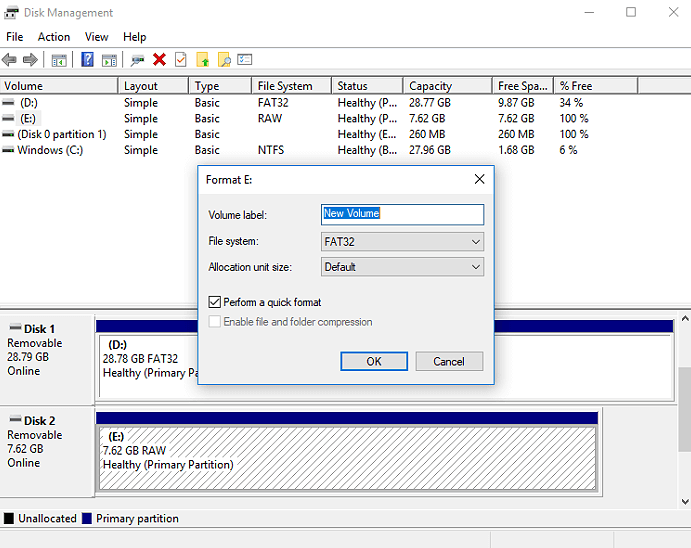
- Find the external hard drive in Disk Management, right-click on it, and choose Format from the contextual menu.
- Then set the disk information, including allocation unit size, volume label, and file system.
- Check the Perform a quick format option and click OK to format the external hard drive.
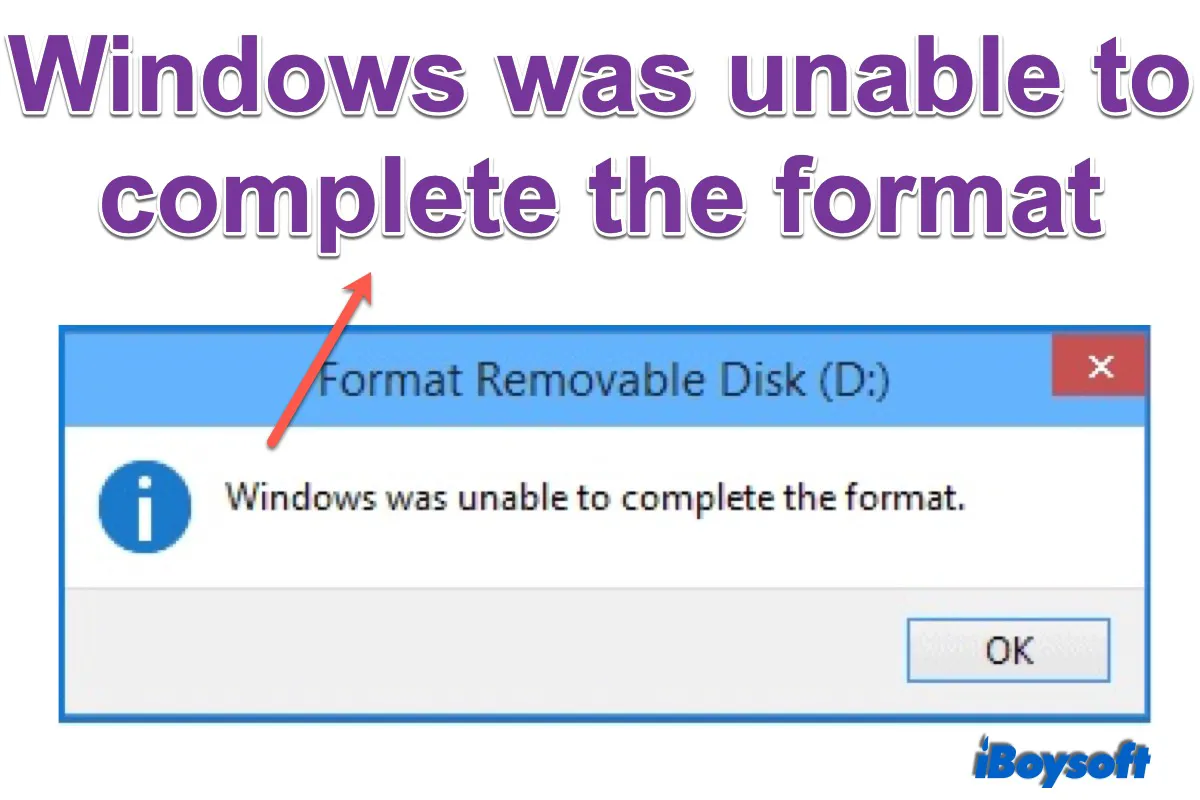
Windows Was Unable to Complete the Format, How to Fix
If you encounter the error that Windows was unable to complete the format, there are 6 solutions to fix the unable problem. Plus, it also guides you on how to recover data from formatted drives on Windows. Read more >>
Method 2: Initialize and Format External Hard Drive with Diskpart
Another way to do this is through the command prompt with the diskpart command line. To initialize a new disk or wipe an existing disk, use Windows snap-in tool - Diskpart with the following steps.
- Click Start, type "cmd" in the search bar, press Enter, and then run the Command Prompt as an administrator.
- In the pop-up window, type "diskpart" in the prompt and press Enter, and then type "list disk" to list all the disks detected by your computer.
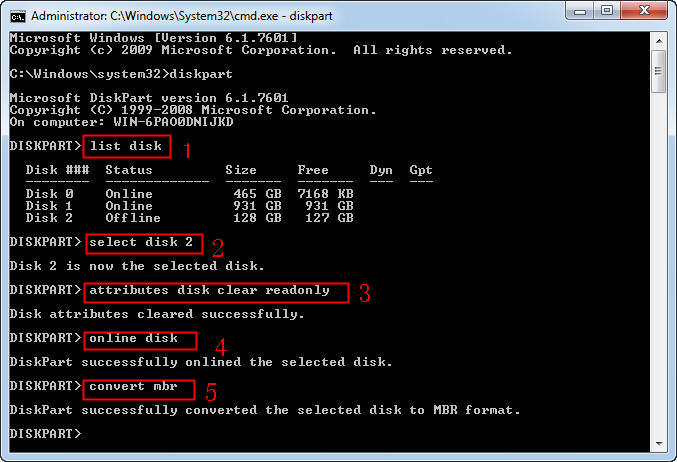
- Type "select disk" and the external hard drive that you want to initialize and press Enter. For example, "select disk 2".
- Type "attributes disk clear readonly" and press Enter if you don't want others to make changes to your hard drive, or else, skip this step.
- Type "online disk" and press Enter so that Diskpart can access it in online conditions.
- Type "convert mbr" or "convert gpt" and press Enter to change the selected disk to MBR or GPT partition table.
Now you have initialized the disk with Diskpart, you can create the partition and format the external hard drive for file saving. - Type "list disk" again and press Enter to list all disks so that you know the disk number on which you want to create a partition.
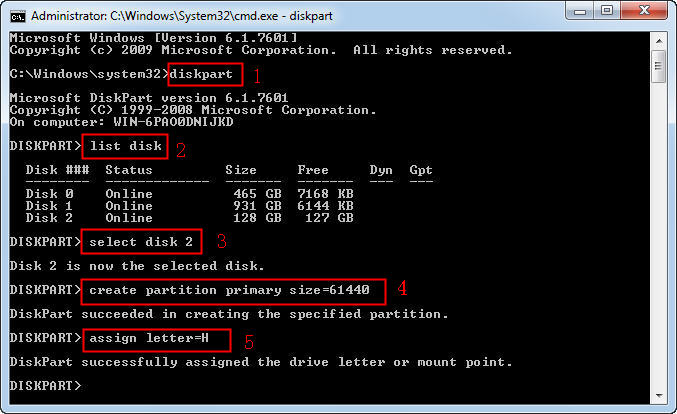
- Type "select disk 2 " and press Enter. You need to replace 2 with the number of your external hard drive.
- Type "create partition primary size=61440" and press Enter. Replace 61440 with the free space that you want to allocate for the partition.
create partition primary size=61440 - Assign a drive letter by typing assign letter=H and pressing Enter. You can replace H with other available drive letters.
Now, a new partition is created on the external hard drive. But to save files on the disk, a partition needs to be formatted. - Type "list volume" and press Enter to list all the volumes under this disk.
- Find the target volume and then type " select volume * " and press Enter. Replace * with your volume number.
- Type "format fs=ntfs quick label=test" and press Enter. You can replace NTFS with the file system you want (like exfat and fat32) and label it with a different name.format fs=ntfs quick label=test
After the external hard drive is initialized, partitioned, and formatted, you'll be able to save photos, videos, documents, or whatever you want on the hard drive.