
If you attempt to partition a hard drive on Mac, this post is right for you. After reading, you will know every aspect of Mac partitioning. Most Mac users choose to partition the Mac hard drive for installing different operating systems, separately storing work and private folders, and for some other purpose. Here, we will guide you on how to partition a hard drive on Mac. Stay tuned to know more.
What does partition mean on Mac
Partitioning a hard drive is to divide the disk into individual sections called containers on Mac. These separate and usable containers coexist on the physical drive without any interference. It allocates the amount of storage space into several parts. Each stand-alone partition/container can install an operating system to boot your Mac from.
When you partition a hard drive on Mac, you can decide the size of the new partition. Once down, the storage space of the partition is fixed to use. If the available space on a partition is not enough to store a large file, you can not grab free space from other partitions given that they are separate.
Should you partition a Mac hard drive
After you partition a Mac hard drive, splitting the disk into multiple containers, you can run Windows and macOS simultaneously and even dual boot two versions of macOS especially when you want to try the beta version of macOS without affecting current content on Mac. Besides, we summarise some other advantages of Mac partitioning:
- Repair disk errors using another macOS bootable partition. When the main in-use partition suffers some startup errors such as MacBook won't turn on, you may need an external macOS bootable to use Disk Utility to repair. If there is already a bootable partition with macOS installed on the main disk, you can directly take use of it instead of using a second media.
- Share Photo library between two or more user accounts with ease. After partitioning the hard drive, you can directly move the Photo library to the partition without ownership to share it with other users on the same Mac. You don't need to move the Photo library to an external hard drive.
- Back up your Mac with Time Machine without a second storage media. It requires keeping your Time Machine backup in a different location from your startup volume. In this way, it gives you a way to retrieve data back when the startup disk is corrupted or damaged. Now, you can store it in another partition on the main disk straightforwardly.
- Better manage your data on different partitions. You can separate your private and work files and store them on different partitions to avoid mixing up. It also helps to find the target files quickly from a specific partition.
However, the most obvious disadvantage of partitioning a hard drive is that it may cause a waste of storage space on the hard drive. As we have mentioned before, a partition only takes a portion of disk storage. With multiple partitions, you may encounter a dilemma that you're cramped for space on one partition but have plenty of free space on another.
On Mac runs macOS High Sierra and later, Apple recommends using APFS as the default file system for Mac hard drive. If this is your case, you don't need to partition the APFS drive, you can directly add APFS volume to the container. APFS features space sharing, which grabs and shrinks the storage space of the partition automatically, all available space on the main drive is shared among the volumes within the container.
Click the button below to share this post with others who want to partition a hard drive on Mac!
Steps to partition a hard drive on Mac
In this part, we will walk you through the detailed steps to partition a hard drive on Mac. In the first place, you need to back up your Mac hard drive because partitioning a hard drive erases all content on it while adding APFS volume to a container keeps the content intact. If you still want to partition the hard drive, follow the steps below.
If you regret partitioning a hard drive, you can also delete the partition on your Mac.
1. Use Boot Camp Assistant to partition for Windows
To install Windows on Mac, you can use Apple's solution Boot Camp Assistant to partition the Mac hard drive. Boot Camp Assistant is only available on Intel Mac running macOS Catalina and earlier. BootCamp Assistant leads you to partition the Mac hard drive for installing Windows.
[2024]How to Run Windows on M1 Mac
This post explains whether you can run Windows on Apple silicon Mac, and it introduces how to run Windows on M1 Mac with different methods, including virtual machine, emulator, and cloud server. Read more >>
Here's how to install Windows with Boot Camp Assistant:
- Check your Secure Boot setting. You need to boot your Mac into macOS recovery mode and access the Startup Security utility, the secure boot setting should be Full Security to install Windows on Mac.
- Open Boot Camp Assistant by clicking Launchpad > Other > Boot Camp Assistant. Click Continue and follow the onscreen the set the size of the Windows partition (at least 64GB).
- When Mac restarts to the Windows installer, select the BOOTCAMP partition and click Format. Click Next and follow the onscreen instructions to begin installing Windows.
- When Mac starts up in Windows and opens a Boot Camp installer window. Follow the onscreen instructions to install Boot Camp and Windows support software (drivers).
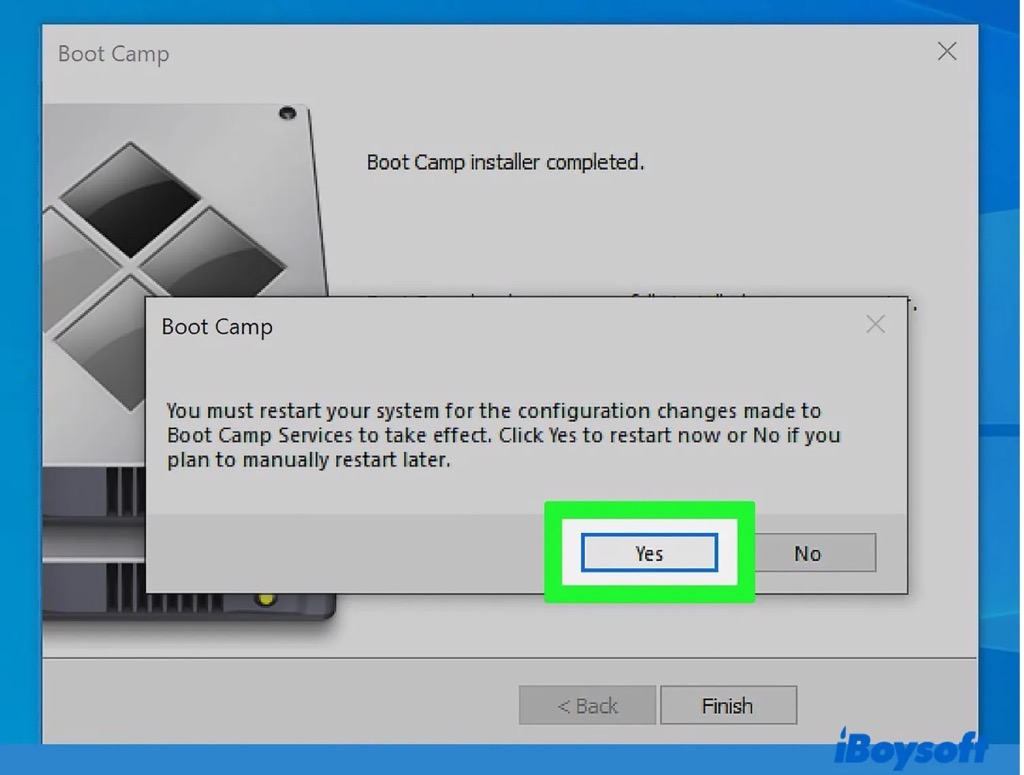
When you want to switch between Windows and macOS, just restart the Mac and hold the Option key during the startup, then choose a startup partition when asked.
Successfully add a Windows partition on Mac? Share the above information to help others to run Windows on Mac!
2. Add a volume to the APFS container
If the Mac hard drive is formatted as APFS, you are recommended to add a volume instead of partitioning. Similarly, on the newly added volume, you can also install different macOS to dual-boot your Mac. And the space sharing feature could maximize the use of storage space given that it shares unused space with all the volumes.
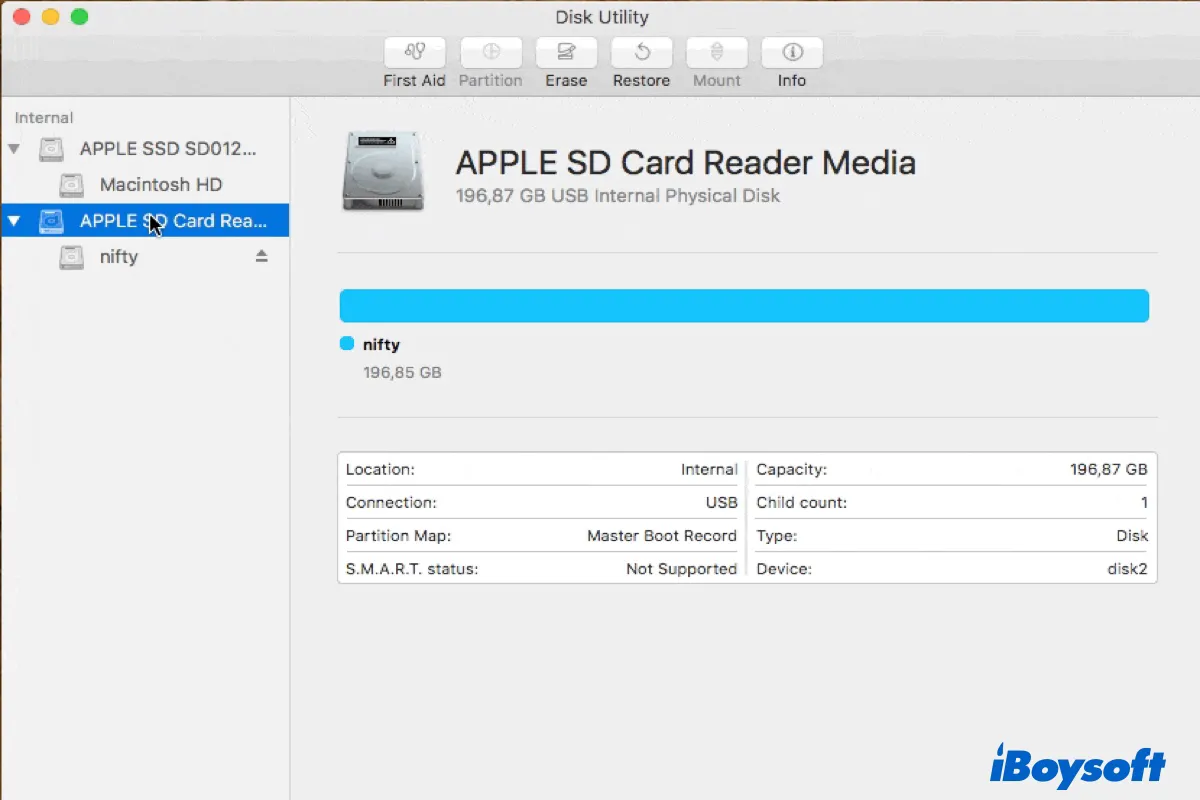
- Head to Finder > Applications > Utilities, then find Disk Utility to launch it.
- Tap on the View button and choose Show All Devices.
- Select the Mac internal drive or connected external drive on the left sidebar.
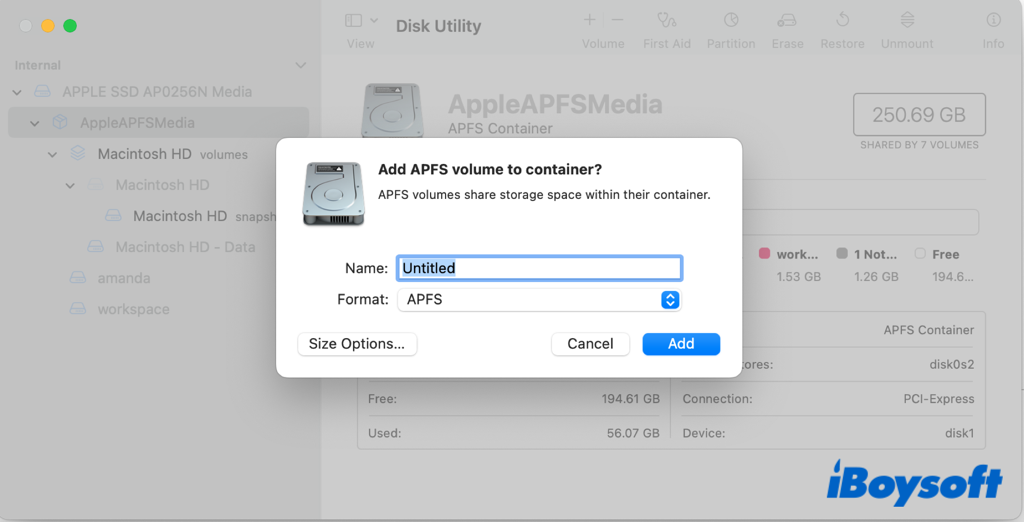
- Choose the "+" button above the Volume option on the toolbar to add an APFS volume.
- Enter a name for the volume and choose an APFS format, then click OK.
3. Create a new partition on a hard drive
For an HFS+/exFAT/FAT32 Mac hard drive, you can partition the hard drive to split the disk into multiple and separate logical parts to use. And you can also partition an APFS volume, the partition option is still available there. But if you are close to running out of storage space, it is not recommended to partition the drive to avoid poor performance.
- Open Disk Utility by using the Spotlight Search.
- Choose View and select Show All Devices.
- On the left sidebar, highlight an internal or external hard drive to partition.
- Tap on the Partition option and a new window pops up.
- Click add (+) to increase the number of partitions.
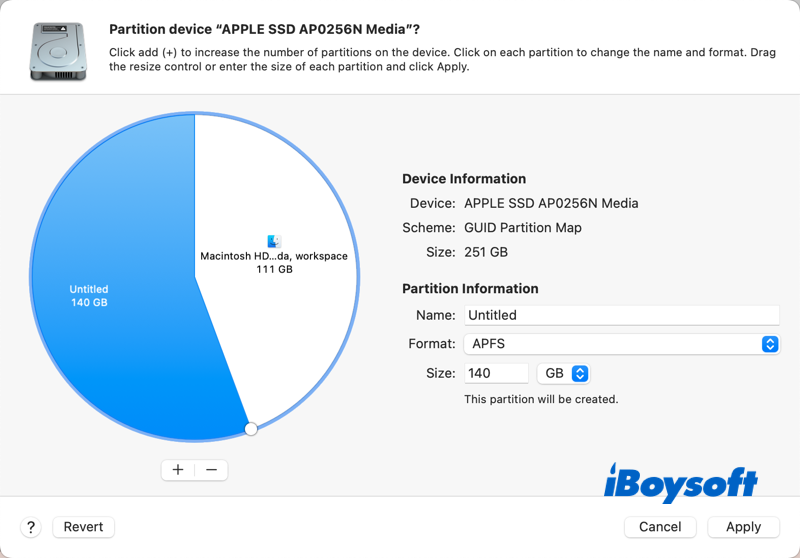
- Click on each partition to change the name and format.
- Drag the resize control or enter the size of each partition.
- Click the Apply button to partition the drive.
- After the operation finishes, click Done.
After the process completes, the new partition is displayed in Finder/Disk Utility, you can install macOS on the newly added partition, store files/folders in it, etc. If you want to change the startup partition/volume, you can make it in System Preferences > Startup Disk to select the new partition/volume to boot your Mac from it, or restart your Mac, and hold the Option key(Intel Mac) or the power button(Apple Silicon Mac), then select the aim partition/volume to boot.
[Fixed] Can't Partition SD Card/USB Drive/Hard Drive on Mac
If you can't partition your internal SSD or external hard drive on Mac, this post provides the solutions to common issues like grayed-out add button. Read more >>
If you have partitioned the Mac hard drive with the steps above, you can share it with more people!

How To Merge APFS Containers/Partitions to Get More Space
If you have multiple APFS containers or partitions, you can merge the empty/unwanted one to the main container to get full disk space. This post guides you to merge APFS containers step by step. Read more >>
Partition recovery software for Mac
You should be always cautious when you partition a hard drive on Mac, if you mistakenly partition an incorrect hard drive on Mac and there is no backup for it, you may lose all the data on it. In addition to wrongdoing, some other reasons such as hard drive crashes, uncertain system shutdown, virus attacks, power surge, software corruption, and file system corruption could also cause the partition to get lost or missed.
Whenever you find any files disappeared on the Mac partition or even the whole partition is missing, you should stop taking any operations on the partition such as reformatting, repartitioning, storing new files to the drive, running Disk Utility to repair, etc., and recover data from the partition as soon as possible with professional recovery software for Mac. Here we recommend iBoysoft Data Recovery to get lost Mac partition/partition files. It is risk-free and reliable data recovery software delivering high success. You can try the trial version of the software to scan out the lost partition on your Mac hard drive now.
Conclusion
With the built-in macOS tool Disk Utility, you can partition a hard drive on Mac with ease. Based on your case, you can choose to add APFS volume, partition the drive with Boot Camp Assistant, or use Disk Utility. You'd better back up your Mac before you take any operation on the boot disk to avoid data. If you lose important files during the process, you can use iBoysoft Data Recovery, the professional data recovery software to retrieve your data back.
FAQs about partitioning a Mac hard drive
- QWhat happens when you partition a hard drive Mac?
-
A
It divides the Mac hard drive into separate, usable systems. You can install different operating systems on these partitions, such as Windows and macOS, or even two versions of macOS to dual-boot your Mac.
- QHow long should it take to partition a drive Mac?
-
A
It should take less than two minutes.
- QDoes partitioning Mac erase data?
-
A
Yes! Partitioning a Mac hard drive will erase all the data stored, therefore it is necessary to create a backup in advance if you have any important files kept on the hard drive.
- QWhat is the difference between a volume and a partition?
-
A
For APFS hard drive, it is recommended to add a volume instead of a partition. All the APFS volumes can share the unused storage space on the main drive, and adding a volume doesn't erase the currently stored contents. While the partition is allocated with a fixed storage space, when there is not enough space to use, it can't grab free space from other partitions, and creating a partition delete all the data on the main drive.