By default, there is only one APFS container that comes with the built-in SSD of your MacBook/iMac, and three are 6 volumes resident in the APFS container, but only the Macintosh HD, divided into Macintosh HD the system volume and Macintosh HD - Data the data volume, can be accessed by Mac users.
All the files you created on a Mac are kept in the Macintosh HD volume. And macOS allows you to add an APFS volume to the container so that you can store files in the newly added volume to sort out data, install a different version of macOS on the volume to boot from it, etc.
How to add an APFS volume on Mac
If you want to add an APFS-formatted volume to the container, it requires an APFS container. You can check whether it is an APFS container in Disk Utility.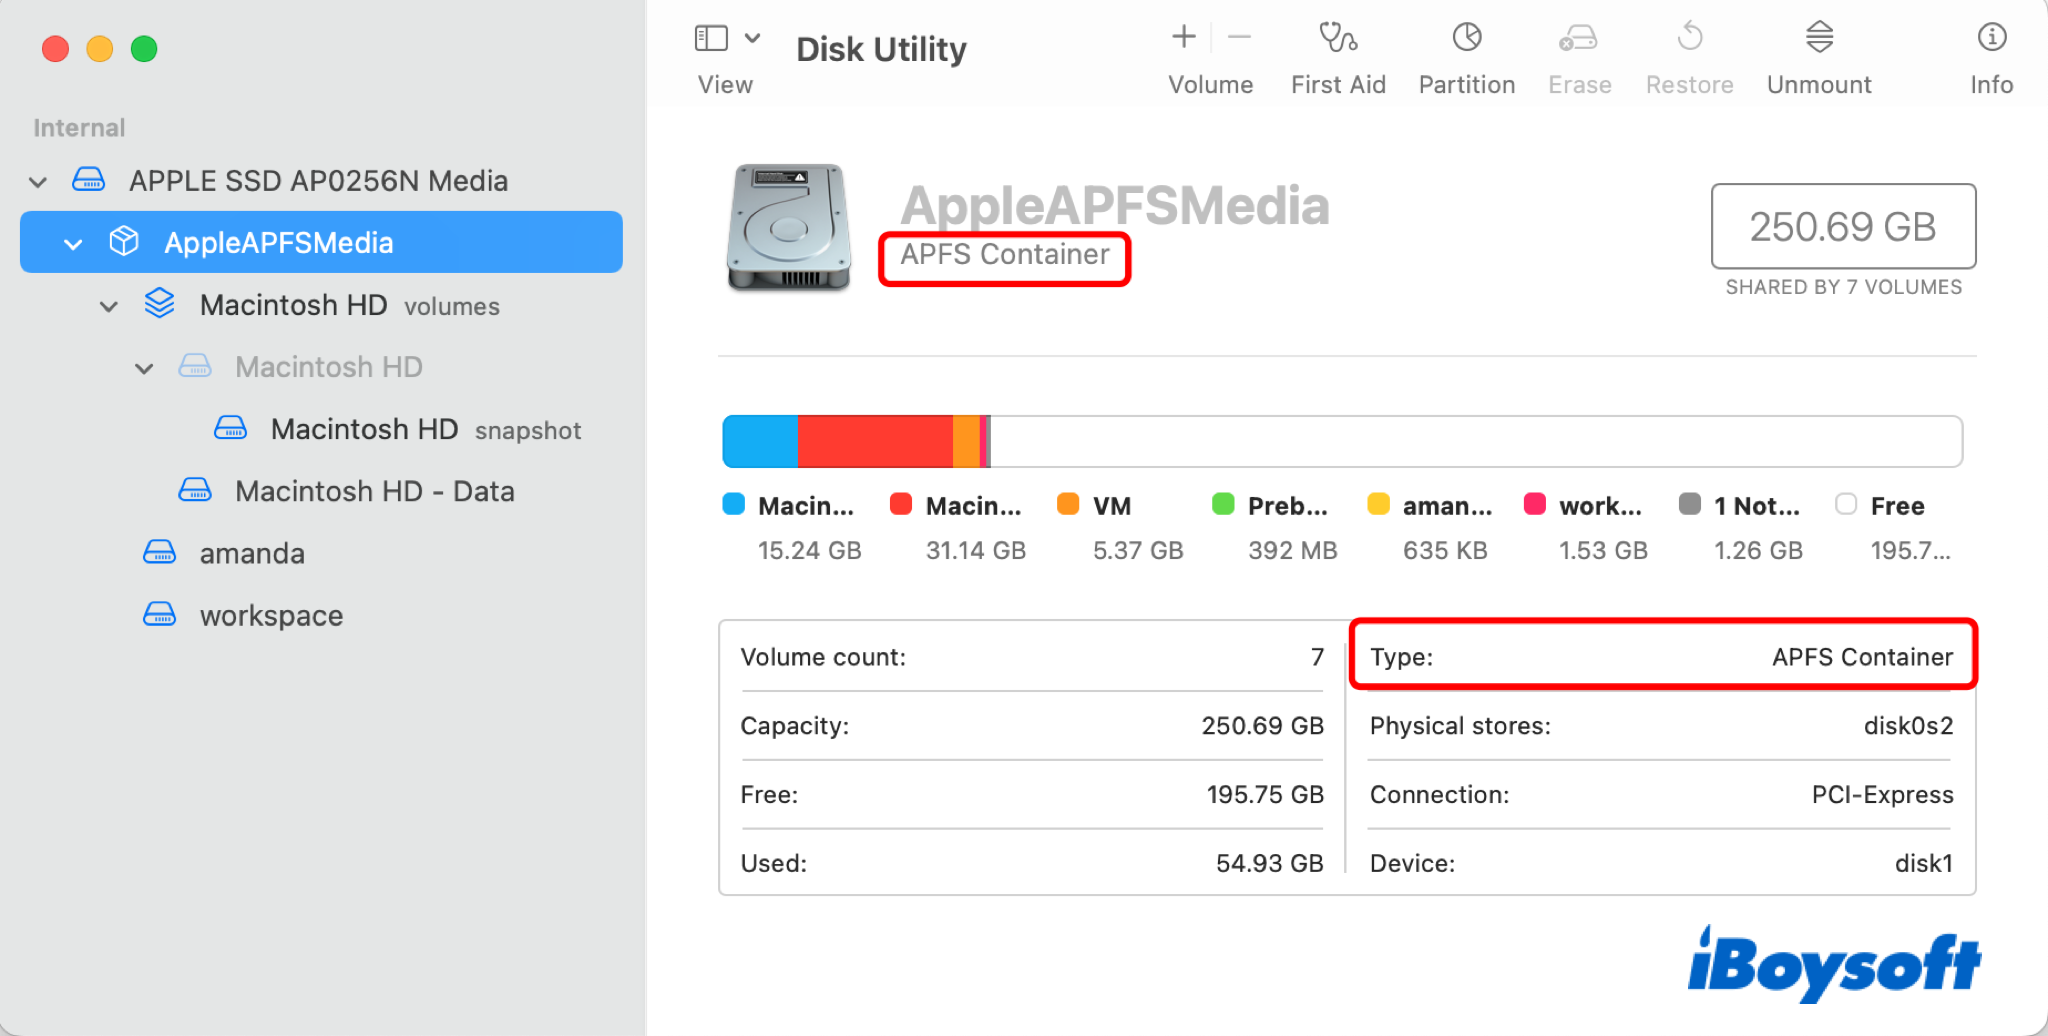
The Macintosh HD volume group and other volumes inside the APFS container are all formatted with APFS. If so, you can proceed to add an APFS volume to the APFS container on your Mac.
Perhaps, the current file system of your Mac drive is not APFS, but the Mac OS Extended(HFS+), then you need to convert HFS+ to APFS so that you can add an APFS volume to the container. But before that, you should make sure your Mac is running macOS High Sierra and later versions.
# Method 1: Add APFS volume via Disk Utility
To add APFS volume to the container on Mac, you can use Disk Utility, where you can also delete APFS volume, erase APFS volume, repair disk error with First Aid, etc. Let's dive into the details.
- Finder > Applications > Utilities > Disk Utility.
- Tap the View button and choose Show All Devices.
- Choose the APFS container on the left sidebar. (not just a volume)
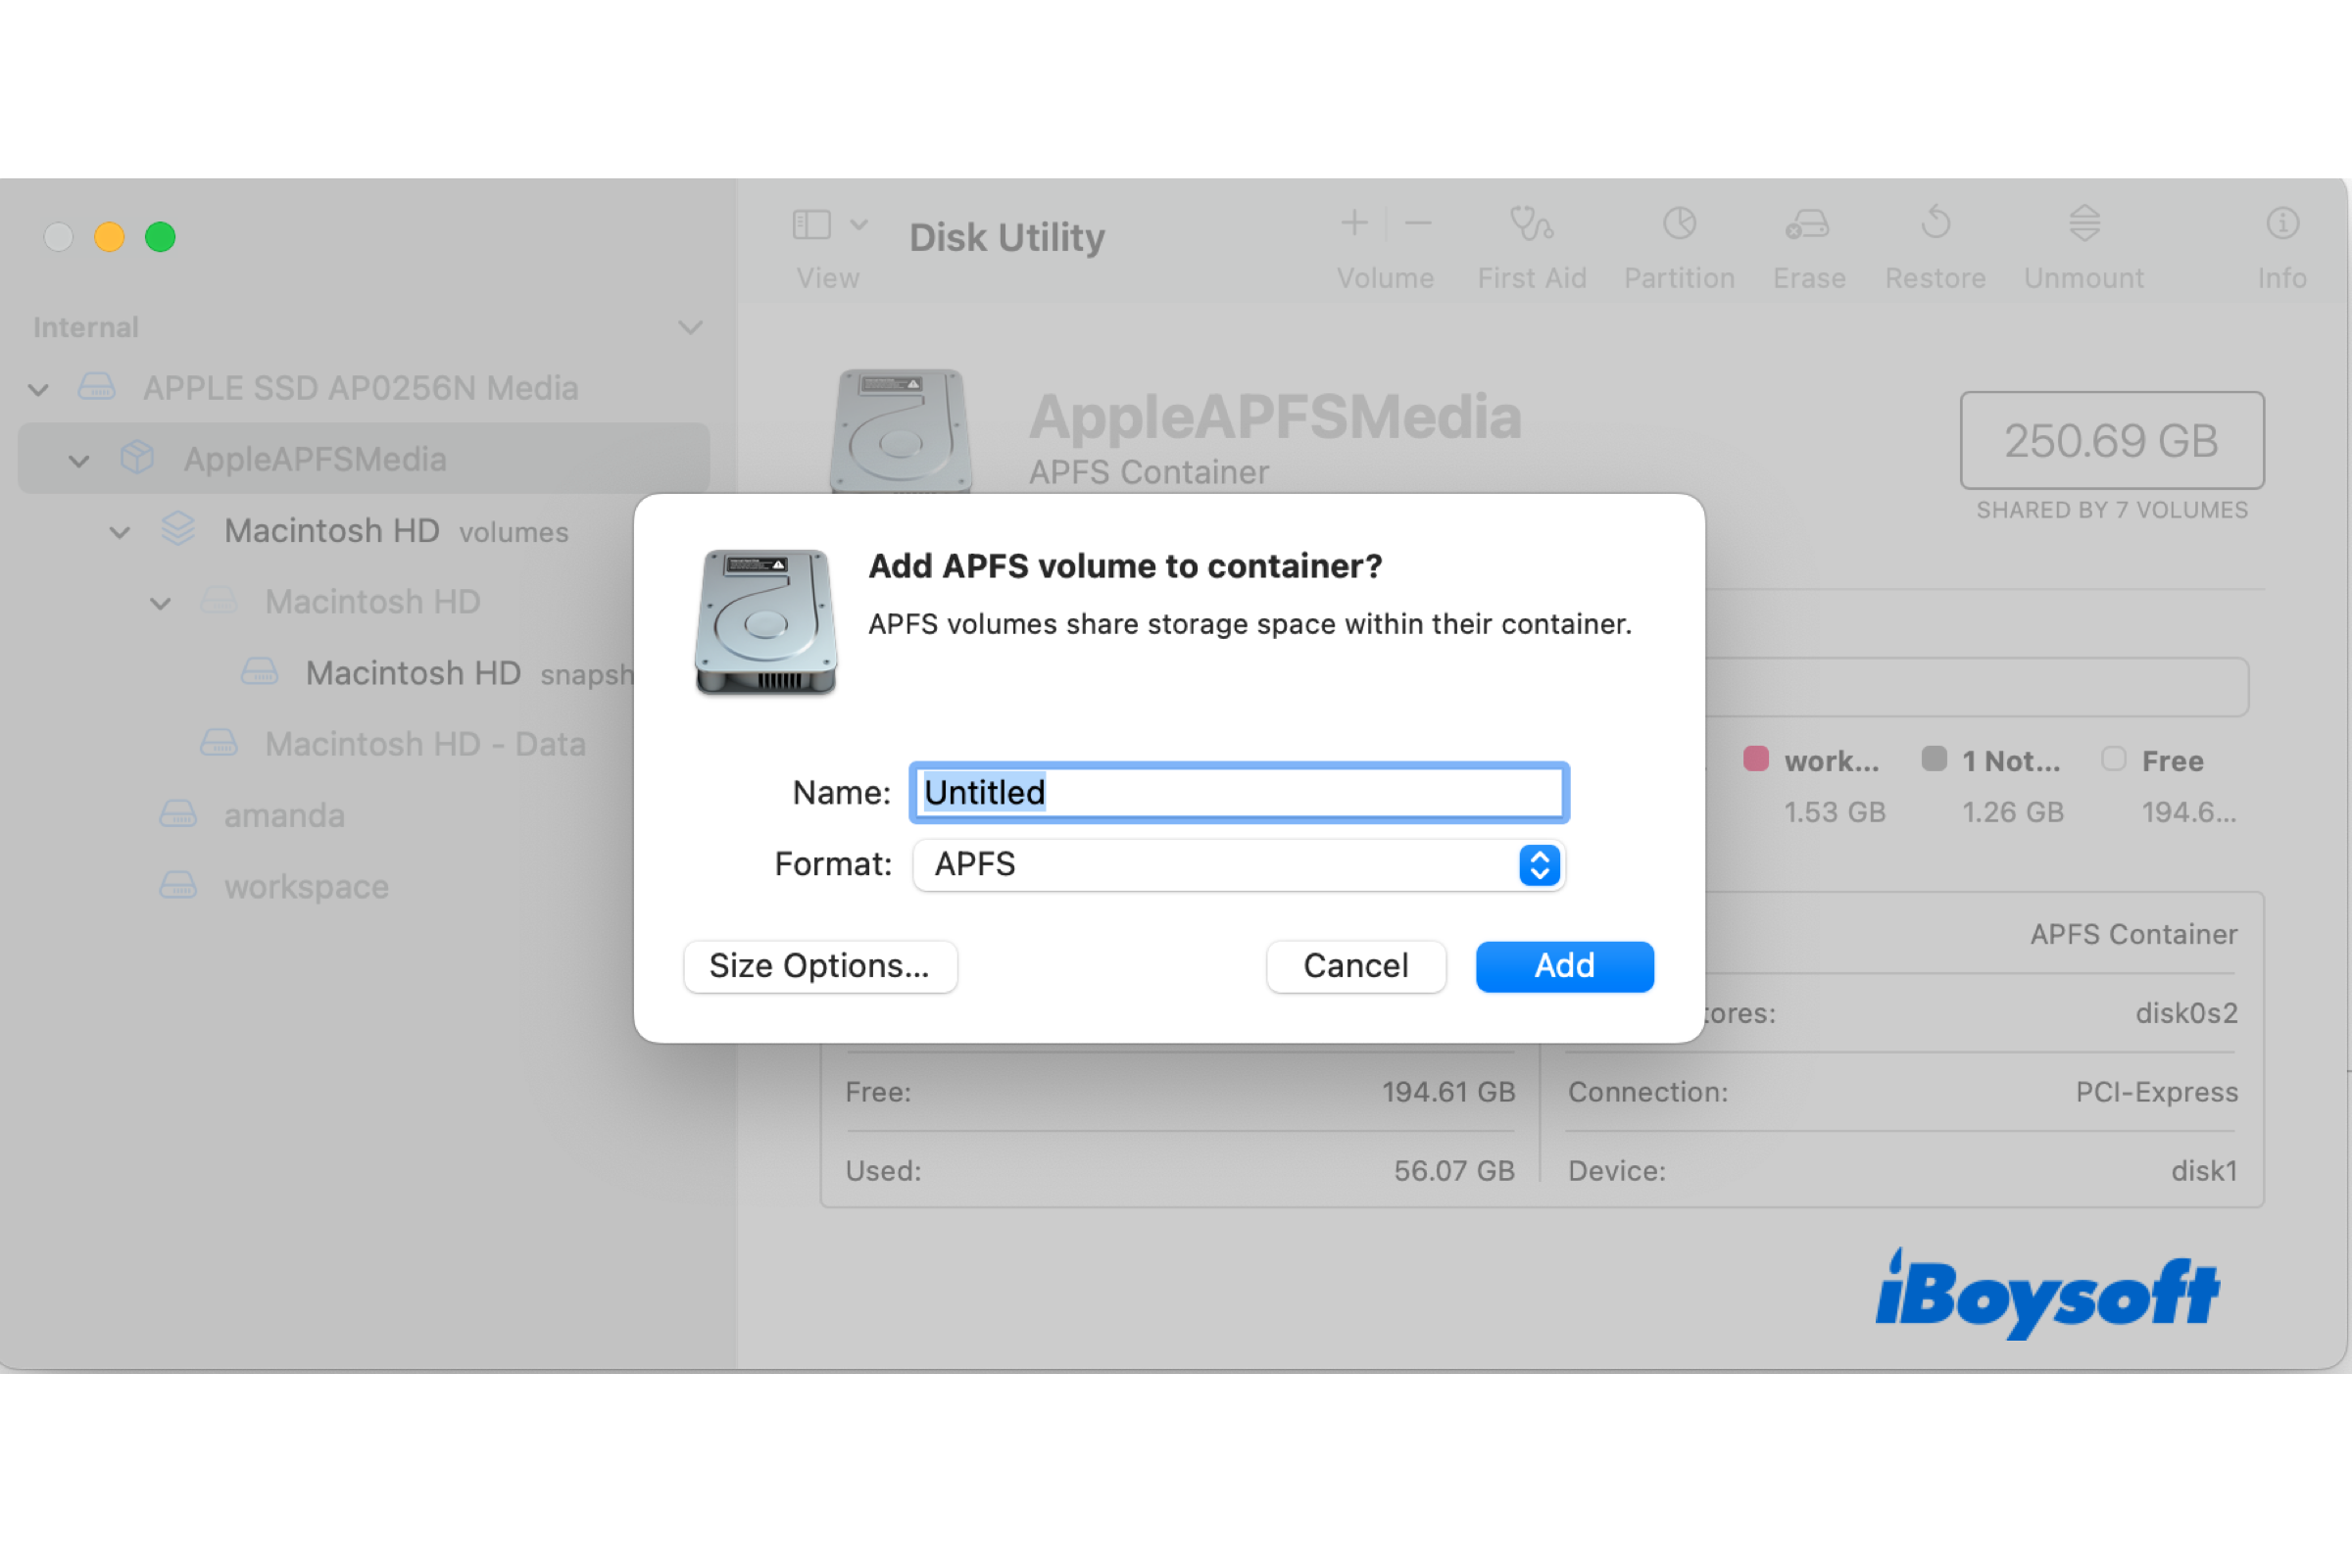
- Click the + button in the toolbar or go to Edit > Add APFS Volume.
- Enter a name for the new volume.
- Choose an APFS format, including APFS, APFS (Encrypted), APFS (Case-sensitive), and APFS (Case-sensitive, Encrypted).
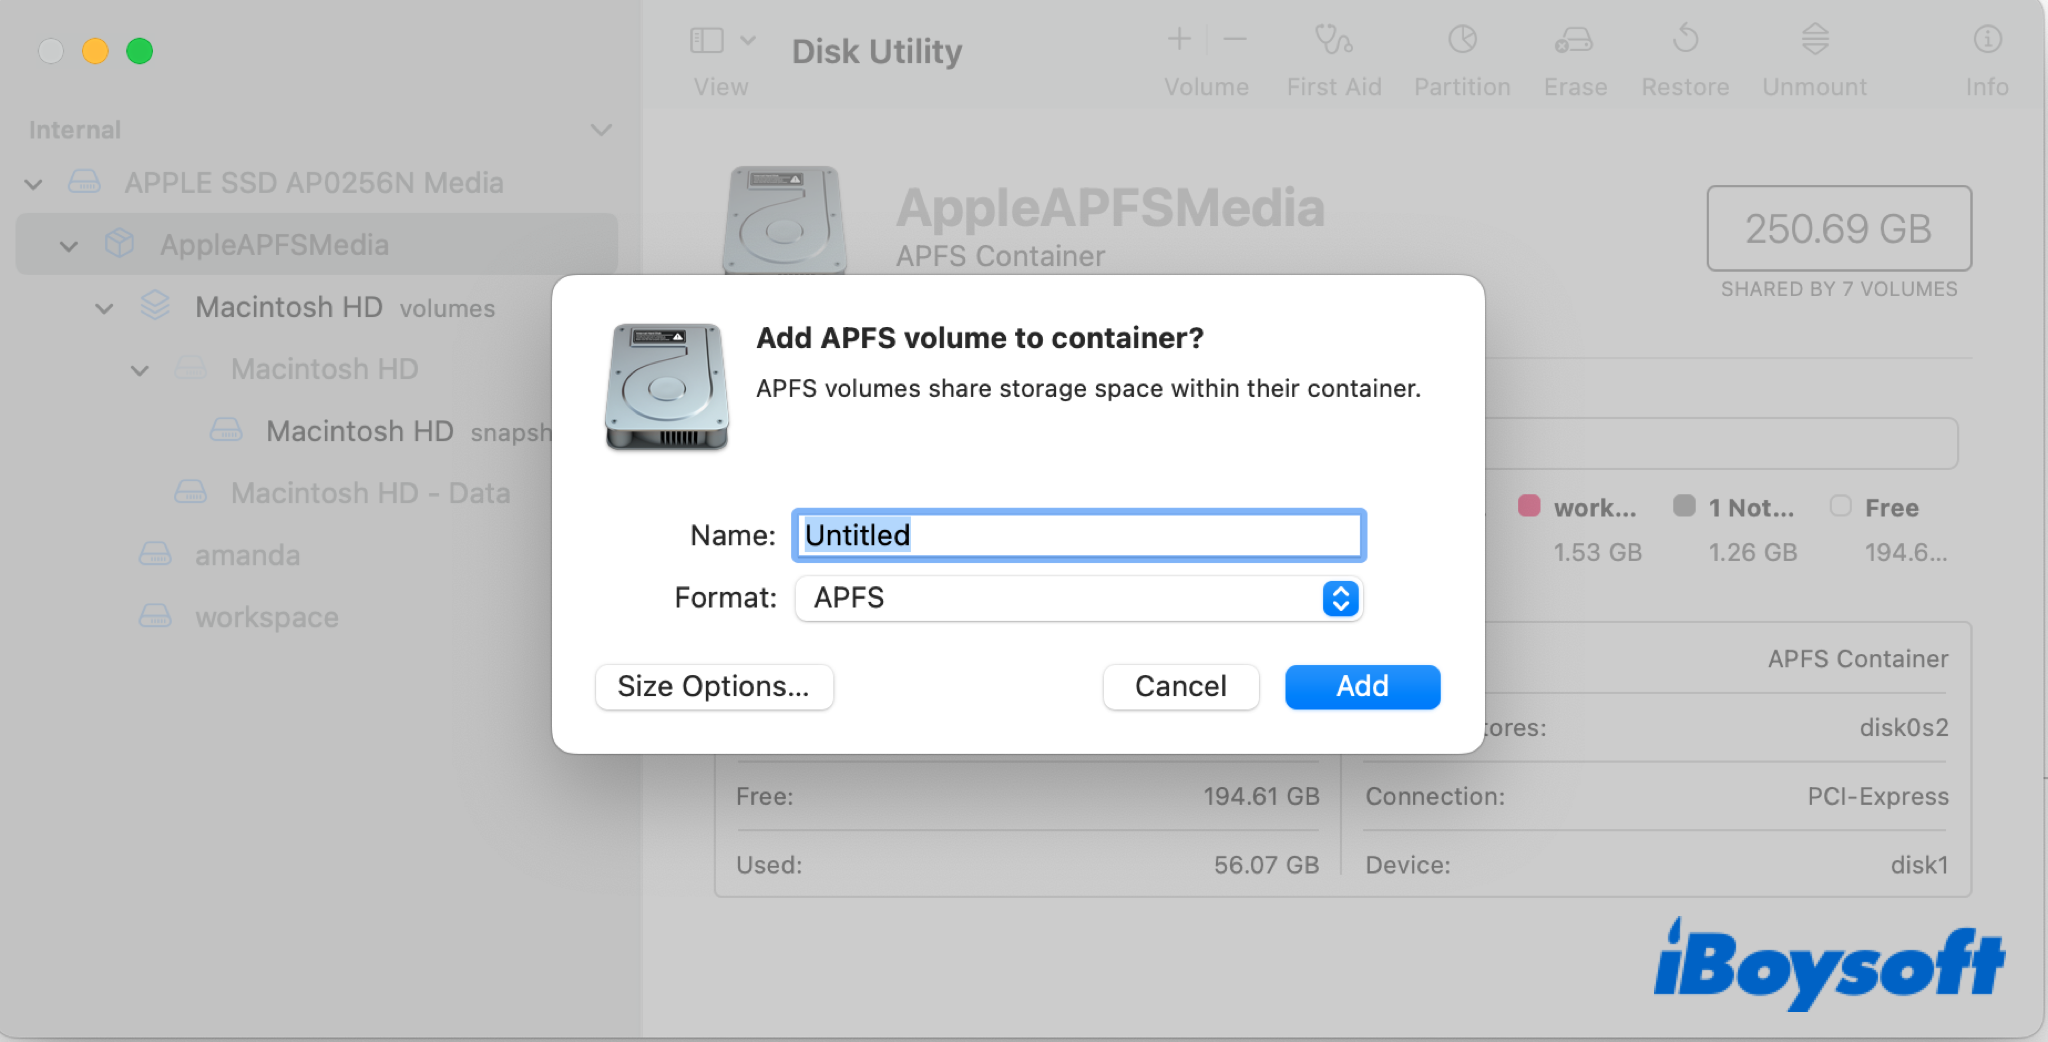
- Optionally, set a quota (storage limit) and reserve size.
- Click the Add button to add this volume to the container.
Once the process finishes, the added volume shows up in the left sidebar under the APFS volume. Then you can store files on it, install another version of macOS on it, etc.
Add an APFS volume to the container? Share it with your friends and family!
# Method 2: Add APFS volume via Mac Terminal
For more advanced Mac users, Terminal seems to be an excellent tool to add APFS volume on Mac. But be careful to use the commands, for some of them may lead to bad results.
- Finder > Applications > Utilities > Disk Utility.
- Type diskutil list to find your APFS container. (Look for a line like APFS Container Scheme and not the identifier.)
- Type diskutil apfs addVolume <container-disk-identifier> APFS <NewVolumeName>.
(e.g. diskutil apfs addVolume disk2s2 APFS WorkDrive.) - For a case-sensitive volume, type diskutil apfs addVolume disk2s2 APFSX DevVolume.
If you wanna specify quotas or reserve space, you can use the command: diskutil apfs addVolume disk2s2 APFS DataVolume -reserve 5g -quota 50g…
Creating a New APFS Container
If you want a separate APFS container (not just a volume), you'll need to:
- Partition a disk or free up space using Disk Utility or Terminal.
- In Disk Utility, select the physical disk (not a volume or container). Then click Partition, then add a new partition, and choose APFS.
- In Terminal, type diskutil partitionDisk /dev/diskX GPT APFS NewContainer 100g and press the Enter key.
⚠️ Be cautious — partitioning can delete data if not done carefully. So you'd better do a backup.
Difference between adding volume and partition
Before the advent of APFS, Mac users could only partition a drive, which divides the drive into several parts and allocates fixed storage for each partition. It causes a problem when you want to store a large file on one partition, the available space of which is not enough, but you can not "borrow" the free space on another partition.
However, when you add volumes to the APFS container, all the volumes share the available storage space within the container. In this way, it maximizes the use of the disk space. The space-sharing feature is one of the highlights of the APFS format. Know more about partitions vs volumes.
Conclusion
When you want to add an APFS volume to the container, you can follow this guide. It needs your Mac to run in macOS High Sierra and later versions and format the internal Mac drive, usually the startup disk, in APFS format. Adding volume will not affect the data on the drive, but it is always recommended to back up your Mac before you take any further action on your drive.
Think this post is useful? Share it with more people!