You add volumes to the APFS container can maximize the use of disk space, as the volumes contained in the same container can grow or shrink as needed. But for some reasons, you may want to erase an APFS volume on Mac to:
- Free up disk space.
- Prepare Mac for sale or donation.
- Factory reset your Mac.
- Have a clean macOS reinstallation.
Whatever the reason for your case, you can follow this tutorial to erase APFS volume on MacBook Air/Pro/iMac.
What is an APFS volume?
APFS(Apple File System), a self-designed file system of Apple Inc for its series products, is the successor of the previous default file system Mac OS Extended, and is applied to macOS Hign Serria in 2017 for the first time. APFS brings higher encryption, supports clones, allows space sharing, has crash protection, etc.
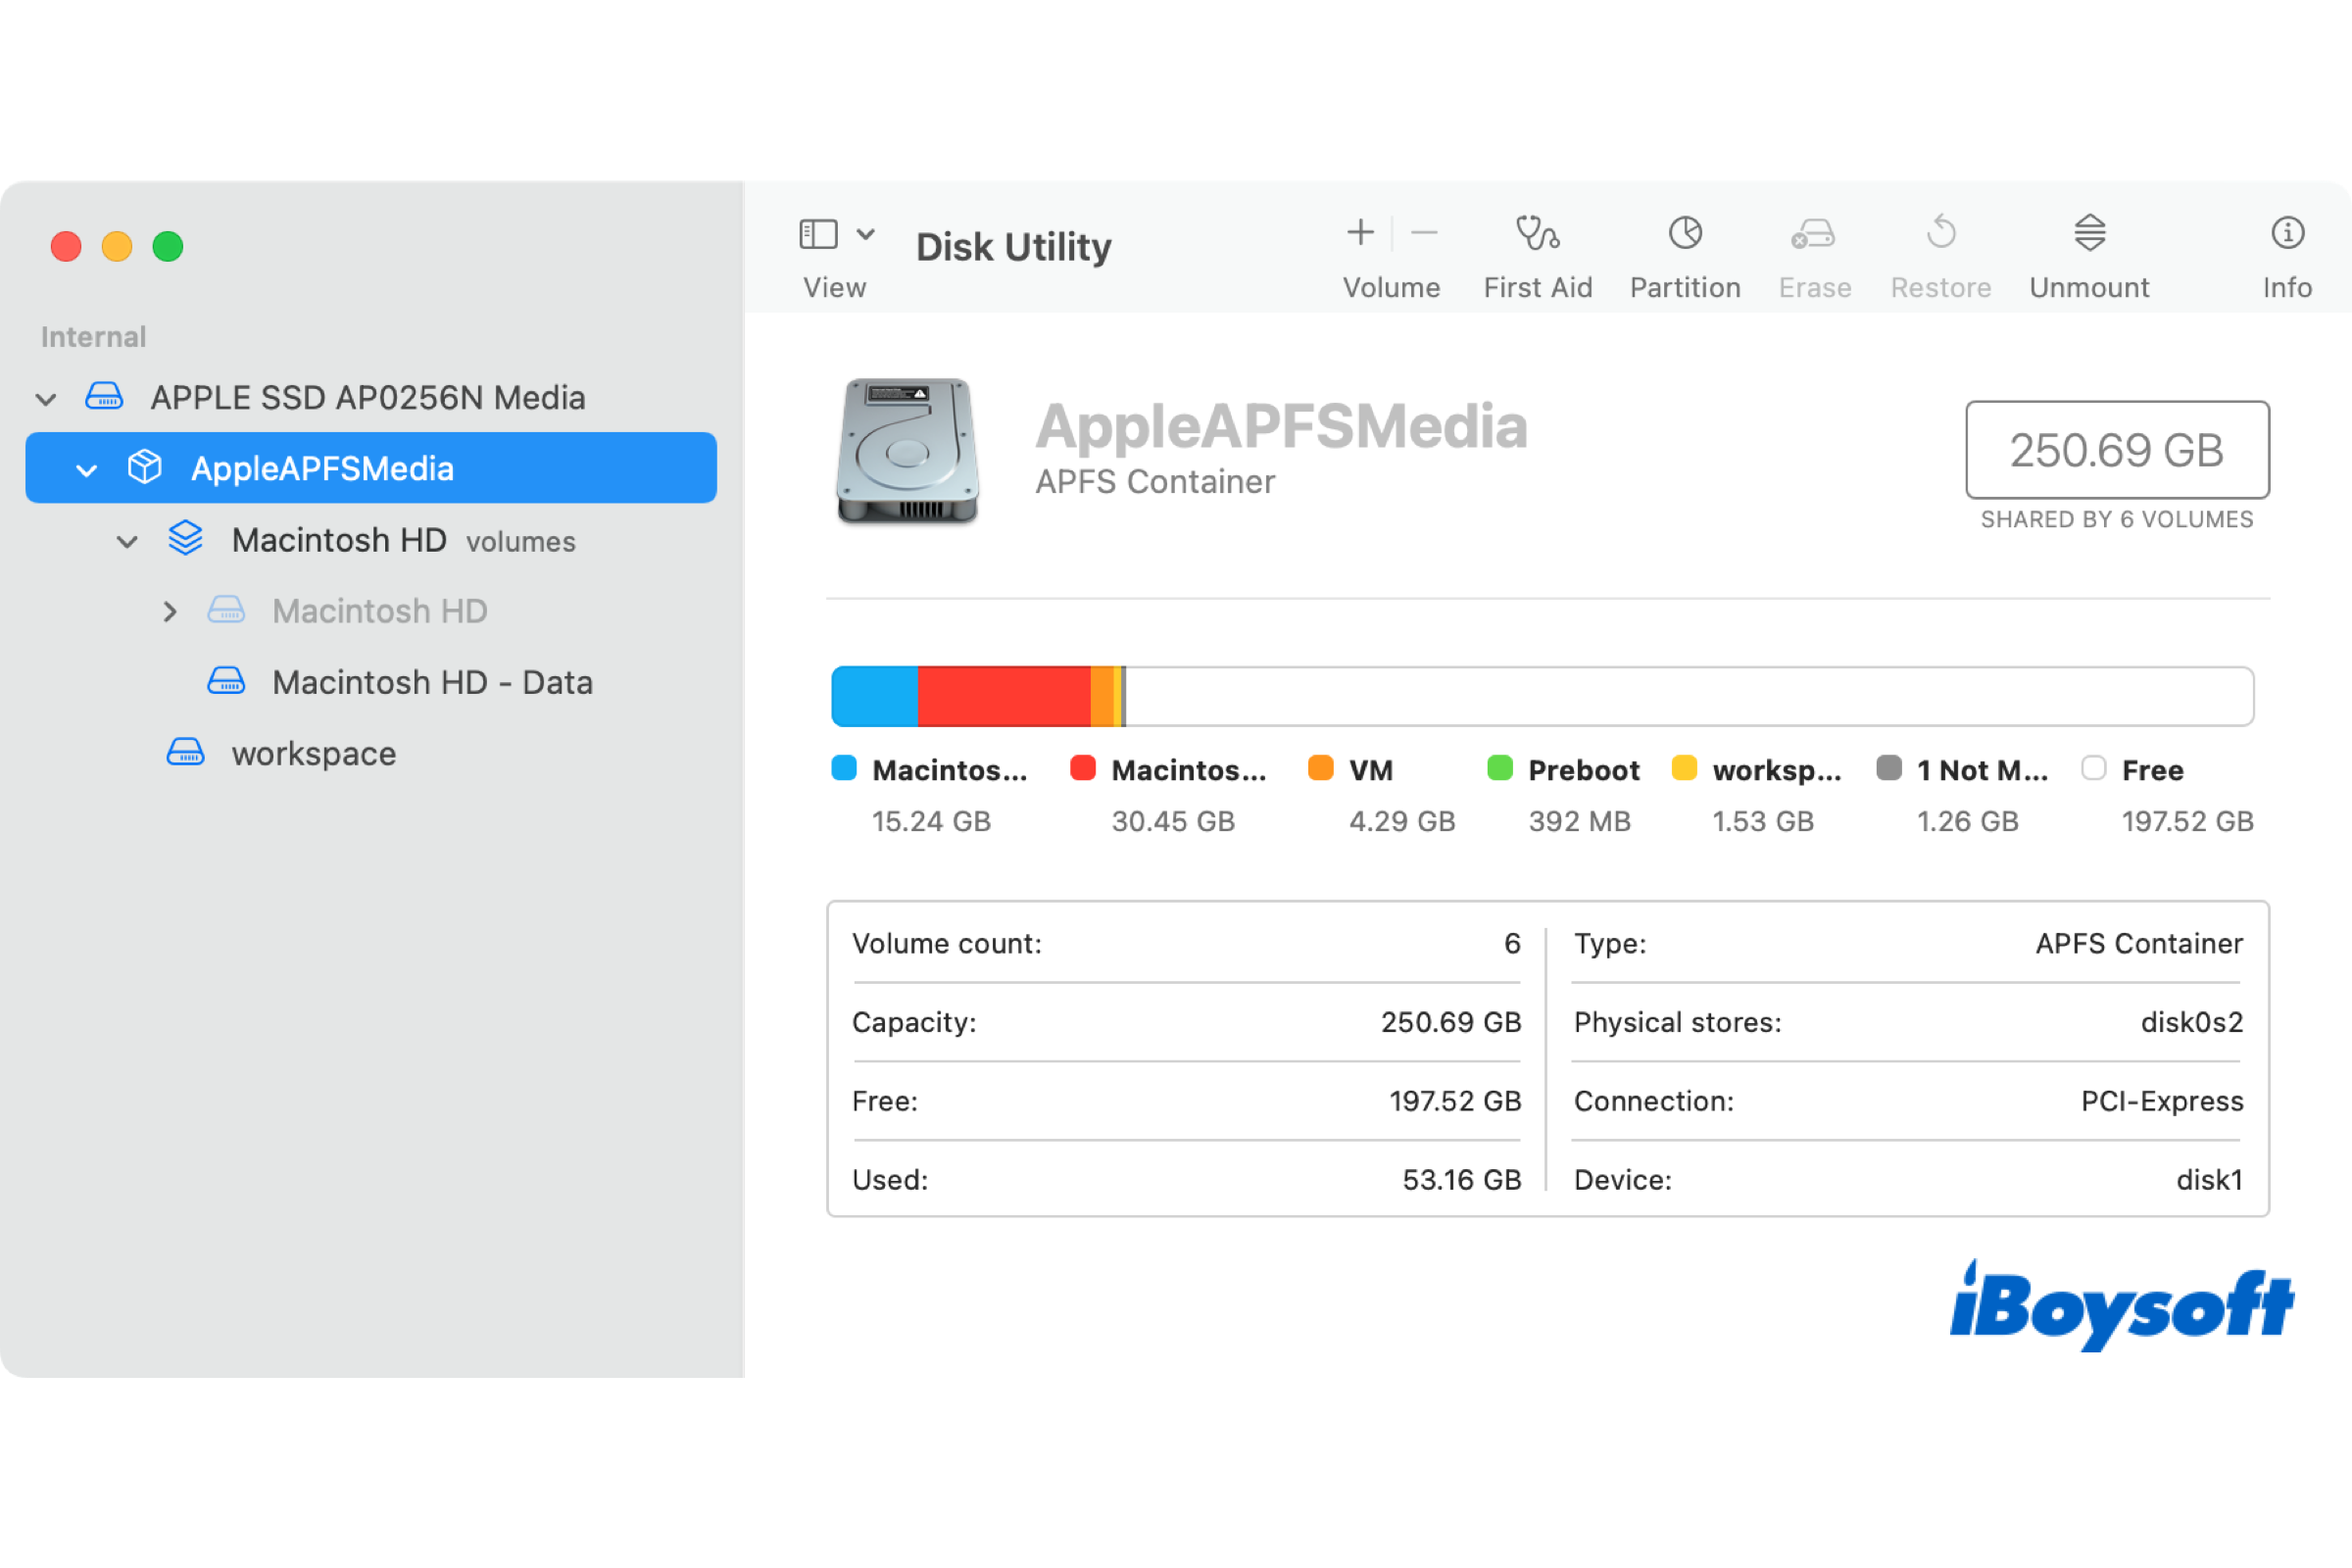
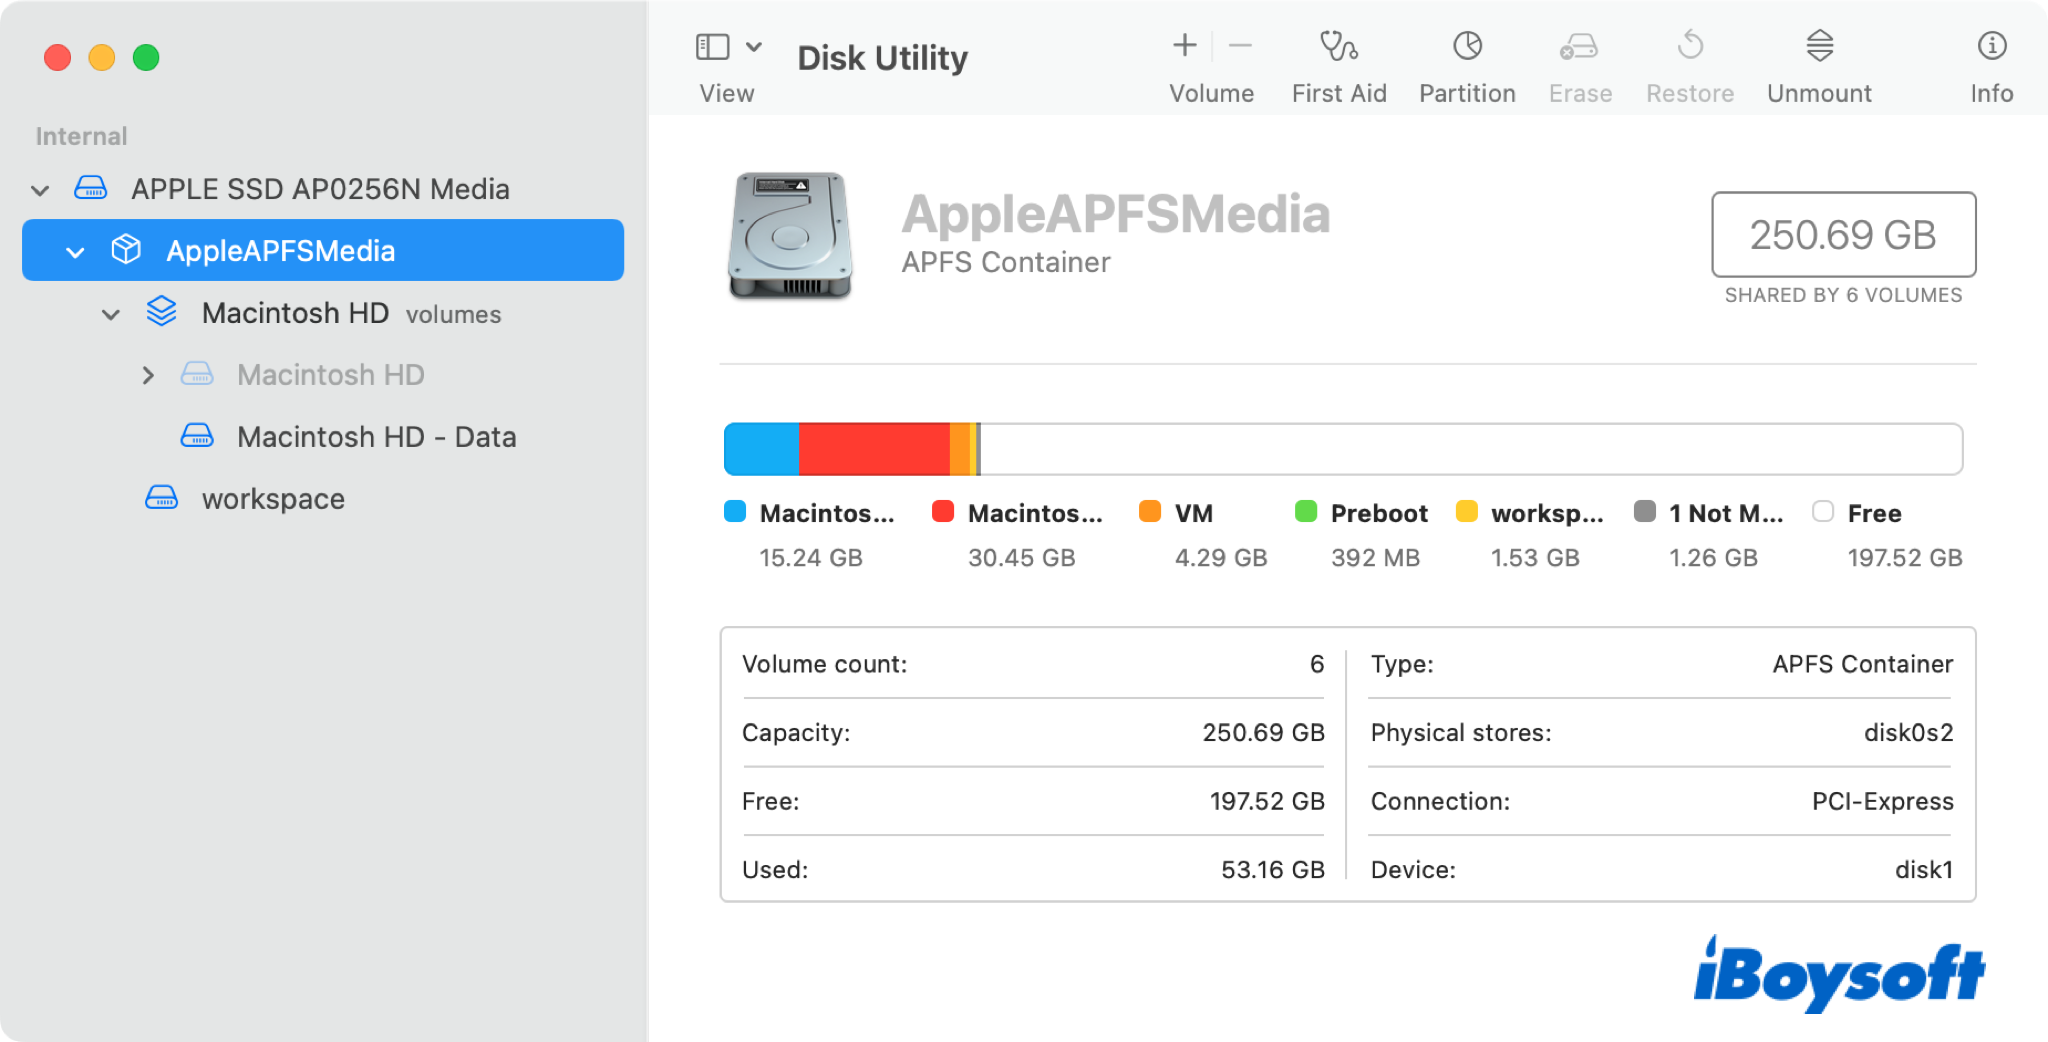
An APFS volume is a self-contained storage area that a computer can read, formatted with the APFS file system, and residents on the APFS container of your hard disk. A physical drive can be divided into several containers, and each APFS container contains one or more APFS volumes. And a volume can be divided into several partitions.
The APFS volume shows as a drive you can see in Finder, and the APFS container can only be seen in Disk Utility.
What happens when you erase APFS volume?
You put your photos, documents, movies, videos, etc., on the APFS volume. When you tap on the erase button and confirm the operation, it will clear all the contents stored on the APFS volume. Then, you will get an empty APFS volume in the container.
Different from deleting APFS volume which deletes kept contents and the volume together from the container, erasing an AFPS volume only removes the contents, you can still store new contents to the erased APFS volume inside the APFS container.
How to erase AFPS volume step by step?
As we have mentioned above, erasing the APFS volume will delete all your files, photos, documents, etc., on the APFS volume. If you have stored important data on it, you should back up Mac before erasing, then you can restore the created backup to your Mac.
You can back up the APFS volume with the built-in Time Machine, move files to an external hard drive, upload files to iCloud, and create a backup using third-party software. Just choose a method you prefer. Then, you can proceed to erase APFS volume without losing data.
And the steps vary depending on whether the volume you attempt to erase is a startup volume(the Macintosh HD by default) or a non-startup volume. The steps below apply to both the internal hard drive of your Mac and the connected external hard drive.
Erase an APFS non-startup volume
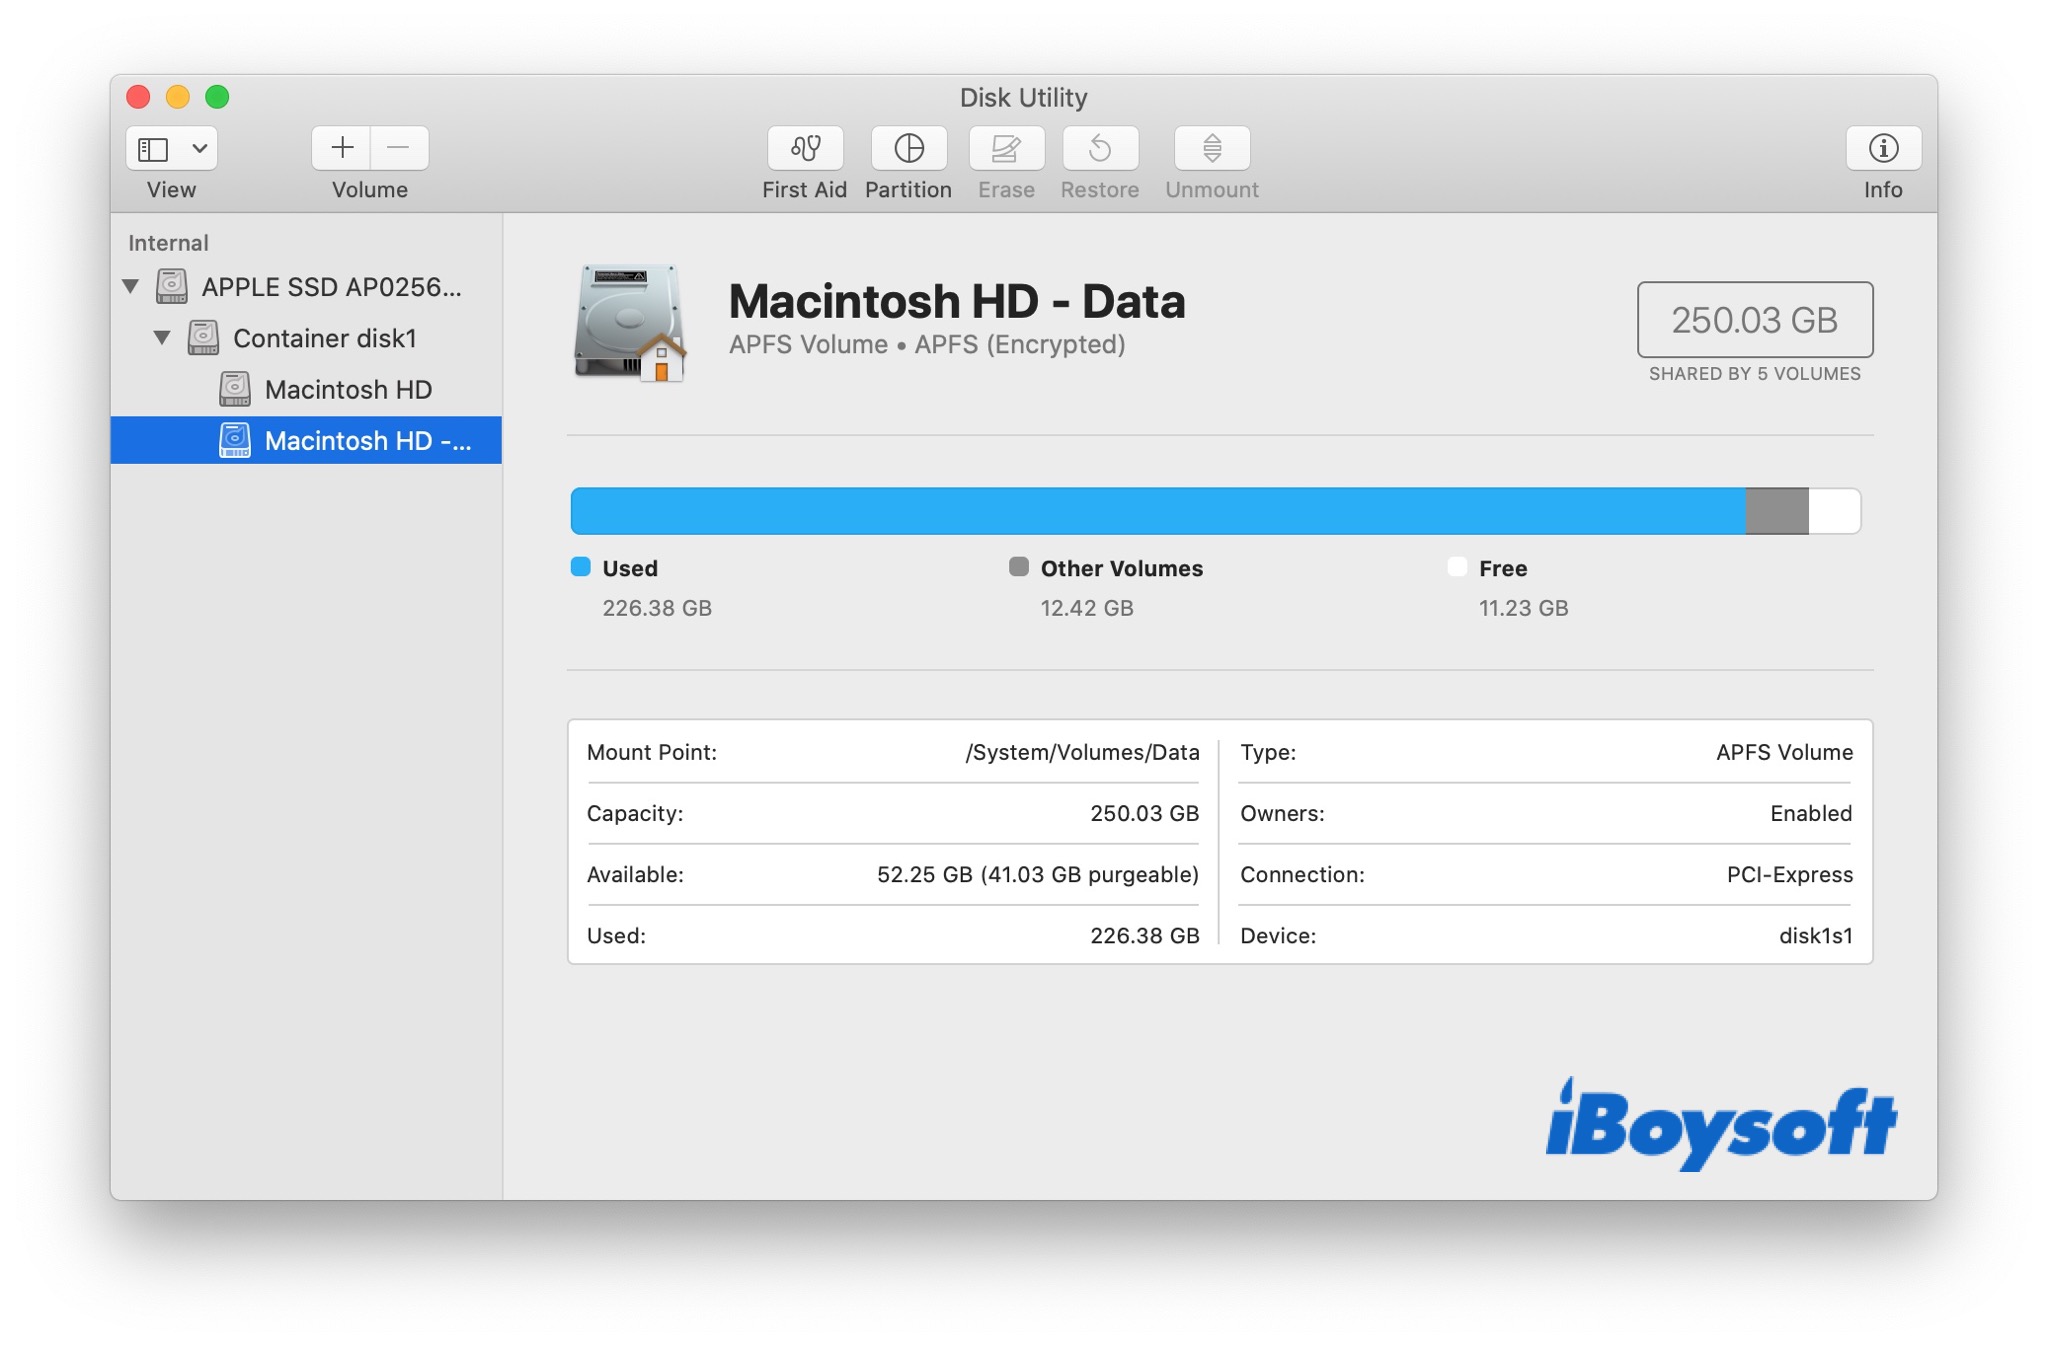
Disk Utility is a macOS disk manager. With it, Mac users can repair hard drives using Disk Utility First Aid, format internal and external hard drives, add and delete APFS volumes, as well as securely erase an APFS volume.
- Navigate to Finder > Applications > Utilities > Disk Utility.
- Double-click Disk Utility to open the tool.
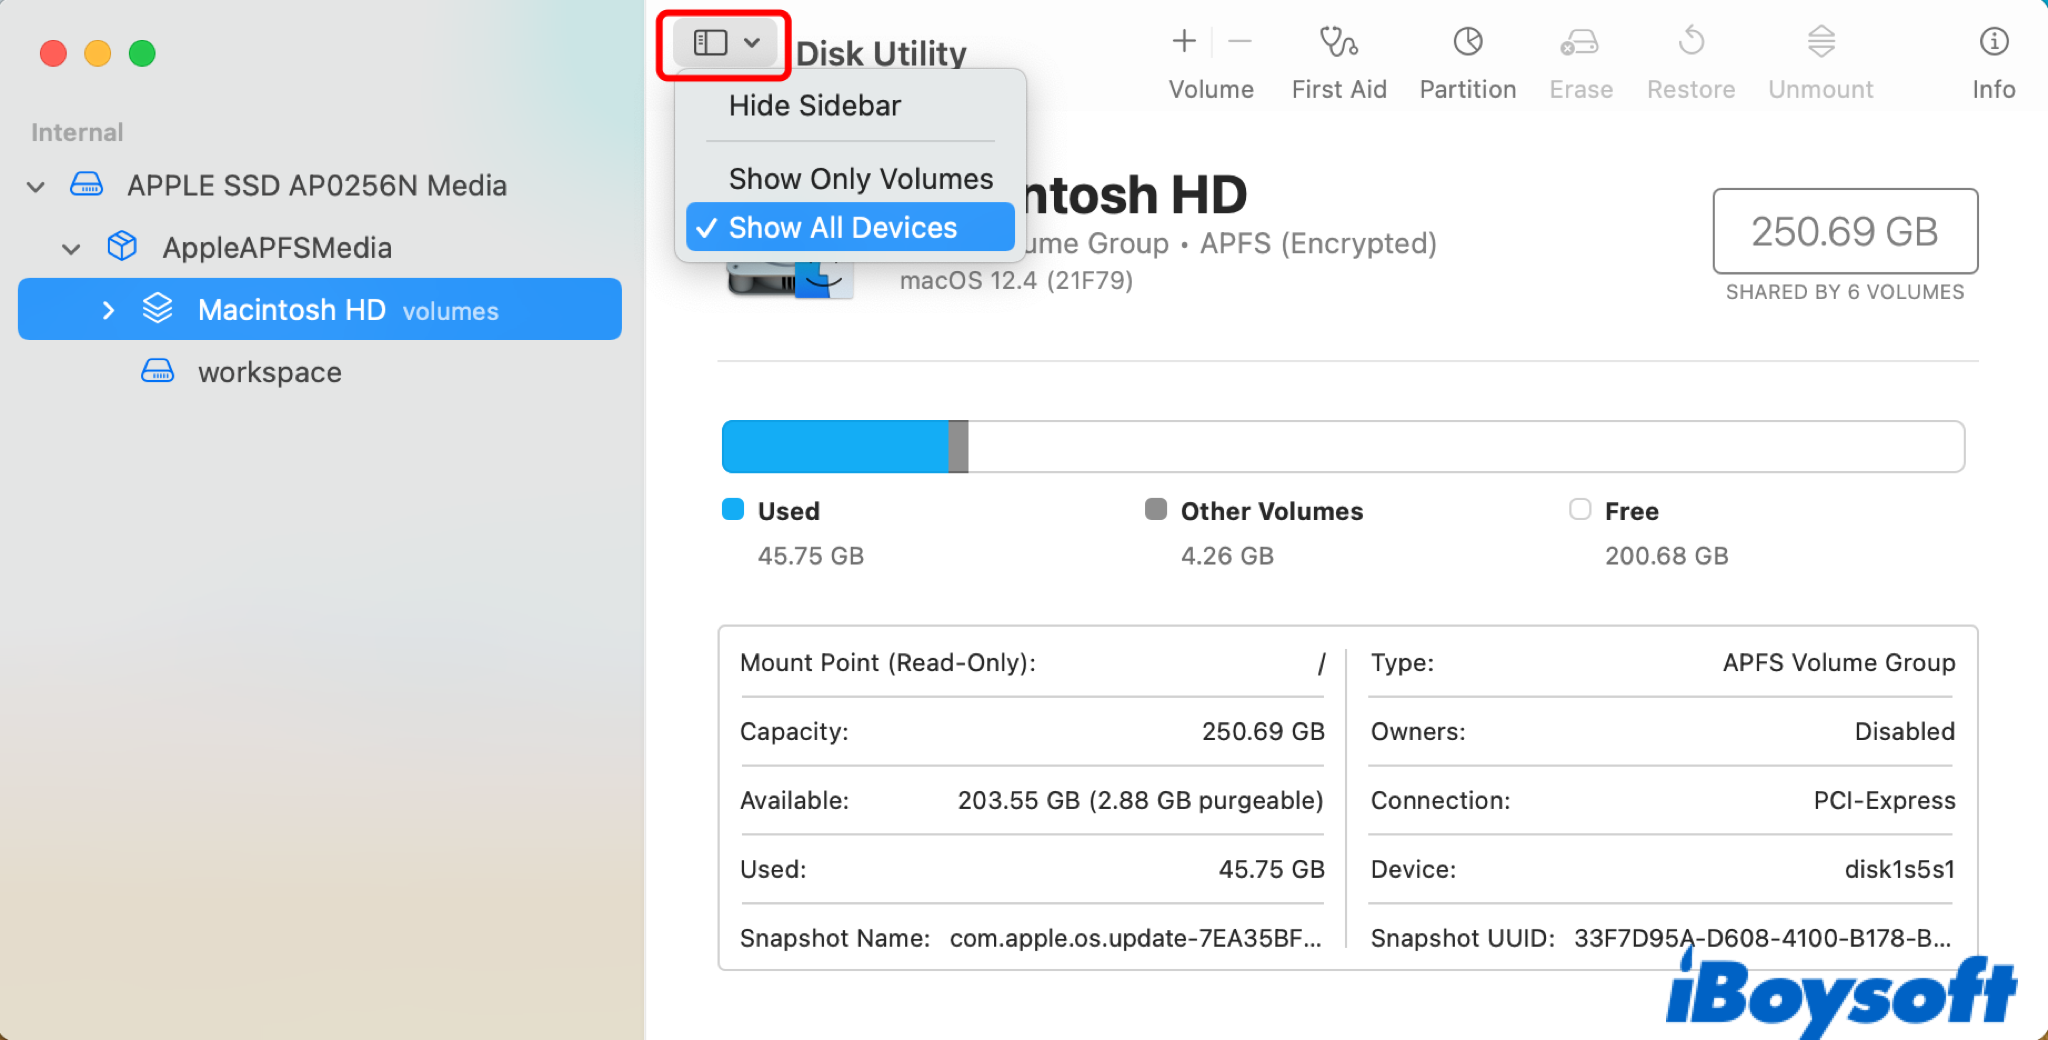
- Tap the View button in the upper left corner and choose Show All Devices to display all detected internal and external hard drives on the left sidebar.
- Locate the AFPS volume you want to erase and select it.
- Click on the Erase button in the toolbar.
- Enter a new name for the volume if necessary.
- To change the format, click the Format pop-up menu, then choose an APFS format, such as APFS, APFS(Encrypted), APFS(Case-sensitive), and APFS(Case-sensitive, Encrypted).
- Click the Erase button to erase the selected APFS volume or click the Erase Volume Group to erase all volumes in the group.
If you erase APFS volume with this post, share it with more people now!
Erase an APFS startup volume
When you select the startup volume in Disk Utility, you find the Erase button greyed out. Because you can only perform operations on a boot disk in macOS Recovery mode. In addition to erasing an APFS startup volume, you can reinstall macOS, restore Mac from Time Machine, access Safari, use Terminal, change Startup Security Utility settings, etc.
Therefore, you need to boot Mac into the macOS Recovery mode so that you can erase an APFS startup volume with Disk Utility there. Follow the steps below to boot an Intel Mac or an Apple Silicon Mac into macOS Recovery.
Boot an Intel Mac into macOS Recovery mode:
- Completely shut down your Mac.
- Press and hold the power button/Touch ID button to turn on Mac.
- Press and hold Command-R keys when Mac starts up until the Apple logo appears.

- The macOS Utilities window shows on the screen.
Boot an Apple Silicon Mac into macOS Recovery mode:
- Completely shut down M1 Mac.
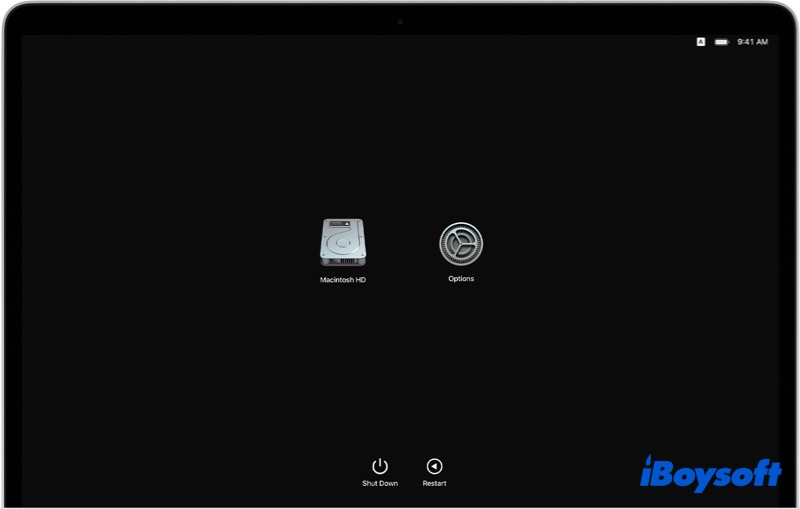
- Press and hold the power button/Touch ID button until you see Loading Startup Options.
- Click Options next to the Mac's Macintosh HD disk and then click Continue.
- Enter the name and password of your admin account to get into the recovery screen.
Steps to erase APFS startup volume in macOS Recovery:
- Open Disk Utility from the macOS Utilities window.
- Select your APFS volume on the left sidebar.
- Click on the Erase button on the toolbar.
- Choose GUID Partition Map and an APFS format on the pop-up menu.
- Enter a new name for your APFS volume.
- Click Erase, then click Done.
- Quit Disk Utility and restart your Mac.
Successfully erase APFS volume in macOS Recovery? Share it with more people!
Recover data from erased APFS volume(optional)
In case you have mistakenly erased an APFS volume, you can try to recover data from that volume with the help of this part.
If you have created a backup for the erased APFS volume, there is no need to worry, you can easily restore the APFS volume with the backup. Unluckily, you have selected the wrong volume to erase without a backup available. then the last resort is to use data recovery software.
Here, we recommend iBoysoft Data Recovery, the professional data recovery software. It helps to recover data from multiple devices such as HDD/SSD, USB flash drives, and SD card, and applies to various situations such as APFS data recovery, deleted file recovery, corrupted drive data recovery, and unreadable drive file recovery.
Recover data from erased APFS volume with iBoysoft Data Recovery:
- Download and install iBoysoft Data Recovery on Mac.
- Launch iBoysoft Data Recovery on your Mac.
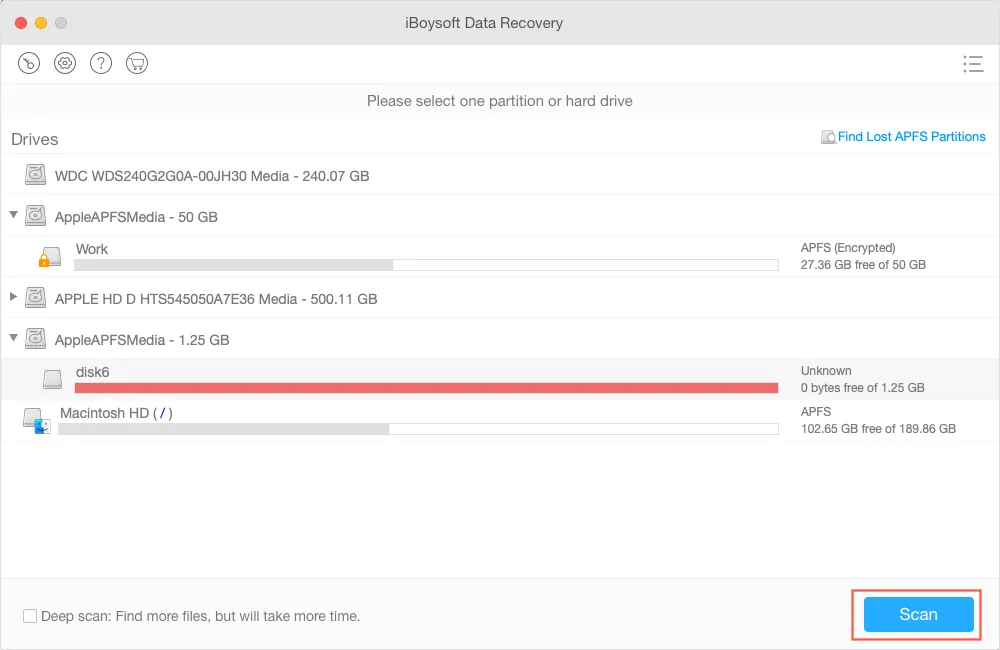
- Choose the erased volume on the main interface.
- Click on the Scan button to search for lost data.
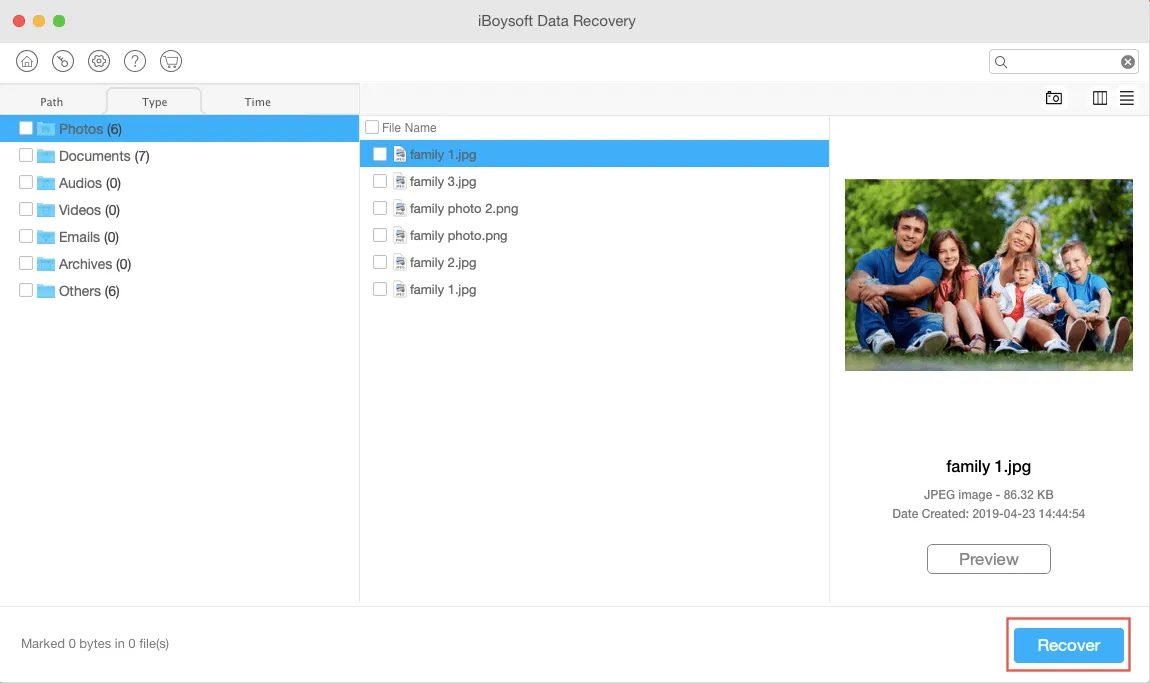
- Preview the scanned results before recovering.
- Select files you want to retrieve and click on the Recover button.
- Choose a new location to store the recovered files.
Can't erase APFS volume on Mac
If Disk Utility won't let you erase hard drives or the APFS volume, there are some different scenarios. Perhaps, the APFS volume, Macintosh HD greyed out in Disk Utility, you can try to manually mount it and repair it to troubleshoot.
Or, you attempt to erase the APFS startup volume and the Erase button greyed out, then you can erase it after booting Mac into macOS Recovery.
What if you can't erase Macintosh HD, the APFS volume, even in macOS Recovery mode, you can try to repair the hard drive with Disk Utilility First Aid, and then try the Internet Recovery mode.
In case you encounter the Erase process has failed error on Mac, you can follow this link to learn how to fix the error.
Think this post is useful? Share it on your social media to help more people!
To sum up
The steps to erase an APFS volume are easy to follow, you should back up the drive if you have stored important files on it. After the erasing completes, you will get an empty volume without any contents inside the container.