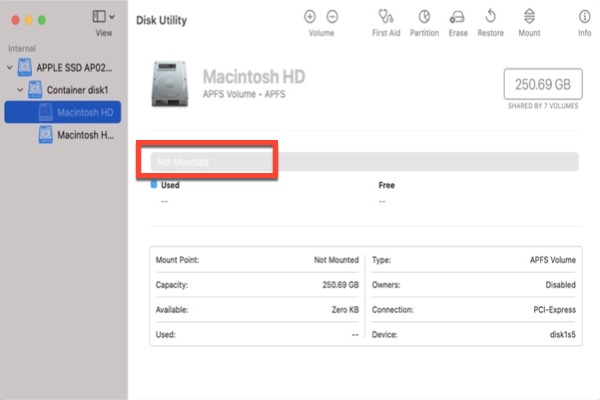
If you enter macOS Recovery Mode and find that Macintosh HD is greyed out in Disk Utility, it means the volume is currently not mounted.
This situation commonly happens after:
- A failed macOS update
- An unexpected shutdown
- System crash
- Boot failure into macOS
This usually indicates a logical mounting issue rather than physical disk failure, though hardware problems cannot be completely ruled out. Your data is typically still on the disk but inaccessible until the volume mounts.
Note: If your Mac starts normally and you see a greyed-out “Macintosh HD” labeled System Snapshot mounted in Disk Utility, there's no need to worry.
This is expected on modern macOS versions — it means your system is running from a sealed, read-only snapshot. Since that snapshot is active and can't be modified, Disk Utility displays it as greyed out.
If First Aid can repair or mount it, the risk is low; if it cannot be mounted, the risk increases, so data backup or recovery should come before erasing. Erasing is only necessary if repairs fail and the data has already been secured.
The key is to follow a safe repair order even when you see a Mac black screen: check whether the disk can mount, verify encryption status, run repair tools, and confirm hardware health before making irreversible decisions.
What “Greyed Out” Really Means (Before You Panic)
When Macintosh HD appears greyed out in Disk Utility, it usually points to one of three situations:
1. Volume Not Automatically Mounted: macOS sees the disk but cannot mount the file system. Until it mounts, your files are inaccessible. This is the most common reason and is often fixable.
2. APFS or File System Issues: Corruption in the APFS container, system/data volume group, or metadata can block the volume from mounting. This is usually a logical error and can often be repaired with First Aid.
3. Possible Hardware Issue: Rarely, the drive itself may be failing, such as an SSD or HDD problem. This can prevent mounting even if the file system is intact. Check S.M.A.R.T status and disk behavior to rule out hardware faults.
Note: A greyed-out disk does not automatically mean data loss. It may still be fully recoverable once the volume mounts or after running repair tools.
Safe Fix Path (Follow in Order to Protect Data)
Proceed step by step. Skipping directly to erasing increases the risk of permanent data loss.
Try to Mount Macintosh HD Manually
- Enter macOS Recovery mode
- Apple silicon: Hold power → Options → Continue
Intel: Command + R at startup - Open Disk Utility → Select Macintosh HD → Click Mount (If volume is FileVault, enter login password)
If Macintosh HD can't be mounted, there must be some corruption in the startup volume you need to repair. Back up data before any further repairing or erasing.
Check S.M.A.R.T Status (Hardware Health)
S.M.A.R.T (Self-Monitoring, Analysis, and Reporting Technology) monitors drive health and warns of potential hardware problems before data is lost.
- In Disk Utility, select the top-level physical disk (not just the volume).
- Look at the S.M.A.R.T. Status at the bottom.
Verified → Disk is healthy. You can continue with the repair.
Failing → Disk may be damaged. Stop using it and back up data immediately; software repair won't fix hardware issues.
Not Supported → macOS cannot read S.M.A.R.T info. This is normal for some external drives and NVMe SSDs. Continue evaluating disk behavior and mounting ability.
If SMART normal - Run First Aid
- Select the volume.
- Click First Aid.
If First Aid completes successfully, restart your Mac and check whether it boots normally.
If First Aid fails repeatedly, and Disk Utility can't repair a disk, the file system may be severely corrupted; in that case, recover your data before attempting to erase or reinstall macOS.
If the disk cannot be mounted or shows serious errors – Secure or recover data
If the disk cannot be mounted or First Aid fails, do not erase it immediately. Repeated restarts or premature formatting may cause permanent data loss, especially on modern SSDs with TRIM. Besides, you'd better recover data if you encounter grayed-out folders/files on a Mac.
The first priority is to recover your important files. iBoysoft Data Recovery for Mac is a reliable option that can scan greyed-out or unbootable volumes. From my text, I was able to recover most files before I reinstalled macOS or erased the disk, helping ensure data remained safe.
Follow the steps below carefully (For macOS 10.12 or above):
- Boot into Recovery Mode
- Open Terminal → run iBoysoft launch commandsh <(curl http://boot.iboysoft.com/boot.sh)

- Select volume → Scan → Preview → Recover to external drive
Always recover your data before attempting to erase or reinstall macOS.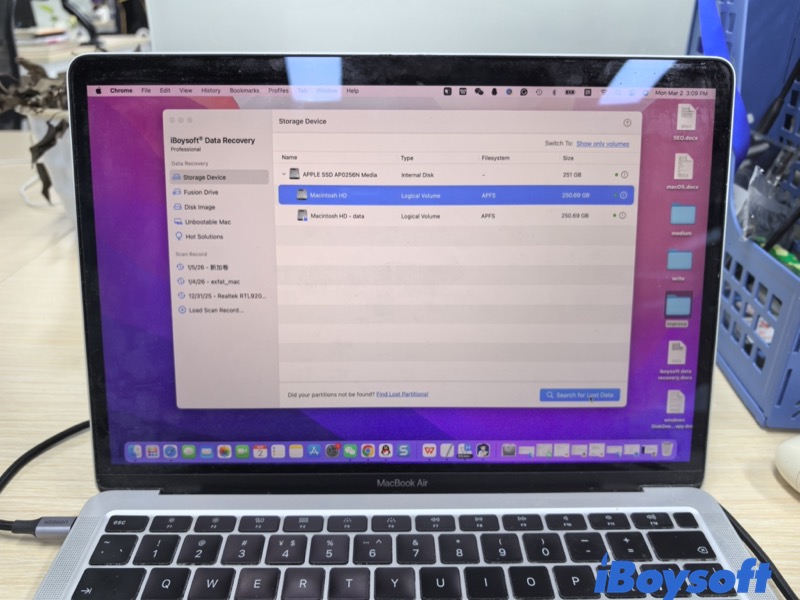
H3: Erase and Reinstall macOS (Last Resort)
Only consider erasing the disk if all repair attempts fail, your Mac still cannot boot, and your important data has been safely backed up or recovered. Also, make sure the disk's hardware is healthy.
To erase the disk:
- In Disk Utility, select the APFS container or the top-level physical disk.
Tip: Choose the volume that contains both System and Data, usually labeled as the 'Macintosh HD' container. - Choose Erase and reformat as APFS.
- Reinstall macOS from Recovery Mode.
If your Mac has macOS 10.15 or above, you need to format the Mac startup disk instead of the Macintosh HD volume.
This will restore the system structure but will remove all existing data, so double-check that backups are complete before proceeding.
When to Seek Professional Help
You need to go to the local Apple store to seek a professional diagnosis if:
- S.M.A.R.T. status shows Failing
- The disk makes unusual clicking or grinding noises (HDD models)
- The Mac overheats and crashes repeatedly
- The internal disk does not appear, even under Show All Devices
Physical drive damage requires hardware-level repair. Continued use may worsen data loss.
Quick Answer
- Greyed out = volume not mounted
- Usually, a logical issue, not a hardware failure
- Data often intact
- Follow safe repair order: mount → check S.M.A.R.T → First Aid → recover → erase last
FAQs
- Q1.How to fix external hard drive greyed out in Disk Utility?
-
A
If an external drive appears greyed out, it usually means the drive is not mounted. First, try to mount it manually in Disk Utility. If that fails, run First Aid to repair the file system. If the drive still cannot be accessed, recover important data before erasing or reformatting it.
- Q 2.Why is Macintosh HD greyed out in Disk Utility?
-
A
A greyed-out Macintosh HD means the volume is not mounted. Common causes include system crashes, APFS container errors, FileVault encryption, or a failed macOS update.
Most of the time, it's a logical issue, and your data is still intact. Follow a safe repair order: try mounting, check hardware health, run First Aid, and recover data if needed.