Mac computers have always been popular due to their fancy appearance and easy-to-use macOS. The only drawback of the Mac or MacBook should be its limited storage. Instead of buying a Mac laptop with larger storage space, most Mac users choose to use an external hard drive on Mac as the main to extend storage by transferring files from Mac to it.
If you're not so familiar with how to use an external hard drive on a Mac like setting up a Seagate external hard drive on a Mac or having some problems in finding and accessing external drives on a Mac, then this post is right for you. Just read on.
How to use an external hard drive on a Mac from the 5 aspects?
| How to use | Specific operations | Difficulty level |
| How to connect the drive | Connect > Double-click it on the desktop | Easy |
| How to format the drive | Connect > Disk Utility > Erase | Medium |
| How to partition the drive | Connect > Disk Utility > Partition | Medium |
| Fix disk not showing up on Mac | Change Finder settings/ Run First Aid | Medium |
| How to transfer files by disk | Connect > Copy/Cut files > Paste/Move to destination | Easy |
How to connect an external hard drive to Mac computer
No matter you're using a totally new disk or an old one, to use the external disk on Mac computers, the first thing you should do is to connect it to Mac. Here's how to do it:
Step 1: Plug the external hard drive into the Mac
Most hard drives connect via USB, so you'll just need to plug the USB cable into an idle port on your Mac. You'll typically find at least one USB port along each side of on your Mac or MacBook.
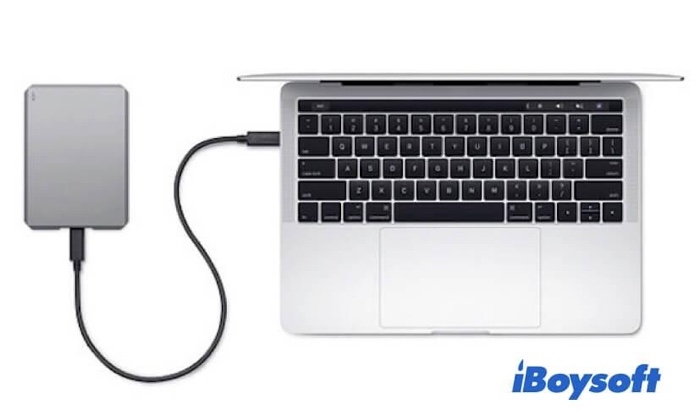
Some external drives for Mac may come with a Thunderbolt instead. If this is the case, you'll need to plug it into the Thunderbolt port or get an adapter if you don't have the proper port on your Mac.
Step 2: Find the external drive on the Mac desktop
If your disk is well-formatted and connected properly, it will appear on your Mac's desktop as a drive with a USB or Thunderbolt icon.
Step 3: Access the external drive
Now double-click the drive on your desktop or select it from the Finder sidebar to access it. You can now transfer files between the external disk and Mac's internal hard drive.
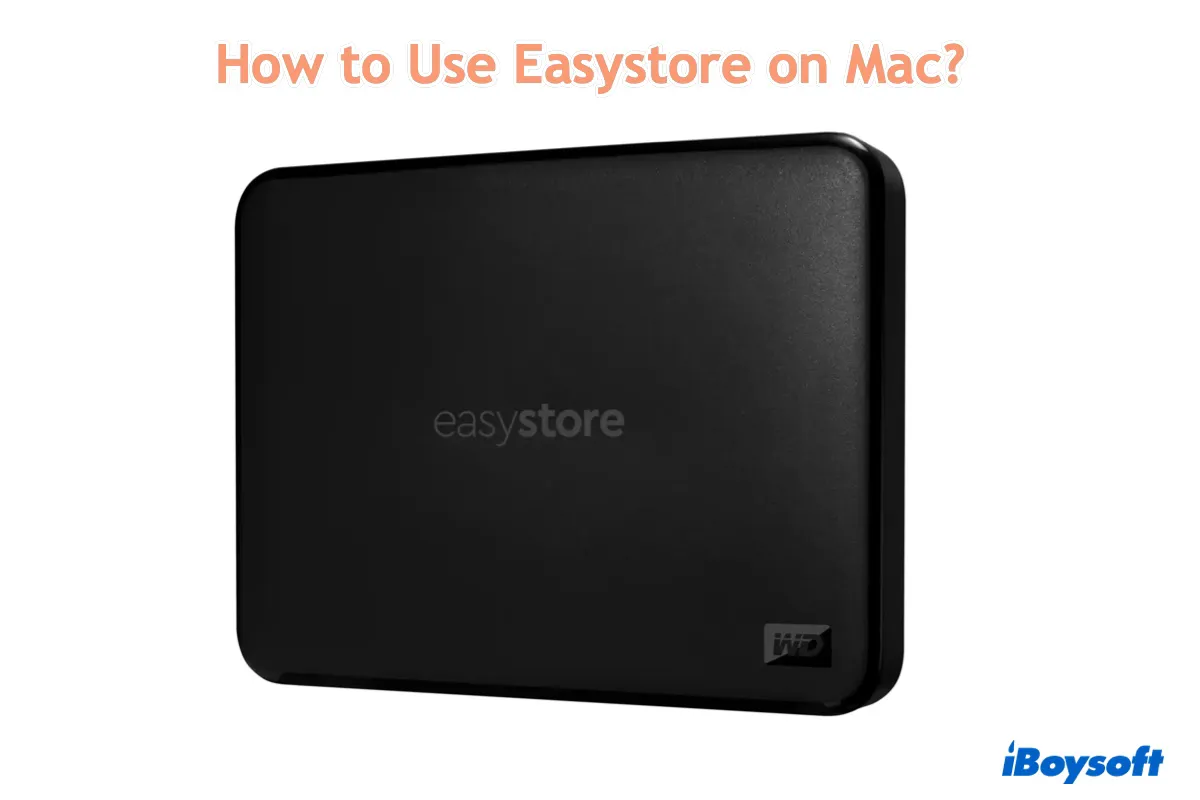
If you have a WD easystore external drive, you can find more details about its usage on Mac in this tutorial. It explains how to format an easystore for Mac or Mac and PC and what to do if an easystore drive is not working on Mac.
If you think this post is helpful, please share it with more people.
How to format an external hard drive on Mac
Most external hard drives in the market are pre-formatted as Microsoft's NTFS filesystem to work with Windows PC. If your external disk is an NTFS drive, you'll be able to read from it on Mac but you won't be able to write to it. In this case, you might have to format the drive into a macOS-compatible file system before you can use it.
Warning: If you have any important files on this disk already, be sure to back up all of them since formatting will erase all the data in it.
Here's how to format an external hard drive on Mac with Disk Utility:
- Connect the external hard drive to your Mac. (If they're connected already, ignore this step).
- Press the Command + S keys to launch Spotlight Search. Type in Disk Utility, and click the first option. This will open the Disk Utility app, where you will find all the internal and external hard drives that are connected to your Mac.
- Then click View in the top-left corner of the window and select Show All Devices.
- Select the external hard drive you want to format. You can easily find it on the left-hand side of the screen under External.
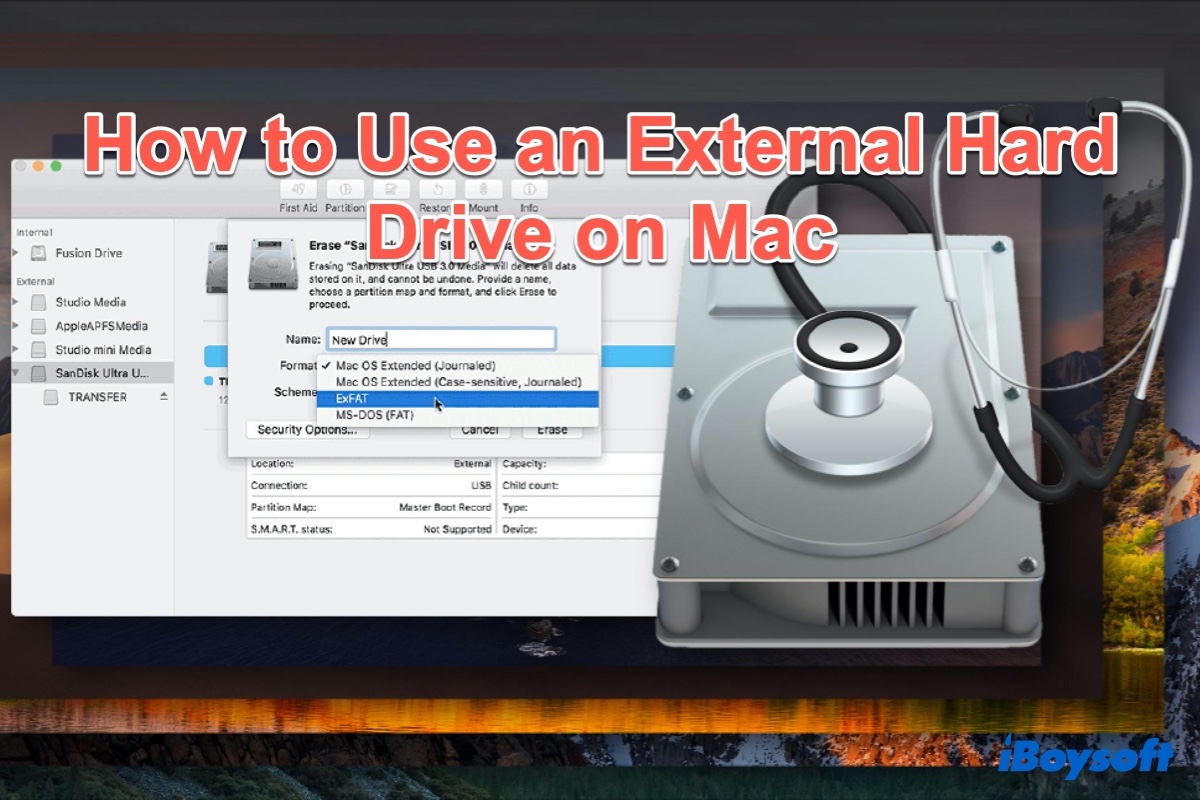
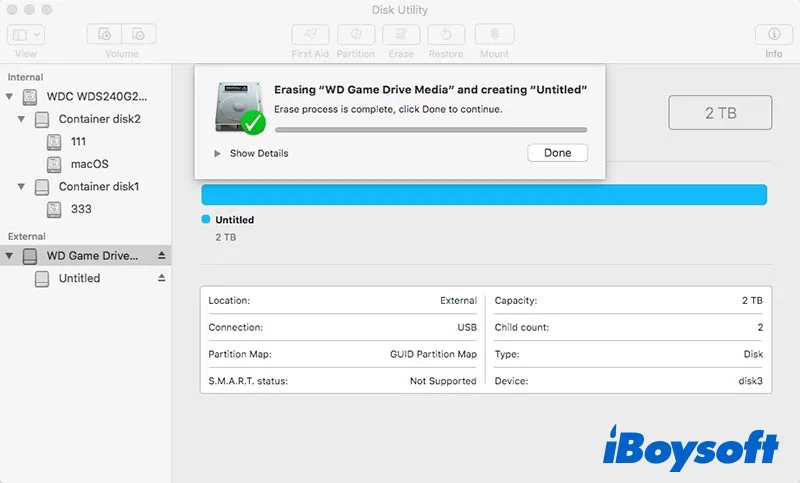
- On the top center of the Disk Utility window, choose Erase. A small window will pop up showing erasing the drive will delete all data stored on it and cannot be undone.
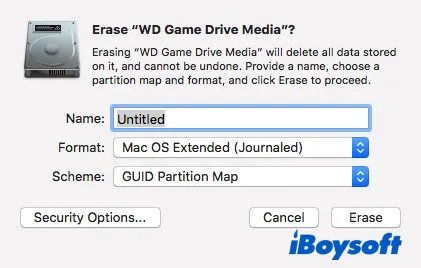
- Edit a name and select a format, and scheme for your external hard drive. You can use whatever name you like for the disk, and you should choose GUID Partition Map for the Scheme in most cases. About the file system format, choose from the following:
Mac OS Extended (Journaled) is the best option for most Mac users since it is compatible with all Mac models.
APFS (Apple File System) is only for newer Macs running macOS 10.13 or later.
exFAT is a Mac and Windows compatible drive format.
MS-DOS (FAT) is also compatible with Mac and PC, but you can only transfer files smaller than 4GB. - After finishing the setting, click Erase again. Select Done when erasing process is finished.
How to partition an external hard drive on Mac
If you want to use your external hard drive both on Mac and Windows PC, you can partition the drive into two volumes. Here's how to do that:
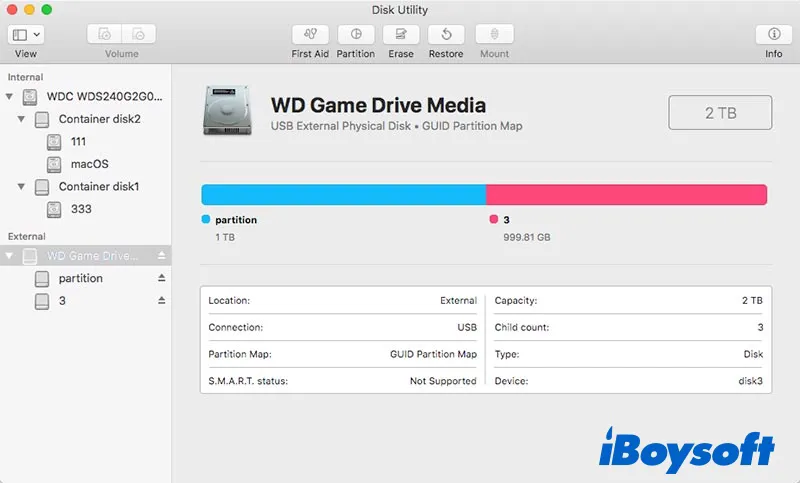
- Open Disk Utility, click View > Show All Devices.
- Select the external drive that you want to partition. In the top menu, select Partition.
- Then click the plus sign (+) at the bottom of the pie chart to create a new partition. Choose a name, format, and size for the newly added partition. If you want to change the size of each of the partitions, drag the white dot at the edge of the circle.
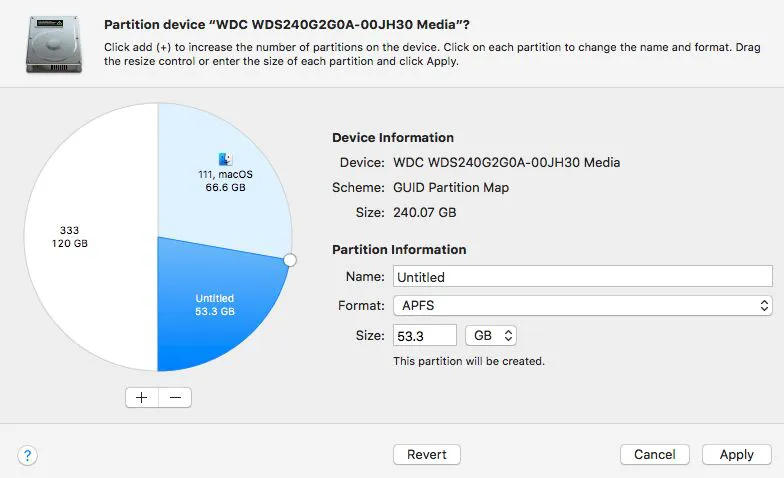
- Finally, click Apply.
Actually, to use an external drive on Mac with better control, you can use iBoysoft DiskGeeker to help you. iBoysoft DiskGeeker is an all-around disk management tool designed for Mac users to support cross-platform disk usage, enhance data security, optimize system performance, and improve work efficiency.
In summary, you can use iBoysoft DiskGeeker to access files on an external drive, format a drive, or partition a drive. Besides, it's able to fully read-write to BitLocker encrypted drives and NTFS drives, encrypt disks using BitLocker or FileVault, map network drives, check and repair disk errors, clone disks, and clean drives.
We'd be appreciated it if you share this article with more people.
How to fix an external hard drive that won't show up on a Mac
Normally, after you connected the external disk successfully to your Mac, you'll see it on Desktop, Mac Finder, or Disk Utility and then use it at ease. But what if you can't see your hard drive on Mac? Under this situation, you can't access external hard drive, and any read and write actions are not allowed on it.
Fortunately, here are some useful solutions to the external hard drive not showing up on Mac according to different scenarios, just read on.
Before starting the fix, check the connection between your Mac and the external drive first. Try to plug the drive into a different port on Mac or into another Mac or PC. You can also try a different cable or change a USB-C or Thunderbolt adapter. If the connection is not the problem, go ahead to try the below fixes.
Fix external hard drive not showing up on Mac desktop
Mac desktop won't show the external drive icon if you haven't set it. To show your external disk on the Mac desktop, try the following steps:
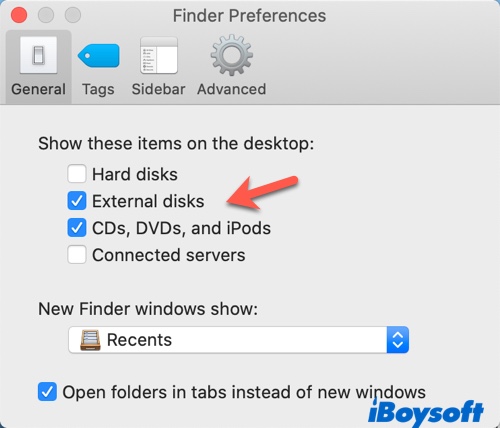
- Open the Finder from Dock.
- Click on Finder in the top menu bar.
- Select Preferences, switch to General tab and check the box labeled External disks.
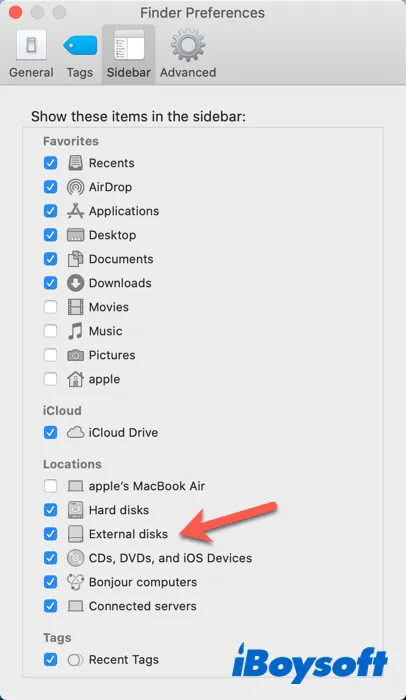
Fix external hard drive not showing up in Mac Finder sidebar
If your case is the external hard disk not showing up in Mac Finder sidebar, use the below steps to fix it:
- Still Launch the Finder from Dock.
- Select Finder from the top menu bar.
- Select Preferences from the drop-down menu, switch to Sidebar tab and check the box labeled External disks under Locations.
Fix external hard drive not showing up in Disk Utility
Disk Utility, a macOS built-in utility, can show up all the connected external disks on your Mac, even if the external hard drives have some minor problems. But if you can't see the external hard drive in Disk Utility, the below solutions should be helpful.
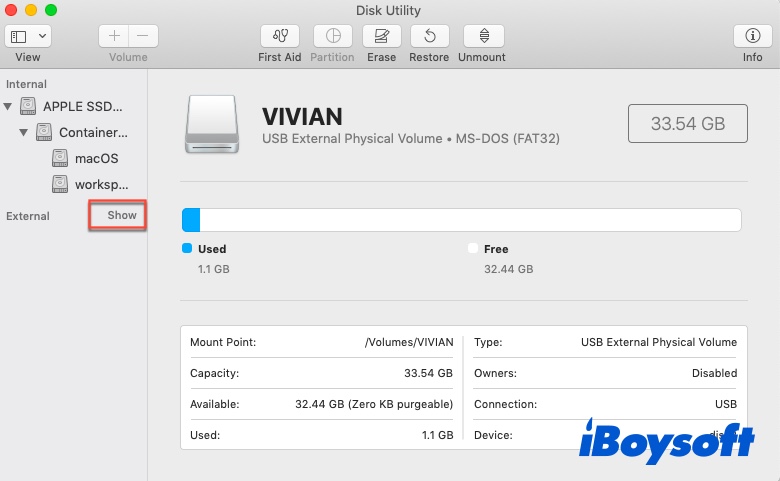
Solution 1: Manually show external hard drive in Disk Utility
Sometimes, the reason why the external hard drive not showing up in Disk Utility is the external disk info has been folded by Disk Utility. To make it appear, try these steps:
- Open Launchpad > Other > Disk Utility after you connect the external hard drive to your Mac.
- Put your mouse pointer on the External option. When seeing the Show option, simply click on it.
Solution 2: Force quit fsck process in Activity Monitor
If the external hard drive doesn't show up in Disk Utility still, check whether its hardware information has been recognized by macOS or not: Go to Applications > Utilities > System Information > USB. And then try to find the external hard drive information.
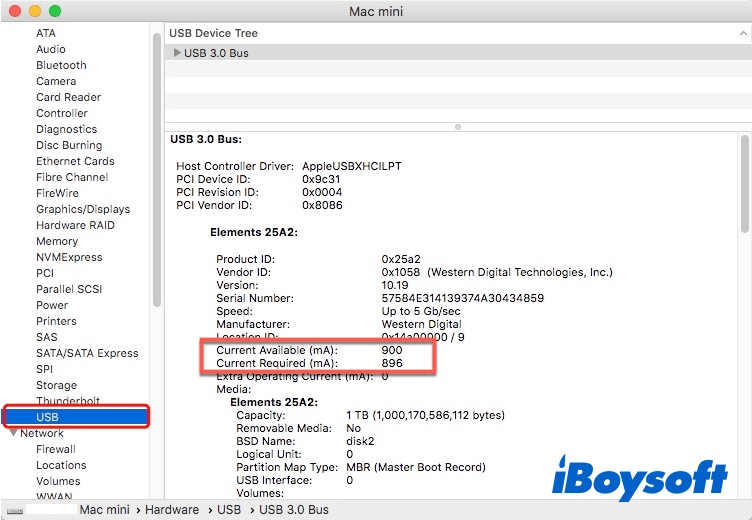
If the external hard drive shows up in the System Information but not in Disk Utility, maybe macOS is repairing it. Go and check it in Activity Monitor.
- Open Finder > Applications > Utilities, launch Activity Monitor.
- Type and search if there is any process named "fsck_hfs" or something similar. (If your external hard drive is exFAT formatted, then it should be "fsck_exfat".)
- Select that task and click the X button at the top left to force quit it. Then the external hard drive should show up on the desktop of your Mac.
Solution 3: Check for software updates
The outdated software on Mac could also results in external hard drive not showing up. In this case, you need to check for system updates and if macOS software updates available, use below steps to update macOS:
- Right-click the Apple menu at the top right, and then choose System Preferences.
- Find and open Software Update to check for new macOS updates.
- Back up your important files on your Mac and follow the wizard to update your operating system.
Now check if the external disk is showing up in Disk Utility. If the external hard drive shows up in Disk Utility but is greyed out, it may have been corrupted. Use Disk Utility First Aid to repair disk:
- Open Disk Utility.
- Choose the greyed-out external disk from the left sidebar.
- Click the First Aid button on the top and then choose Run to confirm this operation.
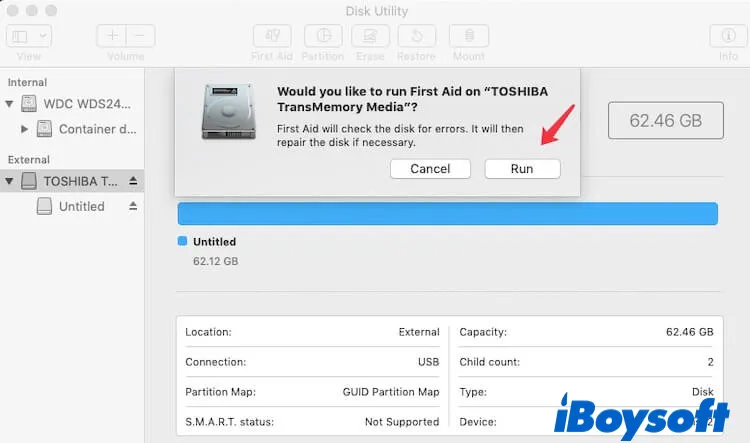
- When the repairing process is finished, select the disk again and click Mount from the top menu bar to mount the disk on Mac.
How to transfer files from Mac to external hard drive
Now, if your external hard drive is well-connected to Mac and formatted as the macOS-compatible file system, meanwhile, can be accessed without any problem, you can transfer files between Mac and the external hard drive seamlessly.
Here's how to transfer files from Mac to external hard drive:
- Click the Finder icon on the Dock to open it.
- Select the folders or files you want to transfer to your external hard drive. Hold down the Command button to select multiple items simultaneously.
- Press Command + N to open a second Finder window and then select your external hard drive from the list of devices.
- Browse to the folder on your external drive where you want to store the files or folders and then drag and drop folders and files from your Mac's Finder window into the external hard drive's window. Or you can copy the selected files/folders from Mac Finder window and then paste them to the external hard drive's window.
- A status bar appears on your screen indicating progress. Wait until the full transfer completes. Click the Eject button to safely remove the hard drive when you're finished.
If you want to transfer file from external hard drive to Mac, the steps are similar. But you need to select or copy the files/folders from the external disk first and then drag and drop them or paste them to the Mac internal disk.
If you cannot edit an external hard drive on your Mac, re-check if it is an NTFS one.
It's very kind of you if you can post this article on your social media to help more people.
FAQs about how to use an external hard drive on Mac
- QWhy can't I use my external hard drive on my Mac?
-
A
Many reasons could cause you can't use external hard drive on Mac, namely, they're:
The connection between external disk and your Mac fails.
The Mac Finder settings is incorrect.
The macOS is outdated and can't recognize your disk.
Your external disk is not well-formatted.
Your external disk has some software or hardware issues.
- QHow do I make my external hard drive compatible with Mac and PC?
-
A
To make your external hard disk compatible with both Mac and PC, you can format its file system as exFAT/FAT. Or you can create two separate partitions of HFS+ and NTFS if you prefer.