WD easystore drives are generally considered a popular choice for external storage needs. But if you're new to them, you may want to learn how to set up a WD easystore external hard drive on your Mac. Or, if you have been using one for a while but it suddenly stopped working, you'll want to find the solutions.
This guide will elaborate on issues you may encounter when working with an easystore drive on your Mac and help you use it efficiently.
How to use WD easystore on Mac?
Here are the steps to use a WD easystore external hard drive on a MacBook Air/Pro or desktop Mac:
| Step 1: Plug the WD easystore into your Mac. | Use a USB A to USB C adapter if your Mac doesn't have USB A ports |
| Step 2: Open the WD easystore on your Mac. | Double-click its disk icon on the desktop |
| Step 3: Use the WD easystore on your Mac. | Read/write to it without formatting via iBoysoft NTFS for Mac or format it |
To transfer files from your Mac to WD easystore immediately, get iBoysoft NTFS for Mac!
Step 1: Plug the WD easystore into your Mac.
If you have an easystore USB, simply insert it into the USB port of your Mac. If you have an easystore portable hard drive, an SSD, or a desktop HDD, you can connect it to your Mac with the provided USB 3.0 cable.

Note that you'll need an adapter if your Mac has only USB C ports, as the cable has a USB A plug and the USB stick has a USB A connector.
Step 2: Open the WD easystore on your Mac.
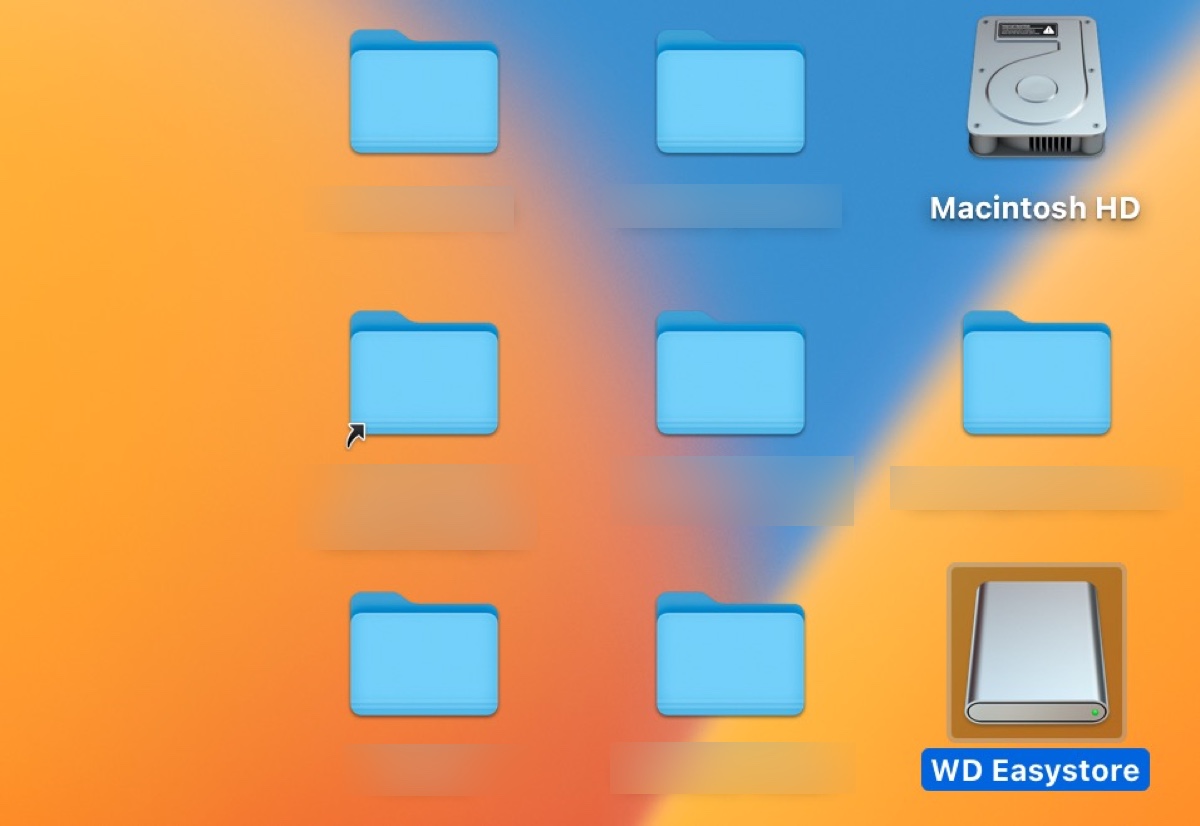
After your Mac recognizes the easystore drive, it should show up on your Mac's desktop and in Finder's left sidebar. You can double-click its disk icon on the desktop or click it from the sidebar to open it.
If it's not showing up on your Mac, check the following Finder settings.
To make your easystore external drive appear on the desktop and in Finder's sidebar:
- Open a Finder window.
- Click Finder > Settings or Preferences from the top-left menu bar.
- In the General tab, ensure "External disks" is ticked.
- In the Sidebar tab, ensure "External disks" is selected.
If your easystore is new, you'll see two files inside called "Install Western Digital Software for Mac.dmg" and "Install Western Digital Software for Windows.exe." It's not necessary to install the WD software because its functions can be achieved by Mac's own Disk Utility and it may cause issues on Mac.
Step 3: Use the WD easystore on your Mac.
Now you have opened the WD easystore external hard drive on your Mac, you might think you can directly copy or move files to it. But that may not be the case for your Mac, as it may not have write access to your WD easystore drive.
WD easystore drives and many other external hard drives usually come preformatted with NTFS because it's the default file system for Windows, and Windows is the most widely used operating system.
However, macOS can only read NTFS but not write to it. That being said, you can copy files (if they exist) from the WD easystore to your Mac but can't do it the other way around.
To use a WD easystore drive on your Mac with read/write access, you need to either employ an NTFS for Mac driver or reformat it with a different file system.
Share this post to help others learn how to use easystore on Mac.
How to read/write to WD easystore on Mac without formatting?
As we mentioned before, you can't drag and drop files to the WD easystore external hard drive on Mac because it's NTFS-formatted.
If your WD easystore isn't empty or you want to use it on your Mac and PC without formatting, which will erase all data on the drive, you'll need a tool like iBoysoft NTFS for Mac.
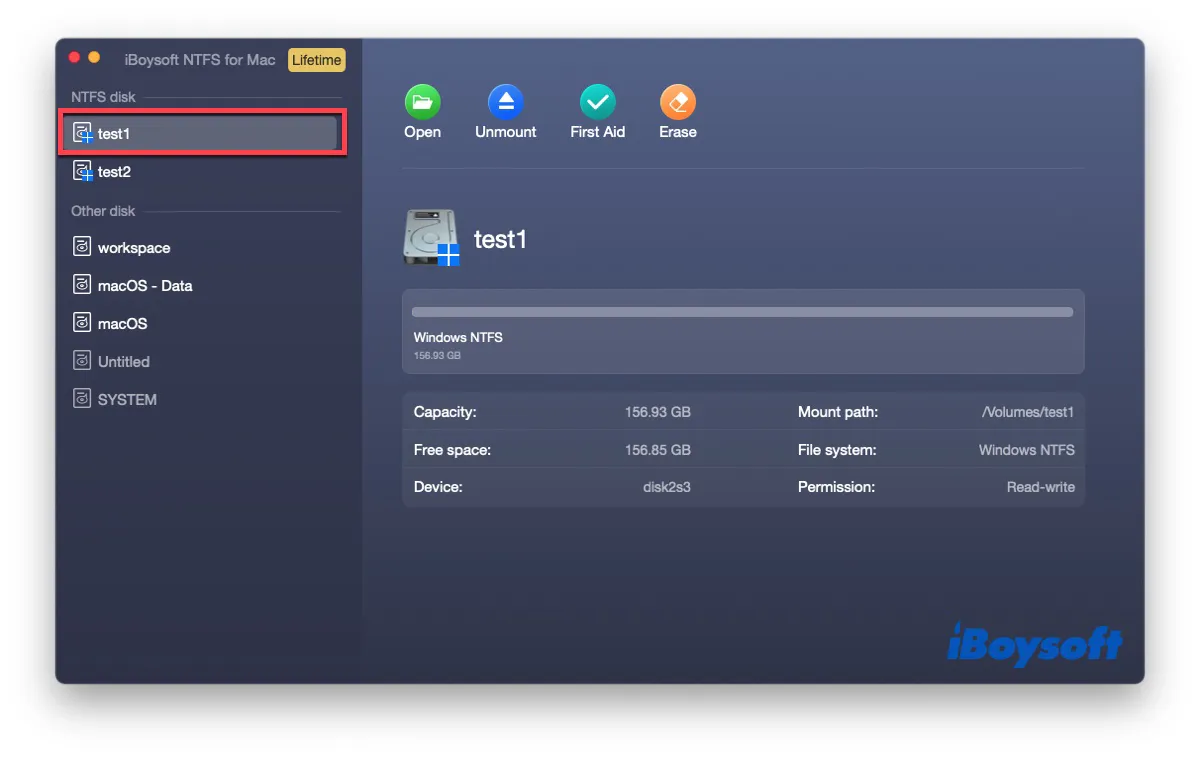
It's a reliable NTFS for Mac driver that allows you to read and write to NTFS drives from WD, Seagate, Samsung, Toshiba, SanDisk, and other brands on Mac without losing data.
It's also compatible with macOS High Sierra and later operating systems, including the latest macOS Sequoia. Once it's installed, it will automatically mount your NTFS drives in read/write mode, enabling you to use your WD easystore external drives on Mac freely.
On top of that, it supports Intel-based, T2, M1, M2, and M3 Apple Silicon Macs.
To gain read/write access to WD easystore external hard drives on Mac, simply download and install iBoysoft NTFS for Mac from the button below.
- ✅ Full read/write support to NTFS-formatted WD easystore on Mac
- ✅ Transfer or copy files from Mac to NTFS drives, including WD easystore
- ✅ Repair NTFS-formatted WD easystore on Mac
- ✅ Format external drives to NTFS on Mac
- ✅ Mount or unmount WD easystore external drives formatted in NTFS
- ✅ Delete, modify, rename, or create new folders on NTFS drives on Mac
Now, you can copy files to your easystore drives on Mac without restrictions.
How to format WD easystore for Mac?
Alternatively, you can format the WD easystore external hard drive to use it on Mac. Be reminded that this will delete all data on the drive, and you should back up the important files beforehand.
- Launch Disk Utility from the Applications > Utilities folder.
- Click View > Show All Devices.
- Select the physical disk of your WD easystore drive and click Erase.
- Give it a name.
- Choose a proper format. (Select APFS if running macOS 10.13 High Sierra or later; Select Mac OS Extended (Journaled) if running macOS 10.12 Sierra or earlier.)
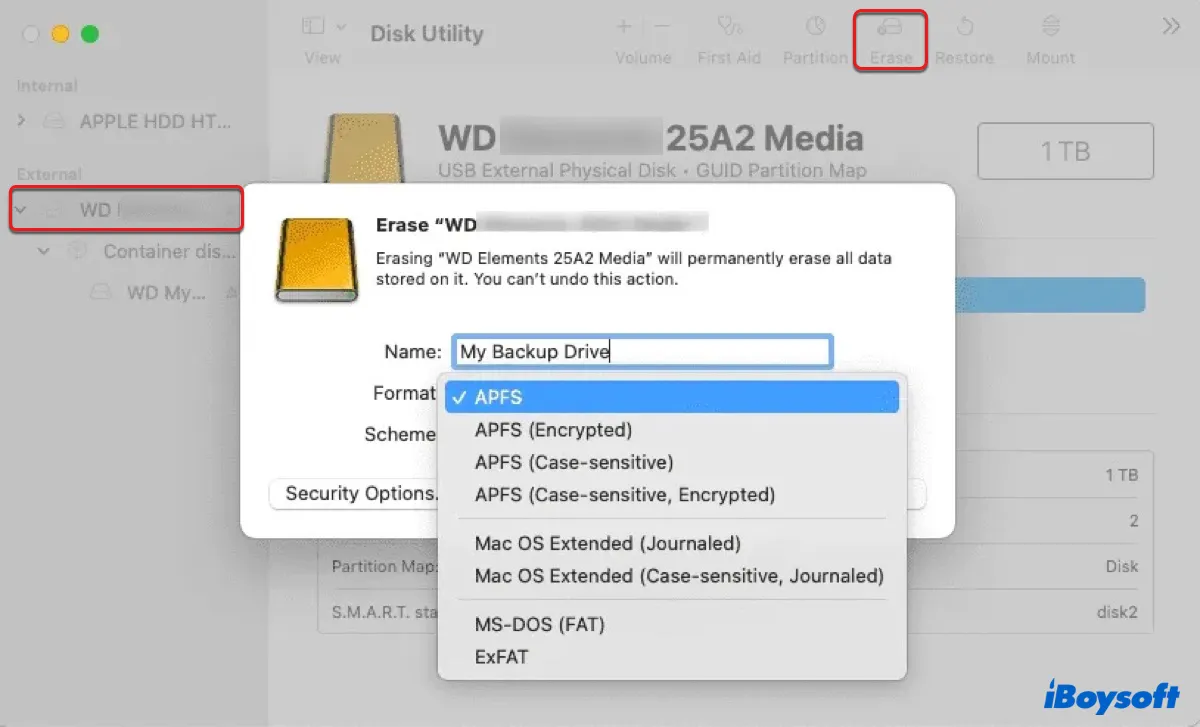
- Keep the scheme GUID Partition Map.
- Click Erase.
If Disk Utility fails to erase the drive, disconnect and reconnect it, then retry the process.
If you want to partition the easystore drive on Mac, follow these steps: (Partition a drive erases all existing data on it.)
- Open Disk Utility.
- Click View > Show All Devices.
- Select the physical disk of your WD easystore drive and click Partition.
- Click the ( + ) button under the pie chart to add a new partition.
- Name the partition.
- Choose a format.
- Specify a size.
- Click Apply.
How to format easystore for Mac and PC?
If you want to format easystore for Mac and PC, you need to choose exFAT or FAT32 as the file system. FAT32 has a file size limitation of 4GB and is less advanced than exFAT. So, it's generally recommended to format a drive with exFAT to work with both Windows and macOS.
Again, formatting the drive will erase its data. Ensure the essential information is backed up before proceeding.
- Open Disk Utility from the Applications > Utilities folder.
- Click View > Show All Devices.
- Select the physical disk of your WD easystore drive and click Erase.
- Name your drive.
- Choose ExFAT as the format.
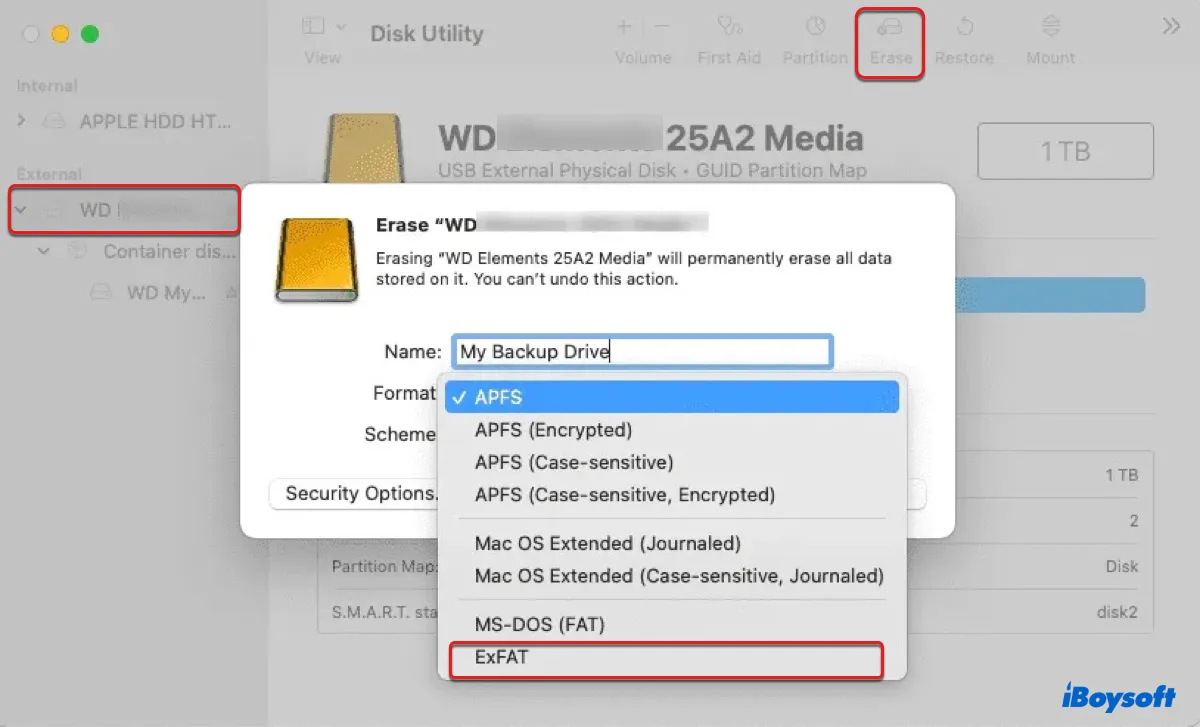
- Keep the scheme GUID Partition Map.
- Click Erase.
How to use Time Machine on Mac with easystore?
Time Machine is the built-in feature for backing up apps, photos, email, documents, music, etc., on your Mac. If you want to back up your Mac to a WD easystore external hard disk, take the following steps:
Before initiating Time Machine, you should format your easystore with a proper file system. If you're running macOS 11 Big Sur or later, select APFS as the format. If you're running macOS 10.15 Catalina or earlier, choose Mac OS Extended (Journaled) instead. (Follow the steps in the above section to format the drive.)
After the drive is erased, you can set up Time Machine with the appropriate instructions below.
On macOS Ventura or later:
- Go to the Apple menu > System Settings > General > Time Machine.
- Click the add ( + ) button, select your WD easystore drive, and click "Set Up Disk." (Easystore won't show up in the list if it's not formatted with a macOS-compatible format.)
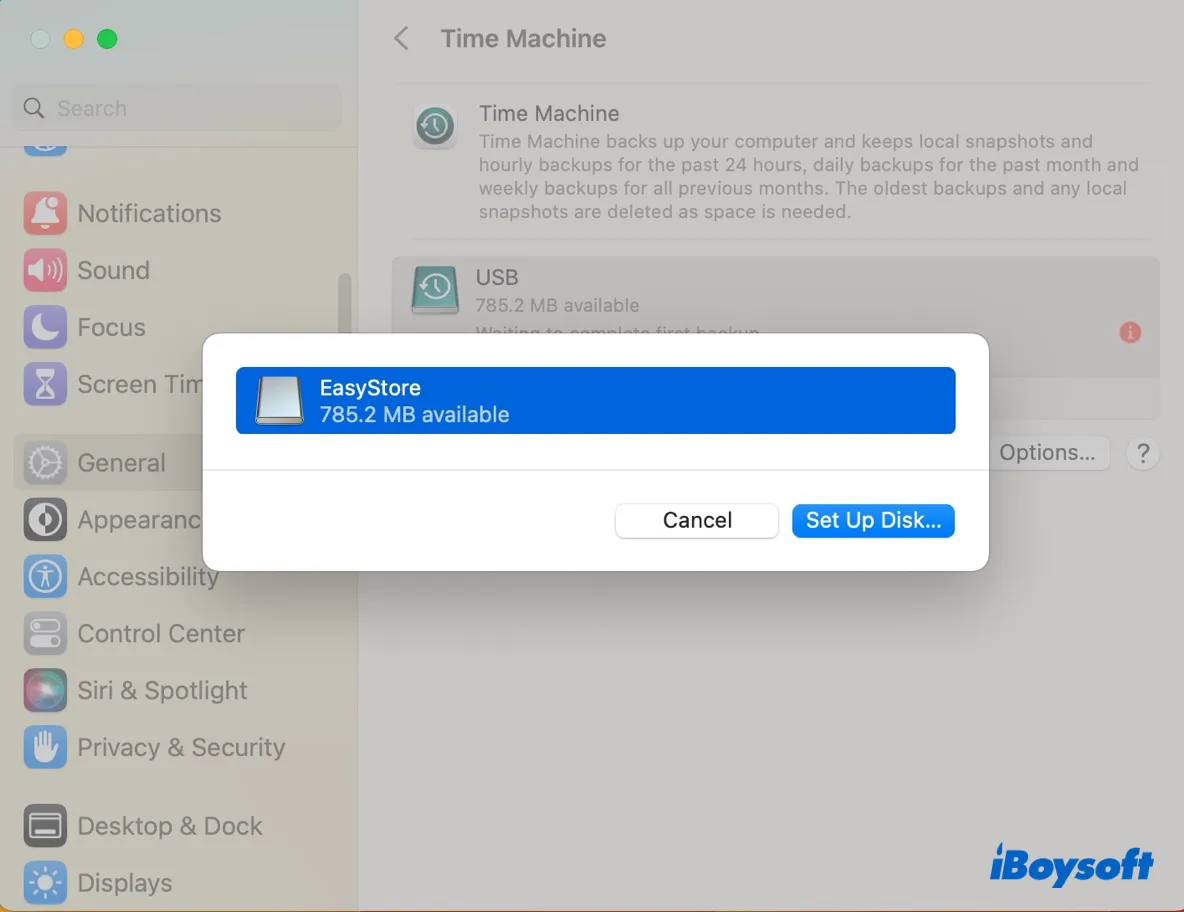
- Decide whether you want to encrypt the disk and click Done.
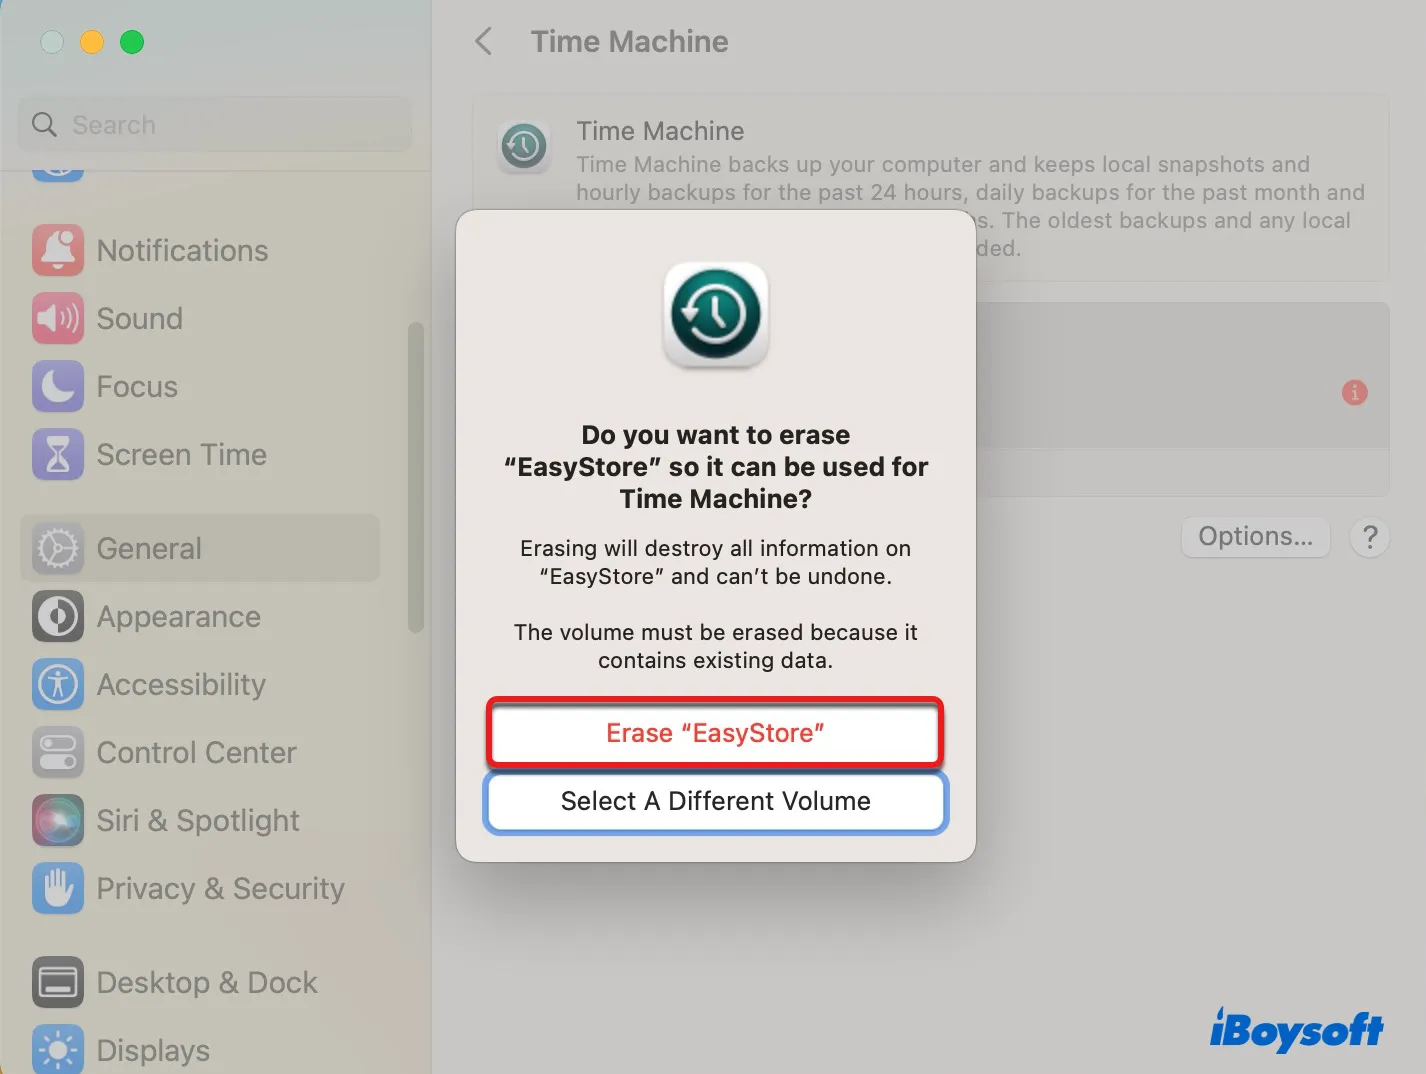
- Click the Erase button to erase the drive for Time Machine.
- Wait while Time Machine is preparing the disk.
- Click Options to configure backup frequency and exclude items you don't want to back up.
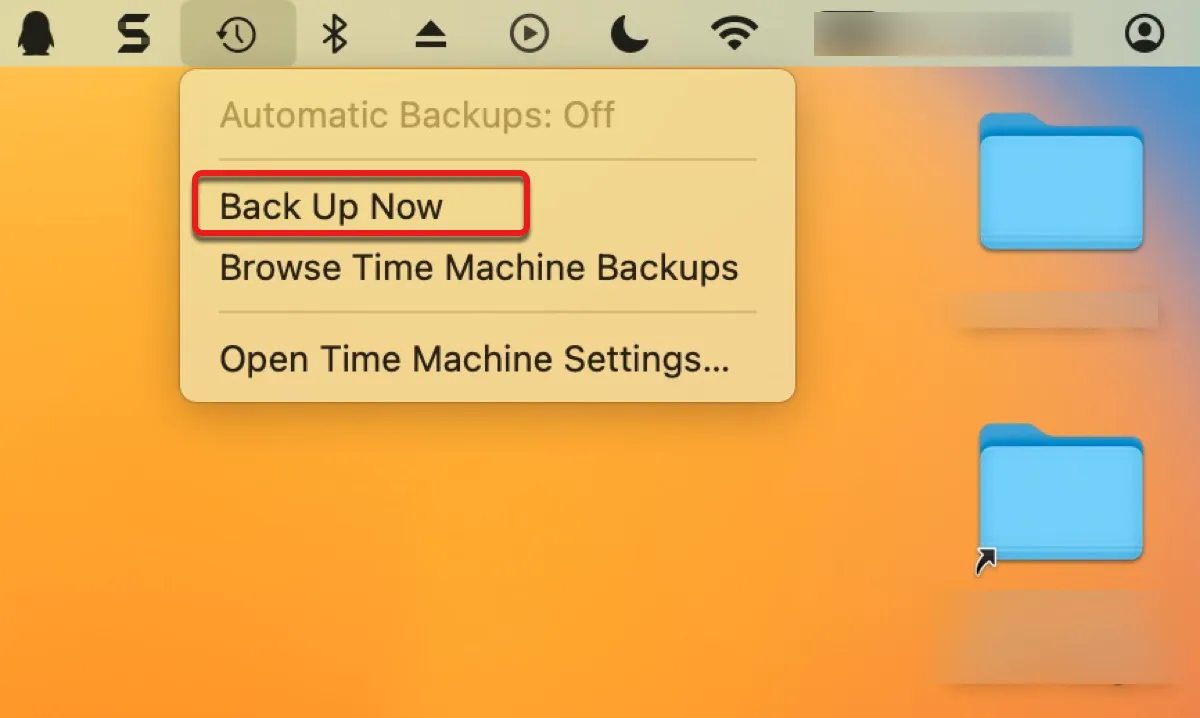
- To trigger the backup now, click the Time Machine icon at the top-right menu bar and select "Back Up Now."
On macOS Monterey or earlier:
- Go to the Apple menu > System Preferences > Time Machine.
- Click "Select Backup Disk."
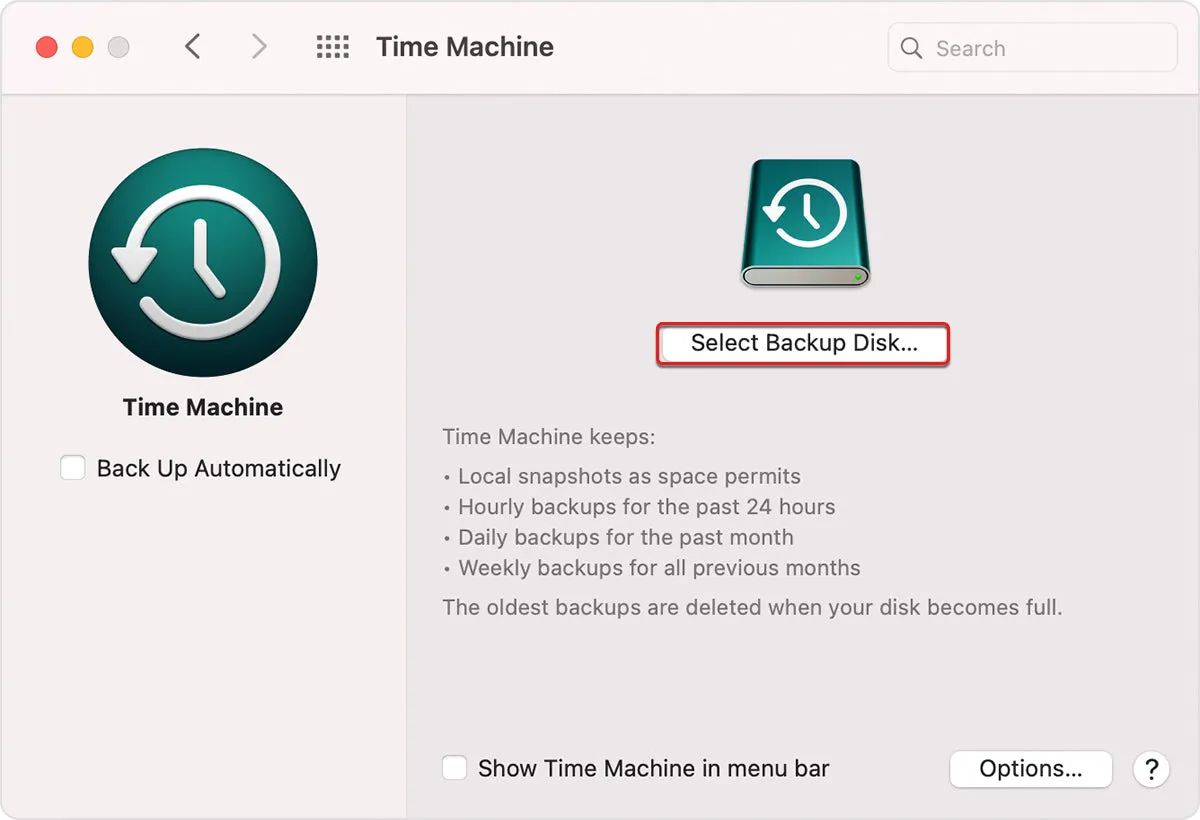
- Select your WD easystore drive and click "Use Disk."
- Click Erase when being asked.
- Ensure "Back Up Automatically" and "Show Time Machine in menu bar" are checked.
- Click Options to exclude items from being backed up.
- To trigger the backup now, click the Time Machine icon at the top-right menu bar and select "Back Up Now."
For more details about backing up your Mac with Time Machine, check out this guide: How to Use Time Machine on Mac: Backup and Restore Tutorials
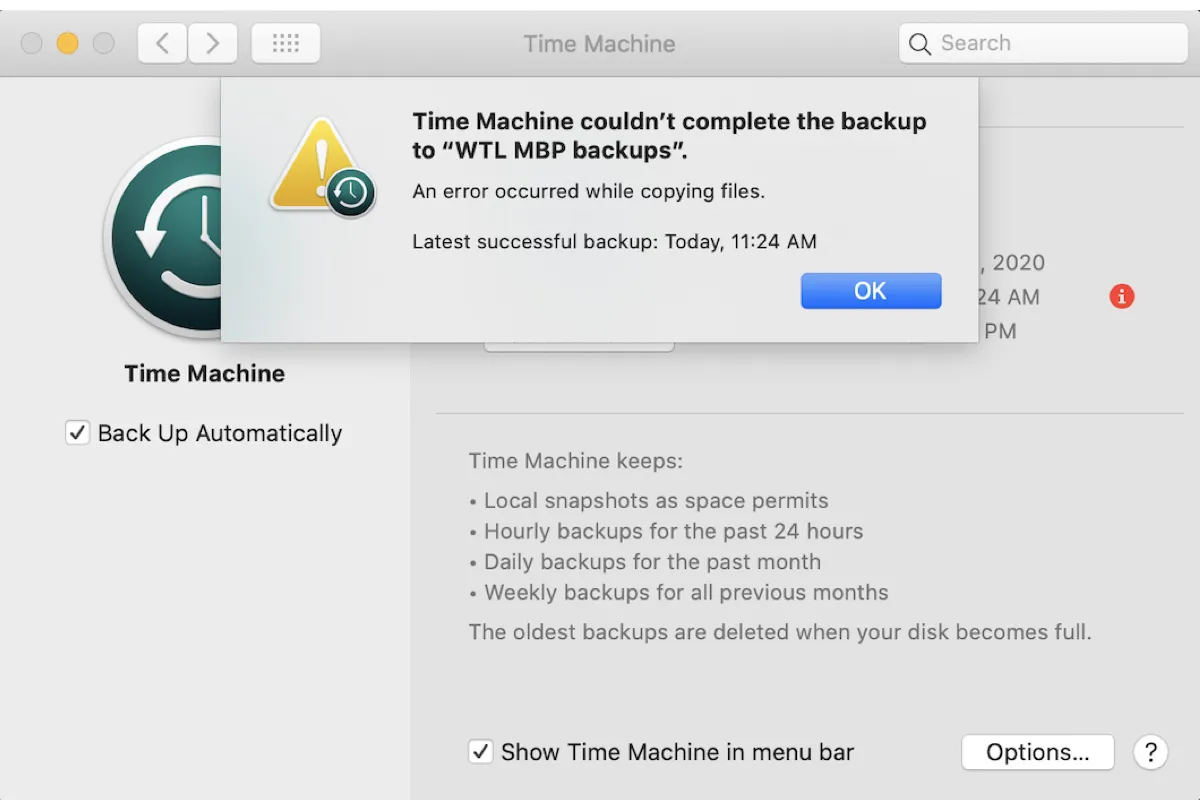
If Time Machine fails to back up your Mac and prompts an error saying "Time Machine couldn't complete the backup on Mac," you can fix it with the solutions in this guide.
Now that you know how to back up your MacBook Air to WD easystore, don't forget to share it with others.
How to fix WD easystore not showing up/not working on Mac?
Sometimes, your WD easystore external drives may not work on your Mac. For instance, you may notice that your Western Digital easystore won't mount after the Big Sur update or other macOS updates. Or, your WD external hard drives may not be recognized on your Mac or not show up.
Here are four proven solutions you can try to fix WD easystore not working on Mac:
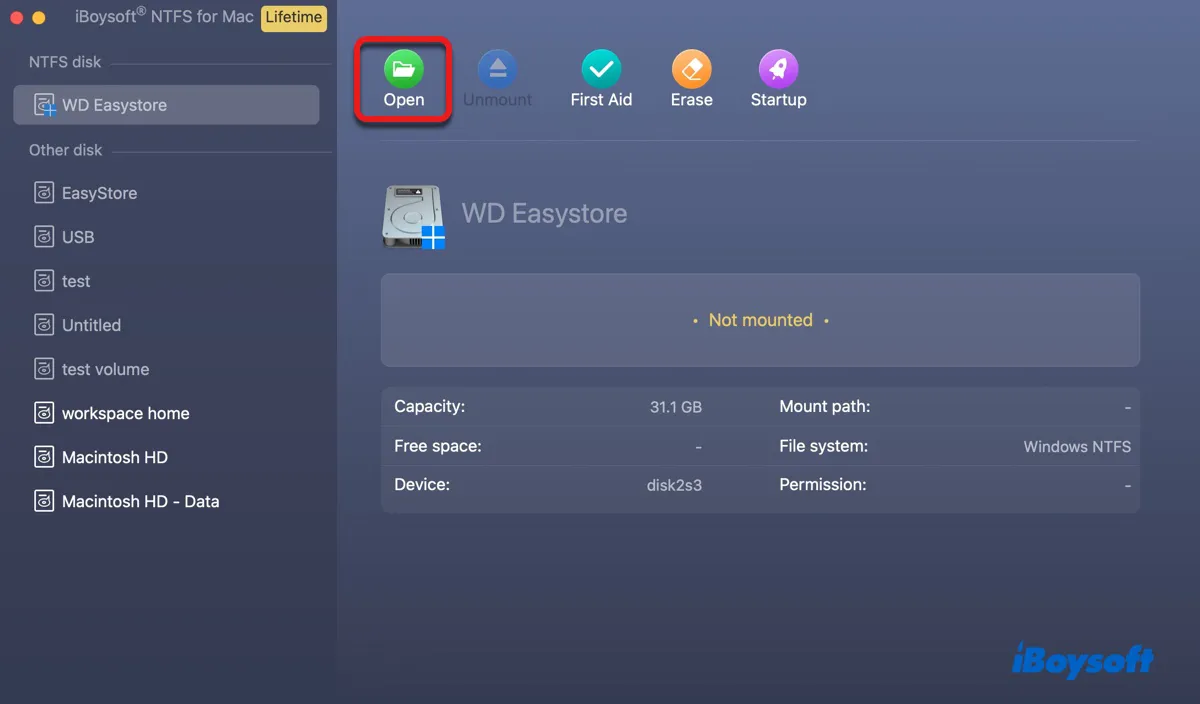
Use iBoysoft NTFS for Mac
If your WD easystore external hard drive is formatted in NTFS, it may stop working when your NTFS for Mac driver has issues. This usually happens after a recent macOS update, caused by the incompatibility between the updated macOS version and the NTFS for Mac driver.
To fix it, you just need a better NTFS for Mac driver. iBoysoft NTFS for Mac is a stable and trustworthy driver that grants you full read-and-write access to WD easystore drives on Mac. It's well-maintained and is compatible with every macOS version after macOS 10.12 Sierra.
Download it from the button below to mount your NTFS-formatted WD easystore on Mac.
Force Quit the fsck process
Fsck is a command-line tool that checks your storage devices for errors and attempts to repair any problems. If your easystore external drive was pulled out without ejecting, it may automatically start to repair it the next time you connect it to your Mac. However, your WD easystore drive may not mount until the fsck process is finished.
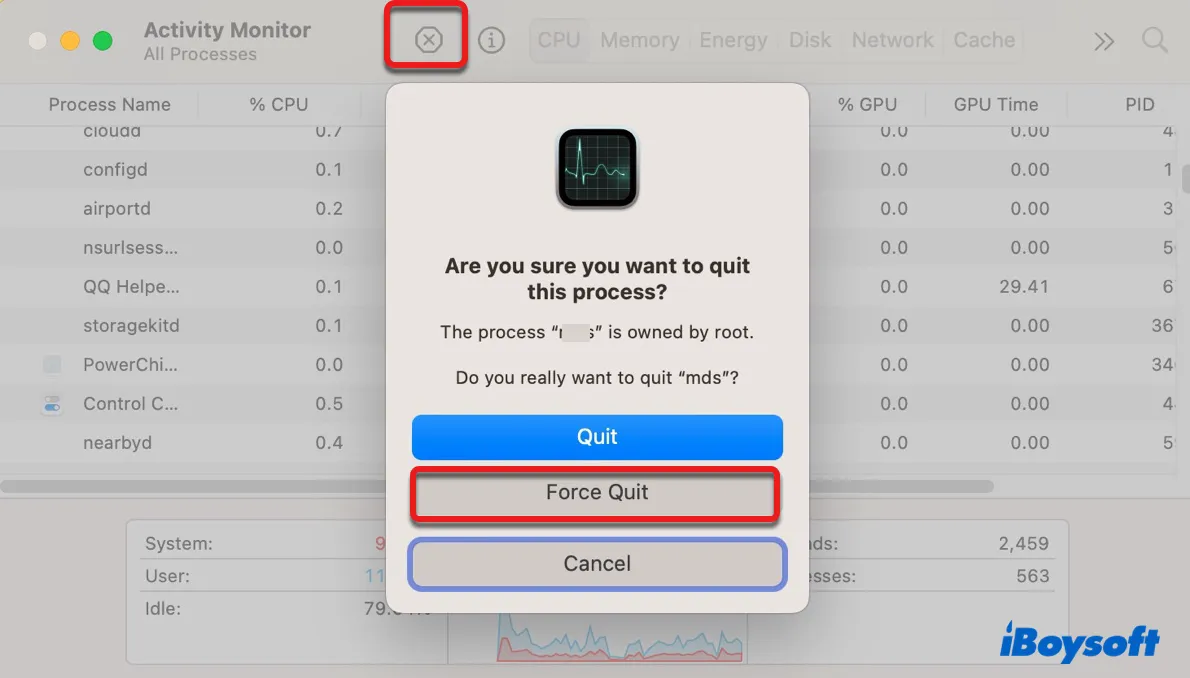
To fix the "WD easystore not mounting" issue, you can force quit the fsck process in Activity Monitor.
- Open Activity Monitor from your Applications > Utilities folder.
- Search for the fsck process. It may be fsck_hfs or something similar.
- Select it, and click the x button.
- Click the "Force Quit" button.
- Check if your external drive is working.
Uninstall or update WD software
If you installed the WD software shipped with your easystore drive, try uninstalling it from your Mac. It's not needed for your drive to function correctly on a Mac but may be a hindrance at times. The software may be incompatible with your current macOS version, rendering the easystore drive not showing up.
However, if you've set a password for your easystore drive with the WD Security software, you can install the latest version of the WD software to unlock the disk.
Recover data and reformat WD easystore
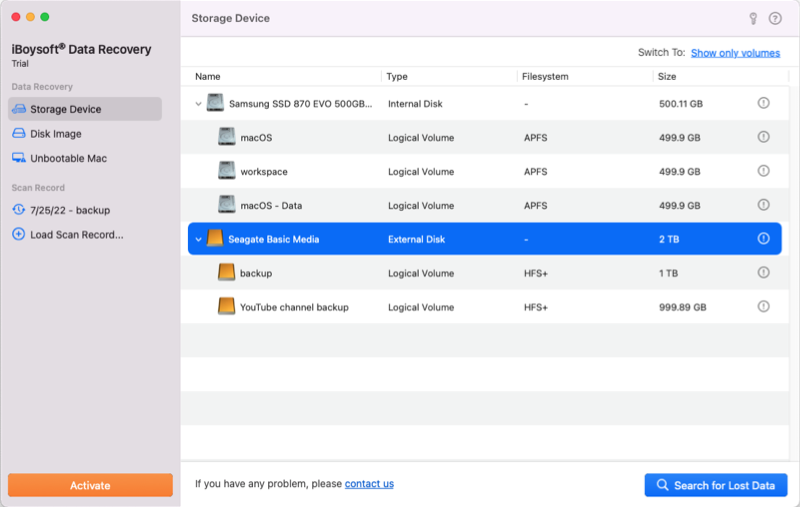
If your easystore external drive still won't work, you can recover its data and reformat it. To retrieve the inaccessible data from it, use iBoysoft Data Recovery for Mac.
It's a professional data recovery software capable of restoring photos, videos, documents, audio, and other files from inaccessible and unmounted external storage devices on Mac. It supports data recovery for WD easystore USB, easystore SSD, easystore portable storage, easystore desktop HDD, and more.
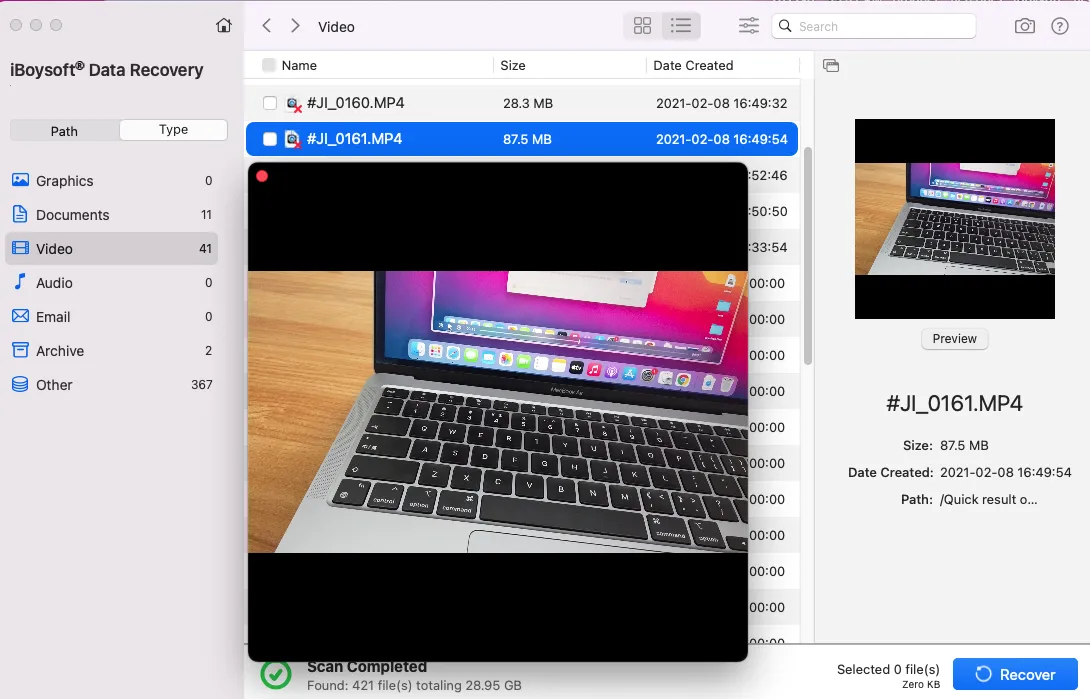
It also allows you to preview recoverable files for free. Take the following steps to recover your data:
Step 1: Download and install iBoysoft Data Recovery for Mac.
Step 2: When the software is open, select your WD EasyStore drive and click "Search for Lost Data."
Step 3: Preview files on the external drive.
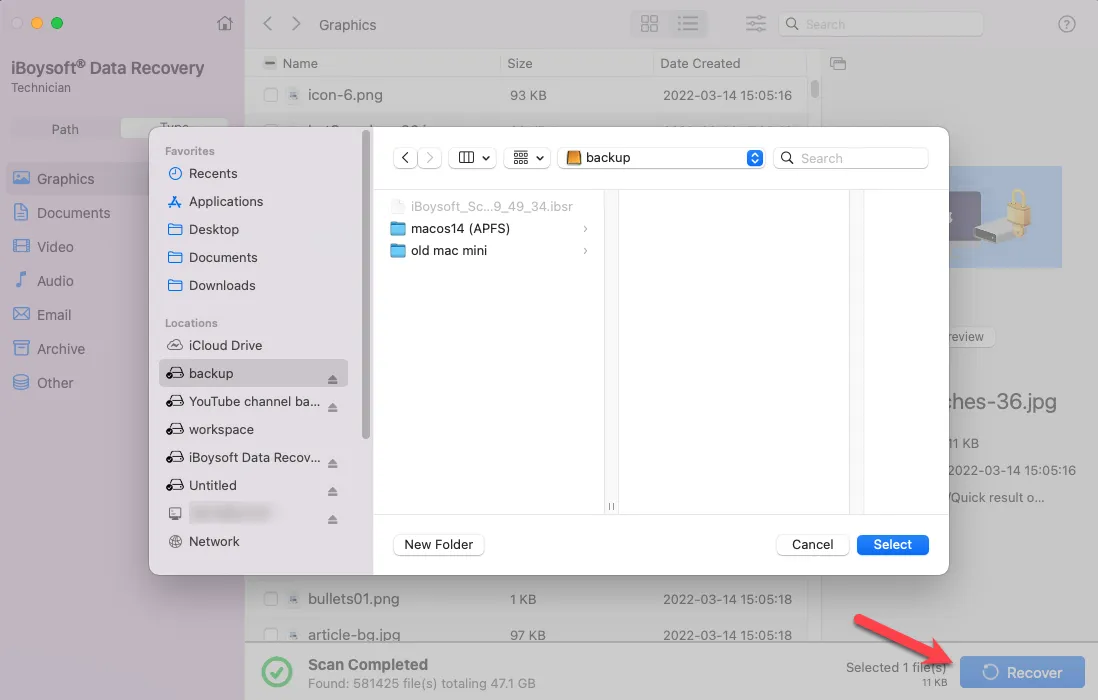
Step 4: Select the files you want to recover, and click the Recover button to save them.
Once your files are recovered, you can reformat your external drive with the steps in the third section of this guide.
Please share this post if you find it helpful!
FAQs about how to use WD easystore on Mac
- QWhy is my easystore hard drive not showing up?
-
A
Here are the reasons why your easystore hard drive may not show up on Mac:
1. Its driver or the WD software isn't compatible with your current macOS.
2. It's locked by WD Security.
3. It's been repaired by the fsck process.
4. It's corrupted.
5. It has connection issues.
6. It's failed.
- QHow to transfer photos from Mac to Western Digital external hard drive?
-
A
To transfer photos from your Mac to a Western Digital external hard drive, your Mac needs to have write access to it. In other words, the drive must be formatted for Mac or has an NTFS for Mac driver if formatted for Windows. Then you can drag and drop files from our Mac to it to transfer files.