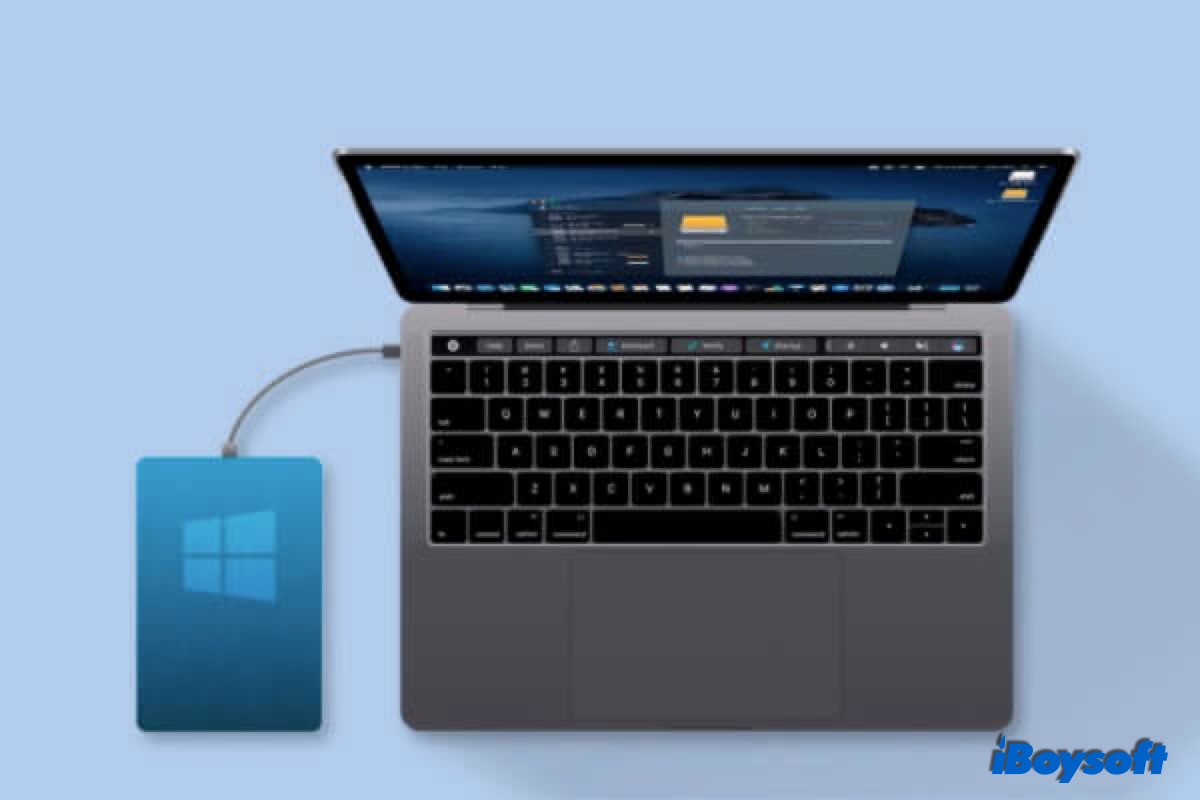
Cross-platform incompatibility has been a huge roadblock for Mac users who have to move back and forth between Windows and Mac computers, especially when sharing files between Windows and macOS using an NTFS(stands for NT File System) drive.
Tips: To read/write to NTFS drive on macOS Tahoe, read: How to Read & Write NTFS Drive on macOS Tahoe 26?
3 Ways to use NTFS drives in read-write mode on Mac:
| Options to read and write NTFS on Mac | Compatibility | Difficulty Level |
| 1. iBoysoft NTFS for Mac | All Mac models and kept updated to support the latest macOS | Easy-Directly read and write the NTFS drive on Mac with full access via the professional NTFS drives for Mac. |
| 2. Free NTFS drives for Mac such as Mounty for NTFS | macOS Monterey and earlier, Intel Macs | Hard-Unfriendly installation which requires advanced knowledge of command lines, FUSE for macOS, Homebrew, or Xcode to be able to compile the code. |
| 3. Enable NTFS write on Mac via Terminal | macOS Monterey and earlier, Intel&Apple silicon Macs | Medium-Need to run command in Terminal to gain NTFS write support on Mac. |
Want to read and write to an NTFS drive on a Mac with ease? Free download iBoysoft NTFS for Mac!
Also, you can follow this video guide: How to Use NTFS drives on Mac?
How to write NTFS drive on a Mac?
This part explores how to enable Mac NTFS write support in 3 possible workarounds. Each of them has pros and cons. You can choose the best method that suits your case to enable NTFS write on Mac with ease.
Option 1. Write NTFS on Mac with an easy-to-use NTFS driver
Using a commercial third-party app is the easiest and fastest way to enable NTFS write support on Mac without formatting NTFS drives to a compatible file system. Although costing a little money, it offers high reliability, fast write speed, excellent compatibility, and free technical support. These benefits you probably won't get from free NTFS drivers for Mac.
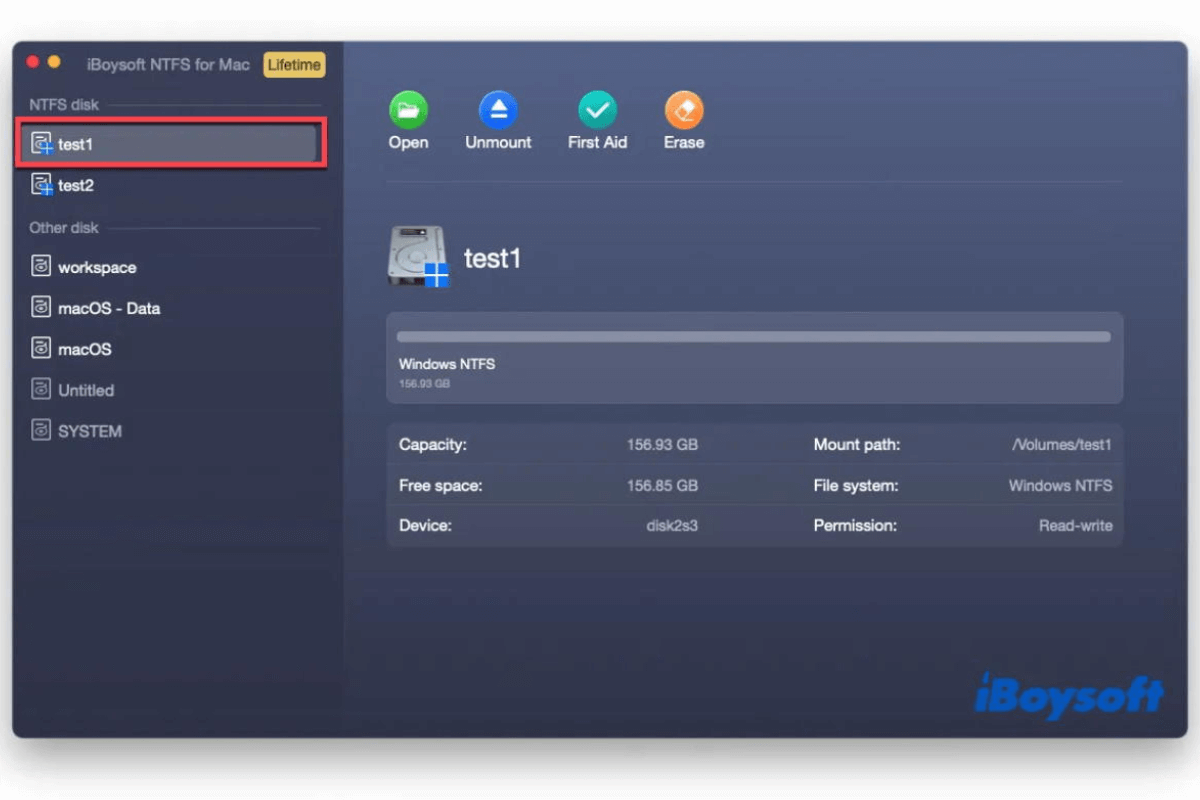
iBoysoft NTFS for Mac is one of the most remarkable and incomparable utilities. It provides super-fast macOS NTFS write and file transferring speed and allows you to write to NTFS drives on Mac without enabling kernel extensions.
You won't feel any difference in using a Microsoft NTFS drive on a Mac with the assistance of iBoysoft NTFS for Mac, which grants you a smooth experience just like running any other macOS-supported format on a Mac workstation.
And now, it also supports writing permission to NTFS on Mac with Apple silicon M1, M2, M3, M4, and the approaching M5 chips. With it, you can read and write NTFS on macOS Sonoma, macOS Sequoia, and macOS 16 -- which comes out in June 2025.
There is a tutorial video about how to read NTFS on Mac and gain Mac NTFS write access with iBoysoft NTFS for Mac. This video tutorial can also help you fix the USB drive is read only Mac problem.
Steps to read and write to NTFS on Mac:
1. Free download and install iBoysoft NTFS for Mac on Mac.
2. Connect your NTFS drive to your Mac computer.
3. After your drive is mounted successfully, you can access the NTFS disk on Mac and read/write NTFS files. If necessary, you'll be asked to install an NTFS driver by iBoysoft and enable System Extensions to gain full disk access.

There is a free trial version of iBoysoft NTFS for Mac. Don't lose this chance to experience its excellent performance to write to NTFS on macOS for free.
This wonderful software is also available for any other NTFS hard drive, for example, the WD My Passport NTFS drive, as long as you install a wonderful iBoysoft WD NTFS driver for Mac on your device.
What is NTFS for Mac, and do you need it?
This post tells you what NTFS for Mac is and almost everything about it. You can follow this post to get complete learning about it. Read more >>
Option 2. Gain Mac NTFS support via a free NTFS driver
Update: Sadly, Apple has changed the entire mount process on macOS Ventura. It removed the previous kernel-based architecture - /System/Library/Extensions/ntfs.kext. This means all free NTFS for Mac drivers, including Mounty for NTFS and others, and terminal commands will not work on macOS 13 Ventura anymore.
If you don't want to use a commercial NTFS driver for Mac or format NTFS, there are some free NTFS for Mac you can choose from. For example, you can use an open-source project called FUSE for macOS. It can mount the Microsoft NTFS drive in read-write mode.
Although they are free to use, the process is very complicated and technical, involving many command lines and repetitive Mac reboots. If you want to try such a free program, please follow the guide very carefully, or you put your machine and data at risk!
Step 1. Download and install Xcode.
Go to Finder > Applications > Utilities > Terminal and run the following command: xcode-select --installThen, click "install" when you are asked to install Apple's command line developer tools.
Step 2. Download and install Homebrew.
Go to the Terminal window and run the following command:
[/usr/bin/ruby -e "$(curl -fsSL https://raw.githubusercontent.com/Homebrew/install/master/install)"
Then, hit Enter to install it (provide the password when prompted).
Note: If you have installed Xcode and Homebrew before, messages will pop up in the Terminal window telling you have installed them before. You just ignore the messages and keep doing the next steps.
Step 3. Download and install FUSE for macOS.
Keep the options default when installing it.
Step 4. Install NTFS-3G.
Go to Terminal window and run the following command: brew install homebrew/fuse/ntfs-3g
Step 5. Disable SIP (System Integrity Protection).
SIP is expected to protect the operating systems from unauthorized changes.
- Restart your Mac and hold down the Command + R keys immediately until you see the Apple logo.
- Open Terminal from the Utilities menu.
- Run the command: csrutil disable
- Hit Enter.
- Reboot the Mac.
Step 6. Read and write to NTFS on Mac.
- Go to Finder > Applications > Utilities > Terminal.
- Run the following command:
sudo mv /sbin/mount_ntfs /sbin/mount_ntfs.original sudo ln -s /usr/local/sbin/mount_ntfs /sbin/mount_ntfs
- Hit Enter to execute this command line.
Note: It is recommended that you enable SIP after you finish using NTFS on Mac to better protect your Mac. To enable SIP, you just need to follow Step 5 and run the command line "csrutil enable" in the Terminal window, hit Enter, and restart the Mac.
Other than FUSE for macOS, Mounty for Mac, NTFS-3G, SYSGeeker NTFS for Mac, and SL-NTFS are other free NTFS for Mac. They are free, but all of them require a good bit of work to install and use.
Option 3. Help Mac write to an NTFS drive using Terminal
I bet most Mac users don't know that macOS includes experimental NTFS write support, but it is disabled by default. You can run some command lines in Terminal to enable macOS NTFS write support.
However, Apple hasn't officially supported NTFS-writing ability yet. It is proven to be unstable and risky. It may cause disk corruption and permanent data loss. In case you couldn't access your NTFS drives or lost data from them, keep iBoysoft Mac Data Recovery as a data rescue option.
This solution is not recommended, but if you are curious about how to enable write support for specific Microsoft Windows disks using macOS Terminal, follow the steps below:
1. Go to the Applications > Utilities > Terminal to launch the Terminal program.
2. Input the following command to edit the fstab file (provide your password when prompted). No letters will show up when you type in a password.
sudo nano /etc/fstab

3. Type the command below in the editor window for the fstab file and press "Control + O" to write. (Be sure to change the word DISKNAME to the name of your NTFS drive)
Tips: If you have multiple NTFS drives you want to write to, write different lines for each NTFS drive.
LABEL=DISKNAME none ntfs rw,auto,nobrowse
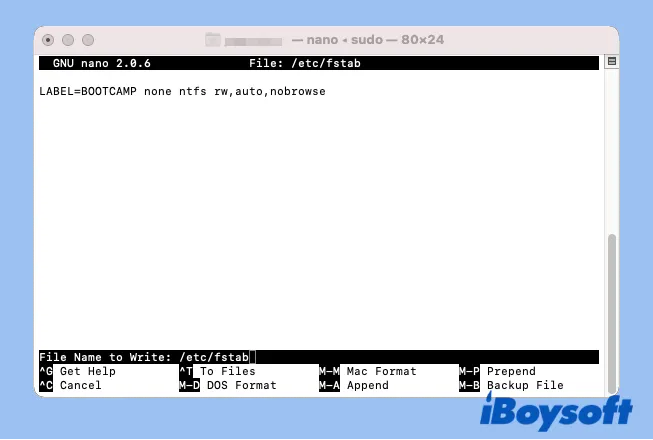
4. Hit Enter and press "Control + C" and then "Control + X" to exit.
5. Re-connect the NTFS drive to the Mac.
6. Click "Go" at the top left menu bar and choose "Go to Folder".
7. Type in this file path and hit Enter.
/Volumes
8. Find the NTFS volume or drive and drag it to the sidebar for easy access.
Tips: If you want to undo the change, follow steps 1 and 2, then delete the command line. Save your change and exit.
A lot of users reported that the set of commands above didn't work on macOS Monterey. Please another another set of commands below. They are more complicated.
1. Open Terminal and input the command below, and hit the Return key to unmount your disk. Replace the DISKNAME with the name of your device.
sudo umount Volumes/DISKNAME
2. Run the command to create a mount point for your NTFS volume.
sudo mkdir /Volumes/1
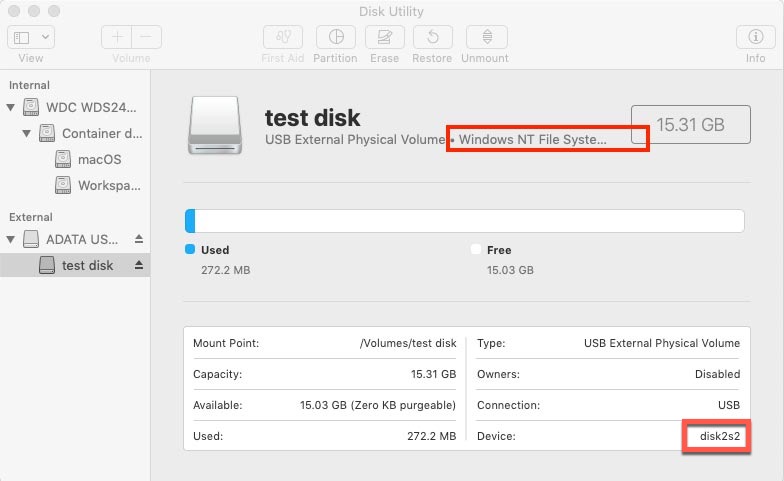
3. Run the command to mount the NTFS on a Mac computer in read and write mode. The "disk2s2" is the Device info of the NTFS drive in Disk Utility. Yours might be different.
sudo mount -t ntfs -o rw, auto, nobrowse /dev/disk2s2 /Volumes/1
4. Quit the Terminal and open the NTFS volume on Mac for use.

How to Mount a BOOTCAMP NTFS Partition with Read-Write Access?
Tutorial to mount BOOTCAMP partition in read-write mode by using command line or with NTFS for Mac software in macOS and Mac OS X. Read more >>
Does NTFS work on Mac?
Generally, when we connect an external drive to a Mac, we want to read and write to it. Therefore, you may ask questions like Can Mac read NTFS and Can Mac write to NTFS.
NTFS is a Windows-exclusive file system, it is not supported by macOS at all the time even on the latest macOS versions. Mac can read NTFS-formatted USB flash drives, SD cards, memory sticks, and external hard drives without any problem, you can open the NTFS drive just like you open other macOS-compatible disks and view the files/folders.
However, Mac can't write to NTFS by default, you can't edit, rename, paste, delete, create, or move files to the NTFS drive on Mac. Of course, you can directly format the NTFS drive for Mac, it will erase data. Besides, there are some workarounds to read and write NTFS on Mac without reformatting.
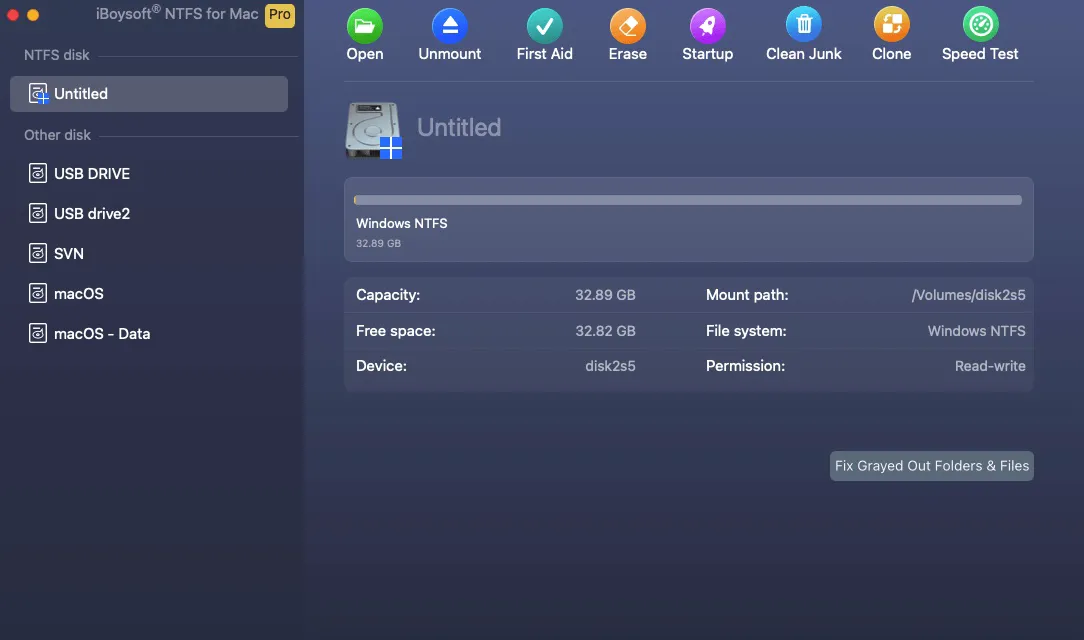
This article offers in-depth explanations about NTFS on Mac, answering questions like whether a Mac can read or write to NTFS, how to write or format to NTFS on Mac, and what to do if NTFS doesn't work on Mac.
Conclusion
Letting Mac read NTFS and write to NTFS files is possible. In addition to changing the file system by formatting, which erases all the contents, you have several options to choose from - free NTFS drivers, cost-effective NTFS drivers, and Apple's native NTFS support.
Free NTFS drivers for Mac and Apple's NTFS support are free, but take an extra amount of work to mount an NTFS drive on a Mac in read-write mode. They are risky and very unstable. Even though iBoysoft NTFS for Mac is not completely free, it saves you a lot of time and effort with its excellent reliability and ease of use.
If you need to use the external drive for file transferring between Windows computers and Mac computers frequently, it is a good idea to convert NTFS to FAT32 or exFAT in macOS Disk Utility. If you will use this Windows NTFS drive on a Mac later, you can also choose to convert NTFS to APFS.
Also read:
How to Read and Write NTFS on Mac Catalina?
How to Format an External Hard Drive on Mac?
This article tells you how to format NTFS on Mac and erase any other external hard drives on Mac with the best format. Read more >>
FAQS about NTFS on Mac
- QDoes NTFS work on Mac?
-
A
macOS only supports reading NTFS on Mac. You can view the stored files on the Windows NTFS disk on Mac. However, you can not move, copy, edit, etc., the files on NTFS drives on Mac by default.
- QCan a Mac write to NTFS drive?
-
A
You are not allowed to directly write to NTFS on Mac. But there are some workarounds you can apply, including using third-party NTFS driver for Mac and enabling the Apple;s NTFS support in Terminal. It is recommended to choose the commercial but easy-to-use iBoysoft NTFS for Mac to access NTFS drive on Mac.
