NTFS is the default file system on modern Windows, offering features like file permissions, backups, and encryption. It's also the preinstalled file system on many external hard drives such as SanDisk, Seagate, and WD Black.
However, NTFS is Windows-exclusive and read-only on macOS, limiting compatibility.
If you have an NTFS external hard drive and want to convert it to FAT32 for compatibility with both Macs and Windows PCs, this guide will show you how to convert NTFS to FAT32 on Mac without losing data.
Best way to use NTFS drives on Mac without formatting
If you want to change the file system of the external hard drive from NTFS to FAT32, you have to reformat it, there is no other way.
However, reformatting the drive on Mac will erase all contents. What's more, FAT32 lacks permissions and other security features and limits its file size to 4GB and its partition size to 8TB.
That is to say, converting NTFS to FAT32 will lose all data as well as powerful security features built into NTFS, this may not be what you want.
Therefore, if you want to read and write the NTFS drive on a Mac with full access, you can try third-party NTFS for Mac drivers, the best way to use NTFS drives on Mac without reformatting. iBoysoft NTFS for Mac is a professional utility that mounts the NTFS drive in read-write mode on Mac.
Let's see how to read-write NTFS drive on Mac with iBoysoft NTFS for Mac:
Step 1. Download and install iBoysoft NTFS for Mac.
Step 2. Make sure the NTFS drive is connected to your Mac.
Step 3. Open iBoysoft NTFS for Mac, select the NTFS drive from the left sidebar, and click the Open button. Now, you can read and write the NTFS drive within the software without limitations.
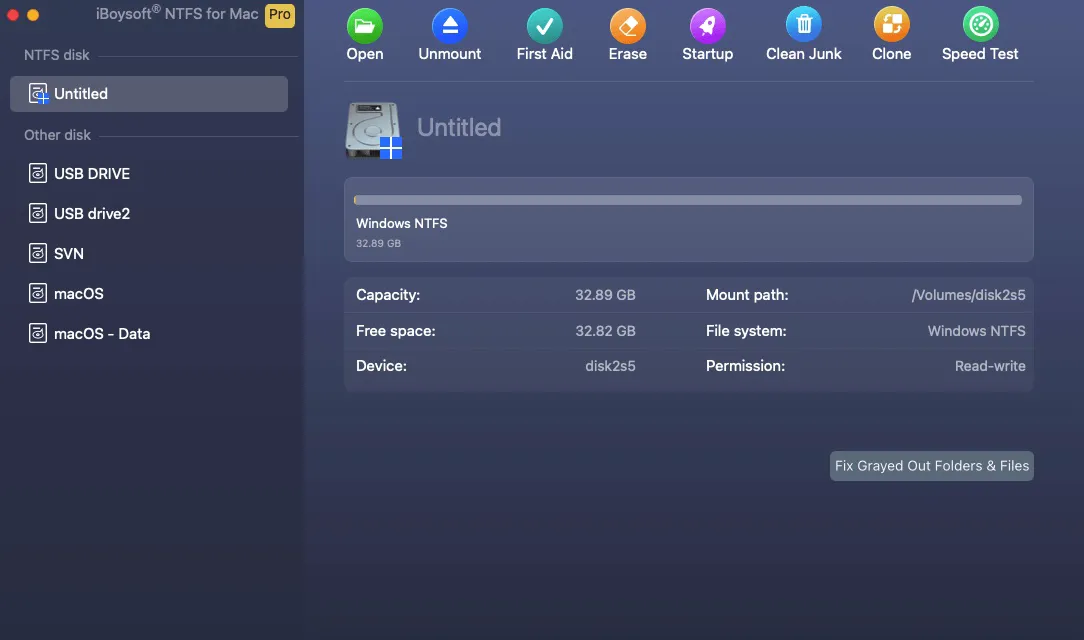
As you can see on the toolbar of iBoysoft NTFS for Mac, this software also enables you to mount/unmount, first aid, erase, and clone the NTFS drive. Just download wonderful iBoysoft NTFS for Mac to use NTFS drives on Mac without reformatting and explore other functions.
Share this NTFS for Mac driver if you find it helpful!
How to change NTFS to FAT32 on Mac without losing data
If you decide to convert NTFS to FAT32 to make it compatible with more computers and other devices such as game consoles and anything with a USB port, you should back up the NTFS drive first to change NTFS to FAT32 on Mac without losing data.
Method 1. Format NTFS to FAT32 with Disk Utility
You can use Disk Utility, the default disk management tool on macOS, to manage internal and external hard drives. You can format an external hard drive on Mac there, here is how to convert NTFS to FAT32 in Disk Utility:
- Launch Disk Utility from Finder > Application > the Utilities folder.
- Click the View button and choose Show All Devices.
- Select the connected NTFS drive on the left list.
- Tap the Erase button on the toolbar of Disk Utility.
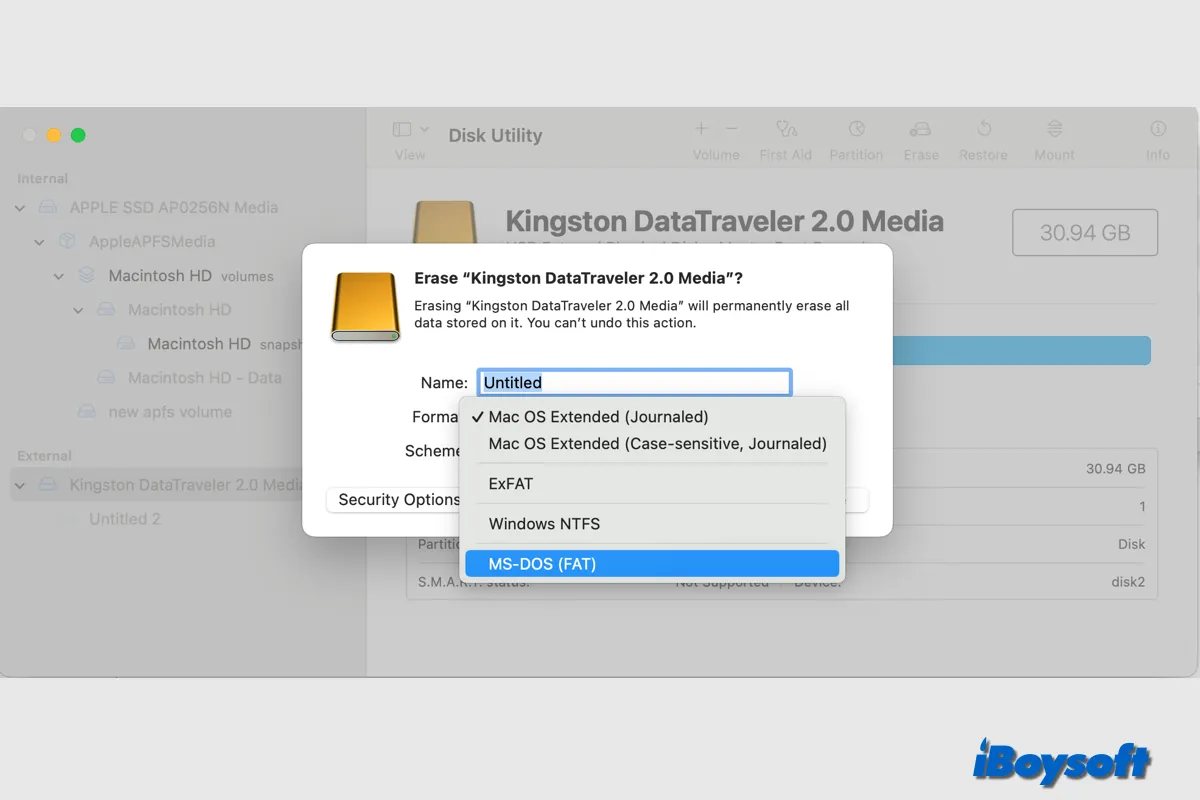
- On the prompt window, click the Format box and choose MS-DOS(FAT), then open the Scheme box and choose Master Boot Record.
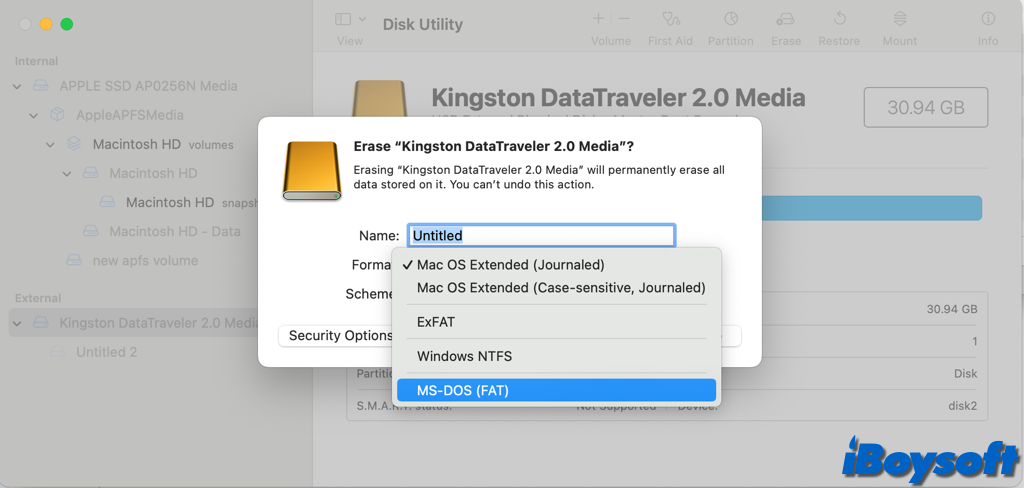
- Click the Erase button to begin the formatting process.
- Click Done and quit Disk Utility.
Method 2. Change NTFS to FAT32 via Terminal
Alternatively, you can also format the drive on Mac via the Terminal commands. You should be careful when running Terminal commands, typing the write disk identifier, otherwise, it may cause data loss on other volumes, follow the steps below:
- Ensure the NTFS drive is plugged into the Mac.
- Open Terminal from Launchpad or Spotlight search.
- Type the command below to list all disks connected to your Mac.
- Find the disk identifier of your NTFS drive/partition such as disk2 and disk2s3.
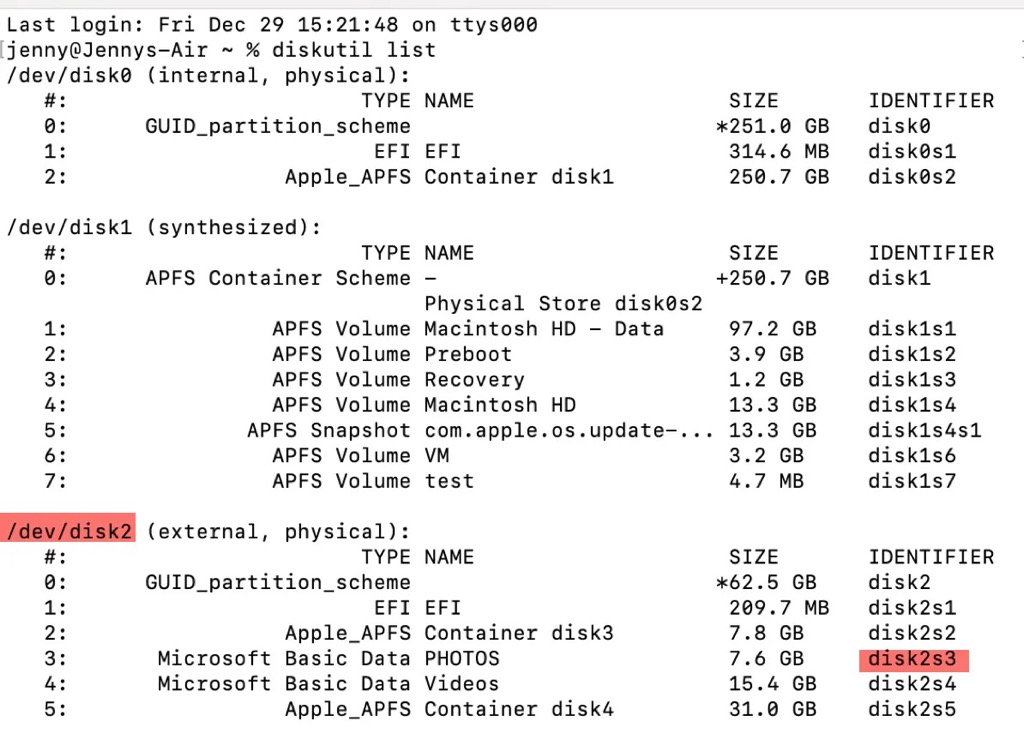
- Enter the command below to format the NTFS drive to FAT32:sudo diskutil eraseDisk FAT32 MBRFormat /dev/disk_identifieror format the NTFS partition to FAT32: sudo diskutil eraseVolume FAT32 MBRFormat /dev/disk_identifier
- Wait for the process to finish and quit Terminal.
Sharing this post to help others convert NTFS to FAT32 on Mac without losing data!
FAQs about how to convert NTFS to FAT32 on Mac
- QHow to convert NTFS to FAT32 without formatting?
-
A
You can not change NTFS to FAT32 without formatting, but if you want to fix the compatibility issue, you can use NTFS for Mac drivers to use NTFS drive without formatting. iBoysoft NTFS for Mac is a good choice for you.
- QHow to convert NTFS to exFAT without losing data on Mac?
-
A
Formatting drive on Mac erases all contents, you should back up all data on the NTFS drive to another device to avoid data loss.
- QHow do I format my NTFS drive to FAT32 on Mac?
-
A
There are two ways you can choose to format NTFS to FAT32, using the Disk Utility or running Terminal commands.