Taking the place of macOS Monterey, macOS Ventura finally came to the public in October 2022. As a significant OS upgrade, macOS 13 welcomes loads of new features, including Apple Freeform, Stage Manager for Mac, an enhanced Live Text that allows you to copy text from a video on Mac, and so on.
You can clean install macOS Ventura on your Mac, or you can install macOS 13 on VirtualBox to test it on other operating systems with a Ventura ISO file. However, there is no official source for the macOS Ventura ISO file at all, unless you create one manually or download it from some warm-hearted developers. This content will be explored later in this tutorial.
Here is a precious chance for you guys to simplify the process of creating a macOS Ventura ISO file, that is, run iBoysoft DiskGeeker to get the macOS DMG file directly, then complete the rest of the process, converting DMG to ISO, which is super quick and easy.
Tips: If you're in a hurry, simple download the Ventura ISO file here (Mac operating system download for Windows). Also, the latest macOS version is macOS Tahoe. Get the macOS Tahoe ISO file if you want.
macOS Ventura ISO file basics
Before creating or downloading the macOS Ventura ISO file, let's first learn about it. The macOS Ventura ISO file is a disk image that contains all the files and folders indispensable for the macOS 13 installation, which would be written to an optical disc, such as a CD, DVD, or Blu-Ray sector by sector, and even the optical disc file system is involved.
Generally, ISO files aim to create backups for the optical disc, which nowadays are used primarily for installer images such as operating systems.
An ISO image can be created from an optical disc by disk imaging software, a different disk image file using conversion, or a collection of files by optical disc authoring software. This post is gonna walk you through the first two approaches with a step-by-step guideline.

Share this post to inform more people about the basic information about the macOS Ventura ISO file!
Create the macOS Ventura ISO file for virtual machines
Since we have learned about the ISO file comprehensively, now we can dive into the part of creating the macOS Ventura ISO file. This post walks you through the whole process, and you needn't worry that you might get lost here, even if you're a newbie to the macOS Ventura ISO file creation.
You can skip to the conversion of a macOS Ventura DMG file to a macOS Ventura ISO file if you run iBoysoft DiskGeeker to download the macOS installer directly, which frees you from a long string of steps filled with clicks and command executions.
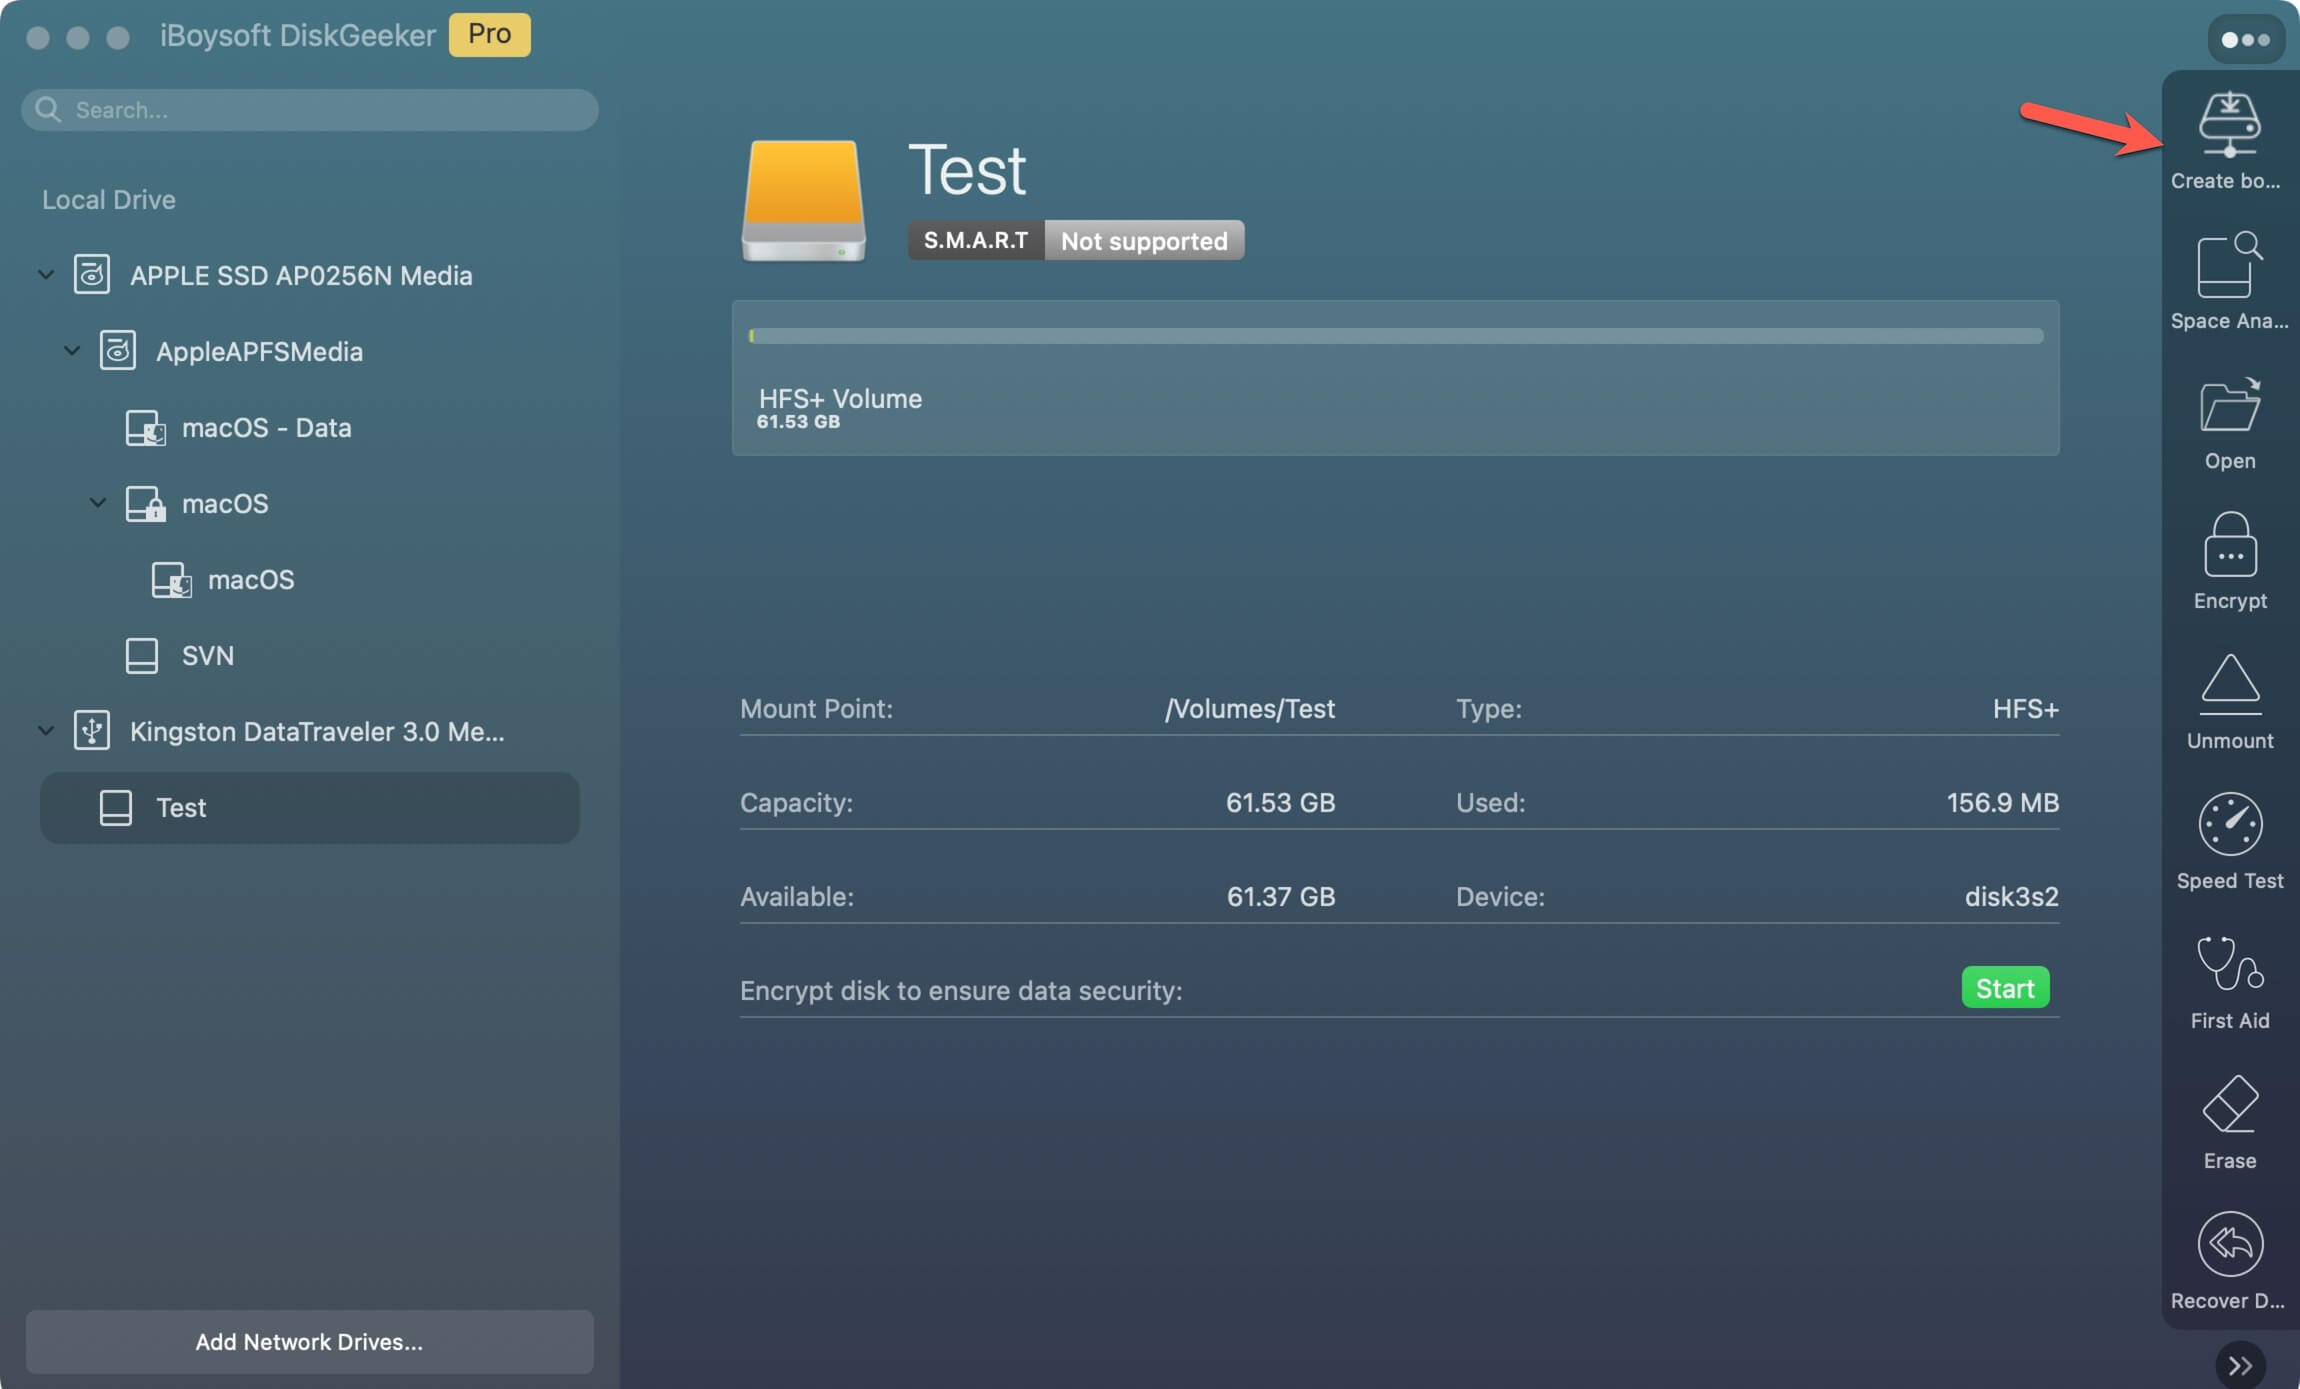
1. Free download, install, and open iBoysoft DiskGeeker on your Mac and connect a clean external hard drive bigger than 12 GB.
2. Select a volume on the target drive and click Create boot disk > Continue.
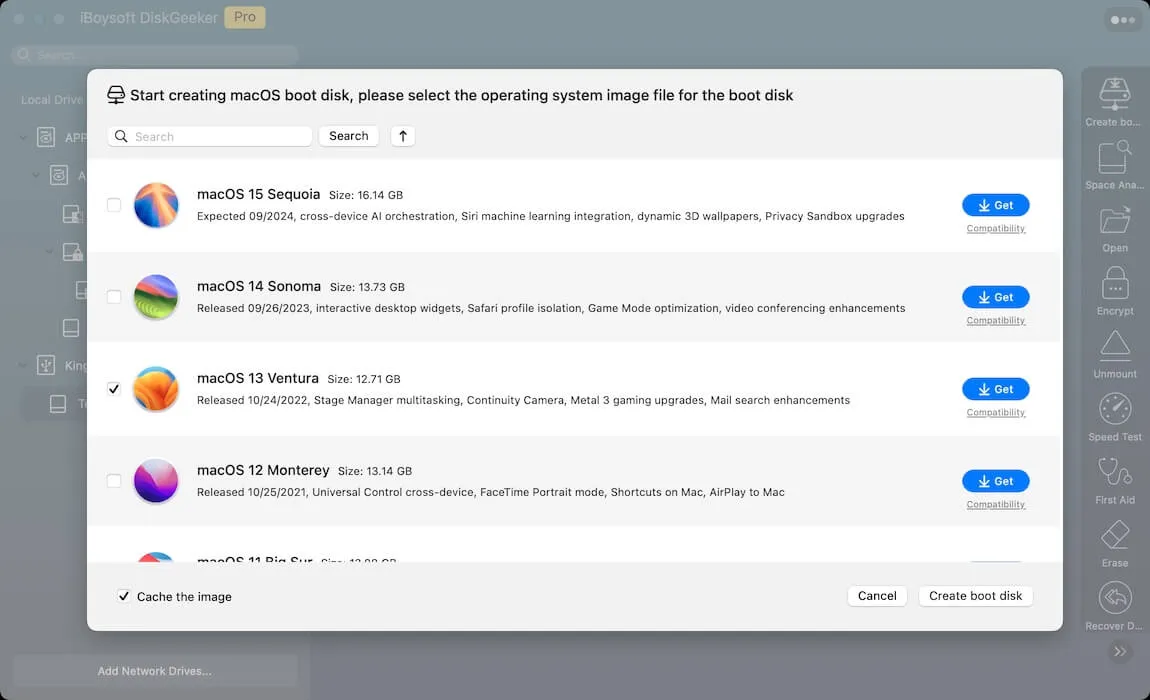
3. Choose macOS Ventura and click Create boot disk > OK to download the Ventura DMG installer first.
4. A pop-up will show up to ask you whether to create a bootable installer. If you want, click OK to go on. Or else, quit the process. Then, find the downloaded macOS Ventura DMG file in your Downloads folder in Finder.
5. Skip to the part of the conversion of the DMG file to the ISO file.
Share this wonderful utility with more people to get the macOS Ventura DMG file easily!
If you prefer to download the macOS Ventura installer and then convert it to a DMG file for the ISO file creation, then go with the following procedure.
Step 1: Download the macOS Ventura installer
- Insert the drive with 12GB of free space into your Mac computer. If there is not enough free space or the Mac disk is full, you can free up space on Macintosh HD for the macOS Ventura file download.
- Head to the App Store via the Spotlight Search shortcut.
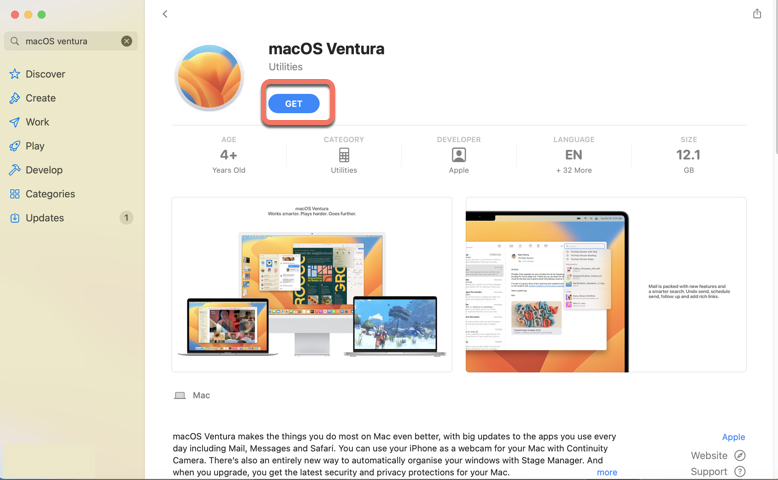
- Search for macOS Ventura in the App Store and find all available downloads there.
- Click Get next to the macOS Ventura that you want to download, and it will appear under the Software Update section.
- When the download ends, navigate to the Applications folder on your Mac to check macOS Ventura there.
Step 2: Convert the macOS Ventura installer to a DMG file
In this section, you will learn how to create the macOS Ventura ISO file on a Mac using command lines. All you have to do is copy and paste these command lines into the Terminal window.
1. Prepare an empty disk image in Terminal
You can execute this hdiutil command line to make room for the macOS Ventura installer you've downloaded. Just copy it here and paste it into Terminal, then hit the Return key to begin. sudo hdiutil create -o /tmp/Ventura -size 14000m -volname Venturaiso -layout SPUD -fs HFS+J
- tmp: the place where the empty disk image.
- Size: the size of the volume that needs to run macOS Ventura, which should range from 14GB to 19 GB.
- Volume name: Venturaiso is the name of the volume. You're recommended to leave it unchanged to avoid any unknown errors.
- Layout SPUD: it refers to the Single Partition, Apple Partition Map.
- -fs HFS+: it means the file system option.
You can now see the Venturaiso volume on your desktop or Disk Utility and a Ventura-cdr image in the Macintosh HD/private/tmp folder.
2. Mount the macOS Ventura empty disk image you've created
Go to the Macintosh HD/private/tmp folder on your machine to mount the empty disk image you've created.
Alternatively, you can run certain command lines to mount the empty macOS Ventura disk image:sudo hdiutil attach /tmp/Ventura.dmg -noverify -mountpoint /Volumes/Ventura
3. Create the macOS Ventura installer application on the mounted disk image
- Type sudo in the Terminal home window.sudo
- Open the Applications folder and control-click the macOS Ventura option.
- Choose Show Package Contents in the dropdown menu.
- Head to the Contents directory and switch to the Resources tab.
- Find Create Install Media, select it, and then drag it to the Terminal window.
- Then, the command line in the Terminal window should be like this:sudo /Applications/Install\ macOS\ Ventura.app/Contents/Resources/createinstallmedia
- Next, you should add the empty volume you created to Terminal. All you need to do is type in -volume and then drag the mounted disk from the desktop to the Terminal. The final command line should be like this: sudo /Applications/Install\ macOS\ Ventura.app/Contents/Resources/createinstallmedia –volume /Volumes/Venturaiso –nointeraction
4. Unmount the macOS Ventura installer
Once the installer is created, you have to eject or unmount the disc from your Mac desktop. You can eject it by right-clicking the file on your desktop and selecting Eject.
Step 3: Convert the macOS Ventura.dmg file to the macOS Ventura.cdr file
Provided that we have a macOS Ventura bootable DMG file, we are almost finished with our macOS 13 ISO file creation work. Type the command line below to convert the macOS Ventura.dmg file into a .cdr file first.
hdiutil convert /tmp/Ventura.dmg -format UDTO -o ~/Desktop/Ventura
Step 4: Convert the macOS Ventura.cdr file to an ISO file
The following command line converts macOS Ventura.cdr to an ISO file and then moves the macOS Ventura.iso file from the temporary location to your desktop.
mv -v ~/Desktop/Ventura.cdr ~/Desktop/Ventura.iso
Now, you have a macOS Ventura.iso file and you can experience macOS 13 on other operating systems with certain Virtual Machines, for example, VirtualBox, VMWare, and Parallels Desktop.
Directly download the macOS Ventura ISO file
In case you have no interest in creating a macOS Ventura ISO file by yourself, you can also download the ISO file directly by clicking the following link:
Free Download macOS Ventura ISO file
With this ISO file, you can fluently run macOS Ventura on virtual software like VirtualBox, VMware, Parallel Desktop, etc.!
Many thanks if you'd like to share this link with more people!
Final words
The simplest way to enjoy macOS Ventura on non-MacOS is to install it via an ISO image. But if you have no access to an ISO image of macOS Ventura, you can create your own.
This article will walk you through downloading/creating a macOS Ventura ISO file, and we hope it will be useful to you.
For more information about macOS Ventura, please read the following articles:
- Top 10 macOS Ventura Problems and How to Fix Them
- How to Install macOS Ventura on an Unsupported Mac?
- NTFS for Mac Ventura: Read/Write NTFS Drive on macOS Ventura
- 4 Ways to Recover Files after macOS Ventura Update
- How to Install macOS Ventura on VMware on Windows PC? (Step-by-Step)
- Need Windows? Windows 11 Download | Windows 10 Download | Windows 7 Download Ultimate | Windows 7 Home Premium