Apple released macOS 14 Sonoma, the successor of macOS Ventura, to the public on September 26, 2023. This major update has introduced a plethora of innovative features, refined designs, and enhancements aimed at improving user experience and productivity.
Among the notable additions are stunning dynamic screensavers of locations from around the world, widgets that you can add to the desktop, a new "Presenter Overlay" feature that can keep you front and center while sharing the screen, Game Mode that allocates games the highest priority on the CPU & GPU, and enhancements to the Safari browser.
If you want to install macOS Sonoma on a virtual machine, such as VMware, VirtualBox, or Parallel Desktop, you'll need the macOS 14 Sonoma ISO file. To create a macOS Sonoma ISO file, you can download the Sonoma DMG file from iBoysoft DiskGeeker and then convert the DMG file to ISO. Just follow the steps below:
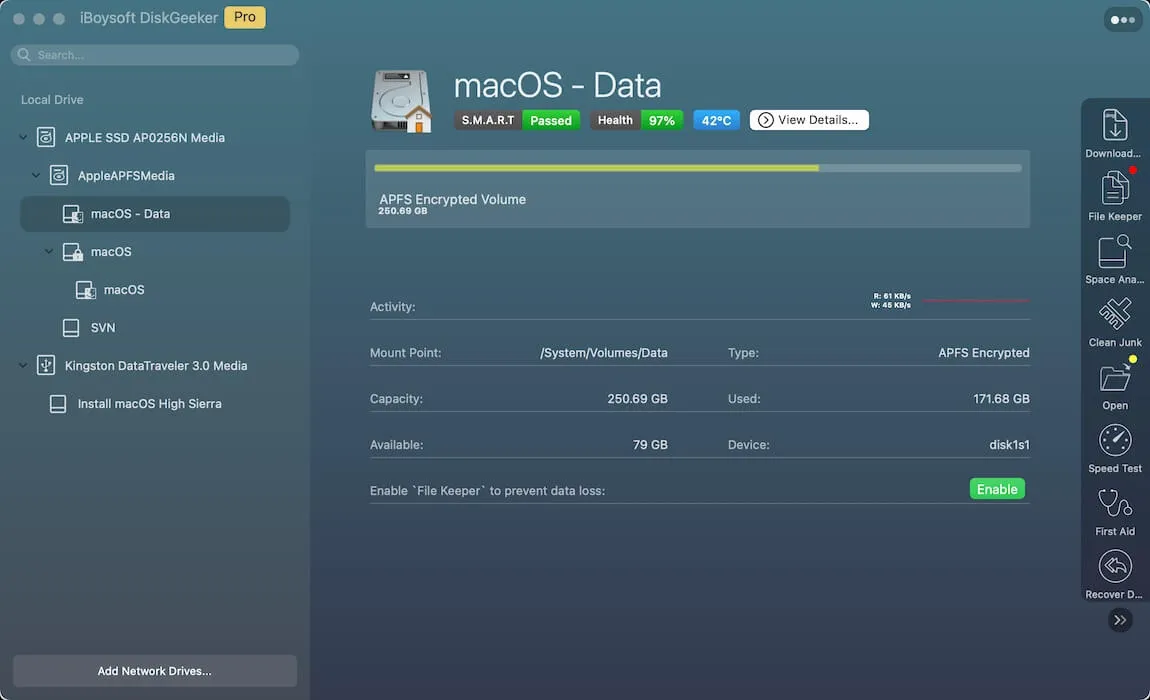
- Launch iBoysoft DiskGeeker.
- Select an internal partition on your Mac and click Download Image.
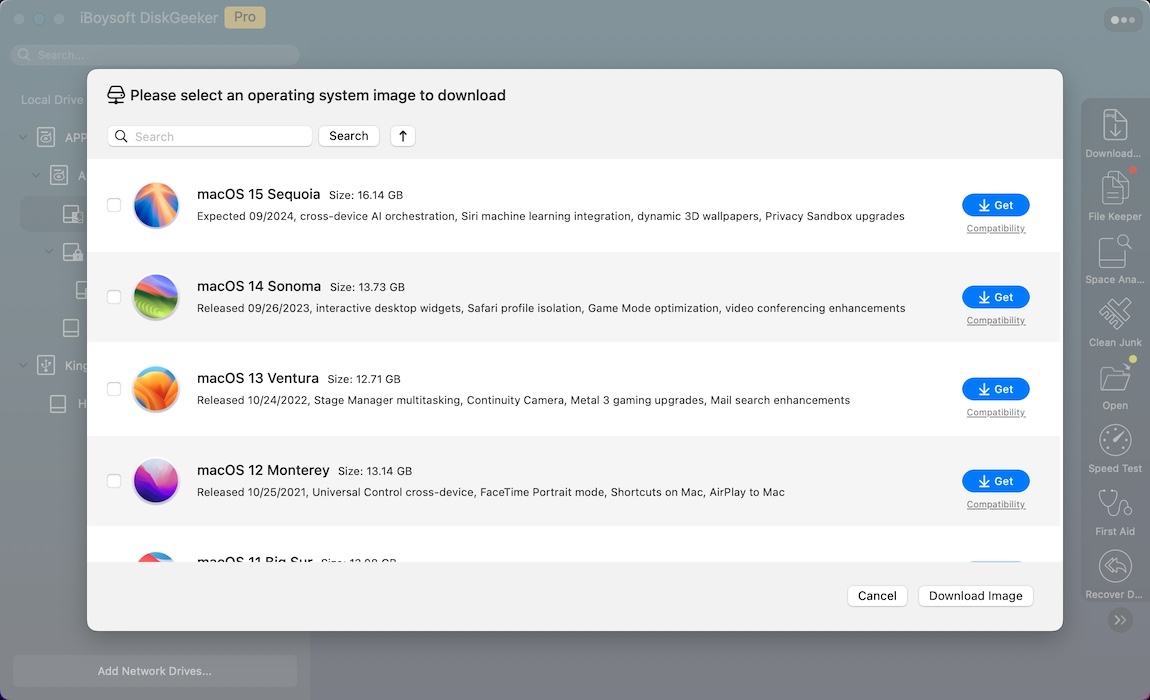
- Choose macOS 14 Sonoma and click Get.
- After macOS Sonoma is downloaded, open Terminal.
- Run the command to convert the macOS Sonoma DMG file to a CDR file.hdiutil convert dmg_file_path -format UDTO -o ~/Desktop/Sonoma.cdrTo get the file path, simply drag and drop the file into Terminal. Please pay special attention to the space between commands. E.g., hdiutil convert /Users/jenny/Desktop/macOS\ 14\ Sonoma.dmg -format UDTO -o ~/Desktop/Sonoma.cdr
- Rename the CDR file to an ISO file.mv ~/Desktop/Sonoma.cdr ~/Desktop/Sonoma.iso
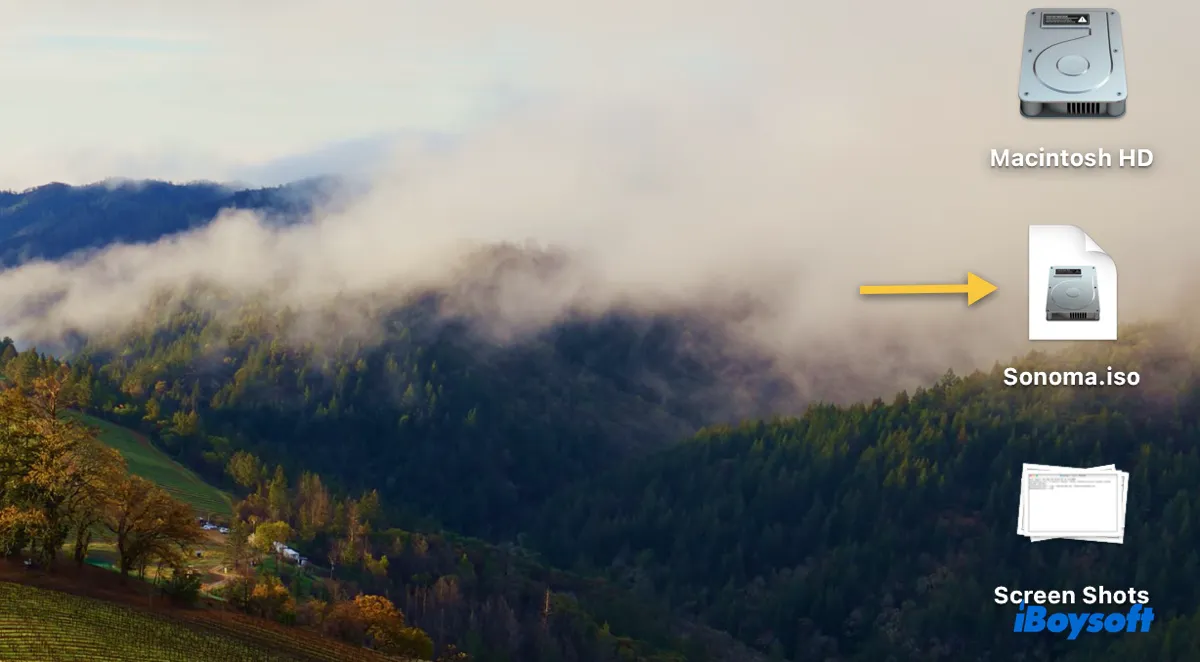
- Use the macOS Sonoma ISO file.
What is a macOS Sonoma ISO file?
A macOS Sonoma ISO file (.iso) is a disk image file for macOS Sonoma, typically used for installing macOS Sonoma on virtual machines like VMware or VirtualBox, creating bootable installers, or for other installation methods beyond the standard upgrade process provided by Apple through the Mac App Store or Software Updates.
If you have a macOS Sonoma ISO file, you can create a new virtual machine in VMware or VirtualBox, mount the macOS Sonoma ISO as the virtual disc drive, and then install macOS Sonoma on that virtual machine, effectively running a macOS Sonoma within your actual computer, regardless of whether your actual computer is running Windows, Linux, or another operating system.
This allows users to test, develop, and run macOS Sonoma and applications in isolated environments without needing to modify their actual computers, which can be especially useful for developers, testers, and IT professionals.
Share this post to help others know what the macOS Sonoma ISO file is!
How to download macOS Sonoma ISO for VMware or VirtualBox?
If you don't have a Mac that's compatible with macOS Sonoma, you can directly download the macOS Sonoma ISO file we created for you from the link below.
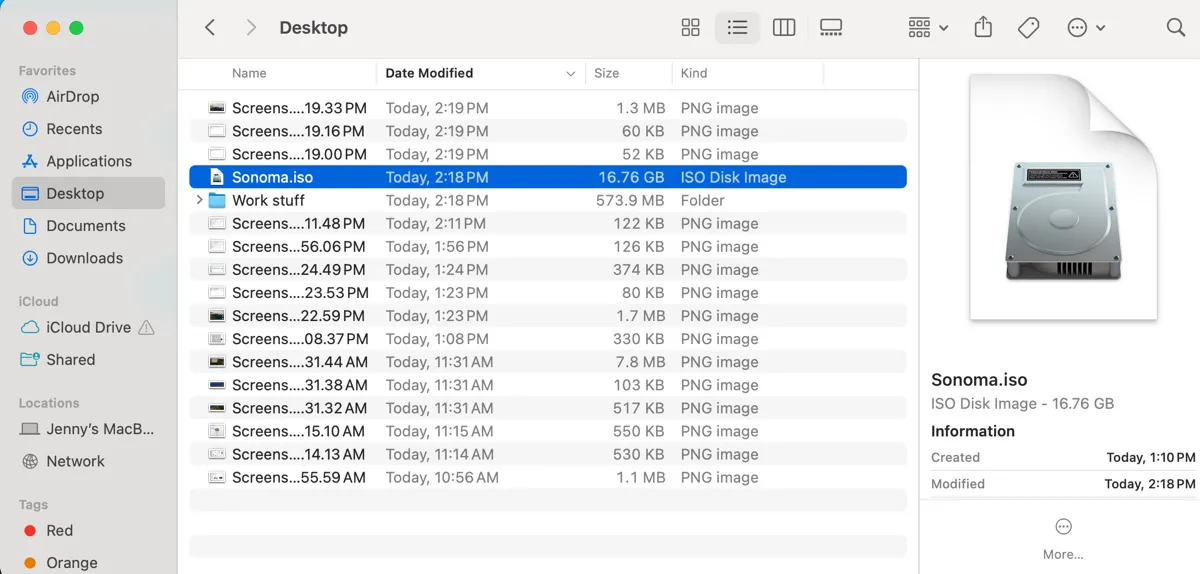
It was made from the public release of macOS Sonoma, which is 12.9 GB in size, downloaded on My MacBook running macOS Sonoma. The final macOS Sonoma ISO file is 16.76 GB. We compressed it to make it easier to transfer and the zip file is 14.36 GB.
How to create macOS Sonoma ISO for Virtual Machines on Mac?
Alternatively, you can create a reliable macOS Sonoma ISO for VMware or VirtualBox with the help of iBoysoft DiskGeeker. It allows you to download the macOS Sonoma DMG file, which can then be converted to ISO.
If you have a spare Mac that supports macOS Sonoma or a macOS virtual machine, you can also manually create the macOS Sonoma ISO file with the steps below:
- Step 1: Download the macOS Sonoma full installer
- Step 2: Create an empty ISO disk image in Terminal
- Step 3: Make the macOS Sonoma installer
- Step 4: Unmount the macOS Sonoma disk image and convert it into the .iso format
Step 1: Download the macOS Sonoma full installer
The first step for creating a macOS Sonoma ISO file is to download the full installer of macOS Sonoma.
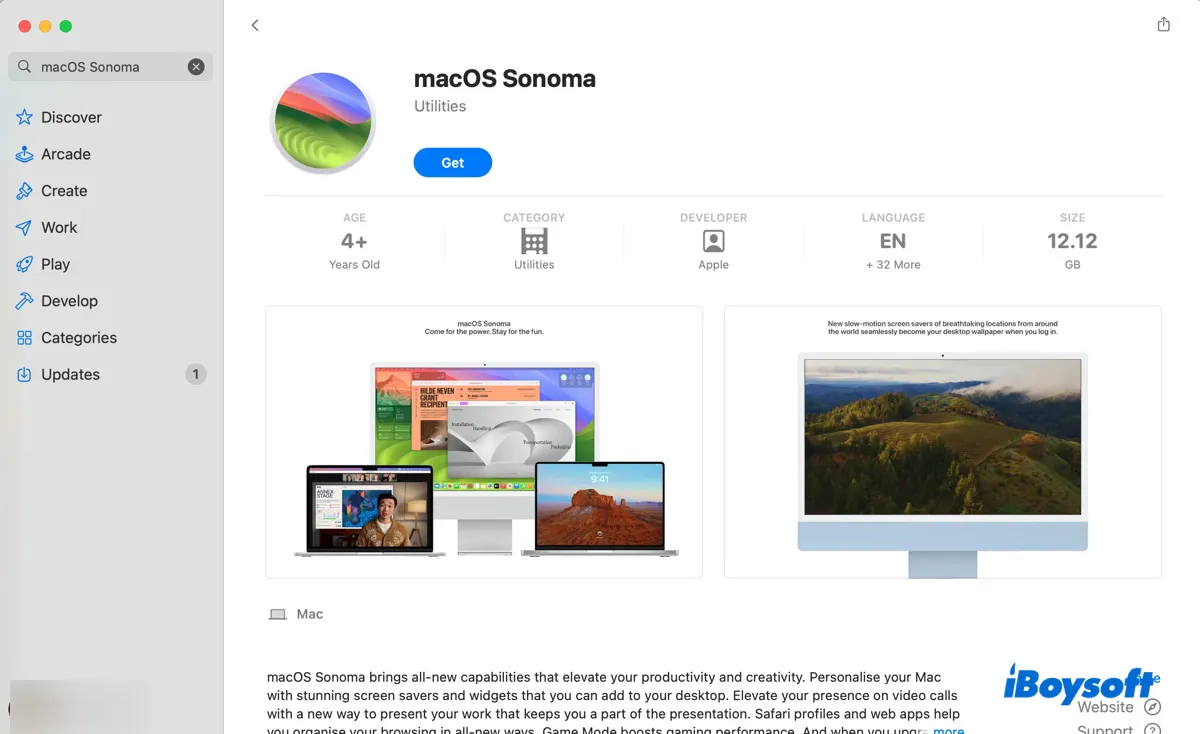
For a compatible Mac, you can download it from the Mac App Store. To do it, open the App Store, search for "macOS Sonoma" in the search bar, and hit the Enter key.
When macOS Sonoma shows up, click View > Get, and then you'll be redirected to the Software Update page. Click the Download button when it asks whether you want to get macOS Sonoma.
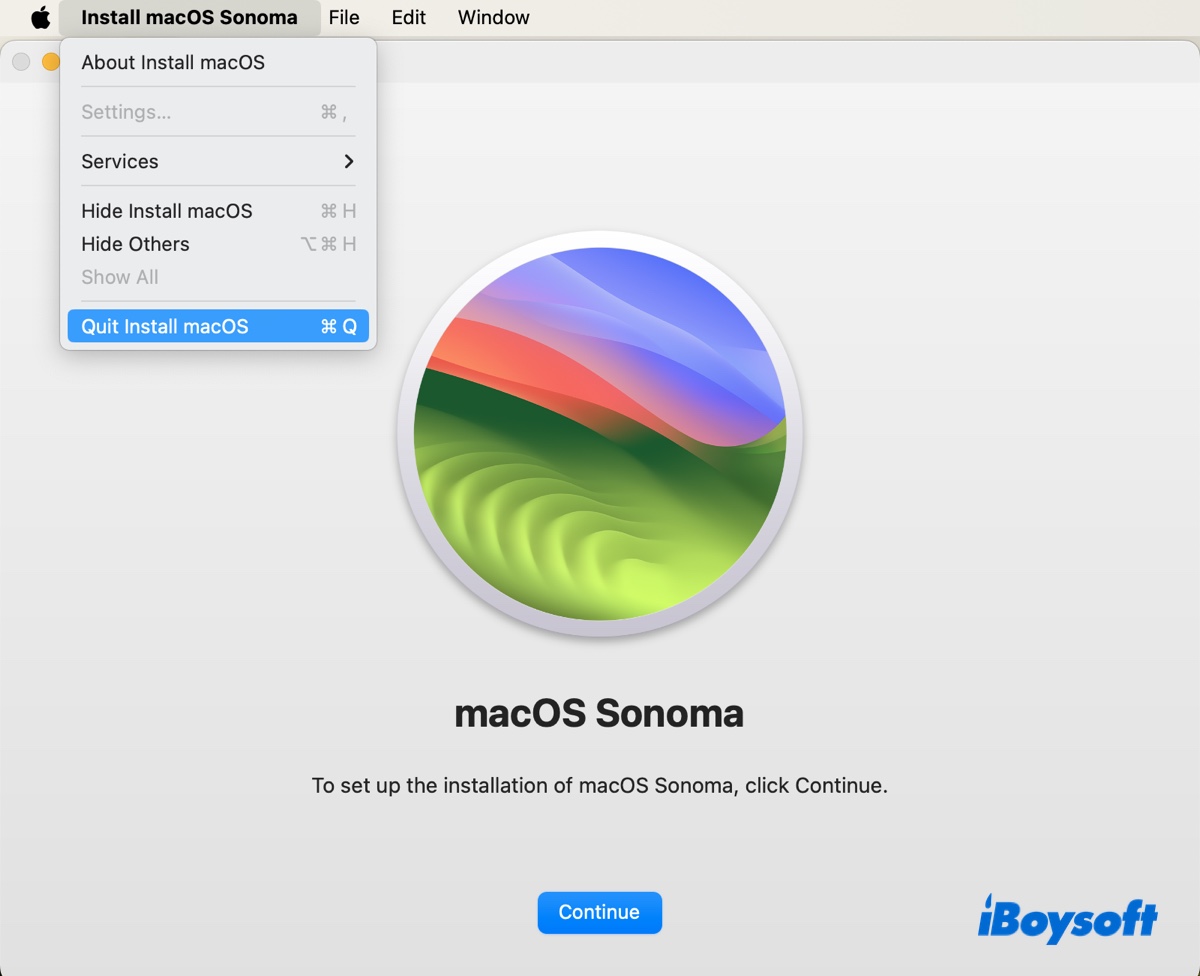
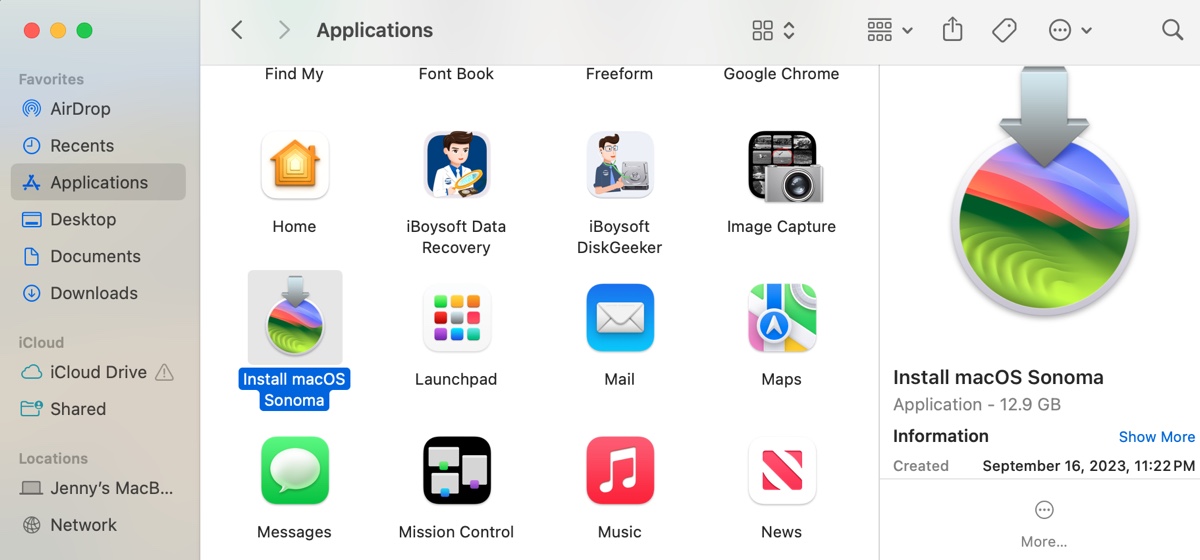
After the download finishes, click "Install macOS Sonoma" > "Quit Install macOS" > Quit to quit the installation. Then the macOS Sonoma installer will be kept in the Applications folder.
For a virtual Mac, you can download it from the Apple Server. The download is an installation package in the format of .pkg. When it completes, you can open the InstallAssistant.pkg file and follow the onscreen instructions to extract it. Once it's extracted, you should see the "Install macOS Sonoma" app in your Applications folder.
Step 2: Create an empty ISO disk image in Terminal
The next step is to prepare an empty disk image for the macOS Sonoma installer and mount it with the hdiutil command line tool.
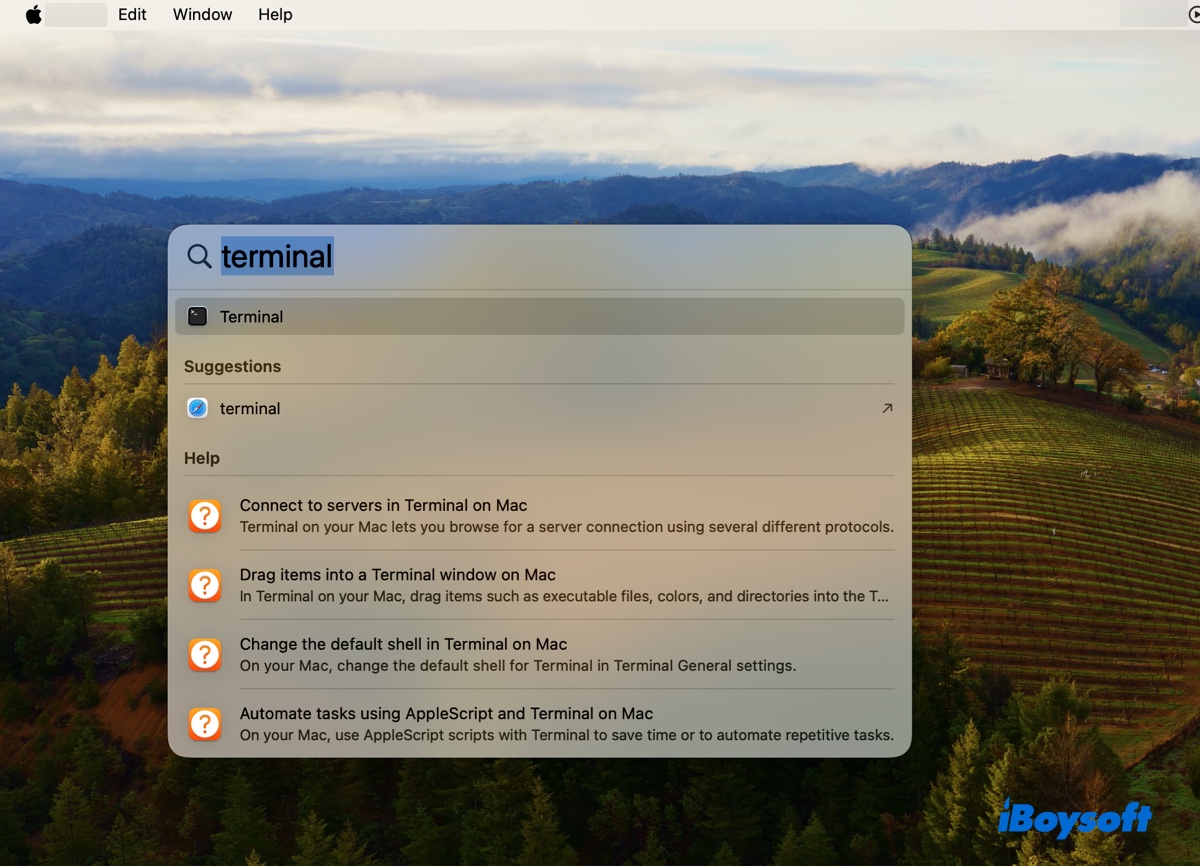
Press Command + Space to open Spotlight search, then type in "terminal" and press the Enter key to launch Terminal.
After that, copy and paste the command below into the Terminal window and hit Enter to execute it. It may take a minute for the disk image to be created. (Learn what hdiutil is)
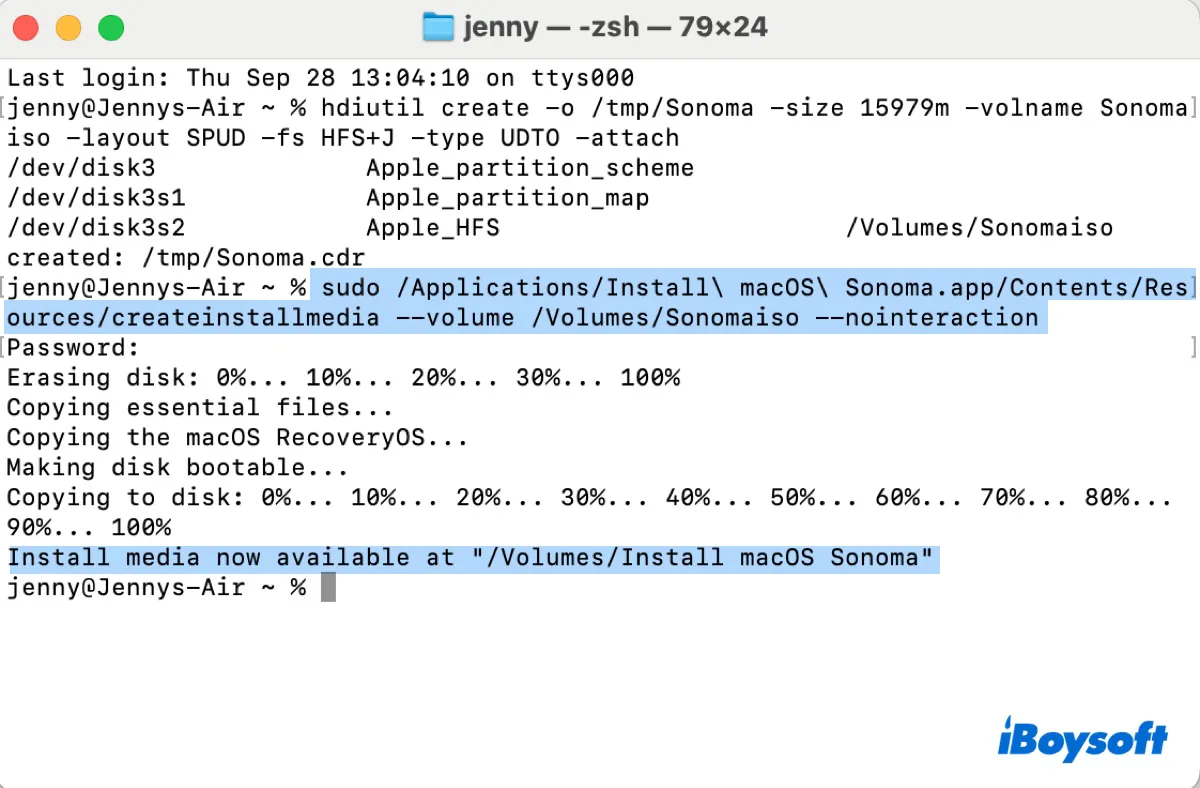
hdiutil create -o /tmp/Sonoma -size 15979m -volname Sonomaiso -layout SPUD -fs HFS+J -type UDTO -attach
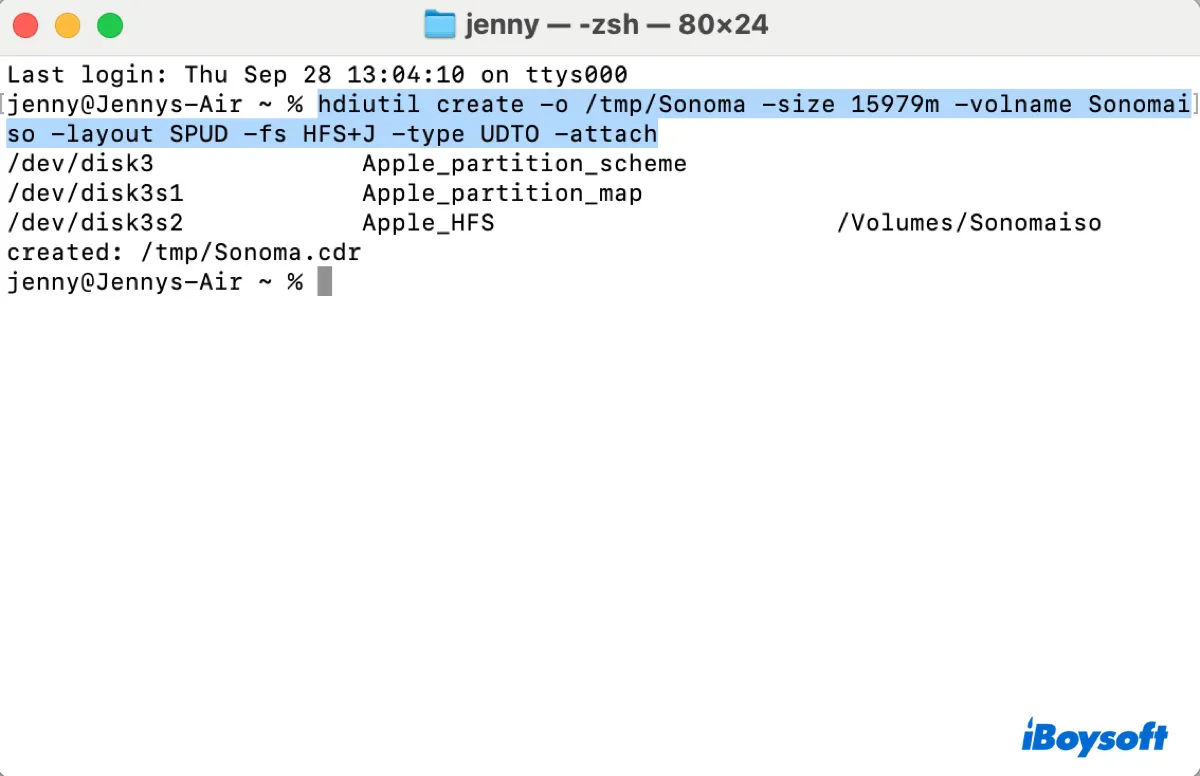
* This command creates a new, single-partition, 15979 MB disk image with the volume name "Sonomaiso," using the HFS+ journaled file system, in the /tmp directory with the name "Sonoma," and of the type suitable for creating CD/DVD ISOs. After creating the disk image, it's immediately mounted to the system.
Here's a breakdown of the command:
- hdiutil create: This initiates the creation of a new disk image.
- -o /tmp/Sonoma: The -o option specifies the output file's location and name. /tmp/Sonoma is the path where the new disk image will be created. The file will be temporarily stored in the system's /tmp directory with the name "Sonoma."
- -size 15979m: This sets the maximum size of the disk image to 15979 megabytes.
- -volname Sonomaiso: This assigns the volume name "Sonomaiso" to the disk image.
- -layout SPUD: The -layout option specifies the partition scheme of the disk image. "SPUD" stands for single-partition UDIF (Universal Disk Image Format).
- -fs HFS+J: This designates the file system for the disk image as HFS+ with journaling enabled. HFS+ is a file system commonly used by macOS.
- -type UDTO: This specifies the disk image type as UDTO, which stands for Universal Disk Image Format (UDIF) DVD/CD-R master. This type is often used to create an ISO image that can be burned to CD/DVD.
- -attach: After creating the disk image, the -attach option mounts the new disk image to the file system, making it accessible as if it were a physical disk.
Step 3: Make the macOS Sonoma installer
Now, you can make the bootable macOS Sonoma installer on the created empty disk image.
Paste the command below into Terminal and hit Enter. Then type in your administrator password and press Enter again. (Note that the password won't echo to the screen.)
sudo /Applications/Install\ macOS\ Sonoma.app/Contents/Resources/createinstallmedia --volume /Volumes/Sonomaiso --nointeraction
- sudo: It is typically used to execute administrative tasks or commands.
- /Applications/Install\ macOS\ Sonoma.app/Contents/Resources/createinstallmedia: This is the path to the createinstallmedia command located inside the macOS Sonoma installer package, which is usually located in the /Applications directory. The backslashes (\) are escape characters used to handle spaces in the file or directory names in the command line.
- --volume /Volumes/Sonomaiso: This specifies the volume "Sonomaiso" as where the bootable installer will be created.
- --nointeraction: This flag runs the command without requiring user interaction, meaning it won't prompt the user for confirmations or additional input during execution.
Step 4: Unmount the macOS Sonoma disk image and convert it into the .iso format
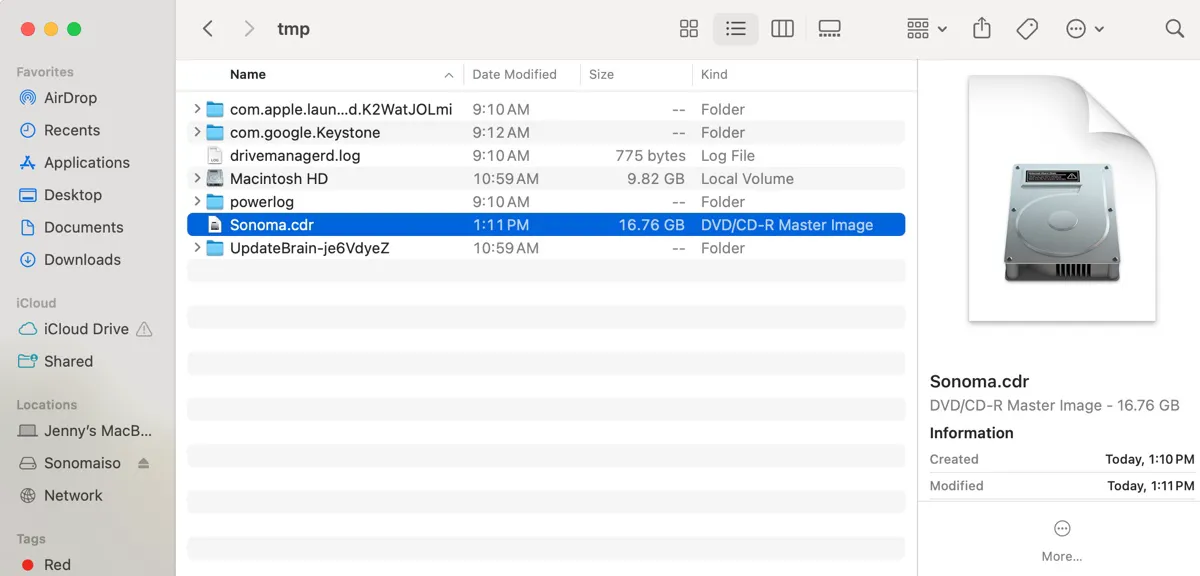
After the macOS Sonoma install media is created, you need to unmount it, convert its format from Sonoma.cdr to Sonoma.iso, and move it to your desktop.
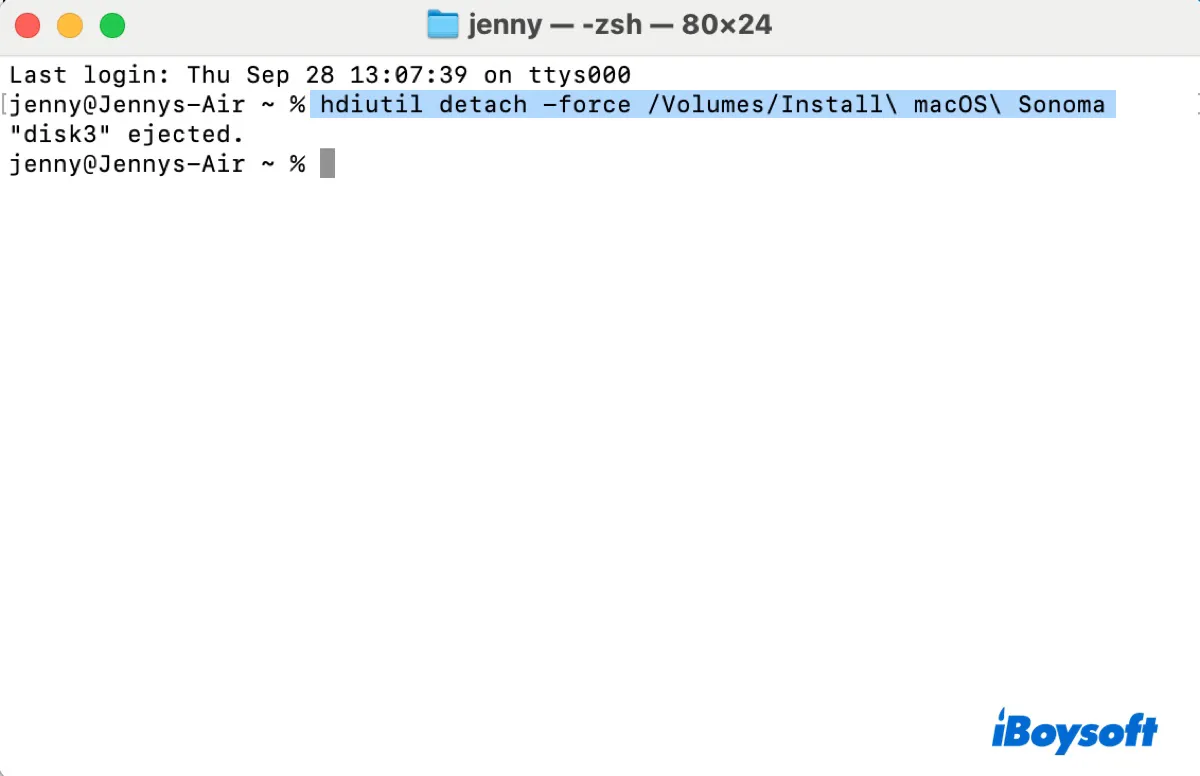
In Terminal, execute the following command to unmount the "Install macOS Sonoma" disk image.
hdiutil detach -force /Volumes/Install\ macOS\ Sonoma
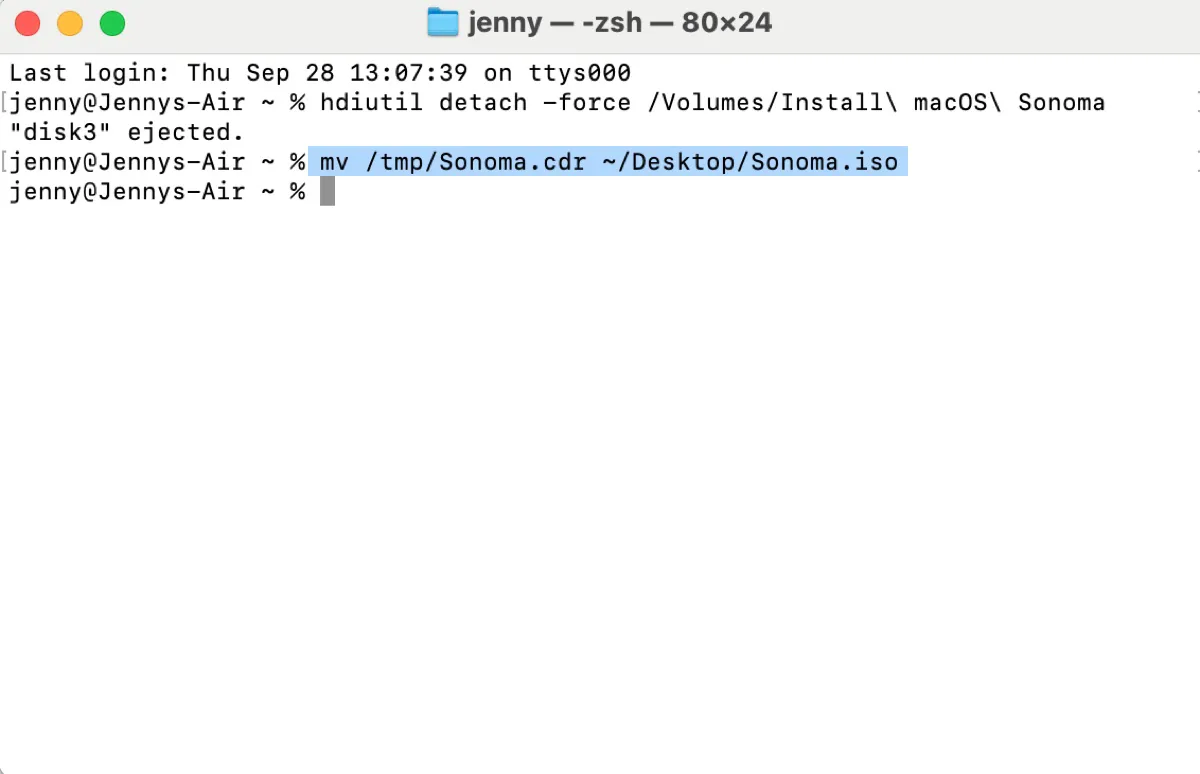
Then run the following command to move the macOS Sonoma installer to your desktop and rename the extension from .cdr to .iso:
mv /tmp/Sonoma.cdr ~/Desktop/Sonoma.iso
Now that you have the macOS Sonoma ISO file on your Mac's desktop; you can utilize it to install macOS Sonoma on VMware, VirtualBox, or other virtual machines.
Also read:
How to Download macOS Tahoe ISO File for VirtualBox/VMware?
How to Install macOS Sonoma on VirtualBox on Windows?
How to Install macOS Sonoma on VMware on Windows?
How to Download macOS Sonoma DMG File?
How to Download macOS Big Sur ISO File for VirtualBox/VMware?
How to Download macOS Catalina ISO File for VirtualBox/VMware?
How to Download macOS High Sierra ISO File for VirtualBox/VMware?
How to Create or Download ISO File for macOS or Mac OS X?
Share this guide to benefit others who want to create a macOS Sonoma ISO file on Mac.