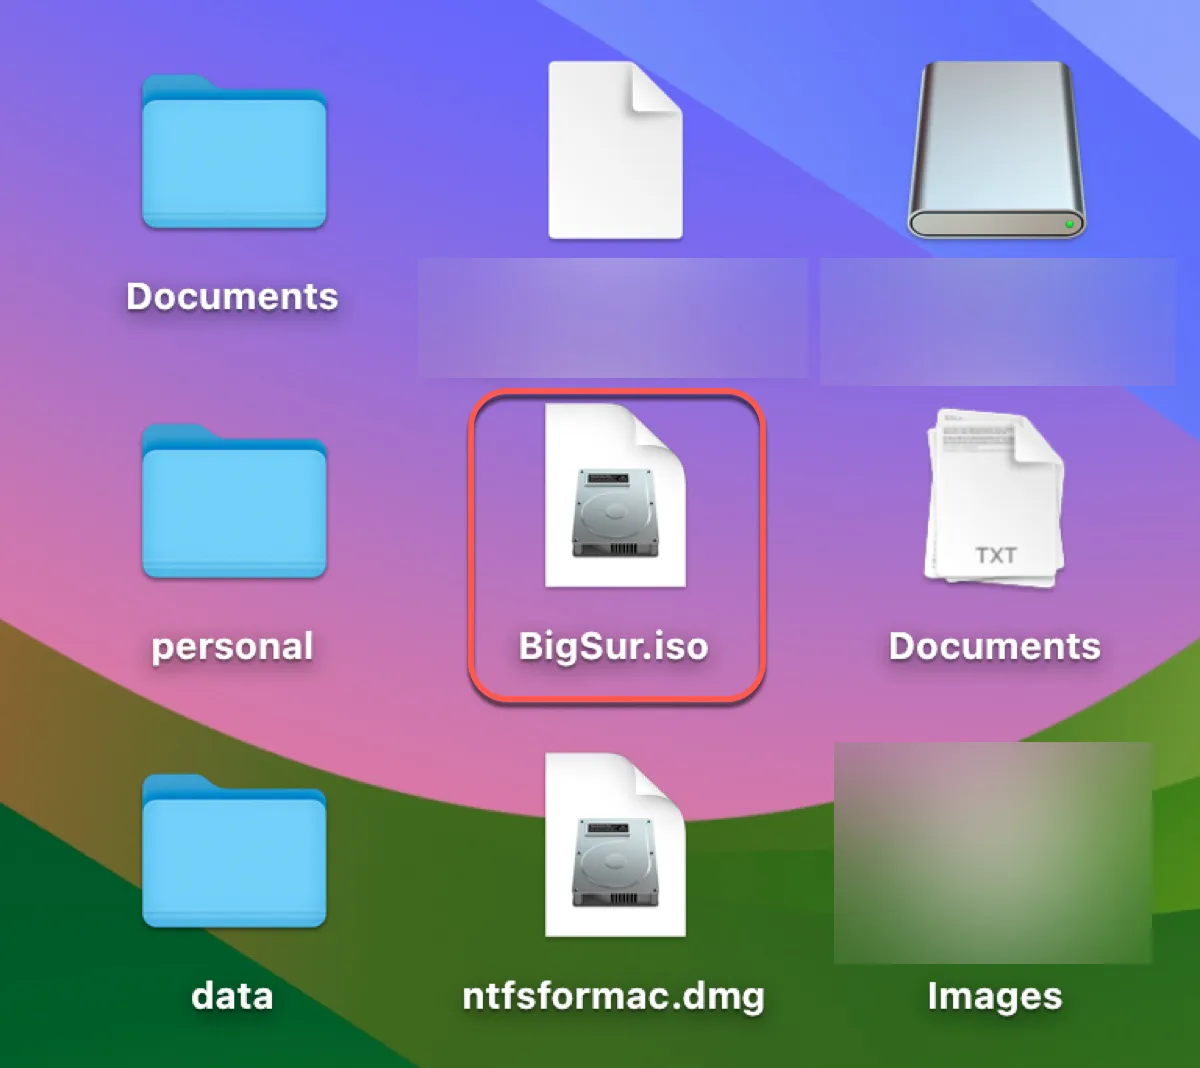
A macOS Big Sur ISO file is essential for installing macOS Big Sur on virtual machines such as VirtualBox or VMware. It allows you to run macOS Big Sur from a Windows PC, an incompatible Mac, or alternative media like a USB flash drive, an SD card, or an external hard drive.
However, Apple doesn't provide the macOS Big Sur ISO file directly; instead, it offers the macOS Big Sur.app file. To convert the .app file to an .iso file, you must execute a series of commands in Terminal on a Mac, which may not be ideal for you.
This guide will show you how to download the macOS Big Sur ISO file directly or create one manually.
How to download macOS Big Sur ISO directly?
The ISO file is vital for installing macOS Big Sur. To ensure the safety and stability of the installation, we recommend you get the macOS Big Sur ISO file from iBoysoft DiskGeeker. It provides macOS ISO and DMG files for Mac OS X Snow Leopard and later versions, including macOS Big Sur.
Whether you need a macOS Big Sur ISO or a bootable USB installer for a Mac (compatible or unsupported) or a Windows PC, this tool provides a seamless solution.
Here's how to download the macOS Big Sur ISO image safely:
Step 1: Download, install, and open iBoysoft DiskGeeker.
Step 2: Click Download Image.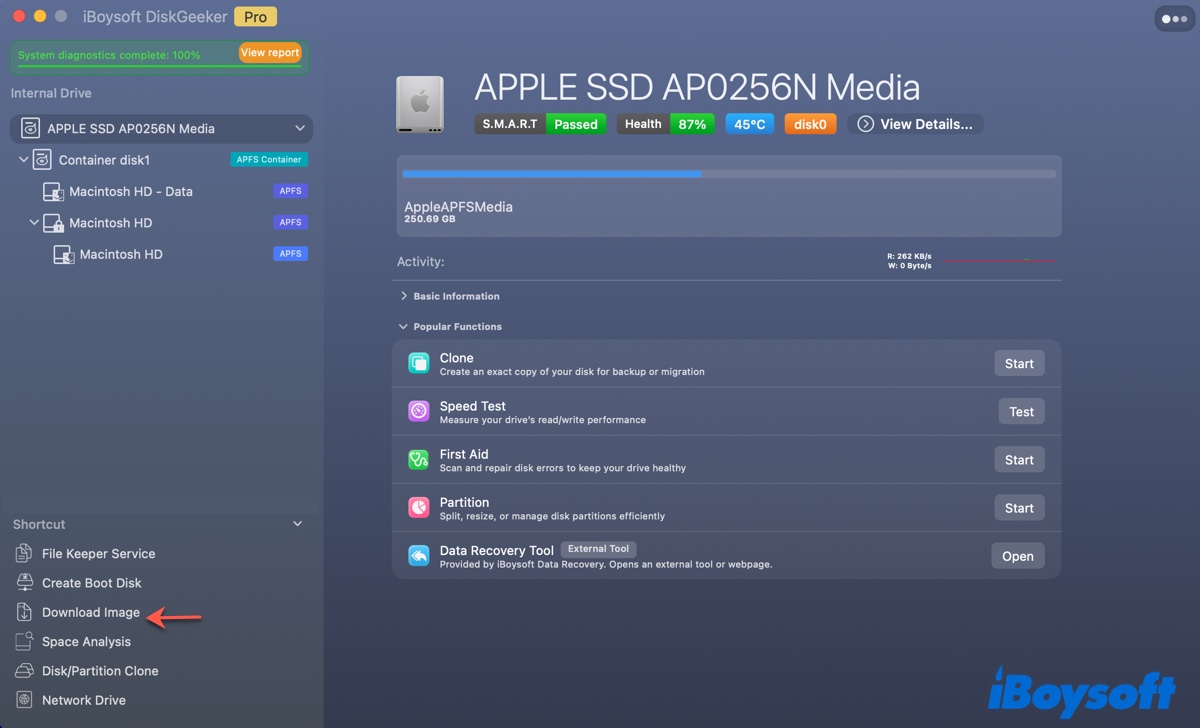
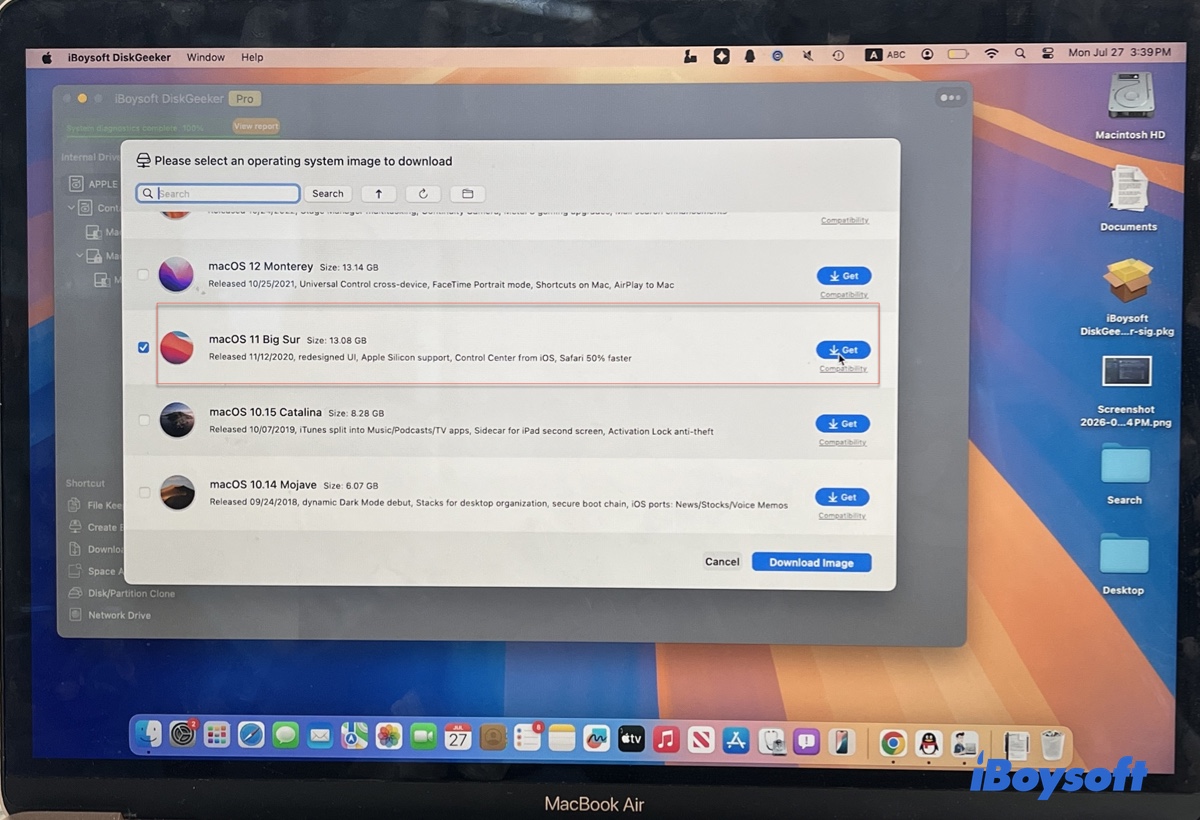
Step 3: Choose macOS 11 Big Sur and click Get.
Step 3: Choose the ISO format, then select how you want to download the Big Sur ISO file.
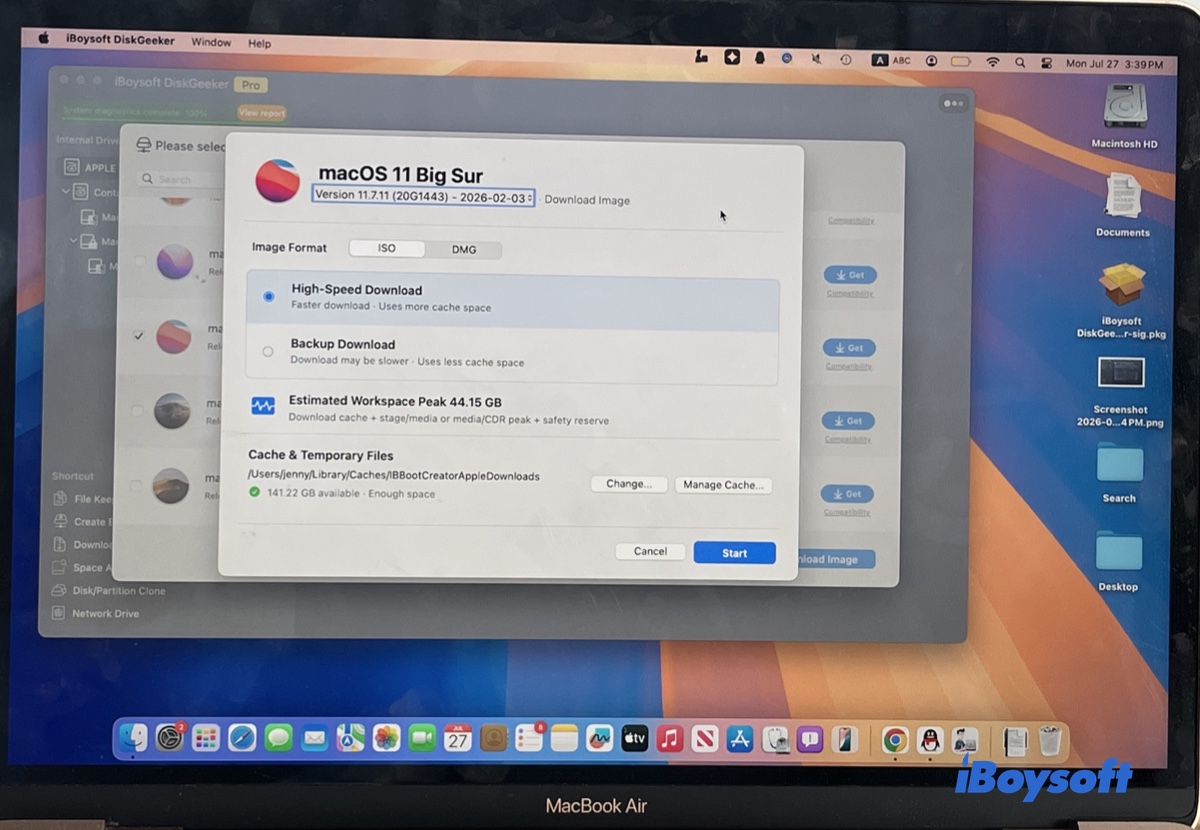
* High-Speed Download: The fastest way to download the ISO file but temporarily needs more cache space. The space will be released after the ISO file is downloaded.
* Backup Download: The regular way to download the ISO file. Slower but requires less cache space.
Step 4: Click Start.
Step 5: Choose where to save the ISO image.
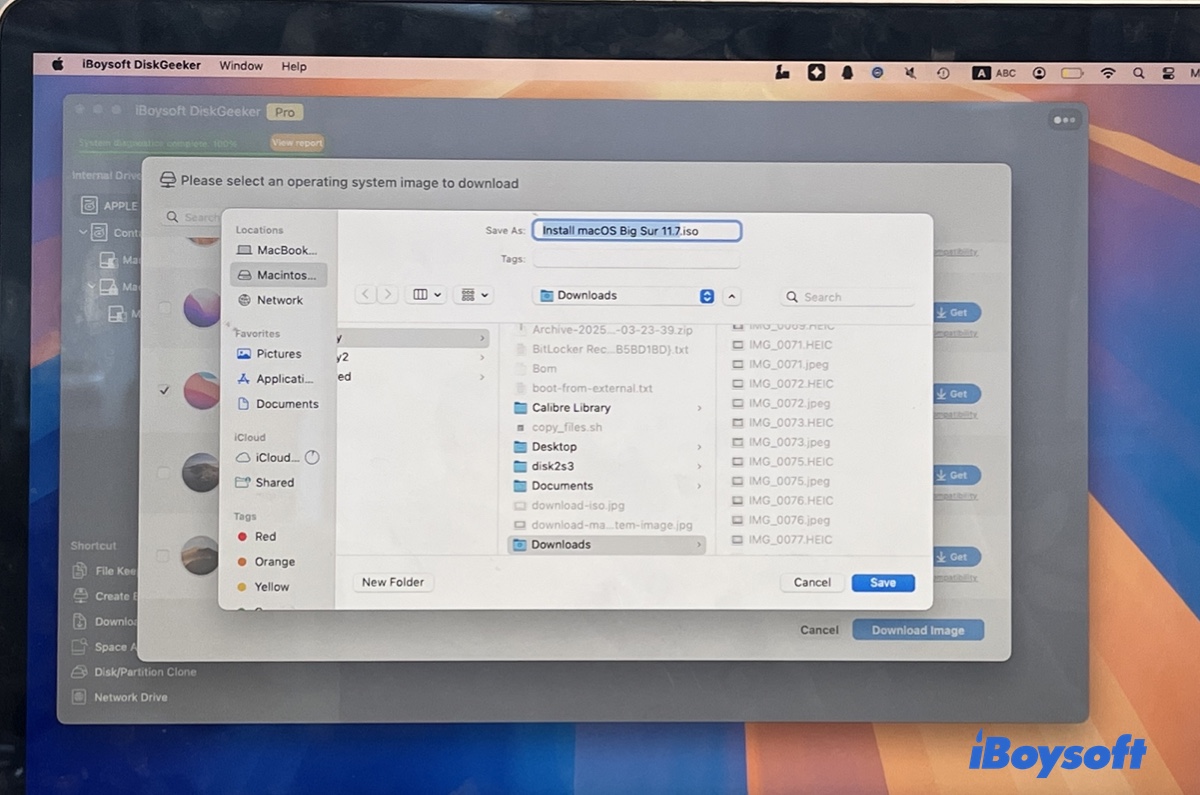
Step 6: Wait for the download to complete.
If you still want the direct download link to the macOS Big Sur ISO file, you can download the macOS Big Sur ISO file from the links below.
Click the first one to download the full installer. If it takes a long time to download or doesn't work, use the second link to download the torrent file and open it with a client to speed up the process.
Warning: The following links are sourced from online archives. Please use them at your own risk.
macOS Big Sur ISO direct download for VMWare/VirtualBox
Help others download macOS Big Sur ISO for VirtualBox or VMWare by sharing this post!
How to create a macOS Big Sur 11.7.10 ISO file?
If you have a compatible Mac, you can manually create a macOS 11 Big Sur ISO file with the latest version of macOS Big Sur:
- Step 1: Download the macOS Big Sur full installer
- Step 2: Make a new ISO disk image
- Step 3: Create a bootable macOS Big Sur installer
- Step 4: Convert the macOS Big Sur install media into the .iso format
Step 1: Download the macOS Big Sur full installer
To make a macOS Big Sur ISO file, you need the macOS Big Sur full installer. There are two ways to download the Big Sur full installer: from the official Mac App Store or Apple Server.
Download macOS Big Sur from the App Store (official)
If your Mac is compatible with macOS Big Sur and isn't running macOS Monterey or later, you can get the full installer from the App Store. Find the macOS Big Sur link in Apple's document to open the Mac App Store, then tap the Get button. It will direct you to the Software Update page, where your Mac is examined for compatibility.
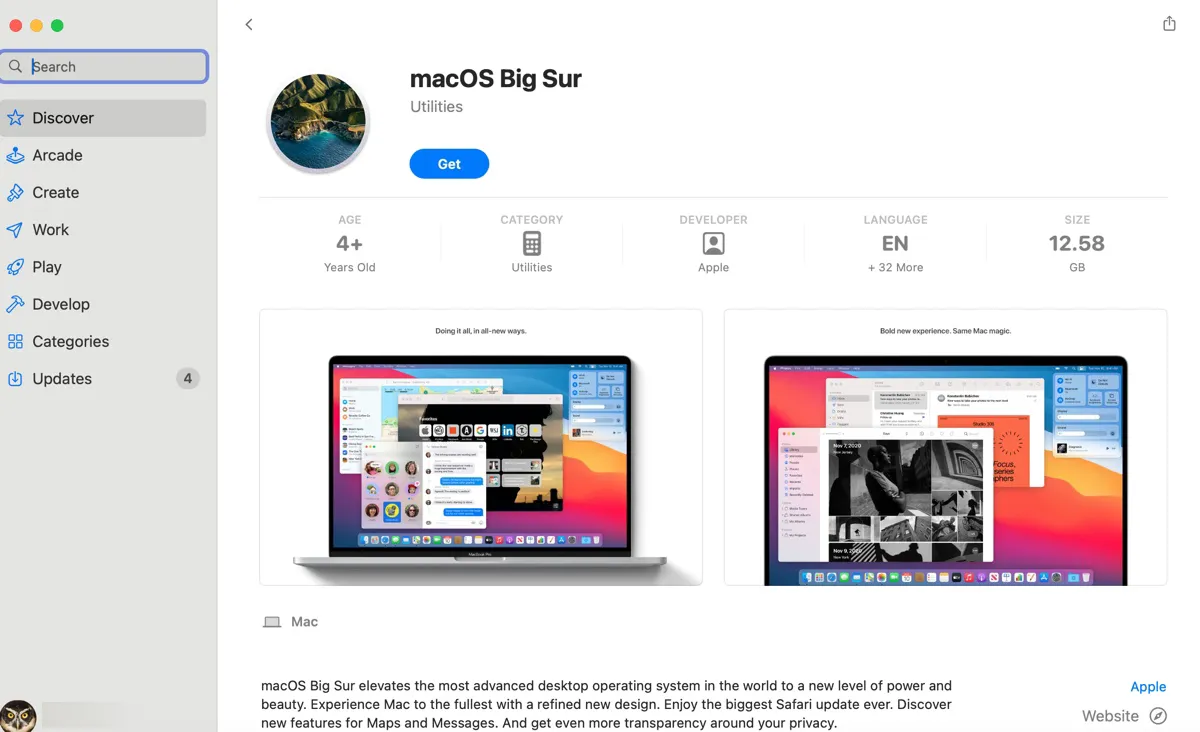
If it passes the test, the system will ask you to confirm the download by clicking the Download button. Then the download will start and automatically open the installer once it finishes. Since you're not installing it on the current Mac, you need to click Install macOS Big Sur > Quit Install macOS to close the installer.
The macOS Big Sur installer, labeled Install macOS Big Sur.app, will be kept in the Applications folder.
Download macOS Big Sur from Apple Server
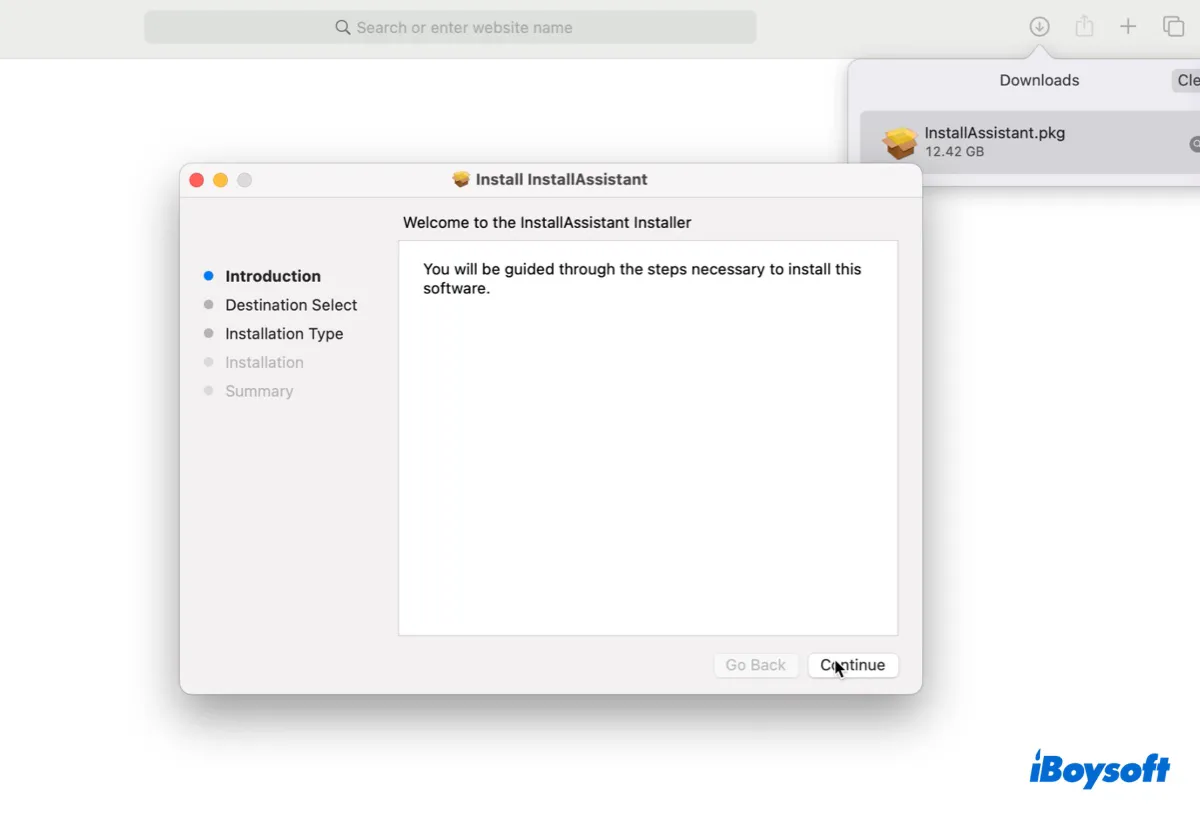
If your Mac isn't compatible with macOS Big Sur, you can download the macOS Big Sur.pkg file from Apple's server.
It's recommended to download it using Safari. After the download, you need to open the pkg file and install it on your Mac. The process extracts the macOS Big Sur installer to your Applications folder.
💡Tips: To download the macOS Big Sur installer, your Mac must have enough space. If it's running low on storage, you can use iBoysoft DiskGeeker to remove unwanted files and junk files.
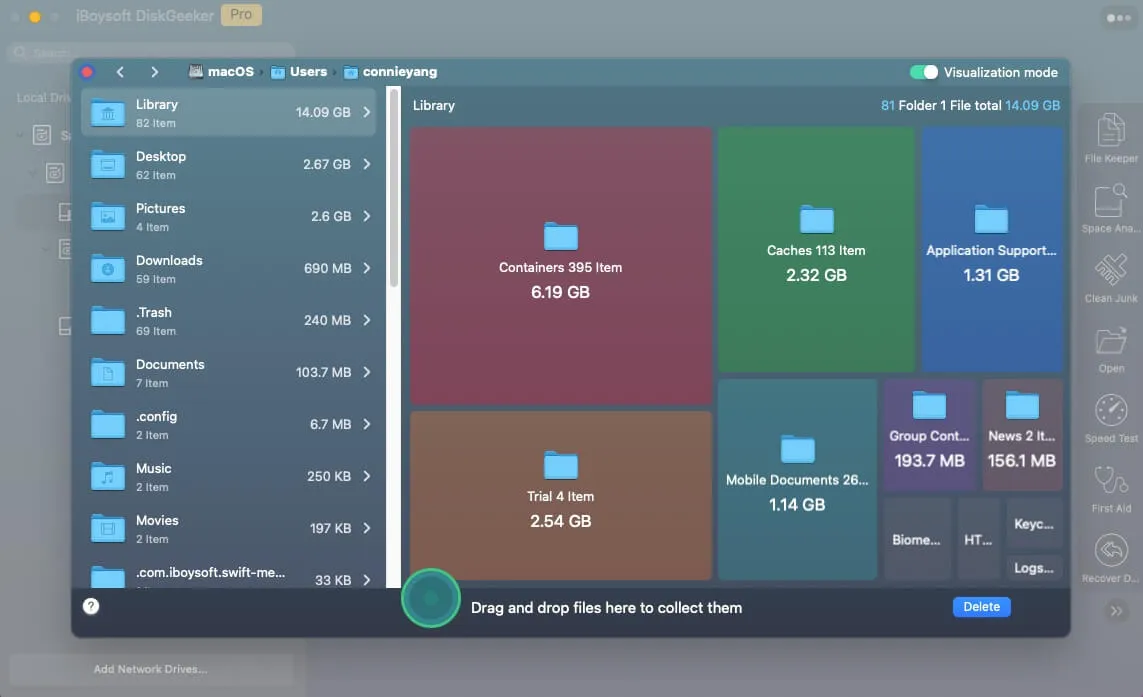
This disk cleaner can analyze your disk space and list all your files in descending order by size, helping you quickly delete large and unnecessary files. Besides, it also has a "Clean Junk" section that allows you to discover and remove temp files, caches, logs, downloads, trashed files, etc.
Step 2: Make a new ISO disk image
When the installer is ready, you can continue creating a temporary disk image in Terminal to store the installer. Press Command + Space and type "terminal," then open the Terminal app and run the hdiutil command below:
hdiutil create -o /tmp/BigSur -size 14000m -volname BigSuriso -layout SPUD -fs HFS+J -type UDTO -attach
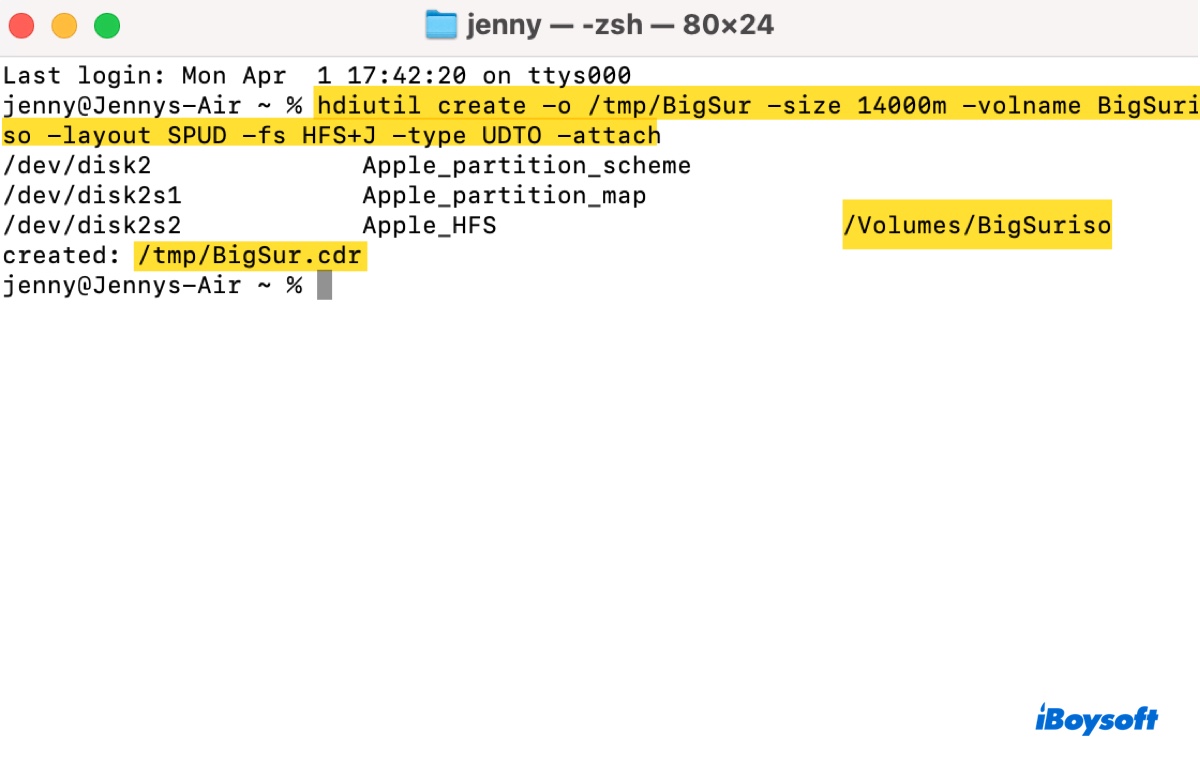
*This creates a new disk image file using the hdiutil command. It specifies the resulted file as /tmp/BigSur, sets the size of the disk image to 14000 megabytes, names the volume within the disk image as BigSuriso, and uses the SPUD (Single Partition – Universal Disk) layout.
Additionally, it specifies the file system as Mac OS Extended (Journaled), sets the type as UDTO (DVD/CD-R master for export), and attaches the newly created disk image.
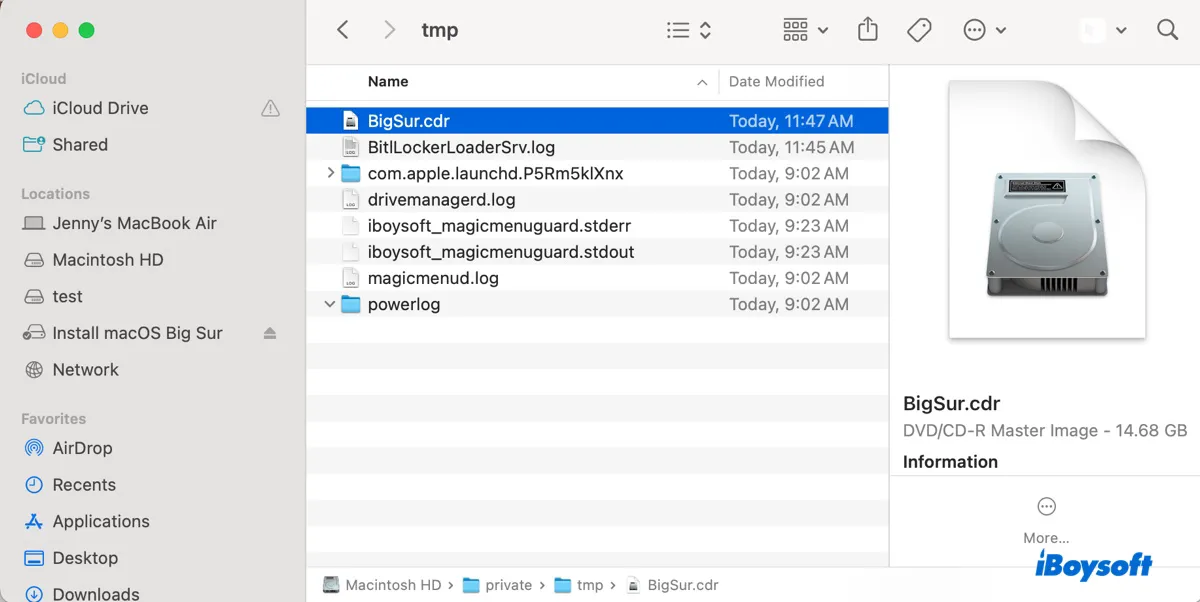
If you open Finder, click Go > Go to folder in the menu bar, and search for /tmp, you'll find the new disk image named BigSur.cdr.
Step 3: Create a bootable macOS Big Sur installer
Next, you need to utilize the createinstallmedia utility to create a bootable macOS installation drive and unmount the volume by executing the commands below.
To create the bootable macOS Big Sur installer:
sudo /Applications/Install\ macOS\ Big\ Sur.app/Contents/Resources/createinstallmedia --volume /Volumes/BigSuriso --nointeraction
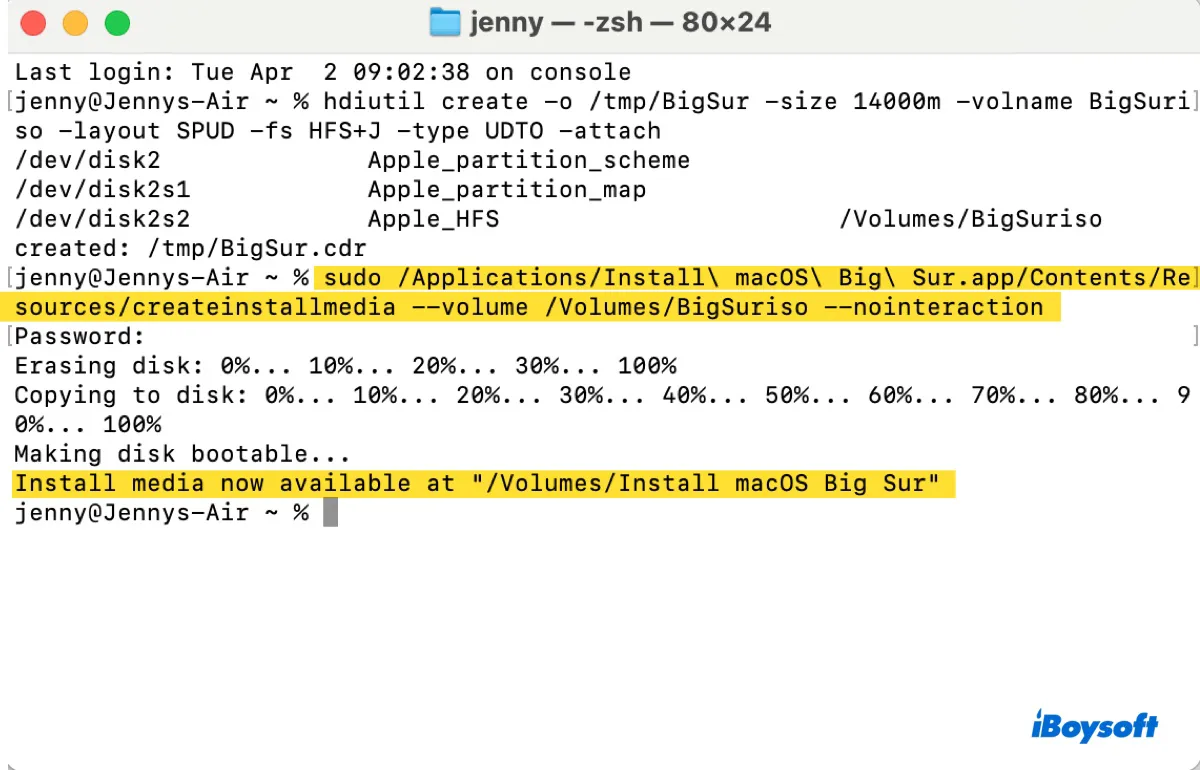
*This command uses "sudo" to run the "createinstallmedia" tool. It will request your admin login password to approve the elevated privilege. When it does, type the numbers in and hit Enter. (Note that the password won't be visible.)
The "--volume" flag specifies the target volume where the macOS installation files will be copied, in this case, "/Volumes/BigSuriso". The "--nointeraction" flag indicates that the process should run without any user interaction.
To unmount the bootable volume:
hdiutil detach /Volumes/Install\ macOS\ Big\ Sur
*This command detaches a mounted volume named "Install macOS Big Sur" from the system. The "hdiutil detach" command is used to unmount or eject a disk image or volume. The backslashes (\) are used to escape the spaces in the volume name.
Step 4: Convert the macOS Big Sur install media into the .iso format
Finally, you must convert the macOS Big Sur disk image from .cdr to .iso and move it from the /tmp folder to your desktop.
mv /tmp/BigSur.cdr ~/Desktop/BigSur.iso
Assuming you've gone through all the steps, you should now have the macOS Big Sur 11.7.10 ISO file on your desktop. Feel free to use it to install macOS Big Sur on virtual machines, including VMware and VirtualBox, or burn it to a USB flash drive, an external hard drive, a CD/DVD, or other external media.
Read more:
How to Install macOS Big Sur on VMware on Windows?
Download macOS 11 Big Sur VMDK for VMware or VirtualBox
Download macOS Golden Gate ISO
Share this guide if you find it helpful!
FAQs
- QHow big is the macOS Big Sur ISO file?
-
A
The installer package is roughly 12.6 GB. When packed into a bootable ISO disk image, the file size usually lands between 13 GB and 16 GB.
- QDo I need an ISO to create a bootable USB drive on a Mac?
-
A
No. On a Mac, you don't need an .iso file at all. You just need the official Install macOS Big Sur app in your /Applications folder. From there, you format a USB drive (16GB+) and run Apple's built-in command: sudo /Applications/Install\ macOS\ Big\ Sur.app/Contents/Resources/createinstallmedia --volume /Volumes/MyVolume.
- QWhich Mac models are actually compatible with Big Sur?
-
A
macOS Big Sur supports:
MacBook (2015 and later)
MacBook Air & MacBook Pro (2013 and later)
Mac mini & iMac (2014 and later)
iMac Pro (2017 and later)
Mac Pro (2013 and later)