On November 12, 2020, macOS 11 Big Sur was released. It represents a step toward unifying the user experience across all Apple devices. Users of the iPhone and iPad may feel as though they are discovering Big Sur for the first time, as the revamp creates a more iOS-like appearance.
Big Sur is the first macOS version to run iOS and iPadOS apps natively on Macs, and it is equipped with M1 hardware. It also enables Time Machine backups using APFS to happen more quickly. Additionally, it improved Dock, Safari, Maps, Messages, Control Center, and other apps.
If you want to run macOS Big Sur on your Windows computer, you will need to a virtual machine such as VirtualBox that can be configured to represent Mac hardware, it can only run when the host operating system is running. Let's see how to install macOS Big Sur on VMware on Windows step by step.
Tips: macOS Tahoe 26 is currently the newest macOS release. You can install macOS Tahoe on VMware on your Windows PC as well.
Note: Ensure there is at least 8GB of RAM, 4 or more cores of CPU, and 80GB of free space on your Windows computer for installing macOS Big Sur on VMware on your PC. If you need to free up space on your Windows PC, iBoysoft DiskGeeker for Windows can help easily and quickly.
How to install macOS Big Sur on VMware on Windows:
- Step 1: Download macOS Big Sur ISO for VMware
- Step 2: Download and install VMware on Windows
- Step 3: Download and install Unlocker for VMware
- Step 4: Create a macOS Big Sur virtual machine
- Step 5: Edit the macOS Big Sur.vmx file
- Step 6: Format virtual hard drive for macOS Big Sur
- Step 7: Install macOS Big Sur on VMware
- Step 8: Install VMware tools on macOS Big Sur
Step 1: Download macOS Big Sur ISO for VMware
To install macOS on VMware, you should first get the corresponding ISO file for the desired macOS version. It is a disk image containing all the necessary files for macOS installation.
You can either create macOS Big Sur ISO for VMware using the full installer on a compatible Mac or directly click the link below to download the macOS Big Sur ISO.
Download macOS Big Sur ISO(11.6.8)
Alternatively, you can directly download macOS Big Sur VMDK.
Step 2: Download and install VMware on Windows
After downloading the macOS Big Sur ISO, you need to download VMware on your computer. There are two versions you can choose from: VMware Workstation Player(free) and VMware Workstation Pro(paid).
Given that VMware Workstation Pro is now free for personal use, it could be better to get VMware Workstation Pro instead of VMware Workstation Player.
Step 3: Download and install Unlocker for VMware
You also require the VMware Unblocker to run macOS on a Windows computer. It can extend beyond the restrictions that prevent macOS virtual machines from running on devices other than Apple's. Here's how:
- Download the Unlocker from GitHub.

- Click the downloaded file to unzip it and open the extracted folders.
- Right-click on win-install and select "Run as administrator."
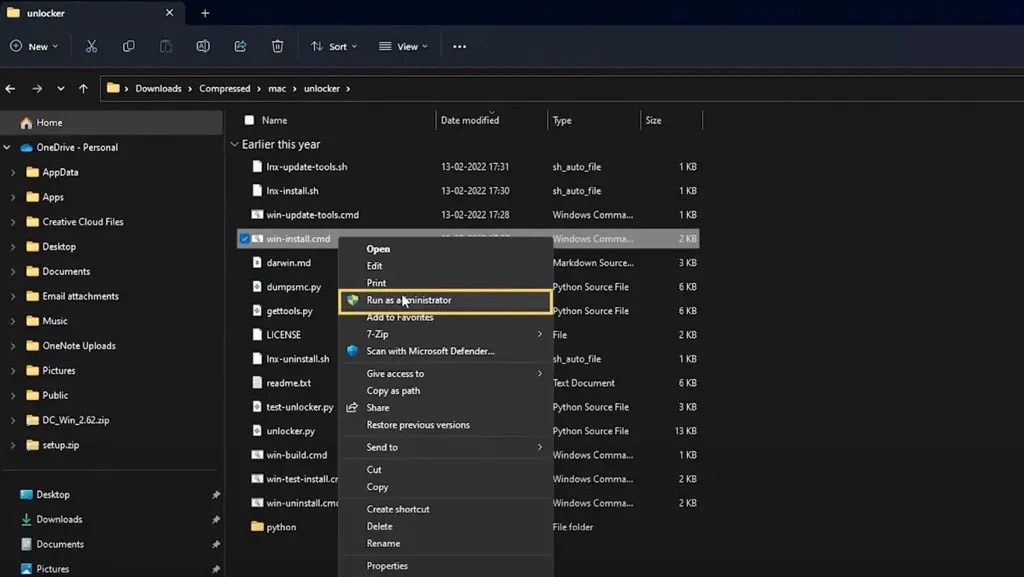
- Click Yes, then it automatically closes after installing.
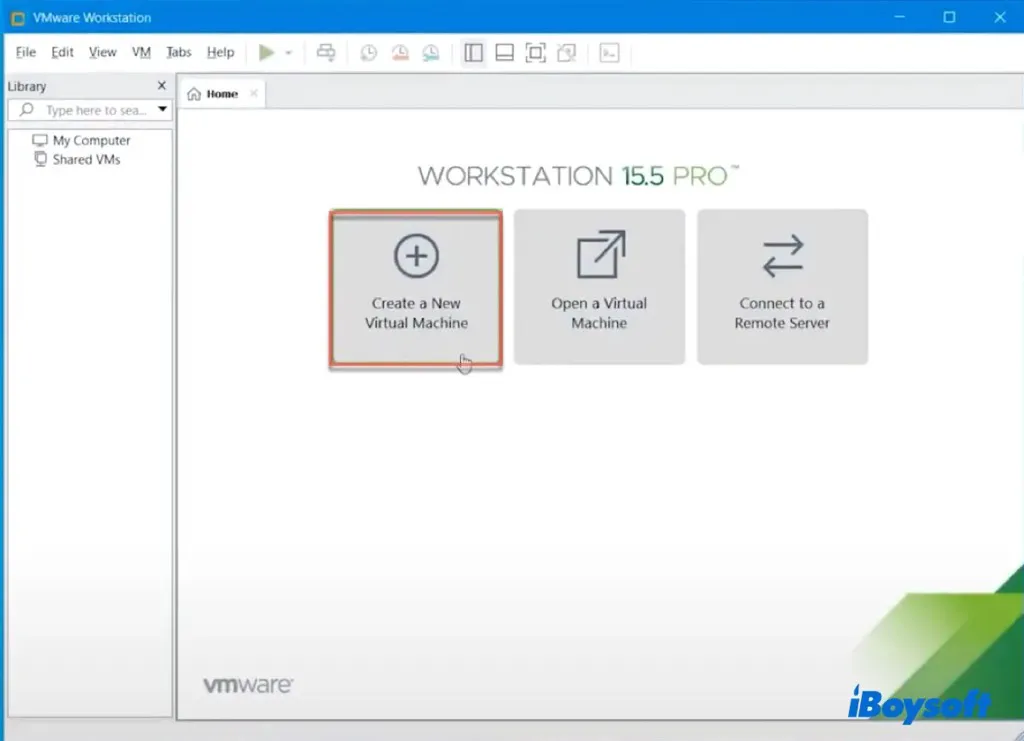
Step 4: Create a macOS Big Sur virtual machine
Up to now, you have got all the necessary files for the macOS installation on VMware on Windows. Now, we can move on to create a macOS Big Sur virtual machine on the Windows computer:
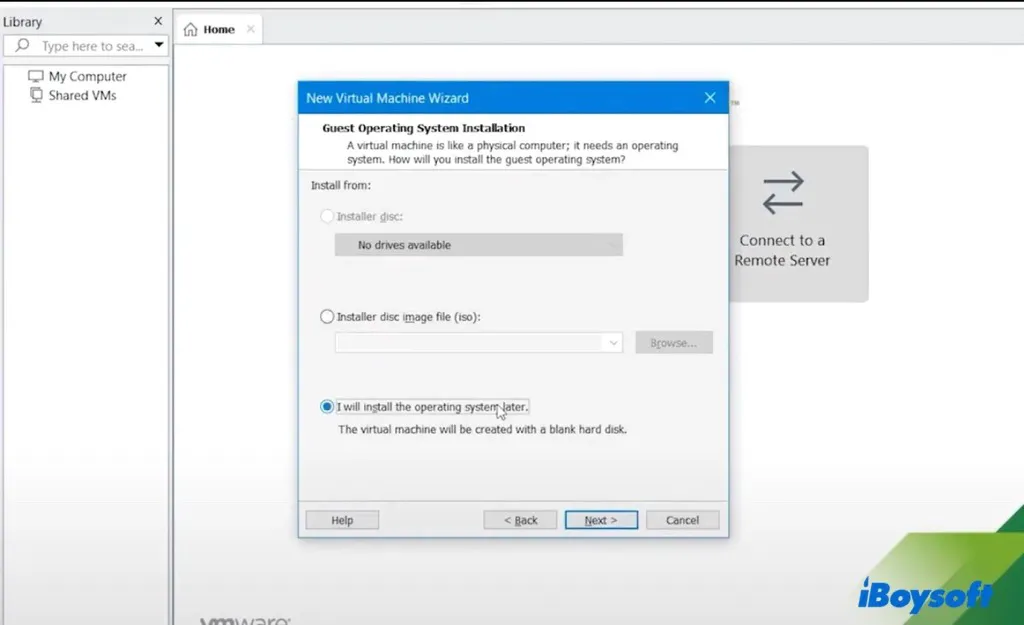
- Launch VMware Workstation, click "Create a New Virtual Machine," and click Next.
- Click on Next again.
- Select "I will install the operating system later" and hit Next.
- Select "Apple Mac OS X" as the guest operating system.
- Select "macOS 11" as the version and click Next.
- Name the virtual machine, customize its location, and then tap Next.
- Choose "Store virtual disk as a single file."
- Specify the maximum disk size of 60GB or above and click Next.
- Click Finish.
- In the main interface, choose "Edit virtual machine settings."
- In the Memory tab, specify 50% of your system's memory.
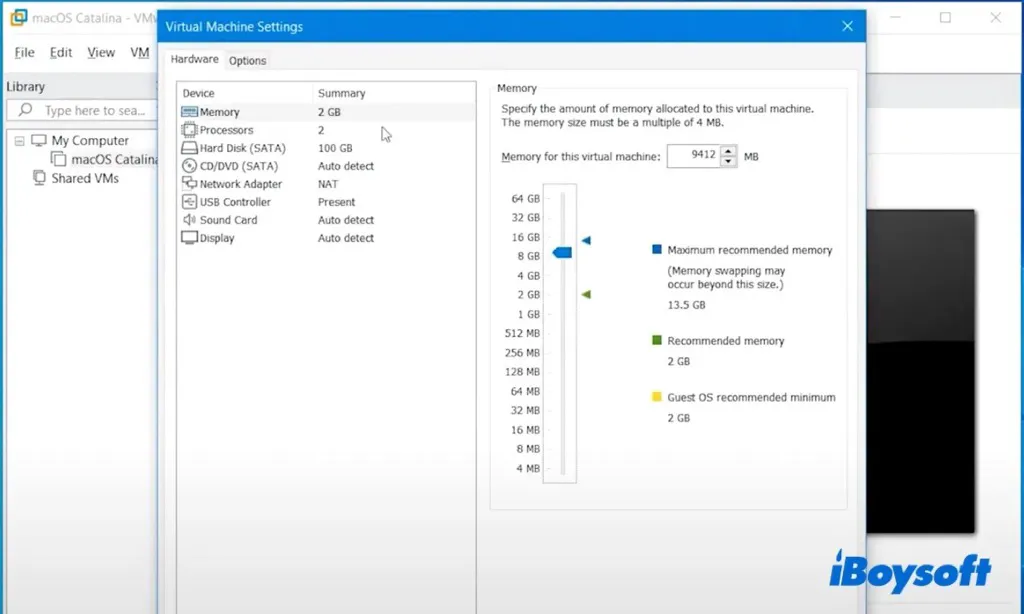
- Tap on Next > Finish.
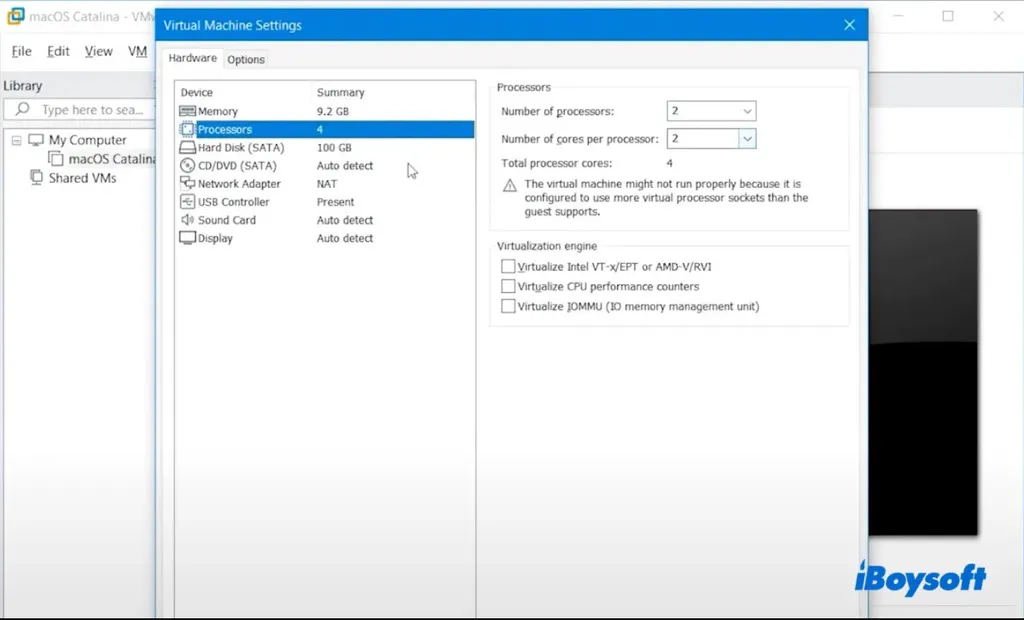
- Tap the Processors tab and set up 50 - 80% of your system's processors.
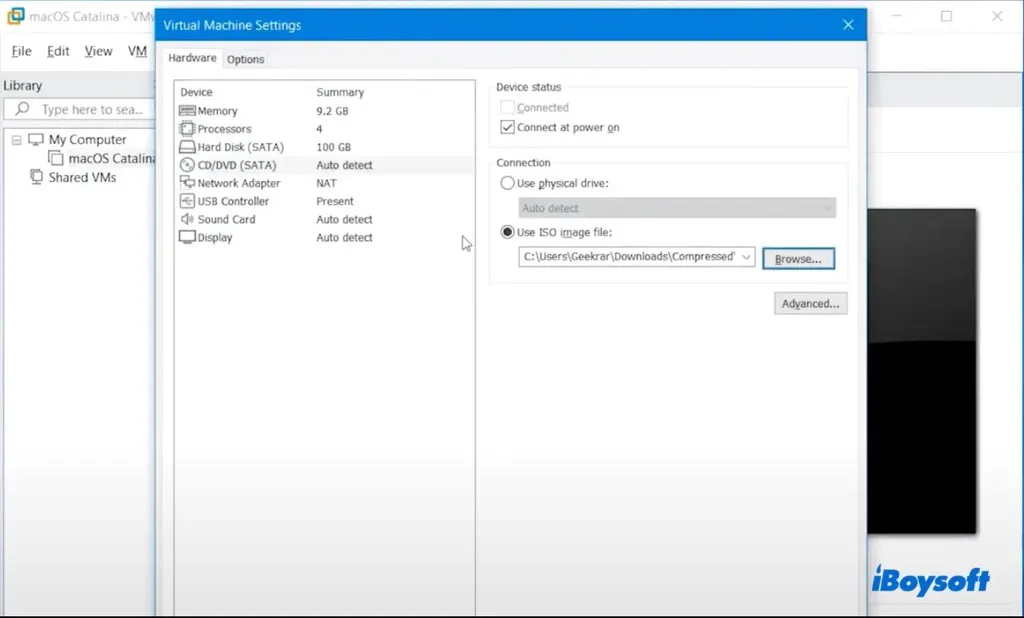
- Go to the "CD/DVD (SATA)" tab, select "Use ISO image file," and add the macOS Big Sur ISO file.
- In "USB Controller," choose USB 3.0 for USB compatibility.
- Click OK and quit VMware.
Step 5: Edit the macOS Big Sur.vmx file
The Next step is to modify the macOS Big Sur.vmx file to make it compatible with Windows so that you can successfully install macOS Big Sur on VMware on Windows. Just follow the steps below:
- Open the directory where the virtual machine is saved on your PC.
- Right-click on the "macOS Big Sur.vmx" file and open it with Notepad.
- Scroll down to the bottom of the text and enter: smc.version = "0"
- Save the changes and close the window.
Step 6: Format virtual hard drive for macOS Big Sur
Before installing macOS Big Sur on the created virtual machine on Windows, you should first format the virtual machine's hard drive. Here's how:
- Within VMware, click "Power on this virtual machine."
- After the virtual machine starts up, select a language.
- Open Disk Utility > Continue.
- Select "VMware Virtual SATA Hard Drive Media" from the left and tap Erase.
- Name the drive and select APFS as the format.
- Once the process is done, quit Disk Utility.
Step 7: Install macOS Big Sur on VMware
After formatting the virtual machine's hard drive, it's time to install macOS Big Sur on the erased drive:
- Back to the macOS Utilities screen and choose Install macOS.
- Choose the formatted virtual hard drive as the destination and tap Continue.
- Follow the on-screen guide to install macOS Big Sur on the disk.
- Set up your macOS Big Sur virtual machine.
Step 8: Install VMware tools on macOS Big Sur
There is one more step to run macOS Big Sur via VMware on Windows, which is to install VMware tools to prevent graphics issues and get extra features such as full-screen mode and communication between the host operating system and macOS Big Sur.
- Open the Apple Menu and select "Shut Down" to turn off the virtual machine.
- Then click "Edit virtual machine settings."
- Select "CD/DVD (SATA)" and click "Use physical drive" > OK.
- Choose "Power on this virtual machine."
- Log in to your account.
- In the menu bar, tap VM > Install VMware Tools.
- Open "Install VMware Tools."
- Follow the instructions to download and install the tools.
- When it prompts the "System Extension Blocked" error, click "Open Security Preferences" to enable it.
- Then click Restart.
Let others know these necessary steps to install macOS Big Sur on VMware on Windows!