While macOS is an operating system specifically used on Mac computers, you can still run it on a Windows PC with a virtual machine like VMware. This will allow you to run macOS alongside the host operating system without restarting. It's ideal for those who want to experiment with macOS or develop macOS apps without a Mac.
Tips: However, if you need better performance, consider installing macOS on Windows directly. For instance, you can create a macOS Tahoe bootable USB installer from Windows to create a macOS Tahoe Hackintosh.
But that doesn't mean any PC can be used to run macOS. If your computer doesn't have extra RAM or storage for macOS, the virtual machine may not work properly. That's why I recommend you use a computer with at least 8GB of RAM and 80GB of free storage space.
If you have a powerful Windows computer, follow the steps below to install any macOS on VMware Workstation. If you need the latest macOS Tahoe, follow this guide: How to install macOS Tahoe on VMware on Windows PC?
Note: Alternatively, you can also install macOS on VirtualBox to run it on a Windows PC.
How to install macOS or OS X on VMware:
- Step 0: Free up space on your Windows PC
- Step 1: Download macOS ISO file for Windows
- Step 2: Download VMware Workstation Pro
- Step 3: Download VMware Unblocker
- Step 4: Create a macOS virtual machine
- Step 5: Format the macOS VMware virtual machine
- Step 6: Install macOS on VMware
- Step 7: Install VMware Tools
Step 0: Free up space on your Windows PC
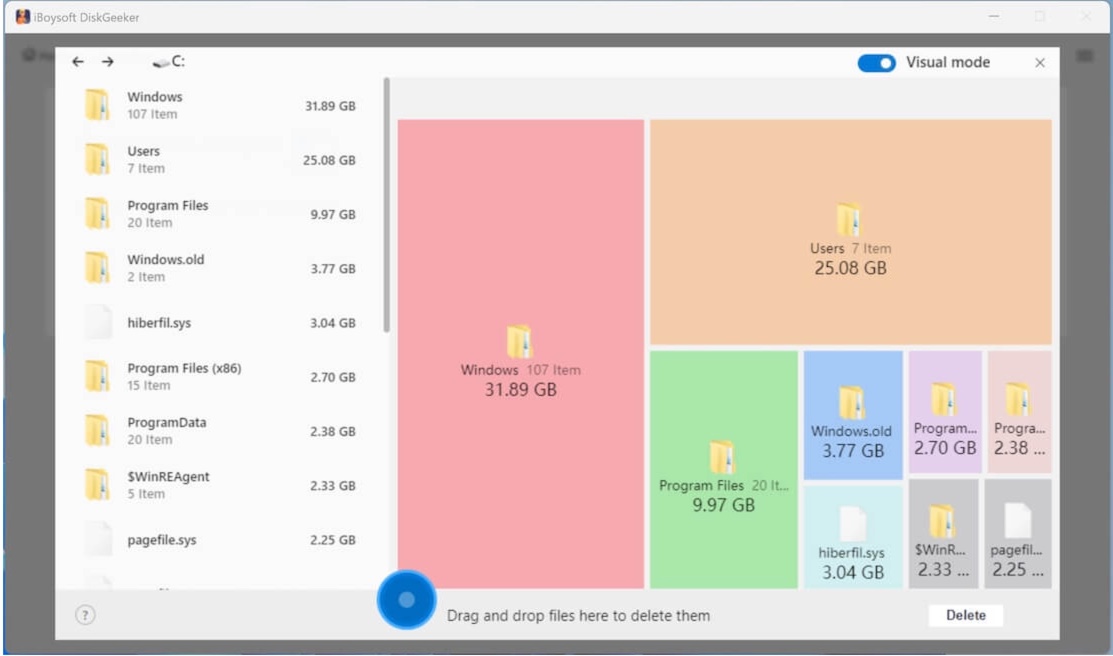
It's advisable to clean your Windows PC before creating the macOS virtual machine with iBoysoft DiskGeeker for Windows. This can ensure your installation won't fail halfway due to storage shortages and improve your PC's performance.
This disk cleaner can quickly find all files and folders on your computer or a selected folder and display them based on size, enabling you to remove large files efficiently.
Step 1: Download macOS ISO file for VMware
The first file you need to prepare before creating a macOS VMware virtual machine is the ISO file of the macOS version you want to install. It's a disk image containing all the essential installation files for macOS.
You can create the macOS ISO file with its full installer on a compatible Mac or download the desired macOS ISO file from the following resources:
Step 2: Download VMware Workstation Pro
The next step is to download and install VMware Workstation for Windows. It has two versions: VMware Workstation Player and VMware Workstation Pro.
Previously, Only Workstation Player was free for personal use. But VMware has made the full-featured Workstation Pro free for non-commercial purposes on May 13, 2024, and is discontinuing the lesser counterpart Workstation Player. So, I recommend you get VMware Workstation Pro instead of VMware Workstation Player.
Step 3: Download VMware Unblocker
To run macOS on your Windows PC, you'll also need to get the VMware Unblocker. It can bypass the limitations that block macOS virtual machines from opening on non-Apple devices.
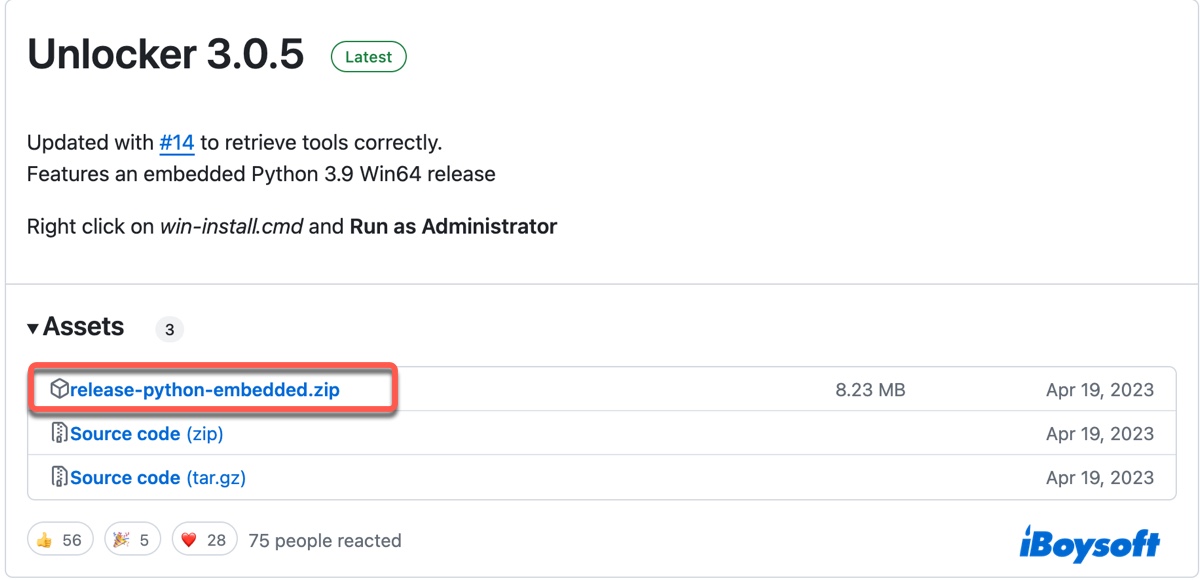
You can download the VMware unblocker from Github, unzip it on your computer, then right-click on the file named win-install.cmd and choose "Run as administrator."
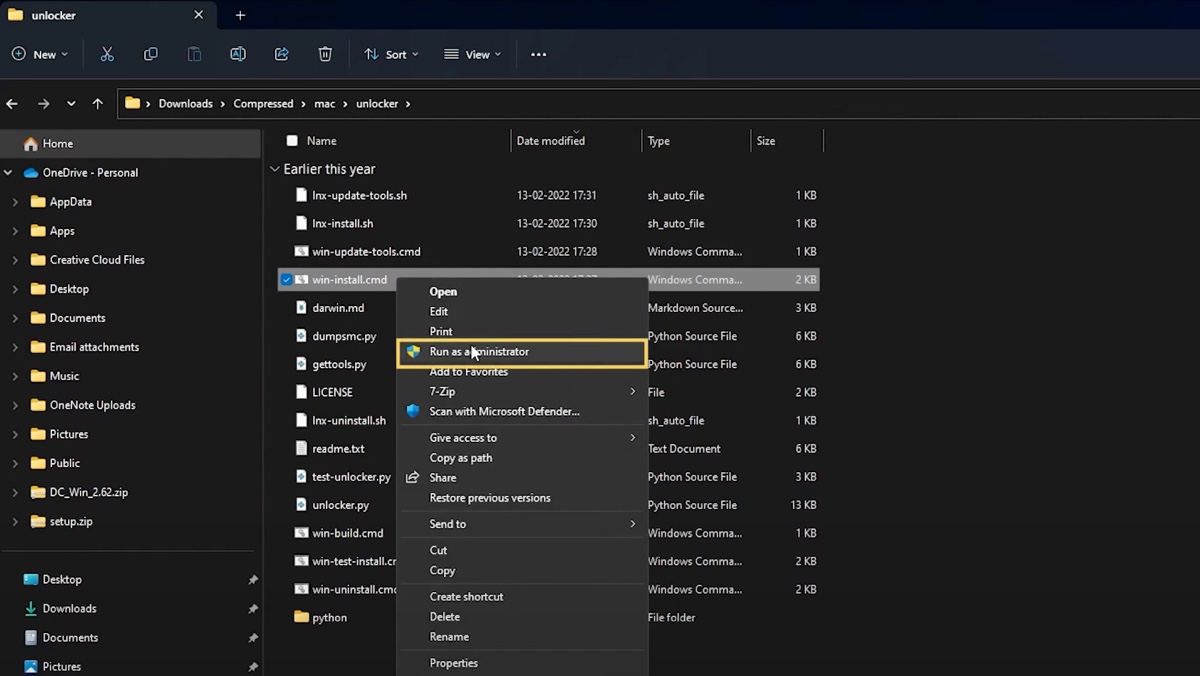
It will open Command Prompt and install the compatibility patch automatically. When the unblocker is installed, you can press Enter to exit the window.
Step 4: Create a macOS virtual machine
With all tools prepared, you can now create the macOS virtual machine with the steps below: (Or you can download the macOS VMDK file to save time)
- Open VMware Workstation Pro.
- Click "Create a New Virtual Machine."
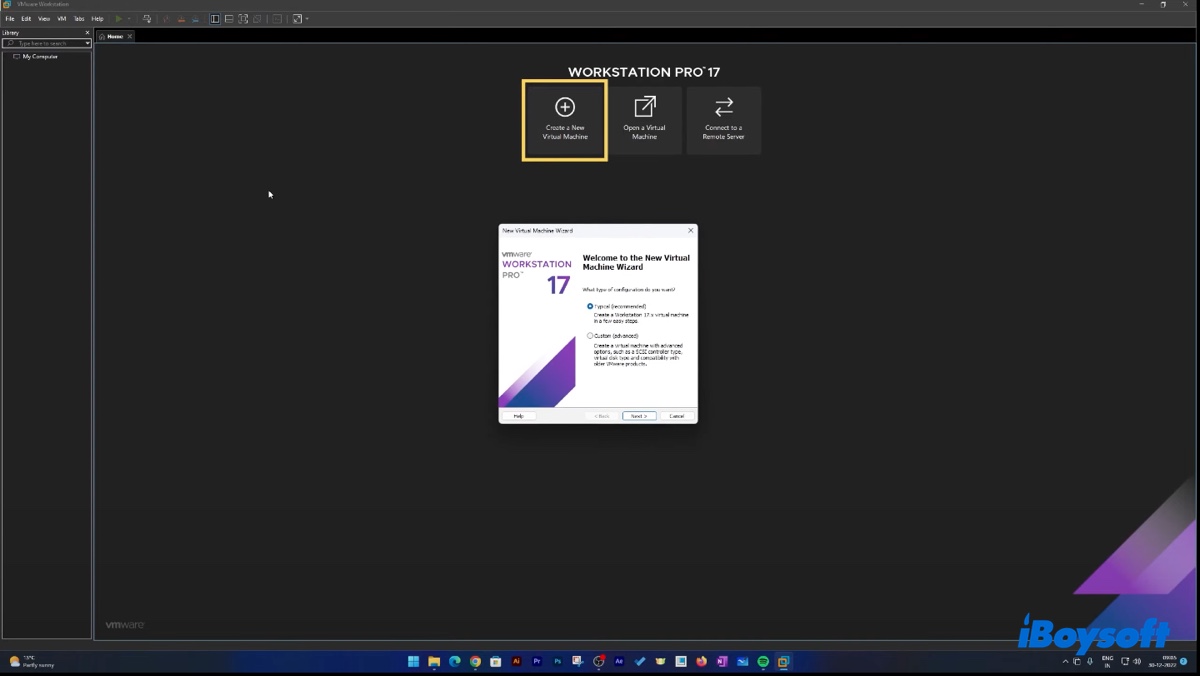
- Select Typical and click Next.
- Choose "Installer disc image file (iso)," then click Browse to select the ISO file and click Next.
- Select "Apple Mac OS X" and the corresponding macOS version you want to install, such as macOS 13.
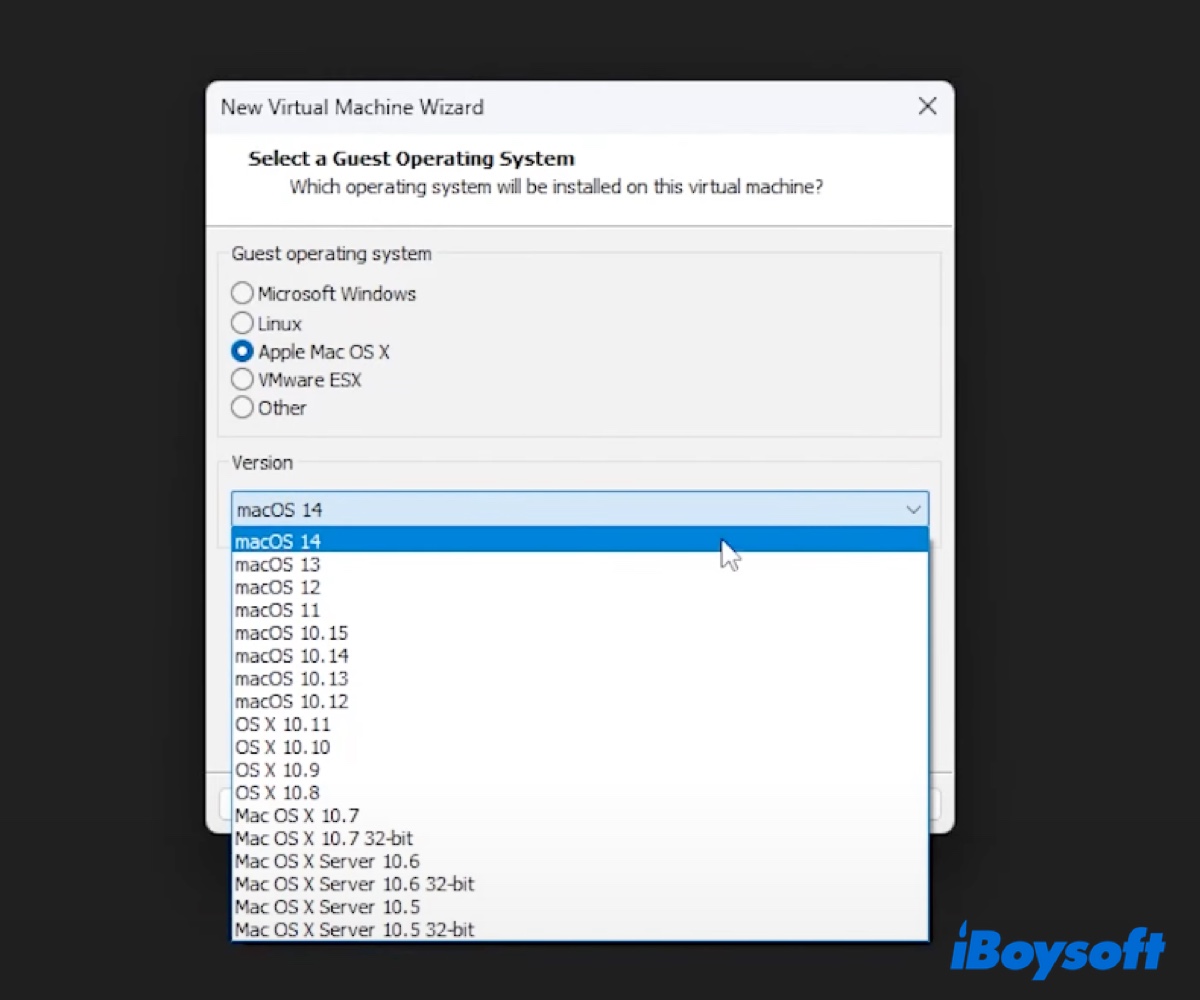
- Click Next.
- Name your virtual machine.
- Check the location you want to save it and click Next.
- Specify the maximum disk size for the virtual machine.
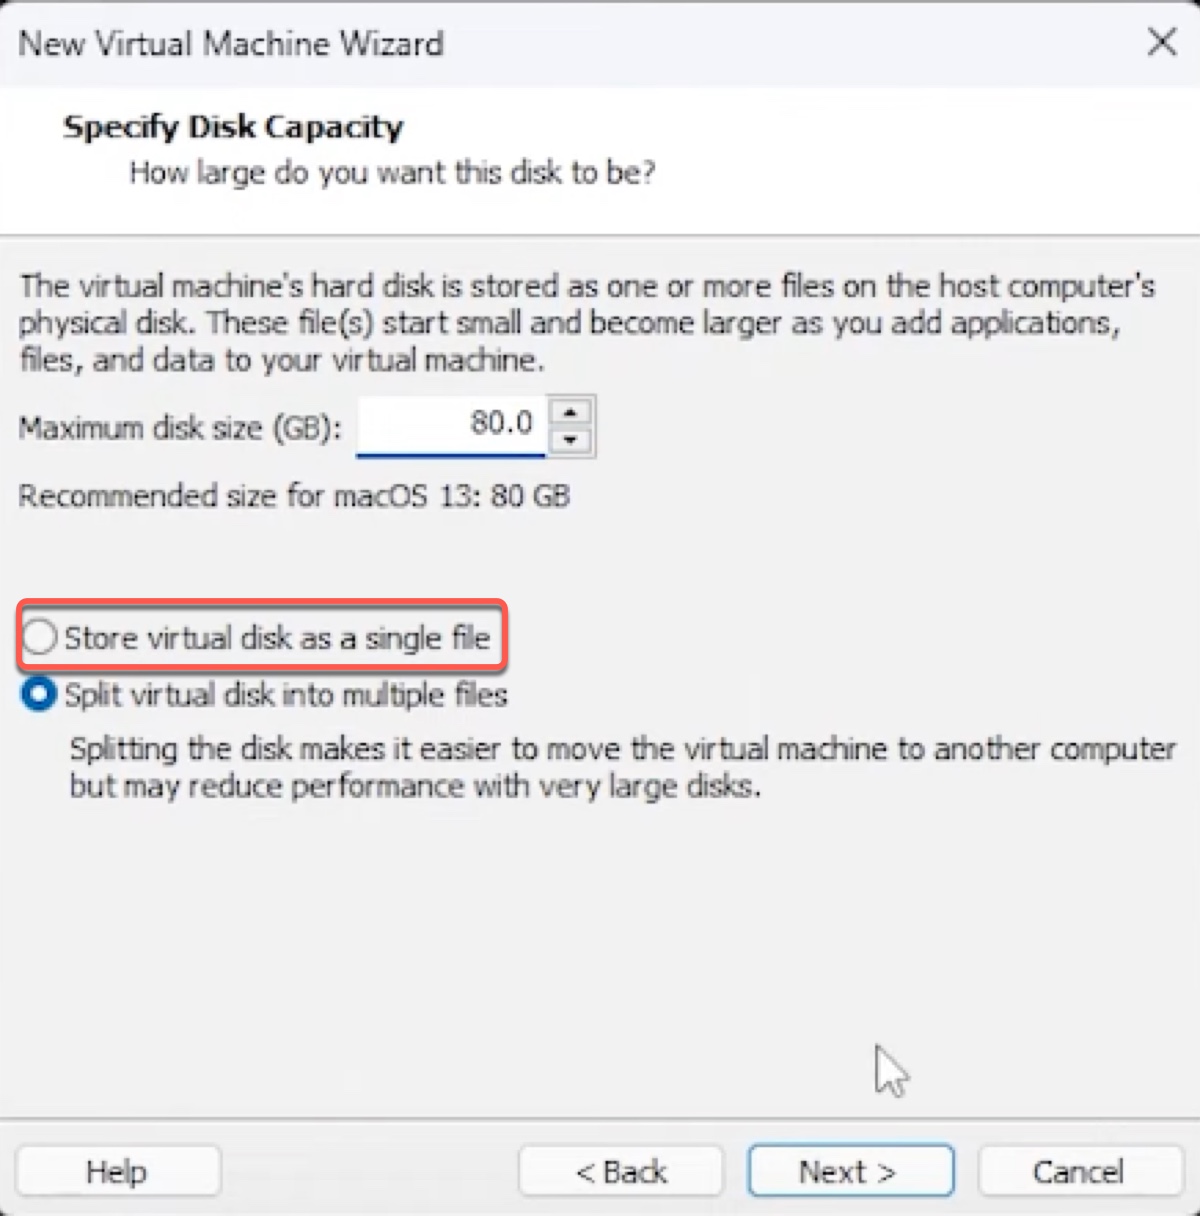
- Choose "Store virtual disk as a single file" if you don't need to transfer the virtual machine to another computer.
- Tap Next.
- Click "Customize Hardware."
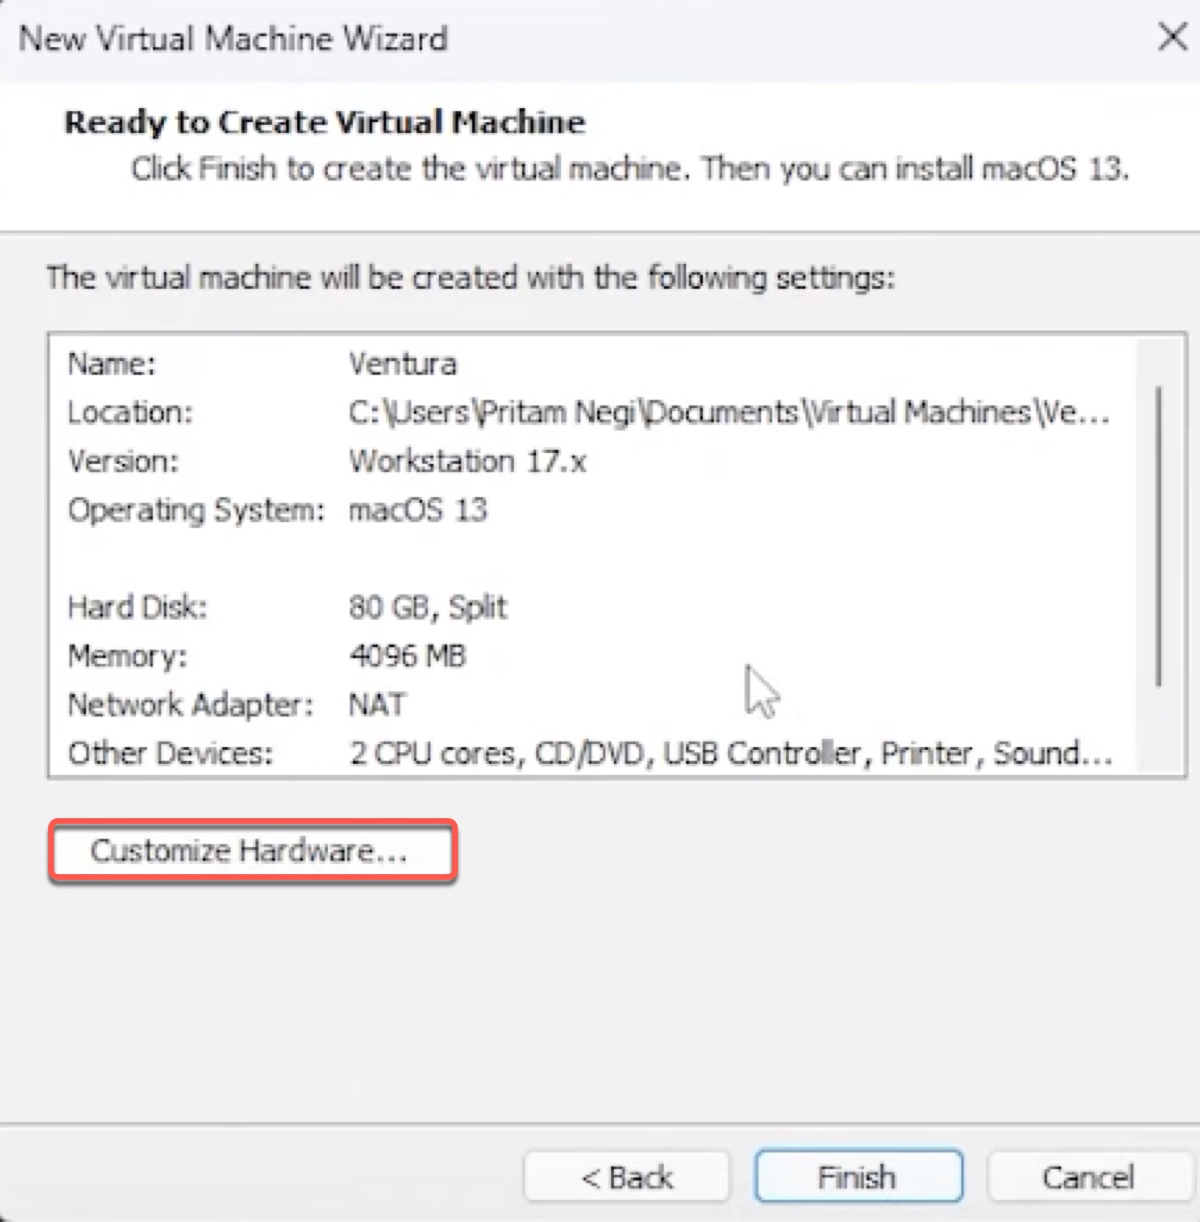
- In the Memory tab, move the slider to assign RAM to your virtual machine (usually half of your total RAM).
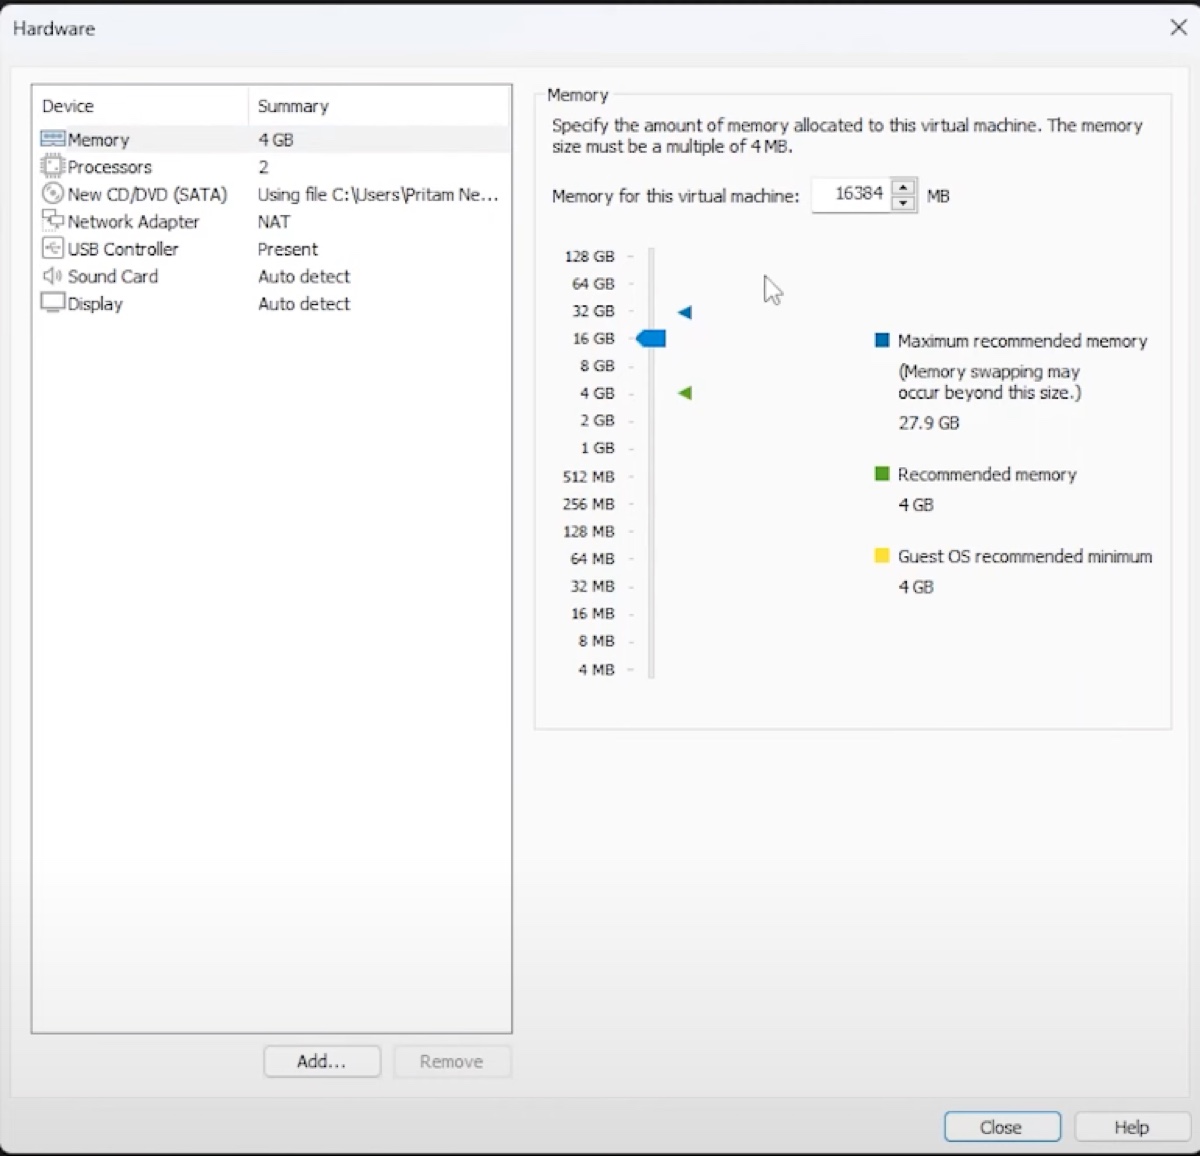
- Select Processors from the left and specify the number of processors you want the virtual machine to have (you can share half of your processors).
- Click Close > Finish.
Step 5: Format the macOS Vmware virtual machine
Before installing macOS on VMware, you must format the virtual hard drive with a compatible format and partition map. To do this:
- Click "Power on this virtual machine."
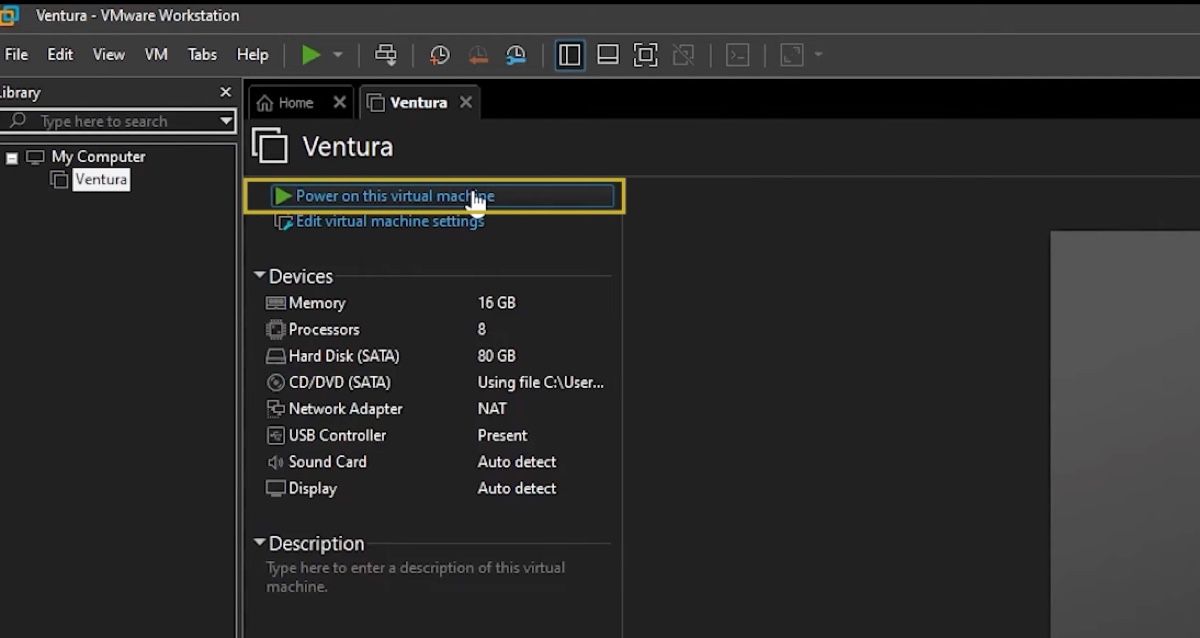
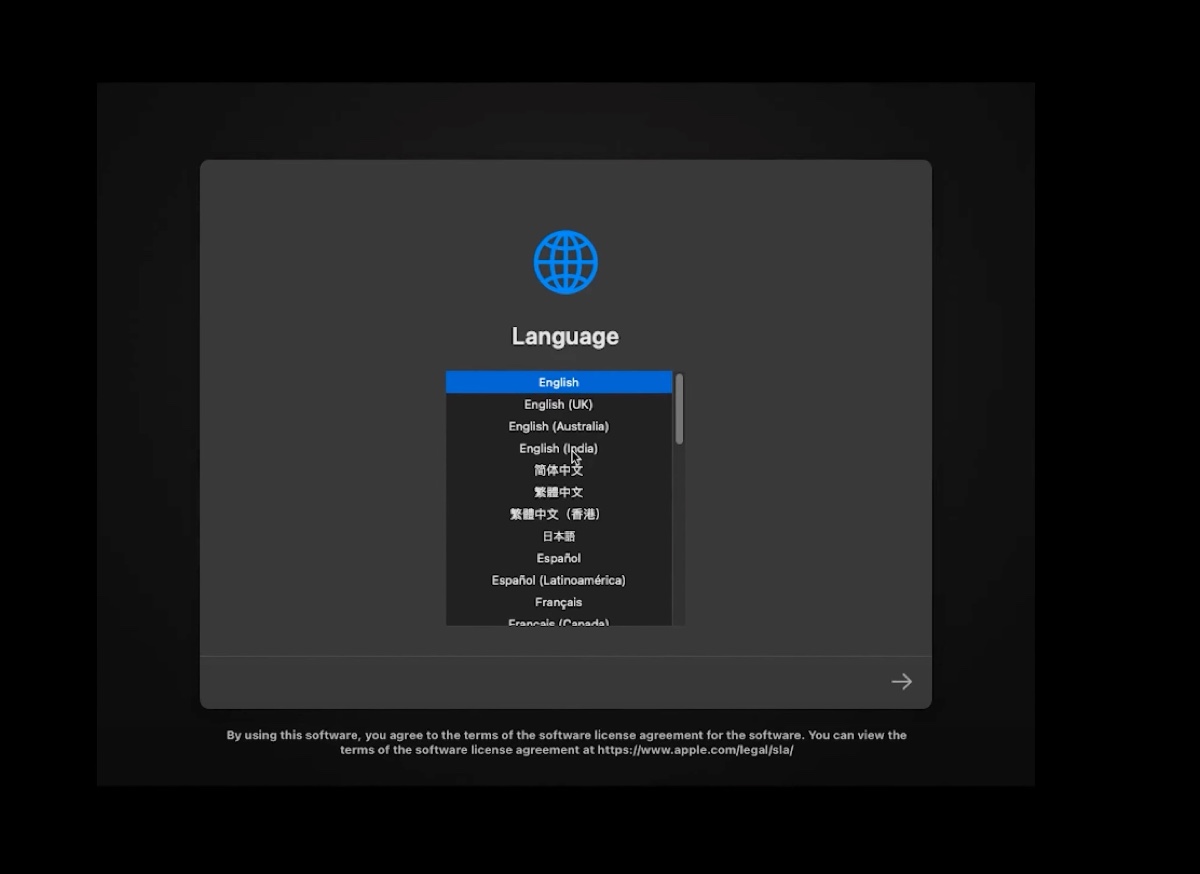
- After the virtual machine boots up, select a language.
- Click Disk Utility > Continue.
- Select "VMware Virtual SATA Hard Drive Media" from the left and click Erase.
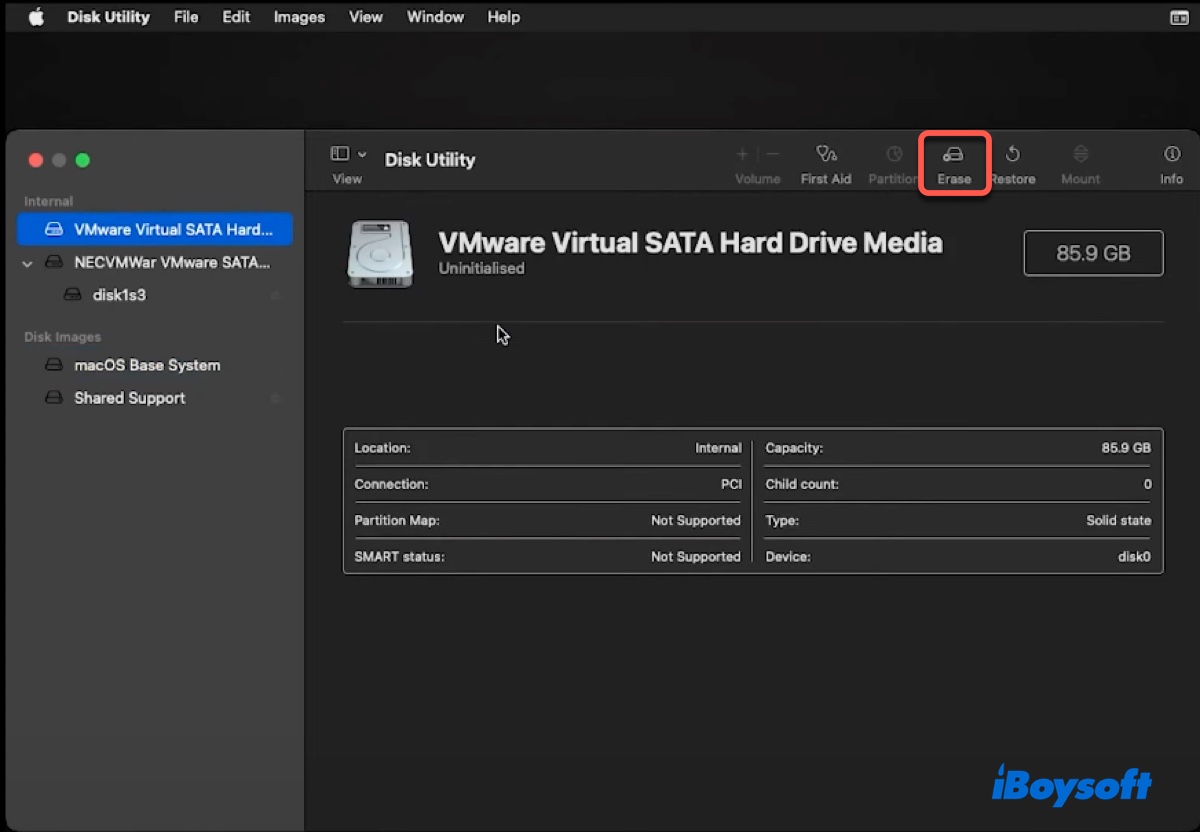
- Give your drive a name.
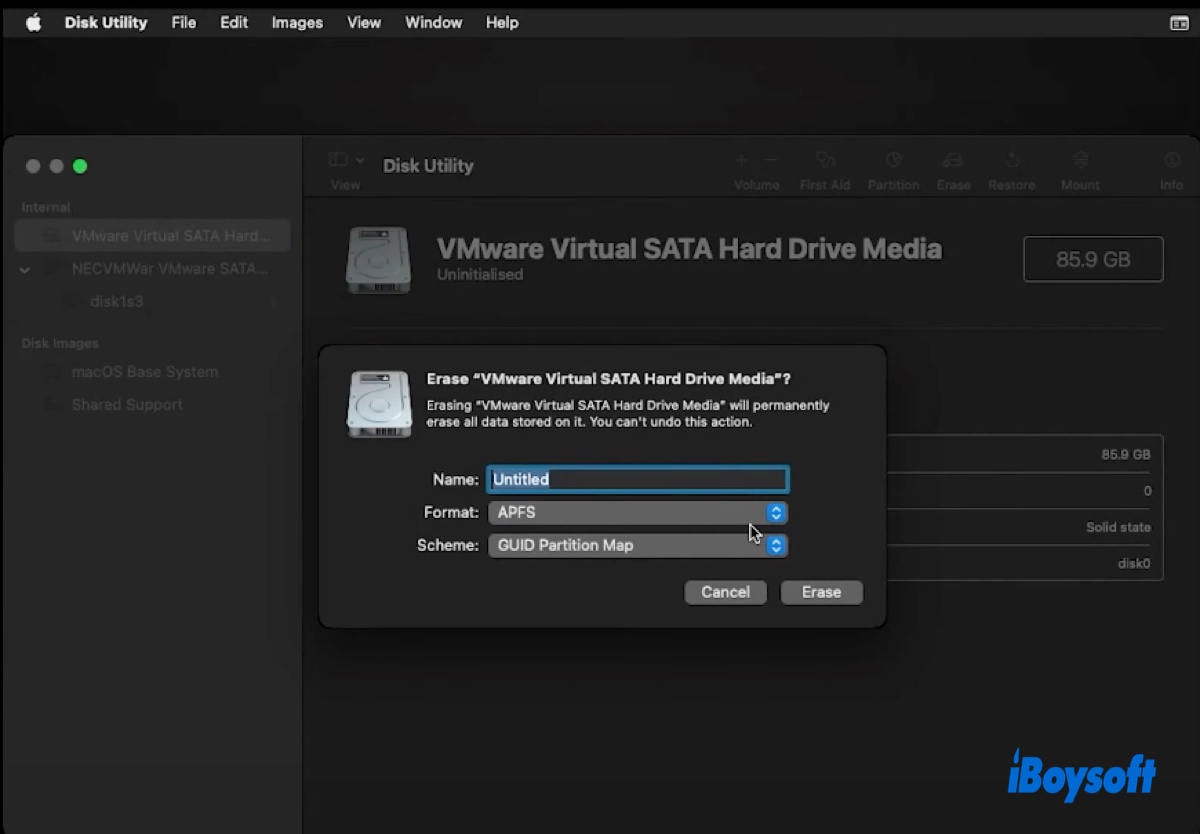
- Choose APFS as the format if installing macOS High Sierra or later; otherwise, use Mac OS Extended (Journaled).
- Once the erase process is done, close Disk Utility.
Step 6: Install macOS on VMware
Now, it's time to install macOS on VMware to experience the new features. Here's how:
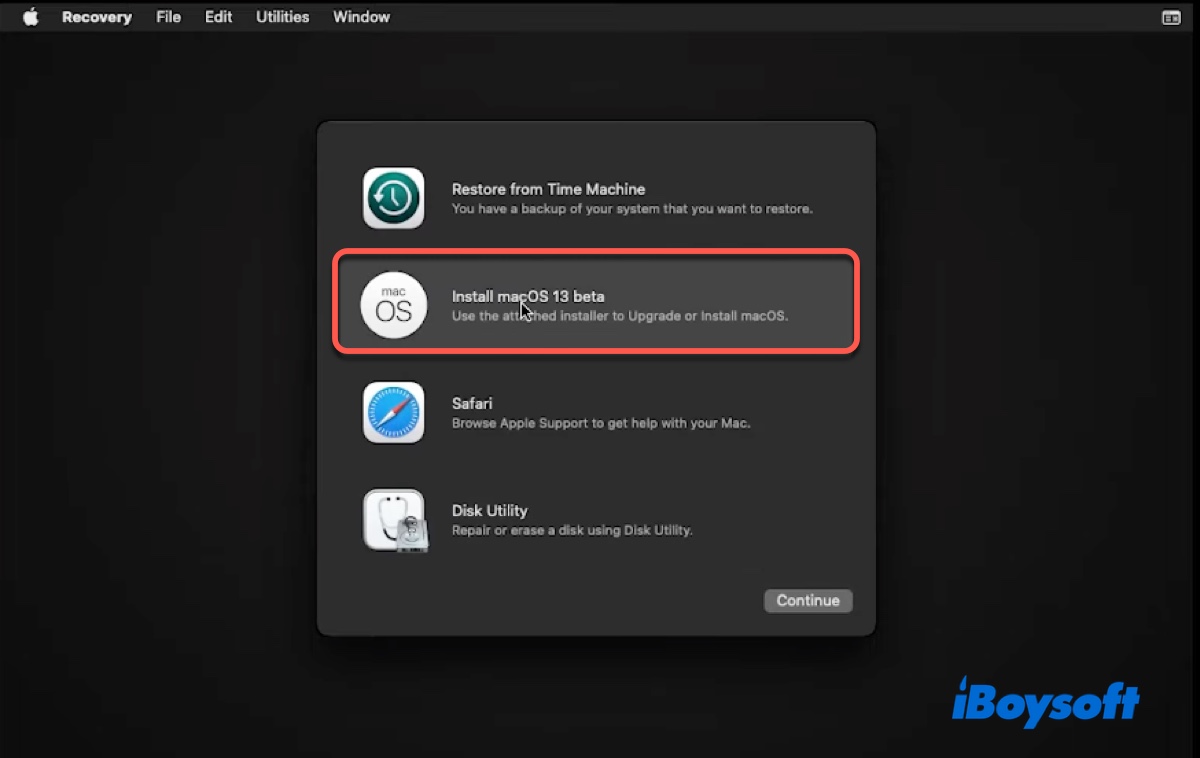
- In the "macOS Utilities" window, select "Install macOS" and click Continue.
- Agree to the terms and conditions.
- Select your virtual machine as the destination drive.
- Follow the instructions on the screen to complete the macOS installation.
Step 7: Install VMware Tools
The last step before you can run macOS on VMware is to install VMware Tools. These tools can help you fix graphic issues and get additional functionalities like full-screen support and communications between the host operating system and your macOS virtual machine, such as mouse integration, copy-and-paste, drag-and-drop, time synchronization, etc.
- Shut down your virtual machine by clicking the Apple menu and selecting "Shut Down."
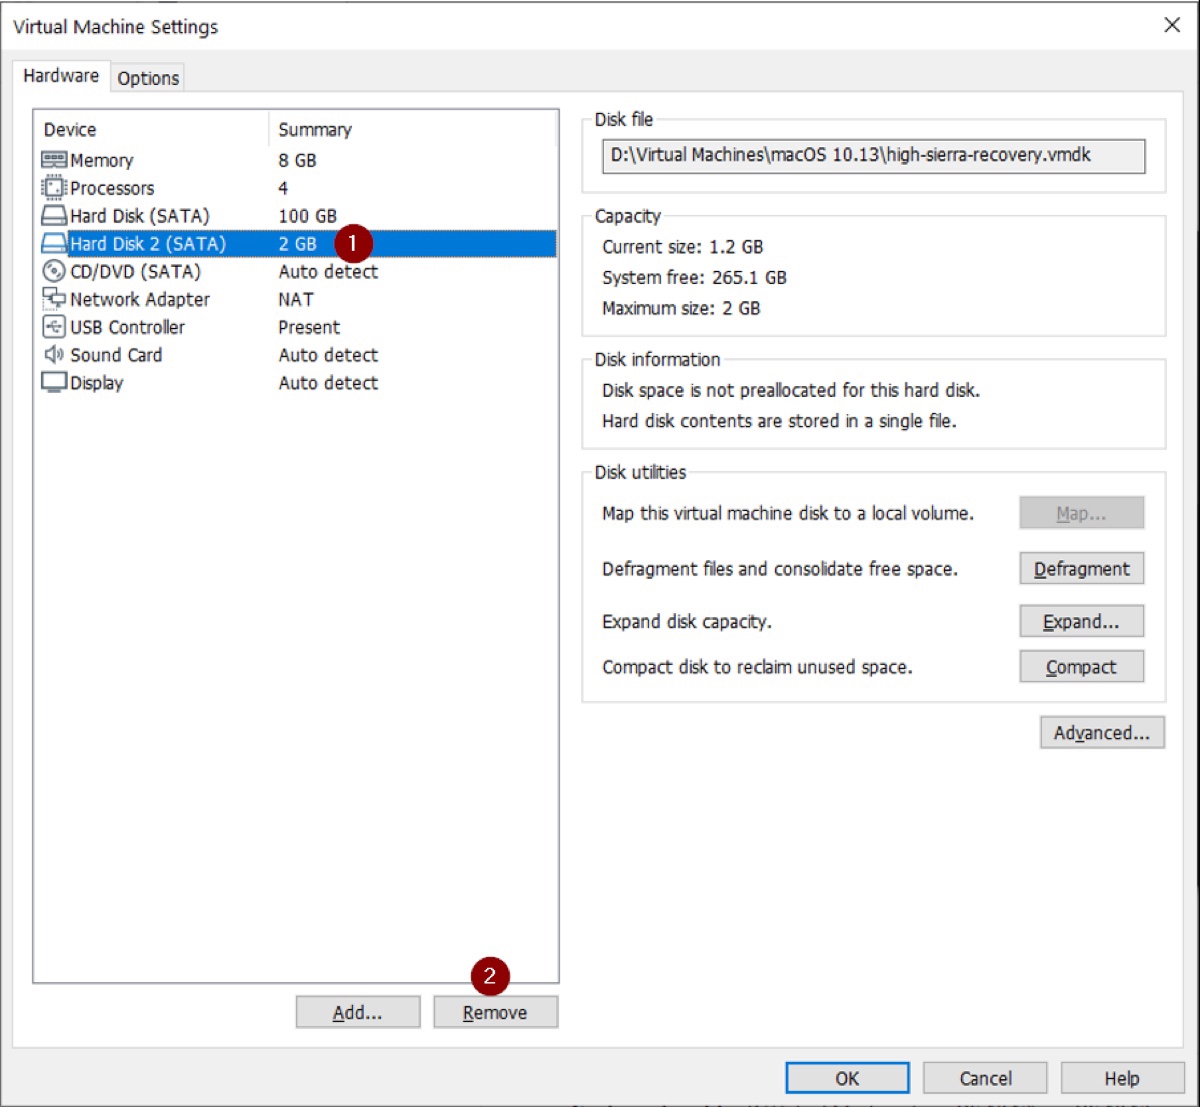
- Click "Edit virtual machine settings."
- Select your macOS recovery.vmdk file and click Remove.
- Power on your virtual machine again.
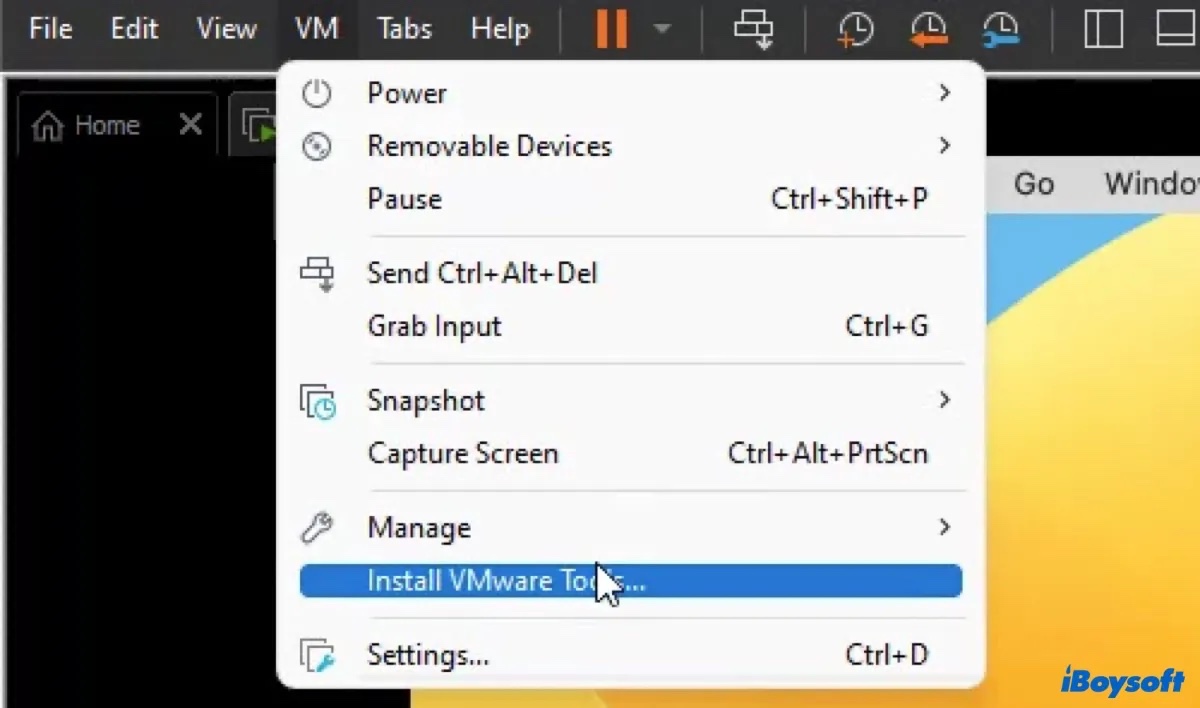
- Click VM > Install VMware Tools in the menu bar.
- After VMware Tools are downloaded, install it.
- If it asks you to enable system extension, follow the on-screen instructions to grant it access.
Those are all the processes for installing macOS on VMware. Share them if you can run macOS or OS X on VMware successfully.
For the specific one, we set macOS High Sierra as an example, read install macOS High Sierra VMware.
