
macOS Sequoia, the successor of macOS 14 Sonoma, was released on September 16, 2024. New features like Apple Intelligence, iPhone Mirroring, etc., introduced to macOS Sequoia are attractive and push you to upgrade to macOS Sequoia. (Want to run the latest macOS 26? Follow: How to Install macOS Tahoe on VMware on Windows)
Using a Windows PC but still want to try macOS Sequoia? Just like previous macOS versions, you can also install macOS Sequoia on your Windows PC via a virtual machine. In this post, we will guide you to install macOS Sequoia on VMware on a Windows PC. Just follow the detailed steps with pictures.
Tips: For near-native performance, consider installing macOS on a PC by building a Hackintosh. Besides, it's also a good idea to install macOS on VirtualBox, a free virtual machine.
Want to install the latest macOS Tahoe on a PC with VirtualBox? Follow this guide: How to install macOS Tahoe on a Windows PC with VirtualBox
How to install macOS Sequoia on VMware on Windows?
You will need to take 6 steps to install macOS Sequoia on VMware on Windows:
- Step 1. Install VMware Workstation on the Windows PC
- Step 2. Unlock VMware
- Step 3. Create macOS Sequoia VM
- Step 4. Edit the vmk file
- Step 5. Format the virtual disk
- Step 6. Install macOS Sequoia on VMware on Windows
- Step 7. Install VMware Tools
Preparations before installing macOS Sequoia on VMware
To ensure the success of the macOS Sequoia installation on VMware on your Windows PC, you should check the following requirements and make sure your computer meets them.
- A healthy Windows computer with at least 8GB RAM
- 80GB storage space for the macOS Sequoia.
- Download and install VMware Workstation Pro 17.
- Download and install VMware Workstation Unlocker.
- Get the macOS Sequoia ISO file.
If there is no sufficient disk space on your Windows PC, you can try iBoysoft DiskGeeker for Windows to quickly find and delete unnecessary files with several clicks. What's more, it is also recommended to back up your PC to avoid accidental data loss during the installation; iBoysoft DiskGeeker's Clone feature can help.
Step 1. Install VMware Workstation on the Windows PC
First of all, you need to download and install the VMware Workstation from the official website. The VMware Workstation Pro has been free for non-commercial purposes since May 13, 2024, it is suggested to get this full-featured version.
VMware Workstation Pro Download
Step 2. Unlock VMware
We must install the compatibility path to unlock macOS installation in VMware Workstation Pro, which does not support it by default. Please close the VMware Workstation before installing the compatibility path.
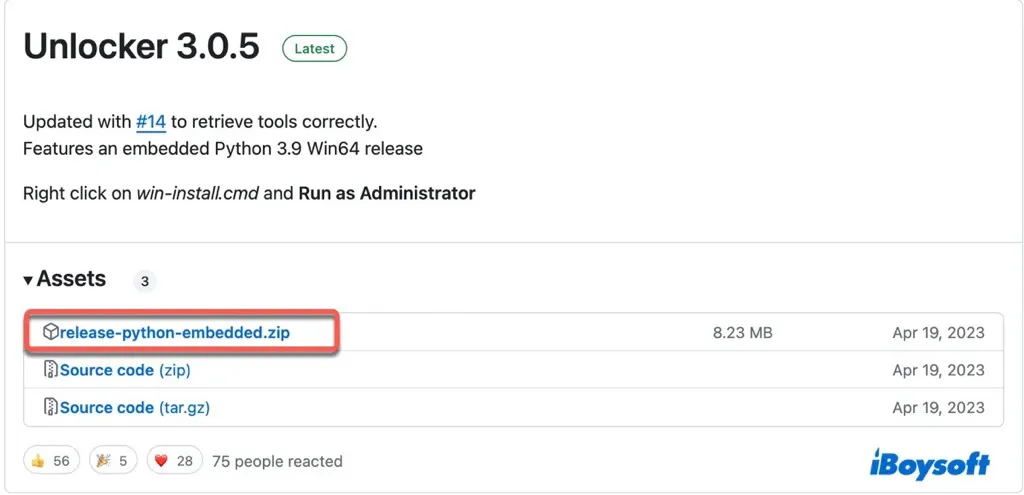
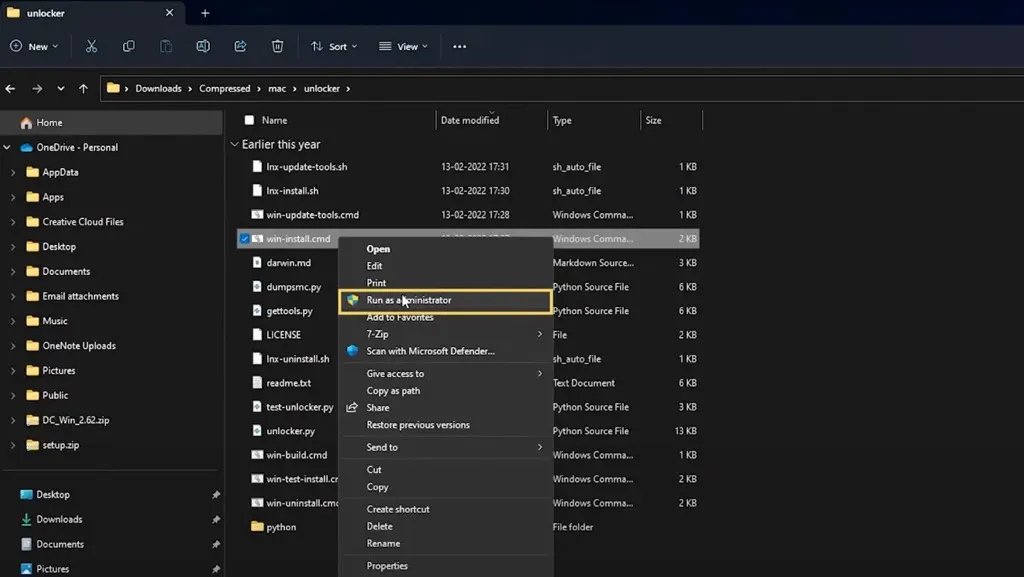
The VMware unblocker is available for download on GitHub. After unzipping it to your computer, right-click on the win-install.cmd file and select "Run as administrator."
The compatibility patch will be automatically installed when the Command Prompt window opens. Press the Enter key to exit this window once the installation is finished, as indicated by the message "Press Enter key to continue..."
Step 3. Create macOS Sequoia VM
With all the necessary files and tools prepared, you can proceed to create a virtual machine for macOS Sequoia. Here's how: (If you prefer a pre-configured VM, download the macOS Sequoia VMDK file.)
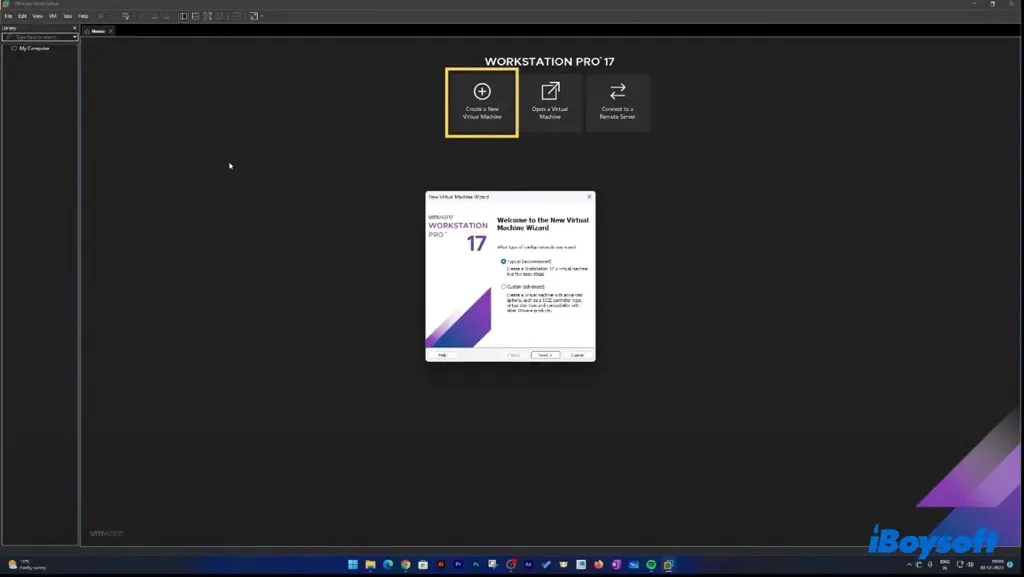
- Open VMware Workstation Pro.
- Choose "Create a New Virtual Machine."
- Select Typical and tap Next.
- Choose "Installer disc image file (iso)," then click Browse > Next.
- Select "Apple Mac OS X" and the corresponding macOS 15 you want to install.
- Click Next.
- Name your virtual machine such as macOS Sequoia or macOS 15.
- Check the location to save it and click Next.
- Specify the maximum disk size for the virtual machine.
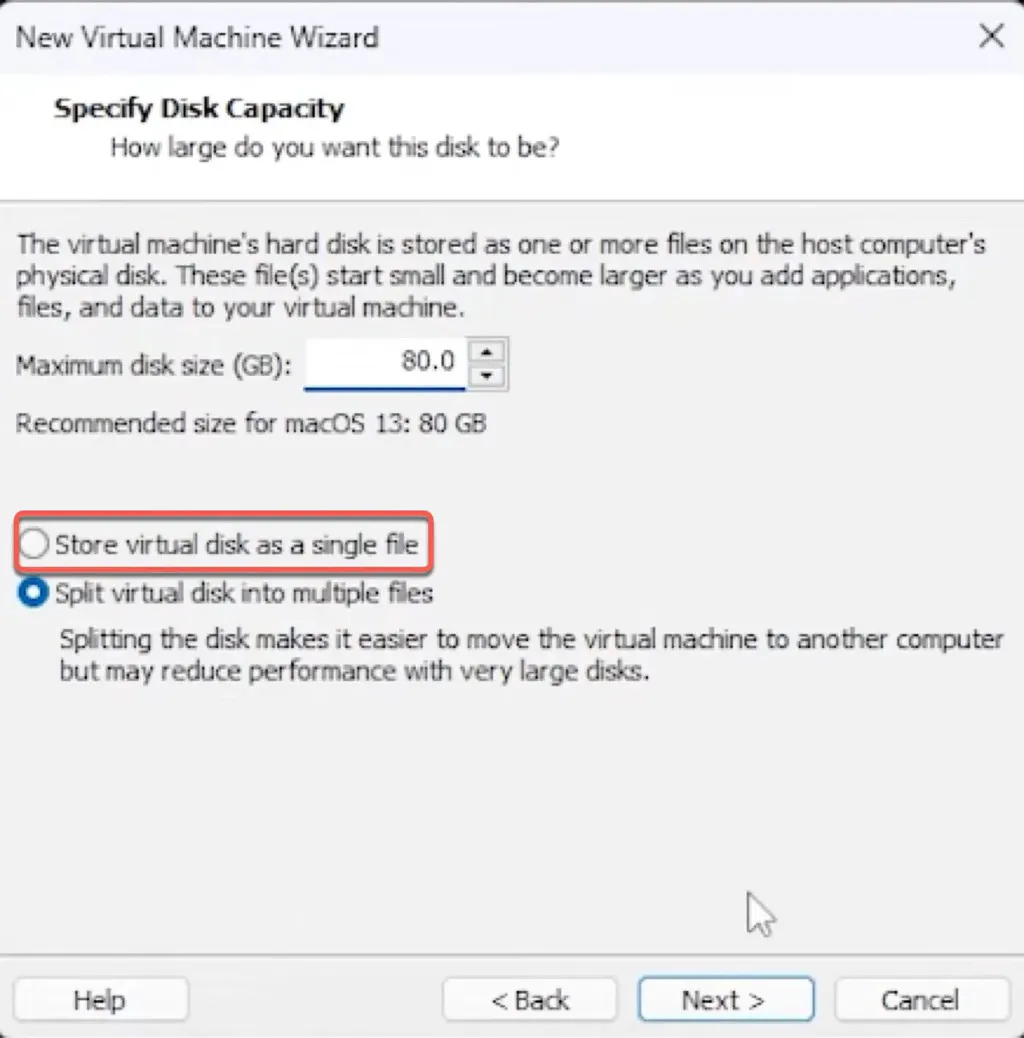
- Tick "Store virtual disk as a single file" if you don't need to transfer the VM to another computer.
- Tap Next.
- Click "Customize Hardware."
- In the Memory tab, move the slider to allocate RAM to your virtual machine (usually half of your total RAM).
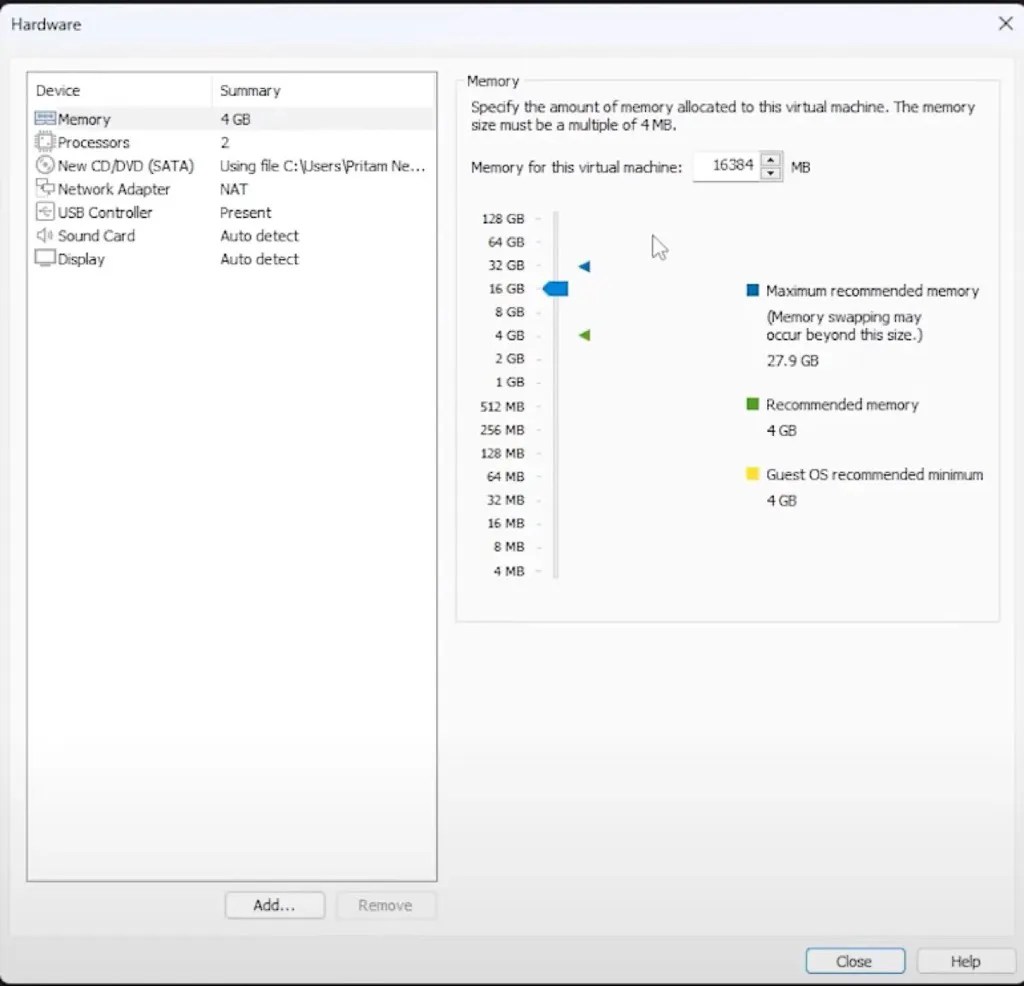
- Choose Processors and specify the number of processors for the virtual machine(you can share half of your processors).
- Click Close > Finish.
Step 4. Edit the vmk file
- Open File Explorer and navigate to the VM files.
- Edit the .vmx file in a text editor.
- Search for board-id.reflectHost and set the value to "FALSE".
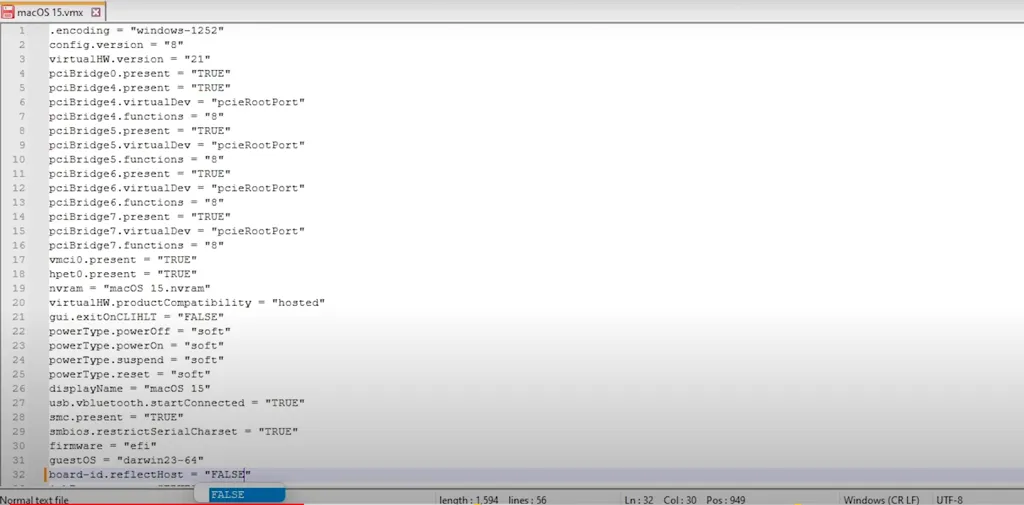
- Search for ethernet0.virtualDev and set the value to "vmxnet3".
- Then copy-paste the following text at the bottom of the file.board-id = "Mac-AA95B1DDAB278B95"
hw.model.reflectHost = "FALSE"
hw.model = "iMac20,1"
serialNumber.reflectHost = "FALSE"
serialNumber = "C01234567890" - Back in VMware, right-click on the MacOS 15 VM > Power On.
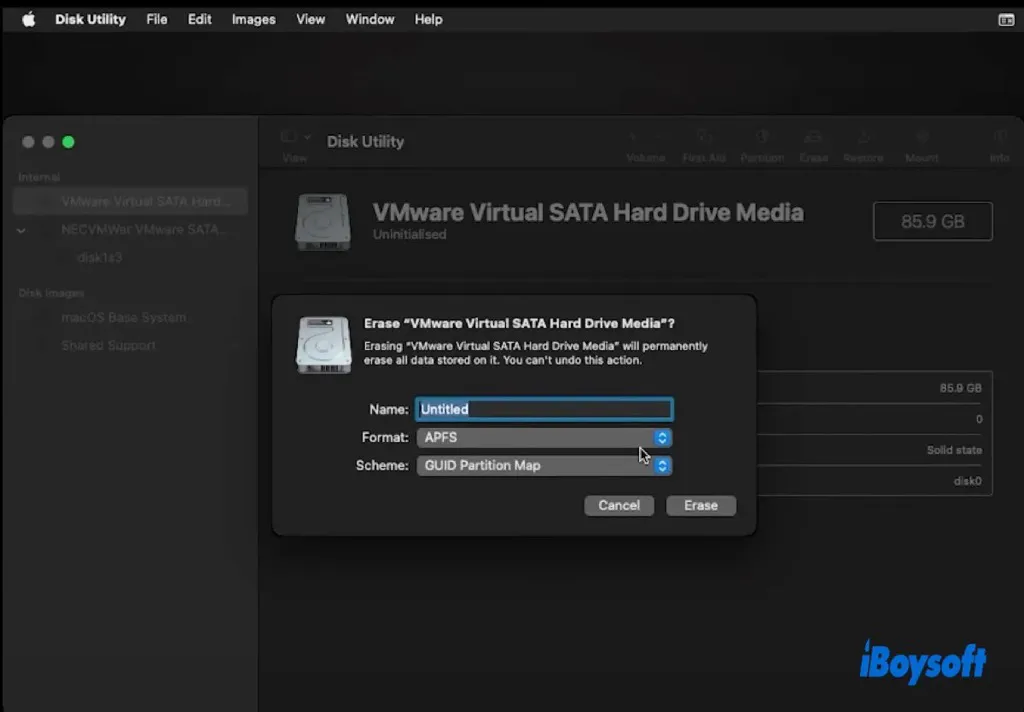
Step 5. Format the virtual disk
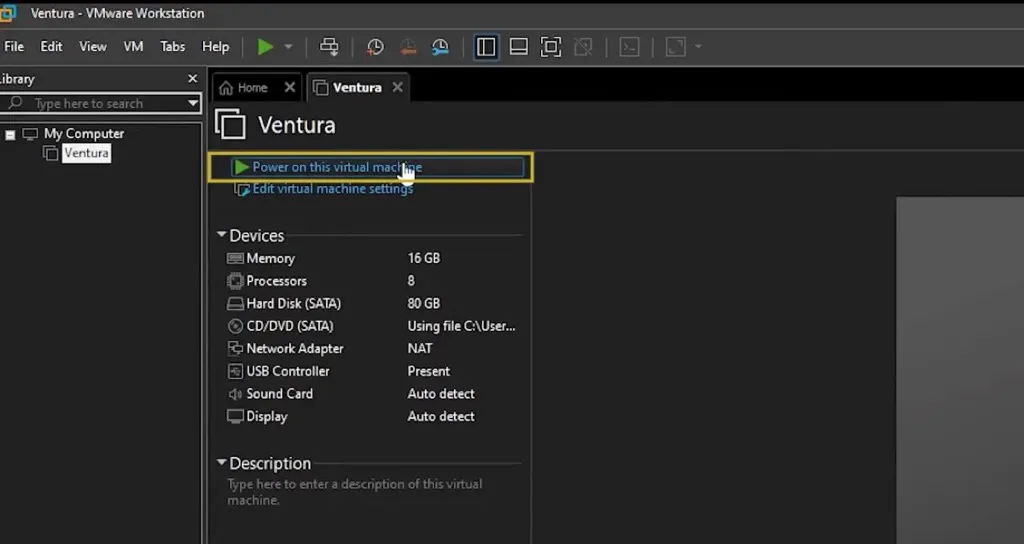
We must format the newly inserted hard disk because macOS is unable to recognize it. The dashboard of the freshly constructed virtual machine running macOS will appear once all the settings have been completed, then:
- Click Power on this virtual machine.
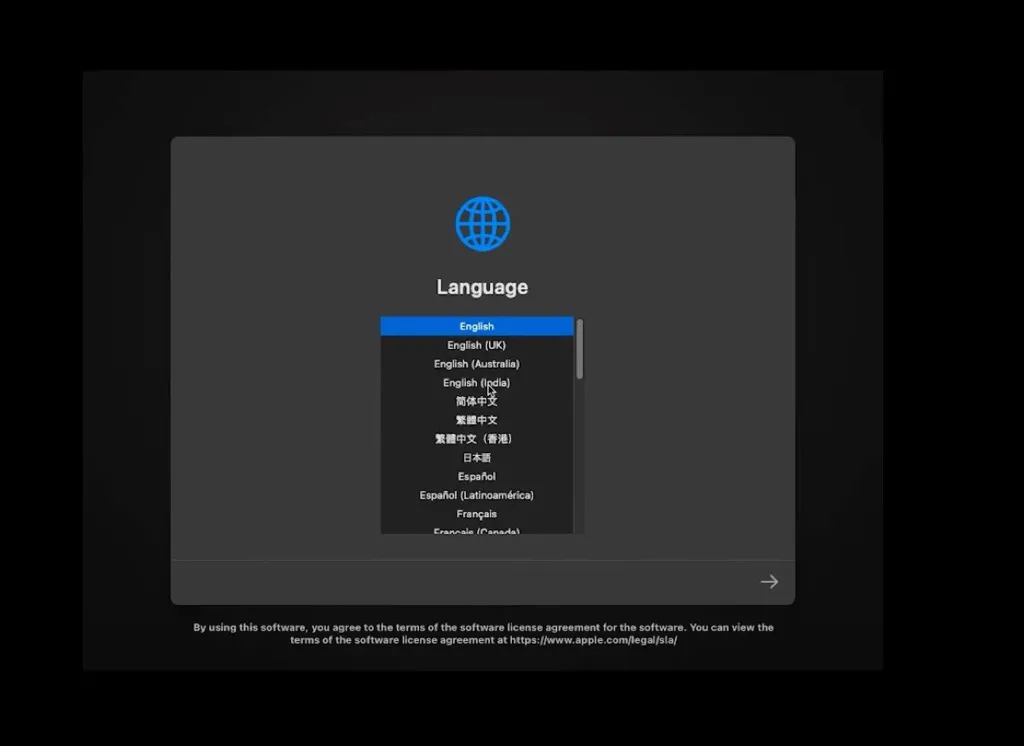
- Select your macOS language, then select Disk Utility.
- Right-click on VMware Virtual SATA Hard Drive Media from the left and choose Erase.

- Remain the default settings and click Erase.
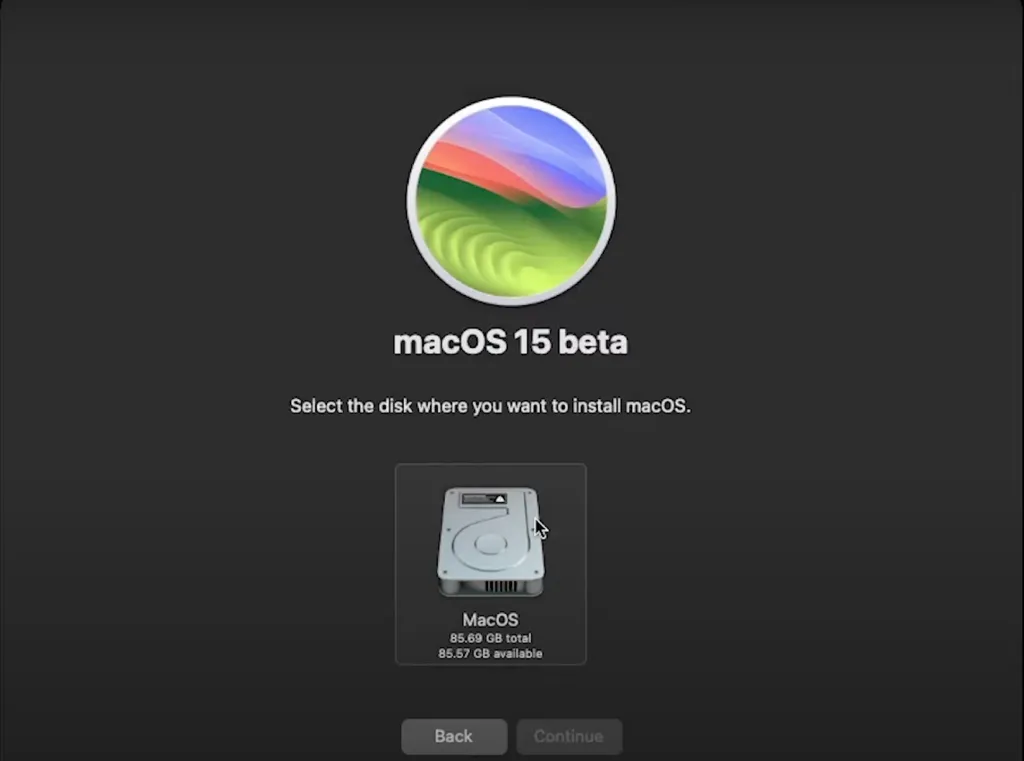
Step 6. Install macOS Sequoia on VMware on Windows
After formatting the VM disk, you can then install macOS Seqoia on VMware:
- Back to the macOS Utilities window and select Install macOS > Continue.
- Agree to the terms and conditions.
- Choose your virtual machine as the destination drive.
- Follow the onscreen guide to complete the macOS installation.
Step 7. Install VMware Tools
Installing VMware Tools is the final step required to run macOS Sequoia on VMware. With these tools, you may resolve visual problems and obtain extra features like full-screen support and communication between your macOS virtual machine and the host OS, including time synchronization, mouse integration, and so forth.
- Open your VMware Workstation and power on the macOS Sequoia.
- Click on the VM options and choose "Install VMware tools".
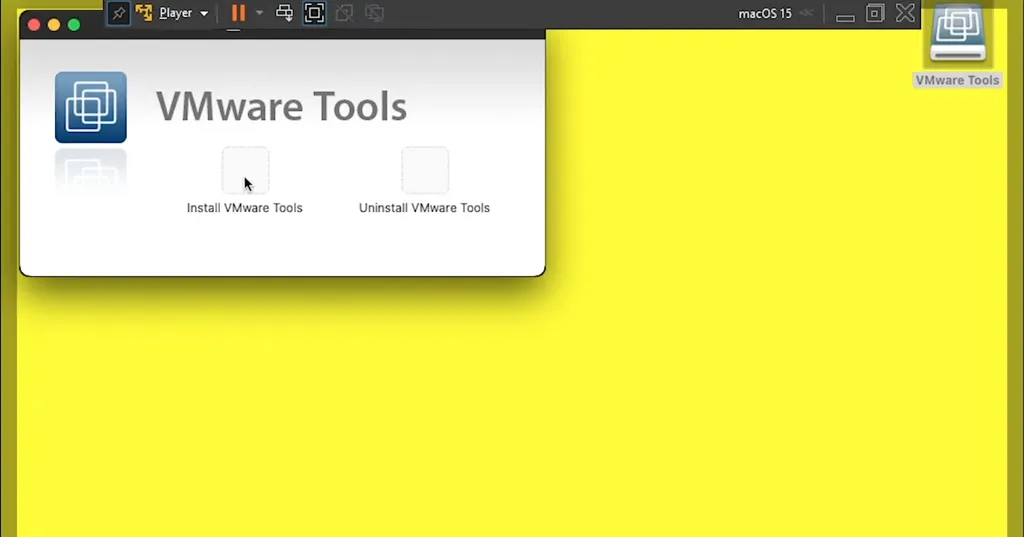
- Double-click on the Install VMware tools > Install.
- Enter your password and tap Install Software.
- If it says System Extensions Blocked, follow the introductions to enable it.
- Click Restart to reboot your VMware of macOS Sequoia.
Share the detailed steps with people who want to install macOS Sequoia on VMware on Windows!