Data loss is not unusual for most of us. It happens when your Mac won't turn on, you've mistakenly deleted files, hard drives are inaccessible, a pink screen shows on your Mac, and so on.
But for Apple silicon M1 Mac users like you, data loss is very troublesome. The CPU architecture of the M1 chip is vastly different from that of the Intel chips. Consequently, some of the data recovery ways or software that you used before are not applicable for an M1 Mac now.
So how to recover data from M1/M2/M3 Mac that won't boot? This article will help you.
![]()
For the mistakenly deleted files, you can restore them from the Mac Trash. For other data loss situations, recover the lost data from your M1/M2/M3 Mac in the following ways:
- Use a data recovery software (Check the free data recovery software for Mac)
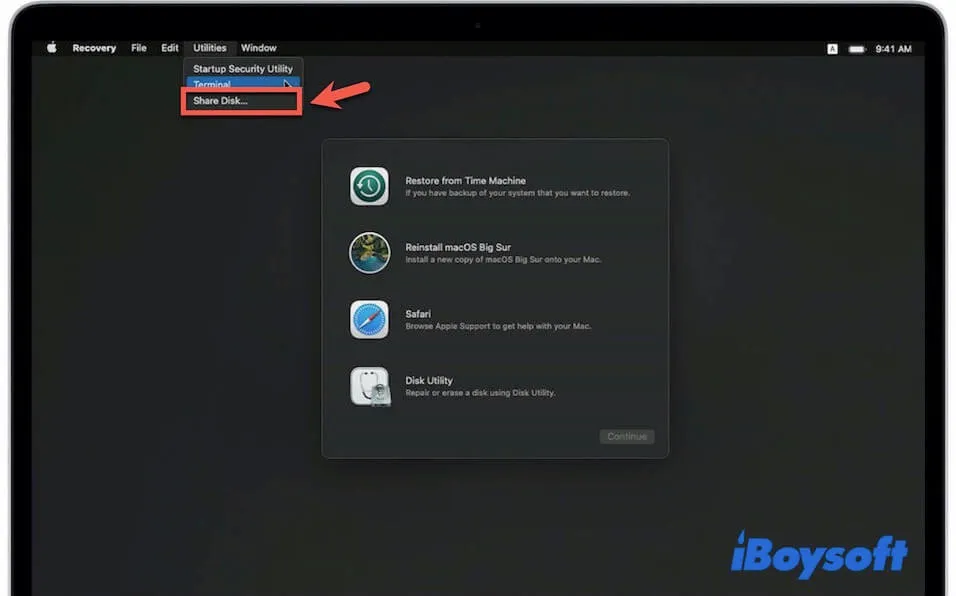
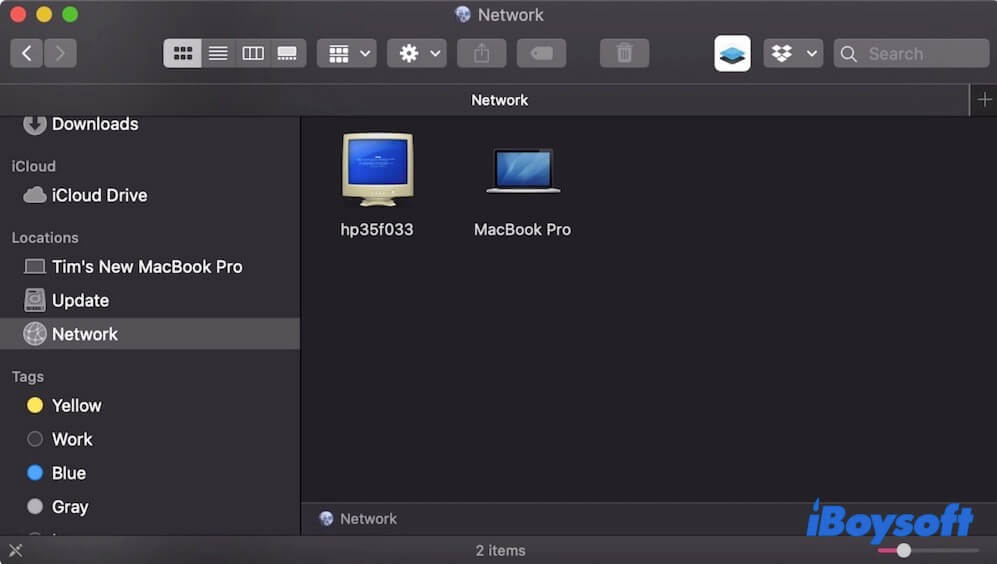
- Use the Share Disk utility
- Use Time Machine backups
Recover lost files from M1/M2/M3 Mac with data recovery software
Data loss reasons are various but data recovery ways can be universal. You are able to utilize professional M1 Mac data recovery software to retrieve data from your M1/M2/M3 Mac.
As the ARM-based M1/M2/M3 chip integrated the data security feature of the T2 chip and also made great enhancements, an M1/M2/M3 Mac has far higher security than previous machines.
Besides, Apple's system-on-chip (SoC) contains the newest generation of Secure Enclave. As a secure coprocessor, the Secure Enclave supplies CPU hardware-level isolation and memory encryption on every server. And it also includes hardware verified secure boot and a high-performance storage controller with AES encryption hardware. All these bring more challenges to data recovery from an M1/M2/M3 Mac.
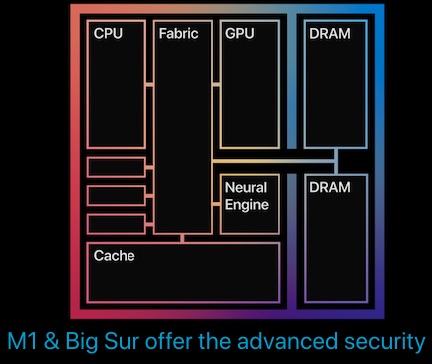
So, that is why the data recovery software you've used before is inapplicable for your M1/M2/M3 Mac now. You have to abandon the prior data recovery software and pick up a new one.
iBoysoft Mac data recovery software is a decent choice. As an identified developer trusted by Apple, iBoysoft has updated its data recovery software to fully support M1/M2/M3 Macs and macOS Sonoma.
Features of iBoysoft Data Recovery for Mac
- Support Apple Silicon M3, M2, M1 Mac.
- Fully compatible with Apple T2 chip.
- Support APFS, encrypted APFS, HFS+, exFAT, FAT32 file systems.
- Recover data from Mac that won't boot.
- Recover data from the corrupted, unmountable, unreadable drive.
- Recover lost photos, documents, files, videos, audio, emails, etc. from Macintosh HD and various external drives.
Read-only & risk-free
Case 1: Recover data from M1/M2/M3 Mac that won't boot
There are two ways for you to restore files from an unbootable M1 Mac.
One is to run iBoysoft Data Recovery for Mac in Recovery Mode to get the lost data. This method is easy to operate and doesn't require you to create a bootable USB installer. And at present, only iBoysoft Data Recovery for Mac supports do so.
Option 1: Run iBoysoft Data Recovery in macOS Recovery Mode
Here's how to run iBoysoft Data Recovery in macOS Recovery Mode to retrieve data from an M1/M2/M3 Mac that won't boot.
- Boot your M1/M2/M3 Mac into macOS Recovery Mode.
Shut down your M1/M2/M3 Mac and wait for a moment. Press down the Touch ID (the power button) until you see the startup options and the Options gear icon. Then, click Options > Continue to enter into macOS Recovery Mode. - Ensure your Mac is connected to the network well.
- Select Utilities > Terminal.
- Copy and paste the command below and wait until iBoysoft Data Recovery is launched in macOS Recovery Mode.sh <(curl http://boot.iboysoft.com/boot.sh)
- Select the startup disk in the iBoysoft Data Recovery window.
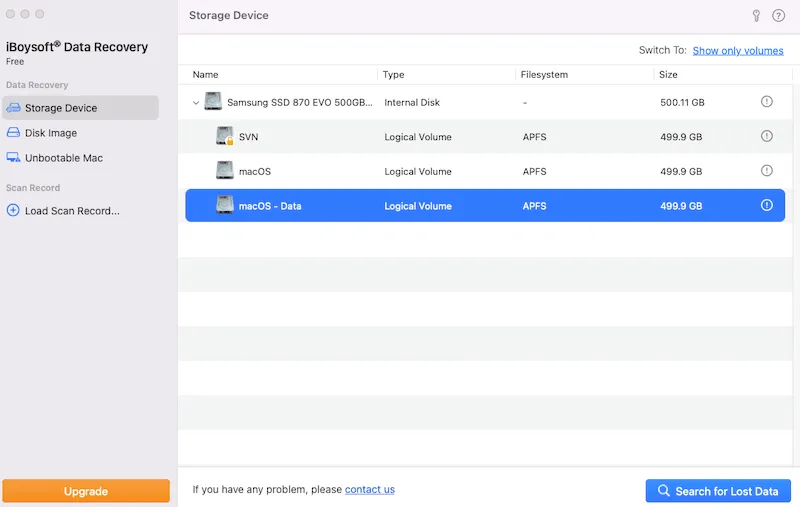
- Click Search for Lost Data to search for the lost files on the disk.
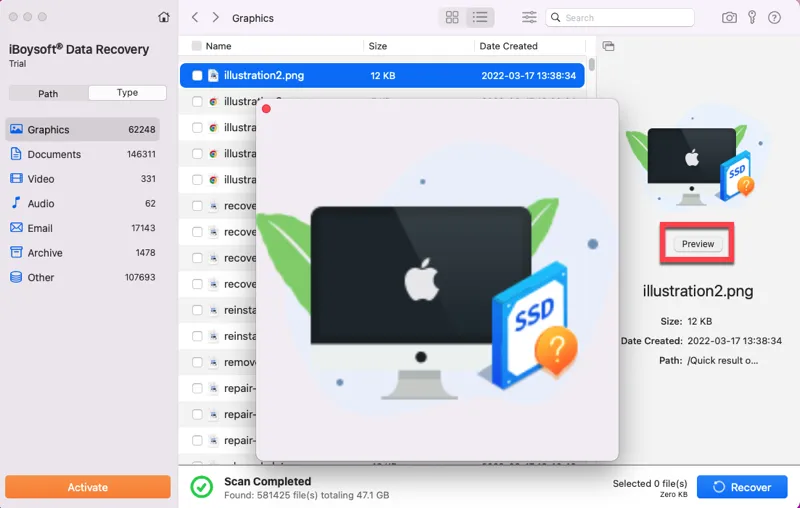
- Preview the found data.
- Select your desired data and click Recover to save them to a connected external drive.
Option 2: Boot your M1/M2/M3 Mac with a bootable external drive & run iBoyosft Data Recovery
Another way is a common and a little bit complicated approach. That is to create a bootable external drive and boot your Mac from the USB first. Then, install iBoysoft Data Recovery software to recover lost data.
Please read the stepwise operations in the following part.
What you should prepare:
- USB-C: Use a USB-C connected drive (USB 3.1 or 3.2) or Thunderbolt 3 or 4 NVMe SSD (Best performance).
- Erase before installing: Erase the drive completely and then format it as APFS file system.
- Install macOS onto the external drive: Obtain a macOS installer and then install macOS from your M-series Mac directly onto the external drive.
Step 1. Create a bootable macOS installer
Now, watch this video to learn how to create a bootable external drive.
1. Connect the Thunderbolt 3 NVMe M.2 SSD to the healthy Mac.
2. Open Finder > Applications > Utilities > Terminal.
3. Type one of the commands below and press Return. Here "MyVolume" in the command means where the macOS installation files will be stored, replace "MyVolume" with the name of your Thunderbolt 3 drive.sudo /Applications/Install\ macOS\ Monterey.app/Contents/Resources/createinstallmedia --volume /Volumes/MyVolumesudo /Applications/Install\ macOS\ Big\ Sur.app/Contents/Resources/createinstallmedia --volume /Volumes/MyVolume
4. Enter your admin password when required and press Return. And type Y when warning you that it will erase the external hard drive and press Return.
When you see the "Copy complete and Done" notification, the macOS Big Sur bootable installer is created.
Step 2. Install macOS onto the external drive
1. Plug the Thunderbolt 3 NVMe M.2 SSD into your M1/M2 Mac that is connected to the Internet.
2. Turn on your Mac and continue to hold the power button until seeing the startup options window.
3. Select the volume containing the bootable installer you've created just now, then click Continue.
4. Follow the on-screen instructions to install macOS onto the external drive.
5. After installing macOS, restart your Mac and continue to hold the power button until seeing the startup options window.
6. Select the external drive to boot your M1/M2/M3 Mac.
Step 3. Download and install iBoysoft Data Recovery for Mac:
After the M1/M2/M3 Mac starts up, download and install iBoysoft Data Recovery. Then launch iBoysoft Data Recovery and start the internal hard drive from your M1/M2/M3 Mac.
Case 2: Recover data from an unmounted/unreadable volume on M1/M2/M3 Mac:
- Download and install iBoysoft Mac data recovery software on your M1/M2/M3 Mac.
- Open iBoysoft Data Recovery for Mac and select the target volume.
- Click Search for Lost Data, and then preview the searching results.
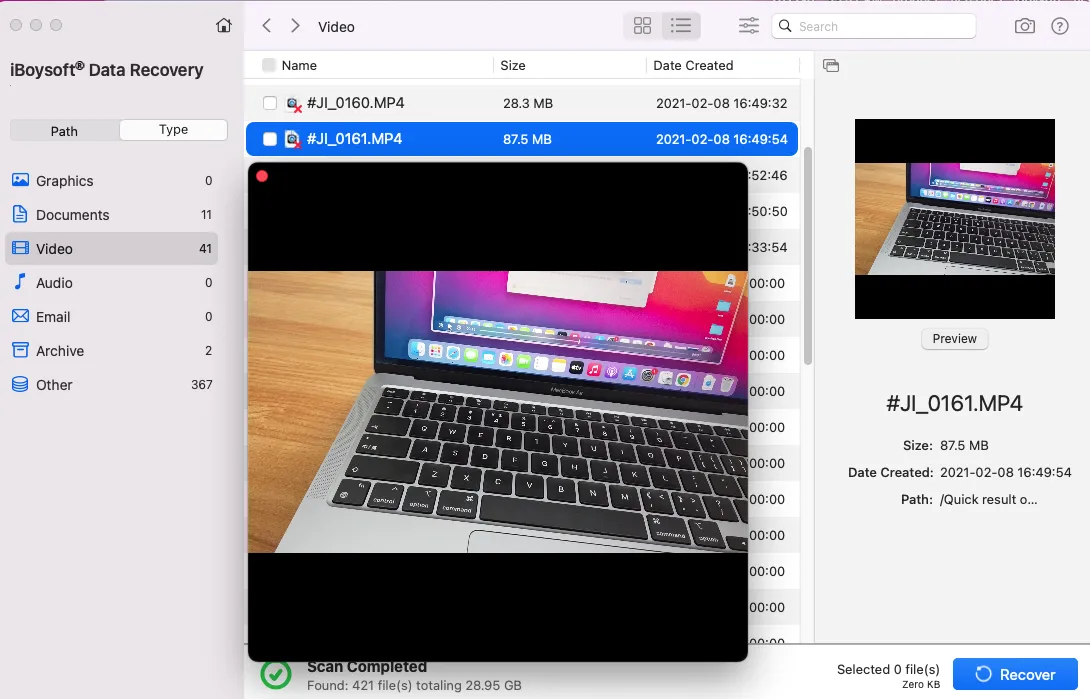
- Select the desired data and click Recover.
Case 3: Recover deleted files from M1/M2/M3 Mac
If you just move the files to the Trash, you can put them back. But if you empty the Trash to permanently delete the files from your Mac, it is hard to recover the lost files from your M1/M2/M3 Mac.
That's because the internal hard drive of Mac features the SSD TRIM technology to automatically remove permanently deleted files. And the enhanced data security technique that applies to the M1/M2/M3 chip, leading to recovering permanently deleted files on Mac from the internal SSD with the M1/M2/M3 chip becomes impossible. No Mac data recovery software can do that, even iBoysoft Data Recovery for Mac either.
Restore lost data on M1/M2/M3 Mac using Time Machine backups
If you have the habit to back up your Mac with Time Machine in a routine before, you are lucky to use the Time Machine backup to recover lost data from your Mac.
Case 1: When your Mac won't boot
You should boot into macOS Recovery mode or Fallback Recovery OS first:
1. Turn on your M1/M2/M3 Mac and hold the power button.
2. Release the power button until you see the startup options window.
3. Select Options, then click Continue.
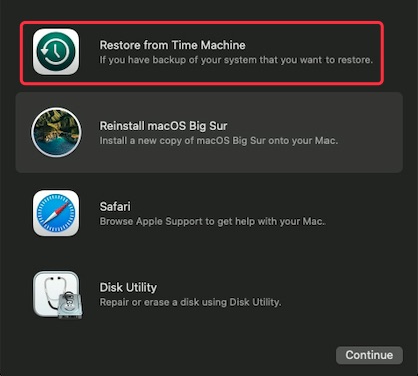
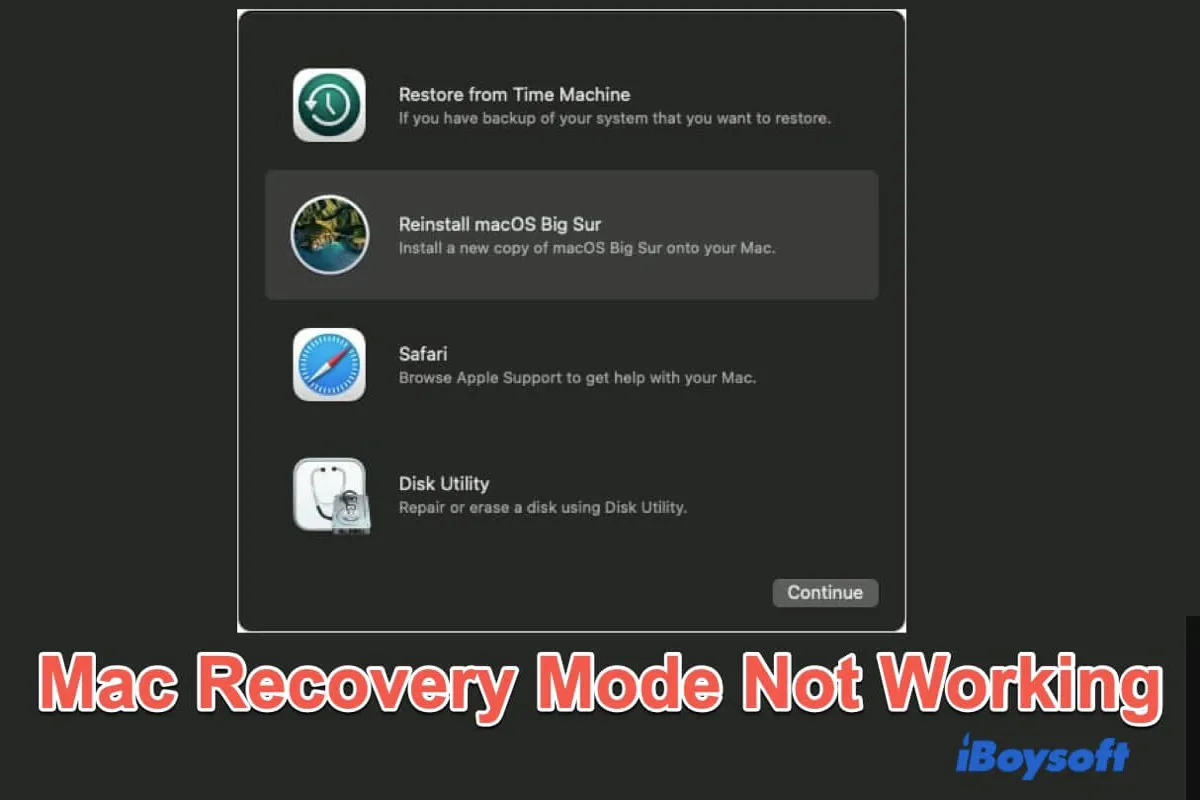
When you see the following four options on your screen, it means you've booted into macOS Recovery mode successfully.
What to do if macOS Recovery mode not working?
This post is a full guide to help you resolve macOS Recovery mode that's not working in different cases. Read more >>
1. Connect your external hard drive or USB drive containing the Time Machine backup to your M1/M2/M3 Mac.
2. Select Restore from Time Machine, and then follow the instructions to restore your Mac.
Case 2: When your Mac can startup
You can restore your Time Machine backup without booting into macOS Recovery Mode.
After restoring your Mac with Time Machine backup, you'll find that the lost or inaccessible data is back.
As data loss happens from time to time, it's better for you to back up your Mac with Time Machine on routine. But for those without a Time Machine backup, recovering data from your M1/M2 Mac with data recovery software, like iBoysoft Data Recovery for Mac, is the only and simplest way.
How to Reset your M1 Mac to Factory Settings
Ways to factory reset your M1 Mac mini, MacBook Air, and MacBook Pro and reinstall macOS Big Sur when you need to replace it or the Mac is bricked. Read more >>
Fix the problems on your disk after recovering the data
If data loss due to your M3, M2, M1 Mac won't turn on, use First Aid to have a Mac hard disk checking first. First Aid will fix some of the errors it has found when checking.
1. Boot into macOS Recovery mode and choose Disk Utility.
2. Select the internal hard drive on the left sidebar of the Disk Utility window and click First Aid.
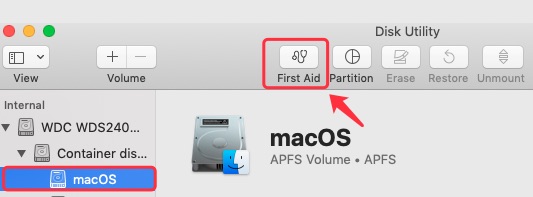
3. Click Run and then wait for First Aid checking and fixing disk errors.
If your Mac can boot up and certain non-system volumes are inaccessible, open Finder > Applications > Utilities > Disk Utility. Then, run First Aid to fix issues on these volumes.
Note: First Aid can only fix the limited disk errors. So, you have to recover your data when First Aid can't help to fix the disk issues.

