Apple has released macOS Monterey for some time and you probably want to experience its well-designed features and enhanced functions. But the Monterey installation failure stops your steps.
Thankfully, whatever your situation is, this post is a dedicated tutorial to help you solve the problem - macOS Monterey cannot be installed on your Mac. After that, you can successfully finish the macOS software update on your MacBook Pro, MacBook Air, iMac, Mac mini, or so.
Get the full macOS installer here or learn other ways to download and install macOS.

macOS Ventura Cannot Be Installed on Macintosh HD [Fixed]
If you tried to install macOS Ventura but received the error reading, "macOS Ventura cannot be installed on Macintosh HD," check out this post for the 15 fixes. Read more >>
Table of Contents:
- 1. Why can't you install Monterey on your Macintosh HD?
- 2. macOS Monterey cannot be installed on Macintosh HD, try these fixes first
- 3. Other ways to install macOS Monterey on Macintosh HD successfully
- 4. FAQs about macOS Monterey cannot be installed on Macintosh HD
Why can't you install Monterey on your Macintosh HD?
Before taking action to fix the macOS Monterey update failure, you need to analyze its possible causes. The reasons will be the key point to quickly fixing the complex Mac won't update problem.
As installing macOS Monterey is an easy job and a successful macOS installation requires a lot, there are many reasons why macOS Monterey cannot be installed on Macintosh HD. Here we've summarized the most common causes.
- Poor internet connection
- Not enough space on your Macintosh HD
- macOS installer file corruption
- Your Mac's startup disk has some errors
- Incompatibility between macOS Monterey and your Mac model (Download macOS on unsupported Macs)
- Bugs in macOS Monterey
macOS Monterey cannot be installed on Macintosh HD, try these fixes first
Generally, macOS Monterey installation or update can be separated into three parts, including macOS Monterey download, installation, and personalization. If something goes wrong in any part, macOS Monterey can't be installed on Mac computers.
Here, we listed the necessary checks you should do to troubleshoot this problem.
1. Check the Internet connection
If you download the macOS Monterey installation file from the Mac App Store or update to Monterey in the Software Update utility in System Preferences, you are trying to install Monterey from the Internet. So, you need to check and ensure the Internet connection is well during the operating system installer download.

App Store Not Working on Mac, Won't Open/Load/Update?
This guide elaborates on how to fix App Store not working on Mac Monterey/Big Sur/Catalina, including App Store won't open, App Store won't load, App Store black screen, App Store can not download or update, etc. Read more >>
2. Check the compatibility between macOS Monterey and your Mac Machine
As time goes on, old Mac machines are getting out of date. They can't support running the latest macOS versions as the new system come with enhanced features that require powerful hardware support.
Thus, if you have an old Mac machine, that's possibly the case why macOS Monterey can't be installed on it. To help you clear about which Mac models can update and run macOS Monterey, you can refer to the list below. If your Mac is not on the list, it cannot update to macOS 12.
- MacBook Pro (Early 2015 and later)
- MacBook Air (early 2015 and later)
- MacBook (early 2016 and later)
- iMac (late 2015 and later)
- iMac Pro (2017 and later)
- Mac mini (late 2014 and later)
- Mac Pro (Late 2013 and later)
3. Check the storage space of your Mac
Whether your Mac is stuck in downloading or installing macOS Monterey, you should consider if the lack of storage space is the culprit. Usually, the macOS Monterey installer needs to occupy about 4 to 5 GB of Mac storage space.
And if you upgrade from macOS Sierra or later to Monterey, 26 GB of free storage is required. If you upgrade from the older macOS, you had better leave 44GB of free space.
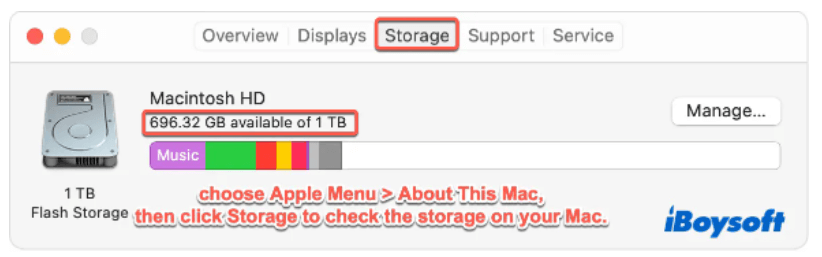
Thus, if your Mac scatters with large files, you'd better free up space on your Macintosh HD. Then, try to download and install macOS Monterey again.
4. Restart your Mac and retry the Monterey installation
Temporary errors or bugs on your Mac computer may lead to the macOS Monterey downloading or installation process is stuck. If you've waited a long time but the process bar still has no changes, you can restart your Mac.
If your Mac is frozen or unresponsive, hold the power button for seconds to force shut down, and then press it again to restart your Mac. Then, go to Mac App Store or Software Update to reinstall macOS Monterey.
Note: If you boot Mac from a bootable drive, force restarting your Mac during the macOS installation process may corrupt the Monterey installer file.
5. Update your Mac to the latest update of the current version
Every macOS version has a series of minor updates that come with patches to fix the available bugs of the version. If you haven't done the latest macOS update of the current version but jump to upgrade to macOS Monterey, there exist glitches that may make your Monterey upgrade process stuck or failed in the end.
So, before upgrading, your Mac to macOS 12, update it to the latest version of the current macOS.
Here's how to update your Mac:
- Click the Apple icon > System Preferences > Software Update.
- Click More Info and then check the latest version of the current macOS.
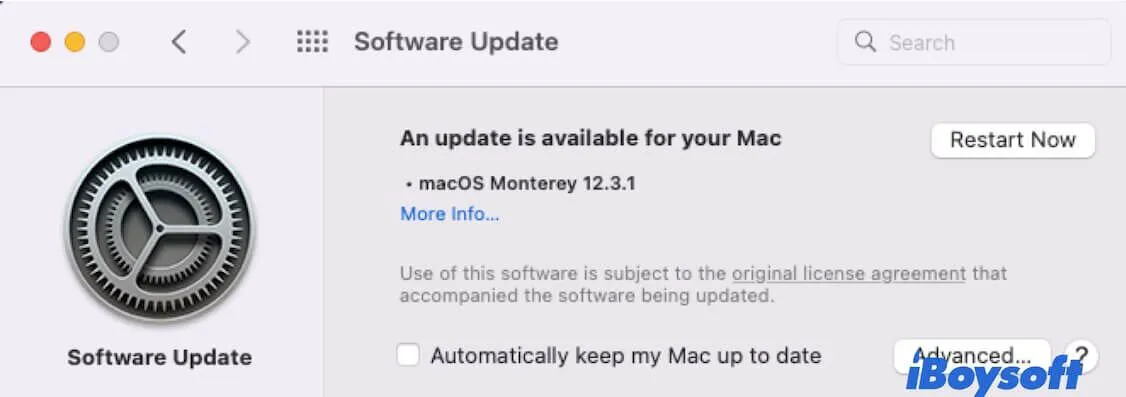
- Click Install Now.
6. Check your Mac start disk in macOS Recovery Mode
Maybe some errors occurred on your Mac's startup disk. So, the macOS Monterey can't be smoothly installed on the Macintosh HD. Especially you prepare to install Monterey to fix issues like your Mac startup slow, MacBook frequent crashes, or Mac won't turn on.
In that case, you can use the First Aid in Recovery Mode to verify and fix some of the tiny errors on your startup disk.
How to check Mac startup disk in macOS Recovery:
- Boot your Mac in macOS Recovery Mode.
For an Intel-based Mac: Shut down your Mac first. Press the power button and simultaneously hold the Command + R keys until the Apple logo appears on the screen.
For an M1 Mac: Shut down your Mac. Then, continue pressing down the power button until you see the Startup Options. Select the Options icon > Continue. - Enter your admin password if required.
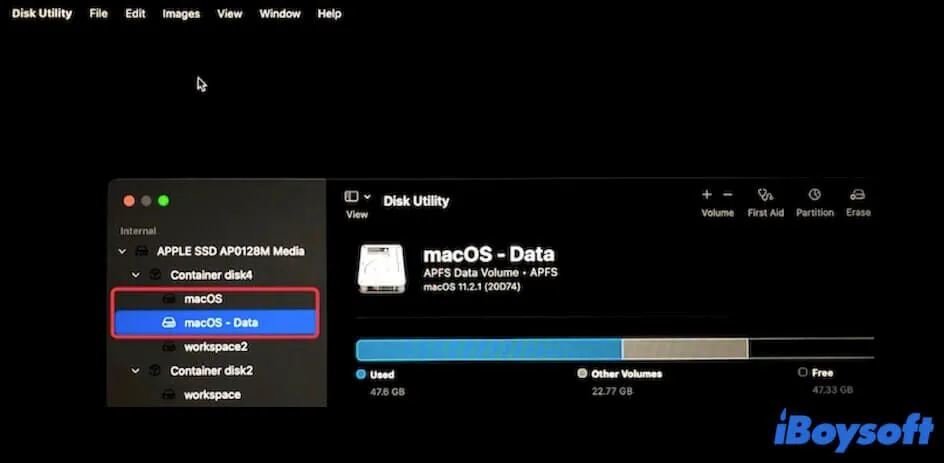
- Select Disk Utility in Recovery Mode.
- Click the View button from the top of the window and select Show All Devices.
- Select the Macintosh HD volume, Macintosh HD - Data volume, the container, and the entire startup disk from the left sidebar of the Disk Utility window one by one orderly and click First Aid at the top of the window to check each of them.
After checking and repairing your startup disk and the containing volumes, click the Apple menu > Restart to reboot your Mac. Then, you can try to install macOS Monterey once again to check if the process gets stuck this time.
7. Delete the download and try again
Perhaps, the Monterey installer you've downloaded is corrupted. So, your MacBook Pro won't update to Monterey.
You can try to delete the macOS installer from your Mac, which is usually stored in the Downloads folder in Finder by default. If you've created a bootable USB installer, erase the USB drive and download macOS Monterey through Terminal again.
After macOS download, go to install macOS Monterey again.
If you install macOS Monterey from a USB bootable installer, you need to do the following extra checks:
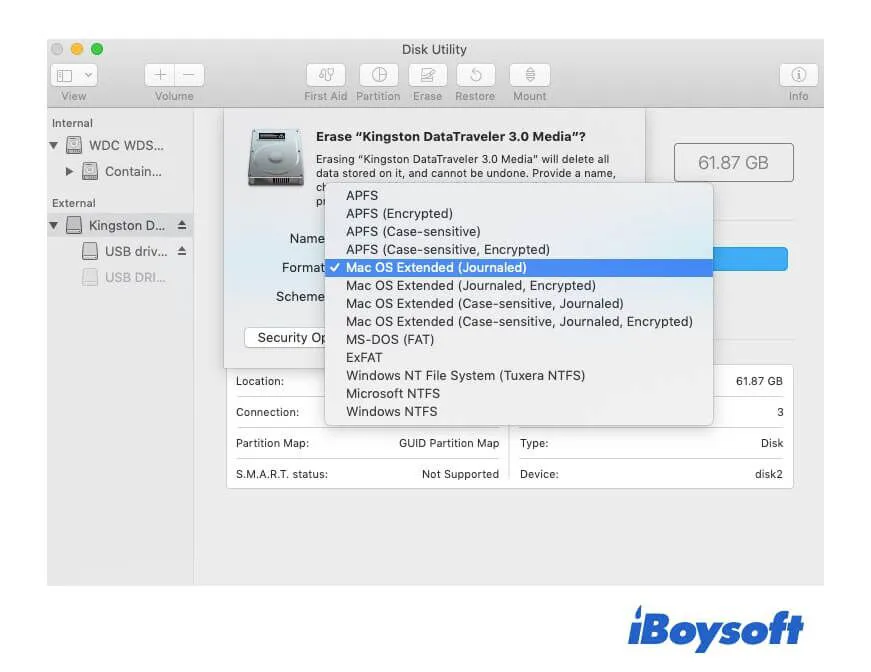
8. Check the format of the USB drive
If you try to create a bootable USB drive to boot your Mac for USB but failed in downloading macOS Monterey onto the drive, you need to check the format of your USB drive first. Usually, the correct format for a drive to load the macOS installer and perform the installation is Mac OS Extended (Journaled) (also called HFS+).
You can connect your drive to your Mac and open Disk Utility (Finder > the Applications folder > the Utilities folder) to check the format of the USB drive. If it doesn't be formatted with Mac OS Extended (Journaled), back up the necessary files on the drive and reformat it to that file system in Disk Utility.
9. Check the connections of your USB drive and Mac
If you've already created a bootable Monterey USB drive but can't use it to boot your Mac, check if the drive shows up in Disk Utility. If not, there may have some connection issues. Try to reconnect it to another USB port on your Mac.
If you use a USB adapter to connect the drive to your MacBook without USB ports, check if the adapter is workable.
If the bootable external drive also does not show up on another Mac, it may have hardware issues. You need to recreate a new bootable USB drive.
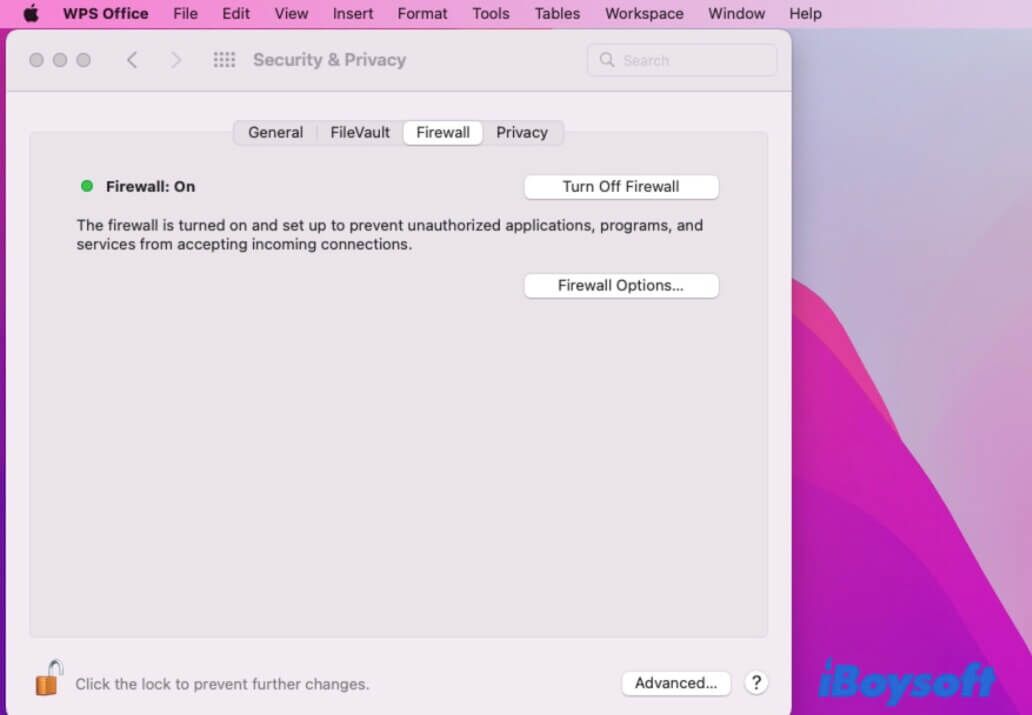
10. Check if the Firewall settings are on
If the USB drive shows up on your Mac but fails to boot your Mac, you need to check if you've turned on Firewall. If Firewall is on, all incoming connections to your Mac are not allowed, like your USB drive.
To disable the Firewall settings, follow these steps:
- Select the Apple logo > System Preferences > Security & Privacy.
- Click the lock icon at the left bottom of the window and enter your admin password.
- Click Turn Off Firewall to disable it.
Then, reconnect your USB drive to your Mac and use it to boot your Mac in macOS Monterey.
11. Check the startup security settings
If your Mac is equipped with a T2 security chip or M1 chip (check-in Apple menu > About This Mac >Processor), you can't boot your Mac from an external hard drive by default.
To reset the settings to make that available, you need to boot your Mac in macOS Recovery mode, and then:
- Click Utilities from the top Apple menu bar in Recovery mode > Startup Security Utility.
- Select Medium Security under the Secure Boot tab.
- Select Allow booting from external or removable media under the Allowed Boot Media tab.
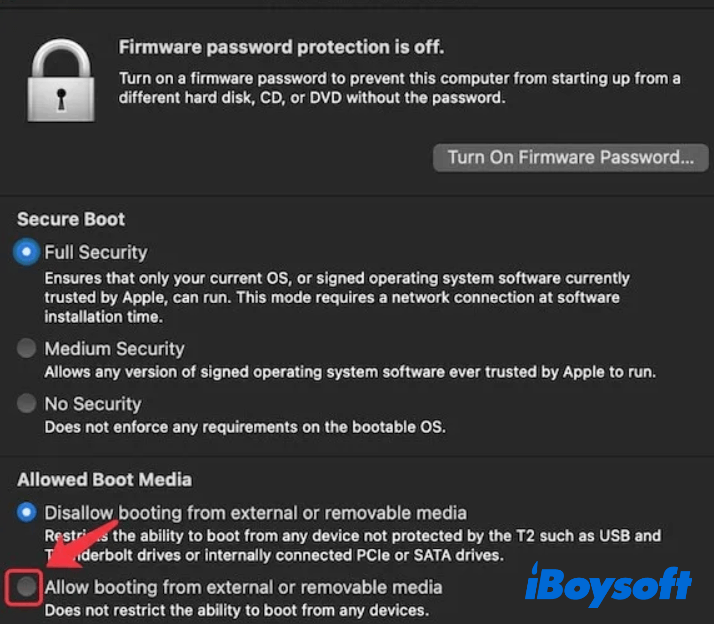
- Exit Startup Security Utility and restart your Mac.
Now, you can boot your Mac in macOS Monterey from an external bootable drive.
12. Check the bootable USB drive errors with First Aid
If your bootable USB drive doesn't have the above issues but still can't boot your Mac in macOS Recovery, you should consider if the USB drive has some errors. You can run First Aid to repair the errors on the disk.
- Connect your USB drive to your Mac.
- Open Disk Utility (from Launchpad > Other).
- Select the USB drive from the left sidebar of the Disk Utility window and choose First Aid at the top of the window. Click Run.
- Waiting for the First Aid to finish checking, then try again to use the drive with macOS Monterey installer to boot your Mac.
Other ways to install macOS Monterey on Macintosh HD successfully
If you've troubleshot the macOS cannot be installed on Macintosh HD error with the above checks and fixes one by one but still fails to install Monterey on your Mac, you can try other ways to finish the job.
Here are four ways to install macOS Monterey on your Mac.
Install macOS from the App Store
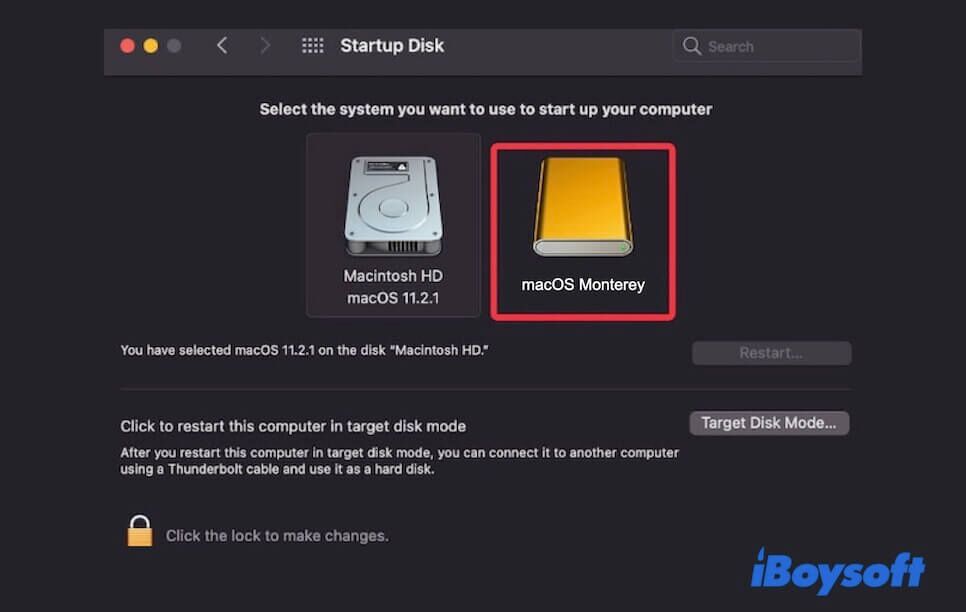
If you prepare to boot your Mac via an external bootable macOS Monterey installer, failures often happen as boot Mac from a USB drive is not an easy thing.
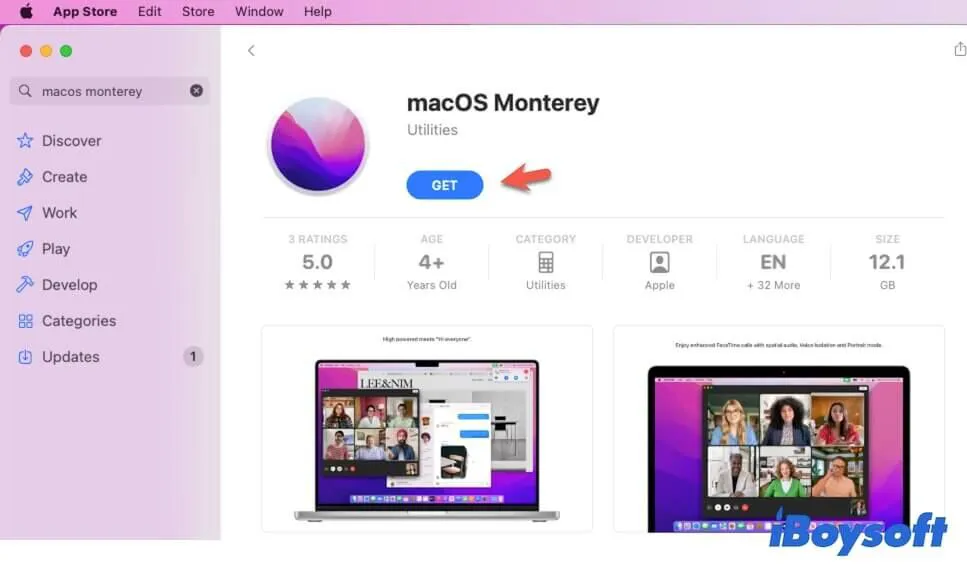
Or if you've tried to update your Mac from the Software Update utility in System Preferences but get stuck, you can directly download macOS Monterey from App Store and install it on your Mac.
- Click the Apple menu > App Store.
- Search for macOS Monterey in App Store.
- Click View to look through macOS Monterey > GET.
After downloading Monterey, check and make sure your startup disk has at least 26GB of free space. And back up your Mac files with Time Machine. Then, click the Monterey installer and follow the onscreen guide to install it.
Install macOS Monterey in Safe Mode
Maybe some programs on your Mac prevent your macOS Monterey from installing or updating. To reduce the disturbance from troublesome third-party drivers and make a relatively clean environment for macOS installation, you can install Monterey in Mac Safe Mode.
To boot Intel-based Macs in Safe Mode:
- Turn off your Mac and wait a moment.
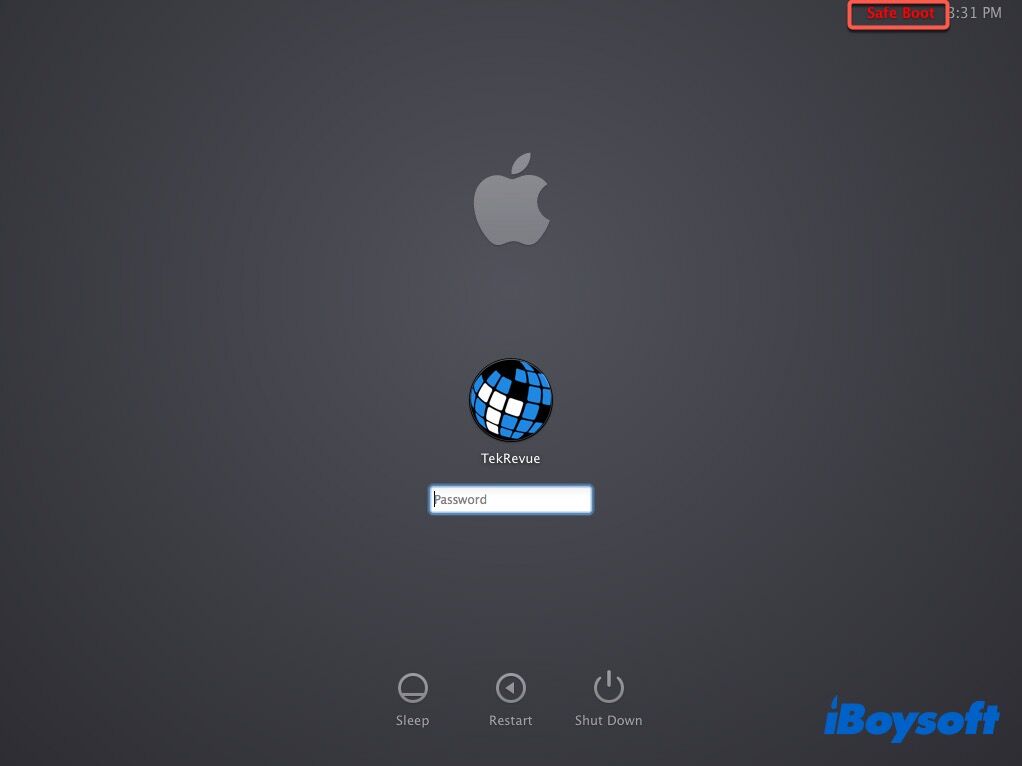
- Restart your Mac and immediately press down the Shift key until you see the login window.
Note that if the Safe Boot words appear in the upper right corner of the login window, it means that you are in Safe Mode.
To start M1-based Macs in Safe Mode:
- Shut down your Mac and wait a few seconds.
- Hit down the power button and release it when you see the Startup Options.
- Select your startup disk.
- Press down the Shift key and select Continue to enter Safe Mode. Next, release the Shift key.
Now in Safe Mode, find the macOS Monterey on your Mac and click it to follow the on-screen instructions to finish the installation.
Clean install macOS Monterey in macOS Recovery Mode
Also, you can install Monterey in macOS Recovery Mode. Especially your Mac won't turn on and you originally prepare to boot your Mac from an external drive.
But since you've tried all the mentioned fixes above but still fail to install macOS Monterey on your Mac computer, you'd better do a clean installation of macOS Monterey. That is to erase your Mac startup disk and then reinstall macOS Monterey in Recovery Mode.
There's also another reason why you'd better erase your startup disk before upgrading to macOS Monterey. Some users find that after macOS upgrading, they see error messages like "The disk Macintosh HD can't be unlocked" or similar occurs on their Mac machines. This error is probably caused by the user haven't erase the Macintosh HD before installing the new macOS.
To clean install macOS Monterey on your Mac, you need to back up the important files on your Mac first. Then, follow the steps below:
Clean install macOS Monterey on an Intel-based Mac:
- Reboot your Mac and simultaneously press down the Option/Alt + Command + R keys to enter Recovery Mode. Keep your Mac connected to the internet well.
- Select Disk Utility in macOS Recovery.
- Right-click the Macintosh HD - Data volume and select Delete APFS volume.
- Select the Macintosh HD volume and click erase.
- Back to the macOS Utilities screen and click the Reinstall macOS option.
- Follow the instructions on the screen to install macOS Monterey.
Clean install macOS Monterey on an M1 Mac:
- Shut down your Mac and hold the power button until you see the Startup Options.
- Click Options and select Continue.
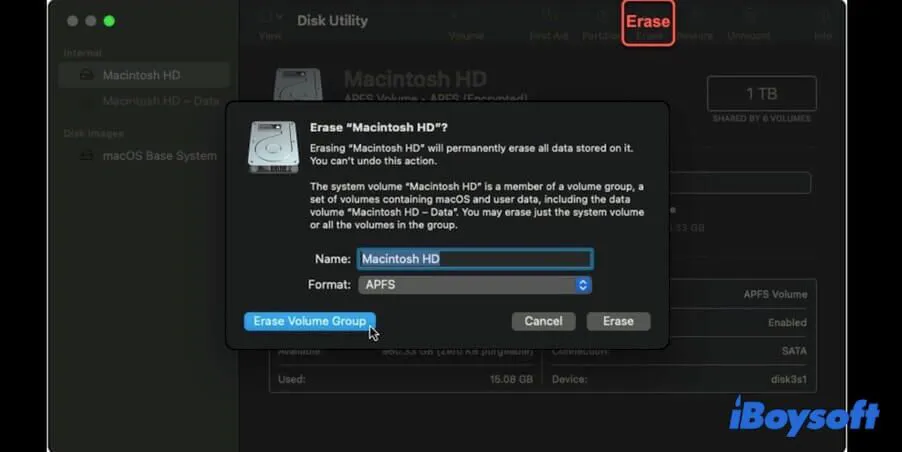
- Select Disk Utility in Recovery Mode.
- Select the Macintosh HD and click Erase. Then, name the volume and choose APFS as the format. And select Erase Volume Group to clean both the Macintosh HD and Macintosh HD - Data volumes.
- Back to the main screen of macOS Recovery mode and select Reinstall macOS Monterey.
FAQs about macOS Monterey cannot be installed on Macintosh HD
- Q1. Do I install Monterey on Macintosh HD or Macintosh HD Data?
-
A
You need to install macOS Monterey on the Macintosh HD volume. The Macintosh HD - Data volume is used to store user data.
- Q2. Is my Mac too old for macOS Monterey?
-
A
If your Mac is in one of those models, it can install macOS Monterey. Mac machines that can install macOS Monterey are MacBook Pro (Early 2015 and later), MacBook Air (early 2015 and later), Mac mini (late 2014 and later), iMac (late 2015 and later), iMac Pro (2017 and later), MacBook (early 2016 and later), Mac Pro (Late 2013 and later).
- Q3. Should I update my Mac from Big Sur to Monterey?
-
A
New features and bug patches come with the new macOS Monterey. If you want to try the new feature like Quick Note, Live Text, Focus, and others, you can upgrade your Mac to macOS Monterey. If you are used to using macOS Big Sur, you can stay on it as Big Sur has similar stability and speed to Monterey.