Although APFS, a file system for macOS, was introduced with macOS 10.13 released in 2017 and has replaced the previous HFS + to become the default file system on Mac computers, there are still quite a few Mac users who use HFS(Mac OS Standard) and HFS+(Mac OS Extended Journaled) file system.
You may delete files from the HFS+ partition intentionally or not, or lose files kept on the HFS+ partition suddenly, even worse, the whole HFS/HFS+ partition is missing. It could be a nightmare for you to lose important HFS+ files/partitions. Fortunately, there are chances to recover HFS/HFS+ partition whether on an internal drive or on an external drive. Stay tuned to know more.
What causes HFS/HFS+ partition and data loss?
HFS and HFS+ file systems are still widely used by Mac users. And some users report that they encounter the issue of the HFS/HFS+ partition and data loss. The causes can be various, and generally, data loss in the HFS+ partition is resulted from:
- Manually deleting HFS+ files or partitions.
- Accidentally formatting an HFS+ partition.
- Bad sectors on the partition.
- Partition corruption or system crash.
- Malware or virus infections.
- Physical damages on the hard drive.
- Reinstalling macOS on the partition.
How to recover data from HFS/HFS+ partition?
Whether you lose HFS+ files/partition due to manual misoperation, or software-related issues, you can try to retrieve the lost/deleted HFS/HFS+ partition and data on your Mac. And you should immediately stop using the hard drive to avoid further data damage. Then, follow the solutions below to recover data back, the soon, the better.
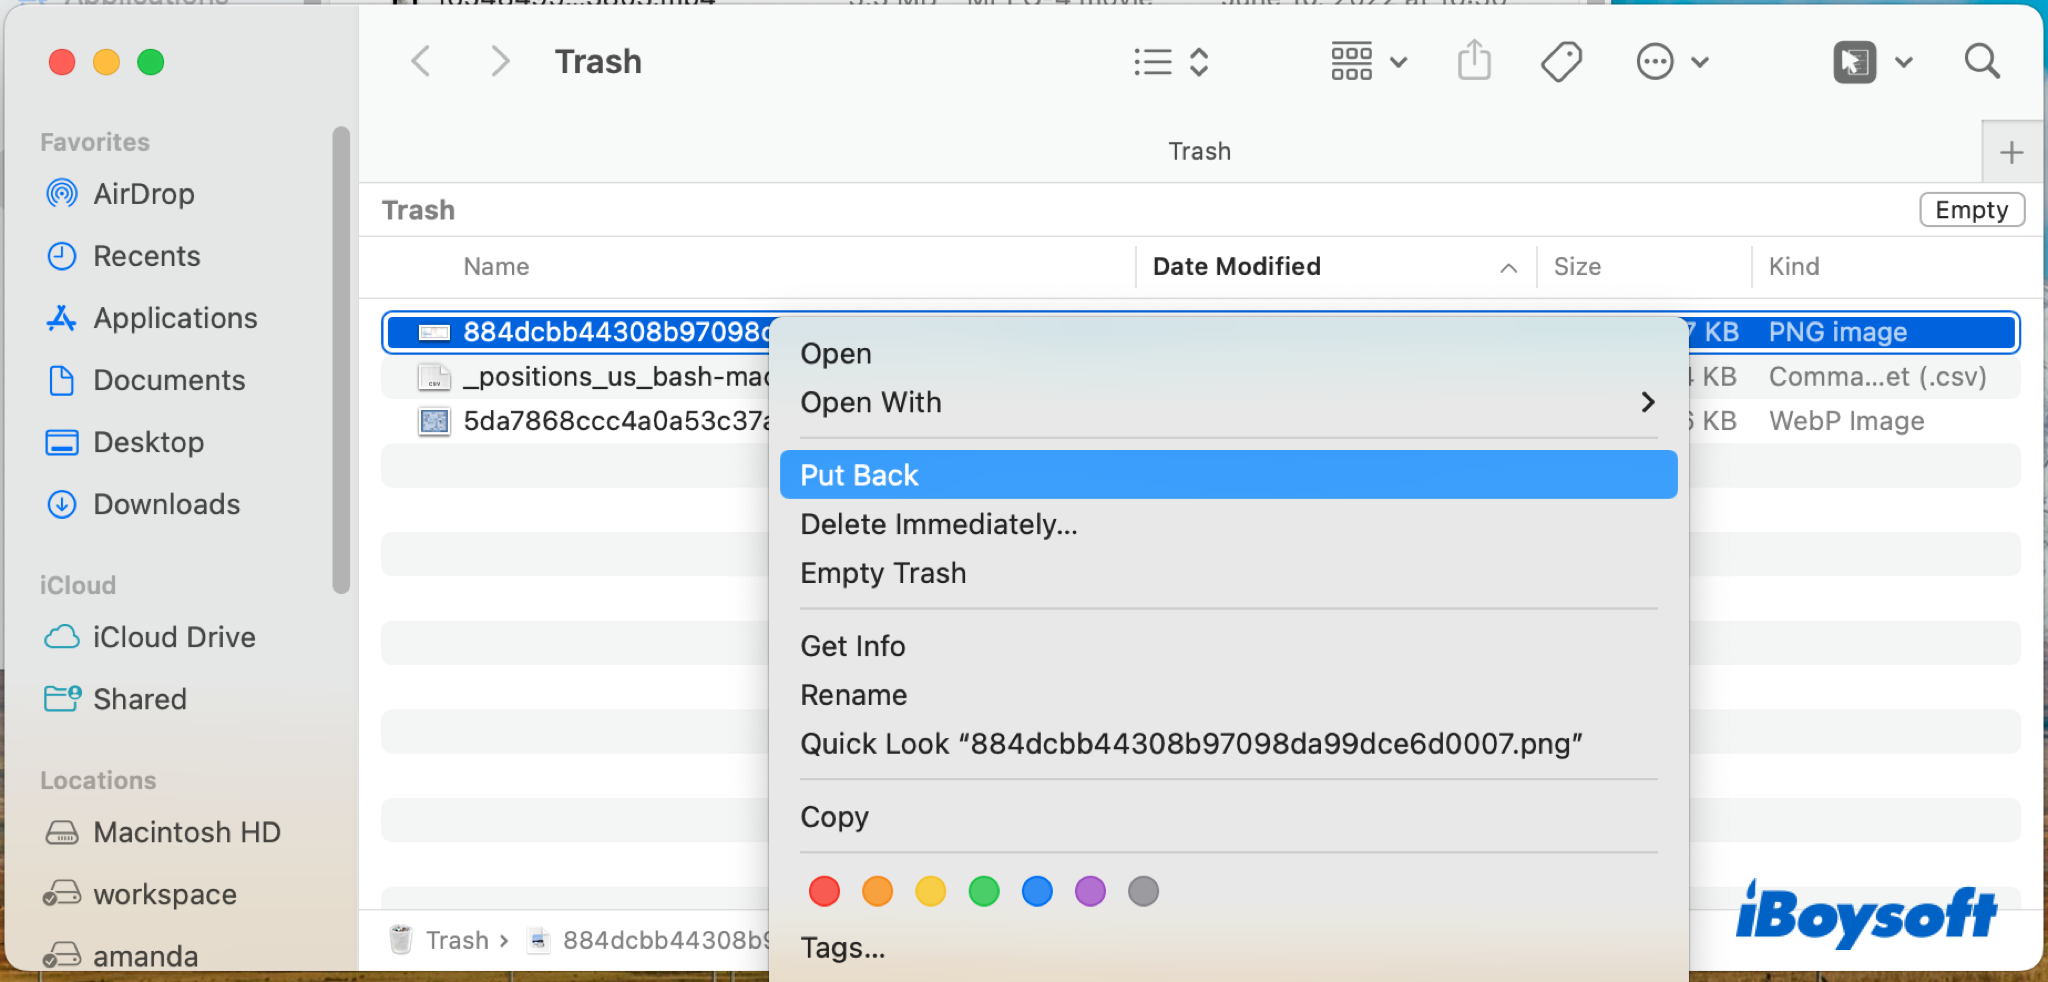
Solution 1. Get HFS+ files back from Mac Trash
When you have deleted files from Mac HFS/HFS+ partition and attempt to get these files back, in the first place, you should check whether the items are still in the Mac Trash. Before you empty the Mac Trash, you can easily recover deleted files on Mac to their previous location.
- Click on the Trash can on the right side of the Dock.
- Locate and select the deleted files or folders you want to restore in the deleted items list.
- Right-click on the selected items.
- Choose Put Back on the menu to restore them to their original locations.
Have recovered lost files in Mac Trash? Share this post with more people!
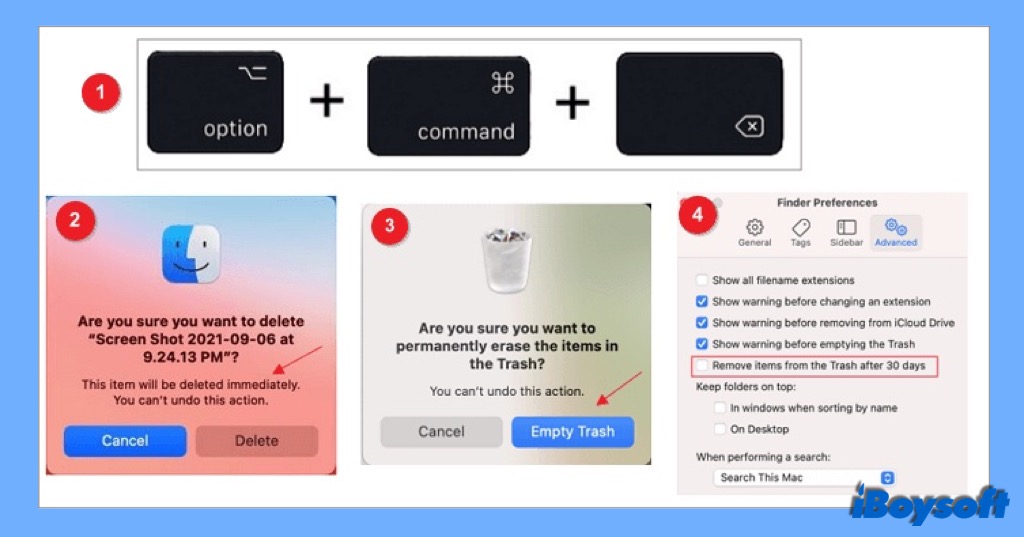
However, you may permanently delete HFS/HFS+ files in these four ways:
- Choose to empty the Mac Trash bin after the deletion.
- Delete files by using the keyboards combination Command + Option + Delete.
- Choose Delete Immediately in Finder to delete an item.
- Remove items from the Trash after 30 days feature is on.
This way, you can not find the deleted/lost files in your Mac Trash. To recover permanently deleted files from HFS/HFS+ partition, you can proceed to try the solutions 4 and 5 below.
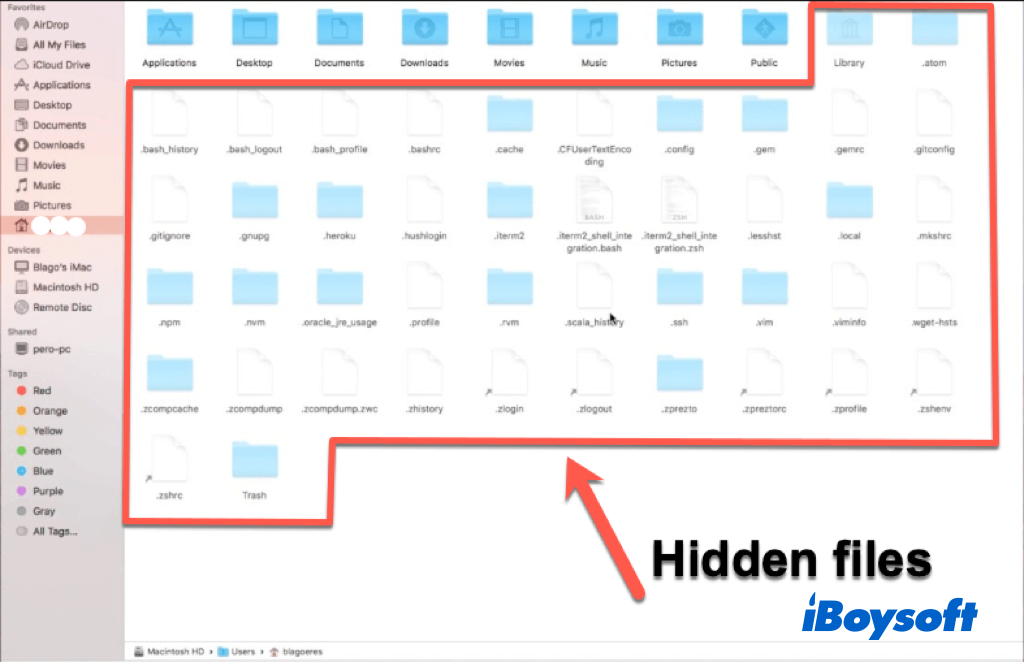
Solution 2. Show hidden files on Mac
In addition to manually deleting HFS/HFS+ files from Mac, you may find the files stored on the HFS/HFS+ partition are lost suddenly. Perhaps, these files are still kept on your HFS/HFS+ partition but are invisible to you such as the macOS Library folder, or you hide them unintentionally. Thus you can show hidden files on Mac to get those lost files back.
Solution 3. Run First Aid to repair HFS/HFS+ partition
As we have mentioned above, hard drive corruption and bad sectors can also lead to HFS/HFS+ partition and data loss. For these logical errors on the partition/drive, macOS built-in Disk Utility has a First Aid feature to fix such issues. Before that, you should back up your Mac to avoid more data loss. And Here's how to run First Aid to repair disk:
- Head to Finder > Applications > Utilities. Then, open Disk Utility.
- Click the View button in the upper-left corner and select Show All Devices to list all detected disks and volumes.
- Select the HFS/HFS+ partition at the left sidebar.
- Click First Aid and then choose Run on the popup window.
- Wait until the First Aid finishes running. (Don't do other operations on Mac when First Aid running).
- Check your HFS/HFS+ partition and data again.
Get lost HFS/HFS+ partition and data back? Share it to help more people!
Unluckily, the First Aid fails to repair the disk and says 'Disk Utility cannot repair the disk, ' 'File system check exit code is 8' and 'File system verify or repair failed,' etc., you can fix these issues with the links and then try to run First Aid to repair disk again. Or, move to the following solutions to continue recovering HFS/HFS+ files.
Solution 4. Restore HFS+ data via Time Machine backup
If you have enabled the Time Machine feature on your Mac, you can easily retrieve your deleted/lost data. Time Machine automatically back up the system files and personal data hourly in the past 24 hours, daily in the past month, or weekly in all the past time. Therefore, you can recover HFS/HFS+ partition and data with your Time Machine backup.
- Connect your Time Machine backup drive to the Mac.
- Open a window of the folder where your file was stored.
- Click the Time Machine icon at the menu bar > Enter Time Machine.
- Use the Up/Down arrows to find the specific file you need to recover.
- Select the desired file and press Space Bar to preview it.
- Click the Restore button to put back file to its original location.
How to Use Time Machine on Mac: Backup and Restore Tutorials
This post will walk you through the steps to set up Mac Time Machine, create Time Machine backups, and restore Mac from Time Machine. Read more >>
Solution 5. Use third-party data recovery software
What if you have permanently deleted the files from the HFS/HFS+ partition, and there is no Time Machine backup available? Or you mistakenly erase the partition? Or the HFS/HFS+ partition is missing? You can resort to professional data recovery software to recover deleted/lost data as long as they haven't been overwritten yet.
Data recovery software can scan out the deleted/lost data on the HFS/HFS+ partition as much as possible. Among all the data recovery software for Mac, iBoysoft Data Recovery ranks top for its high recovery rate, reliance, security, etc., it can recover files from all storage devices and can be applied to hundreds of data loss scenarios. You can give it a shot to recover HFS/HFS+ partition and data.
Best Mac Deleted File Recovery Software - iBoysoft Data Recovery for Mac
Steps to recover data with iBoysoft Data Recovery:
- Download and install iBoysoft Data Recovery on your Mac, then launch it.
- If you are using an external hard drive where HFS/HFS+ files are lost, connect it to the Mac.
- Select the partition you want to recover data from on the listed drives and volumes/partitions.
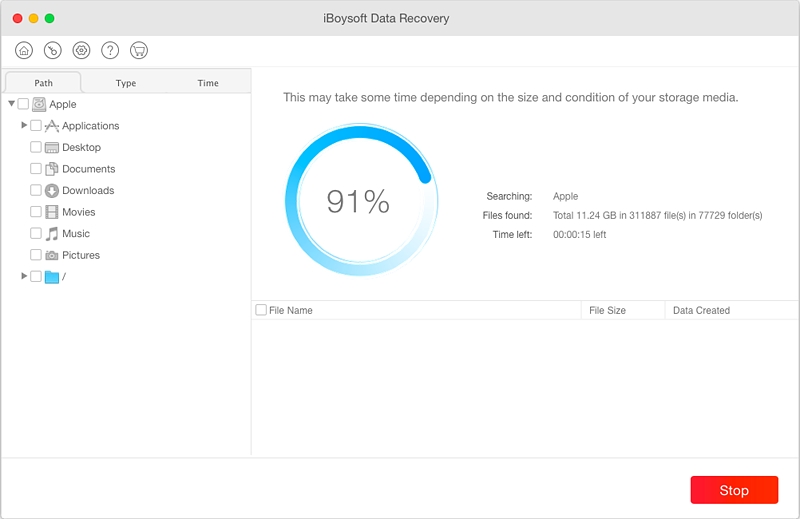
- Click the Scan button to find deleted/lost files on the selected partition.
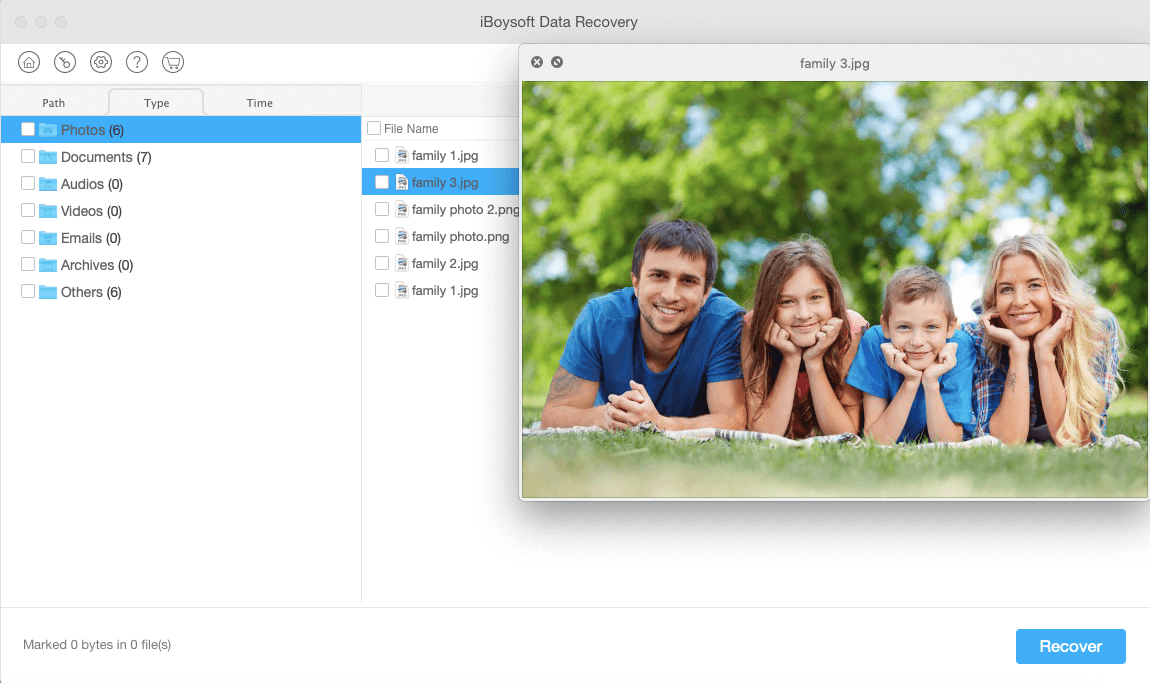
- Preview the recoverable files and click the Recover button to store them on a different location partition/drive.
If you have recovered desired data back with iBoysoft Data Recovery, you can share it now!
The final words
We provide 5 methods to help you recover HFS/HFS+ partition and data. You can easily get them back if those files have been moved to Trash but you haven't emptied it yet. If you have permanently deleted HFS/HFS+ files from your Mac, you can use Time Machine backup or data recovery software to rescue your data. If none of the above solutions works, the drive may be physically damaged, you can send it to a local repair or consider a replacement.