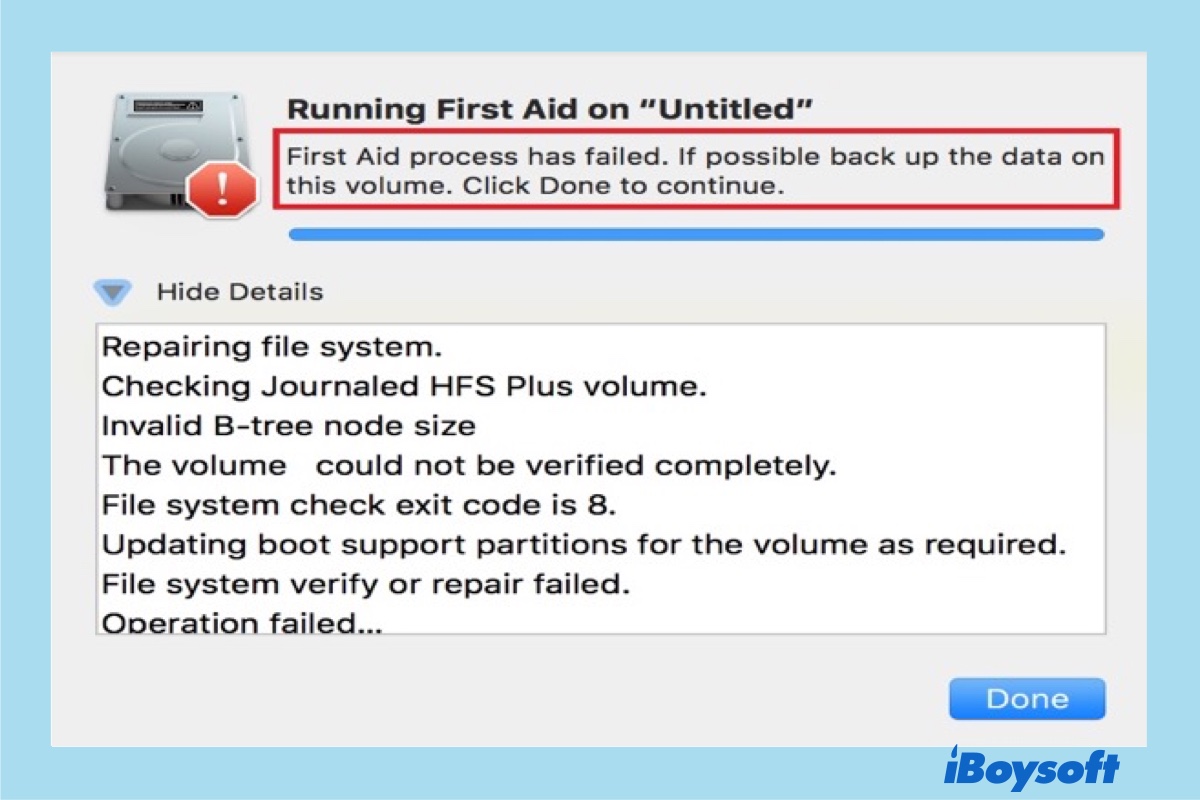
Disk Utility's First Aid is designed to detect and repair file system issues on a disk, such as repairing the drive's data structures, fixing external hard drives not mounting on Mac. However, when the damage is too severe, the repair process may fail, and macOS will return an error message.
Common messages and failures include:
- Fisrt Aid says "Unable to unmount volume for repair 69673"
- Problems were found with the partition map, which might prevent booting
- First Aid found corruption that needs to be repaired
- File system verify or repair failed (-69845)→ severe corruption
- Invalid B-tree node size→ broken file index
- Couldn't mount disk (-69842)→ system cannot access files
When this happens, the key is not just fixing the error, but understanding your situation first and choosing the right action to avoid data loss.
Check Your Situation First
Before fixing anything, quickly check your current situation in the table below.
| Situation | What it means | What to do |
| First Aid fails but the drive still opens | Disk still readable | Back up files immediately |
| Drive is read-only | Early corruption | Copy important data now |
| Drive won't mount | File system likely broken | Go to data recovery |
| Disk is slow/disconnecting | Possible hardware issue | Stop repairs, save data |
| Drive not detected | Possible hardware issue | Turn to a professional repair service |
Warning: Do not write new data to the disk. This may overwrite recoverable files.
Methods to Fix Disk Utility First Aid Failed Errors
If First Aid fails, you can still try several repair methods depending on the cause. These methods progress from basic system repair to deeper repair of the corrupted external hard drive on Mac, so it's best to follow them in order.
Note: If the disk is slow, disconnects unexpectedly, cannot be mounted, or contains important data, recover the data first. Do not proceed with any repair attempts.
Method 1: Run First Aid Again
- Open Disk Utility.
- Click View → Show All Devices.
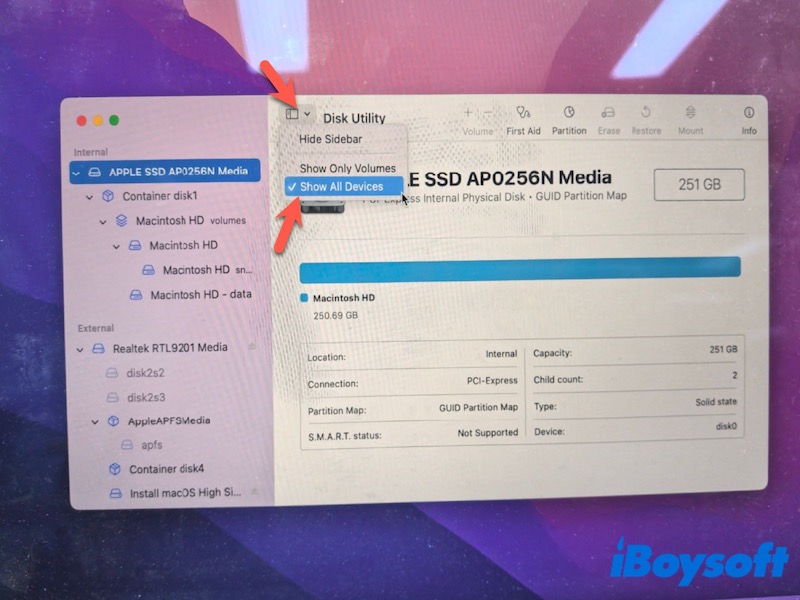
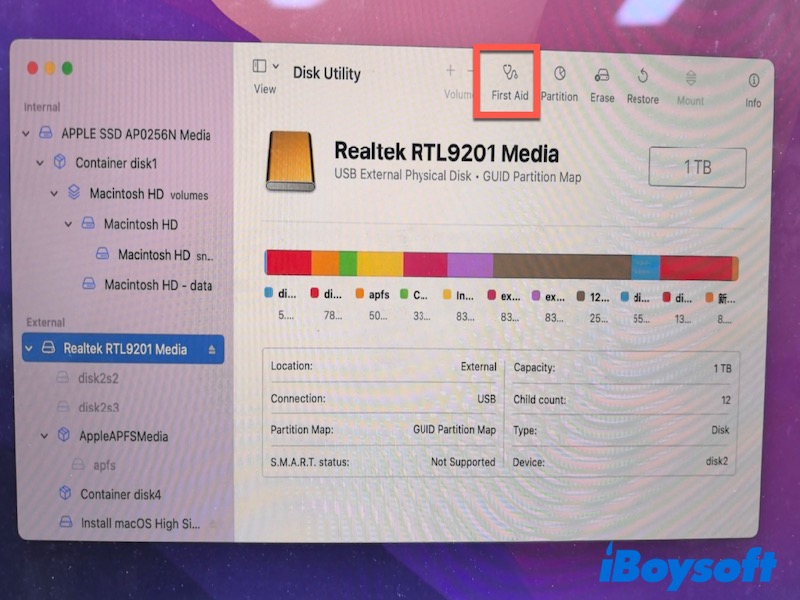
- Select Volume. (If Volume First Aid didn't work, select Container; the external storage device is the last one to choose.)
- Click First Aid → Run.
If First Aid fails with errors like 'could not unmount the volume', it means the disk is still in use and cannot be repaired in normal mode. Running First Aid from macOS Recovery avoids this issue.
- Restart your Mac.
- Immediately press and hold:
Command + R (Intel Mac)
Power button → Options (Apple Silicon Mac) - When macOS Recovery loads, select Disk Utility.
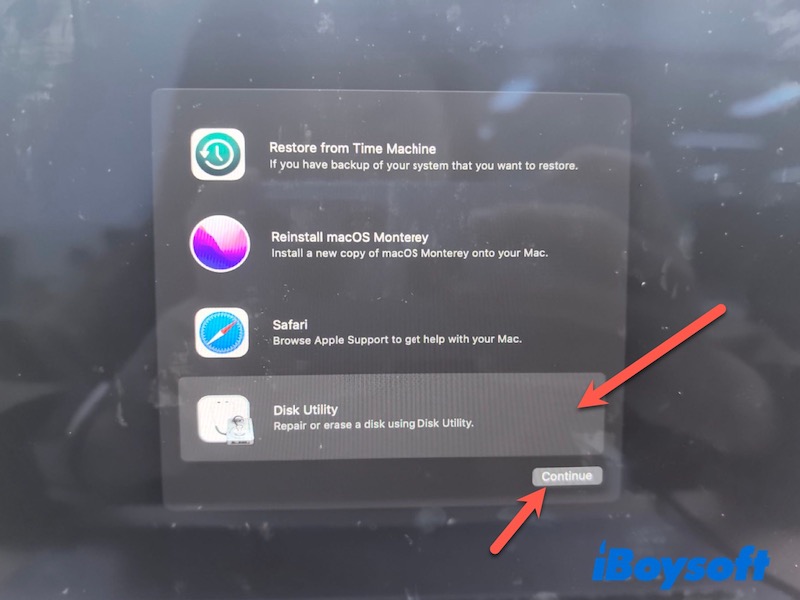
- Choose Volume.
- Click First Aid → Run.
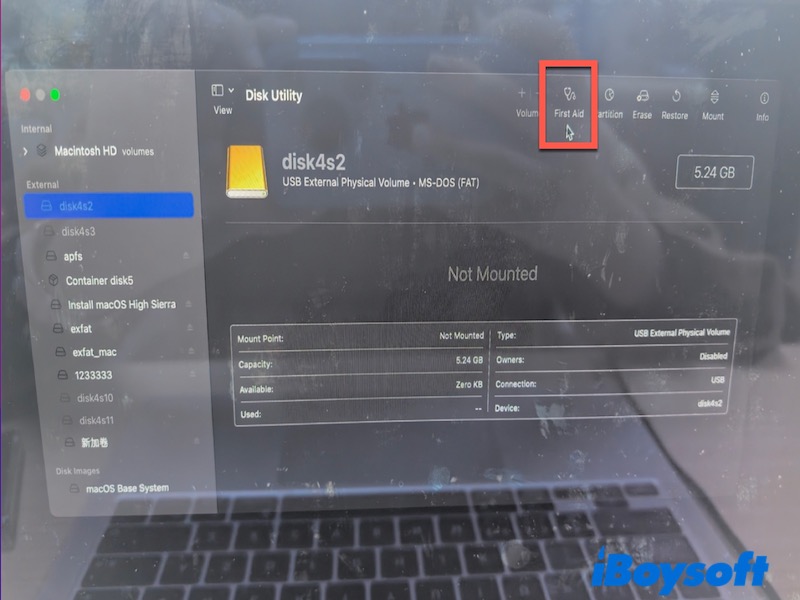
If First Aid completes → the disk is repaired. If it still fails → the disk is likely severely corrupted.
Method 2: Run FSCK (Advanced Only)
FSCK (File System Consistency Check) is the underlying tool macOS uses to check and repair disk errors. Disk Utility's First Aid is based on it, but running FSCK directly can perform a deeper repair when First Aid fails.
Before running FSCK, verify the disk identifier and file system. Do not run the FSCK commands without confirming they match your disk. This helps prevent accidental errors.
Note: Single User Mode is not available on newer Apple Silicon Macs. Alternatively, go to macOS Recovery Mode, select Utilities > Terminal, and then enter this command: /sbin/fsck_hfs -fy /dev/disk3s2
- Open Disk Utility.
- Select your external drive, then note:
Device name (e.g., disk3s2)
File system format (e.g., HFS+, exFAT)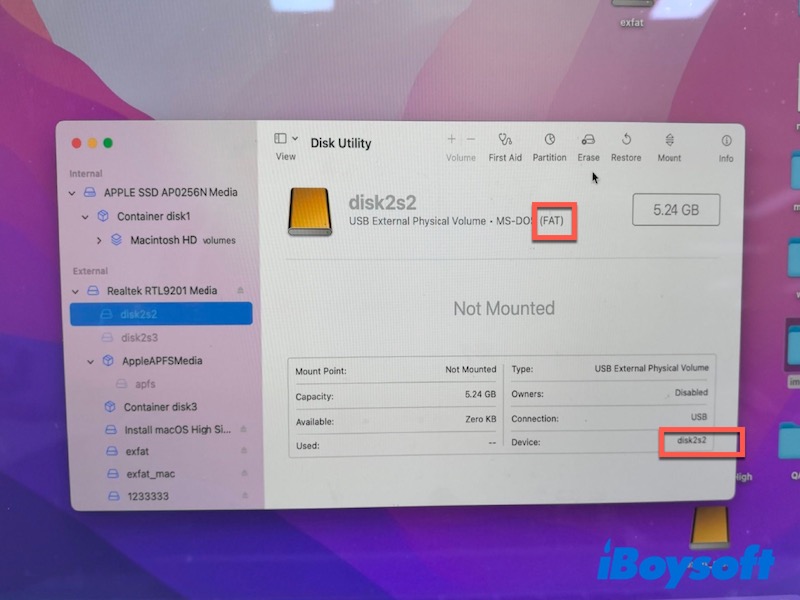
- Restart your Mac, then immediately hold Command + S to enter Single User Mode.
- When you see the command line, type the appropriate command:
/sbin/fsck_hfs -fy /dev/disk3s2 Before running the command, update it based on your disk:
Replace disk3s2 with your disk's identifier (found in Disk Utility, e.g., disk2s1)
Replace fsck_hfs with the correct tool for your disk format:
Use fsck_apfs for APFS
Use fsck_exfat for exFAT
Use fsck_msdos for FAT32
Use the command that matches your disk format + your disk name, not the example shown above.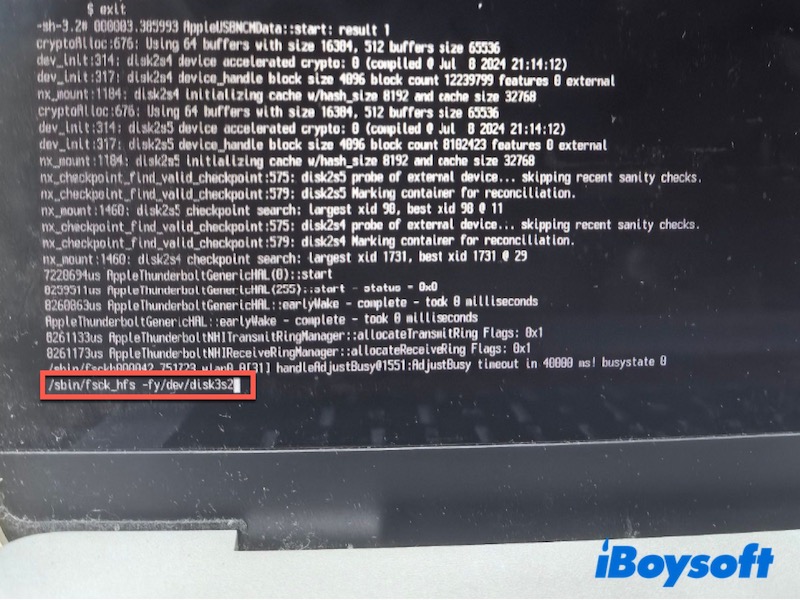
- Wait for the process to complete.
If you see 'File system was modified' or 'The volume appears to be OK '. The disk has been repaired successfully. If no success message appears, stop further repair attempts and move to data recovery.
Stop Repairing and Recover Data First
If none of the repair methods work, it usually means the file system is too damaged to fix.
At this stage, continuing to repair the disk may lead to further data loss. The priority should shift from fixing the disk to protecting your data.
Recover Data from the External Hard Drive
iBoysoft Data Recovery for Mac is a tool that supports USB flash drive data recovery and SD card data recovery in whatever file types, like documents, photos, audio, videos, Emails, archives, etc.
It's suitable for unmountable, unreadable, corrupted drives or APFS encrypted volumes that are still recognized by macOS. It is not intended for physically damaged drives or drives that are no longer detected by the system.
- Download, install, and open iBoysoft Data Recovery for Mac.
- Select the external hard drive and click Search for Lost Data to start scanning.
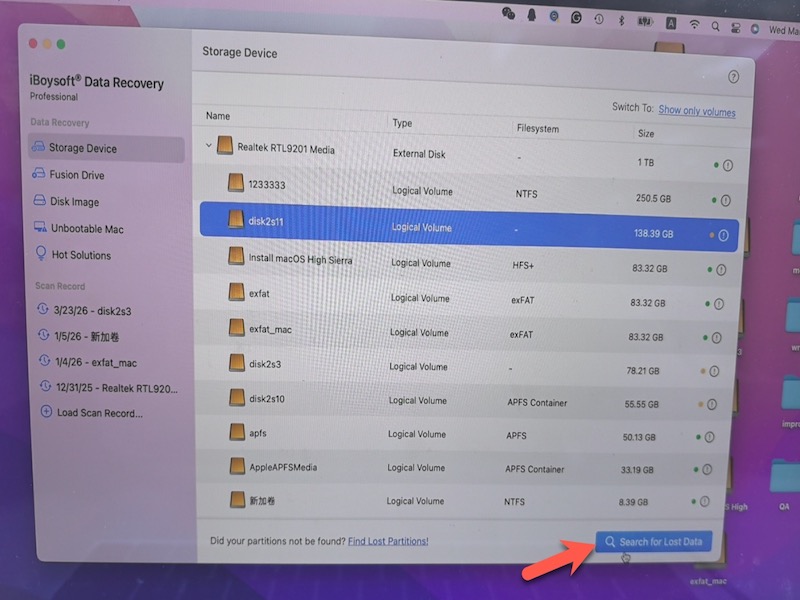
- After scanning, click Preview to check files.
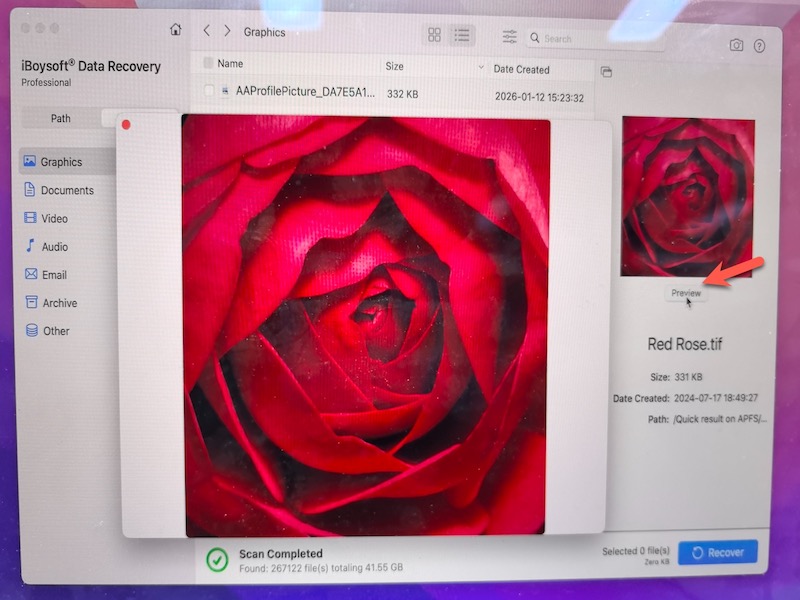
- Select the needed files and click Recover.
- Save recovered files to a different disk (not the original drive).
Reformat the External Hard Drive
After recovering your data, reformatting is usually necessary when the file system is too damaged to repair. This is typically indicated when tools like Disk Utility First Aid and FSCK both fail or repeatedly return errors (such as “File system verify or repair failed”).
In these cases, the disk's core structures cannot be reliably fixed, so reformatting rebuilds them from scratch and removes the corruption.
However, this process will erase all data on the disk. Perform this method only after data recovery is complete or after confirming that the data is no longer required.
- Open Disk Utility
- Select the external drive
- Click Erase
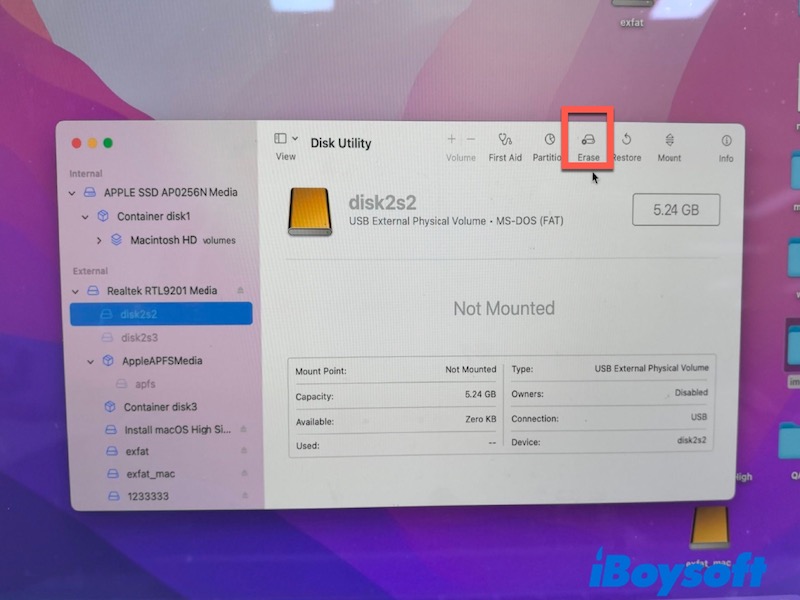
- Enter a name and choose a format:
APFS (Mac only)
exFAT (Mac and Windows) - Click Erase and wait for completion
How to Prevent This in the Future
- Always eject drives safely
- Avoid sudden power loss
- Keep regular backups
- Check disk health periodically
FAQs
- Q1. Can a failed external hard drive be repaired?
-
A
It depends on what caused the failed external hard drive. If the external hard drive failed due to software problems such as file system corruption or soft bad sectors, it is possible to repair it and get it back to a workable state. However, if the failed external hard drive is physically damaged, you need to replace the hardware to see if it can be fixed.
- Q2. Can you recover a failed external hard drive?
-
A
You can recover files from a failed external hard drive with the right data recovery tools or the help of professional data recovery services. The success chance of recovery varies according to how damaged your external hard disk is.
- Q3. Should I run First Aid again before recovering data?
-
A
You should not. First Aid already failed to repair your external drive. That indicates some errors might be too tough to handle. You'd better recover data first. After all, data always comes first.
- Q4. Can FSCK make data loss worse?
-
A
Yes, fsck can make data loss worse by deleting corrupted files, truncating data, or moving mangled fragments into the lost+found directory without their original names or paths.
- Q5. Can software recover a physically damaged external drive?
-
A
No, the current software is unable to recover data from a physically damaged external drive.