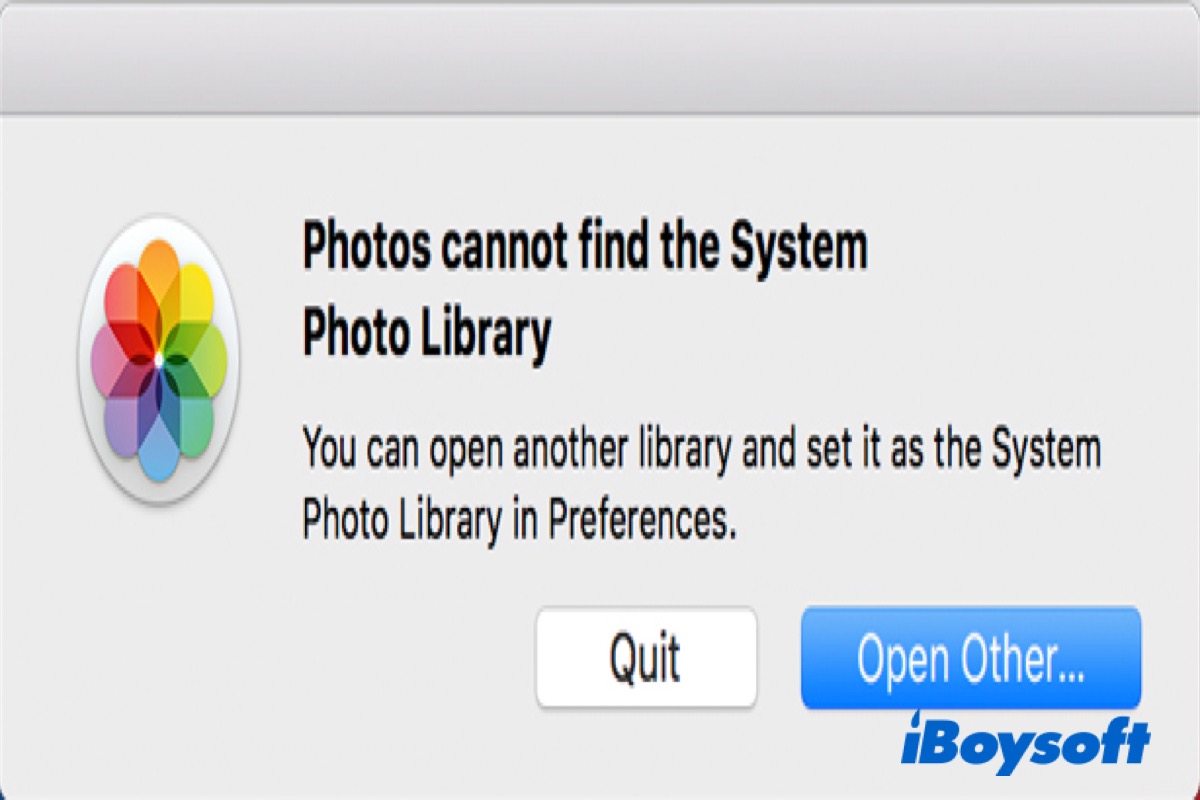
When you open Photos on your Mac or MacBook, you may receive an error message that Photos Cannot Find the System Photo Library, which makes thousands of photos on your Mac or MacBook inaccessible. And it indicates you can't view, open, edit, or share your pictures.
The reason why the Photos cannot find the System Photo Library could be different every time. It could be a Photos app bug, one of your Photos Library may be corrupted, or there can be some corrupted image files in the library folder.
I've just upgraded to Catalina from Mojave, with much trepidation. I use Time Machine as a backup. Now I cannot open Photos at all; I'm told that "Photos cannot find the System Photo Library named PhotosLibrary.photoslibrary." - From Apple Community
It usually occurs after updating your Mac as the above user mentioned, switching to a different Photo Library as the System Photo Library, or transferring photos from other devices to your Mac or MacBook.
No matter when it appears, the solutions below can help you fix Photos Cannot Find the System Photo Library. Keep reading the following text to find the answer!
| Methods | Difficulty level | Costs | Applicable scenarios |
| iBoysoft Data Recovery for Mac | Easy | Free trial | Missing Photo Library files; missing photos |
| Update your Mac/MacBook | Easy | Free | Using an outdated macOS |
| Restart your Mac/MacBook in Safe Mode | Hard | Free | Haven't found the trigger of this issue; a universal solution |
| Repair Photo Library | Easy | Free | Corrupted Photo Library |
| Remove the empty Photo Library | Easy | Free | An empty Photo Library has been set as a System Photo Library by mistake |
| Create a new Photo Library | Easy | Free | Corrupted Photo Library & can't restore missing Photo Library files |
If you have the same issue, try the following methods to fix it, and don't forget to share them with others.
Use third-party software to recover missing System Library files
To fix Photos Cannot Find the System Photo Library, you can try to restore the missing System Library files on your Mac/MacBook, and the best way for you is to use professional data recovery software. Here, we highly recommend you choose iBoysoft Data Recovery for Mac.
With a reliable and advanced algorithm, iBoysoft Data Recovery for Mac can help you quickly and securely recover kinds of missing/deleted files, such as photos, videos, audio files, documents, etc. from internal and external hard drives on macOS and Mac OS X, including macOS Ventura and later.
Follow the below steps to try recovering your missing System Library files on Mac/MacBook with iBoysoft Data Recovery for Mac.
Best Mac Deleted File Recovery Software - iBoysoft Data Recovery for Mac
- Free download, install, and launch iBoysoft Data Recovery for Mac.
- Select the drive and then click Search for Lost Data to start the scan process.
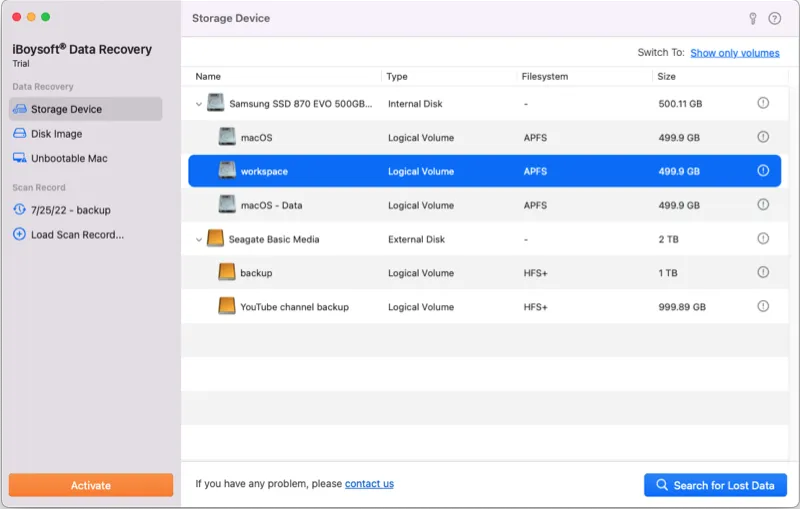
- Tick the desired files and click the Recover button.
- Save the recovered files to a different location.
After that, your System Library file must have come back. If not, try to take the following methods to fix the Photos Cannot Find the System Photo Library error.
Five Methods to Fix Photos Cannot Find the System Photo Library
Back to the point, five methods were given to fix the Photos Cannot Find the System Photo Library error. You can choose one of the methods based on your needs.
Update your Mac/MacBook
You can try updating macOS, which will automatically update the Photos app. Sometimes, this issue may be caused by an outdated operating system. Updates usually fix software-related problems. So turn to Settings > General > Software Update to check if there is any update available. If it is, click Update Now.
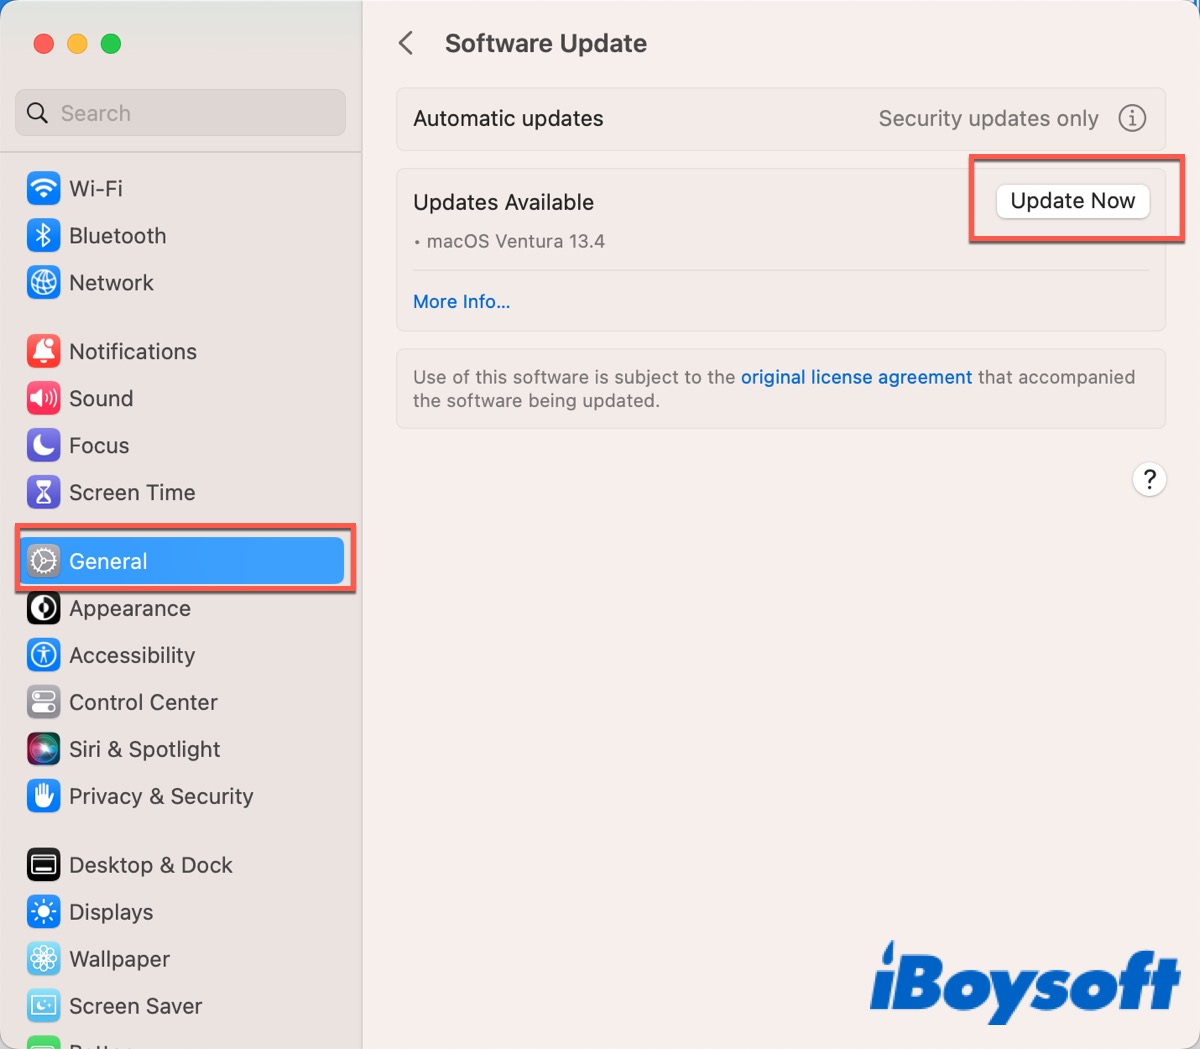
Your Mac/MacBook will automatically update the installed macOS and all built-in apps for you, including Photos. After updating, check whether the issue has been fixed.
Restart your Mac/MacBook in Safe Mode
Safe Mode performs a startup disk check, clears caches, runs file repair, and prevents some startup software and files from loading allowing only the essential ones. Therefore, restarting your Mac/MacBook in Safe Mode may help you solve this issue.
- Shut down your Mac computer and wait for 10 seconds.
- Press the power button until the startup options and the Options gear icon appear on the screen.
- Choose your startup disk.
- Hold down the shift key and click Continue in Safe Mode. Then, release the shift key.
After that, reopen Photos to check whether the Photos Cannot Find the System Photo Library issue has been fixed.
Do the above methods help you fix Photos Cannot Find the System Photo Library on Your Mac/MacBook? Click the button below to share with your friends!
Repair Photo Library
One of the reasons for the issue is that the iPhoto library version becomes somewhat incompatible with the Photo app. Fortunately, your Mac/MacBook system contains built-in repair functions to fix the version incompatibility issue of the System Photo Library. Here's how:
- Quit Photos on your Mac/MacBook if it is open.
- Hold the option and command keys simultaneously, and click Photos in the Dock.
- Click Repair in the Repair Library window.
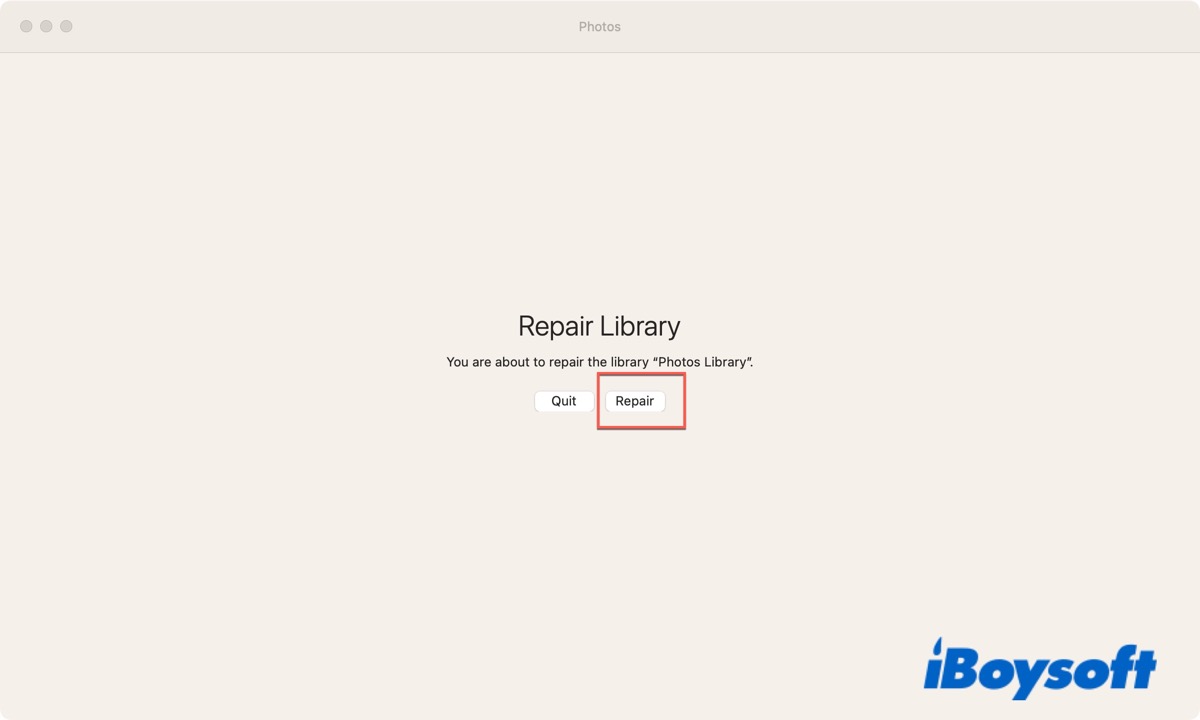
After that, a progress bar appears when the repair process starts. This may take time to finish, depending on the size of your Photo Library. Once finished, reopen your Photos to check if the error has been eliminated.
Remove the empty Photo Library
If the empty Photo Library has been designated as your System Photo Library by mistake, it's obvious why you can't see any photos in your Photo Library. Check your Photo Library and remove the empty one if it exists.
- Quit Photos on your Mac/MacBook if it is open.
- Hold on to the option key and click Photos to open.
- Click Other Library in the pop-up window. (Or right-click the Photo Library and then click Show in Finder.)
- Right-click the empty Photo Library and then click Move to Trash.
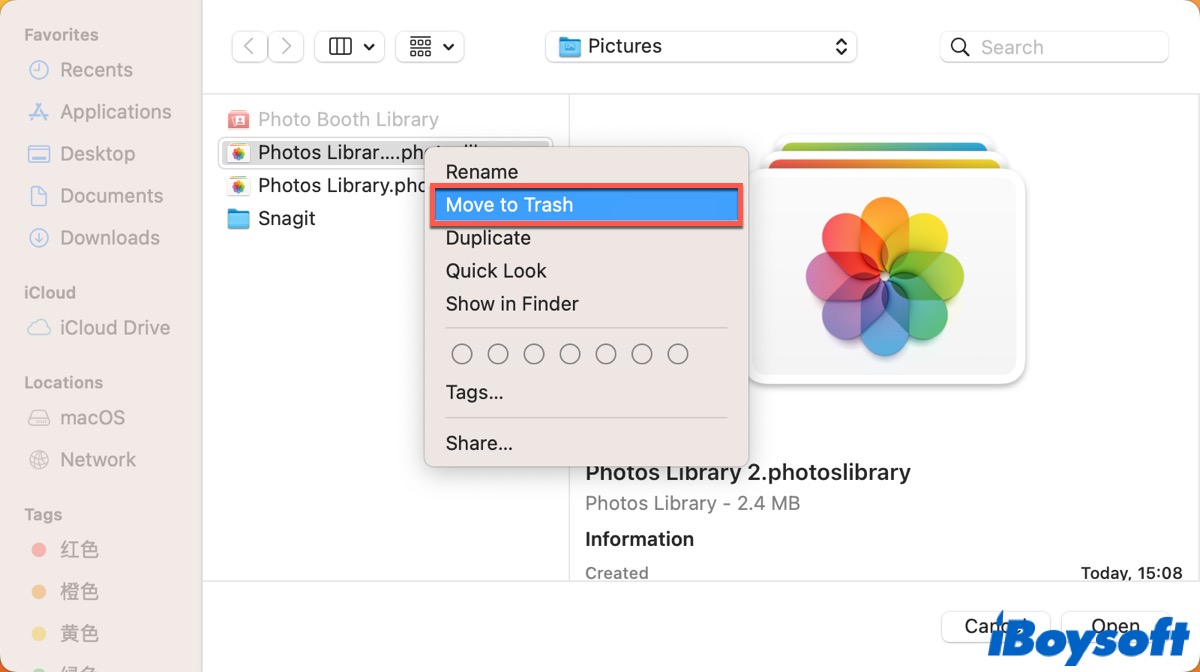
After that, reopen your Photos to check if the error has been fixed.
Create a new Photo Library
If you can't restore your missing Photo Library files via professional data recovery software, you need to create a new Photo Library. Your existing photo library may have been corrupted, or there's some corrupt image file preventing the Photos app from opening. Thus, following the given steps to create a new Photo Library to try fixing this issue.
- Quit Photos on your Mac/MacBook if it is open.
- Hold on to the option key and click Photos to open.
- Click Create New and then type in a library name.
- Choose a location to store it and click OK to finish.
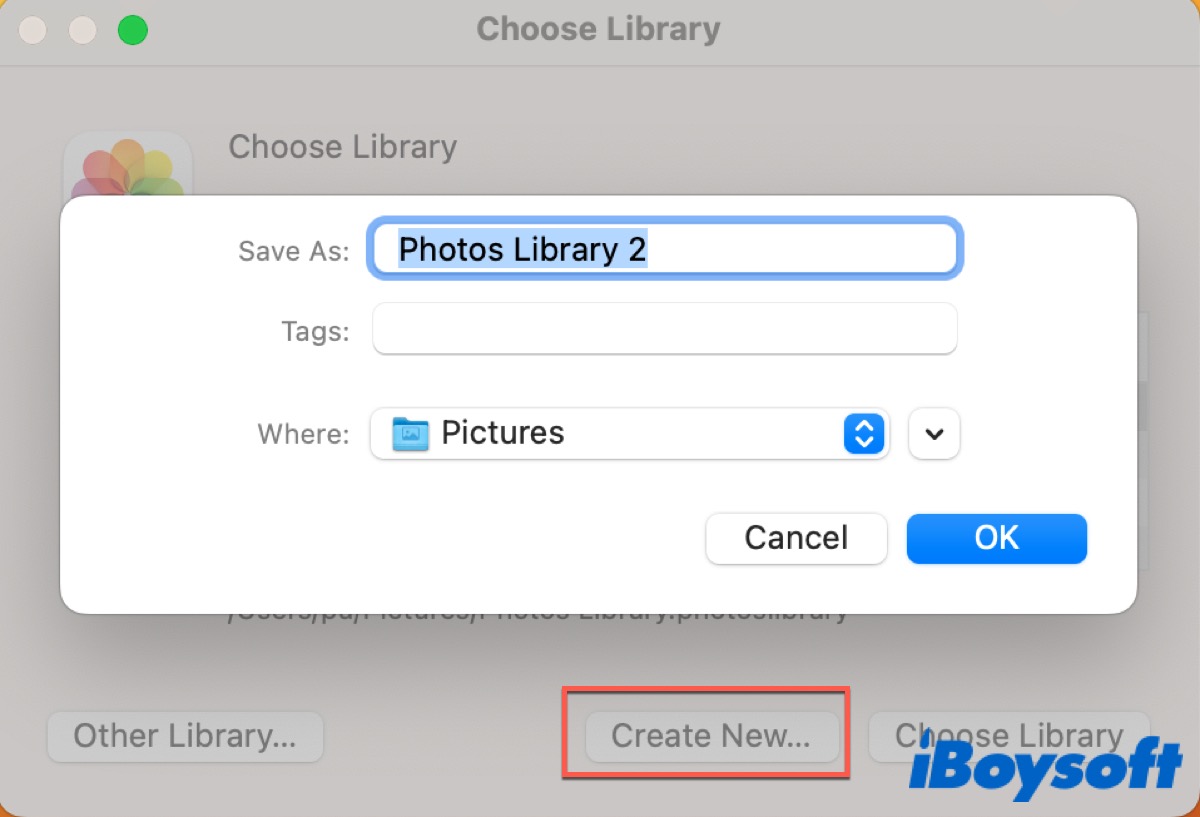
Now, close all the windows and reopen Photos to check if you can access the new Photo Library. After that, you can use the method below to designate this new Photo Library as your System Photo Library.
What is a System Photo Library?
Now that you know how to fix the Photos Cannot Find the System Photo Library issue, let's take a closer look at the System Photo Library and learn how to set it as the System Photo Library in the Photos app on your Mac.
When using Photos for the first time, you can create a new library or select the one you want to use. This library will automatically become the System Photo Library.
Although you can use multiple photo libraries in Photos, the System Photo Library is the only one with access to iCloud services, including iCloud Shared Photo Library, Shared Albums, and My Photo Stream. In addition, some Apple apps and third-party applications can also access your System Photo Library using the Media Browser.
By default, the System Photos Library is stored in the Pictures folder on your Mac or MacBook, but you can move it to another location on your Mac or store it on an external storage device.
You can follow the given steps to designate a System Photo Library in Photos on your Mac/MacBook:
- Quit Photos if it is open.
- Hold on to the option key to open Photos. (One of the photo libraries is already designated as System Photo Library.)
- Select the library you want to designate as System Photo Library.
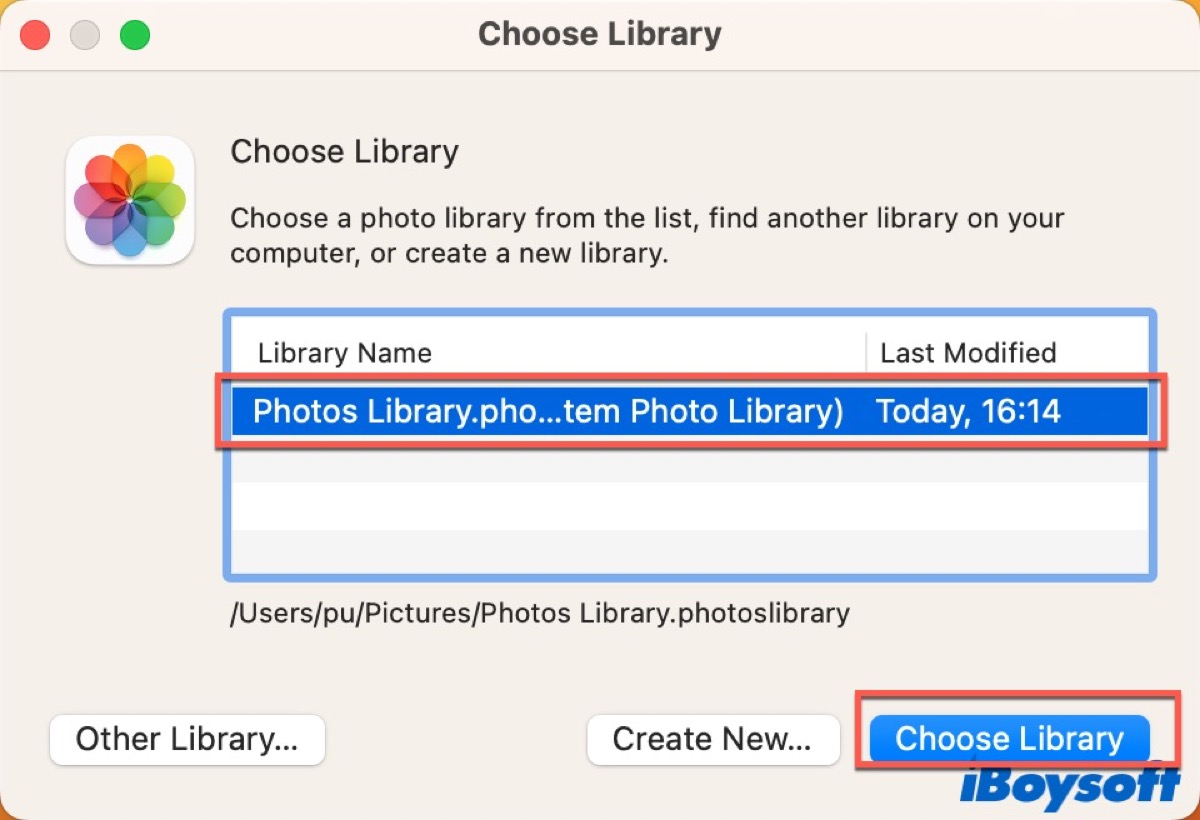
- Choose Photos > Settings from the Apple menu after Photos opens. (Or press Command + comma to open.)
- Hit the General tab and tap Use as System Photo Library.
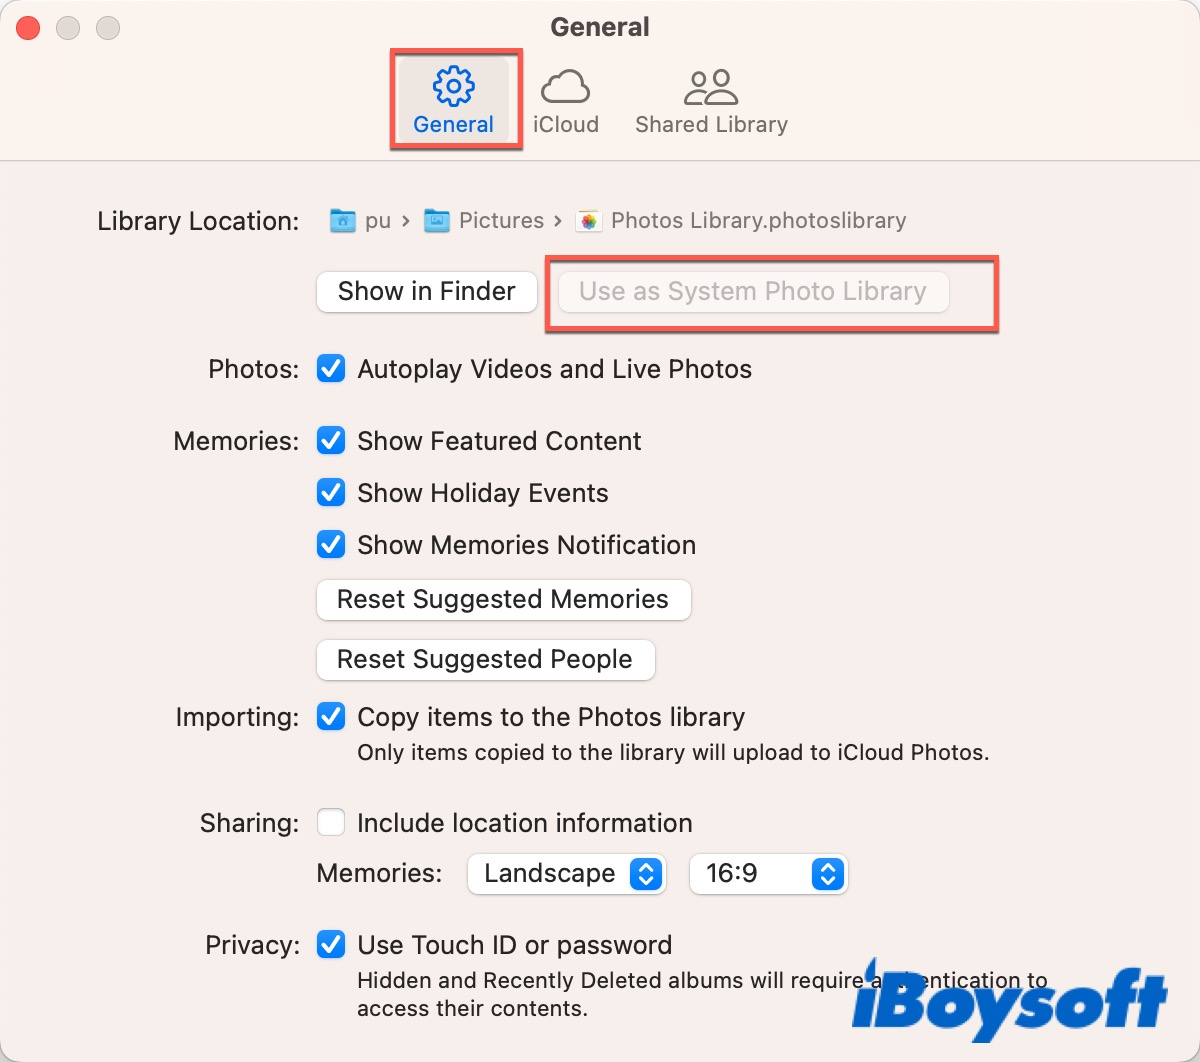
If Use as System Photo Library is grayed out, the current library is already set as your System Photo Library.
After that, you can share your photos on different platforms or devices. It's easy to choose a photo from the photo library without asking for permission during selection.
Bouns Tips
For some users, the Photos Cannot Find the System Photo Library error message may put them on edge, so they must keep a backup via Time Machine or other software. Regularly backing up your Mac/MacBook allows you to quickly retrieve data in case of loss.
Click the below button to share this tutorial on your social media to help others.
FAQ about Photos Cannot Find the System Photo Library
- QHow do I enable System Photo Library?
-
A
Quit Photos. Hold on to the option button to open Photos. Select the library that you want to designate as System Photo Library. Choose Photos > Settings from the menu bar. Click the General tab. Click the Use as System Photo Library button.
- QHow do I find the system photo library on Mac?
-
A
Usually, your System Photo Library is stored in the Pictures folder on your Mac unless you move it to another location on your Mac or store it on an external storage device.
- QWhat does Photos Cannot find the system photo library mean?
-
A
It indicates you can't view, open, edit, or share your pictures, in other words, photos on your Mac/MacBook become inaccessible.
