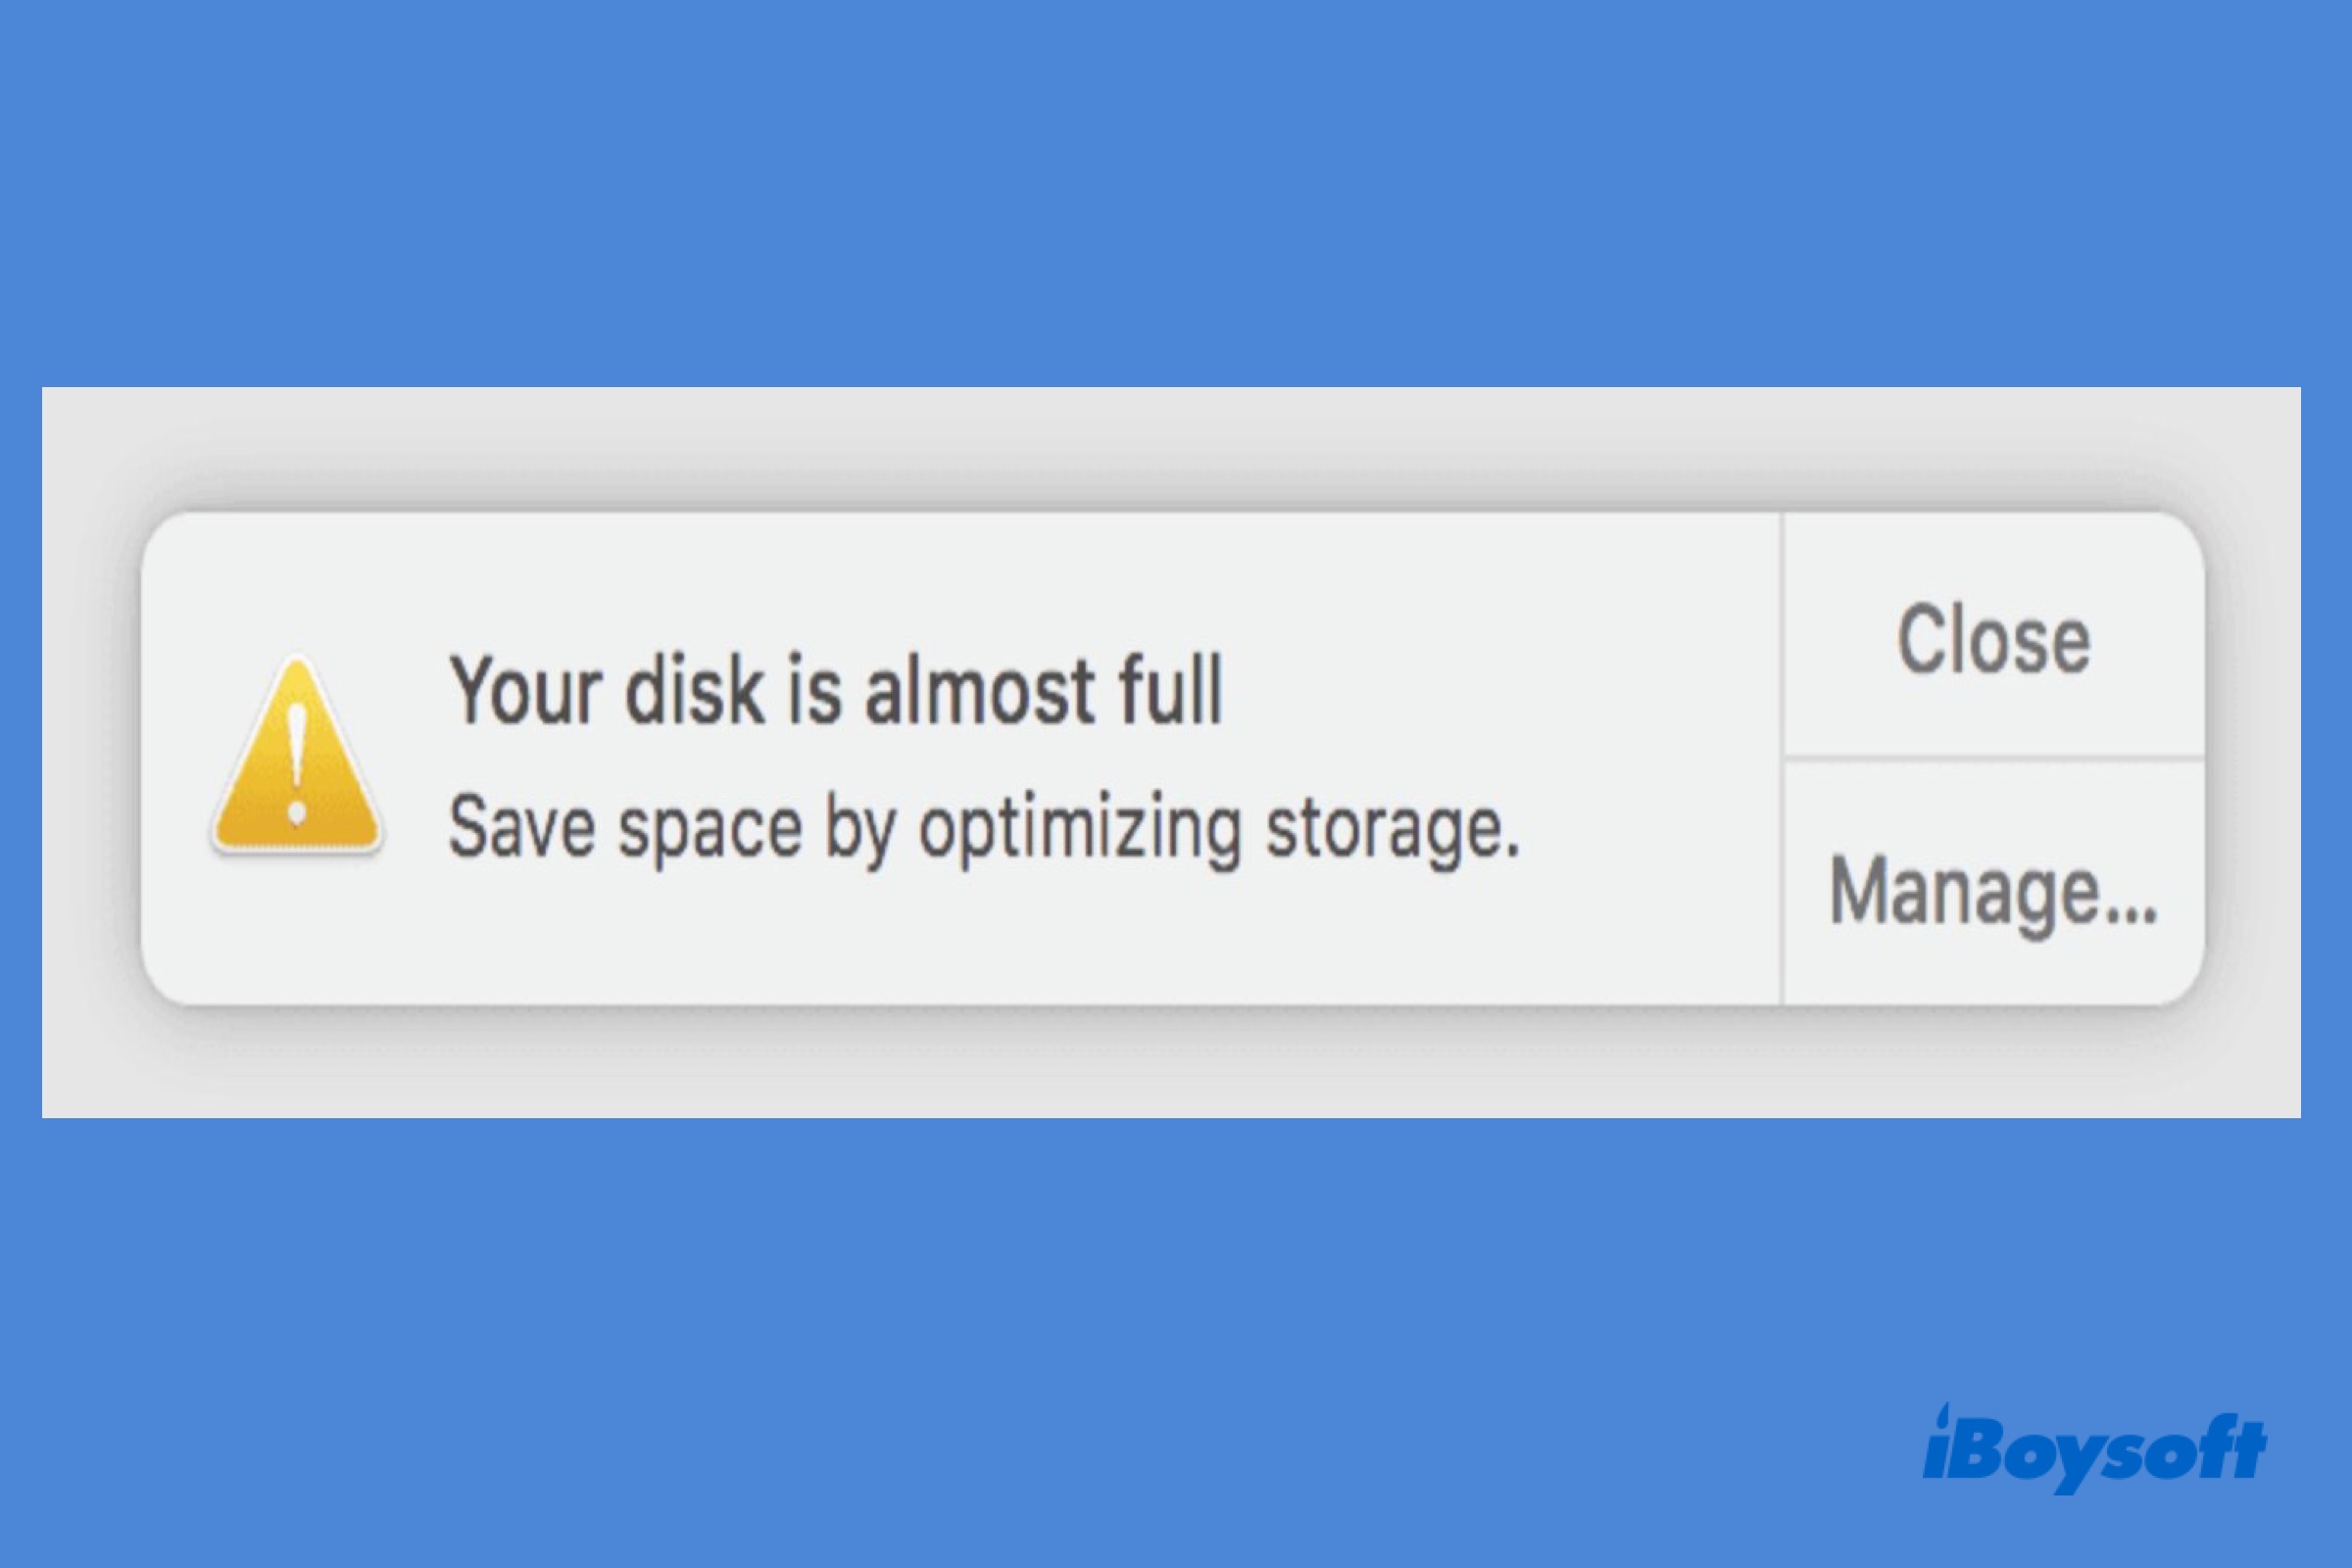
If your Mac says “Your startup disk is almost full" or "Your disk is almost full," the drive containing macOS is running short of free space. Start by opening System Settings > General > Storage to see what is using the most space. In most cases, you can reclaim storage by emptying Trash, deleting large Downloads, removing unused apps, or clearing removable system data.
This guide shows the safest and fastest fixes first and also explains what to do when your Mac is so full that it barely works.
What to Delete First?
When my startup disk is full, the main question isn't simply how to delete files or folders, but "which ones are safe to remove and can free up space fastest". If you're wondering the same thing, use the ordered cleanup list and my actual released space below for reference.
| Action | Risk | Time Cost | The Space Released |
| Empty trash | Very Low | 1 min | 162.5 MB |
| Delete large Downloads | Low | 1-4 min | 18.51 GB |
| Remove unused applications | Low | 3-5 min | 1.13 GB |
| Review large files | Low | 3-5 min | 0 KB (large files are still in need) |
| Remove old iPhone/iPad backups | Low | 5 min | 0 KB (I don't use iPhone or iPad) |
| Offload photos, videos, audio | Low | 5 min+ | 27.9 MB |
| Reduce System Data | Medium | 5 min | 2.05 GB |
Total space released: 21.31 GB (before 30.47 GB vs after 51.78 GB available space)
What to Do If Your Mac Startup Disk is Almost out of Space?
The cleanup methods are arranged so the early steps are the safest and fastest to free up space on Mac.
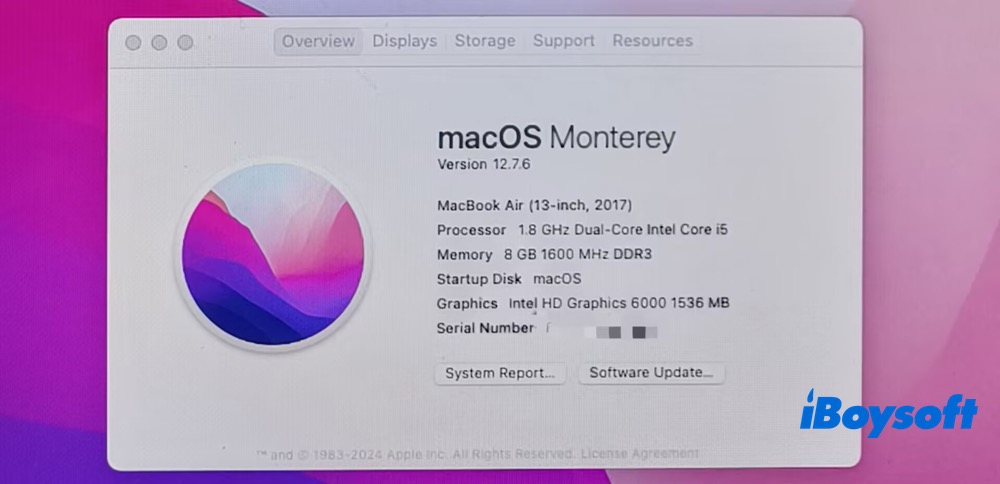
How I tested: I'm running on a MacBook Air 2017 with macOS Monterey 12.7.6, 1.8 GHz Dual-core Intel Core i5 processor, 8GB RAM memory, and 120.99 GB of macOS space.
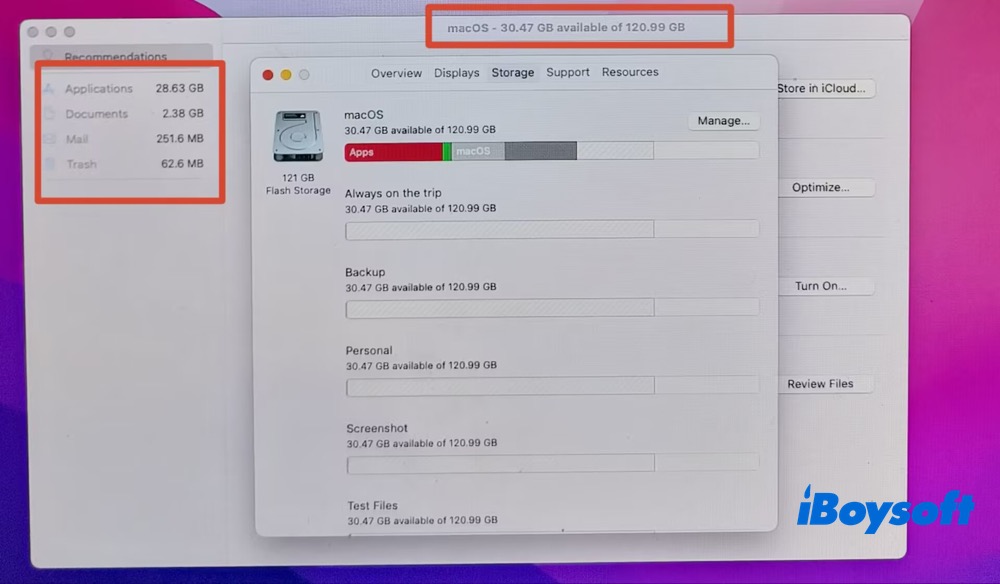
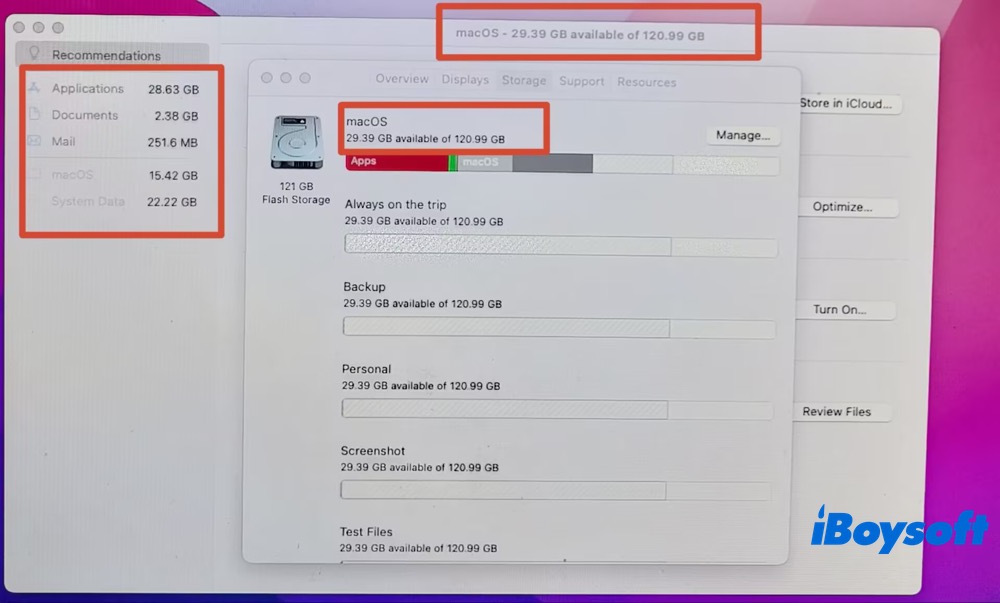
My Mac startup disk storage info: 30.47 GB available of 120.99 GB. Used space details are:
- Applications: 28.63 GB
- Documents: 2.38 GB
- Mail: 251.6 MB
- Trash: 62.6 MB
1. Empty Trash
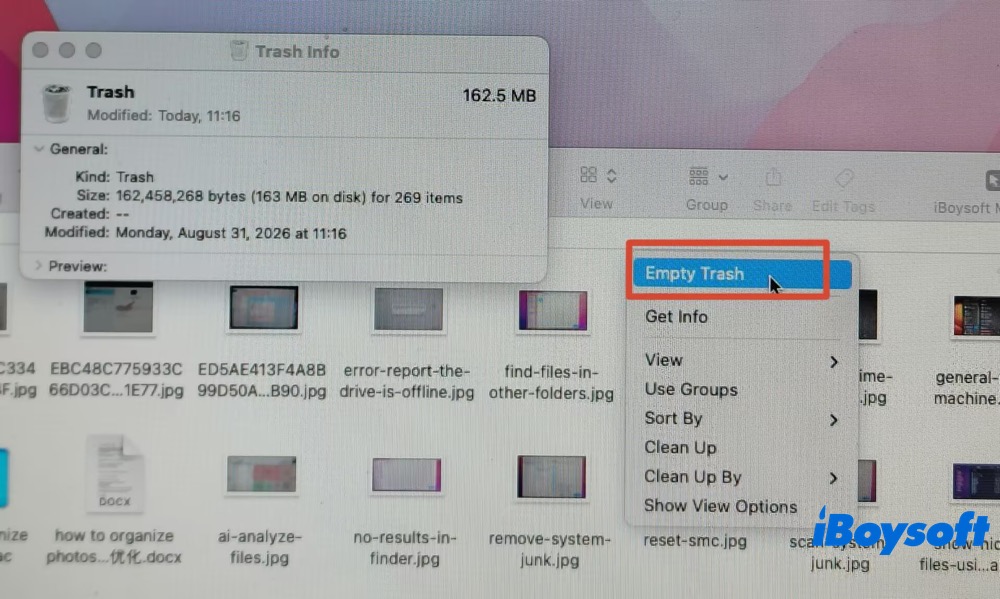
- Deleted files size: 162.5 MB
- Mac startup disk available space: before 30.47GB vs after 29.39 GB (inaccurate space report)
Generally, I don't think much about the files I move to the Trash. I usually drag and drop them there and leave them until my Mac's startup disk starts warning me that it's almost full. But there's an important point to keep in mind: "moving files to the Trash doesn't actually free up disk space". The space is only reclaimed after you empty the Trash.
In most cases, the files I move to the Trash are personal files rather than system files, so emptying the Trash is generally safe. It won't negatively affect macOS, and it takes just one click to permanently remove those files and quickly free up some storage space.
How do I empty the Trash?
- Open the Trash and review its contents. Emptying Trash permanently removes those files, so review its contents first.
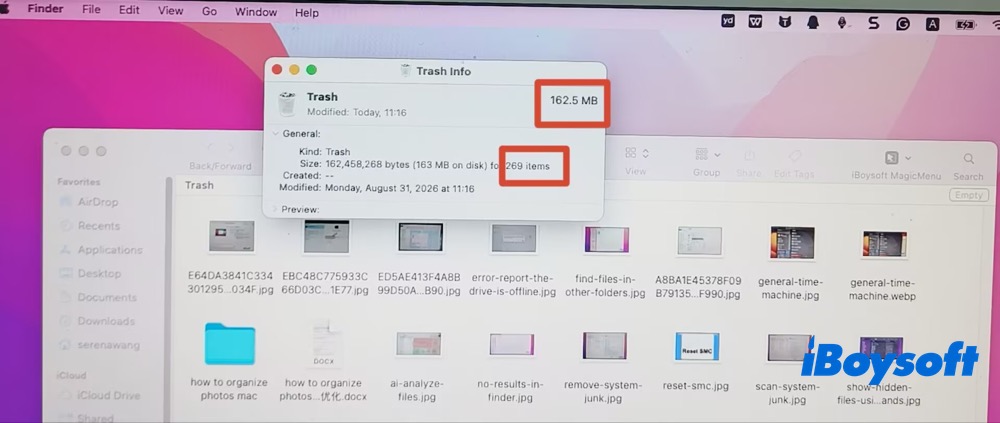
- Right-click the shortcut menu > choose Get Info. My MacBook's Trash info is displayed, including items count (269 items), total size (162.5 MB), modification date, etc.
- Right-click the shortcut menu > choose "Empty Trash" > hit “Empty Trash" again on the pop-up notice window.
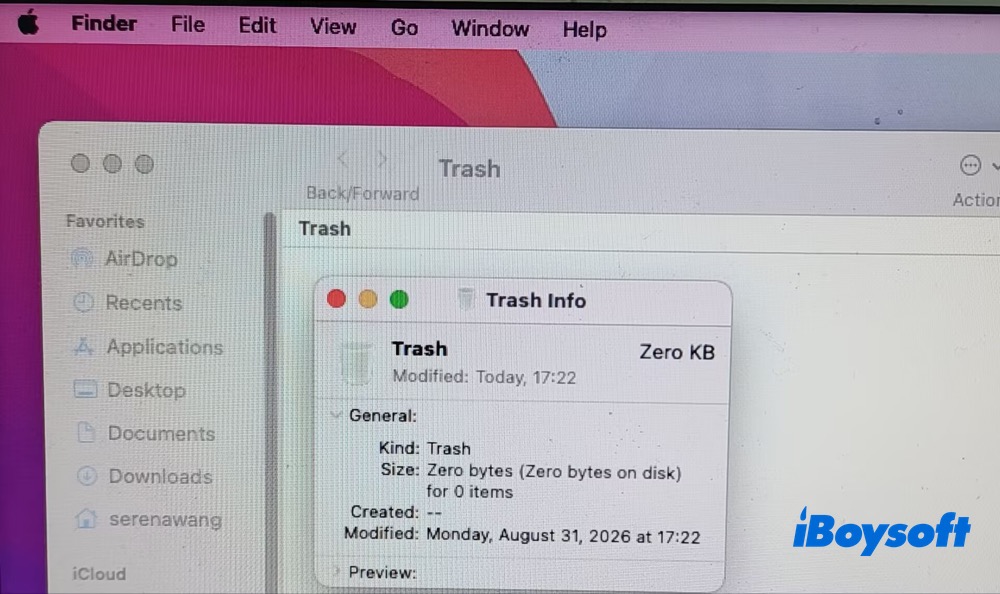
- I re-open my Trash, and it displays zero KB.
I went back to the Mac Storage settings and found that only 29.39 GB was available (previously 30.47 GB). That was strange—the available space actually decreased after I emptied the Trash. This is mainly due to inaccuracies in macOS's storage reporting or the storage manager not updating in a timely manner, so don't rely too heavily on the Storage report when checking your available space.
2. Delete Large Downloads
- Deleted files size: 18.51 GB
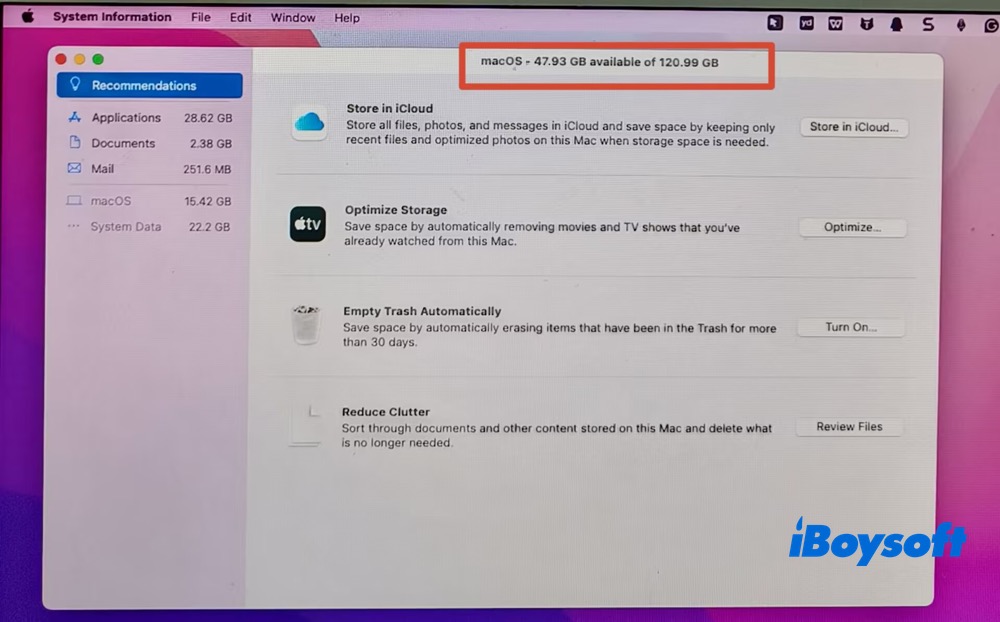
- Mac startup disk available space: before 29.39 GB vs after 47.93 GB
Files downloaded from websites are usually saved to the Downloads folder and can take up gigabytes of space over time. If you no longer need them, it's safe to delete large downloads.
My Downloads folder was already using 20.74 GB, even though I cleaned it just last month. If you haven't cleared yours in months, you could free up even more space.
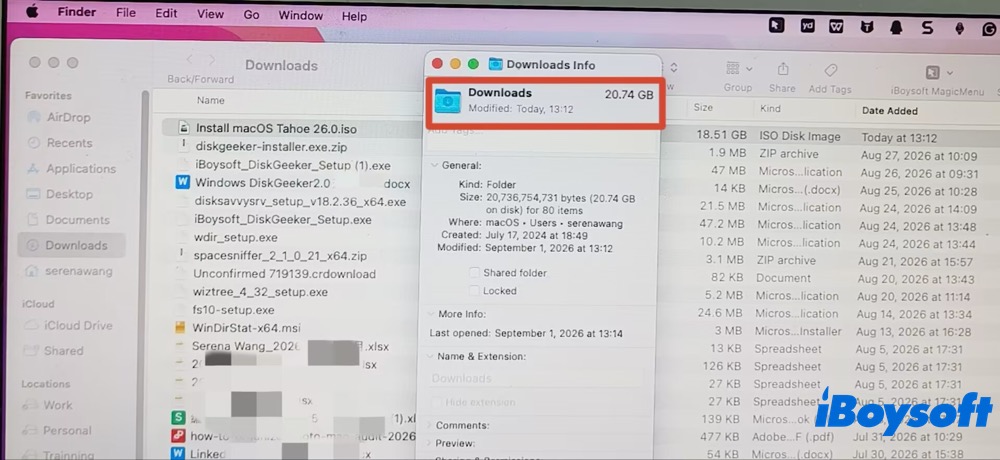
I reviewed my Downloads folder and found several installer files, including ISO images, ZIP archives, DMG files, EXE files, and PKG files. One of the biggest was a macOS Tahoe 26 ISO image, taking up 18.51 GB. Since I no longer needed it, I deleted the file and emptied the trash to free up space on my startup disk.
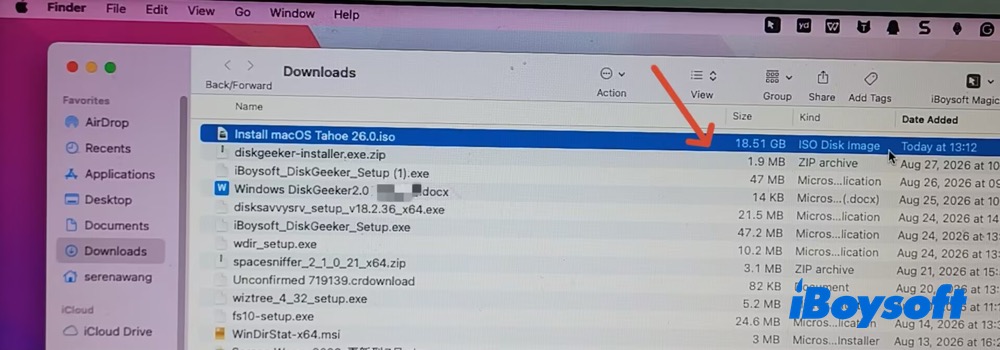
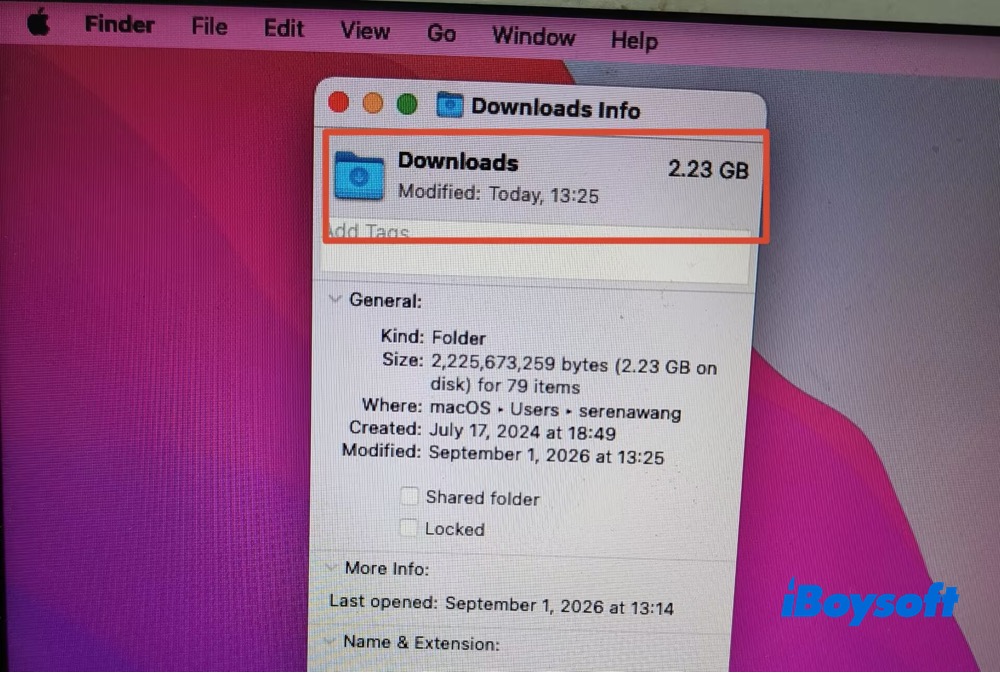
After deleting the macOS 26 ISO image, my Downloads folder shrank to just 2.23 GB, freeing up 18.51 GB of storage space.
So far, the Mac startup disk available space comes to 47.93 GB of 120.99 GB.
3. Uninstall Unused Apps
- Uninstalled apps size: 1.13GB
- Mac startup disk available space: before 47.93 GB vs after 49.7 GB
On my MacBook Air, the Documents folder takes up only 2.38 GB, while applications use 28.62 GB in total. So, uninstalling unused apps is a more effective way to free up Macintosh HD space when my Mac's startup disk is almost full.
I opened the Applications folder in Finder and found an older version of one app, along with several unused apps that I could uninstall, including:
- iBoysoft Data Recovery 1.0 — an older version (34.6 MB) installed on January 8, 2025. Since I installed the latest version, 6.1.5, in August 2026, I no longer need the older version and can safely remove it.
- Unused apps: Doubao, 3 BitLocker programs, Blackmagic Disk Speed Test.
Generally, select the target application and choose "Move to Trash" on the right-click menu to uninstall unused apps. Yet, this way is only to uninstall the application itself, not to remove the residual apps or the leftover files. Hence, here I chose iBoysoft Cleaner to completely uninstall unused apps, residual apps, and their leftover files.
Step 1. Download and install iBoysoft Cleaner on my MacBook Air. Launch it after installation.
Step 2. Choose "App Uninstaller" > this Mac app uninstaller utility instantly scans all the applications on my Mac and categorizes them via different types: All Applications, Selected, Large, Large and Old, Incompatible, Uninstalled residual apps, Store, and Vendor.
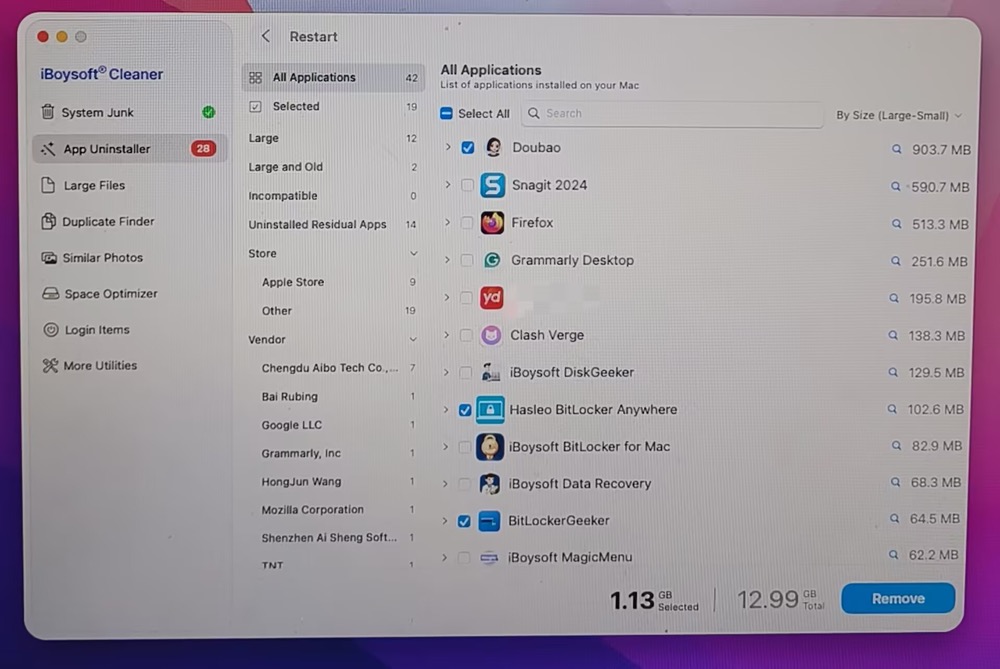
Step 3. I selected "Select All" under Uninstalled Residual Apps, then went to All Applications and manually selected the unused apps mentioned earlier. In total, 1.13 GB of files were selected for removal.
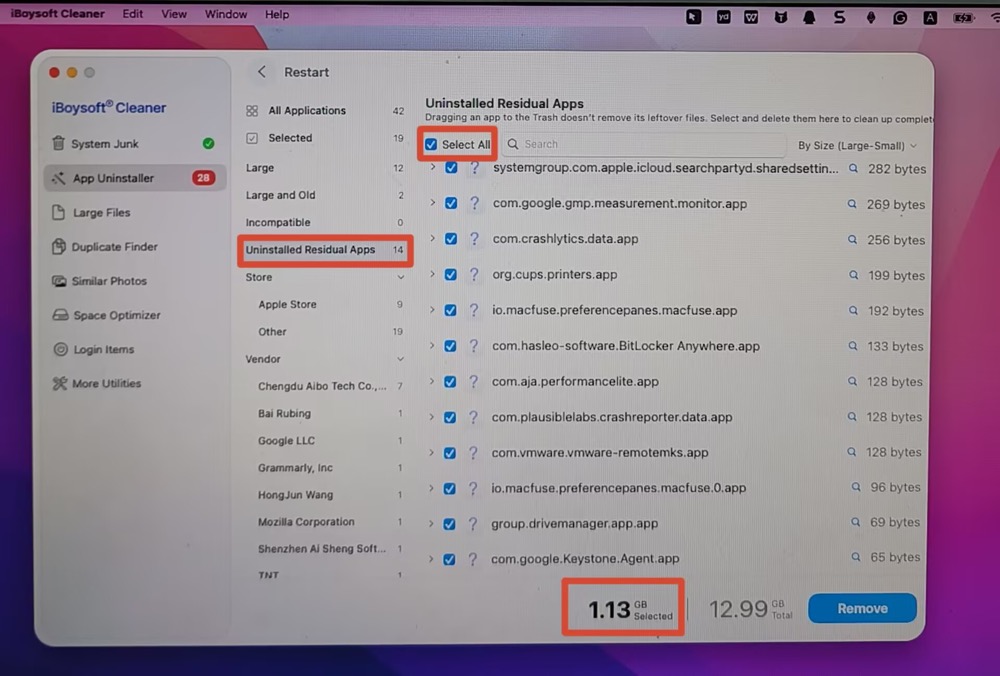
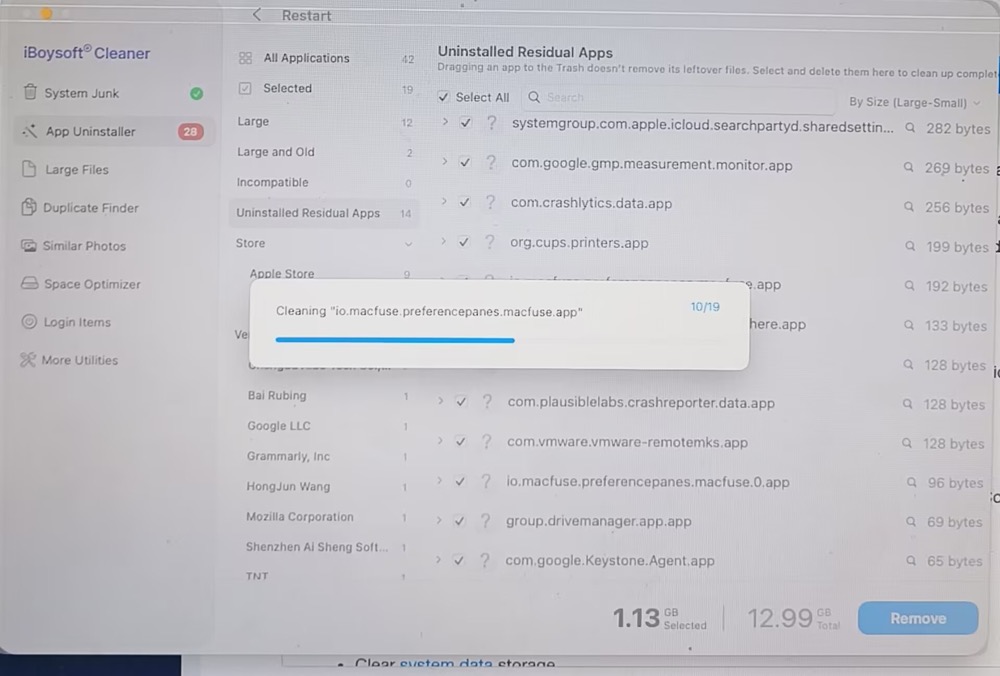
Step 4. Tap the blue button "Remove" in the lower right corner of the interface > click "Confirm" > it begins uninstalling apps and removing leftovers (19 files in total) from my Mac. The whole process costs me only 45 seconds.
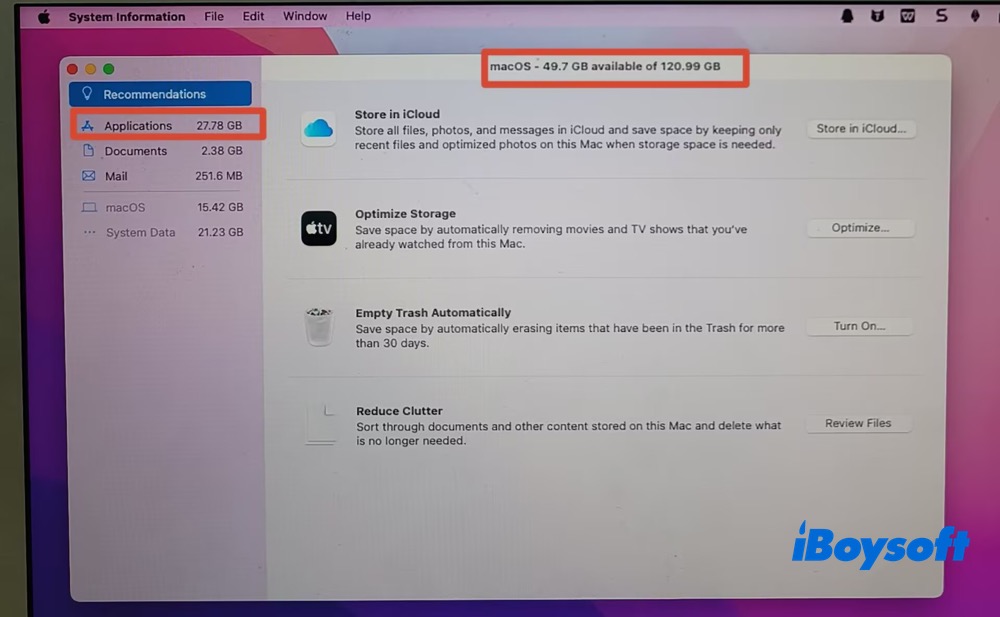
At this point, Applications is showing 27.78 GB of storage usage, while the available space is only 47.77 GB. That doesn't look right. I suspected it was simply a storage calculation or refresh issue, so I restarted my MacBook Air and checked the storage again.
After the restart, the available space increased to 49.7 GB. If you run into a similar situation where the storage figures don't seem to add up, try restarting your Mac first. It may simply need to refresh the storage information.
Note: Both Finder and the dedicated Mac cleaners can be used to uninstall third-party applications, but none of them can uninstall macOS's built-in apps.
4. Find the Large Files on Mac
- Deleted large files: 0 kb
- Mac startup disk available space: still 49.7 GB
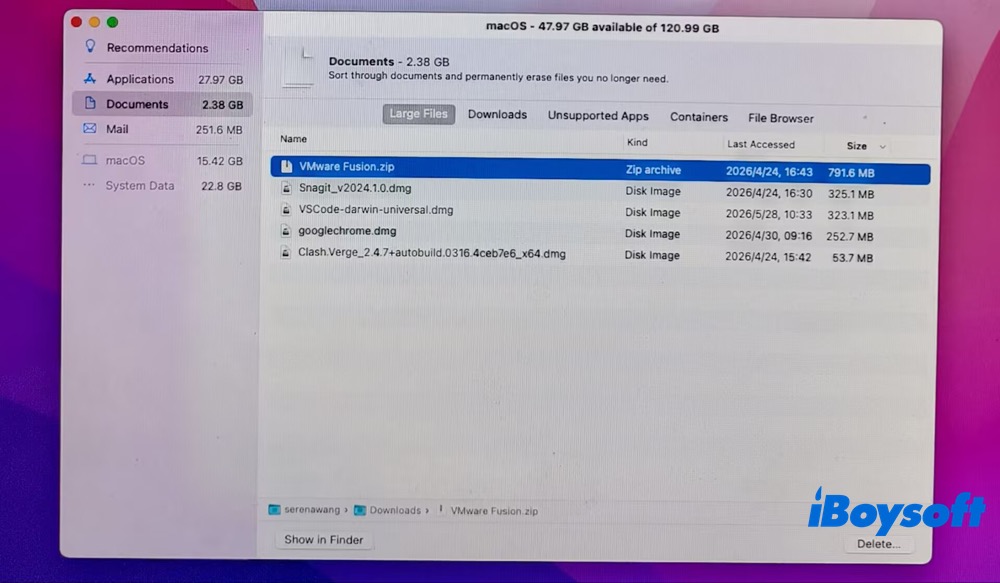
To find the large files on Mac, go to System Settings > General > Storage > Documents for most modern Macs like Apple Silicon Macs.
For my old Intel-based MacBook Air, I click the Apple menu > About this Mac > Storage > Manage > Documents. Then, select "Large Files" (2.38GB in size). It contains 1 zip file and 4 dmg files. But all of these files are useful to me. I have nothing to delete here. You can choose the unnecessary files to delete based on your specific case.
5. Delete Old iPhone/iPad Backups
- Deleted iPhone iPad backups: 0 kb
- Mac startup disk available space: still 49.7 GB
I'd like to clarify that I don't use iPhone or iPad in my daily life. Therefore, I have no iPhone or iPad backups on my MacBook Air. This part I can't show you the personal experience. Instead, you can check this article from Apple Support to delete old iPhone or iPad backups in Finder or Apple devices app.
6. Relocate Photos/Videos to External Drive
- Moved photos/videos: 27.9MB
- Mac startup disk available space: 49.73 GB
This is always a bigger win than deleting caches. Here's how I move my photos to an external drive:
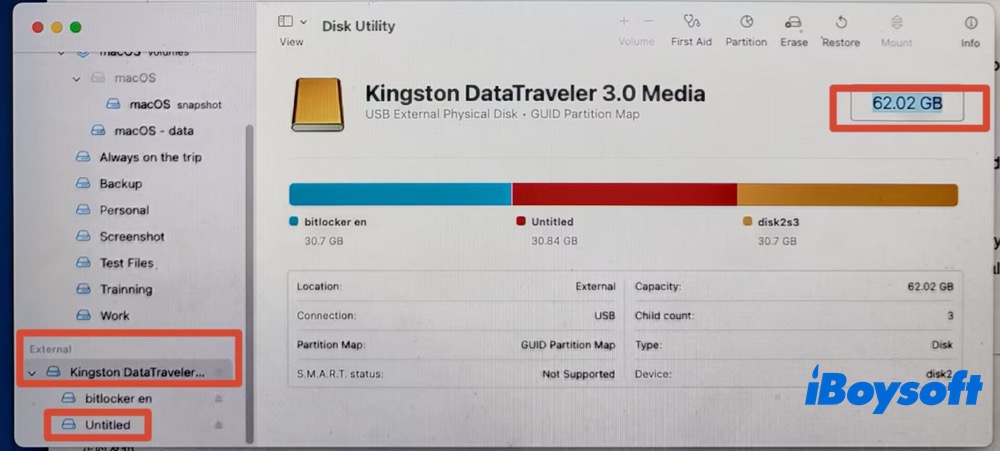
Step 1. Connect my external USB drive (Kingston DataTraveler 3.0 Media, 62.02 GB in total) to my MacBook Air. One volume named "Untitled" has 11.58 GB of free space, which is enough to store my photos.
Step 2. Open my photo volume "Screenshot" > review photos and make sure all of them can be transferred to the external USB drive.
Step 3. The Screenshots folder is using only 27.9 MB of storage, which is actually quite small. That's mainly because my screenshots aren't particularly high-resolution. Photos can take up much more space, especially when they have a high pixel count and large dimensions.
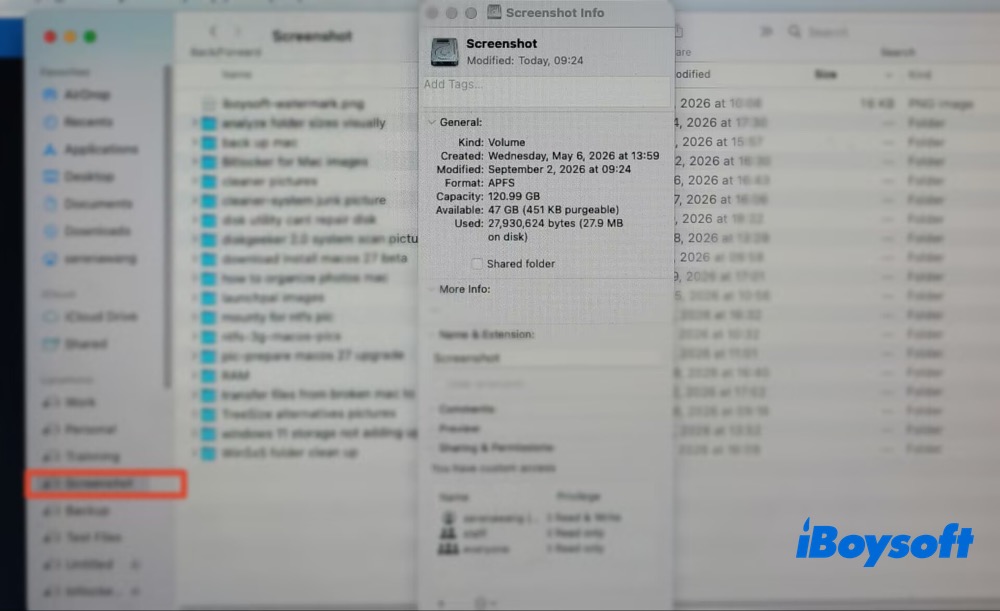
Step 4. Move all the photos from Screenshot to my external USB Untitled volume. The whole transfer is smooth and quick, no wait. The same also applies to relocating your videos and audio files to an external drive.
7. Reduce System Data (Be Careful!)
- Reduced system data size: 2.05 GB
- Mac startup disk available space: before 49.73 GB vs after 51.78 GB
System Data is not one folder! System Data (or called "Other" in older macOS) contains caches, logs, local snapshots, app support files, device backups, developer files, etc. You shouldn't try to blindly delete /System or /Library.
In addition, do NOT delete unfamiliar files from /System, /Library, or hidden macOS folders simply because they are large. Removing required system or application files can cause apps to malfunction. Start with files you recognize, or use a professional Mac cleaner to identify which system data is safe to remove and which should be left untouched.
iBoysoft Cleaner is the one you can count on. It covers all the features you need to free up your startup disk space, including system junk, space optimizer, app uninstaller, large files finder, duplicate finder, similar photos, login item manager, RAM memory boost, Spotlight index, DNS refresh, etc.
How to use iBoysoft Cleaner to reduce system data safely?
Step 1. Launch iBoysoft Cleaner since I've installed it before.
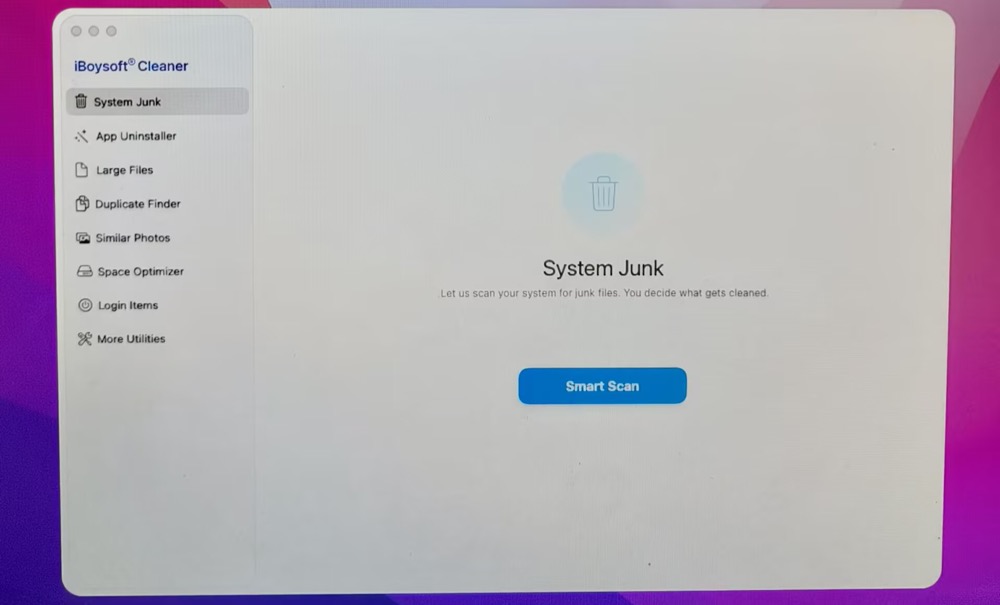
Step 2. Click Smart Scan in the System Junk section and wait for the completion of scanning.
Step 3. The scan results categorize the cleanable system data into different sections, including Downloads (2.23 GB), Browser Cache (1.21 GB), Chat Tools (718.4 MB), System Junk (87.8 MB), Trash, and App Cache (28.8 MB), among others.
The automatically selected files add up to 1.34 GB. These files are considered safe to remove, so you can clear them without worrying about damaging macOS.
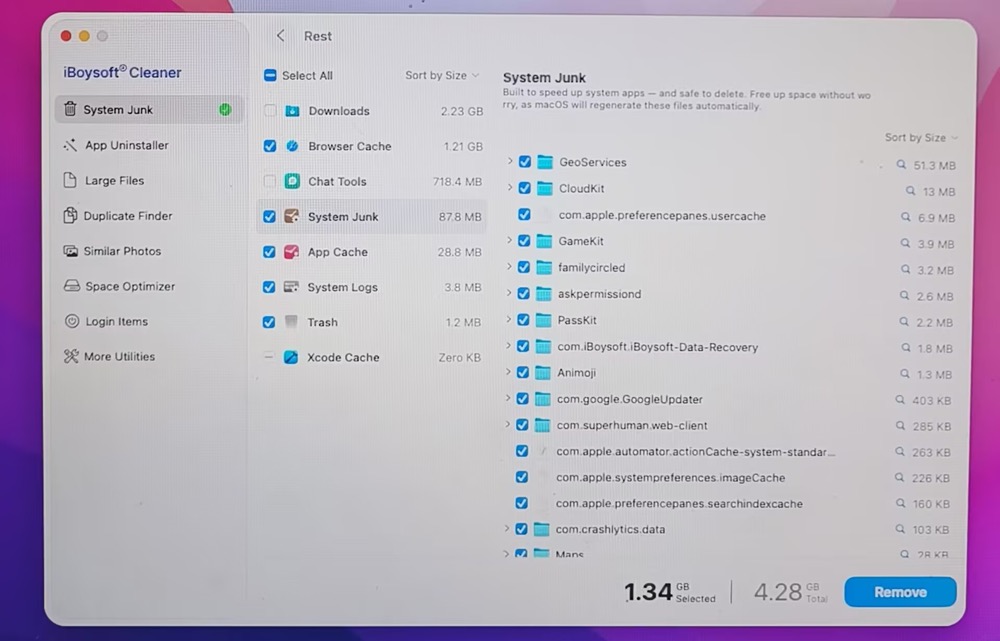
For Downloads and Chat Tools, this Mac cleaner gives you control over which files to remove. If you want to see exactly what's taking up space in a category like Chat Tools, you can open a folder such as QQ and review the specific files identified as cleanable.
You can then decide whether to keep or delete them. After checking my QQ chat folder, I manually selected it for removal, which increased the total cleanable space to 2.05 GB.
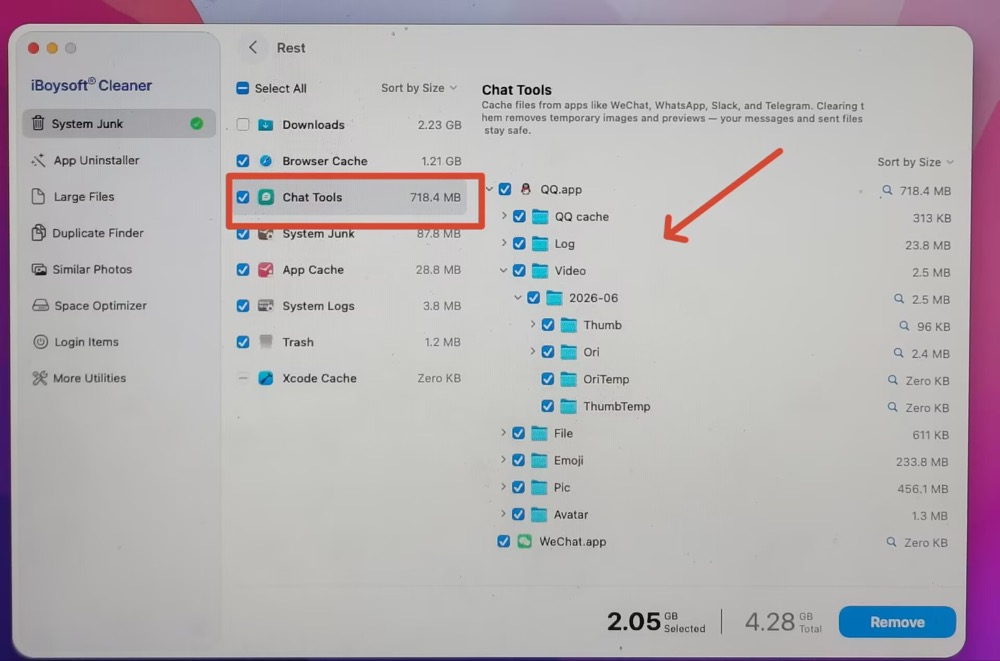
Step 4. Safe-to-remove files are automatically selected, so you can simply click the Delete button to remove them all at once. If you're concerned about accidentally deleting important files, you can check the cleaner's on-screen description of each folder, as shown below, before proceeding.

Step 5. Click Remove to delete the selected files and folders. After the cleanup, 2.05 GB of storage space is freed up, increasing my available space to 51.78 GB.
At this point, the Mac startup disk almost full issue is resolved.
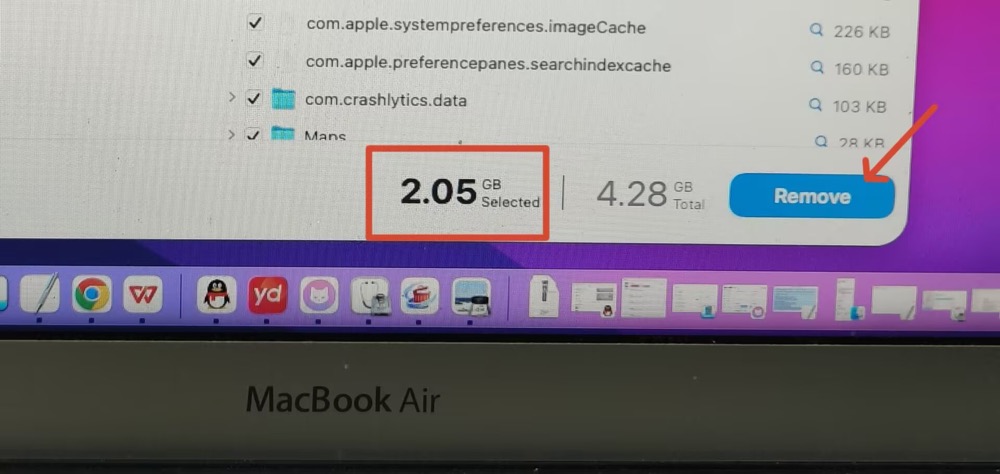
If you're still unsatisfied with the space cleaned up, use its other features like large files, duplicate finder, similar photos, login items, etc. to further free up your startup disk space.
On top of the above-mentioned safe and quick methods, there are also other solutions, including check and remove Time Machine local snapchats, delete Mail and Messages attachments, restart your Mac, etc.
What to Do If the Mac is too Full to Function?
In this case, don't perform risky manual System Data deletion while the machine is unstable. Instead, find a few personal large files first and delete them. Then try the following workarounds:
- Restart your Mac
- Try Safe Mode
- Empty Trash
- Move your personal large files to an external hard drive or iCloud service
- Enter Recovery Mode to free up space and rescue your Mac if necessary
Why is My Mac still Full after I Deleted Files?
This is another issue that some Mac users may encounter even after deleting files. In general, several potential causes could explain why the freed-up storage space doesn't appear as expected:
- Trash wasn't emptied
- "Recently Deleted" in Photos app still contains items
- Time Machine local snapshots
- Hidden removable system data exists
- Active application cache/log growth
- Improper iCloud sync or optimization behavior
- Storage calculation hasn't refreshed yet
You can check your Mac based on these potential causes and then try the cleanup methods mentioned above to free up storage space again.
Let others know how to fix the error "Your disk is almost full."
FAQs
- Q1. What does Your disk is almost full mean?
-
A
This dread warning will appear on your Mac when the space of the Mac's startup disk is going to be full. It is annoying. Worse, with a large amount of storage occupied on the startup disk, Mac may fail to upgrade macOS, run slowly, or behave abnormally. Therefore, you need to take measures like cleaning junk files on Mac to avoid seeing the startup disk full error again.
- Q2. How to check my Mac storage usage?
-
A
For maOS Ventura 13 or newer, go to System Settings > General > Storage.
For macOS Monterey or older, go to Apple Menu > About this Mac > Storage.
- Q3. How much free space a Mac should have?
-
A
Apple doesn't specify one universal percentage of free storage that every Mac must maintain. As a practical guideline, keep roughly 10–20% free gives macOS room for temporary files, virtual memory and updates.
- Q4. Can I delete swap files or purgeable space myself?
-
A
Swap files: No—macOS stores them in a protected system area and recreates them as needed. Deleting them manually can destabilize your Mac.
Purgeable space is also managed automatically, including local Time Machine snapshots and offloaded iCloud files. If your disk is completely full and macOS can't reclaim space, you can force snapshot thinning with sudo tmutil thinlocalsnapshots / 20000000000 4. Otherwise, focus on caches, backups, and large files—these are the areas macOS won't automatically clean up.
- Q5. What is the Other storage filling up my startup disk?
-
A
On macOS Monterey and earlier, Other is the gray section in the storage bar containing files that don't fit Apple’s main categories, such as caches, logs, temporary files, swap files, Time Machine snapshots, iPhone backups, disk images, and developer files.
Starting with macOS Ventura, Apple renamed this category System Data.