iBoysoft DiskGeeker Online Help
Getting Started
iBoysoft DiskGeeker is a comprehensive disk utility for Mac users that can help access Windows volumes, clone a disk, repair a disk, clean junk files, and encrypt disks. It can enhance the protection of your data and improve your work efficiency.
Supported Operating Systems
macOS 26 Tahoe, macOS 15 Sequoia, macOS 14 Sonoma, macOS 13 Ventura, macOS 12 Monterey, macOS 11 Big Sur, macOS 10.15 Catalina, macOS 10.14 Mojave, macOS 10.13 High Sierra.
Supported Storage Devices
Macs (includes Intel, M3, M2, M1, M1 Pro/Max Macs), external hard drives, solid-state drives, USB flash drives, SD cards, CF cards, memory cards, memory sticks, etc.
How to Download and Install iBoysoft DiskGeeker?
Step 1: Free download iBoysoft DiskGeeker at https://iboysoft.com/download/.
Step 2: Double-click the installation package to open it.
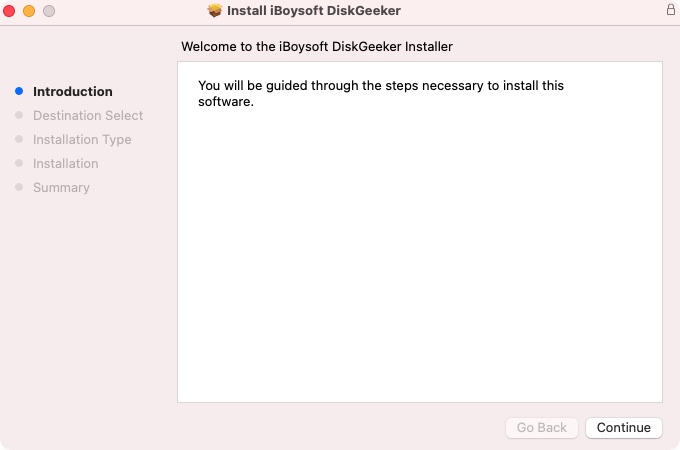
Step 3:Go to Launchpad to open the application.
Note: For the first-time installation, if your Mac is running macOS 11 or above, click "Ok" to allow iBoysoft DiskGeeker to access your files.
How to Activate iBoysoft DiskGeeker?
You have a 7-day free trial. After the trial expires, please purchase a yearly subscription from our online store.
Step 1: Copy the license key from your order confirmation email.
Step 2: Click the software icon from the menu bar to bring up the main window.
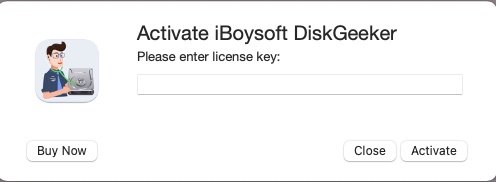
Step 3: Click the yellow "Activate" button at the lower left corner.
Step 4: Paste the license key and click "Activate".
How to Open a Partition?
Step 1: Select a Partition from the left panel.
Step 2: Click "Open" from the toolbar.
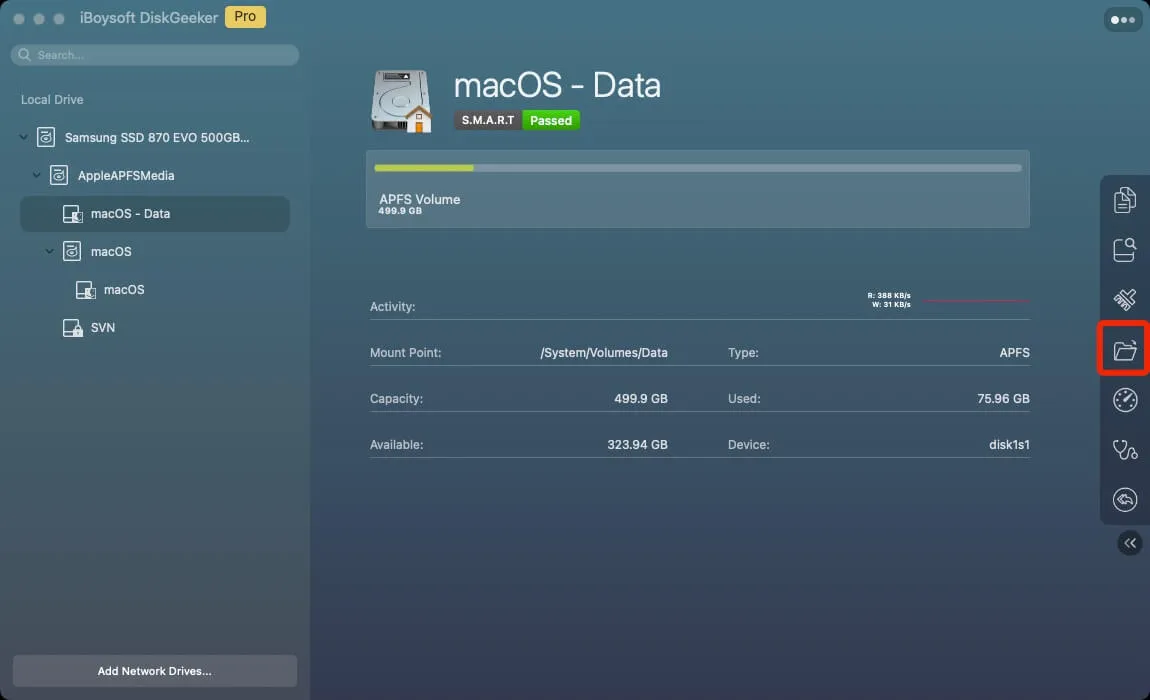
Note: if you only have read permission to the partition, using the "Open" button doesn't change the permission you have.
How to Mount All/Unmount All Partitions?
Step 1: Select a disk from the left panel.
Step 2: Click "Mount All" or "Unmount All" from the toolbar.
How to Mount/Unmount a Partition?
Step 1: Select a partition from the left panel.
Step 2: Click "Mount" or "Unmount" from the toolbar.
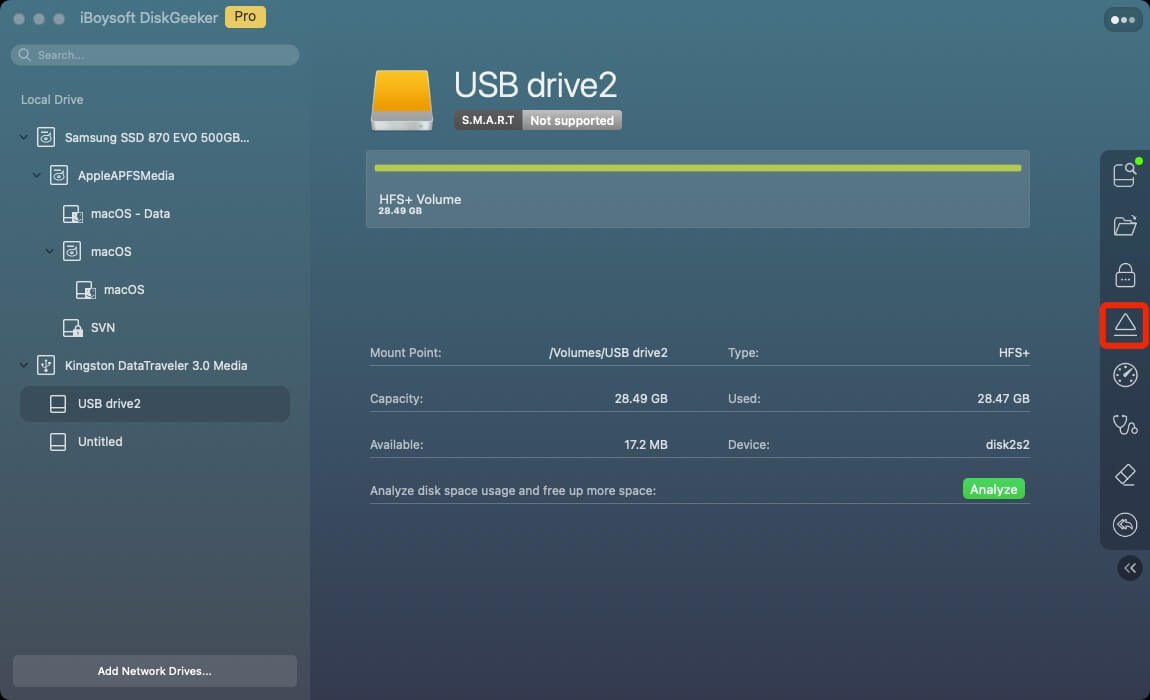
How to Eject a Partition?
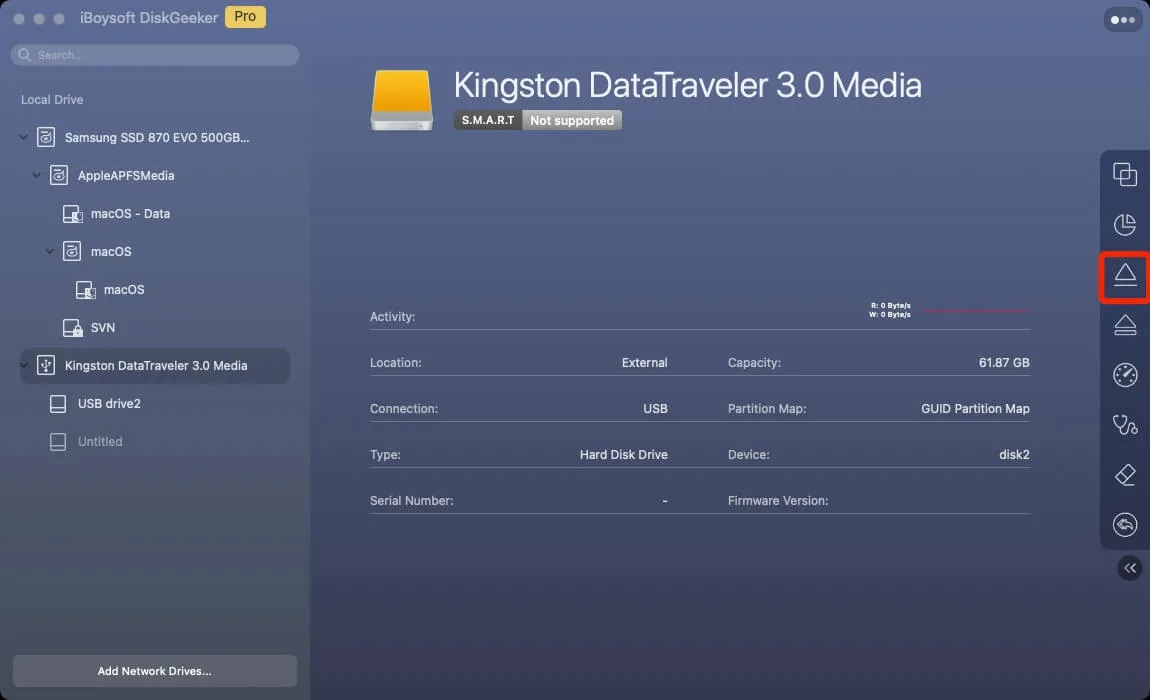
Step 1: Select a partition from the left panel.
Step 2: Click "Eject" from the toolbar.
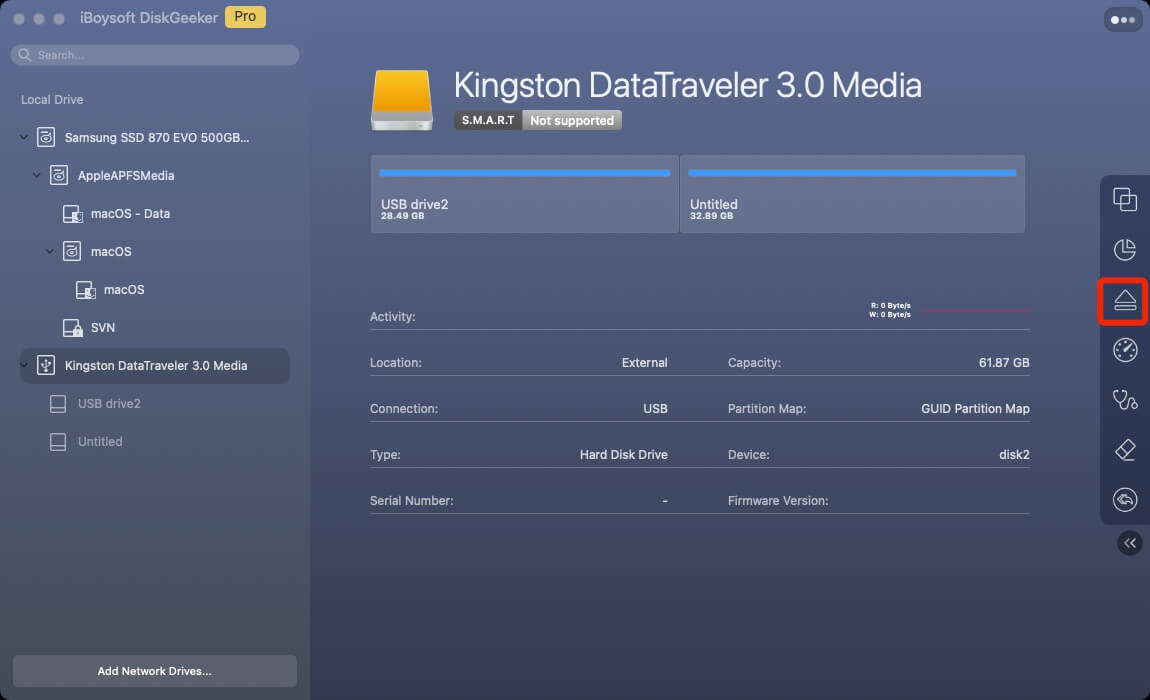
Note: the application will eject the entire disk even though you select a single partition to eject.
How to Read and Write to NTFS Drives?
iBoysoft DiskGeeker uses the system's built-in NTFS read and write support. Your Microsoft NTFS-formatted disk will be mounted in read-write mode automatically after the application detects it without extra setup.
But if you can't write to your NTFS volume, follow these steps:
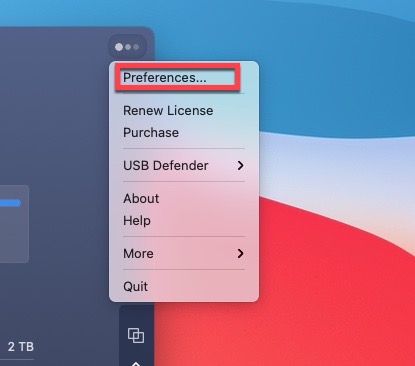
Step 1: Click the three dots at the top right corner and select "Preferences".
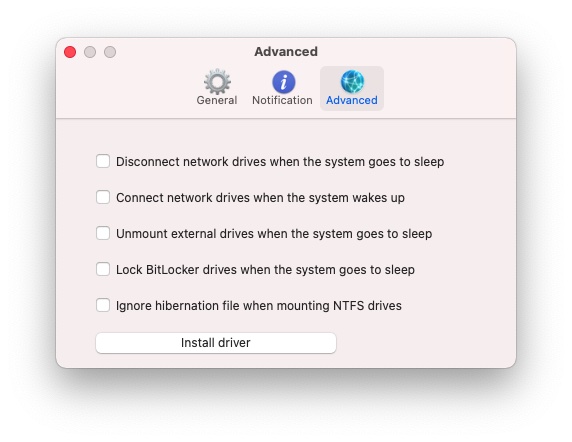
Step 2: Go to "Advanced" tab and click "Install driver".
Step 3: Follow the onscreen wizard to install NTFS driver by iBoysoft.
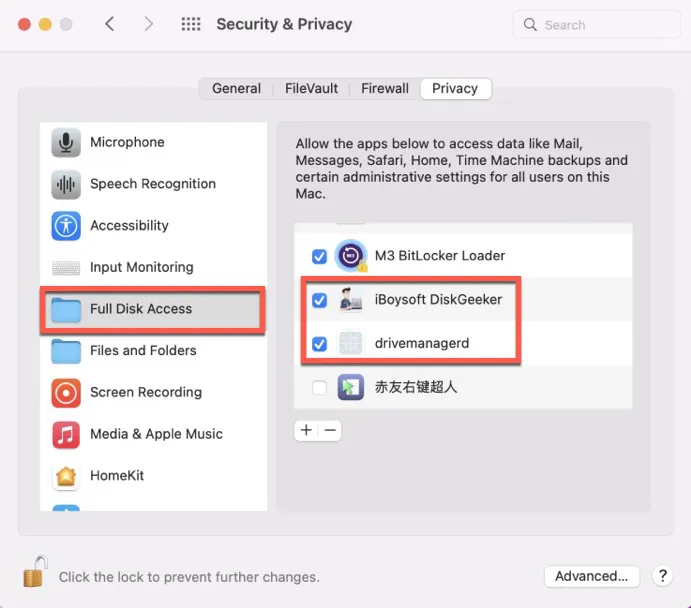
Step 4: Go to Apple logo > System Settings > Privacy & Security > Full Disk Access to check if "iBoysoft DiskGeeker" and "drivemanagerd" are enabled in the list.
Step 5: Restart your Mac.
Note: If your Mac has an Apple Silicon chip, you need to enable system extension before the NTFS driver can take effect.
How to Unlock Encrypted Hard Drive?
Note: This feature is for Professional Edition users. iBoysoft DiskGeeker can only unlock BitLocker encrypted, FileVault encrypted, and encrypted APFS volumes.
Step 1: Connect the drive that is encrypted to Mac if it is an external device.
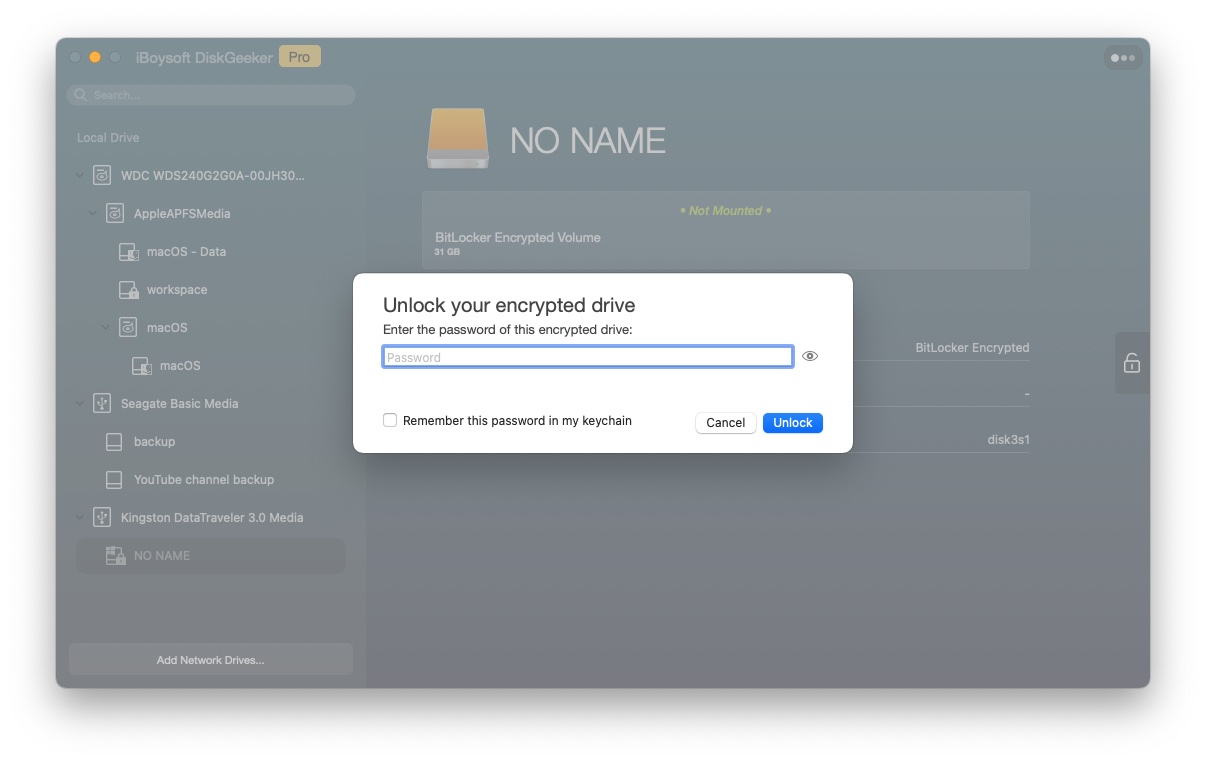
Step 2: Select the encrypted disk/volume from the left panel.
Step 3: Click on the "Unlock" button from the toolbar.

Step 4: Enter password and click "Unlock" to confirm. You can also enter the BitLocker recovery key to unlock a BitLocker-encrypted drive and a FileVault recovery key to unlock a FileVault encrypted drive.
Step 5: Access and manage files after the encrypted drive is mounted and opened automatically after unlocking.
How to Lock an Encrypted Disk?
Step 1: Select the unlocked disk/volume from the left panel.
Step 2: Click on the "Lock" button from the toolbar.

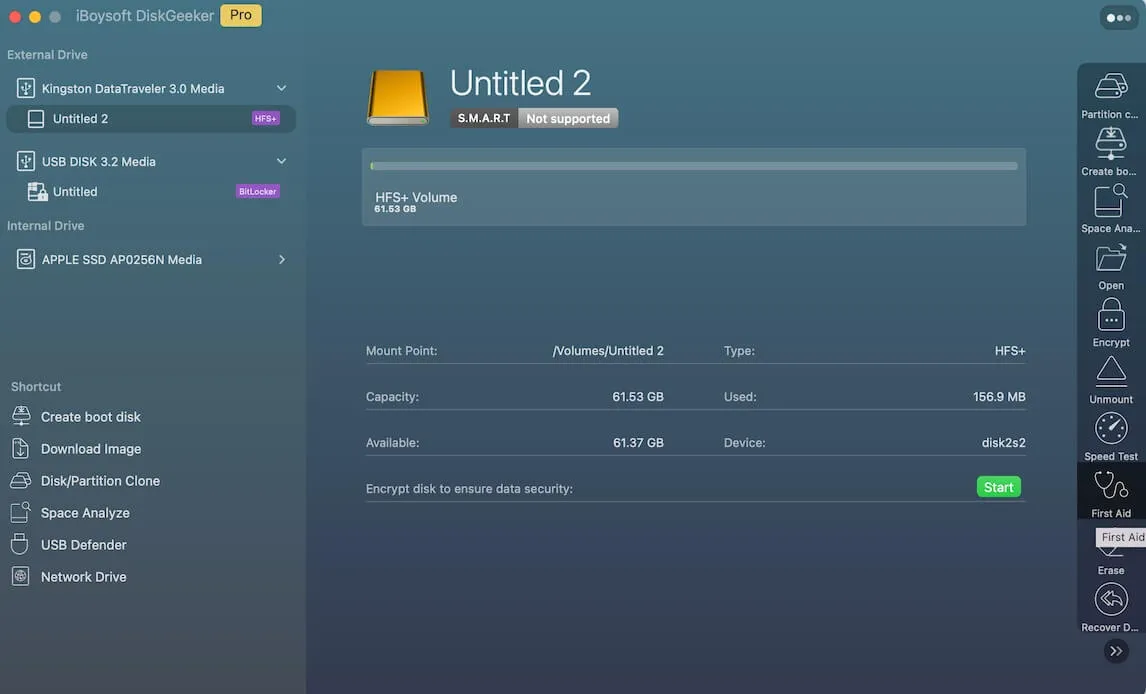
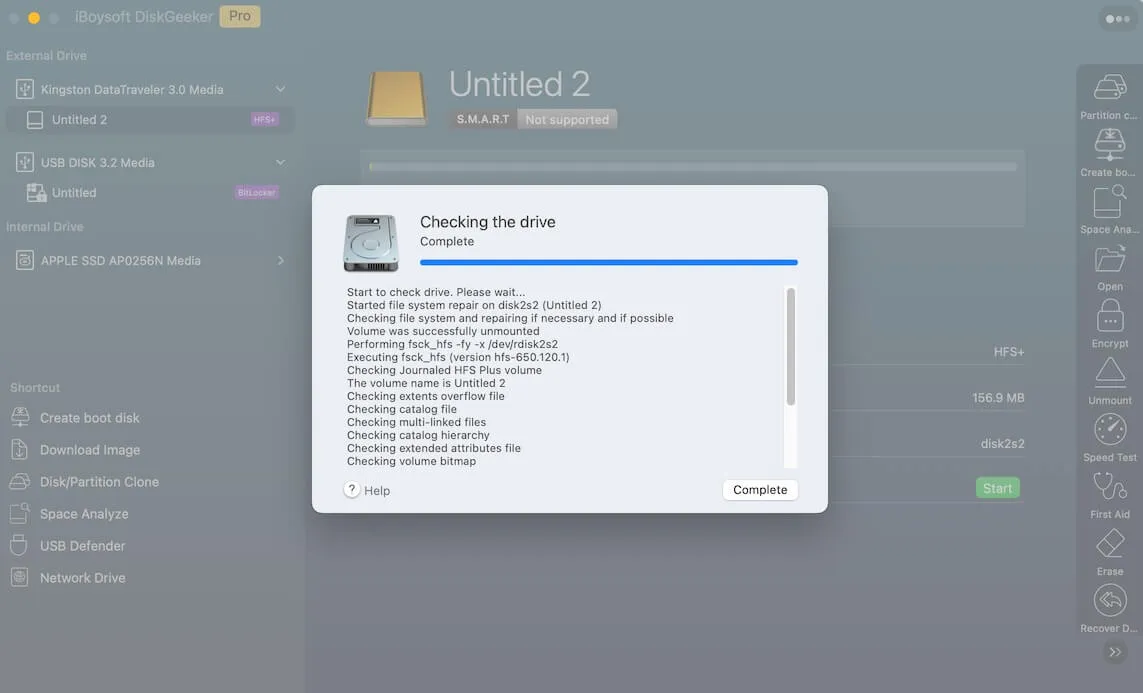
How to Check and Repair a Volume?
Step 1: Select a problematic volume from the left panel.
Step 2: Click "First Aid" from the toolbar.
Note: if you select a non-NTFS volume, the software will use the Mac's built-in First Aid function to check and repair it. If you select an NTFS partition, you will be asked if you want to just check the errors without repairing or both check and repair found errors.
Step 3: Wait for the process to be done and click "Complete".
Learn more about iBoysoft DiskGeeker's First Aid feature.
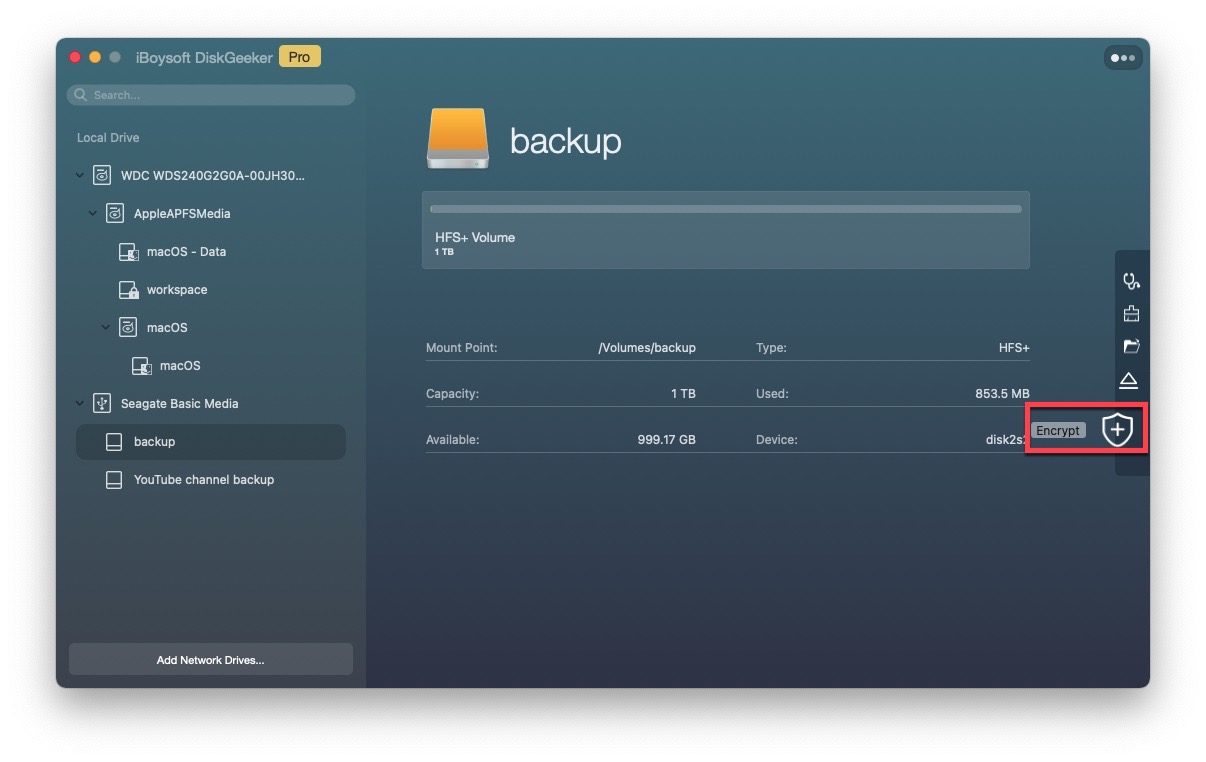
How to Encrypt a Partition by FileVault?
Note: Only partitions/disks with GUID Partition Map can be encrypted with FilaVault using iBoysoft DiskGeeker. FileVault encryption method only applies to HFS, HFS+, and APFS file system.
Step 1: Select a partition that you want to encrypt from the left panel.
Step 2: Click the "Encrypt" button from the toolbar.
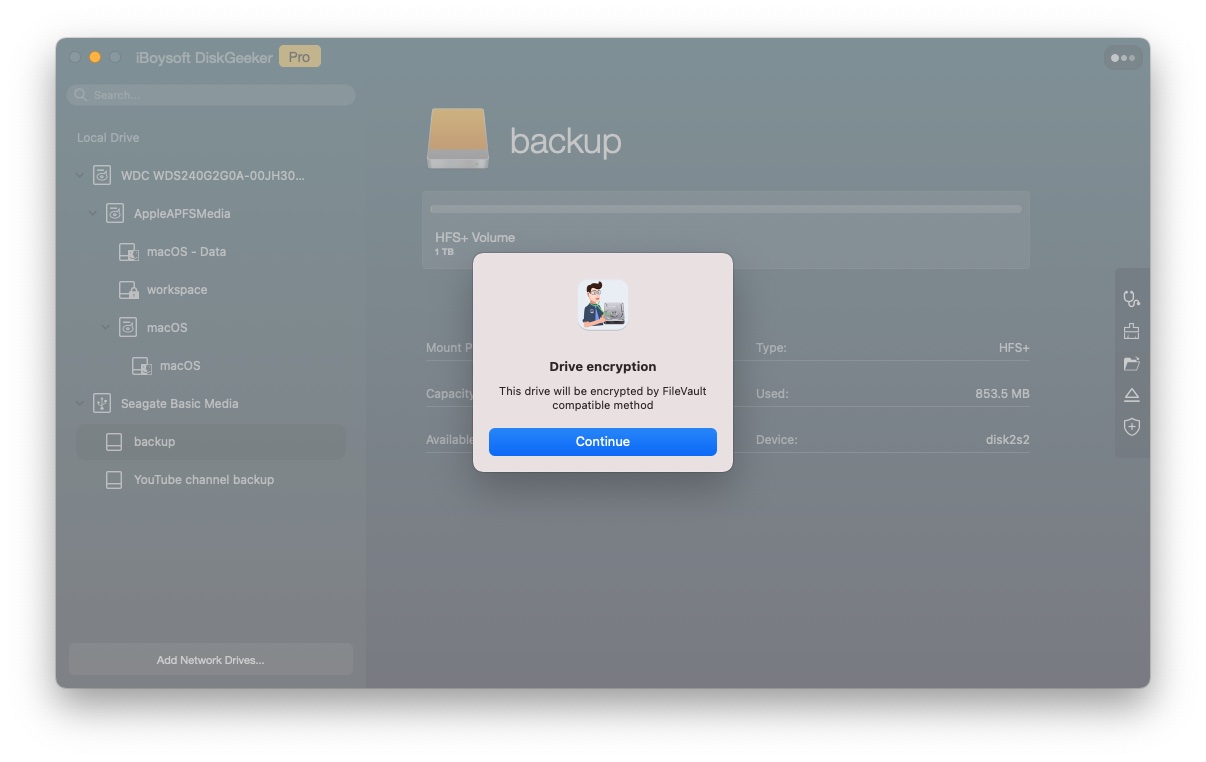
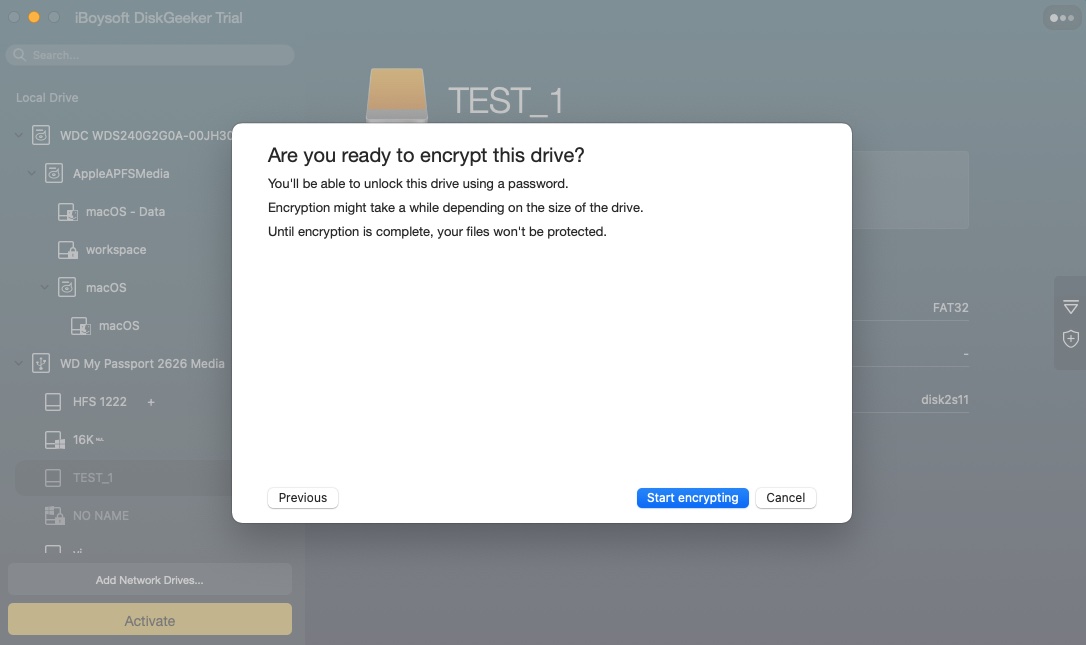
Step 3: Click "Continue" to proceed.
Step 4: Enter your password and re-enter the same password. Your password should be less than 48 digits.
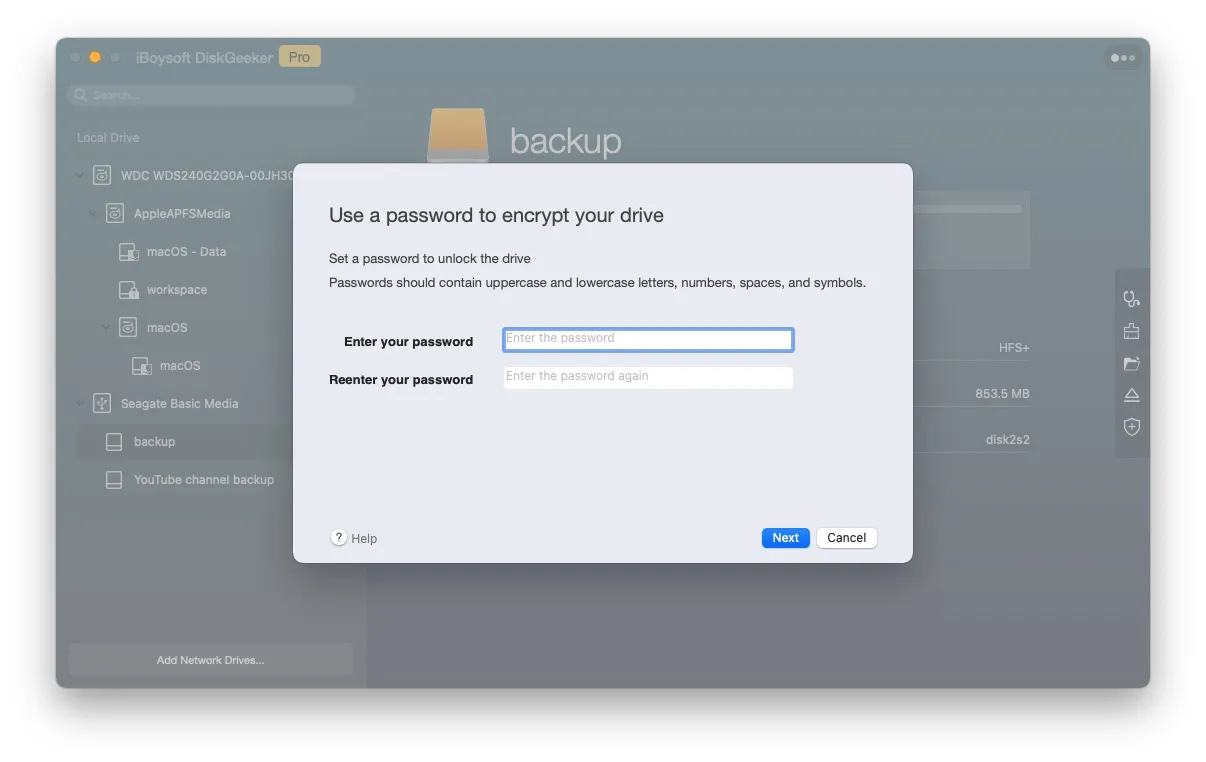
Step 5: Click "Next".
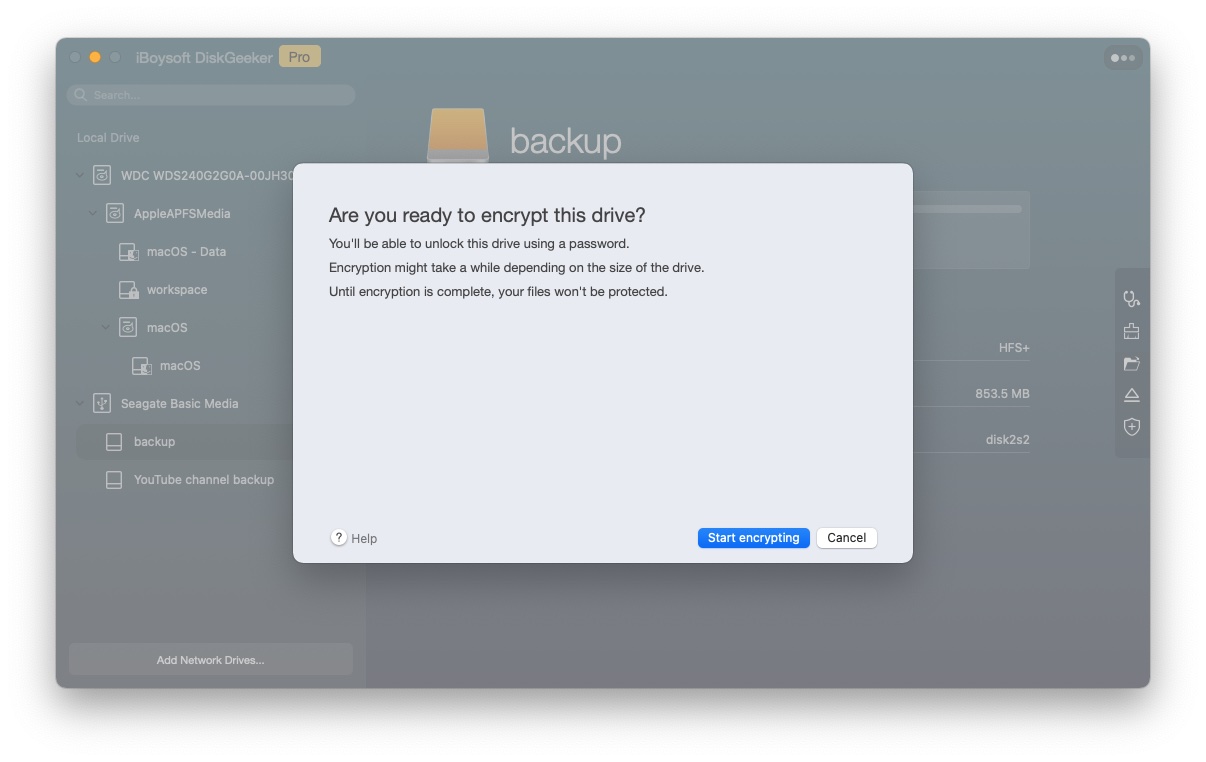
Step 6: Click "Start encrypting". The encryption can't be terminated by a user.
How to Encrypt a Disk by BitLocker?
Note: BitLocker encryption method only applies to exFAT, FAT, and NTFS file system.
Step 1: Select a partition that you want to encrypt from the left panel.
Step 2: Click the "Encrypt" button from the toolbar.
Step 3: Click "Continue" to proceed.
Step 4: Enter your password and re-enter the same password. Your password should be less than 48 digits.
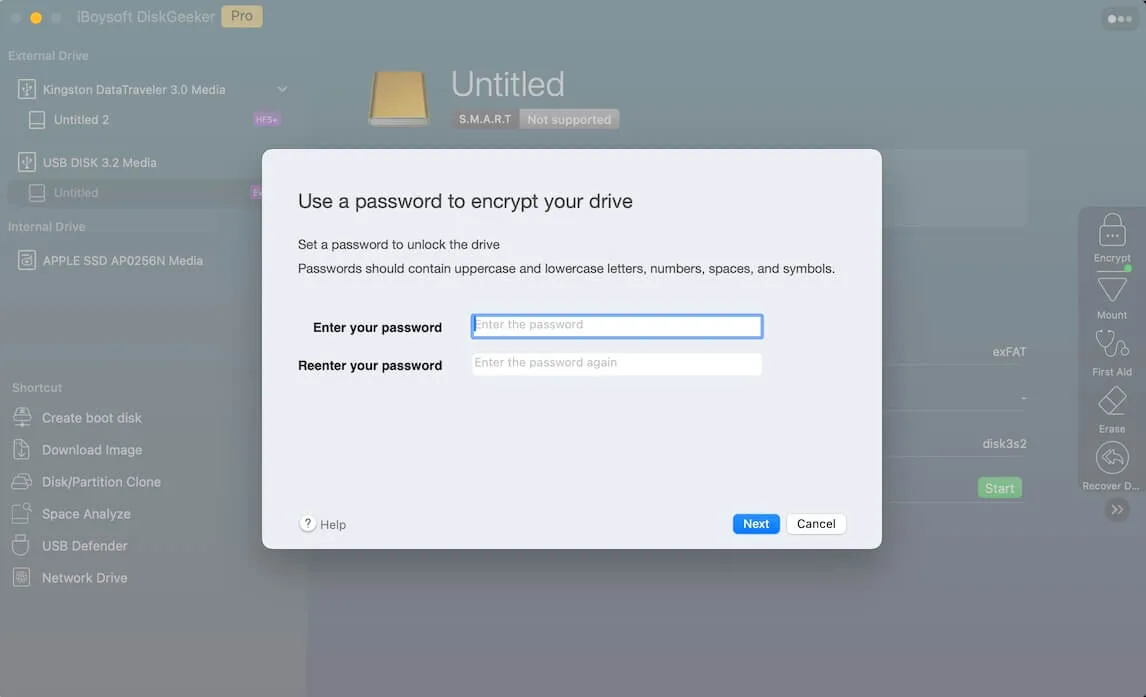
Step 5: Click "Next".
Step 6: Save the generated Recovery Key to a file or print it to have a backup.
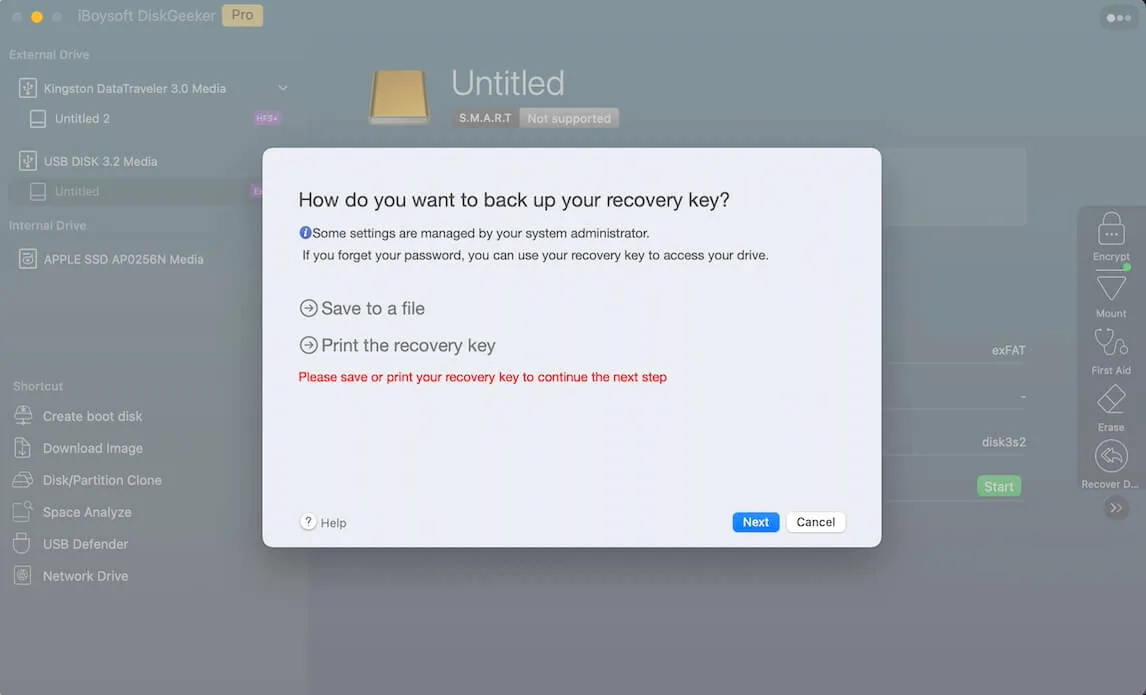
Step 7: Click "Next" and click "Start encrypting". The encryption can't be terminated by a user.
Learn more about iBoysoft DiskGeeker's BitLocker Encryption.
How to Map a Network Drive in Finder?
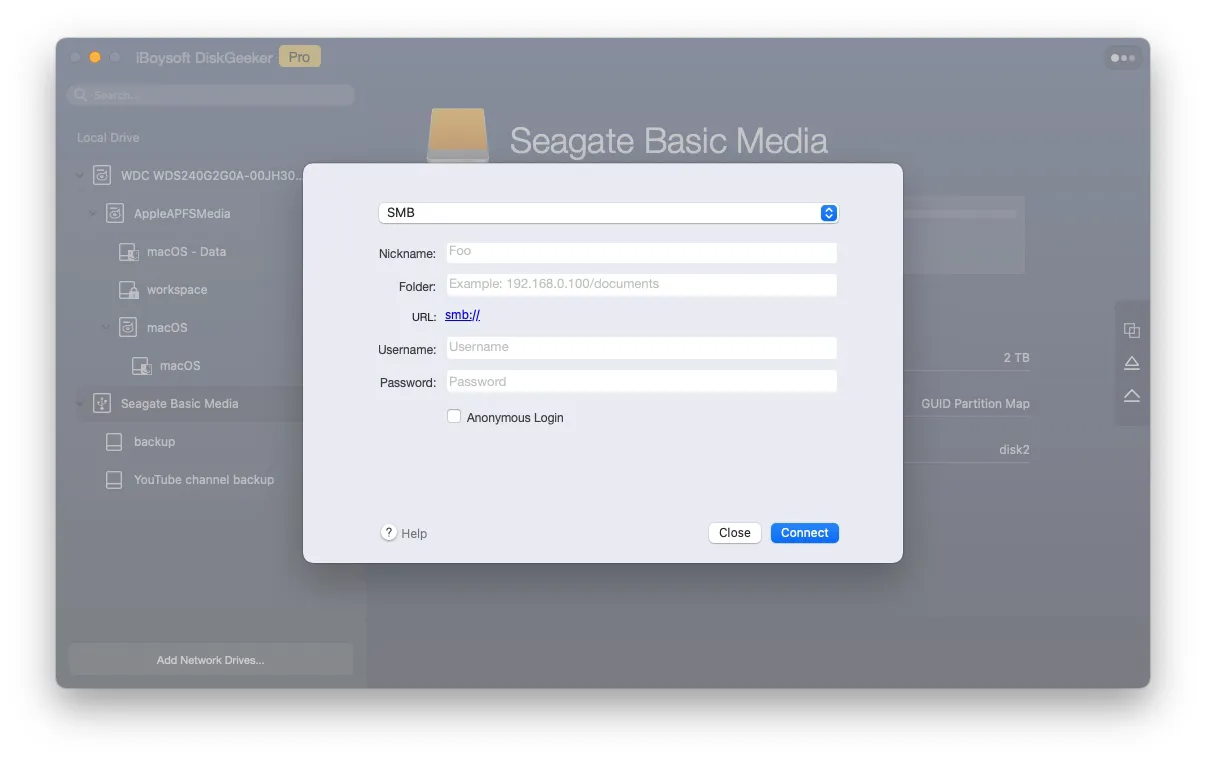
Step 1: Click "Network Drive" from the left sidebar > "Add".
Step 2: Provide all required information including server protocol, server address, password, etc. and click "Connect".
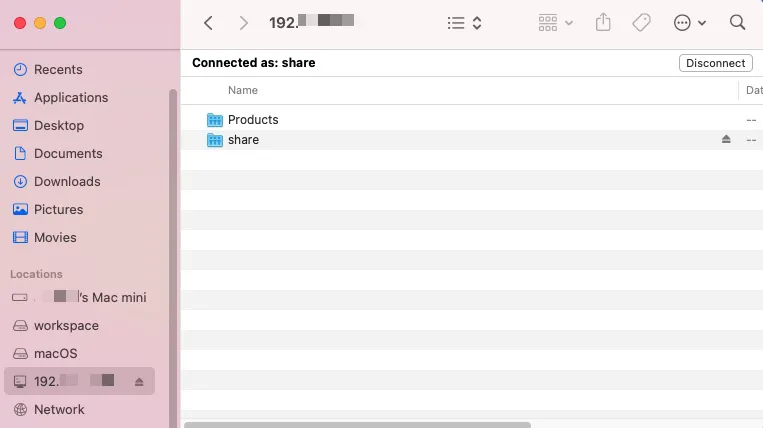
Step 3: Find your network drive under Locations in Finder after it is successfully connected.
Learn more about iBoysoft DiskGeeker's Network Drive Connection feature.
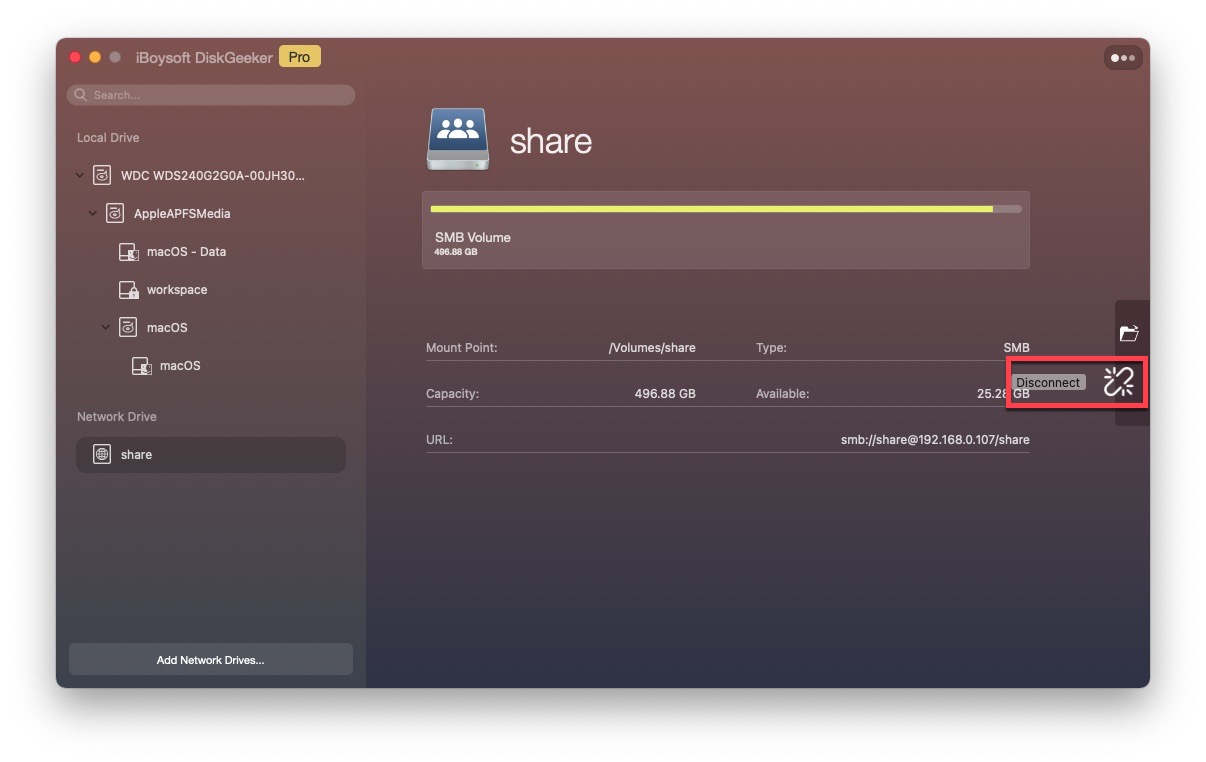
How to Disconnect a Network Drive?
Step 1: Select a network drive.
Step 2: Click the "Disconnect" button next to it.
How to Clone a Disk?
Note: Before you start to clone data from a disk (source device) to another disk (destination disk), please be aware that:
1. Make sure you have backed up the important files on the target disk as it will be overwritten to store data cloned from the source disk.
2. The target disk must have a larger (or at least the same) capacity than the source disk.
3. The startup disk containing the operating system can't be selected as target disk.
4. Go to Apple logo > System Settings > Privacy & Security > Full Disk Access to make sure "drivemanagerd" item is checked.
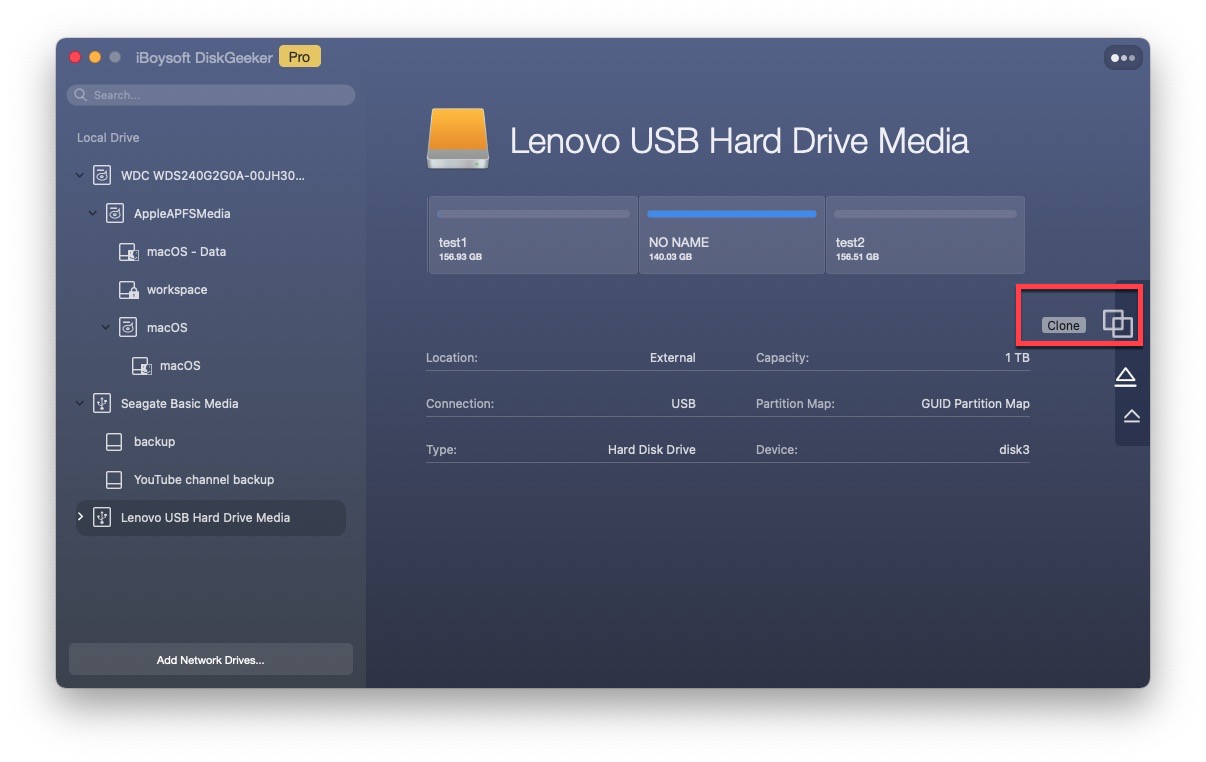
Step 1: Select the source disk. Remember to select the entire disk not a volume.
Step 2: Click "Clone" from the toolbar.
You can also directly click the Disk/Partition Clone button on the left sidebar.
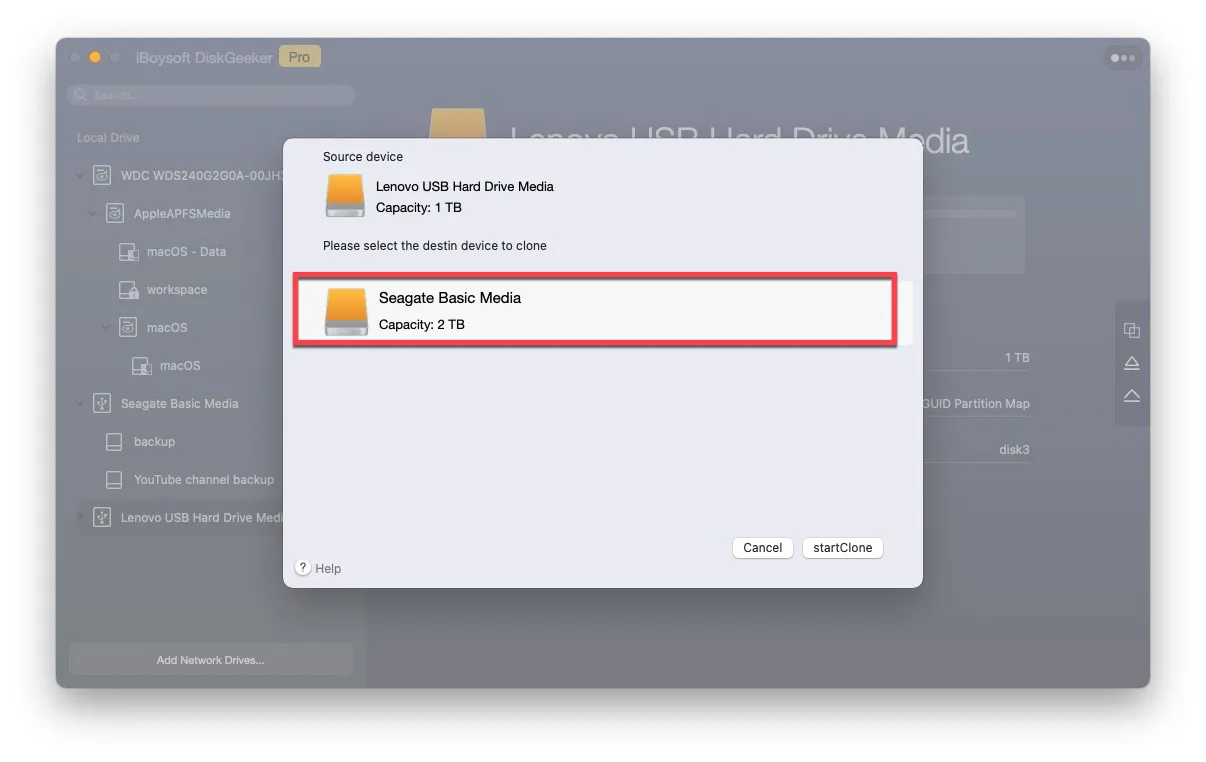
Step 3: Select a destination device in the list.
Step 4: Click "Start Cloning". The cloning process can't be terminated by a user. If the process is terminated by accident, the disk cloning will resume automatically after two disks are connected to Mac again.
How to Clone a Volume on a Disk?
The Partition clone feature in iBoysoft DiskGeeker only supports cloning APFS and HFS+ (Mac OS Extended) volumes.
Here's what you should pay attention to before starting a clone:
• The target volume must be larger than the source's used space.
• Ensure you've backed up data on the target volume as the clone will wipe all data on it.
• Both the startup and startup-related volumes cannot be the destination, as it may prevent the device booting.
• An HFS+ volume cannot be cloned to an APFS volume due to macOS limitations.
• The disk container can be the destination when cloning a volume.
• The Partition clone function only helps clone the data. The properties of the source volume, like encryption, won't be cloned to the target volume.
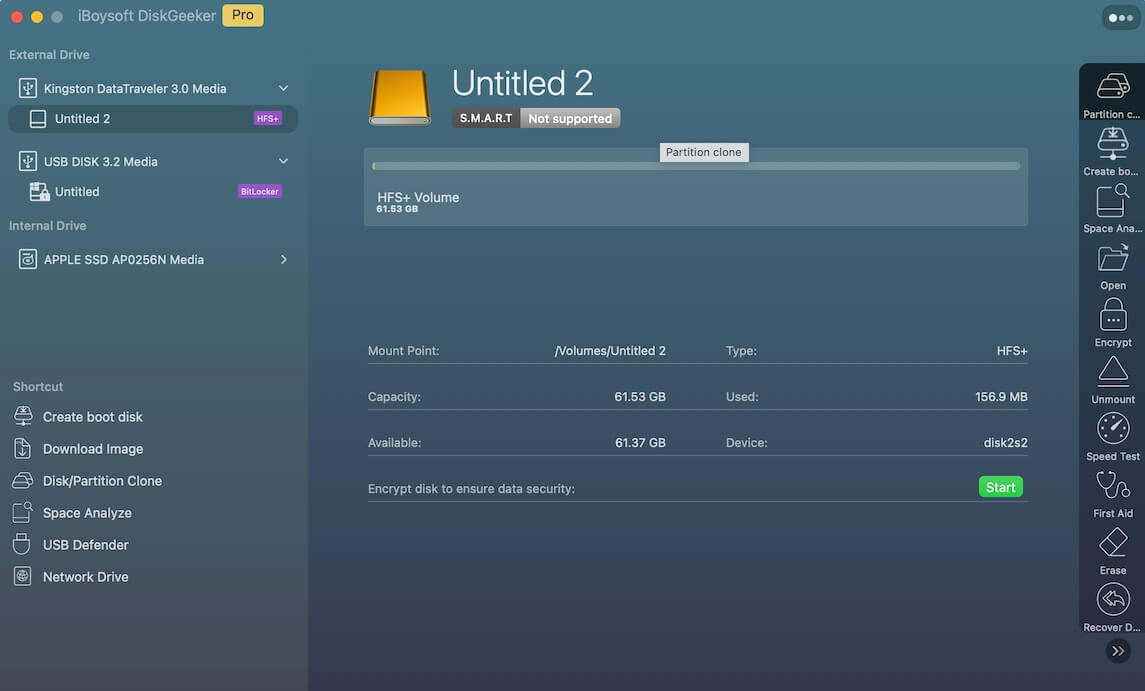
Step 1: Choose the source volume (the volume you want to clone files from) on the left sidebar.
It can be a non-startup-related volume on your internal hard drive or a volume on an external hard disk.
Step 2: Click "Partition clone" from the toolbar.
You can also directly click the Disk/Partition Clone button on the left sidebar.
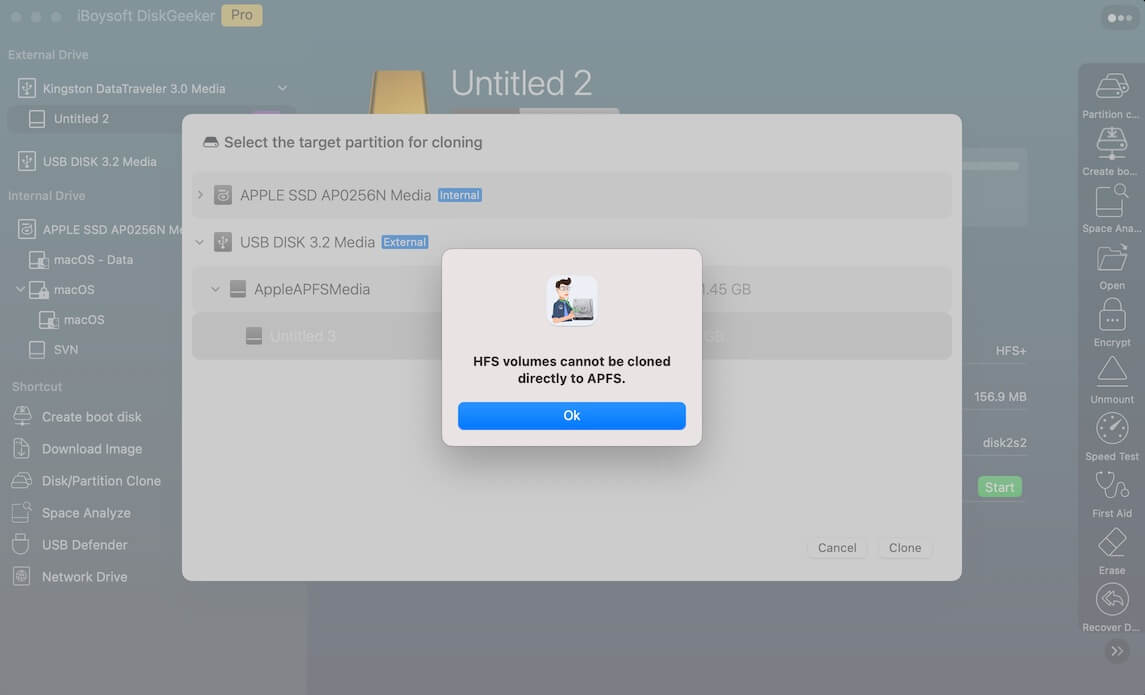
Step 3: Choose the target volume from the list and click Clone.
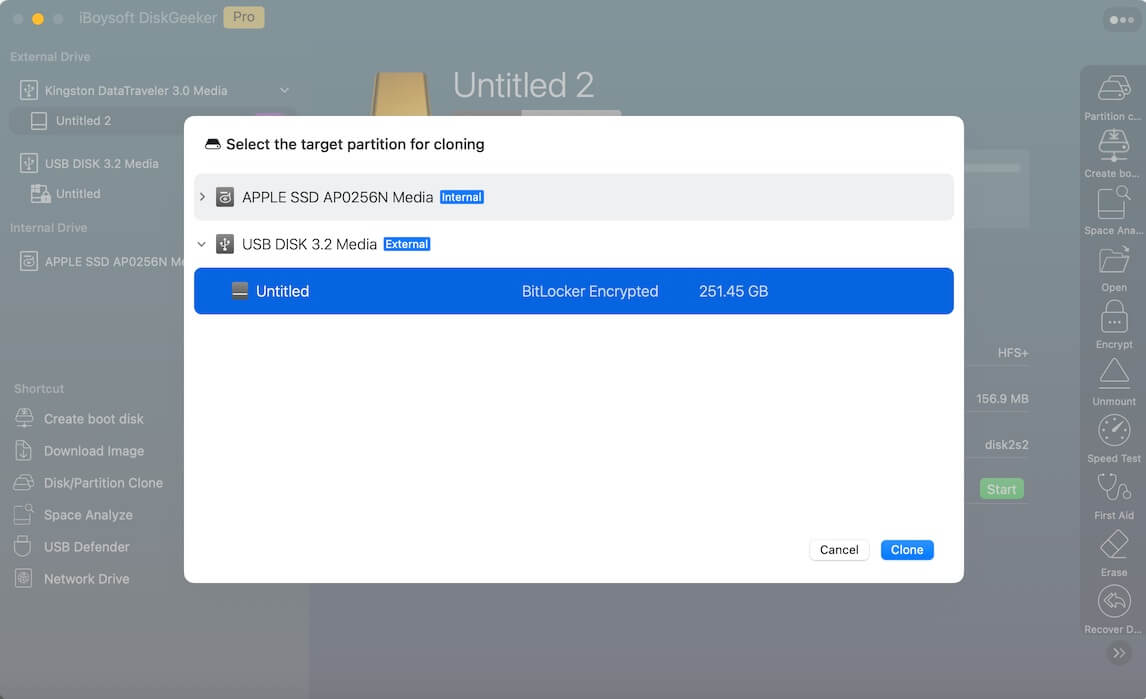
If there's only a container on the desired disk, you can also select it as the destination.

Due to system limitations, you can't clone an HFS+ volume to an APFS volume
Step 4: On the pop-up (alerting you that all data on the target volume will be erased), click OK to start cloning.
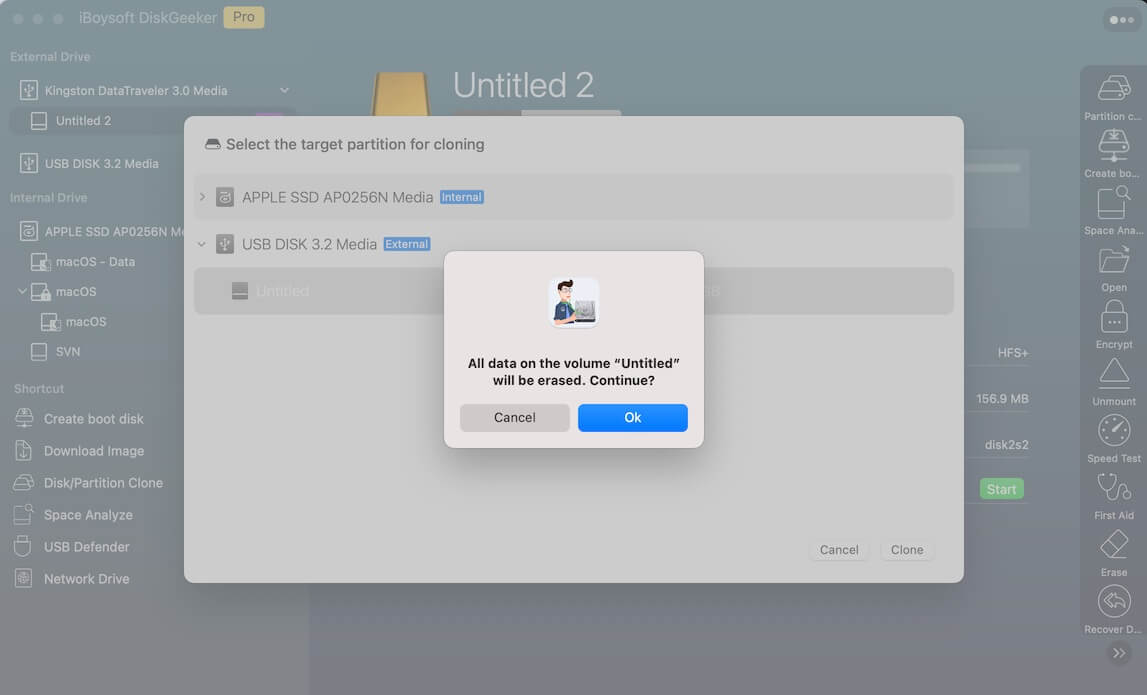
If you haven't backed up data on the target volume, cancel the process and back it up now.
Step 5: Wait for the clone process to complete.
Once the cloning process begins, it can't be terminated. The cloning time depends on the amount of data in the source volume. If the process is terminated accidentally, such as a power outage or external disk disconnection, the clone failure will occur.
Learn more about iBoysoft DiskGeeker's Disk/Volume Clone feature.
How to Analyze a Partition and Clean Files?
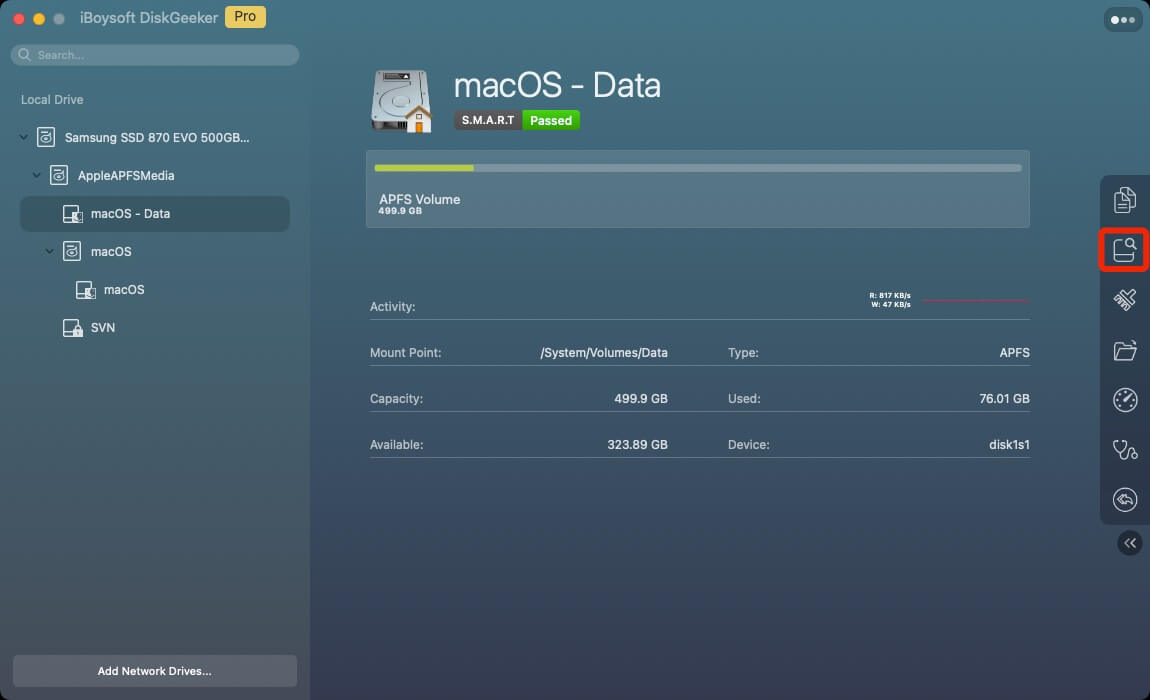
Step 1: Select a partition from left panel.
Step 2: Click "Space Analyze" from the toolbar and wait for the scanning process to finish.
Step 3: Select the files you want to delete and drag and drop them into the bottom collection. Or, you can right-click the unwanted files and select "Move to the delete queue."
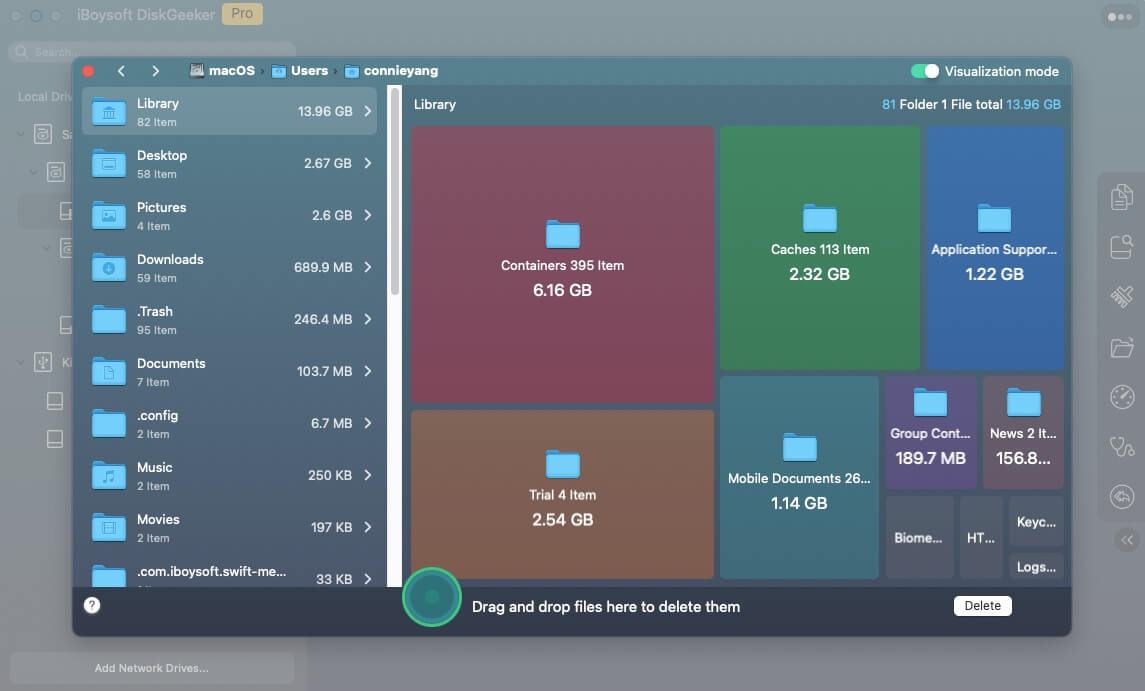
If you are not sure whether you can delete a certain file, move your cursor over it. Then, you'll see a rotating ball. Just click it to let AI tell you what the file is and whether it is safe to delete it. Usually, if the file can be deleted, you'll see the Add delete list button on the AI content window. Click it to add the file to the delete collection.
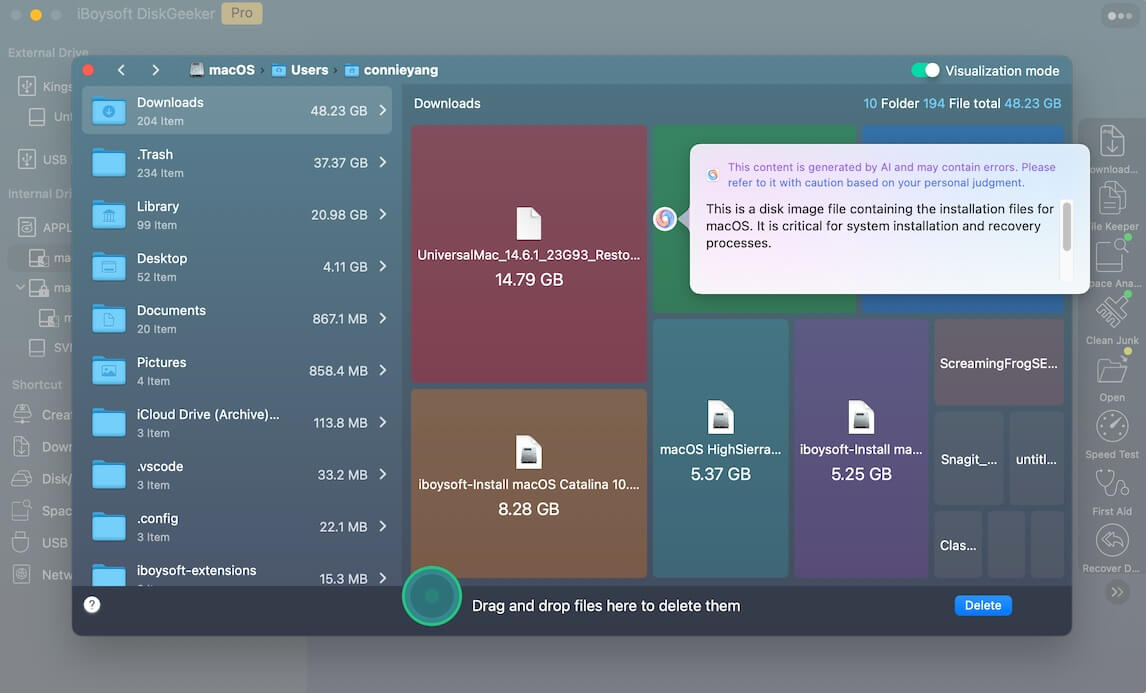
Step 4: Click "Delete" to remove these files.
Learn more about iBoysoft DiskGeeker's Space Analyze feature.
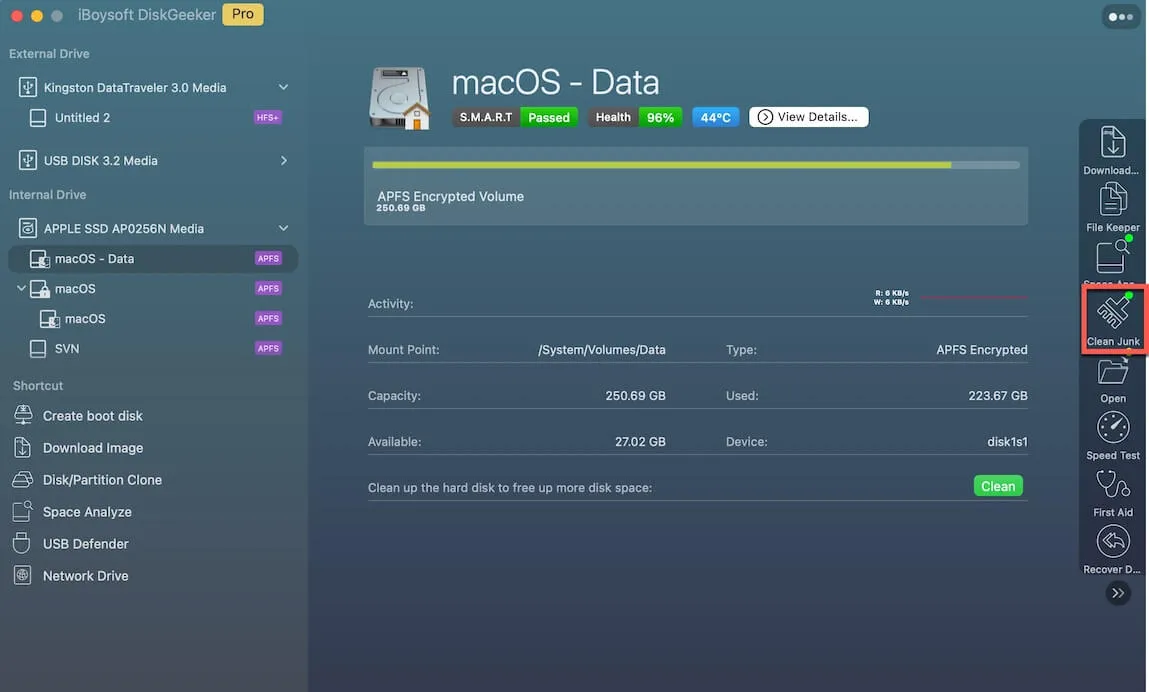
How to Clean System Junk?
Note: 1. This feature is only available for the startup disk containing the operating system.
2. If you don't have permission to delete the file, you can't clean it with iBoysoft DiskGeeker either.
Step 1: Select the startup volume usually labelled as macOS - Data, macOS, or Macintosh HD, or Macintosh HD - Data.
Step 2: Click "Clean Junk" from the toolbar.
Step 3: You can open a folder and select files you want to delete.
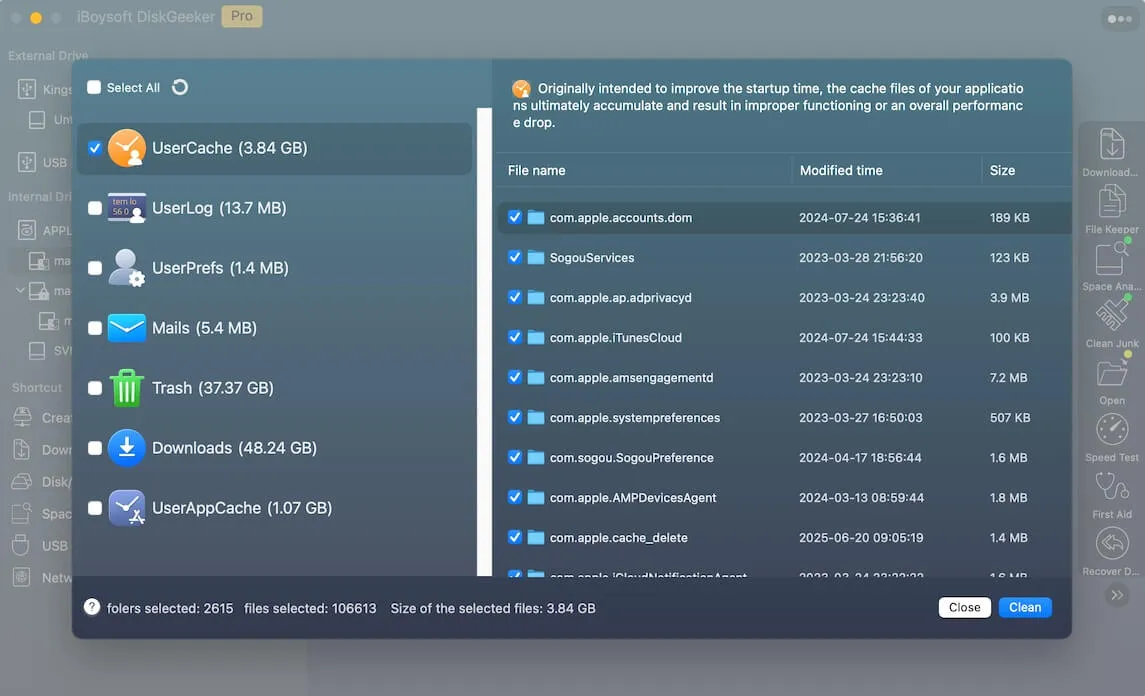
Step 4: Click "Clean" and then click "Ok".

Learn more about iBoysoft DiskGeeker's Clean Junk feature.
How to Download macOS DMG
iBoysoft DiskGeeker offers direct entrances to download macOS DMG files when you are not allowed to get the installer from the App Store or Software Update.
The macOS DMG files you can download are:
✅ macOS 26 Tahoe, macOS 15 Sequoia, macOS 14 Sonoma, macOS 13 Ventura, macOS 12 Monterey, macOS 11 Big Sur, macOS 10.15 Catalina, macOS 10.14 Mojave, macOS 10.13 High Sierra, macOS 10.12 Sierra
✅ OS X 10.11 El Capitan, OS X 10.10 Yosemite, OS X 10.9 Mavericks, OS X 10.8 Mountain Lion, OS X 10.7 Lion
✅ Mac OS X 10.6 Snow Leopard
You can use the downloaded macOS DMG file to downgrade macOS or create a bootable installer for macOS.
Step 1: Click the Download Image button on the left sidebar.
Or else, you can click the non-startup volume on your Mac hard drive and select Download Image from the right-side toolbar.
Step 2: Click the Get button next to the macOS version you want. Or you can select the macOS version and click "Download Image."
Note: You can click the Compatibility option to check the hardware compatibility of the target macOS version.

Step 3: Choose a location to save the macOS DMG file. It could a destination on your Mac or an external hard drive.
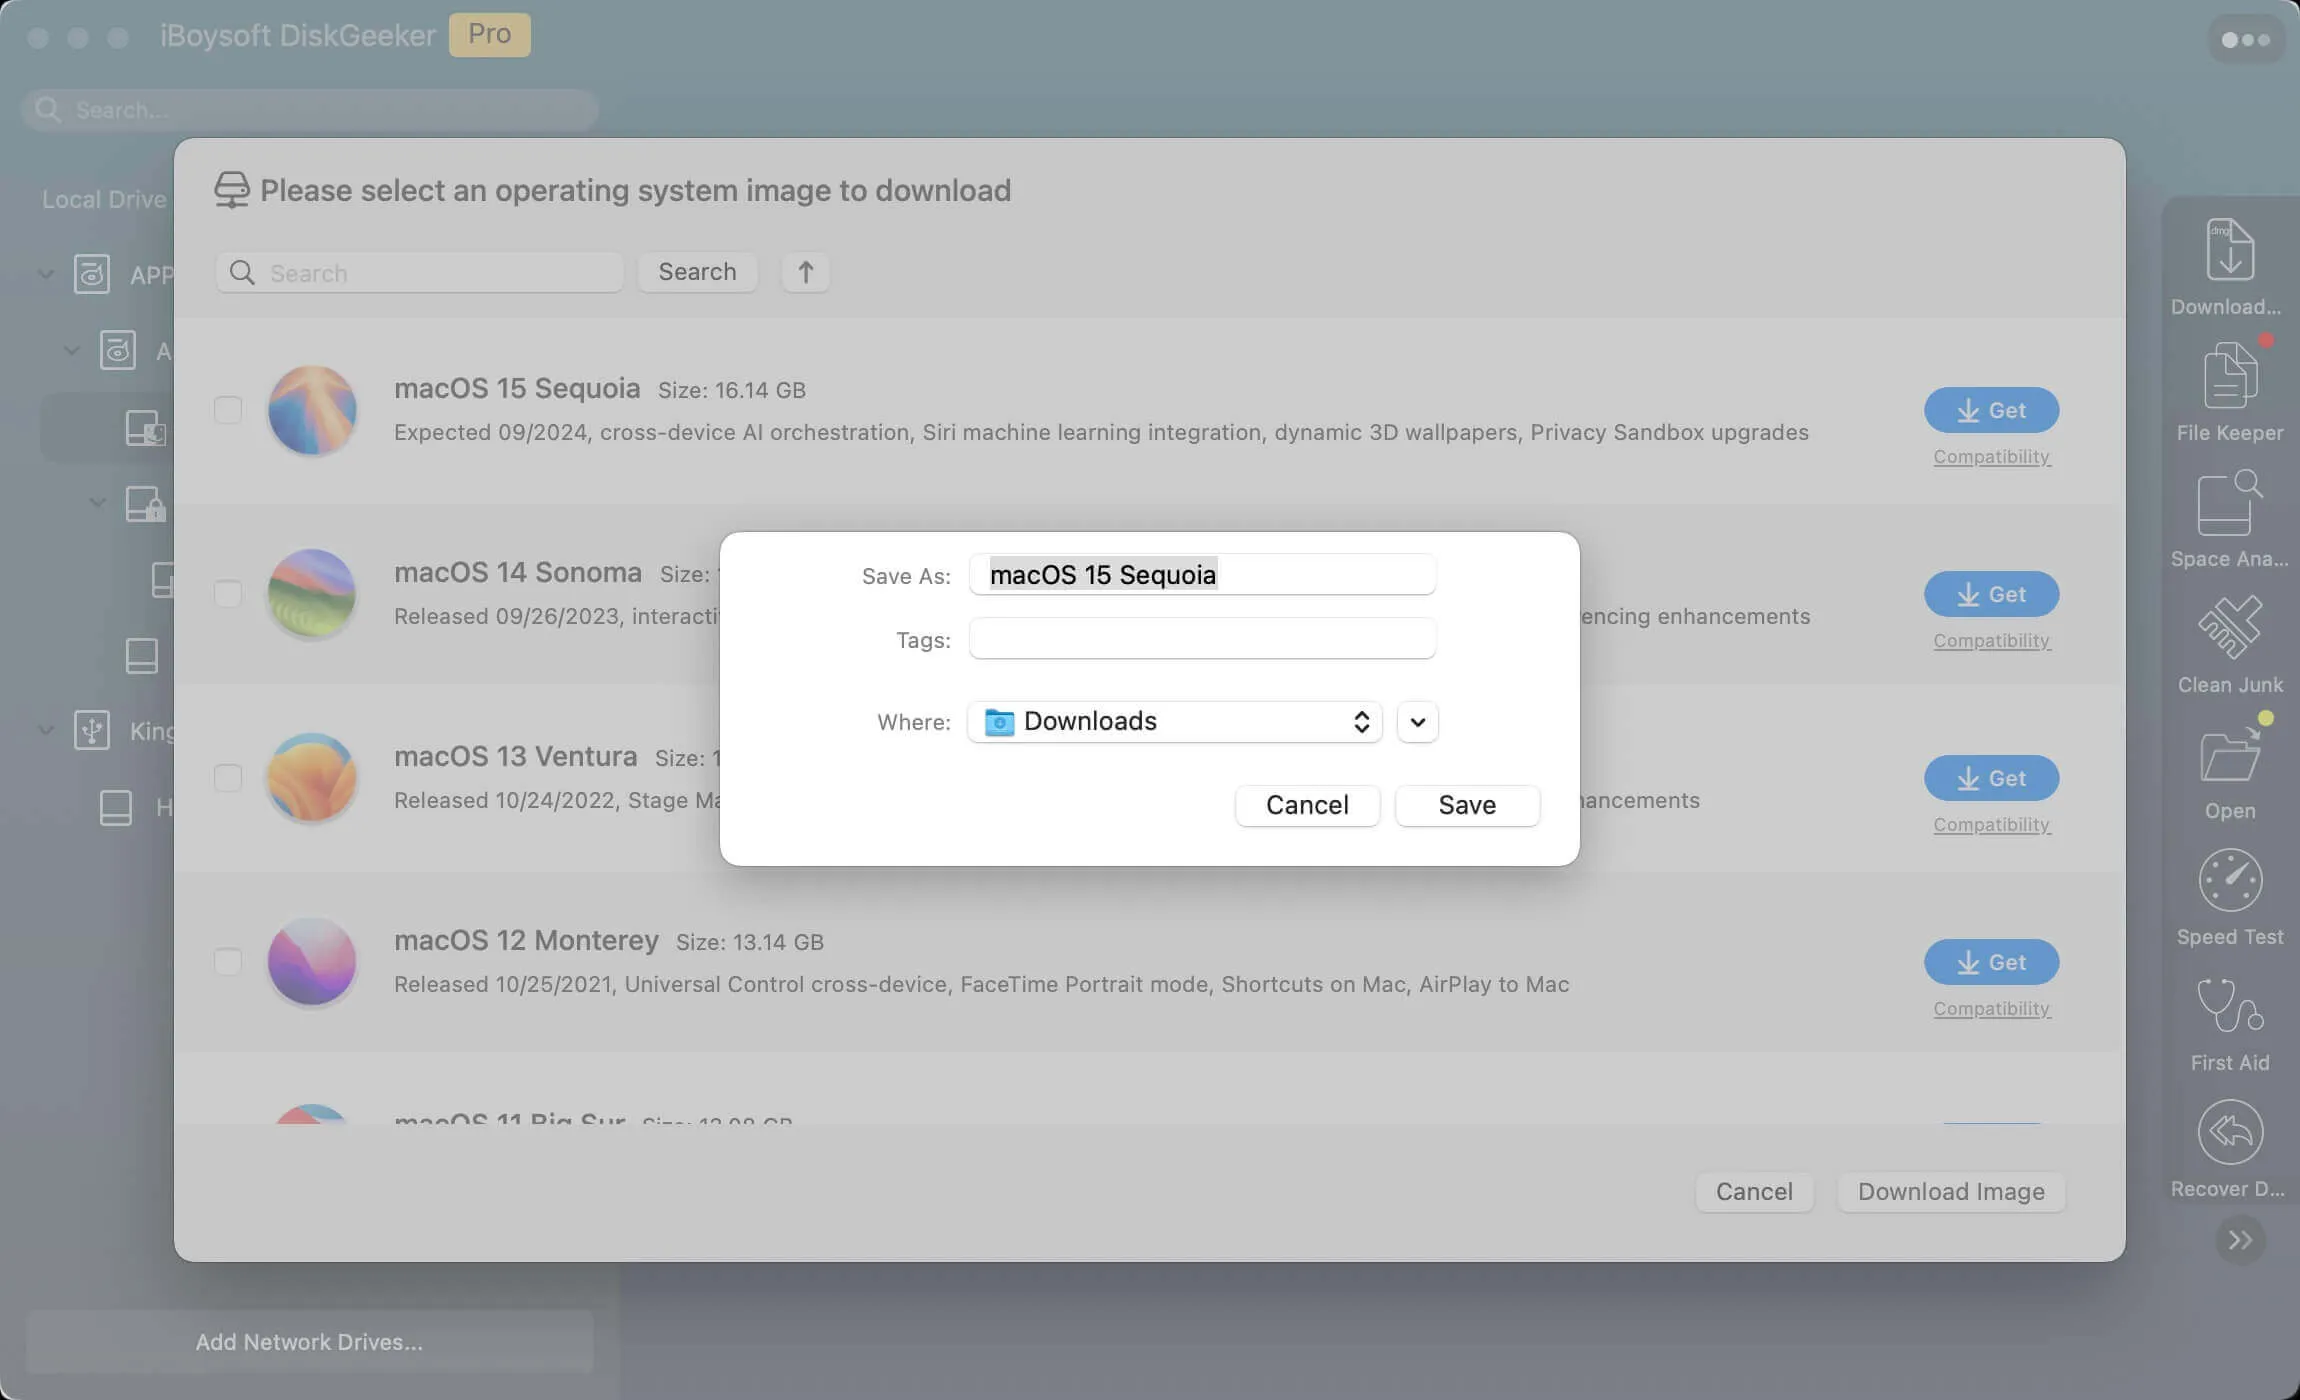
Step 4: Wait for the downloading process to complete.
Learn more about iBoysoft DiskGeeker's Download Image
How to Create a Bootable USB installer for macOS?
iBoysoft DiskGeeker only supports using the ISO-converted DMG file to create a bootable macOS installer. In other words, DMG files downloaded from other sources like the Apple App Store are not allowed to create a bootable macOS installer.
The created bootable USB macOS installer only works on supported Mac models. When you download the target macOS version, click the Compatibility button next to it to check its hardware compatibility.
Step 1: Connect an external hard drive to your Mac.
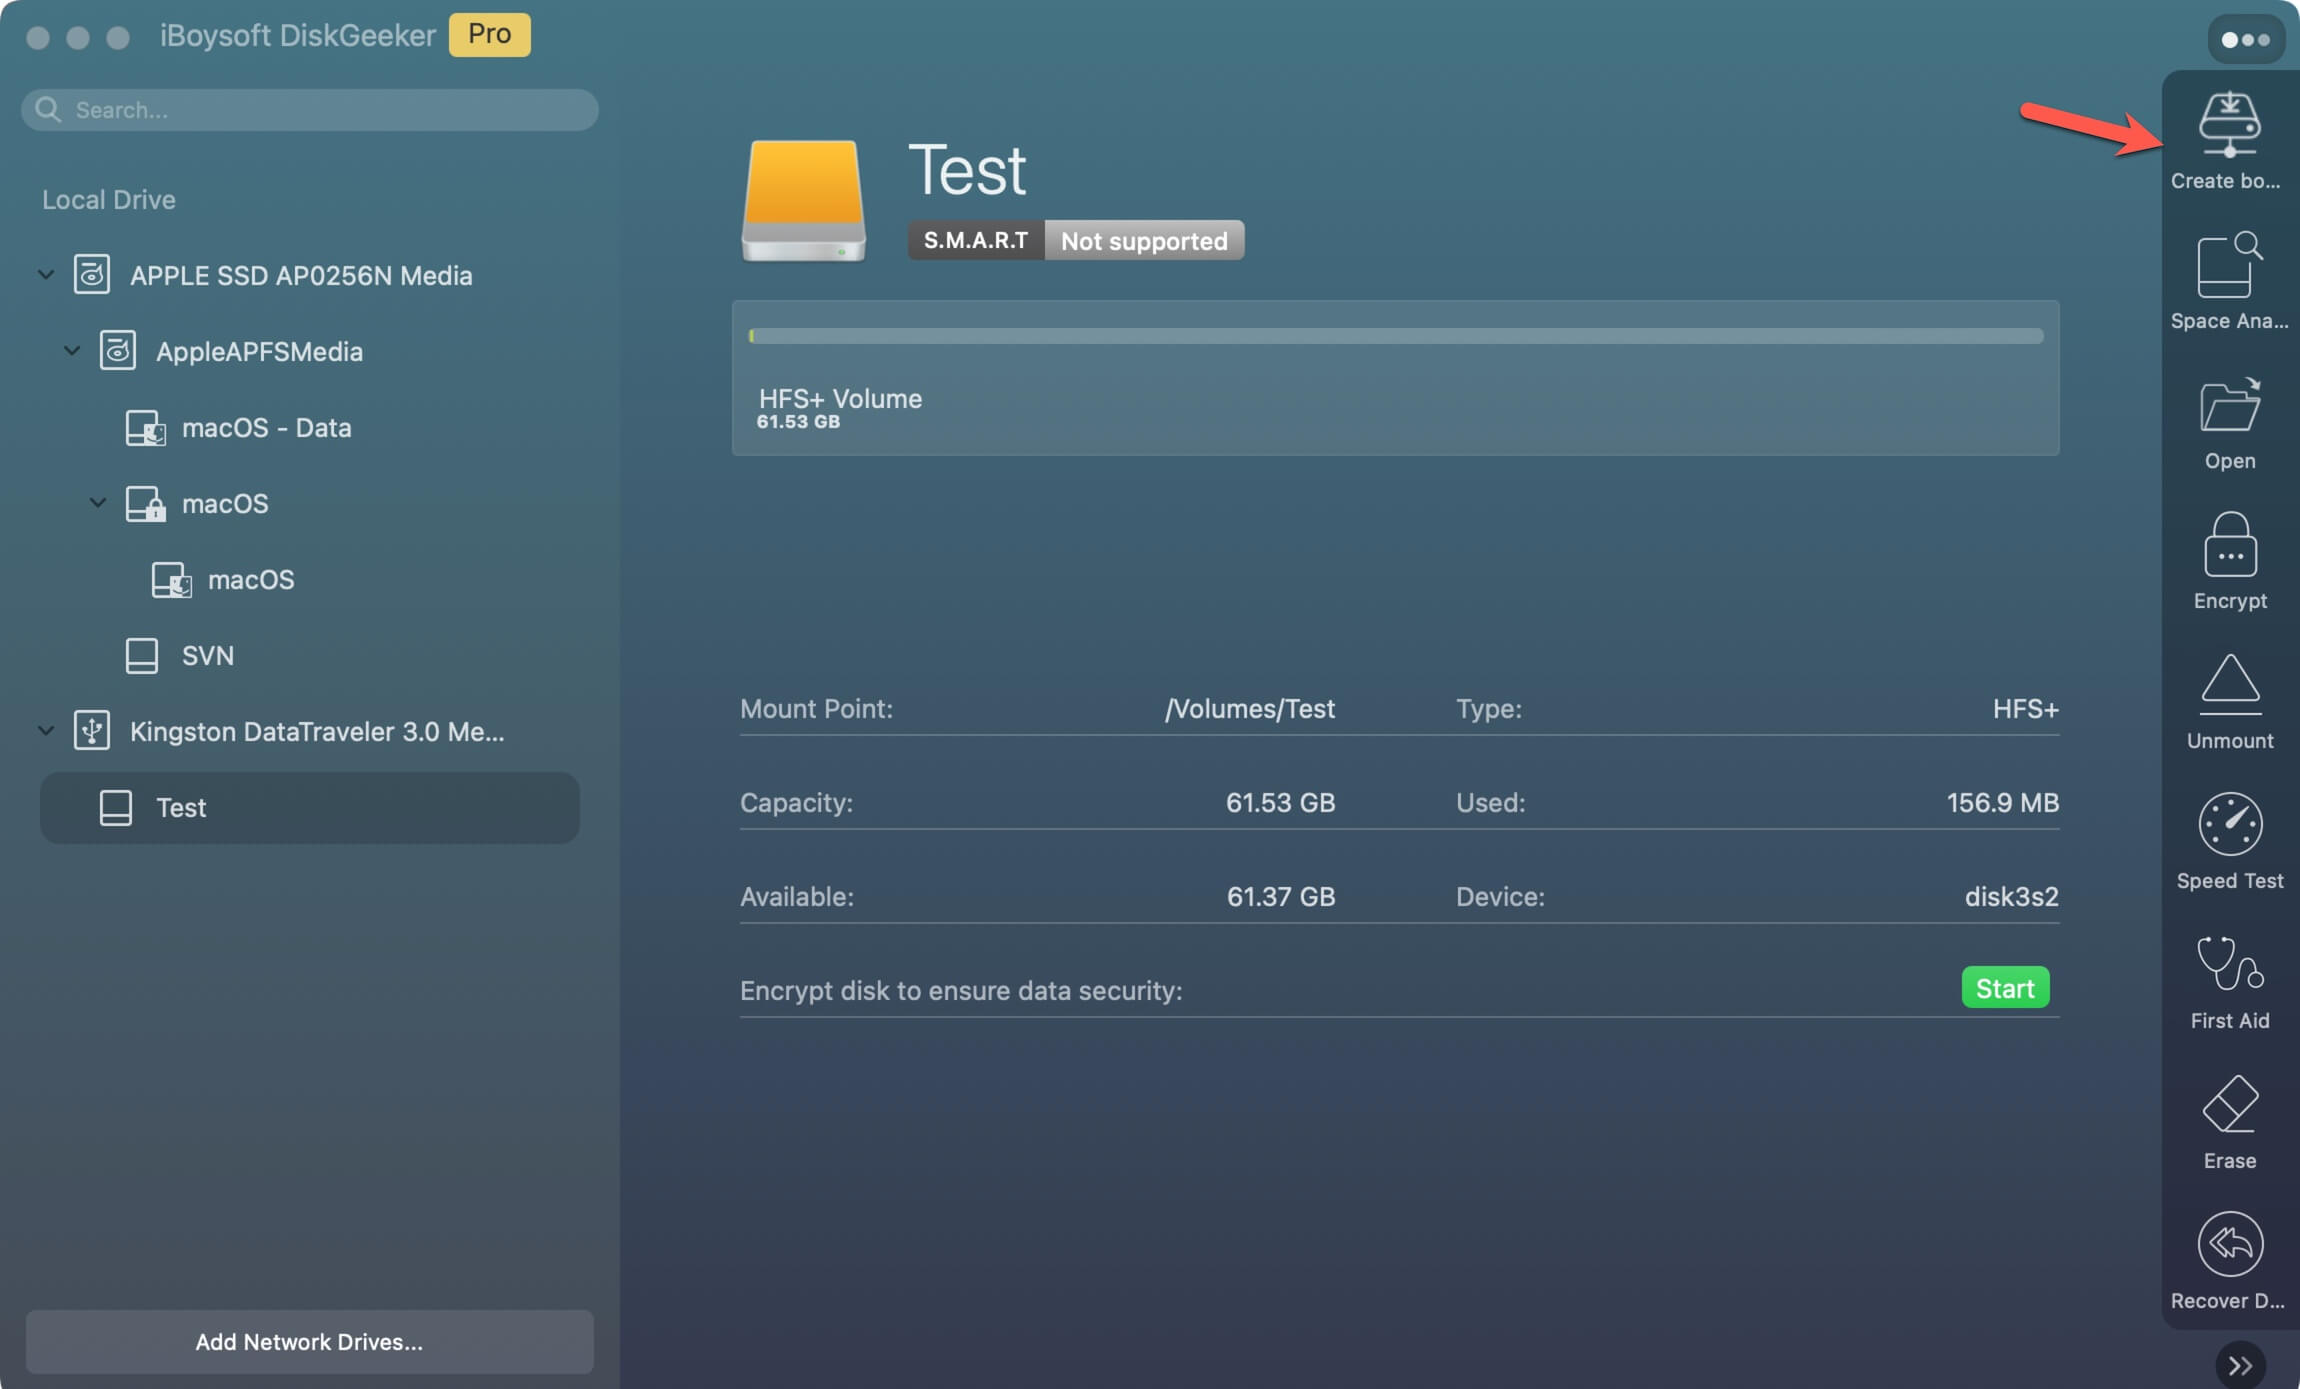
Step 2: Select "Create boot disk" from the left sidebar.
Or, you can select a partition on the external drive from the left sidebar and click "Create boot disk" on the right side toolbar.
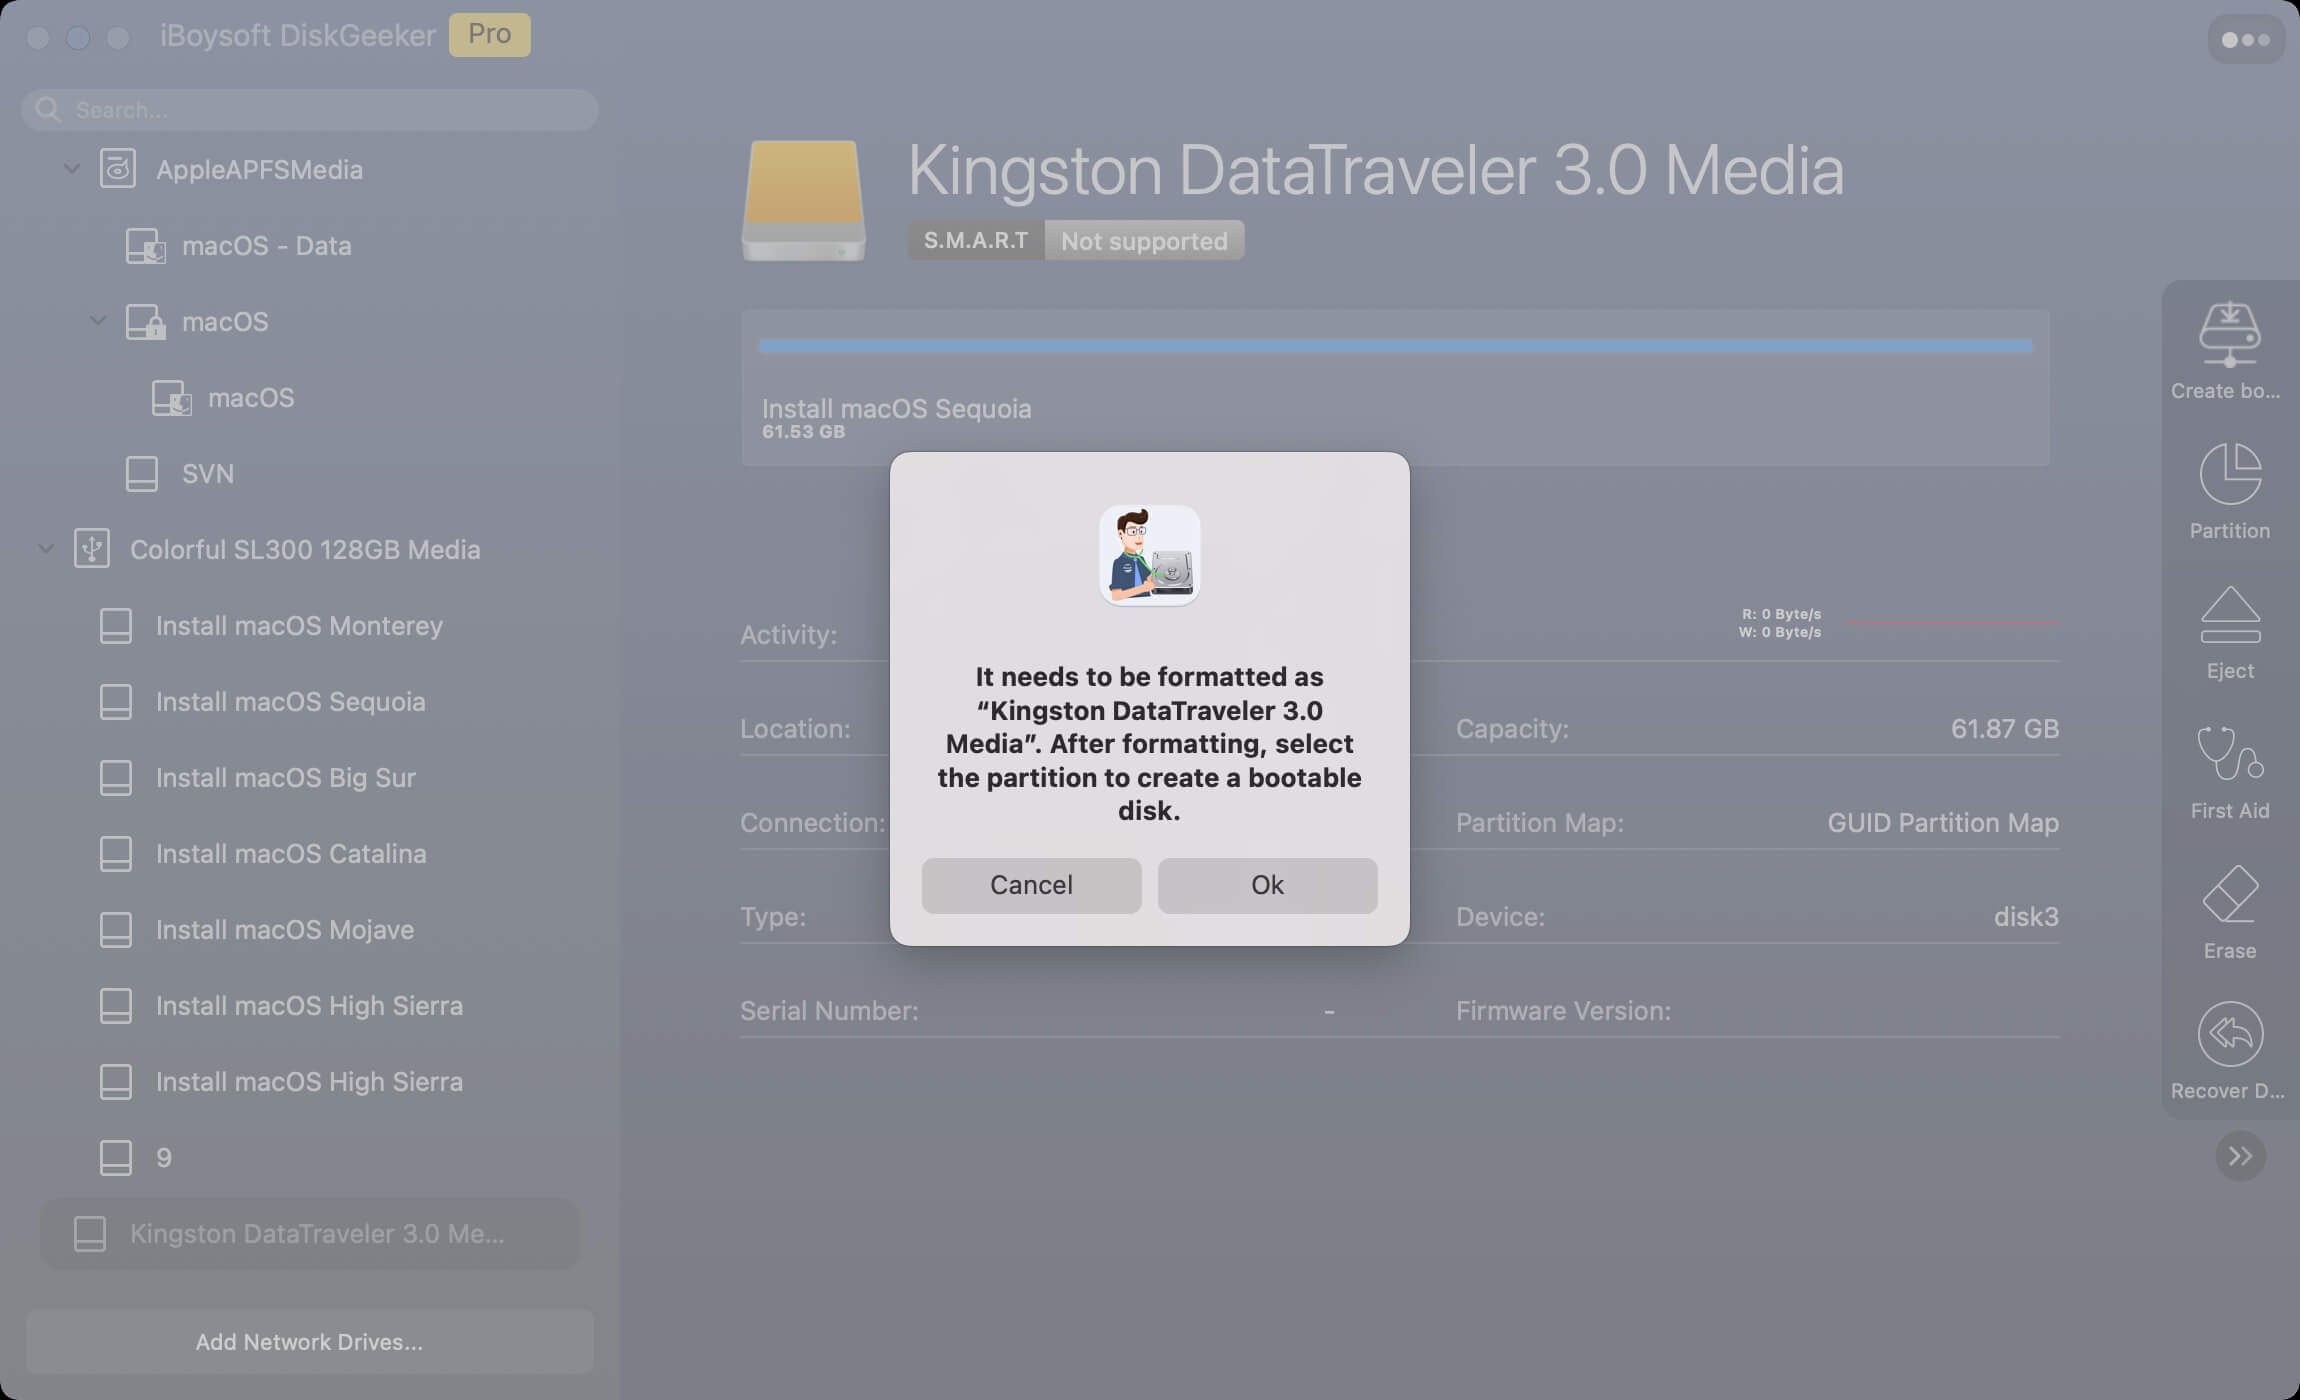
Step 3: Choose the target partition to create a bootable macOS installer > "Select."
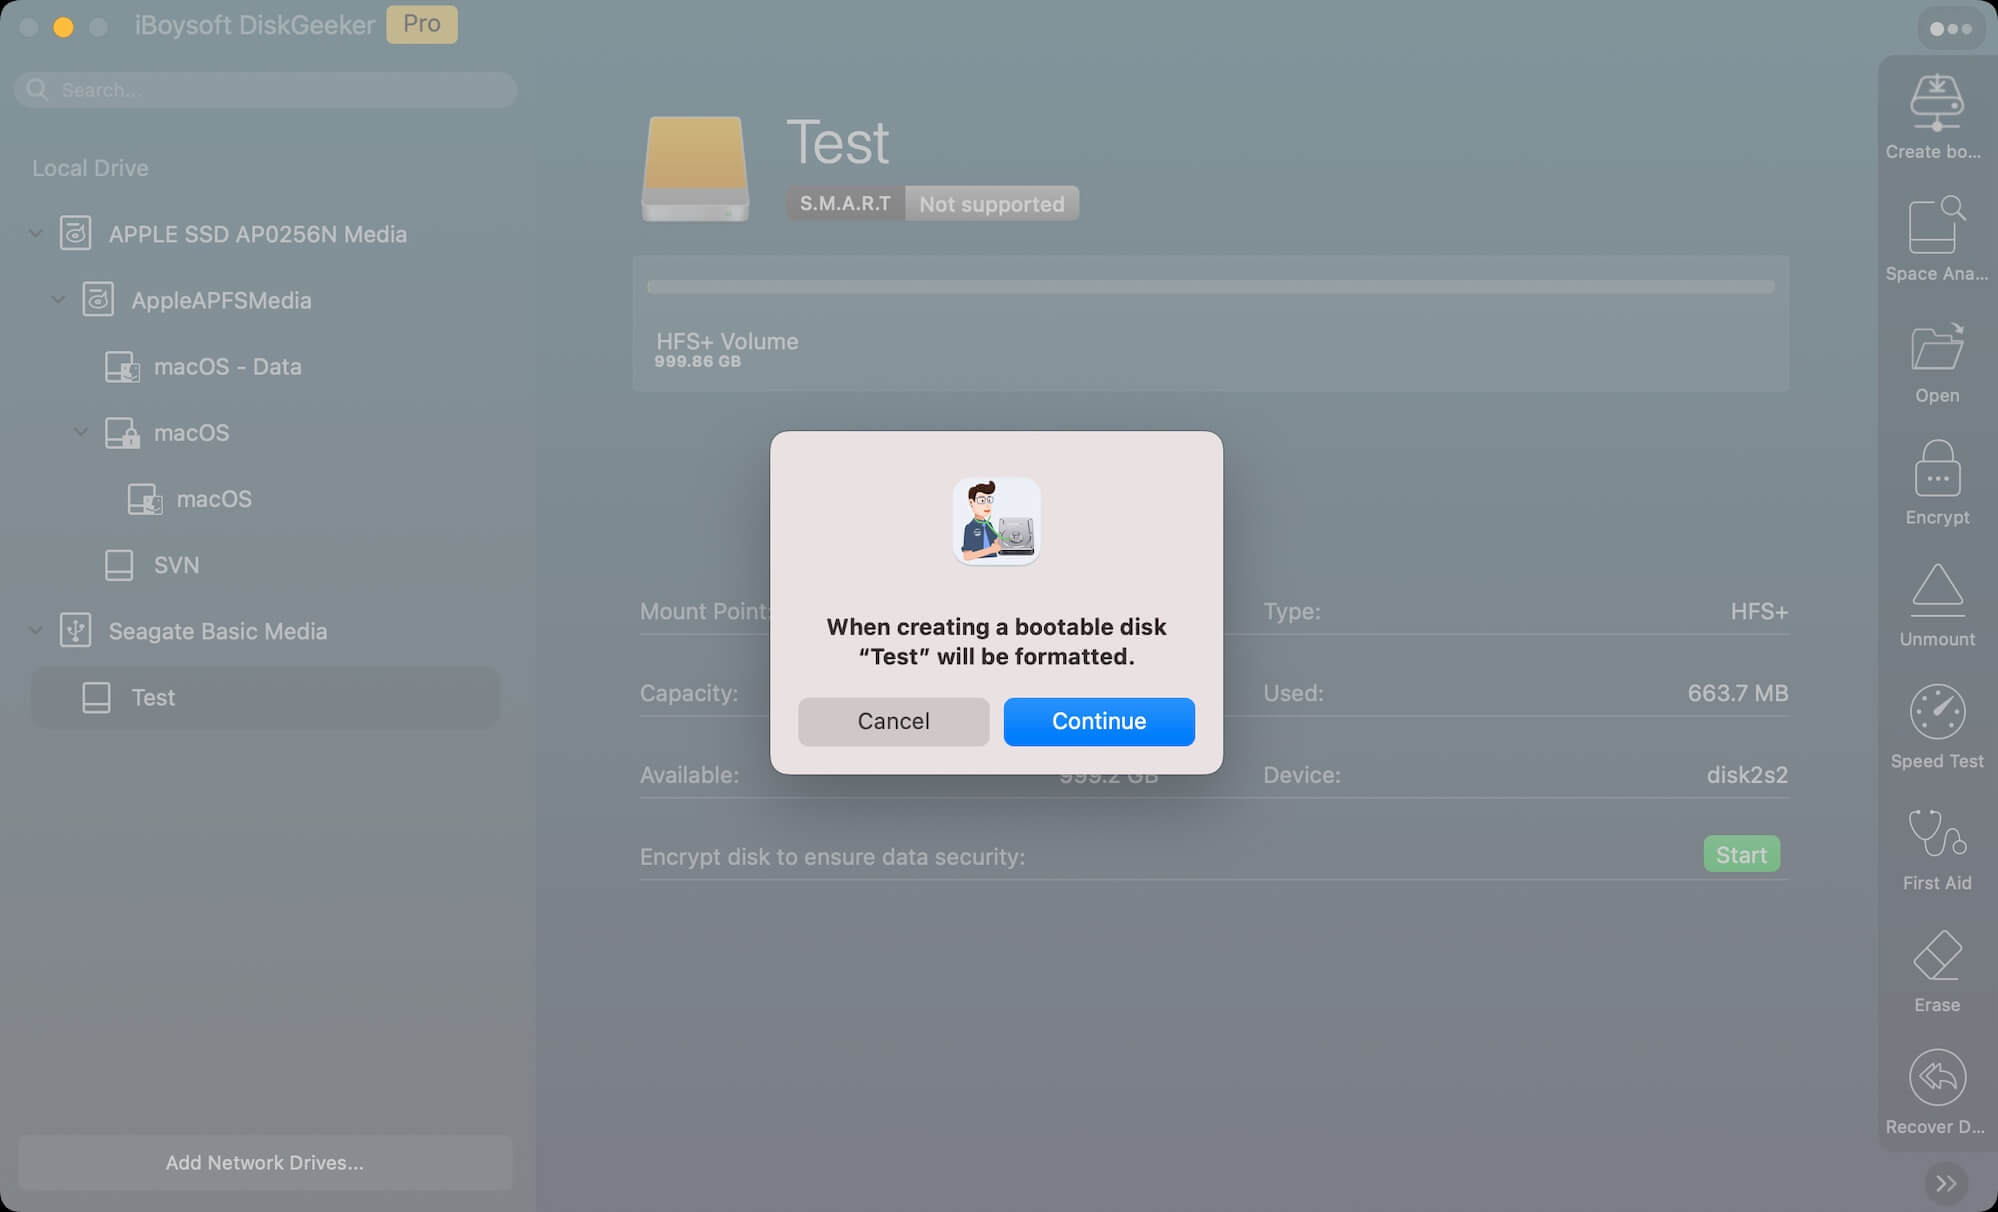
Step 3: Click "Continue" on the dialogue window. Ensure you've backed up data on the external drive before formatting.
Step 4: Select a macOS version you want and click "Create boot disk".
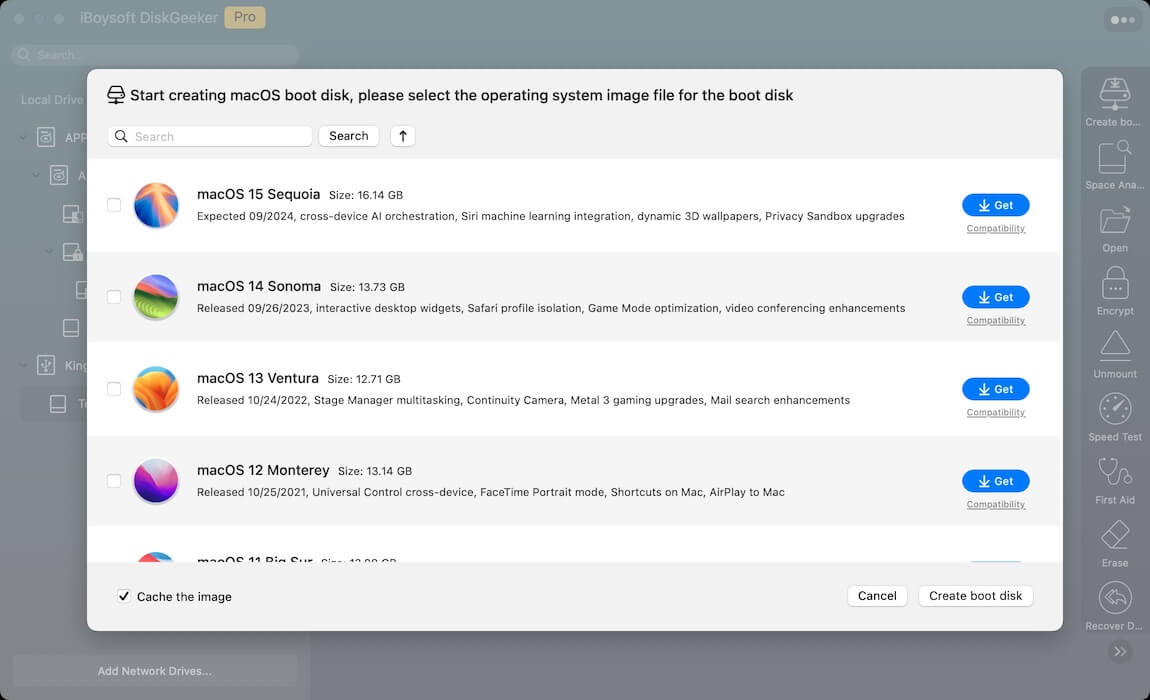
Notes:
• The target partition size must be at least as large as the image file.
• The macOS DMG file will be automatically downloaded to the Downloads folder on your Mac.
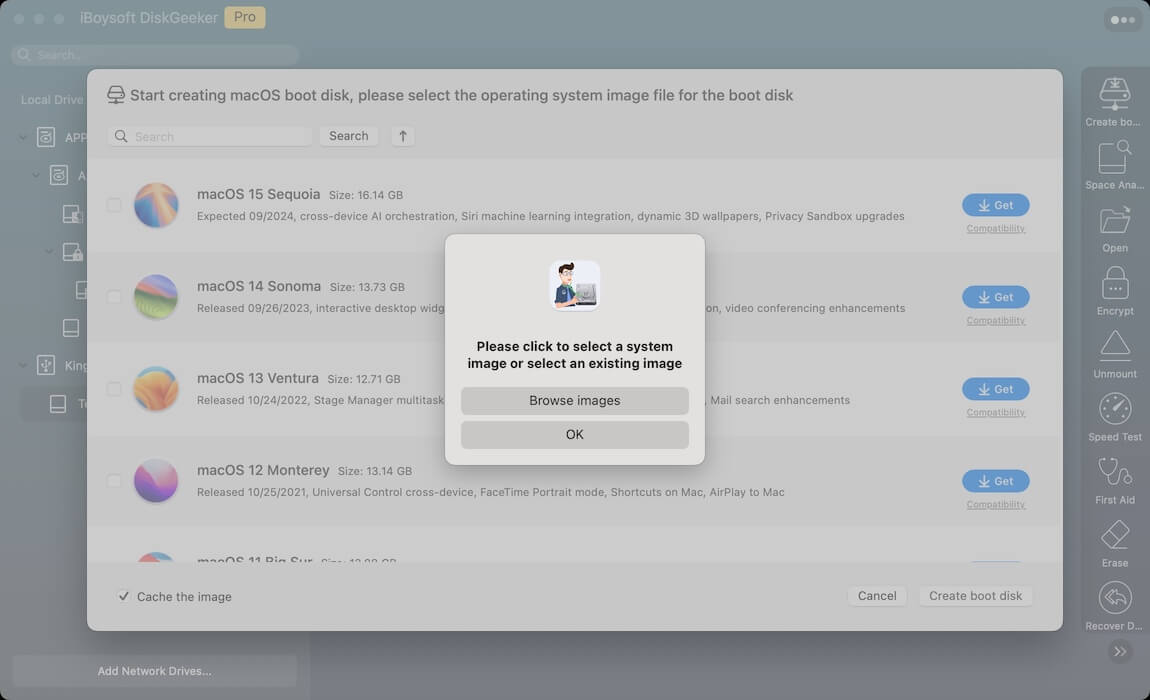
• If you've already downloaded a macOS DMG file, don't select any macOS version. Click "Create boot disk" > "Browse images" to upload it. Then, jump to the Step 7.
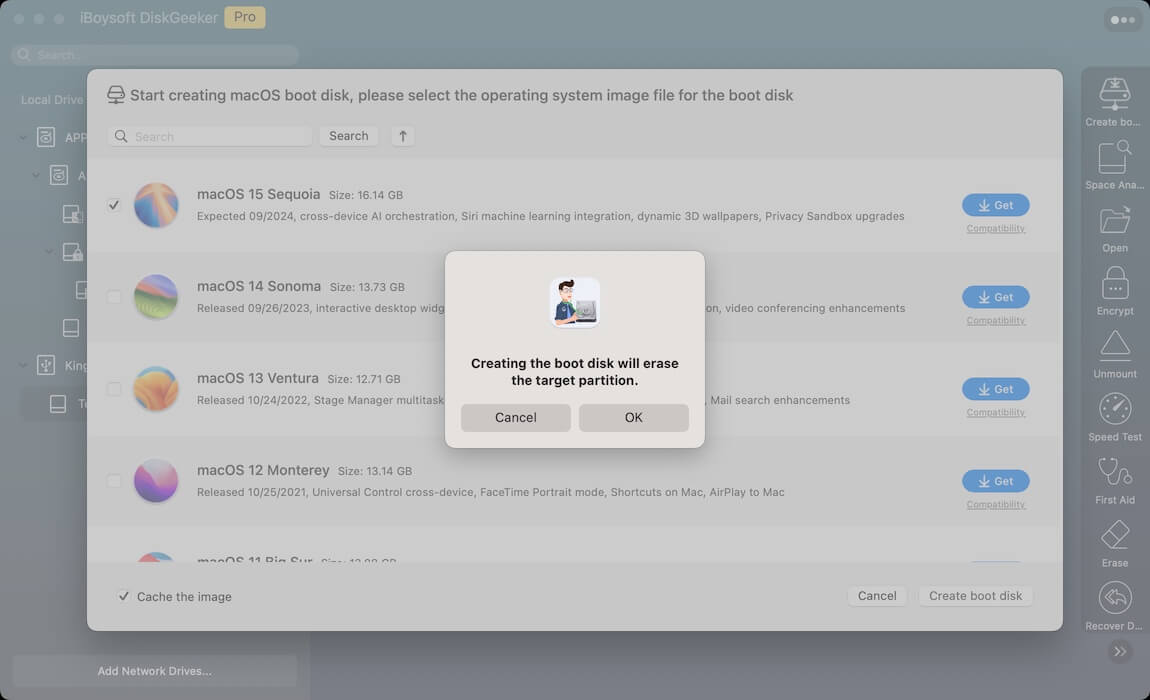
Step 5: Click "OK" on the pop-up alerting you that creating the boot disk will erase the target partition.
Step 6: Wait for the macOS DMG downloading process to complete.
Notes:
• During the process, keep your Mac charged and the network stable.
• If you want to cancel the process, click the X button. The canceled process can't be resumed.
Step 7: Once the DMG downloading process finishes, click "OK" on the prompt reminding you that creating the boot disk will erase the target partition.
Step 8: Wait for the bootable macOS installer to be created.
Step 9: Click OK on the "Boot disk creation completed" pop-up.
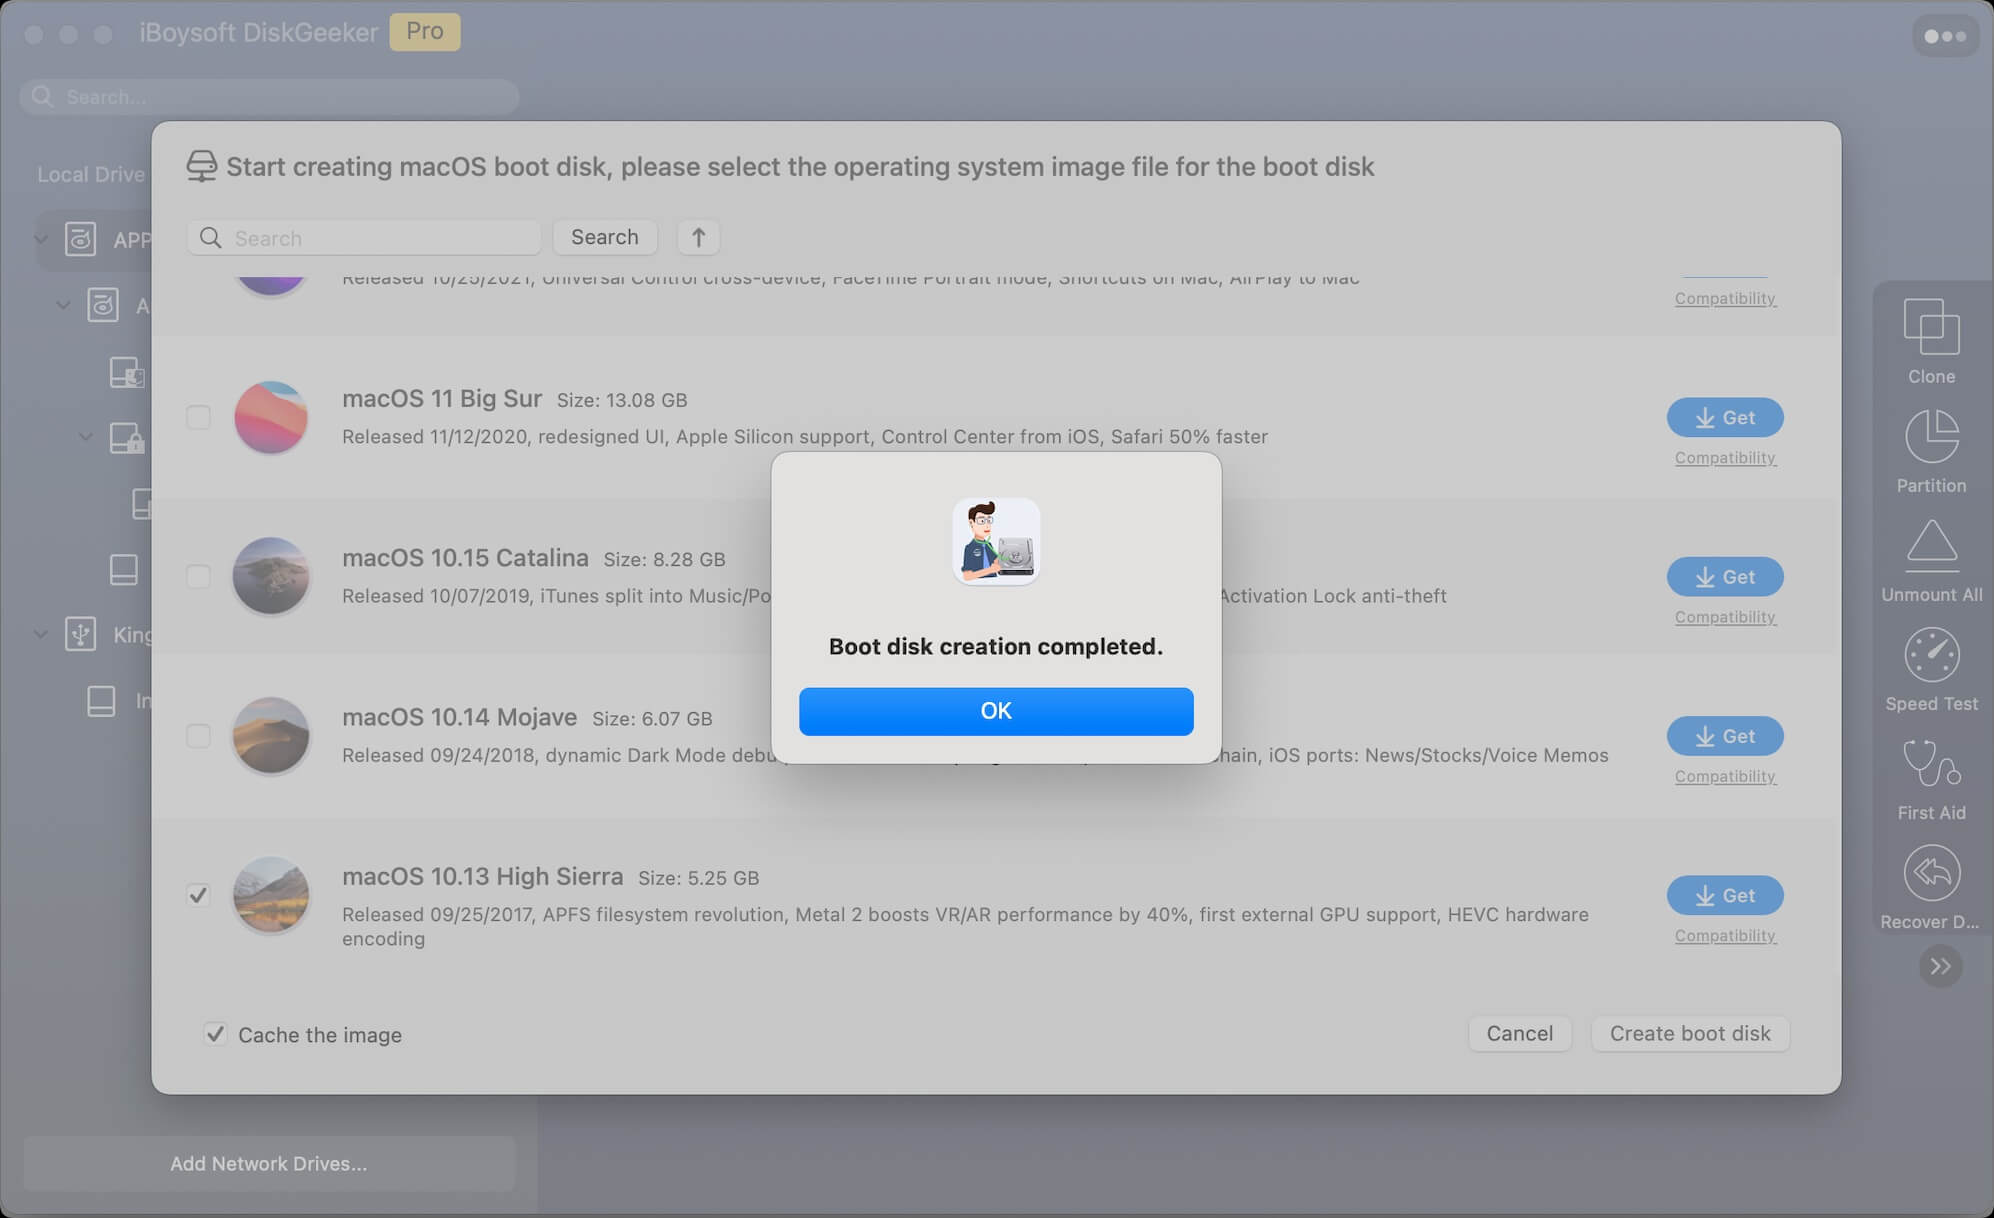
Now, you can use the macOS bootable installer to start up your Mac that won't boot, finish a clean install, or boot multiple Macs.
Notes:
When using the macOS bootable installer, pay attention to these things:
• On T2-secured and Apple silicon Macs, ensure you've changed the security settings in macOS Recovery to allow your Mac to boot from external media.
• Only Mac devices that support the target macOS version can boot from this USB drive.
• If your Intel-based Mac fails to boot from the USB drive with the Option (Alt) key, follow these steps:
1. Restart your Mac while pressing down the Command - Option - R - P keys together until the progress bar or Apple logo appears. This is to clear the cache that may cause booting trouble.
2. Restart your Mac, and meanwhile, press and hold the Option key until the bootable USB drive shows.
3. Select the USB drive and press "Return."
4. Choose your language, select Install macOS from the Utilities window, and follow the on-screen instructions to boot your Mac from the USB.
Learn more about iBoysoft DiskGeeker's Create Boot Disk
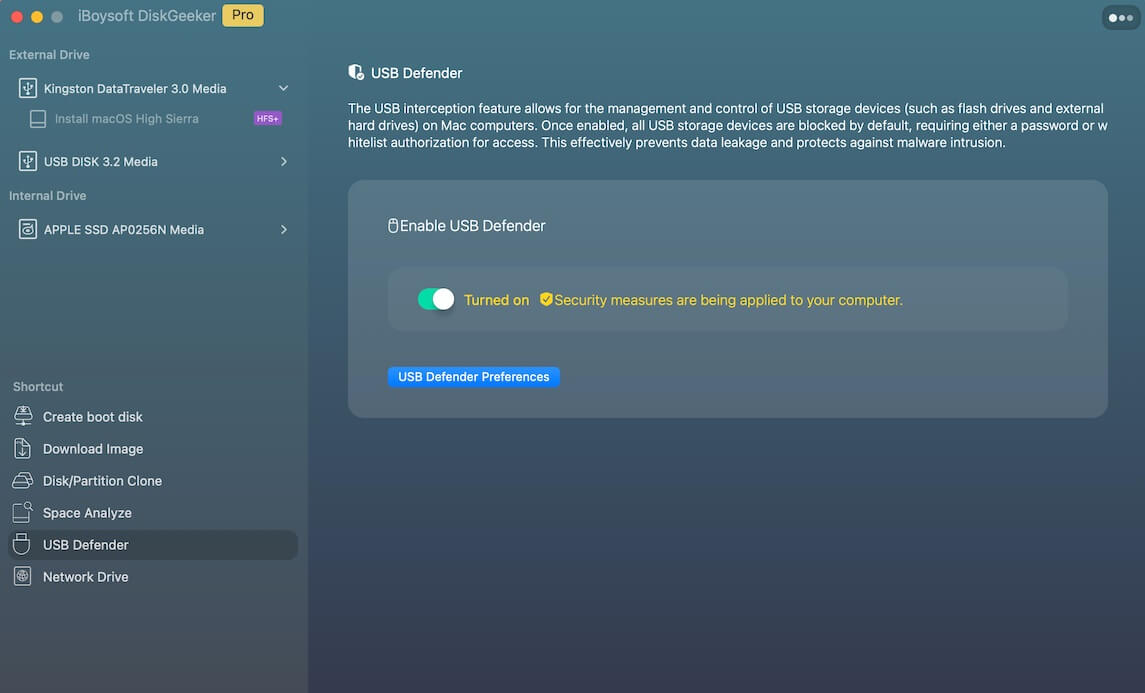
How to Enable USB Defender?
Step 1: Click "USB Defender" on the sidebar and enable USB Defender.
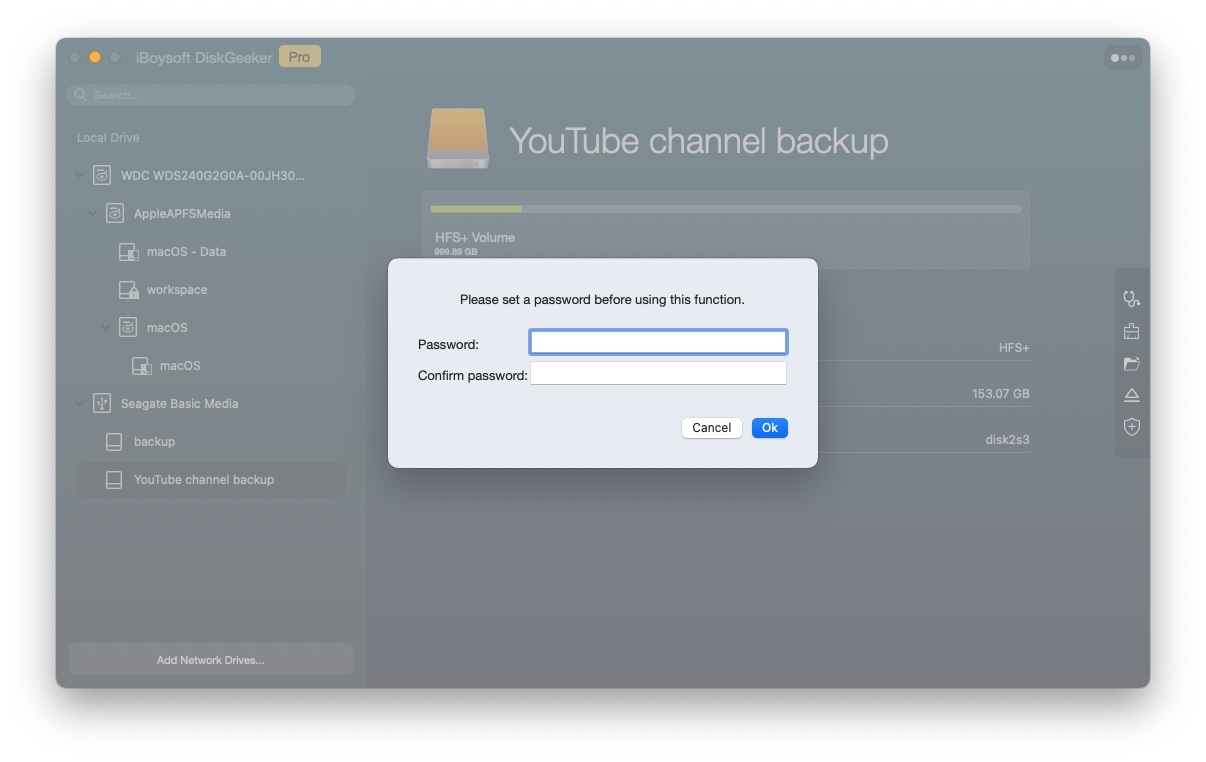
Step 2: Enter your password to protect your USB drives. Your password should be less then 48 digits and has no requirement on letters, numbers, or special characters.
Note: After you enable USB Defender, all your USB drives connected to the Mac will be unmounted. You need to manually mount them and enter the correct password for USB Defender.
Step 3: Go to "USB Defender" > "USB Defender Preferences" and then enter USB defender password to change settings and password.
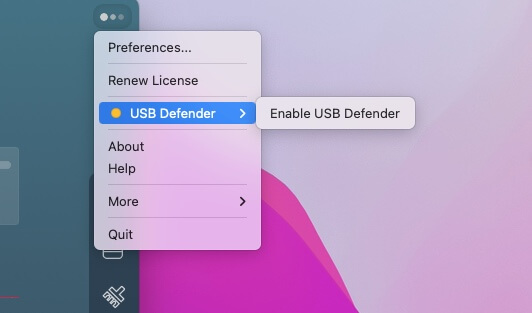
Or, you can click the three dots  > "USB Defender" > "USB Defender Preferences."
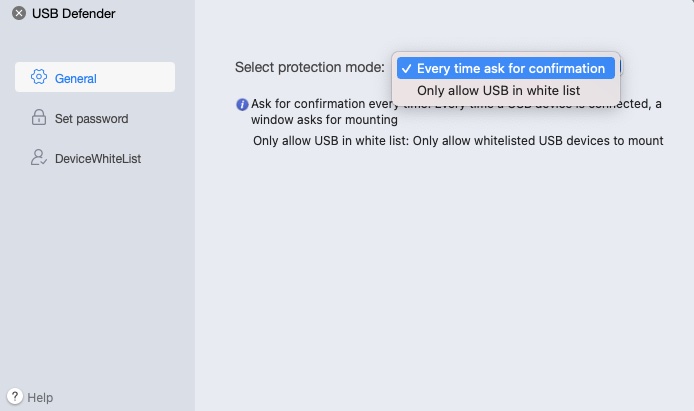
Every time ask for confirmation (default): every time iBoysoft DiskGeeker detects a USB device, it will ask you to enter the correct password to allow Mac's Disk Utility and iBoysoft DiskGeeker to mount it.
Only allow USB in whitelist: the software only allows USB devices that have been added to whitelist to be mounted.
Learn more about iBoysoft DiskGeeker's USB Defender feature.
How to Disable USB Defender?
Step 1: Click "USB Defender" on the left sidebar.
Step 2: Slide off the button and enter your password.
Also, you can click the three dots > "USB Defender" > "Stop USB Defender" and enter your password.
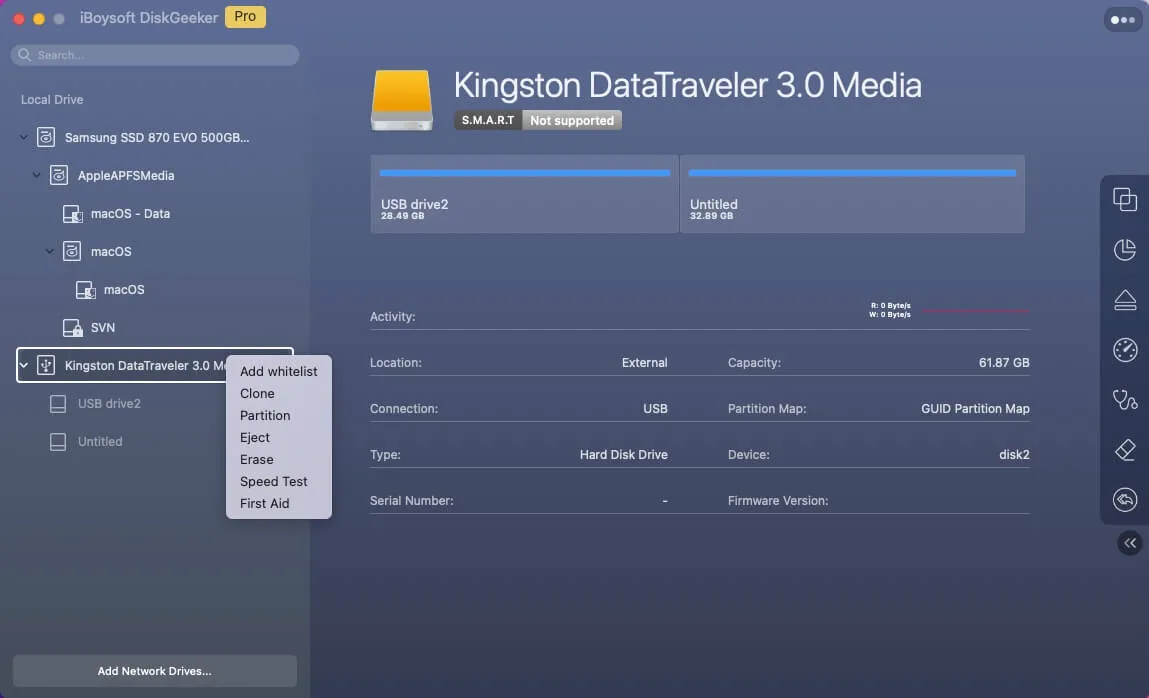
How to Add a Device to Whitelist?
Note: All devices that are not added to whitelist will be locked. You can't have any read and write operations even with the built-in Disk Utility application.
Step 1: Select the disk (not the partition) in the disk list from the left panel.
Step 2: Right-click it and select "Add whitelist".
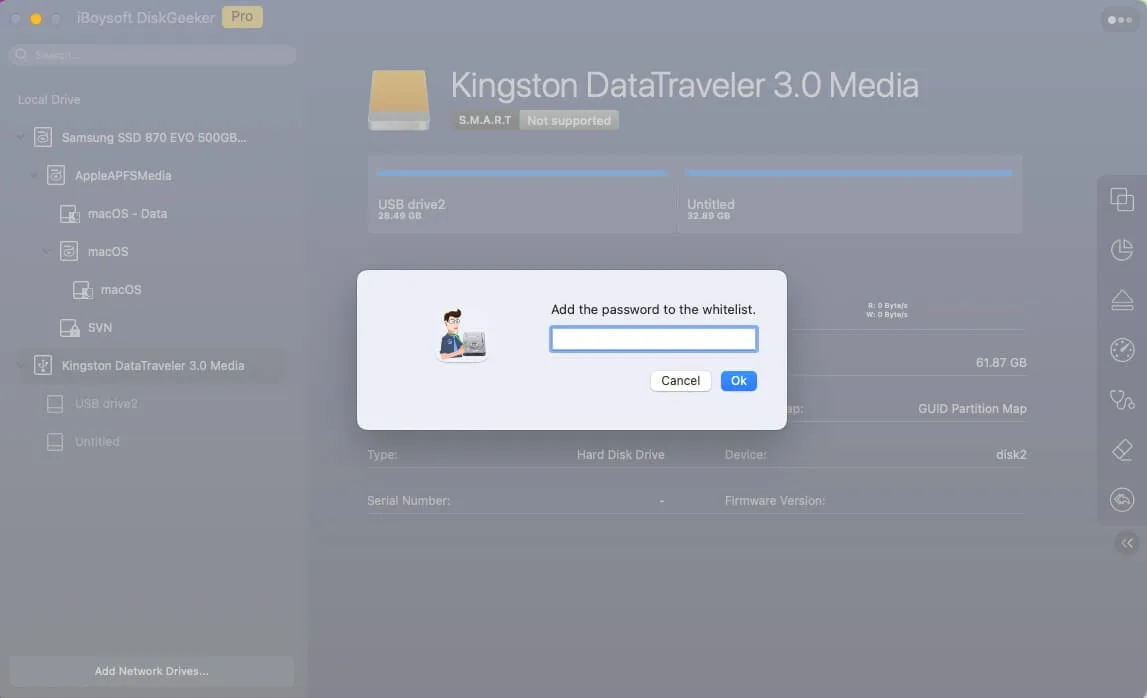
Step 3: Enter a password for your whitelist.
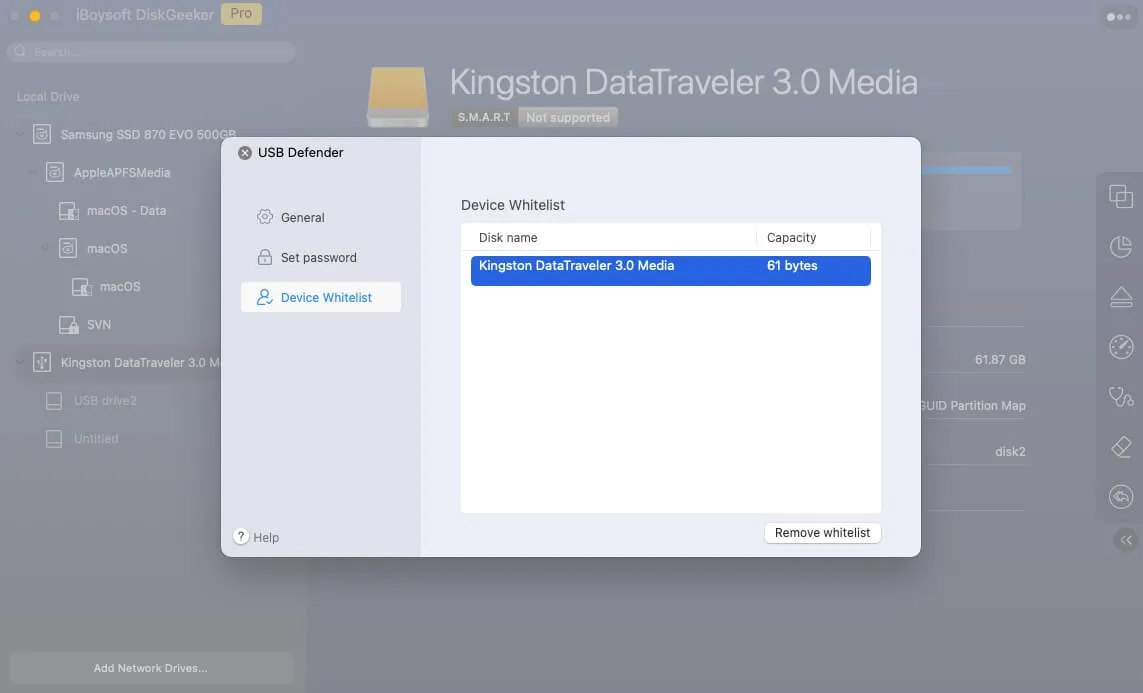
Step 4: Check the whitelist by going to "USB Defender" > "USB Defender Preferences," enter your password, and click "Device Whitelist."
How to Remove a Device from Whitelist?
Step 1: Click "USB Defender" > "USB Defender Preferences" and enter your password.
Step 2: Select "Device Whitelist."
Step 3: Select the device in the list and click "Remove Whitelist."
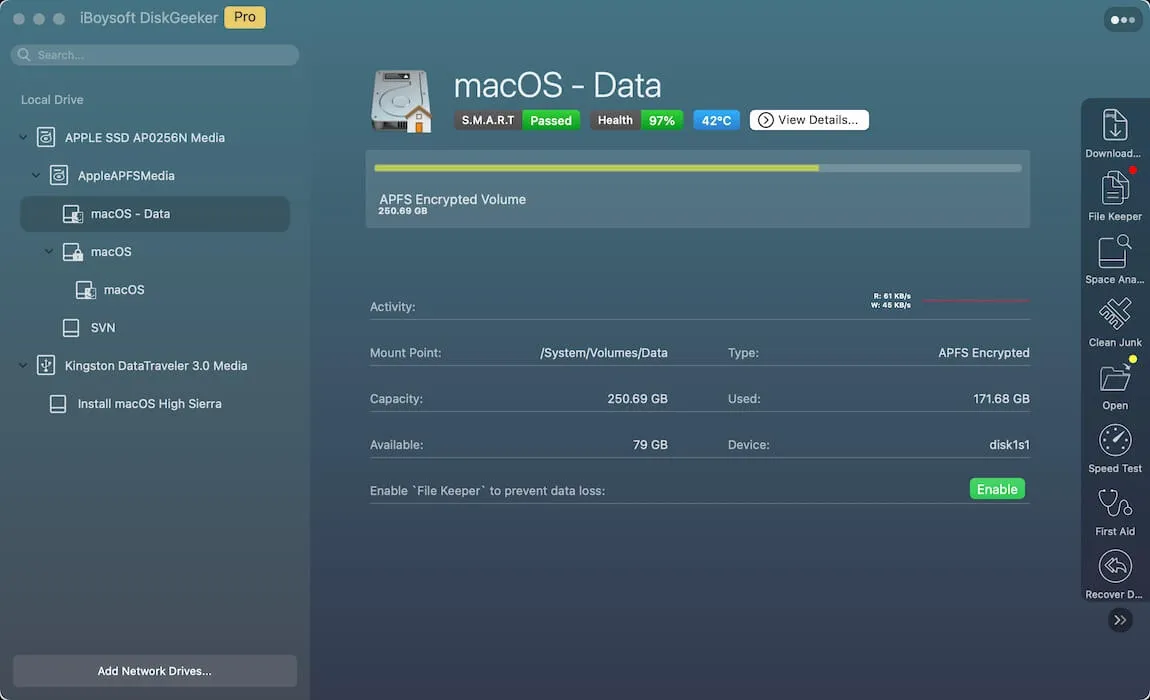
How to Use File Keeper to Back Up And Restore Files?
File Keeper is a backup fucntionality that used to back up and restore data on APFS volumes only.
How to Back Up an APFS Volume?
Step 1: Select the target APFS volume on the left sidebar.
Step 2: Click "File Keeper" from the right-side toolbar.
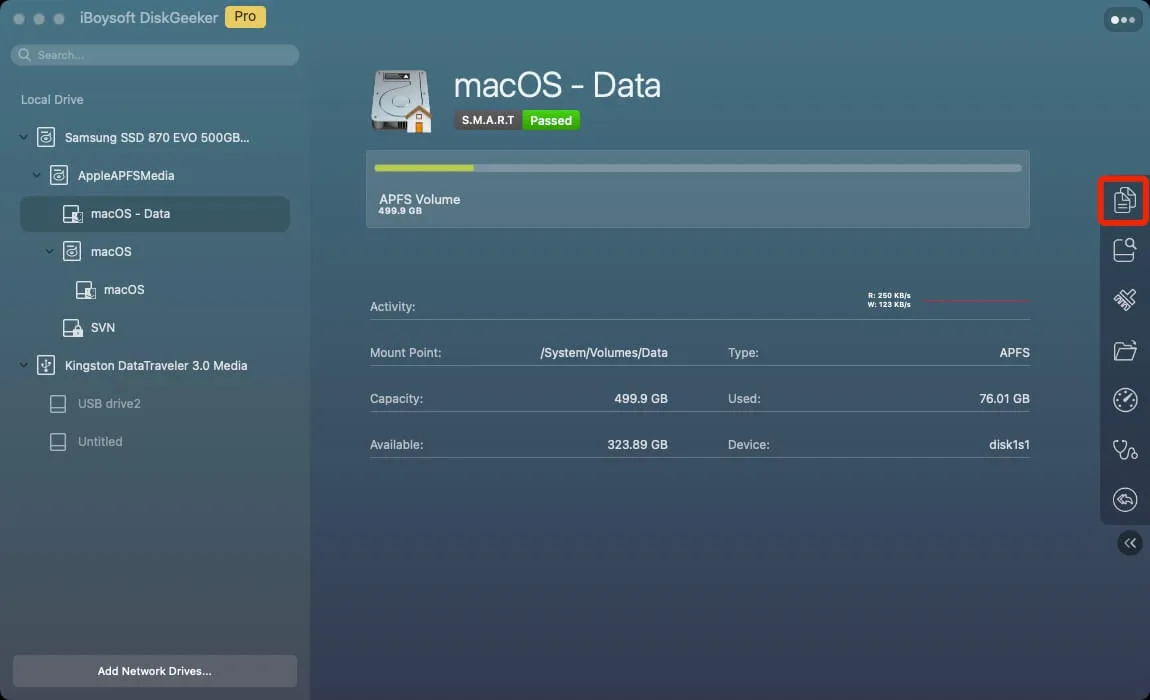
Step 3: Click "Turn On" on the popup window.
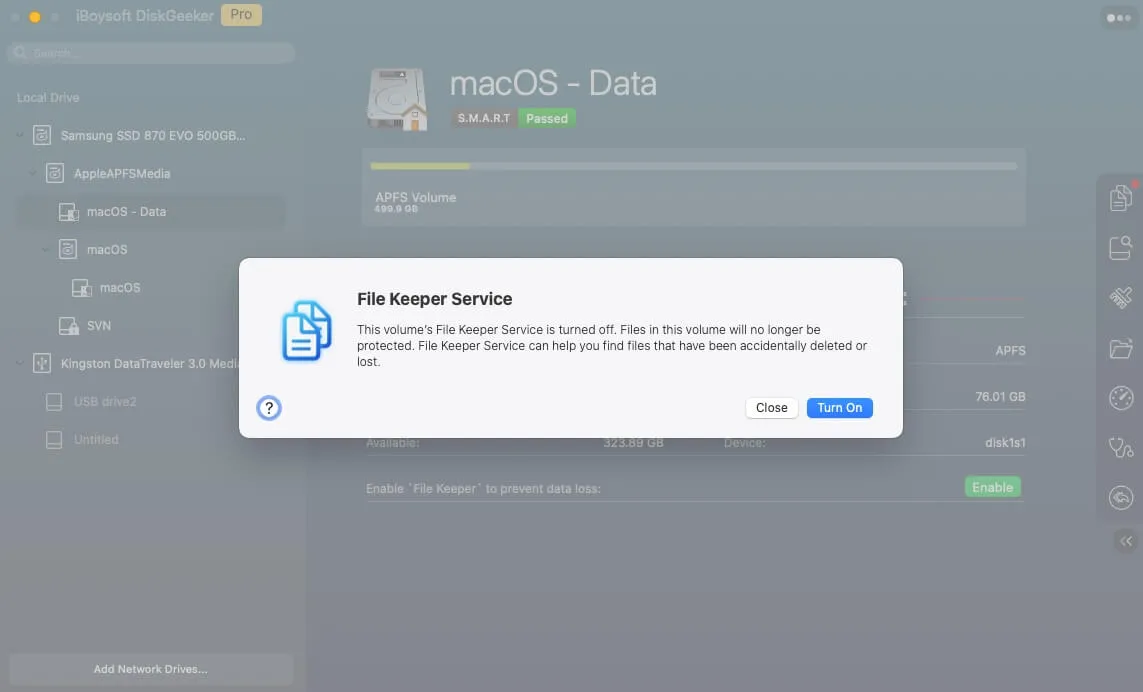
By default, once you enable File Keeper, it starts to back up the target APFS volume automatically. To disable File Keeper, click the gear icon at the upper right corner > "Turn Off".
Note: If you want to change the backup settings, click the gear icon > Options to open the backup preferences pane.
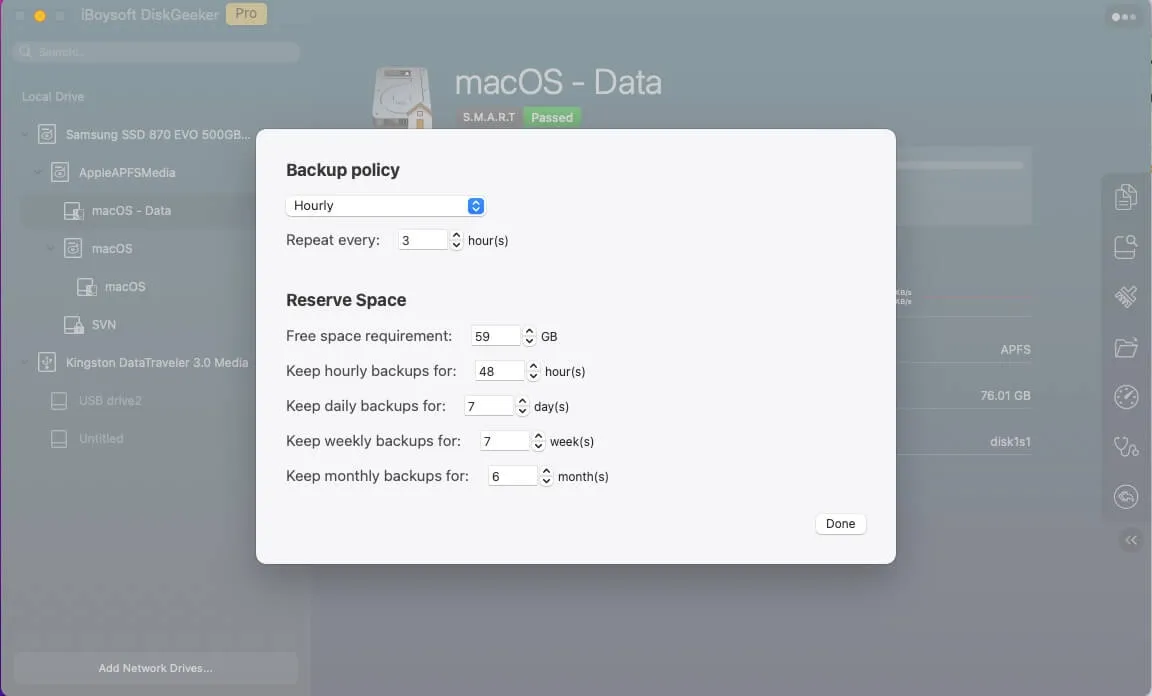
In the Backup policy section:
1. You can set it to allow iBoysoft DiskGeeker to back up the target APFS volume hourly, weekly, daily, or monthly.
2. On the box next to Repeat every, set an interval time to repeat each backup.
In the Reserve Space section:
1. Choose an amount of free storage capacity you want (the minimum requirement is 15GB) beside the Free space requirement box. Files on the target volume can be backed up only if the volume has the free space you set.
2. Set the retention time for hourly, daily, weekly, and monthly backups.
How to Search Files from File Keeper Backups?
Step 1: Select the target APFS volume on the left sidebar.
Step 2: Click "File Keeper" from the toolbar.
Step 3: On the pane, set the searching range from your backups to quickly locate the target backup files.
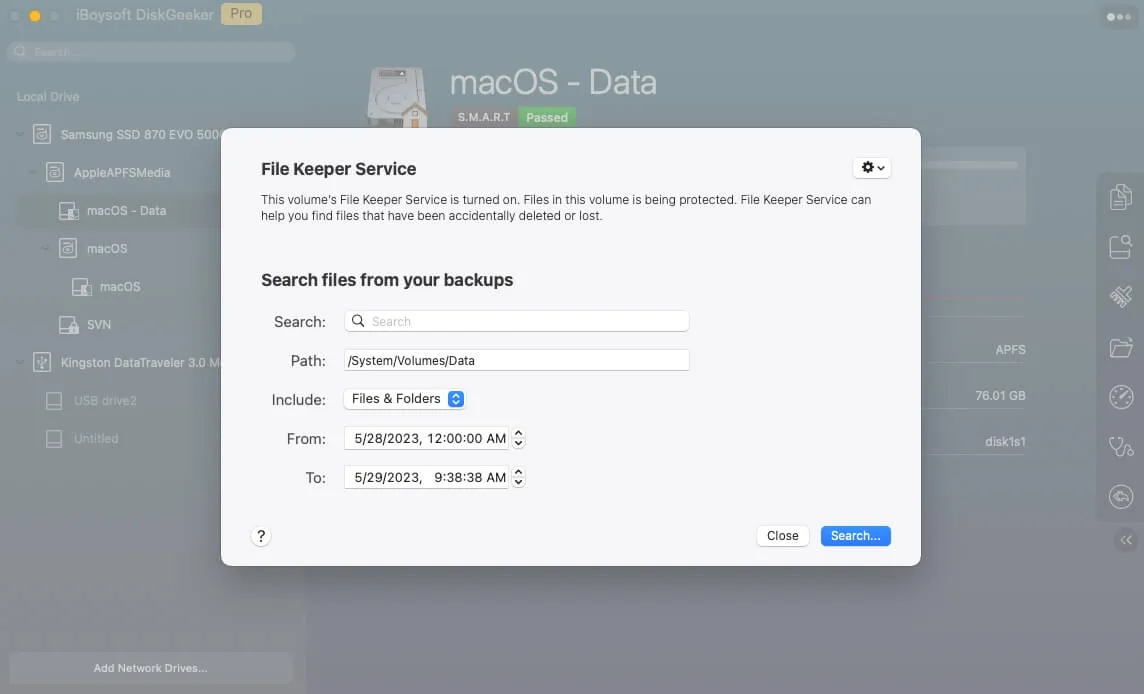
Step 4: Click "Search".
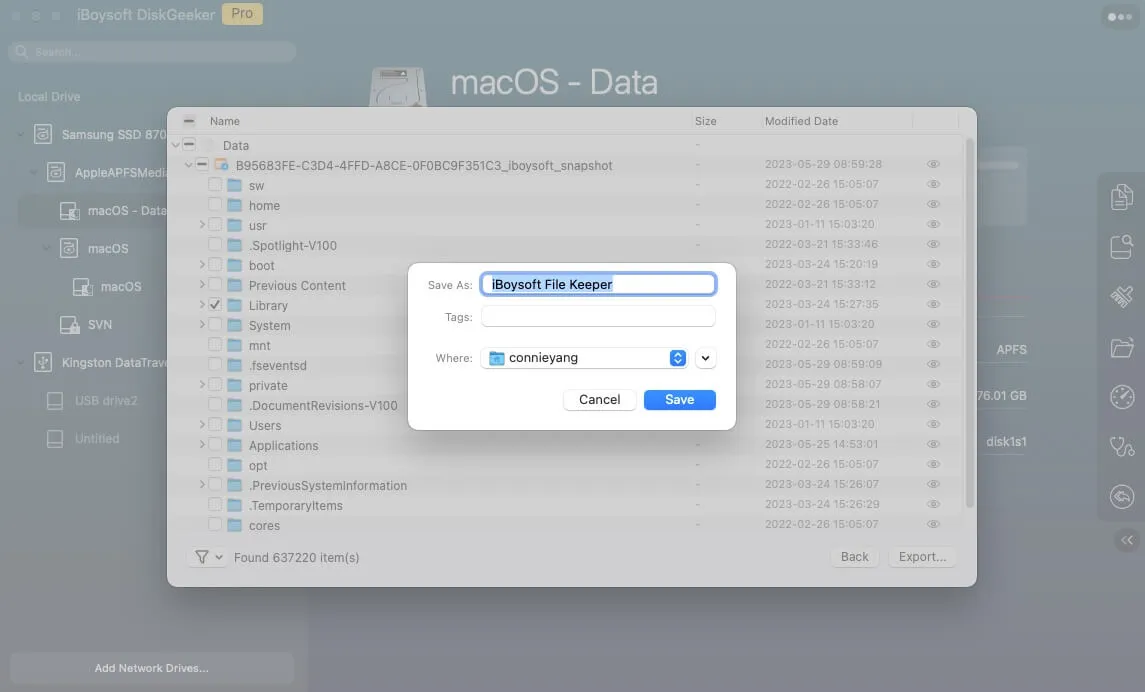
Step 5: Expand the backup folders and tick in your desired files.
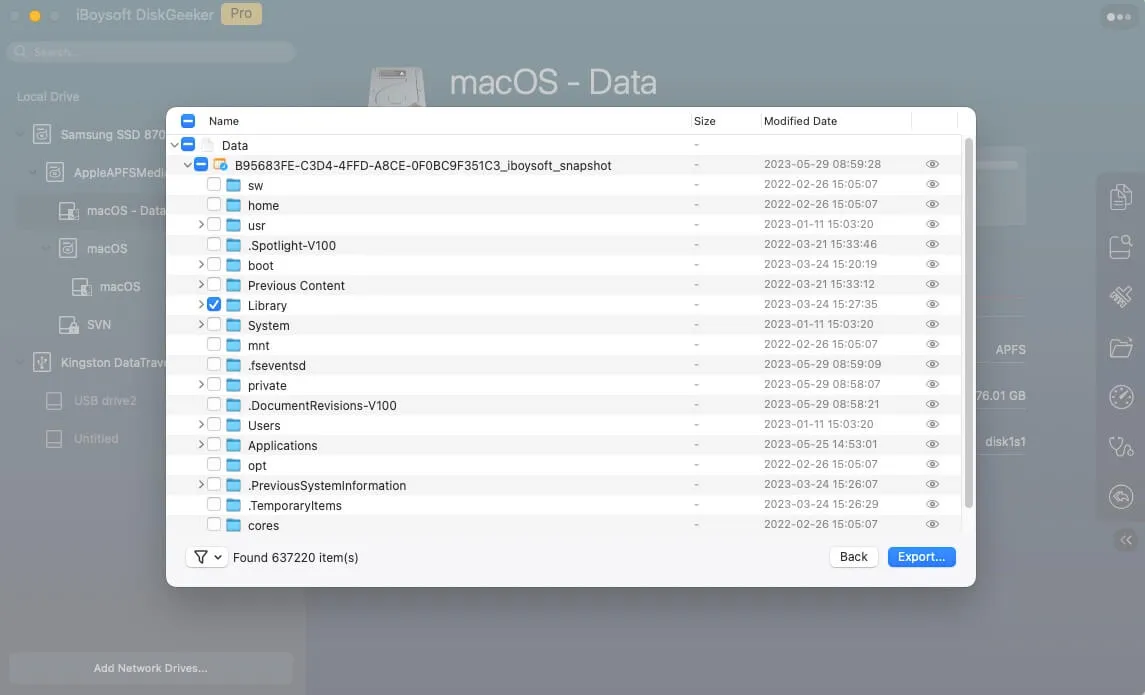
Step 6: Click "Export".
Step 7: Choose a destination to save the files and click "Save".
How to Test Disk Speed?
Step 1: Select a volume or hard drive you want to test.
Step 2: Click "Speed Test" from the toolbar.

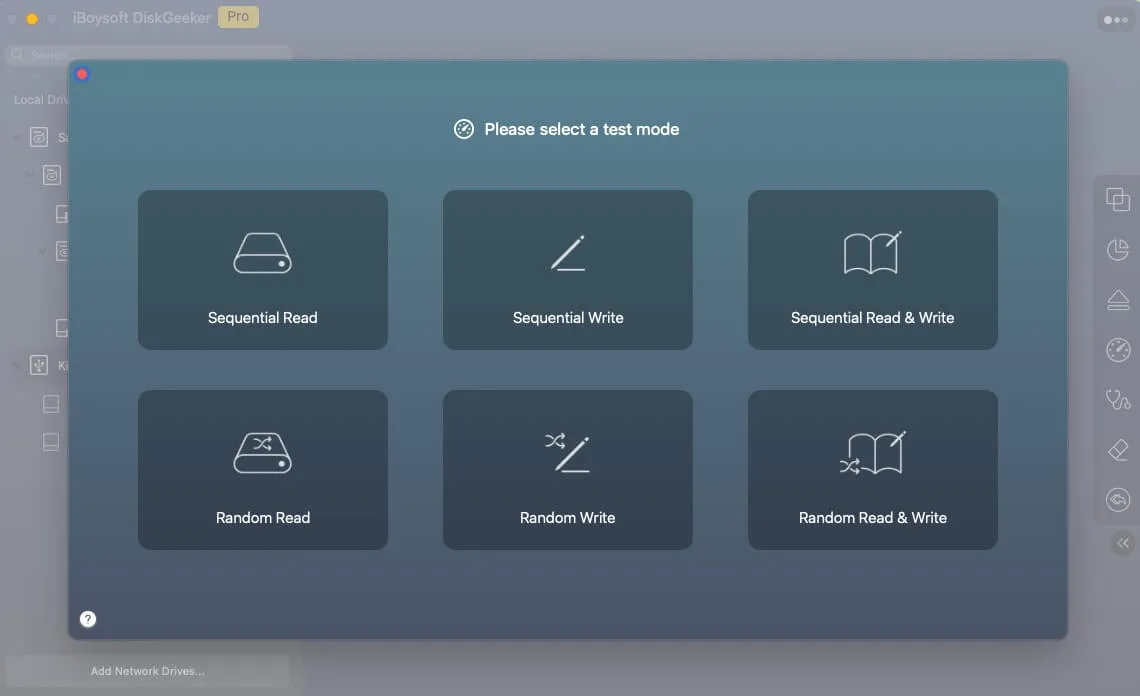
Step 3: Choose a test mode.
For the Internal hard drive and volumes, there are two modes: Sequential Read & Write and Random Read & Write.
For external hard drives and volumes, there are six modes, including Sequential Read, Sequential Write, Sequential Read & Write, Random Read, Random Write, and Random Read & Write.
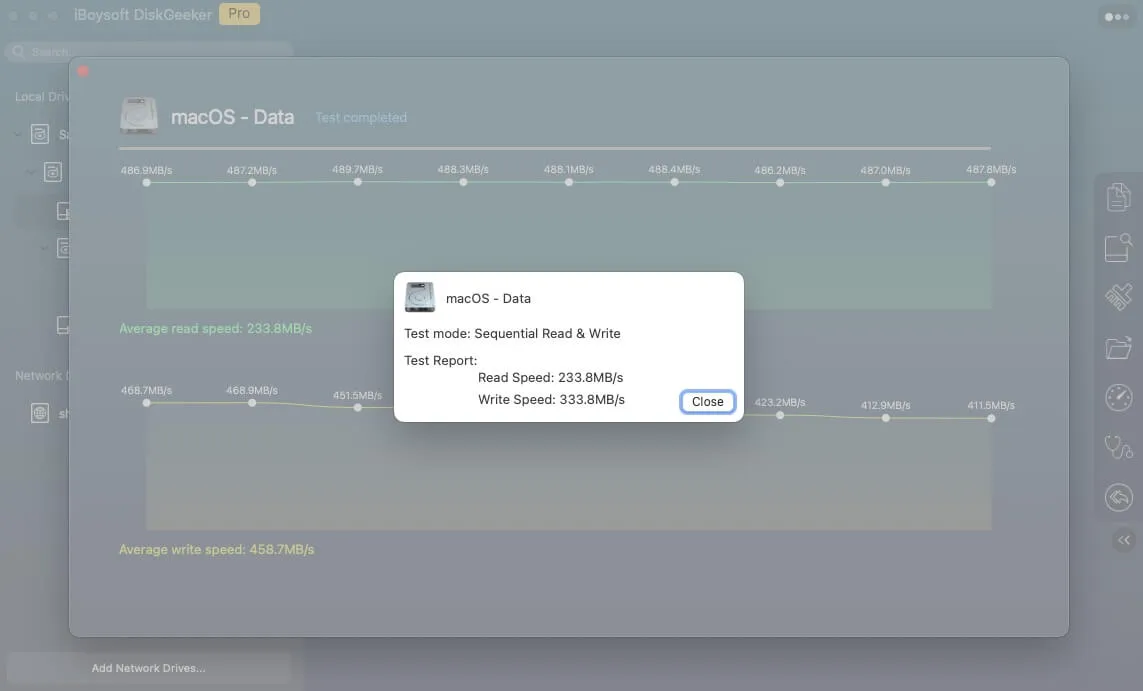
Step 4: Wait for the testing process to finish. You'll get a test report.
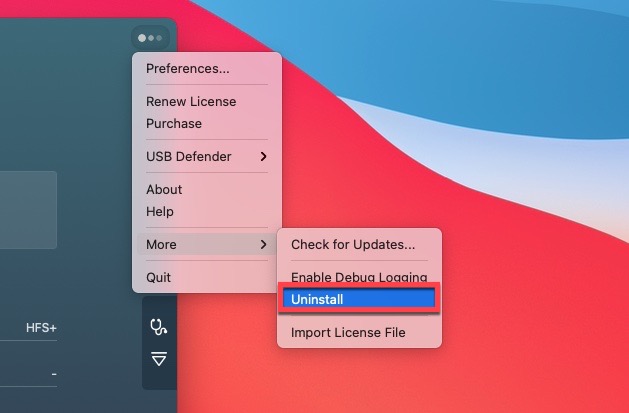
How to Uninstall iBoysoft DiskGeeker?
Step 1: Click the three dots at the top right corner and select "More..." and "Uninstall".
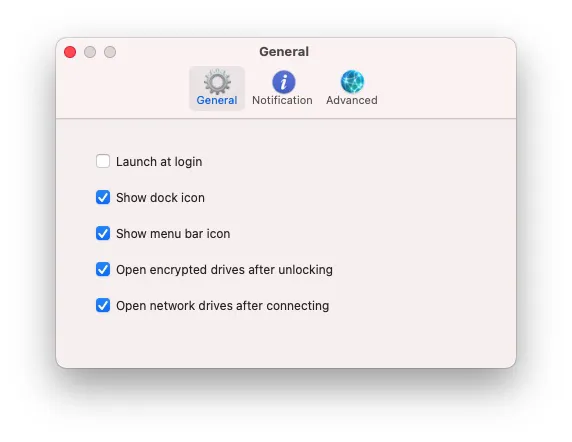
Preferences
Go to > Preferences, you will find "General", "Notification", and "Advanced" tabs.

FAQ
1. What should I do if iBoysoft DiskGeeker fails to work?
Restart iBoysoft DiskGeeker or restart Mac computer to check it again. If it still can't work, please send your problem in details to [email protected] for further analysis.
2. Why can't I uninstall iBoysoft DiskGeeker?
To uninstall it, you need to go to > More... > Uninstall. Or you can quit the software and drag iBoysoft DiskGeeker from Applications folder to the Mac Trash.
3. Can I mount external drive with iBoysoft DiskGeeker when macOS Disk Utility cannot mount it?
No. If your macOS Disk Utility cannot mount the macOS-compatible external drive, iBoysoft DiskGeeker cannot mount it either.