iBoysoft DiskGeeker Online Help
- USB Defender
Overview of USB Defender
The USB Defender feature in iBoysoft DiskGeeker is designed to manage and control USB devices that are connected to your Mac. It can stop the operating system from detecting and mounting USB drives of unknown origin, protecting your Mac and personal files against potential virus attacks.
Once you decide to enable USB Defender, you need to set an authorization password for later USB drive access. After that, you can set USB Defender preferences for USB drives management and maintenance.
By default, there are two optional USB management modes available. The one requires entering the password for each USB access. The other only allows USB drives added into the list (called Whitelist) can be mounted and accessed on your Mac.
USB drives that are not authorized by USB Defender cannot be identified and mounted by the system.
How to enable USB Defender in iBoysoft DiskGeeker?
Step 1: Open iBoysoft DiskGeeker on your Mac.
Step 2: Select "USB Defender" on the left sidebar and turn on the button.
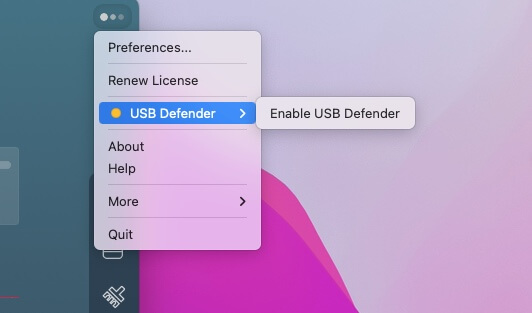
Or, you can also click the three dots at the upper right corner of the window and select "USB Defender" > "Enable USB Defender."
Step 3: Type a password within 48 digits and confirm it. (No requirement for letters, numbers, or special characters for the password.)
Note: After enabling USB Defender, all the connected USB drives will be unmounted on your Mac. You need to enter the password for USB Defender to mount them manually.
Step 4: Click "USB Defender" > "USB Defender Preferences" and enter your USB Defender password to reset preferences and password.
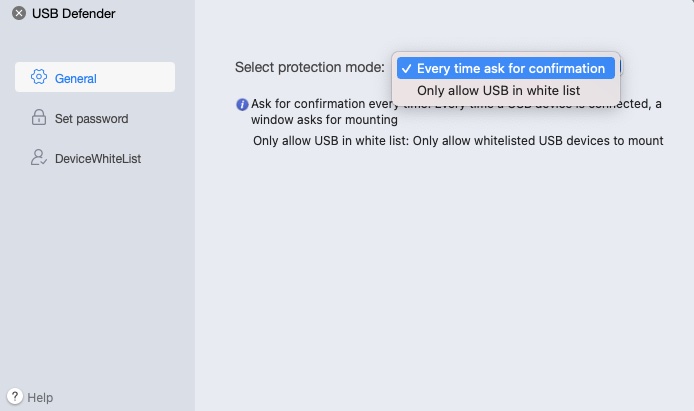
General:
• Every time ask for confirmation (default): Every time iBoysoft DiskGeeker detects a connected USB device, a hint will pop up to ask you to type the correct password to allow your Mac's Disk Utility or iBoysoft DiskGeeker to mount it.
• Only allow USB in white list: iBoysoft DiskGeeker only permits USB drives in the whitelist can be mounted on your Mac.
Set password: Change a new password for USB Defender with the old one.
Device WhiteList: Remove the USB devices that have been added to the whitelist.
How to add a USB device to the whitelist?
It is worth noting that once you add a USB drive to the whitelist, all unadded USB devices will be unmounted and locked automatically. Even the built-in Disk Utility program is not allowed to mount them.
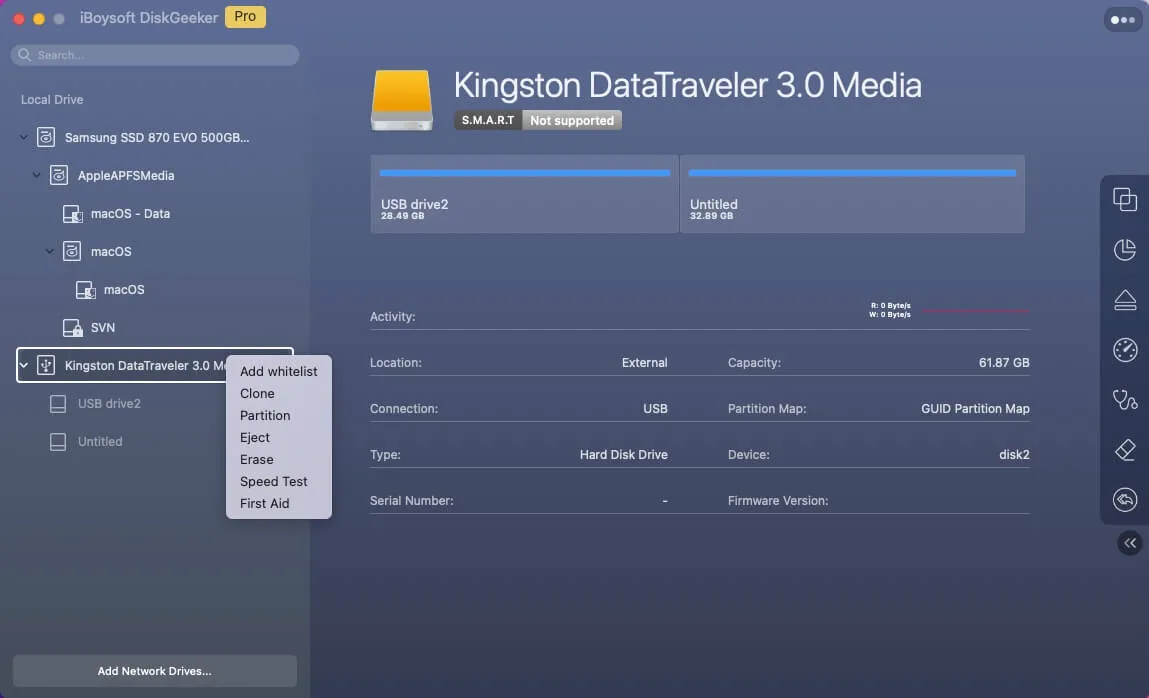
Step 1: Select a connected USB drive from the left sidebar of iBoysoft DiskGeeker.
Step 2: Right-click the drive and select "Add whitelist".
Step 3: Enter your USB Defender password > OK. Then, you'll see a prompt "Add whitelist successfully".
How to remove a USB device from the whitelist?
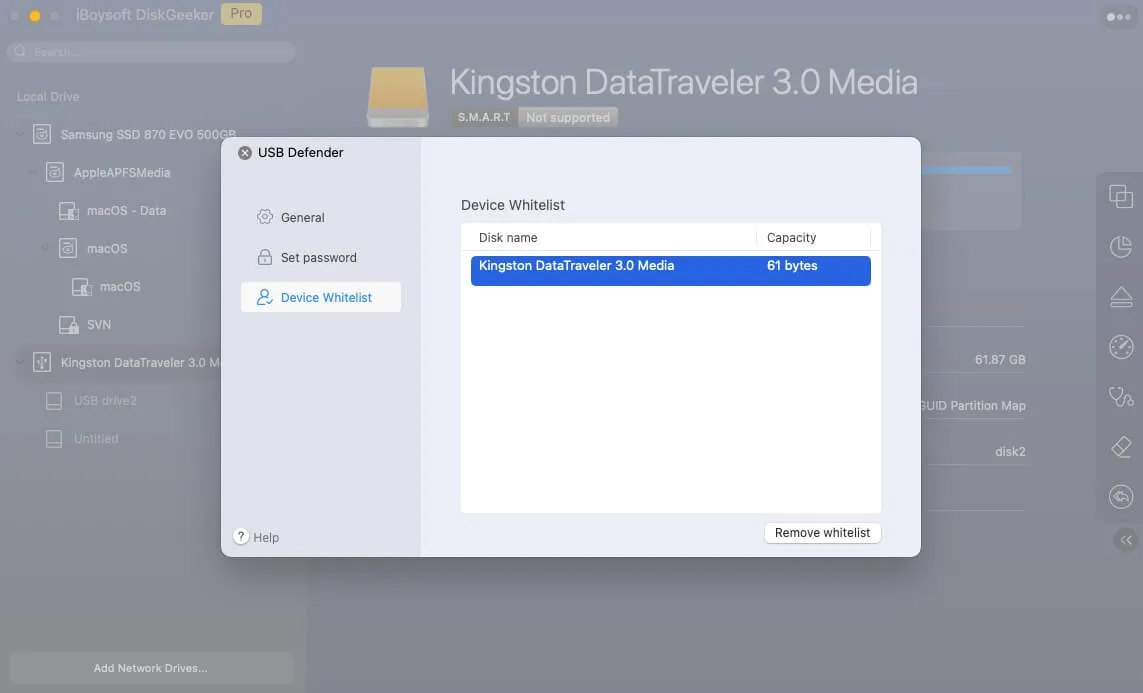
Step 1: Open the whitelist by clicking "USB Defender" > "USB Defender Preferences" > enter your USB Defender password > "Device WhiteList."
Step 2: Select the device you want to remove from the list and click "Remove whitelist."
How to disable USB Defender in iBoysoft DiskGeeker?
Step 1: Select "USB Defender" on the sidebar.
Step 2: Turn off the button.
FAQ about USB Defender in iBoysoft DiskGeeker?
1. How do I continue using USB Defender if I forget my password?
You can reinstall iBoysoft DiskGeeker to refresh USB Defender settings and reset the password.
2. Why can't I access other USB devices when I add a drive to the whitelist?
After you add a USB drive to the whitelist, USB Defender won't allow other USB drives that aren't in the whitelist to be mounted. You can manually mount these USB devices in read-write mode via entering your USB Defender password.
3. Why does no window pop up asking for entering the password to mount a USB device?
Because you have changed the protection mode to Only allow USB device in white list in USB Defender Preferences.